Article Contents:
- Why the radiator under the window is always in focus
- The main condition: beauty should not come at the cost of heat
- How convection works around the radiator
- What is essential in the screen design
- Types of decorative wooden radiator screens
- Frame with vertical slats
- Wooden lattice with ornament
- Screen with moldings
- Wooden box under the windowsill
- Removable decorative panel
- How to choose a style for a radiator screen
- Modern interior and minimalism
- Classic Interior
- Neoclassicism
- Country house
- Children's room
- Which wood materials are suitable for a radiator screen
- Oak
- Oak
- MDF
- Coatings for a radiator screen
- How to calculate the dimensions of a radiator screen
- Step 1: Width
- Step 2: Height
- Step 3: Depth
- Step 4: Bottom gap
- Step 5: Opening from the top
- Step 6: Access to the valves
- Comparison table of screen types for a radiator
- Where a wooden radiator screen looks particularly good
- Living Room
- Bedroom
- Children's room
- Kitchen
- Office
- Entry Hall
- Bay window
- Restaurant and hotel
- How to make a slatted radiator screen with your own hands: step-by-step guide
- What you'll need
- Work sequence
- Decorative grille for a radiator: how to choose a pattern
- How to match the radiator screen with the rest of the interior
- Mistakes when creating a radiator screen: learning from others' experience
- Solid panel without holes
- Bottom gap is blocked
- Screen is flush against the radiator
- No access to valves
- Style mismatch
- Too heavy construction
- Interferes with curtains
- What to buy for creating a decorative radiator screen: list of materials
- Thermal physics of the screen: a bit about why proper clearance is important
- FAQ: answering the most common questions about radiator screens
- About the Company STAVROS

A radiator under the window is a faceless object. It heats the air but does not decorate the interior. It stands in the most visible place — in the center of the wall, under the windowsill, in view from any point in the room. And it usually looks exactly like a heating appliance from the Soviet or post-Soviet era: unpainted metal, rust stains, yellowed enamel, visible valves, wires and pipes at the base.
The good news: something can be done about it. And it can be done beautifully, without compromising heat output and without a complex construction process. A decorative wooden radiator screen is a solution that works in a modern apartment, a classic interior, a children's room, and a country house.
But this topic has its pitfalls. A poorly made screen is not just unattractive. It reduces thermal efficiency, creates maintenance issues, and sometimes poses risks. That's why we'll break it down step by step: what works, why it works, and how to make a decorative wooden radiator screen correctly.


Why the radiator under the window is always in the spotlight
Think about it: where in the room is the main source of natural light? By the window. And what stands by that window? The radiator. That's why the battery is always visible—it's in the area of greatest illumination, where your gaze naturally falls when you look at the window.
In modern apartments, panel and sectional radiators are being replaced with stylish horizontal batteries, but in most residential buildings—especially in older housing stock and economy-class homes—radiators still look untidy.
When is a decorative radiator screen needed?
-
The battery is old, with uneven paint, drips, and rust;
-
The radiator doesn't fit the room's color scheme and style;
-
Supply pipes—horizontal or vertical—are visible;
-
In a children's room, sharp corners and hot surfaces need to be concealed;
-
In a living room, the area by the window is part of the formal space, and the radiator ruins its aesthetics;
-
In a classic interior, the radiator competes with wall decor, architraves, and baseboards.
-
Under a wide windowsill, a niche forms that you want to design comprehensively.
This is not a whim or an excess. It is a real design challenge that occurs in every home.


The main condition: beauty should not cost warmth.
Before discussing design and materials, let's address a fundamental question. A radiator is a heating device that works on the principle of convection: cold air from below heats up and rises. If the screen blocks this process, the room will heat less effectively.
Our factory also produces:


How convection works around a radiator
Cold air from the floor reaches the lower part of the radiator. As it heats up, it becomes lighter and rises. Exiting from the top—heated—it spreads throughout the room. This is a continuous cycle that ensures air heating.
If you cover the radiator with a solid box:
-
air does not enter from below;
-
heated air does not exit from above;
-
convection is disrupted;
-
the temperature in the box rises sharply, which loads the radiator and reduces its service life;
-
the room heats up significantly worse.
Get Consultation
What is mandatory in the screen design
A proper wooden screen for a radiator must:
-
have a gap at the bottom — at least 5–8 cm for cold air intake;
-
have an open or gridded top — for warm air exhaust;
-
have a front part with slats, grille, or openings — not a solid panel;
-
not block valves and taps — access to them must remain free;
-
be removable or openable — for radiator maintenance.
These are not just recommendations — they are conditions without which a decorative screen becomes a problem.
Types of decorative screens for a wooden radiator
Frame with vertical slats
The most popular and versatile option. A wooden frame is installed in front of the radiator. The front part consists of vertical slats with gaps. The gaps between the slats ensure air movement while hiding the radiator behind the vertical rhythm of the wood.
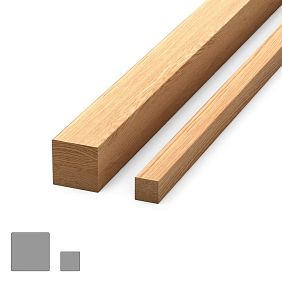
Wooden trim — the main material for a slatted screen. Slats are 15–25 mm wide, with gaps of 10–15 mm between them. This is enough to visually hide the radiator and sufficient for good ventilation.
A slatted screen fits organically into a modern interior, Scandinavian style, and laconic classic. Its principle is the same as that of a slatted partition made of oak: vertical rhythm of wood, transparency, structure.
Wooden lattice with ornament
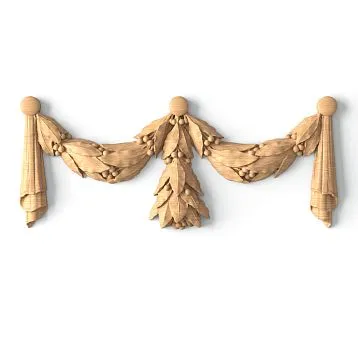
For interiors with a more pronounced character — classic, neoclassical, country house, restaurant — a wooden lattice with a geometric or floral ornament is suitable. It covers the radiator with a pattern that itself serves as a decorative accent.
wooden patterns on the battery screen, they create the effect of an ornamental panel. In side lighting, the pattern casts shadows — and the battery completely disappears behind the play of light and wood. This is not just "to cover" — it is "to create a point of beauty."
Screen with moldings
If the interior has wall panels with molding frames or baseboards with shaped profiles, the battery screen is made in the same system. wooden molding creates a frame structure on the screen facade. Inside the frames — slats or a grille. Outside — an ornamental wooden plane.
Such a screen looks like part of the furniture or part of the wall decoration — not like "something placed in front of the battery." This is the highest level of integration of a technical object into the interior.
Wooden box under the windowsill
An option for niches under wide windowsills. If the battery is in a niche, the box forms a closed decorative space with a front grille and side walls. On top — the windowsill, which becomes a shelf. On the bottom — a gap for air intake.
For such a box, use Wooden trim for vertical and horizontal ribs, Moldings for decorative trim and wooden frames for the front part.
A box under the windowsill works well in a bay window: it combines the radiator, niche, and windowsill into one architectural element.
Removable decorative panel
The simplest option for those who want the ability to quickly remove the screen for radiator maintenance. The panel made of MDF or plywood with decorative finishing (moldings, grille, slats) is installed on holders or magnets — it can be removed in seconds.
On the front part — Wooden moldings a frame structure. In the center of the frame are slats or a cut-out grille. The removable panel is practical and does not require complex installation, but is inferior to a stationary box in decorative effect.
How to choose the style of a radiator screen
The screen should speak the same language as the interior. If it stands out from the context, it becomes another "ugly object" that you want to remove.
Modern interior and minimalism
Vertical slats made of wooden trim 15–20 mm wide, with even spacing. The frame is minimal, without shaped profiles. Finish: in the color of the wall, or natural oak with an oil finish, if there are wooden accents in the interior.
No ornament — only the rhythm of vertical lines. This aligns with Scandinavian style, Japanese minimalism, and modern classics.
Classic interior
Here, a full screen with a frame made of molding, a decorative grille with ornament, and corner overlay elements. Finish: white enamel to match other wooden elements, or dark oak under varnish.
A radiator screen in a classic interior should be coordinated with baseboards, architraves, and wall panels. A unified style code ensures the screen looks like a planned architectural element, not an afterthought.
Neoclassicism
Symmetrical frame structure, calm molding profile, white or light gray enamel. Ornament is minimal or completely absent. Clean geometry, correct proportions, nothing extra.
decor for furniture — small overlay elements at the corners of the frame — can add the necessary detailing to a neoclassical screen without overloading it.
Country house
Natural wood texture under oil or stain. Oak or beech slats, slightly wider, with a looser spacing. A grille with floral or geometric ornament is possible. Warm shades: walnut, honey, dark oak, wenge.
A radiator screen in a country house should be part of the wood theme: the same shades, the same species, the same oil or varnish as the floor, furniture, and ceiling beams.
Children's room
In a children's room, safety comes first. The screen solves several tasks at once: hides the hot surface, removes sharp corners of the radiator, and prevents the child from contacting metal.
The design must be:
-
without sharp corners and edges — all ends are rounded or covered with a profile;
-
stable — does not tip over when pressed;
-
easily removable for cleaning behind the radiator;
-
made with a coating that is safe when heated — eco-friendly varnish or enamel without toxic components.
Coating: pastel colors, natural oak with oil finish, white enamel.
Which wooden materials are suitable for a radiator screen
Choosing a material is a balance between decorativeness, heat resistance, and cost.
Oak
The first choice for a screen with a transparent coating. Dense (750–900 kg/m³), stable, resistant to moderate heat. Expressive texture. Oil, varnish, stain — accepts all types of finishes. Oak slats for a radiator screen are durable and beautiful.
Limitation: if the screen is close to a hot radiator (distance less than 5 cm) — the wood may darken over time. The gap between the screen and the radiator should be at least 5–7 cm.
Beech
Optimal for screens to be painted with enamel. Smooth surface, without large pores, accepts paint well. For white, gray, cream screens — the best option among natural wood species.
MDF
Economical option for screens to be painted. Perfectly flat surface, no movement with humidity changes, easy to mill. A good choice for removable panels and screens in areas with moderate humidity.
Limitation: not suitable for high-humidity rooms and not used under transparent coatings — no wood texture.
Coatings for radiator screens
Important nuance: the coating must withstand heat. The screen surface heats up from the radiator — especially if the gap is small. The varnish should be polyurethane or alkyd-based — it withstands temperatures up to 60–80°C. Wax coatings may soften when heated. Acrylic enamel is a good choice for painting.
How to calculate radiator screen dimensions
The calculation seems simple. In practice — without considering all details, you end up with a structure that either doesn't cover the radiator or interferes with its operation.
Step 1: Width
Measure the radiator width. Add 5–10 cm on each side. Final screen width: radiator width + 10–20 cm. This creates a small visual "buffer" and allows the screen to look like an independent element, not just a cover for the radiator.
If the radiator is in a niche under the windowsill — the screen is made from wall to wall (along the niche width) or to the side stops.
Step 2: Height
The screen height is determined by the height of the battery with pipes. The standard radiator height is 40–60 cm. Add a bottom gap (5–8 cm to the floor) and consider that the top of the screen should be below the windowsill — or flush with it if the screen forms a single unit with the windowsill area.
Important: if the windowsill overhangs the battery — it already creates a "top cover" for the thermal zone. In this case, it is sufficient to make the screen up to the windowsill level, without covering the top part.
Step 3: Depth
The screen depth is from the wall plane to the front edge of the battery plus 5–7 cm of clearance. This gap between the screen and the battery is mandatory: it ensures air movement inside the structure.
Standard depth: 10–20 cm for most sectional and panel radiators.
Step 4: Bottom Gap
The bottom gap is the distance from the floor to the bottom edge of the screen. Minimum: 5 cm. Optimal: 8–10 cm. If Wooden baseboard runs along the bottom edge of the screen — it forms the lower horizontal line of the structure and simultaneously visually "connects" the screen with the floor, but does not physically close the gap.
Step 5: Top Opening
The top part of the screen is open or with a grille. Warm air must be able to freely exit upward. If the screen is made without a top cover — that's great. If a top cover is provided (for example, to use it as a shelf under the windowsill) — it needs slotted openings or a decorative grille.
Step 6: Access to valves
Valve units and pipe connections must be accessible for maintenance. If they are located on the side, the side wall of the screen should be removable or have a door. If at the bottom, the bottom gap should allow access to them.
Comparison table of screen types for radiators
| Screen type | Ventilation | Decorative element | Access | Style | Difficulty |
|---|---|---|---|---|---|
| Slatted (slats) | Good | Moderate | Good | Modern, Scandinavian | Low |
| Ornamental grille | Good | High | Medium | Classic, country style | Medium |
| Screen with moldings | Medium | High | Depends on the design | Classic, neoclassic | Medium |
| Box under the windowsill | Good (with gaps) | High | Requires planning | Any | High |
| Removable panel | Good | Moderate | Excellent | Any | Low |
Where a wooden radiator cover looks especially good
A wooden radiator cover works in a variety of scenarios — each with its own features.
Living Room
Living room — a formal space. The radiator here should either disappear or become part of the decor. A wooden cover with a frame structure made of molding and a grille made of wooden patterns creates a decorative focal point by the window. Done right, it doesn't 'hide the radiator' — it becomes a wooden interior element that just happens to be by the window.
Bedroom
In the bedroom, the main thing is tranquility. The screen is in a neutral color, with a simple slatted structure, made of oiled oak or beech with white enamel. Nothing that distracts. Just the purity of form at the windowsill.
Children's room
The screen in the children's room is both safety and function. The wide windowsill above the screen becomes a shelf. The side walls are smooth, without sharp corners. The color matches the walls or is an accent pastel shade.
Kitchen
In the kitchen, the radiator is often located under the windowsill-countertop. A wooden screen with a slatted grille is organic here in a wooden or Scandinavian kitchen. For the kitchen, it is important to choose a moisture-resistant coating — matte polyurethane varnish.
Office
In the study — strictness and character. Dark wood under varnish, a molding screen with a frame structure — in the style of an English study. Or a slatted screen made of dark oak in a minimalist modern study.
Entryway
In the hallway, the radiator at the entrance is often the first thing a guest sees. A wooden screen in the same style as the trim and baseboard of the hallway makes the technical equipment part of the "entry ensemble."
Bay window
The bay window is an area of special attention. The radiator in the bay window, covered with a wooden box-bench, is a classic country solution. The box serves as both a screen, a bench, and a windowsill shelf. Wooden trim for the frame, Moldings for decoration, a grille on the front facade — and the bay window turns into a cozy area with a built-in wooden box.
Restaurant and hotel
In commercial spaces, the radiator is doubly out of place. A wooden screen with carved decor or an ornamental grille in a restaurant creates an authentic atmosphere. In a hotel, it adds a feeling of a residential, "real" space.
How to make a slatted radiator screen with your own hands: step-by-step breakdown
This is a practical section for those who want to implement the solution on their own.
What you'll need
-
Wooden trim for slats: cross-section 20×30 mm or 25×20 mm, length — according to the screen height;
-
Timber for frame posts and horizontal crossbars: cross-section 30×40 mm;
-
wooden molding for frame edging: width 25–40 mm;
-
Wooden baseboard for the bottom line (optional);
-
Miter saw, screws, mounting glue, drill;
-
Sandpaper, primer, paint or varnish.
Work sequence
1. Calculation and cutting. Determine the width, height, and depth of the screen. Cut the timber into frame elements. Cut the slats to the required length.
2. Frame. Assemble a rectangular frame from timber: two vertical posts + horizontal crossbars at the top and bottom. If the screen is deep (more than 15 cm), side walls are needed.
3. Slats. Attach slats vertically to the horizontal frame crossbars with equal spacing (10–15 mm between slats). First slat — from the edge, last — from the other edge, intermediate ones — with equal spacing according to markings.
4. Framing. Moldings around the perimeter of the front side — for a decorative frame. Attach with glue and finishing nails.
5. Bottom baseboard. If the bottom gap is covered decoratively — Wooden baseboard along the bottom edge of the screen (does not touch the floor — it only visually "covers" the gap from the front side, the physical gap remains).
6. Wall mounting. The screen is fixed to the wall through side posts — dowels into the wall. Or installed on special holders for quick removal.
7. Coating. Sanding, primer, paint in 2–3 layers or varnishing.
Decorative radiator grille: how to choose a pattern
If you have chosen a grille — the question of pattern arises. This is a stylistic decision that needs to be made before ordering.
Geometric grid — diagonal or straight cells. Universal, neutral. Suitable for modern interiors and neoclassicism.
Floral pattern — leaves, vines, branches. For classic style, country house, interiors with wooden accents. Carved wooden decoration with a floral motif in the screen grille — this is a signature of style.
Meander and key ornament — Greek meander along the perimeter, geometric center. For neoclassical and classic interiors.
Arabesque — an intricate intertwined pattern. For oriental, Mediterranean, Moroccan interiors. This is a grille that is a work of art in itself.
Diamond grid — a slanted grid reminiscent of an art deco motif. For modern classics, loft with wooden accents.
Any ornament in the screen grille must have enough open area — at least 30–40% of the total face area. This ensures proper ventilation.
How to integrate a radiator screen with the rest of the interior
The screen should not stand alone. It should be part of the space.
Baseboard. Wooden baseboard around the perimeter of the room fits flush against the lower part of the screen. The same profile, the same color — and the bottom line of the screen 'blends' with the floor trim.
Trim. Molding frames on the screen from the same series as Wooden moldings on the door trims — create a unified rhythm of wooden decor in the room.
Wall panels. If the wall is finished with wooden panels with molding frames, the radiator screen is made in the same system. One of the "panels" is the screen. The room looks like a single architectural ensemble.
Decorative overlays. decorative elements for furniture — corner overlays in the corners of the screen's molding frame match similar details on the furniture.
Frames. If the room has wooden frames on the walls or mirrors — the screen frame profile in the same system completes the look.
Mistakes when creating a radiator screen: learning from others' experience
Each of these mistakes occurs regularly. Not because people are inattentive — but because they didn't know in advance.
Solid panel without openings
The most common mistake. A person sees that an MDF panel matching the wall color completely hides the radiator — and it seems ideal. But after a month or two, it turns out the room heats up worse, and heat accumulates inside the screen.
The front part of the screen always has openings, slats, or a grille.
Bottom gap blocked
The baseboard continues under the screen without a gap. Or the screen is flush against the floor. Result: air does not reach the radiator, convection is disrupted.
A gap of 5–8 cm at the bottom is mandatory. The baseboard only visually decorates the bottom line; physically, the gap must remain.
Screen flush against the radiator
The distance between the radiator and the front panel of the screen is less than 3 cm. Heat concentrates inside, wood darkens and deforms with prolonged heating. Minimum gap between the radiator and the screen is 5–7 cm.
No access to valves
Valve units are sealed shut. To shut off the radiator, the screen must be dismantled. Best solution: a removable side panel or a door with a hinge and magnet.
Style mismatch
A 'rustic' style screen with large carved ornament in a modern apartment with white walls and metal — a conflict. Or vice versa: a minimalist slatted panel in a classic interior with stucco — dissonance. The screen style should come from the room's context.
Too heavy construction
A massive wooden box made of thick plywood with wide moldings — 15–20 kg. It needs to be securely fastened to the wall. On a drywall wall without a steel profile, this is a problem. Fastening must be planned before installation, not after.
Interferes with curtains
The screen protrudes forward from the wall — when lowered, the curtains press against it. Or the window opening is limited by the depth of the screen. The depth of the screen must be coordinated with the length of the curtains, the placement of the curtain rod, and the window opening.
What to buy for creating a decorative screen for a radiator: list of materials
Full list of wooden elements:
-
Wooden trim — slats for the front facade, timber for the frame;
-
Wooden molding — for a decorative frame on the screen facade;
-
Wooden moldings — full range of profiles for trims;
-
wooden frame — for the front frame structure;
-
wooden frames — ready-made options in different formats;
-
Carved wooden decoration — for decorative grilles and ornamental inserts;
-
wooden patterns — ideas for ornamental panels in the screen;
-
decor for furniture — overhead corner and central elements;
-
Wooden baseboard — for the bottom decorative line;
-
Wooden items — the entire range for selecting additional elements.
Thermal physics of the screen: a bit about why the correct gap is important
This section is for those who want to understand the physics, not just follow recommendations.
A heating radiator transfers heat in two ways: convection (movement of heated air) and radiation (infrared waves). Convection provides 60–70% of heat output in a typical radiator. That's why blocking airflow is so critical — you lose the main heat transfer channel.
If the bottom gap is 5–8 cm and the top is open, the convection flow is preserved almost entirely. Heating efficiency decreases by no more than 5–10% — this is acceptable for a decorative effect.
If the bottom gap is 2 cm and the top is closed with a solid cover, heat output losses reach 30–40%. That's already significant.
Conclusion: a proper wooden screen with maintained gaps reduces battery efficiency minimally. An improper one turns the radiator into an electric heater for itself.
FAQ: answering the most common questions about a battery screen
Can you cover a battery with a wooden screen?
Yes, if the screen is not solid. The front part should have slats, a grille, or holes. There should be a gap at the bottom for air intake. At the top, an open outlet for warm air. Then a decorative wooden radiator screen does not disrupt heating operation.
How to cover a radiator without losing heat?
Leave a gap at the bottom (5–8 cm), ensure air outlet at the top, use a slatted or grille front panel with an open area of at least 30–40%. Wooden trim in a slatted screen provides good ventilation with a high decorative effect.
What is better — slats or a decorative grille?
Slats made of wooden trim — for modern, Scandinavian interiors and loft style. Decorative grille with an ornament — for classic, neoclassical, and country house styles. Both provide normal ventilation with the correct spacing of elements.
Can a radiator screen be made to match the wall color?
Yes. This is one of the best ways to make the screen "invisible." The wooden screen is painted the same color as the wall. The radiator disappears — while ventilation is maintained through slats or a grille.
Does the screen need to be removable?
It is recommended. A removable or opening screen provides access to the radiator for maintenance, to the valves for repairs, and to the wall behind the radiator for cleaning. A fixed screen is installed once and for all, but if the radiator breaks, it will have to be dismantled.
What material is best for a radiator screen in a children's room?
Oak or beech with an eco-friendly varnish free of toxic components. All edges are rounded or covered with a profile. The structure must be stable and have no sharp corners. The color should match the walls or be a neutral pastel shade.
Can a radiator screen be made in the form of a bench under the window?
Yes — this is one of the best solutions for a bay window and a wide windowsill. A wooden box-bench covers the radiator from below and from the front (through a grille or slats), and the top lid serves as a seat or shelf. It is important to provide slotted openings in the lid or leave a gap between the lid and the wall.
How to coordinate a radiator screen with the baseboard?
Wooden baseboard The baseboard around the room should approach the bottom line of the screen, not go under it. The profile of the screen's bottom molding should be from the same series as the baseboard. Then the bottom line of the room looks like a single horizontal line.
About the company STAVROS
A radiator under the window is not a problem. It is a task with a beautiful solution. And that solution is wooden: slats, moldings, grilles, frames, baseboards, decorative overlays — everything needed to create a screen that decorates the space while not interfering with the heat doing its job.
STAVROS has been a manufacturer of wooden decor since 2002. The company began its work on the restoration of state-owned landmarks: the Konstantinovsky Palace, the Hermitage, and the Alexander Palace. This experience is not a museum story, but a working standard applied to every item in the catalog.
The STAVROS assortment includes — Wooden trim for slatted screens, Moldings for frame structures, Carved Decor for ornamental grilles, Decorative Inserts for accents, wooden frames for front structures and Wooden baseboard for finishing the bottom line. Everything is made from solid wood, oak and beech, with precise dimensions and professional surface treatment.
Production is in Saint Petersburg. Showrooms are in Moscow and Saint Petersburg. Delivery across Russia and CIS countries. Minimum order is from one item.
When the radiator under your window stops ruining the interior and becomes part of it — that will be wood from STAVROS and your decision to make the space beautiful.