

























Article Contents:
- Step-by-step instructions with drawings, dimensions, and node diagrams
- Example of calculating the external dimension
- Full-scale bedroom layout
- Classic collapsible frame
- Platform bed
- Bed on high legs
- Bed with drawers
- Bed with lifting base
- Solid wood
- Plywood
- MDF
- Particleboard and laminated particleboard
- Pallets
- Acclimatization and storage of wood
- Fiber orientation and pattern selection
- Why a solid panel requires a special approach
- Why metal brackets alone are not enough
- How to set up a home workshop
- Pilot holes and edge distance
- When to use glue
- Marking template
- How to create a cutting plan
- Inspection of parts before assembly
- Step 1. Make a working drawing
- Step 2. Prepare the material
- Step 3. Assemble the frame dry
- Step 4. Install the support rails
- Step 5. Add the central beam
- Step 6. Test the frame with a trial load
- Step 7. Disassemble and finish
- Step 8. Perform final assembly
- How to check the frame geometry
- How to organize transportation and reassembly
- How to calculate slats
- Wooden headboard
- Soft headboard
- Carved headboard with moldings
- Under-bed storage boxes
- Storage box
- Installing a lift-up base using a template
- Floating bed
- Bed in a niche
- Bunk bed
- Bed from an old base
- Pallet bed
- Choosing style without losing functionality
- First build the frame, then buy the mattress
- The frame is held only by four outer legs
- The side rails are connected with small corner brackets
- The leg is screwed into the thin edge of the side rail
- All slats are laid tightly together
- The slat spacing is too large
- The center leg does not touch the floor
- The tall headboard is held by a single bolt
- The coating was applied before trial assembly
- The gas lifts were chosen based on a photo
- The decor was glued before checking symmetry
- The bed does not disassemble

Step-by-step instructions with drawings, dimensions, and node diagrams
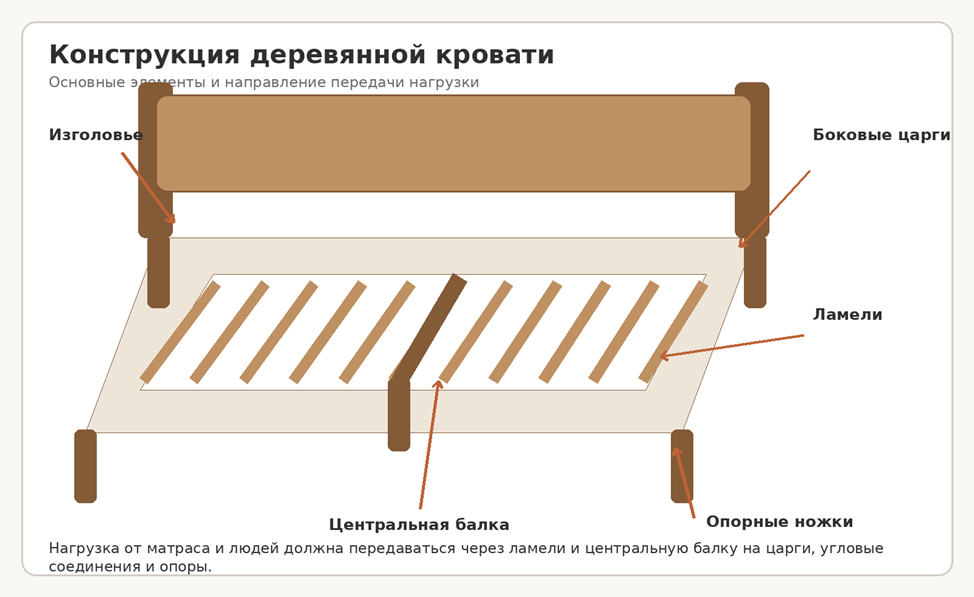
You can make a bed with your own hands if you start with the mattress and load calculation, rather than buying random boards. A reliable structure includes a rigid frame, collapsible corner joints, a central longitudinal beam for a wide sleeping area, supports, slats, and a properly secured headboard. For those who don't want to make all the parts from scratch, it's easier to buy a solid wood bed frame or use ready-made STAVROS elements as the basis for your own project.
The article covers single and double beds, models with legs, drawers, and a lifting base, methods for assembling side rails, calculating internal dimensions, making a slatted base, attaching the headboard, and finishing. For a classic project, you can choose wooden bed legs, carved overlays and moldings, but decorative elements are installed only after the geometry and strength of the frame have been checked.
|
Short answer. First, choose and measure the mattress. Then determine the internal frame size, sleeping height, and base design. Assemble the frame dry, check the diagonals, install the central beam and supports, lay the slats, secure the headboard, and only after a test load perform the finishing. |
When to make a bed with your own hands
Self-manufacturing is justified when standard furniture does not fit in length, width, height, or style. For example, a niche has a non-standard size, a specific storage height is required under the bed, the headboard must match wall panels, or you need to use already selected carved elements.
Savings are possible but not guaranteed. High-quality dry wood, plywood, bed fittings, slats, fasteners, oil or varnish, and tool rental can cost significantly more than a budget serial bed. A homemade project is beneficial not for the lowest price, but for control over the design, maintainability, and the ability to replace individual parts.
For a first project, it's better to choose a rectangular frame without complex kinematics. A model with four external supports and a central beam is easier to calculate than a floating bed, a bunk bed structure, or a base with homemade gas lifts.
|
Not recommended. Without engineering verification, you should not independently design a bunk bed for children, a hanging or floating structure with a large overhang, or lift mechanism assemblies made from random hinges and gas struts. |
First, choose the mattress
Nominal designations of 160 × 200 or 180 × 200 cm do not always equal the actual size of the cover. Before cutting, measure the mattress with a tape measure in several places or get the exact size from the manufacturer. A soft, voluminous cover may protrude beyond the rigid core, so the frame should be designed based on the maximum actual dimension.
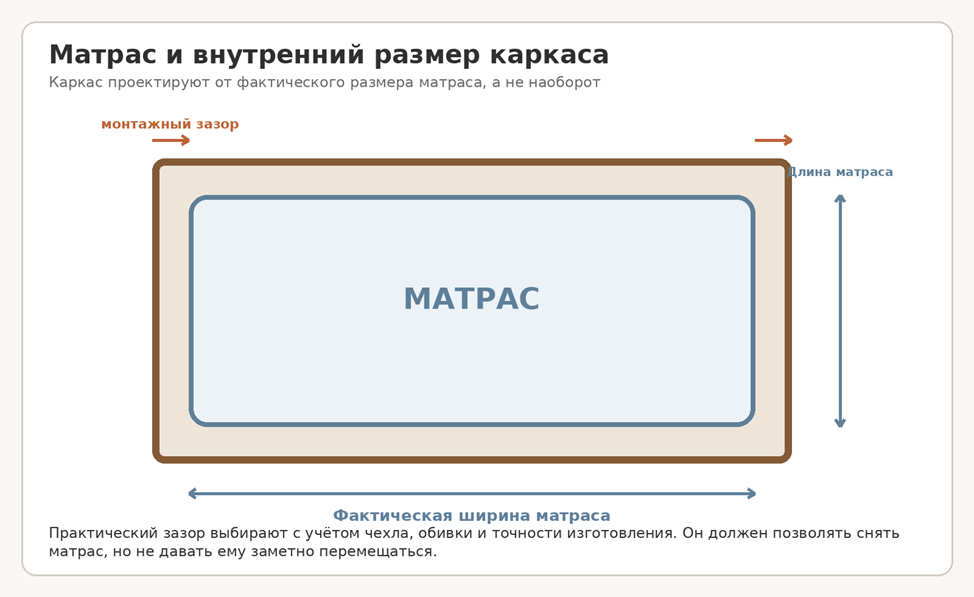
The internal frame size should allow the mattress to be easily placed and removed. However, excessive clearance leads to its movement and the appearance of gaps near the headboard. There is no universal value: it depends on the thickness of the side rail upholstery, wood precision, and cover shape. For a rigid wooden frame, a small total allowance is usually provided, and then it is checked on a template or during dry assembly.
Study the base requirements. The mattress manufacturer may limit the maximum gap between slats, require a certain number of supports, or prohibit a solid base without ventilation holes. These conditions are more important than universal advice from the internet: violating the base can shorten the mattress's service life and affect the warranty.
|
Nominal mattress |
Who it's for |
What to check before designing |
|
800/900 × 1900/2000 mm |
One adult, teenager, guest room |
Actual length, thickness, slat requirements |
|
1200 × 2000 mm |
One person with increased width |
Side passages and central support as needed |
|
1400 × 2000 mm |
Compact double bed |
Room width and bed access method |
|
1600 × 2000 mm |
Common double bed |
Central beam and number of supports |
|
1800 × 2000 mm |
Spacious double bed |
Base reinforcement, moving through doorways |
|
2000 × 2000 mm |
Large bedroom |
Collapsible structure, transportation, 3–4 central supports |
Bed dimensions and bedroom ergonomics
The external size of the bed consists of the internal opening, the thickness of the side rails, headboard posts, protruding decor, and possible upholstery. A bed for a 1600 × 2000 mm mattress can have a width of about 1660 mm for a minimalist frame, or over 2000 mm for a classic model with massive posts.
Before designing, mark the future outline on the floor with painter's tape. Check door and cabinet openings, passage to the window, drawer extension, socket positions, baseboard height, and cleaning accessibility. A drawing on the plan appears more compact than the actual furniture, so full-size marking is more useful than a sketch.
The comfortable height of the sleeping area is determined by the sum of the support height, the side rail or base, and the mattress. A bed that is too low looks modern but is inconvenient for people with limited mobility. A bed that is too high makes sitting down more difficult and visually weighs down a small bedroom. Focus on the users' height and the height of a familiar chair, rather than an abstract "standard" number.
|
Parameter |
How to determine |
Common mistake |
|
Internal width |
Actual mattress width + installation allowance |
Adding the allowance twice |
|
Internal length |
Actual mattress length + installation allowance |
Not accounting for the soft edge of the cover |
|
External width |
Internal size + thickness of both side rails/posts |
Ignore protruding decor |
|
Height of mattress top |
Supports + base seating + mattress thickness |
Select legs separately from mattress |
|
Clear passage |
Checked against actual layout |
Count only room area |
|
Headboard height |
From floor including mattress and pillows |
Close sockets or wall lights |




Example of calculating the external size
Suppose the actual mattress has a width of 1602 mm and a length of 2003 mm. The designer allows a small total installation clearance to remove the mattress after making the bed. The internal opening is fixed on the drawing as a separate dimension. Only then is the thickness of the side rails and posts added. If each visible rail has a thickness of 35 mm, the external width of a simple frame will be approximately equal to the internal width plus 70 mm. But for a bed with headboard posts, the external dimension may be determined precisely by the distance between the outer edges of the posts.
The length is calculated similarly. The front rail may be located between the side parts or overlap their ends; the headboard may be inside the dimension or protrude backward. Therefore, the formula 'mattress plus two board thicknesses' only works after choosing a specific corner joint. The working drawing must indicate which part goes through and which butts against it.
The height is calculated separately. If the top of the slats is 280 mm from the floor and the mattress has a thickness of 240 mm, the top of the sleeping area will be approximately 520 mm. When choosing legs with a height of 100 mm, you need to check what part of the height is formed by the rails and internal support strips. You cannot simply add the leg height and mattress height, forgetting how deep the mattress is recessed into the frame.
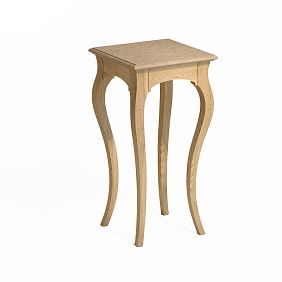
Our factory also produces:





Full-scale bedroom layout
Mark on the floor not only the rectangle of the bed but also the movement paths. Allocate space needed for opening the door, pulling out a drawer, passing to the window, and changing bed linen. Place cardboard boxes at the height of the future mattress: flat painter's tape does not show how massive the bed will appear in the room.
Check the transfer of parts. A solid headboard wider than two meters may not fit through a stairwell or door turn. In this case, the panel is made collapsible, assembled inside the room, or a ready-made element is ordered after a control measurement of the delivery path. Similarly, long rails are designed with detachable connections so that the bed can be taken out during renovations.
Do not place the back surface of the headboard flush against a damp exterior wall. Leave room for air circulation and cleaning. If there are sockets, switches, or wall lights nearby, include them in the drawing before determining the height and width of the backrest. It is especially important to check that a socket does not end up behind a non-removable structural post.
Which design to choose
Get Consultation
Classic collapsible frame
Consists of a headboard, footboard or front rail, two side rails, a center beam, and a slatted base. The rails are connected to the bed posts using bed ties, hooks, or bolts. This bed can be disassembled for moving, and a damaged part can be replaced.
For a complex classic project, you can use a ready-made Carved bed frame KRVT-001, rather than reproducing structural and carved elements from a photo. A ready-made frame is also useful as a guide: it shows that the headboard, footboard, and rails should form a single system, rather than being connected by a few random brackets.
Platform bed
The mattress sits on a wide, low base. The platform may extend beyond its edges, but the protrusions should be clearly visible and have no sharp corners. A rigid frame is hidden inside, and the decorative cladding should not bear the main load.
Bed with high legs
Makes cleaning easier and visually lightens the furniture. With a high support, the bending moment at the attachment point increases, so the leg cannot simply be screwed into a thin side rail. Reinforcement blocks, mounting plates, threaded inserts, or another engineered assembly are needed.
Bed with drawers
Suitable for a room where there is space on the side for full extension. The drawers are made independent on wheels or mounted on slides. In both cases, a gap must be left above the flooring and the baseboard must be taken into account.
Bed with lifting base
Provides access to the entire box from above and is convenient in a narrow bedroom. The mechanism is purchased as a kit matching the base width, mattress weight, and lifting direction. The box frame is reinforced at the attachment points of hinges and gas lifts.
Materials for the bed frame
Solid wood
For side rails and posts, use dry, straight-grained wood without large loose knots, deep cracks, or spiral warping. Oak and beech are strong and well-suited for visible classic parts but require precise drilling. Pine is more affordable and easier to work with, but it is softer and gets dents more quickly.
The species name does not guarantee quality. Moisture content, grain direction, grading, absence of internal stresses, and proper storage are important. A board that is noticeably warped before assembly cannot be "fixed" by tightening it forcefully: after the fasteners loosen, it will continue to deform the frame.
Plywood
Furniture-grade plywood is suitable for headboard panels, drawers, support platforms, and individual platform elements. For a load-bearing part, thickness, direction of outer layers, and edge quality are important. Thin plywood without ribs does not replace a side rail.
MDF
MDF is convenient for decorative panels, routed headboards, and paintable parts. It should not be used as the sole load-bearing side rail in a place where fasteners are subject to pull-out, unless the joint is reinforced with a solid wood insert or metal.
Particleboard and laminated particleboard
Laminated particleboard is often used in mass-produced furniture but requires special hardware and precise edge design. Repeatedly screwing a self-tapping screw into the same spot reduces holding power. For a first DIY project, a knockdown frame made of solid wood and plywood is usually easier to repair.
Pallets
Pallets cannot be considered a ready-made safe furniture material. Their origin, contamination, treatment, and storage conditions are often unknown. If pallets are still used for a temporary project, choose clean elements with clear markings, completely remove protruding nails, and do not limit yourself to surface sanding.
|
Material |
Where to use |
Advantages |
Limitations |
|
Oak/Beech |
Posts, stretchers, legs, visible parts |
Strength, expressive texture |
Price, weight, demanding drilling |
|
Pine |
Frame, temporary or budget project |
Availability, easy processing |
Softness, dents, resinous areas |
|
Birch plywood |
Panels, boxes, reinforcements |
Stability, flatness strength |
Edges require finishing |
|
MDF |
Decorative panels and paintable headboard |
Smooth surface, milling |
Does not like moisture, requires embedded parts |
|
Particleboard |
Box and panels with furniture fittings |
Finished surface |
Weaker when reassembled |
|
Finished STAVROS parts |
Legs, frame, headboard, decor |
Precise decorative base |
Need to check installation dimensions |
Acclimatization and storage of wood
Blanks should not be immediately unpacked in a cold garage and then assembled in a warm bedroom. Wood changes dimensions with changes in humidity, especially across the grain. Before precise processing, the material is kept in conditions close to future use, laying it horizontally on even spacers. Long side rails should not be leaned against a wall: under their own weight, they may become bent.
If plastering or screeding work continues in the house, the air may be significantly more humid than usual. Assembly during such a period creates a risk of shrinkage and joint opening after the heating season. First stabilize the microclimate, then perform precise fitting and final coating.
Grain orientation and pattern selection
Before cutting, lay out visible parts next to each other. It is advisable to select side rails close in color, headboard posts symmetrical in pattern, and the central front panel without a sharp transition of shades. After tinting, differences become more noticeable, so a test stain is done on offcuts from each batch.
Avoid areas with large knots or sloping grain on the ends and near fasteners. The decorative texture should not weaken the location of a bolt, bushing, or bed catch. If a beautiful section coincides with a structural node, the workpiece is rotated or the cutting layout is changed.
Why a solid panel requires a special approach
A wide solid wood headboard is not fastened across the grain with many rigid screws without allowance for movement. During seasonal changes in width, the panel may crack. For large panels, a frame-and-panel scheme, floating fasteners, elongated holes, or a stable plywood base with decorative veneer and overlays are used.
Tools, fasteners, and connections
For quality assembly, you will need a tape measure, square, long straight batten, pencil, drill or screwdriver, set of drill bits, countersink, clamps, sander, and a tool for precise cutting. A miter saw speeds up work but does not fix incorrect marking.
First, make a test connection on scraps of the same wood. This is especially important when installing a threaded bushing, dowel, or furniture tie: the size of the pilot hole depends on the fastener and material density.
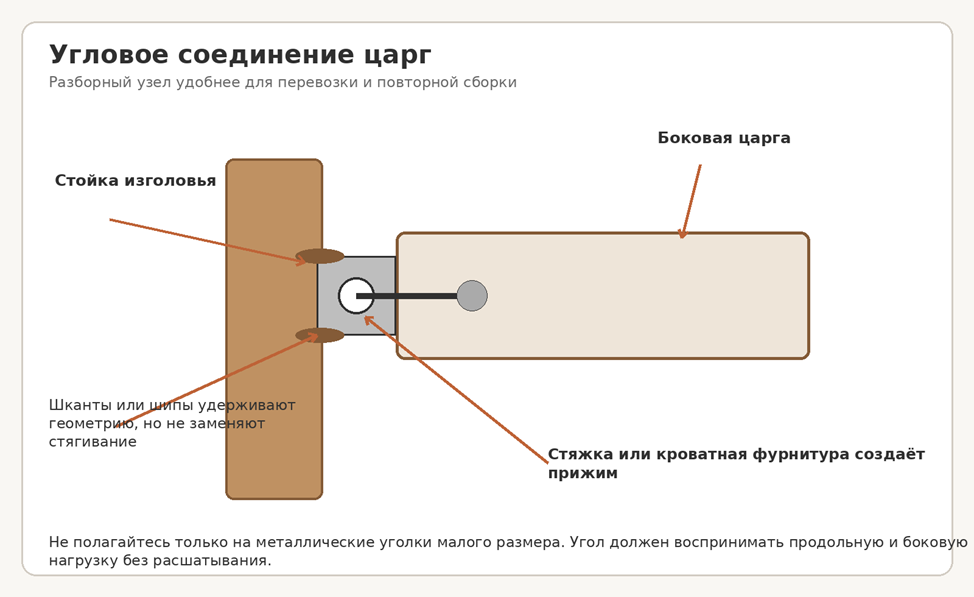
Why metal brackets alone are not enough
A small bracket holds parts in position but does not always provide sufficient clamping and poorly resists repeated rocking. In a knockdown bed, it is better to use bed catches, bolt ties, eccentric systems, or a combination of dowels for positioning and a screw for clamping.
|
Connection |
Purpose |
Knockdown design |
Comment |
|
Tongue and groove with glue |
Headboard, footboard, fixed frame |
No |
Very rigid, but requires precise woodworking |
|
Dowels + tightening screw |
Side rail with post |
Yes |
Dowels position, screw creates clamping force |
|
Bed hooks |
Quick disassembly assembly |
Yes |
Requires precise mortising of both parts |
|
Threaded insert + bolt |
Legs, side rails, headboard |
Yes |
The bushing must be in the reinforced area |
|
Structural screws |
Internal reinforcements and lamella holders |
Conditionally |
Pilot hole required |
|
Small brackets |
Auxiliary fixation |
Yes |
Must not be the only load-bearing joint |
How to set up a home workshop
Long parts cannot be accurately processed on a wobbly table or on the floor. Prepare two stable supports of equal height and leave space for tool clearance. Before cutting, ensure the workpiece does not pinch the blade and does not fall after the short part is separated. When using power tools, wear safety glasses, use dust extraction, and hearing protection.
Pair side rails and posts are marked from one reference edge. If each part is measured independently, a small error repeats in different directions and the frame becomes trapezoidal. After precise cutting, connect the paired parts with clamps and compare the ends, holes, and position of the support rails.
Pilot holes and edge distance
A screw or bushing spreads the wood fibers. The closer the fastener is to the end or side edge, the higher the risk of splitting. The size of the pilot hole is chosen based on the core of the thread and the density of the species. For oak and beech, test drilling is especially important: the force that pine easily withstands can split a dense part.
Countersinking is needed not only for appearance. A head protruding above the support rail prevents the lamella from lying flat. At the same time, excessively deep countersinking reduces the remaining thickness of the part. All technological operations are first tested on a scrap of the same cross-section.
When to use glue
Wood glue is effective between clean wooden surfaces with a tight fit. It is suitable for a permanent headboard, support rails, dowels, and reinforcement blocks. Removable side rails should not be accidentally glued to the posts: during moving, the joint would have to be destroyed.
Glue does not fill large gaps as a structural material. If a dowel wobbles freely and the ends do not fit, adding more glue will not create a quality joint. The cause is eliminated by precise fitting or replacing the part. Excess is removed before drying, otherwise a stain will appear after stain.
Marking template
For repetitive holes, make a template from plywood or dense plastic. It fixes the distance from the top or bottom edge and the center position. One template reduces error accumulation when installing support rails, center holders, and hardware on both side rails.
The template must have a clear front side. If it is accidentally flipped, the holes will become mirrored and will not match the mating parts. Label the directions "headboard", "inner side", and "top" before starting drilling.
Example specification for a bed 1600 × 2000 mm
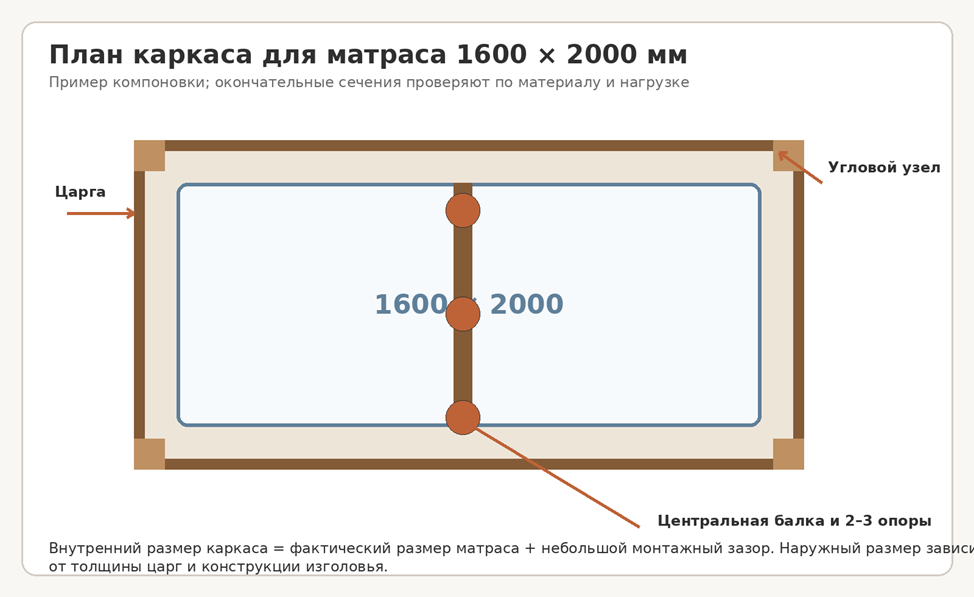
Below is not a finished strength calculation, but an example of the parts composition for understanding the project. Cross-sections are adjusted according to wood species, span length, joint design, mattress weight, and number of users. Before purchasing material, make your own drawing with external and internal dimensions.
|
Part |
Quantity |
Approximate function |
What to clarify |
|
Side rails |
2 |
Support the edges of the slats and connect the headboard to the front part |
Height, thickness, tightening location |
|
Front rail or footboard |
1 |
Closes the frame |
Will it protrude above the mattress |
|
Headboard |
1 set |
Pillow support and decorative center |
Height, attachment to frame/wall |
|
Center beam |
1 |
Reduces slat span |
Cross-section and support points |
|
Center legs |
2–3 |
Transfer load to the floor |
Height adjustment |
|
Support rails for slats |
2 |
Create a shelf inside the side rails |
Screw size and glue seam |
|
Slats |
By calculation |
Support the mattress |
Width, thickness, gap |
|
Corner bracket |
4 nodes |
Frame detachable joint |
Compatibility with cross-section of stretchers |
|
Outer legs |
4 or by design |
Lift the frame above the floor |
Reinforcement blocks and mounting plates |
Allowances are added to the length of parts only before cutting. The final drawing should not contain expressions like "approximately 2000 mm": each part has an exact size and number, and the direction of the visible side is marked before cutting.
How to create a cutting map
Write each part on a separate line: name, quantity, finished size, allowance, material, grain direction, and designation on the drawing. Long stretchers are placed on the straightest blanks, short reinforcement blocks are obtained from quality offcuts. Do not plan the cut so that a power hole ends up in a knot area or close to the end of a glued lamella.
First, cut the parts with a small technological margin, let the wood rest, and only then perform the final trimming. After longitudinal cutting, internal stresses sometimes manifest as bending. If you immediately cut to the exact size and start assembly, correcting the geometry will be more difficult.
Separately calculate losses for sawing, trimming defective ends, and pattern matching. Simply dividing the total length of parts by the board length gives an underestimated consumption. For a visible classic bed, an allowance is needed not only for technical defects but also for color sorting of paired elements.
Acceptance of parts before assembly
Lay out the entire set on a flat surface and compare paired elements. Two side rails must have the same length, holes must be in a mirror position, and support slats must be at the same height relative to the top edge. Check that the hardware does not protrude into the mattress area and does not conflict with the central beam.
Mark the parts before sanding in an inconspicuous area. After coating, similar-shaped rails are easy to confuse, and holes may end up on the outside. The marking system reduces final assembly time and prevents damage to the finished surface from repeated drilling.
Check the fastener set before applying the final coating. Bolts must pass freely through the technological holes, the thread must tighten without misalignment, and the wrench must fit into the provided recess. If access to the nut is possible only before installing the headboard panel or box bottom, the assembly order is fixed in the instructions and on the drawing. A good bed should not only be assembled the first time but also be disassembled for maintenance without damaging the decor.
Step-by-step assembly of the bed frame
Step 1. Make a working drawing
Draw the internal opening for the mattress, the thickness of the rails, the outer posts, the position of the central beam, support slats, and each fastening unit. Separately draw a cross-section: it will show at what height the slats lie and how much the mattress is recessed into the frame.
The drawing must take into account the tool. If you do not have the ability to accurately select a groove, do not design a joint that cannot be made with the available equipment. It is better to choose a high-quality ready-made tie than to imitate a complex carpentry tenon with several self-tapping screws.
Step 2. Prepare the material
Keep the wood in a dry room, check straightness, label parts, and select face sides. First perform rough cutting with allowance, then precise trimming. Pair side rails are processed together to ensure their length matches.
Step 3. Assemble the frame dry
Connect the four sides without glue and final tightening. Measure the diagonals: for a rectangular frame they must match. Check angles and flatness with a long straightedge. If the geometry is incorrect, do not try to fix it with slats or the headboard.
Step 4. Install support rails
On the inner side of the side rails, attach rails that will support the slats. Their height determines the mattress recess depth. Mark from one reference edge, not separately from the floor: the floor may be uneven.
The rail runs along the entire length, so fasteners are distributed evenly. For wood, make pilot holes and countersinks. A glue joint can increase rigidity but does not replace mechanical fastening.
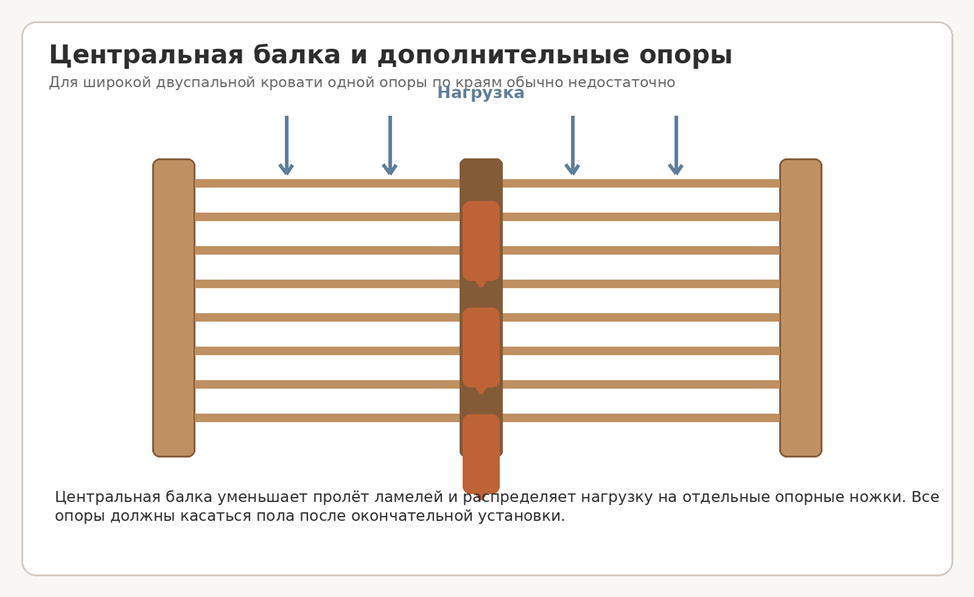
Step 5. Add the center beam
The center beam is installed along the longitudinal axis of a double bed. Its top surface must be in the same plane as the support rails. If the beam is higher, the mattress will rest mainly on the center; if lower, the slats will have excessive deflection.
Step 6. Test the frame with a trial load
Before finishing, install the slats, place the frame on a level floor, and gradually apply load. Do not jump on the unfinished frame. First check for wobbling by hand, then evenly load with a mattress or material bags and inspect the joints.
Step 7. Disassemble and perform finishing
After inspection, disassemble the frame, sand visible surfaces, remove sharp edges, and apply the selected coating system. Do not fill threads, grooves, or hardware seating areas with varnish.
Step 8. Perform final assembly
Assemble the bed in the room where it will be placed. Recheck the diagonals and ensure all supports touch the floor. After placing the mattress, make sure it can be removed without excessive force and does not block ventilation gaps.

How to check frame geometry
Equal diagonals indicate that the rectangular frame has not turned into a parallelogram. Measure from identical points, such as inner corners. If one diagonal is longer, loosen the connections, shift the corresponding corner, and retighten the fasteners. Do not install slats as spacers for forced alignment.
After checking the diagonals, place a long straight batten against the top edges of the side rails and the center beam. All support surfaces should form a single plane. Local differences will cause clicks and uneven load. Correct the position of the beam or support rail, do not insert random pieces of cardboard.
Place the frame in position and check for wobbling without the mattress. If the floor is uneven, determine which support is not touching the surface. Do not file down external decorative legs until a frame error has been ruled out. Adjustable supports are convenient for the center beam, but the outer contour must remain stable.
How to organize transportation and reassembly
Number the side rails and posts on the inside. Disassembled hardware wears into its place over time, so swapping left and right parts may worsen the fit. Store fasteners in a labeled bag and protect protruding threaded studs with caps.
Do not carry an assembled double bed by one side rail: the frame works in its installed position, and lifting it by a corner causes uncalculated torsion on the joints. Disassemble the bed into sections or lift it evenly with several people, supporting all corners.
Mattress base: center beam and slats
A wide bed without a center support often starts to creak and sag not because of weak outer legs, but due to a large slat span. The center beam divides the span into two parts and transfers the load to additional supports.
The number of center legs depends on the length and stiffness of the beam. For a standard length of 2000 mm, several support points are used, positioned so that the middle does not remain a free span. An adjustable leg is convenient on uneven floors, but after adjustment it must be locked to prevent self-rotation.
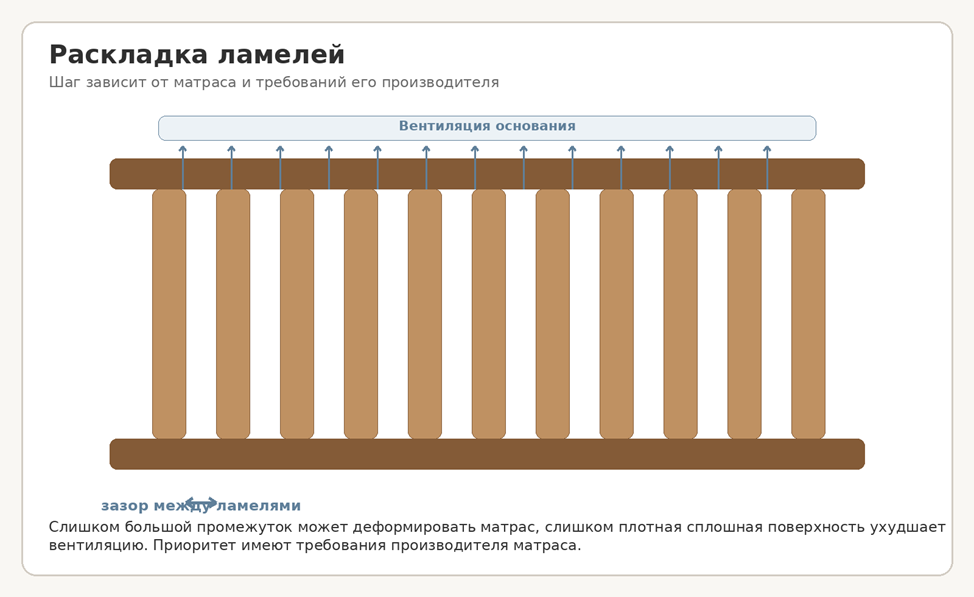
How to calculate slats
First, determine the usable length of the base between the headboard and the front side rail. Subtract the total width of all slats from it. Divide the remainder by the number of gaps. Compare the resulting gap with the mattress requirements.
The outer slats should not press against the side rail fasteners or the hinges of the lifting mechanism. All elements are positioned parallel, and the support points on the left, center, and right must be at the same height.
|
The mattress takes priority. If the mattress manufacturer requires a solid ventilated base or a specific maximum slat spacing, follow their instructions rather than the average value from a general guide. |
How to choose and secure bed legs
Legs simultaneously set the height, affect the appearance, and transfer the load to the floor. First, calculate the frame structure, then select supports with a suitable mounting plate. Do not choose a leg based only on a photo.
In the category buy wooden bed legs you can compare models by shape and size. For a compact classic frame, for example, turned legs MN-088 100 mm high or wooden legs MN-094 for bed. Before ordering, it is necessary to check the actual area of the top platform and provide a reinforcement block inside the frame.
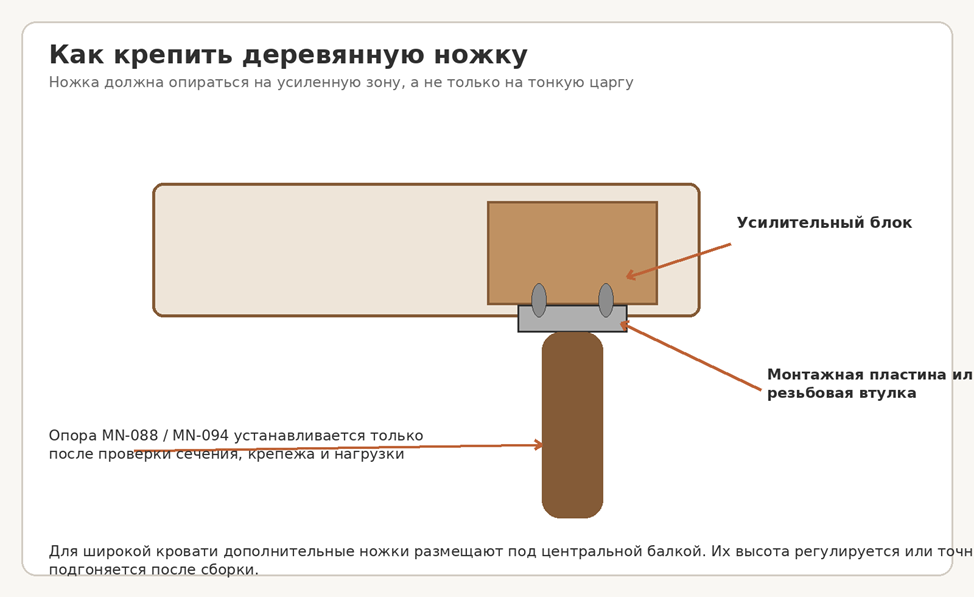
Diagram 7. Attaching a wooden leg through a reinforcement block and mounting plate
If the leg has a threaded stud, the mating bushing must be in a solid part. Screwing the bushing into the end of a thin side rail close to the edge may cause splitting. For a turned swivel leg, it is also important to prevent it from rotating together with the stud when moving the bed.
Decorative legs are not necessary under the central beam: adjustable hidden supports are more practical there. They must touch the floor and bear the load, not hang a few millimeters above.
|
Question |
What to check before buying legs |
|
Height |
Final mattress height and seating comfort |
|
Top view |
Is there enough space for the plate, bolt, or bushing |
|
Material |
Compatibility with side rails and future coating |
|
Quantity |
Four outer supports do not replace central ones |
|
Floor |
Are thrust bearings, adjustment, and coating protection needed |
|
Shape |
Does the leg protrude into the passage or create a hazardous angle |
DIY bed headboard
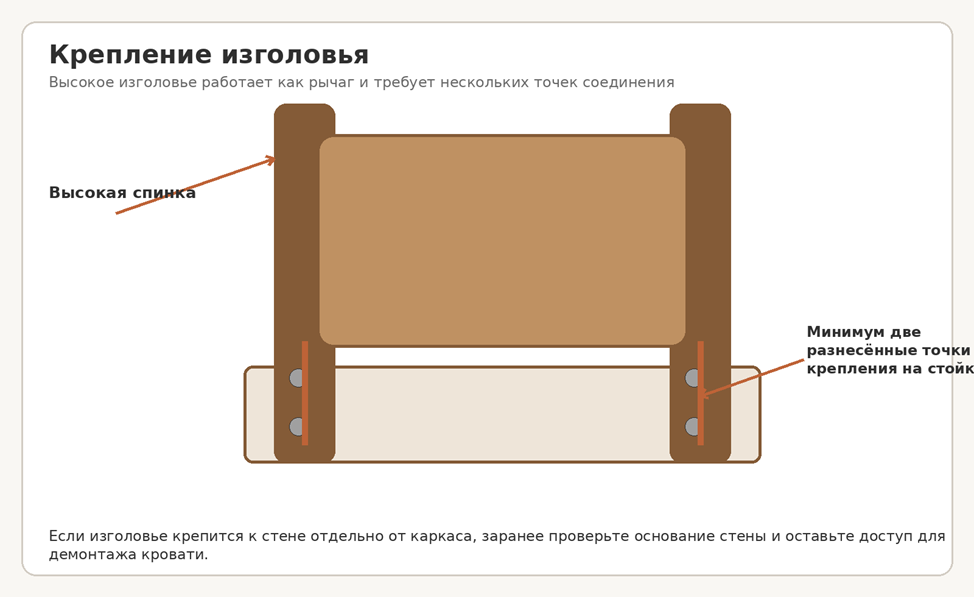
The headboard can be part of the structural frame, a separate panel on the wall, or a combined construction. These options cannot be mixed. If the side rails are attached to the headboard posts, the posts bear the frame load and must have full connections. A wall panel, on the other hand, can be decorative and does not have to touch the frame.
Wooden headboard
A simple panel is assembled from a frame and a panel insert or from a plywood base with decorative trim. A wide solid board must be designed considering seasonal width changes: a rigidly glued solid panel insert may crack or warp the frame.
For a project with ready-made carving, you can use solid wood bed headboard KRVTC-001-1, and complement the front part with a footboard KRVTC-001-2. Such elements require precise dimension checks: the width of the decorative part may exceed the mattress size and determine the overall outer size of the bed.
Soft headboard
The plywood base is covered with elastic padding and upholstery fabric. Staples are placed on the reverse side, and sharp ends are fully covered. The panel is attached to the wall or posts so that it can be removed for cleaning and repair.
Carved headboard with moldings
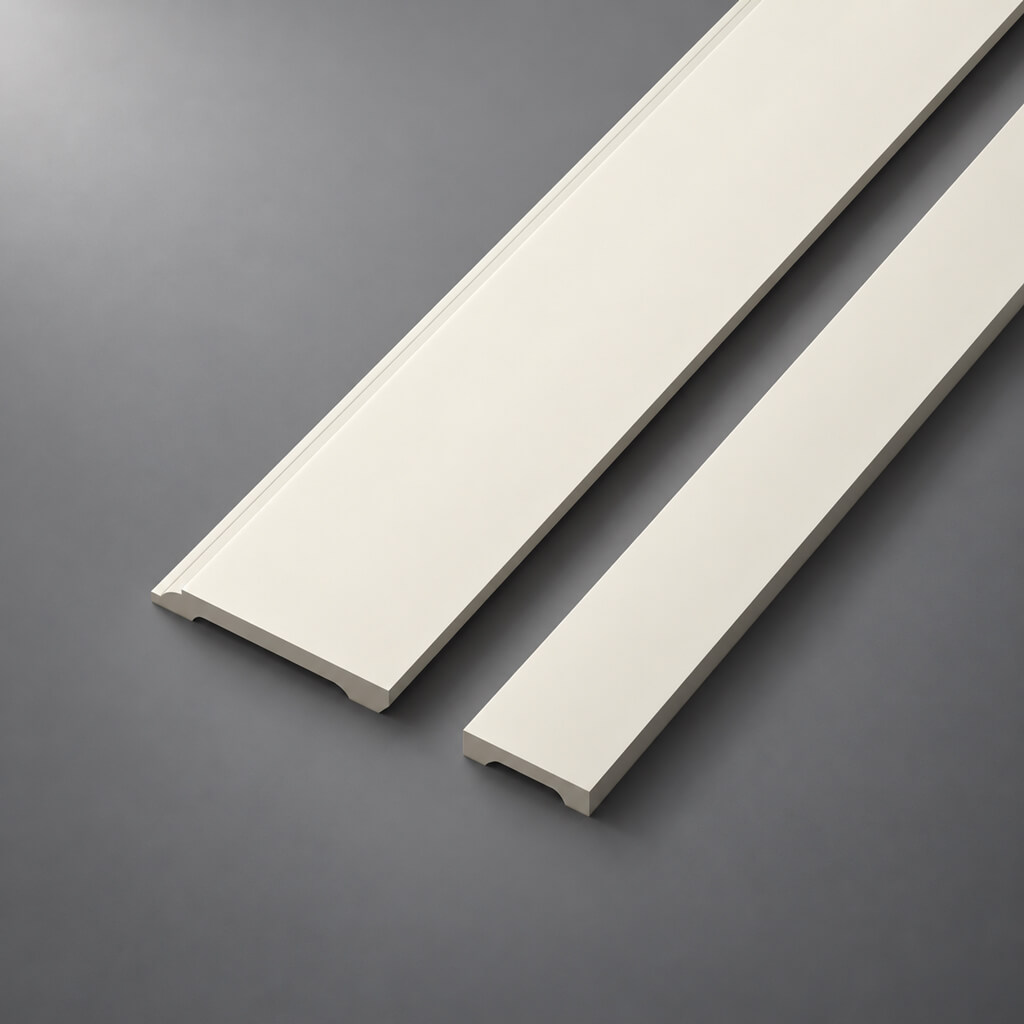
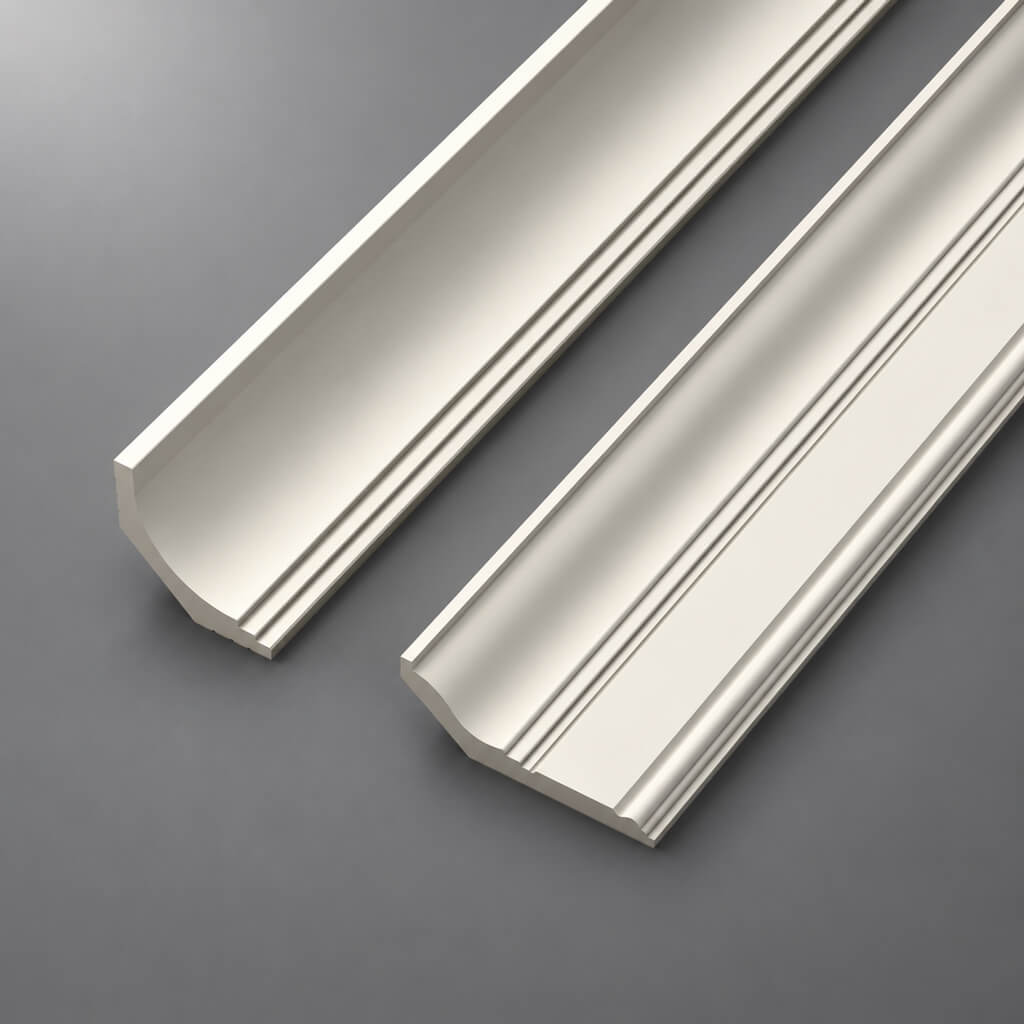
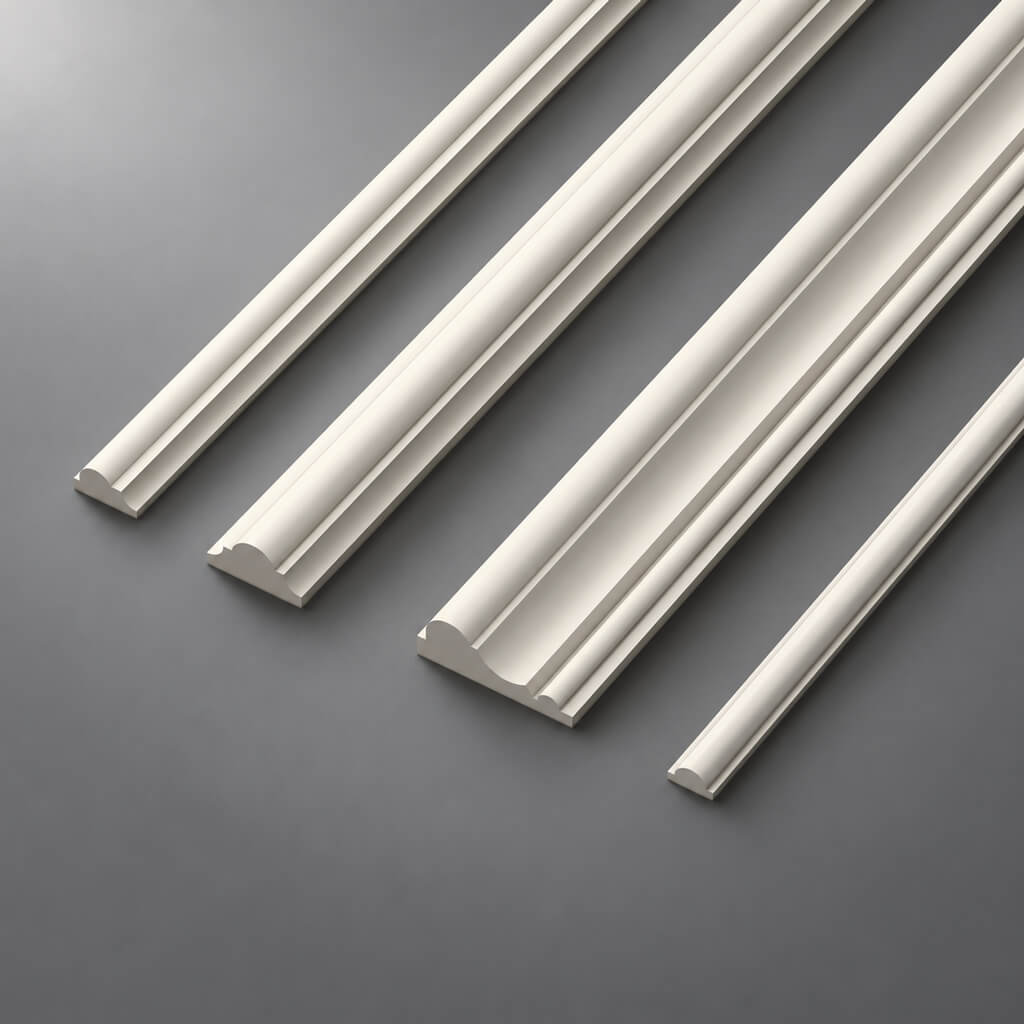
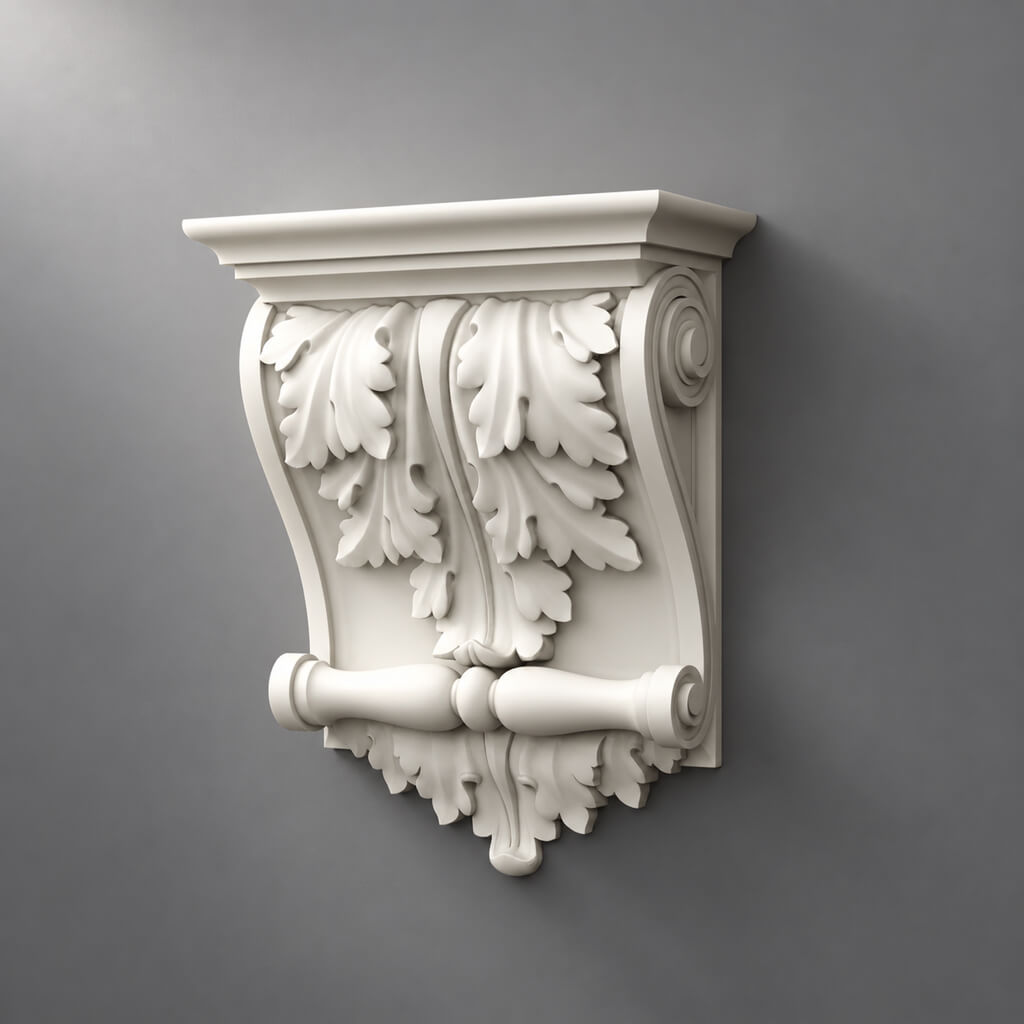
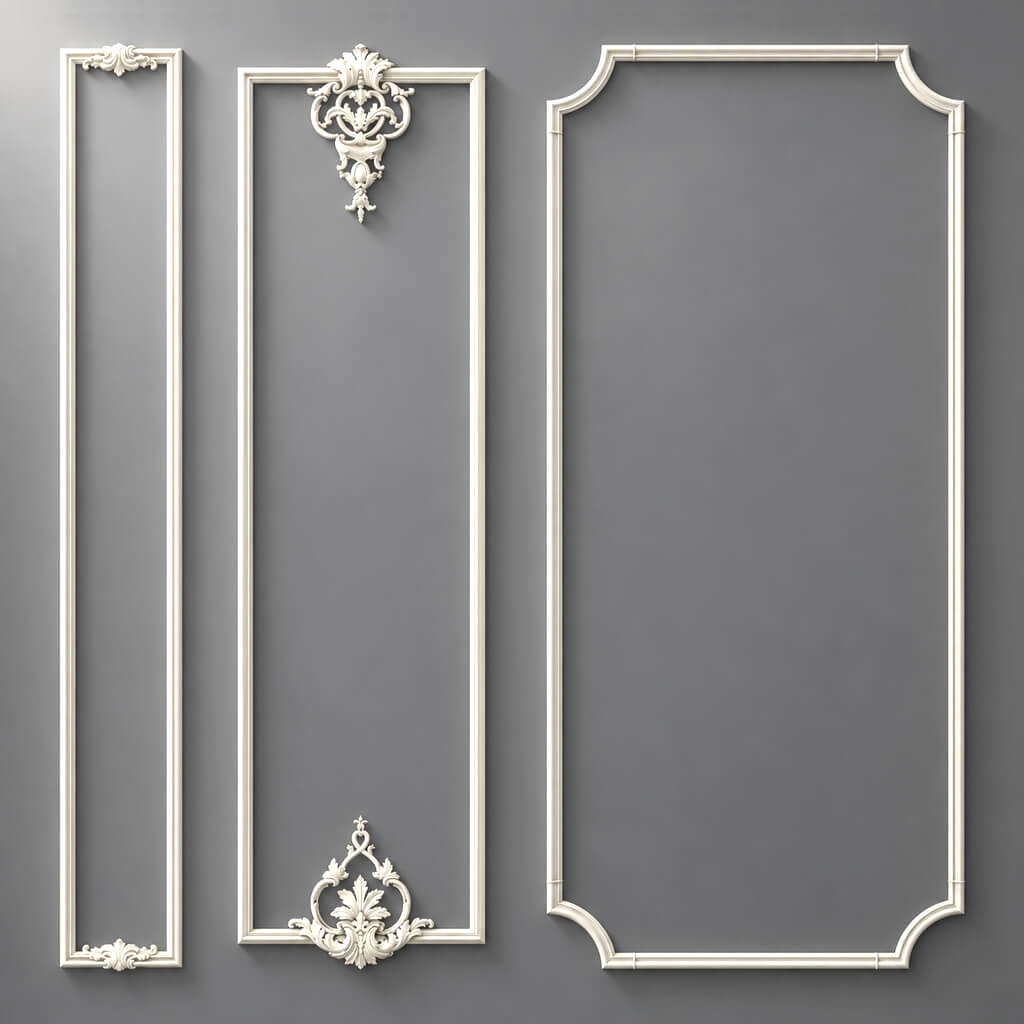
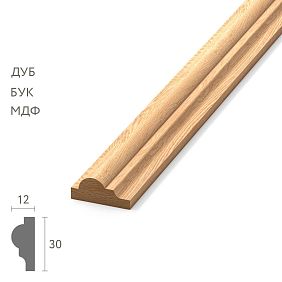
A minimalist base can be transformed into a classic composition using wooden molding MLD-003 35 × 12 mm for the outer contour and molding MLD-002 22 × 11 mm for the inner frame. The central accent creates set of carved decor C-026 or separate decorative inlays for furniture.
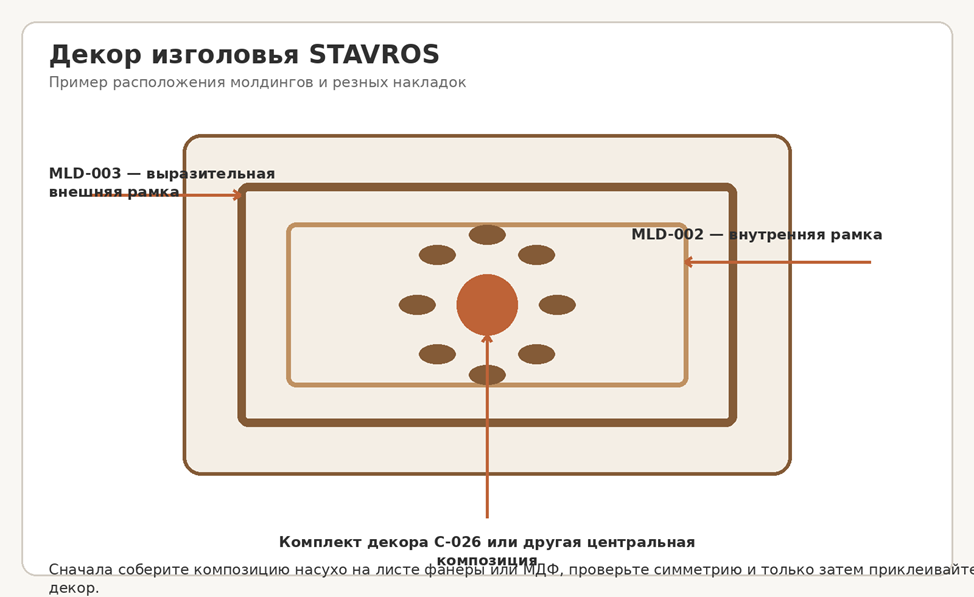
First, cut out paper templates of the decor or lay out the elements on a horizontal surface. Check symmetry relative to the mattress, not just the edge of the panel. The carving is glued after a dry fit and before the final finish, if the coating technology does not require a different order.
Bed with lifting mechanism
A lifting bed consists of a fixed box, a metal base for the mattress, hinges, and gas springs. The force of the gas lifts is selected not only by the width of the bed: the weight of the base, mattress, center of gravity position, and lever geometry are taken into account.
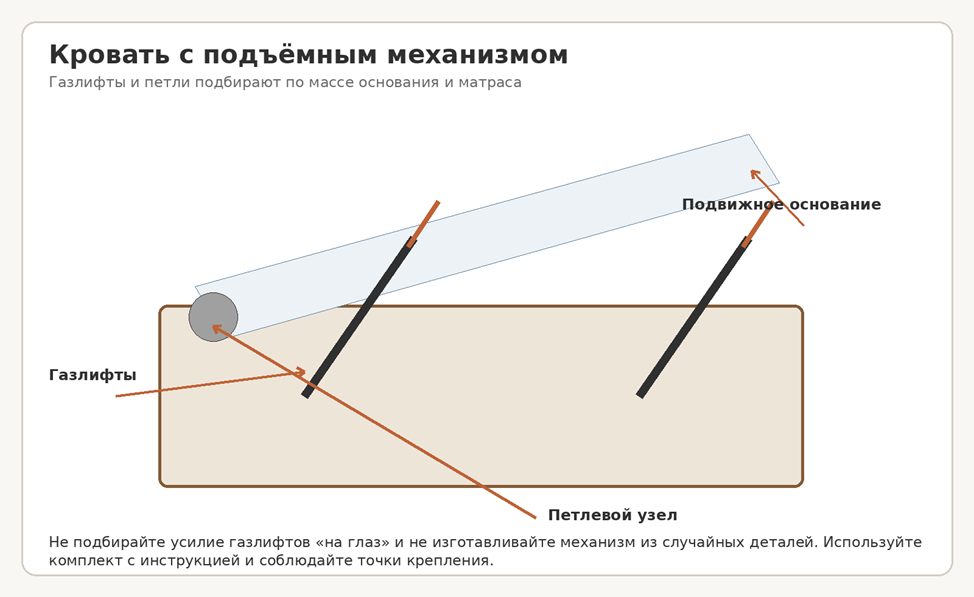
Do not buy gas springs separately based on the maximum number of newtons. A set that is too weak will not hold the base, one that is too strong will lift it abruptly and overload the fasteners. Use a set from one manufacturer with a selection table and hole template.
At the attachment points of the mechanism, the side rails are reinforced with inserts. Screws should not go only into thin MDF or chipboard. After assembly, check the synchronization of the left and right sides, the absence of skew, and safe holding of the base in the open position.
Drawers under the bed
Pull-out drawers are simpler than a lifting mechanism but require free space on the side. Before designing, fully open cabinets and doors, mark the outline of the future drawer, and check if the carpet will interfere.
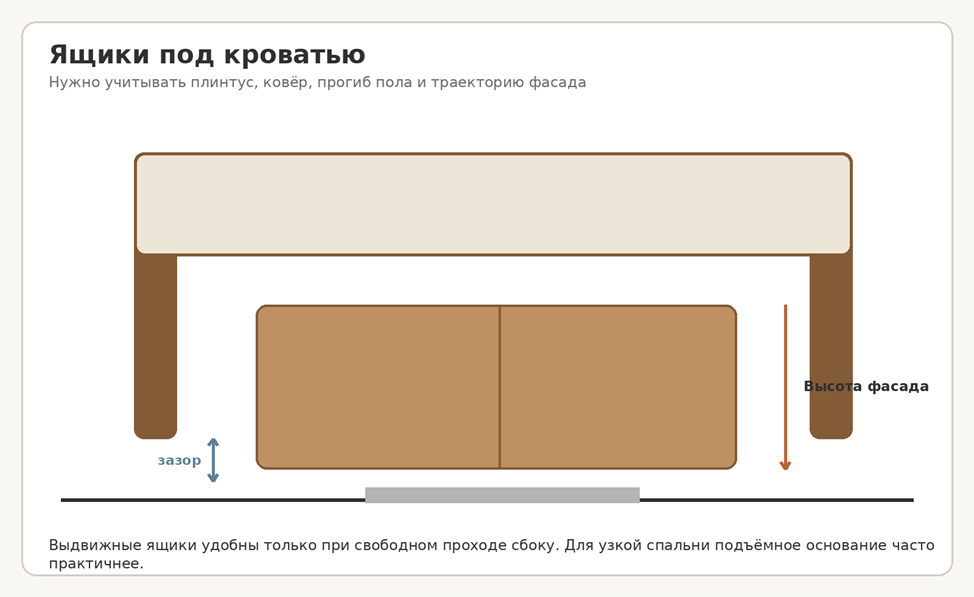
An independent roller drawer is less dependent on the frame geometry and is easy to remove. Guides provide more precise movement but require rigid parallel sidewalls. The drawer bottom must have support or a groove, not just be held by short nails around the perimeter.
Storage box
The interior space cannot be sealed airtight if textiles are stored there. Provide ventilation and the ability to remove dust. The box bottom must rest on a frame or crossbars; a large thin sheet suspended only around the perimeter will sag under items.
Check access to fasteners after installing the box. Sometimes a solid bottom blocks the nuts of the central beam or the bolts of the lifting mechanism, requiring disassembly of the entire furniture for routine maintenance. Removable bottom sections are more practical than a single solid sheet.
Installing the lifting base using a template
First, assemble and level the fixed box. Then transfer the holes from the factory template of the mechanism to both side panels from one base. The left and right units must be mirrored and at the same height. An error of even a few millimeters causes the metal frame to warp.
Gas springs are installed in the position specified by the manufacturer. Before connecting them, manually check the free movement of the hinges. After installing the mattress, smoothly open and close the base several times, without being inside the box or holding your fingers near the hinges.
Special bed options
Floating bed
The effect is created by a hidden base set back from the visible edge. The greater the overhang, the higher the load on the internal frame. The decorative base cannot simply be reduced to one narrow cabinet: the hidden frame must prevent tipping when sitting on the edge.
Bed in a niche
Do not make the outer dimension equal to the width of the niche. Walls may not be parallel, and the mattress and bedding require access. A collapsible front part or removable panels significantly simplify installation and cleaning.
Bunk bed
This is not an enlarged single bed frame. The structure must have calculated posts, rigid connections, a safe ladder, a protective guard, and attachment to the wall or another stability system. For children's furniture, a ready-made proven design or a manufacturer's product is preferable.
Bed from an old base
Before decorative renovation, check where the source of looseness is. Often the problem is not in the legs, but in broken tie holes, a weak central beam, or a cracked support slat. A new carved overlay should not mask a damaged structural unit.
Bed from pallets
This option is only acceptable after checking the origin and condition of the wood. Pallets are heavy, have many hidden cavities for dust, and may extend beyond the mattress. For a permanent bedroom, a regular frame made of planed wood is usually more hygienic and lighter.
Sanding and finishing
Main sanding is done before assembly, paying attention to edges that a person touches. A sharp corner of the side rail is unpleasant when sitting and quickly damages the coating. Edges are slightly softened with a router or sanding, without changing the geometry of the joints.
Oil emphasizes the texture and allows for local surface renewal. Varnish forms a more pronounced film and requires careful interlayer sanding. Enamel hides differences in wood species and is suitable for MDF decor, but the base must be primed with a compatible system.
Do not apply the coating in a thick layer to bolt holes, threads, dowels, or seating surfaces of metal catches. After complete drying, reassemble the frame and check the tightening: the finish layer may change the fit of parts.
|
Coating |
Appearance |
Repair |
What to pay attention to |
|
Oil |
Matte or silky wood |
Local renewal is relatively simple |
Excess must be completely removed |
|
Oil-wax |
Warm tactile surface |
Local repair is possible |
Do not apply too thick a layer |
|
Polyurethane varnish |
Durable film, varying degrees of gloss |
A chip often requires sanding the area |
Interlayer treatment required |
|
Enamel |
Even opaque color |
Chips can be touched up but may be noticeable |
Primer for solid wood and MDF differs |
|
Stain + varnish/oil |
Color change while preserving the grain |
Depends on the finish coat |
A test coat is mandatory |
How to calculate materials and budget
Create a table not only for wood, but also for all hidden costs: delivery of long side rails, cutting, routing, ties, slats, central supports, sandpaper, drill bits, glue, coating, glides, and a margin for defects. Separately calculate the tools that will need to be purchased or rented.
The coverage area is calculated for all visible faces, taking into account the number of coats and the manufacturer's consumption. For carved parts, consumption is higher due to the developed surface. Buying finish compound right to the edge is not profitable: the remainder will be useful for repairs.
Wood is calculated based on the cutting map, not the sum of lengths. Short parts can be obtained from scraps, but face posts and long side rails require straight blanks without critical defects. For complex carvings and turned supports, ready-made elements are often more economical than making them yourself.
Choosing a style without losing functionality
A modern bed does not necessarily have to be frameless and very low. Clean straight side rails, hidden ties, geometric legs, and a monochrome headboard create a modern look with a standard reliable scheme. The technical frame can remain the same, while the appearance is changed by the supports, the shape of the backrest, and the coating.
A classic bed requires a coordinated scale. Massive carved legs do not pair well with a thin side rail, and a large set of overlays is lost on a low headboard. First, determine the main detail—for example, the central carved decor—then select the width of the moldings and the height of the posts.
For Scandinavian and natural interiors, calm wood and a tactile coating are more important than complex carvings. Visible joints must be neat, as light finishes emphasize gaps. In neoclassicism, moldings can be painted together with the headboard, creating relief without contrasting different wood species.
A footboard is not useful in all bedrooms. A high headboard creates a complete classic composition but reduces the visual depth of a small room and makes bed-making more difficult. In a compact project, a low footboard with decorative legs is sufficient.
Common mistakes when making a bed
First, they make the frame, then they buy the mattress
The nominal size does not guarantee a precise fit. The mattress is chosen and measured first.
The frame rests only on four outer legs
A wide bed requires a central beam and supports.
The side rails are connected with small brackets
Brackets do not create a proper tightening and quickly become loose.
The leg is screwed into the thin edge of the side rail
The load splits the wood. A reinforcement block or plate is needed.
All slats are laid tightly together
The mattress ventilates worse. The base scheme is agreed upon with the manufacturer.
Too large slat spacing
The mattress sinks between the supports and becomes deformed.
The central leg does not touch the floor
The beam acts as a large free span and bends.
The high headboard is held by a single bolt
The backrest rocks the joint like a lever. Spaced attachment points are needed.
The coating was applied before the trial assembly
Fitting and drilling damage the finished surface.
Gas lifts selected from photo
The base may fall or rise sharply. A selection table is needed.
Decor glued before symmetry check
Even a slight shift is noticeable on a large headboard.
The bed is not disassembled
A large product cannot be taken out of the room without damage.
Why the bed creaks and how to maintain it
Creaking occurs in moving contact: between the side rail and the post, the slat and the support rail, the central leg and the floor, the metal tie and the wood. You cannot simply fill the entire joint with glue. First, localize the source by unloading and pressing on different areas.
Collapsible ties are periodically checked and tightened. If the bushing hole is damaged, the screw cannot be replaced with a thicker one without assessing the remaining cross-section. The damaged area is restored by gluing in a wooden insert or replacing the part.
The pads are cleaned of sand that scratches the floor. Central adjustable supports are checked after moving the bed. The oil coating is renewed based on condition, not a formal schedule: areas near hands and the floor wear out faster.
How to repair a broken hole
If the screw no longer holds, do not drive a second one nearby at a random angle. Disassemble the joint, remove the damaged wood, and assess the remaining cross-section. In a simple load-bearing block, you can drill the hole to a proper shape, glue in a plug of compatible wood, and after full drying, re-mark and drill. In a thin rail or near an edge, it is safer to replace the reinforcement block or the entire part.
Do not fix a threaded insert that spins with a surface drop of glue. Remove it and check why the fit is compromised: the hole is too large, insufficient depth, or pull-out load. Sometimes an insert with a larger outer diameter is needed, but the decision is made only if sufficient residual cross-section remains.
Repair of squeaking slats
Remove the mattress and load each slat one by one. If the sound occurs at the contact with the support rail, check for evenness, absence of protruding heads, and free movement. A thin felt or polymer tape can eliminate friction, but first ensure it does not change the base height or retain moisture.
Replace a cracked slat, do not reinforce it with a short patch in the middle of the span. The new part must match the length, thickness, and elasticity of the adjacent ones. Replacing several slats at once with random boards of different stiffness creates uneven mattress support.
Check after moving
After reassembly, do not place the mattress immediately. Check the diagonals, tightness of fasteners, position of central supports, and evenness of slats. The floor in the new room may have a different slope, so adjust the leveling feet again. Perform the first recheck of fasteners after a few days of use.
Which STAVROS elements to use in the project
For a reader who wants to fully manufacture the load-bearing frame, the category is useful solid wood bed frames: it helps to assess proportions and choose a ready-made structure. For a classic interior, you can consider carved frame KRVT-001which already combines the front backrest, side rails and headboard.
If the main frame already exists, the appearance is changed with individual components: headboard KRVTC-001-1, a footboard KRVTC-001-2, bed legs made of oak and beech, decor set C-026 and furniture moldings. The links lead not to general articles, but to pages for selecting a specific product or narrow product group.
For those who need ready-made furniture rather than DIY woodworking, it is more logical to go to the section classic solid wood beds. For example, Versailles bed 001-001 shows how a carved frame, soft headboard, and trim come together in a finished composition.
|
User's task |
Recommended link in article |
Anchor |
|
Need a ready-made base |
Bed frame category |
buy a solid wood bed frame |
|
Need a carved classic frame |
KRVT-001 |
Carved Bed Frame KRVT-001 |
|
Only the back panel changes |
KRVTC-001-1 |
solid wood headboard |
|
Need a footboard |
KRVTC-001-2 |
wooden bed footboard |
|
Selecting supports |
Bed leg filter |
buy wooden bed legs |
|
Need specific legs |
MN-088 and MN-094 |
turned bed leg |
|
Headboard is being decorated |
C-026, MLD-002, MLD-003 |
carved decor and molding for headboard |
|
Need a ready-made bed |
Category of classic beds |
classic solid wood beds |
Who is suitable for DIY
The project is suitable for a person who can measure accurately, is willing to do a dry assembly, and does not perceive decor as a replacement for the structural frame. The basic frame can be made without a professional workshop if the cutting is done precisely and complex grooves are replaced with high-quality furniture fittings.
DIY is not suitable when there is no way to transport long parts, the bedroom is already fully finished and cannot tolerate dust, certified children's bunk bed furniture is required, or the client expects complex carving without access to milling equipment.
Final checklist before cutting
· ☐ The mattress is selected and measured at several points.
· ☐ The internal frame size is recorded separately from the external one.
· ☐ Passages, doors, cabinets, sockets, and baseboards are checked.
· ☐ There is a cross-section with the height of the slats and mattress.
· ☐ A collapsible corner joint has been selected.
· ☐ The drawing shows the central beam and its supports.
· ☐ The gap between the slats corresponds to the mattress.
· ☐ The legs have a reinforced mounting plate.
· ☐ The high headboard is secured at multiple points.
· ☐ The decor does not cover the bolts and collapsible connections.
· ☐ The bed can be brought into the room and disassembled when moving.
· ☐ The lifting mechanism is selected as a kit, not assembled from random parts.
· ☐ There is a supply of material and finish coating.
· ☐ A test load is planned before finishing.
Checking the finished bed before use
After final assembly, leave the frame without the mattress and inspect all connections again in good lighting. No fastener head should protrude into the mattress area, the slats should lie completely on the support rails, and the center beam should be in contact with all provided legs. Check that decorative elements do not cover technical holes or interfere with tightening the ties.
Increase the load gradually. First, press on each corner and the center with your hands, then place the mattress and evenly distribute weight on it. Watch not only for obvious cracking but also for movement of joints, changes in diagonals, and the appearance of gaps. If the frame shifts, remove the load and find the cause; additional tightening without understanding the problem can split the wood or strip the insert.
Check convenience in real use: can you safely sit on the edge, do your legs hit protruding supports, is there enough space for cleaning and changing linens. For drawers, perform several full extension cycles with a working load. For a lift-up base, check retention in the open position and smooth closing only according to the mechanism's instructions.
A few days after starting use, re-inspect the disassemblable joints. Wood and hardware finally settle into their working position, so individual ties may require careful tightening. Record the key type and location of hidden fasteners in a small note: this will simplify maintenance and reassembly after moving. Store the diagram together with spare plugs, glides, and fasteners so that during repairs you don't have to pick random incompatible parts.
Frequently Asked Questions
What kind of timber to use for a bed?
The cross-section is determined by the design, wood species, and span. For long side rails, the height of the part and the quality of the joint are more important than the formal term "timber." Giving a universal size without calculation is incorrect.
Can the frame be made only from plywood?
It is possible to design a box or platform structure, but a thin sheet without ribs does not replace side rails. Multi-layer panels, ribs, and suitable joints are needed.
Is a center beam needed for a 1400 mm bed?
This depends on the slats and base, but for a double width, a central support often improves rigidity and durability. The final decision is coordinated with the mattress system.
How many legs should a double bed have?
In addition to the outer supports, several points are usually provided under the central beam. The specific number is determined by its span and rigidity.
Can I put a mattress on solid plywood?
Only if the mattress allows such a base and ventilation is ensured. Otherwise, moisture will be removed less effectively.
How to make a bed without squeaking?
Use tightening detachable joints, precise geometry, a central support, and eliminate free friction of the slats. After assembly, locate each sound, rather than lubricating everything indiscriminately.
How to connect the side rails to the headboard?
With bed hooks, bolt ties, dowels with a tightening screw, or another furniture system. A small bracket can only be an additional element.
Can I glue carved overlays after painting?
It is more reliable to determine the compatibility of the glue and coating in advance. Often, the decor is glued to the prepared base, and then the entire composition is painted.
How to choose the height of the legs?
Add the height of the leg, the position of the slats, and the thickness of the mattress. Compare the resulting height with a comfortable seating height and the possibility of cleaning.
Can I use legs MN-088 or MN-094?
Yes, if the mounting plate and fasteners match your frame. The product card provides dimensions, but the power unit is still designed for a specific frame.
Is it worth making a lifting mechanism yourself?
No. It is safer to buy a ready-made coordinated kit and install it according to the manufacturer's template.
How to make a soft headboard removable?
Secure the panel on a French cleat, hidden furniture hinges, or bolts to the posts, leaving access to the fasteners from the back side.
Do I need to attach the bed to the wall?
A regular low frame does not require fastening if it is stable. A tall separate headboard, floating or bunk bed structure may require fixation according to the design.
When to install STAVROS decor?
After dry assembly and size check, but before final finishing, if the glue and coating technology involves painting the entire composition.
Can the finished frame be enlarged for a different mattress?
Sometimes it is possible to replace the side rails and center beam, but the position of the hardware, headboard width, and base must be recalculated. Simply adding slats along the edges is not always safe.
Conclusion
A quality homemade bed starts with an accurate mattress size, a clear load diagram, and detachable structural joints. Decorative legs, carved headboard, and moldings make the furniture expressive but do not fix a weak center beam, incorrect side rails, or random fasteners.
Be sure to keep the working drawing, cutting map, and fastener diagram after completing the project. These documents will be useful for tightening couplings, replacing slats, moving, or ordering a new decorative part. The clearer the structure is documented, the easier it is to maintain the bed without damaging the finish or redrilling structural elements.
Assemble the frame dry, check the diagonals and each support, perform a test load, and only then apply the coating. For a lift-up base, use a ready-made mechanism; for a wide bed, provide a center beam; and secure a tall headboard with several spaced points.
If manufacturing a complex frame exceeds the capabilities of a home workshop, use ready-made STAVROS bed frames, wooden bed supports and decorative elements as the basis of the design solution. This approach preserves the individuality of the product but reduces the risk of errors in the most labor-intensive details.