
























































Article Contents:
- When one smooth cornice is not enough
- What is KPU-118 and how it differs from a second cornice
- What gap to leave between the cornice and KPU-118
- How to paint the pair "cornice + KPU-118"
- When a second belt works, and when it works against the interior
- When it is better not to buy KPU-118 at all
- Around the entire perimeter or only on the front walls
- How to handle internal and external corners
- Continuation of the carved pattern through the corner
- How to position joints on straight sections
- Cutting algorithm: how to correctly calculate the quantity of KPU-118
- Example 1: continuous perimeter, room 4.8 × 3.7 m
- Example 2: only front walls with a doorway, room 5.2 × 4.0 m
- Order cost for both examples
- What allowance to provide after layout
- Choosing adhesive based on the base type
- Preparation of an already painted wall for frieze installation
- Treatment of joints and seams after installation
- KPU-118 or wide KPU-114 — why these are different tasks
- Application scenarios: a table for quick decisions
- Typical mistakes when ordering and installing
- How to buy and what to consider when placing an order
- Frequently Asked Questions
When a single smooth cornice is not enough
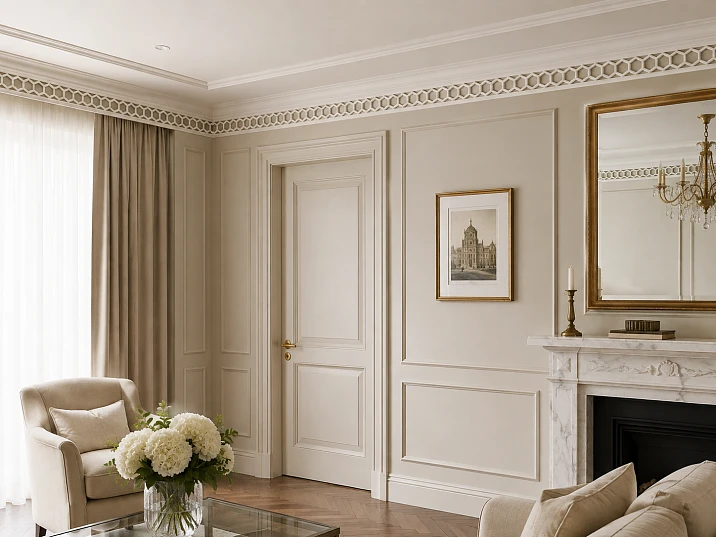
A smooth ceiling cornice covers the joint between the wall and ceiling and eliminates the gap — this is its main technical function. It does not create a pattern or hold the eye, so the perimeter after installation often looks technically complete but visually empty, especially if the walls are painted in a single tone without other decor nearby.
The standard solution to the problem is to replace the cornice with a massive ornamented profile. This path has a price: a wide cornice with relief typically takes up 80–150 mm on the wall and noticeably weighs down the top of the room, and with a ceiling of 2.5–2.7 m it can visually lower it. In addition, replacing an already installed or already purchased cornice means dismantling, new fitting of corners, and often repainting the entire perimeter.
An alternative is to leave the cornice as is and add a separate carved band of small height underneath it. This solution changes the task itself: instead of "replace the cornice," the buyer adds a second, thin element that does not conflict with the already chosen profile and does not require redoing an already finished section.




What is KPU-118 and how it differs from a second cornice
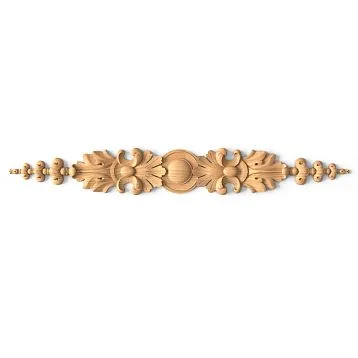
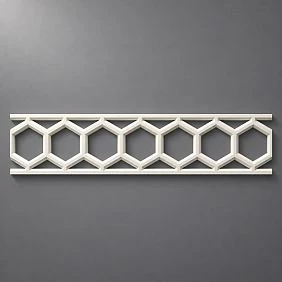
KPU-118 molding is a decorative polyurethane element with a figured carved relief. According to the product card on the Stavros website, its geometry is as follows: width of the visible carved strip — 40 mm, profile thickness (projection from the wall plane) — 5 mm, length of one plank — 2000 mm. The product is sold individually, the current price of one two-meter plank is 6,880 ₽. The item belongs to the "Molding" section of the catalog and is called "Decorative stucco KPU-118" on the website — that is, formally it is polyurethane stucco decor, not a separate product category.
Important note on availability: on the product card, the status is displayed as "to order" rather than "in stock". This means that before placing an order, you should check with the manager the exact production time at the time of purchase — it may vary depending on production load and season. Relying on a specific number of working days without checking against the order date is not advisable: this information changes faster than the article is published.
The size ratio of KPU-118 is what sets it apart from the second cornice. A regular smooth ceiling cornice protrudes from the wall by 40–100 mm and creates its own volume and shadow. A profile 5 mm thick barely protrudes from the wall plane: it reads as a pattern on the surface rather than an architectural projection. Because of this, KPU-118 is functionally closer to a decorative carved strip than to a cornice, although both elements are located in the same zone — under the ceiling.
For scale comparison: the neighboring product in the same line, KPU-114, has a visible strip width of 100 mm with the same plank length of 2000 mm and the same profile thickness of 5 mm. The 60 mm difference in width is the difference between a thin graphic line and an independent wide border; it is detailed in a separate section below.
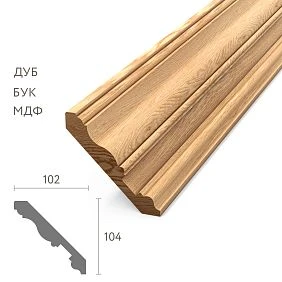
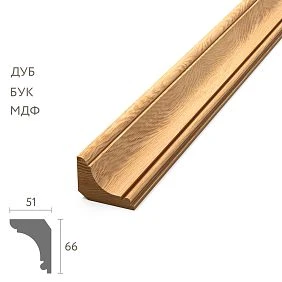
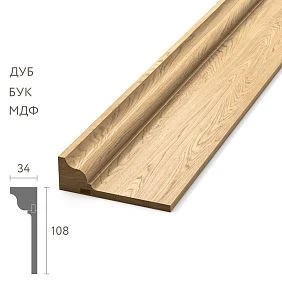
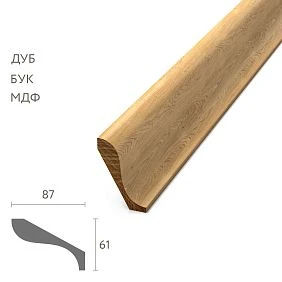
Our factory also produces:
What gap to leave between the cornice and KPU-118
The gap between the lower edge of the cornice and the upper edge of KPU-118 determines whether the two elements read as a coordinated pair or as randomly coinciding strips. Below are not normative values, but practical starting points that should be checked on site — using a photo of the wall, a painter's tape mockup, or a plank sample applied to the wall at the intended height.
A too-small gap visually merges the cornice and frieze into one thick band — then the point of adding the second element is lost, because it simply widens the cornice rather than creating an independent accent. A too-large gap breaks the composition: an empty strip remains between the two decorative lines, and the connection between them stops being perceived when viewed from the floor.
As a starting point for a standard ceiling (2.6–2.7 m), a gap of about 30–50 mm can be used: here it is important not to take away wall height with an unnecessary decorative pause. For a ceiling around 3 m, the range can be expanded to 60–100 mm — a larger gap helps the elements not merge into one thick frame and emphasizes the room's height. In tall halls with ceilings of 3.3 m and above, the gap often reaches 120–150 mm, and sometimes another thin molding is added between the cornice and KPU-118, forming a three-level system. The exact value in each case is best checked visually before gluing the first plank, rather than strictly following a number from the article.
Get Consultation
How to paint the pair "cornice + KPU-118"
In one color. Both elements are painted to match, usually matching the ceiling or cornice. The carved relief of KPU-118 remains readable due to its own shadows from side light, but does not conflict in color with the surroundings. This option is universal and suitable when an accent on the upper wall zone is undesirable — for example, if the room already has another strong decorative element.
Contrast painting. KPU-118 is painted in a tone different from the cornice and wall — often 1–2 shades darker or in a shade that echoes the floor, furniture hardware, or frames. This approach strengthens the frieze's role as an independent accent and is justified if the goal is not just to complete the cornice, but to add a second visual layer to the interior. Contrast requires more careful installation: any unevenness in plank joints or corner seams becomes more noticeable than with uniform painting.
Patination. Applying a darkening compound to the recesses of the relief is applicable to both painting scenarios and emphasizes the carved pattern through the contrast between protruding and recessed areas of the profile, without changing the main tone of the wall. Patina is especially appropriate if the overall interior style already includes aged or tinted surfaces—for example, dark hardware or patinated textiles.
When the second belt works, and when it works against the interior
Any additional horizontal line under the ceiling visually reduces the perceived height of the wall. The question is whether the decorative effect compensates for this side effect or not.
The belt works in favor of the interior if three conditions are met simultaneously: the ceiling is at least 2.7 m, the offset is chosen for the specific room height, and there are no other horizontal divisions at the same height in the room—for example, a wide wall molding frame that reaches into the same zone. Under these conditions, KPU-118 adds detail without overload and justifies the decision not to replace the cornice with a massive one.
The belt starts working against the interior in three typical cases. The first is a ceiling below 2.6 m: an additional horizontal shortens the wall more than it adds decorativeness, and it is wiser to limit yourself to one cornice. The second is a wall already saturated with horizontals: a high baseboard, a molding frame, a panel at a height of 900–1000 mm—a third line creates a feeling of striping rather than hierarchy. The third is a narrow, long room: a continuous carved belt on long walls visually stretches the proportions even more, and here it is often wiser to limit the frieze to short walls or the entrance area.
When it is better not to buy KPU-118 at all
There are situations where the decision not to add a frieze will be the right choice, not a compromise. If the ceiling is below 2.55 m, adding a second horizontal almost always works against the sense of height—it is better to leave only the cornice and compensate for the emptiness with color or wall texture, not decor. If the wall is already saturated with decor—a molding frame, a panel, large paintings in the upper third of the wall—a third accent creates visual noise rather than completeness. If the room is narrow and long (for example, a corridor less than 1.5 m wide), a continuous carved belt emphasizes the elongation of proportions more than it hides it. In these cases, an empty section of wall under a smooth cornice is a working solution, not a flaw, and purchasing KPU-118 is not required.
Around the entire perimeter or only on the front walls
This decision depends on the role of each wall in the room, not on aesthetics in itself.
A continuous perimeter is logical in representative and passage rooms—living rooms, halls, dining areas—which are viewed entirely from different points: a break in the band on one of the walls would be noticeable when walking around the room. Here, KPU-118 is mounted on all walls, including piers and areas behind low furniture.
Partial installation — only on "front" walls — works where part of the perimeter is either not fully visible (behind a tall cabinet, behind the headboard of a bed) or is interrupted by technical elements: door frames, windows up to the ceiling, built-in niches. In a bedroom, it is often enough to decorate the wall with the headboard and two adjacent short walls, leaving the blank wall with the cabinet without a frieze — the effect there would remain unnoticeable anyway.
How to handle internal and external corners
At internal corners, two segments of KPU-118 are cut at 45° on a miter box and joined butt-to-butt, forming a 90° angle — the same way molding or a cornice is cut. Precision of the cut is especially important here: with a profile thickness of only 5 mm, any deviation on the thin relief is more noticeable to the eye than on a massive cornice, where inaccuracy is partially "absorbed" by the overall thickness of the profile.
External corners (protruding pilaster, box) are cut similarly, but at the opposite angle. On protruding corners, it is recommended to additionally secure the joint with glue over the entire cut surface, since such a corner is mechanically more vulnerable during cleaning and accidental touches.
Continuation of the carved pattern through the corner
For carved molding, the ornament repeats with a certain step along the plank, and when cut at 45°, the pattern on the two sides of the corner does not always match in phase — that is, the pattern may "stumble" exactly at the joint. Before final gluing, it is worth dry-fitting both planks to the corner and visually assessing whether the pattern continues naturally. If there is no match, there are two practical solutions: shift the cut point along the plank so that the pattern matches (in this case, the length of the cut piece will change, which needs to be accounted for in the cutting plan), or, for contrasting painting, deliberately highlight the corner with a separate accent element — for example, a small rosette or a short vertical insert that visually "accepts" the joint rather than trying to hide the mismatch of the ornament.
How to position joints on straight sections
A joint of two planks on a wall longer than 2 m is inevitable. There are two approaches. The first is to place the joint strictly in the center of the wall: this simplifies marking, but makes the seam more noticeable under side lighting. The second is to shift the joint closer to the corner, within 150–300 mm from the corner: less direct gaze and less sliding light from a window or sconce falls there. The second approach is almost always preferable with contrasting painting, where the seam is more visible than with a uniform paint matching the wall tone.
Cutting algorithm: how to correctly calculate the quantity of KPU-118
Formally dividing the perimeter by the length of the plank (2 m) gives only a lower bound, not a ready number for ordering. The actual number of planks depends on how exactly you cut the material — independently for each wall or according to a single cutting sheet for the entire room. The difference between these two approaches can reach one or two planks, and it is worth understanding before ordering.
The practical algorithm is as follows: first, measure the length of each wall (or each section of wall being finished, if part of the perimeter is interrupted by an opening). Then, for each section, determine the minimum number of pieces — this is the section length divided by 2 m, rounded up. After that, write down the remainder length for each section: it equals the number of pieces multiplied by 2 m, minus the section length itself. Finally, try to group remainders from different sections so that their total length on one spare plank does not exceed 2 m — then several small remainders can be cut from one additional plank instead of several.
Example 1: continuous perimeter, room 4.8 × 3.7 m
Room perimeter: 4.8 + 3.7 + 4.8 + 3.7 = 17 m. Formal division gives 17 / 2 = 8.5, rounded up — 9 planks. This is the lower bound, and it can indeed be achieved, but only with a properly compiled cutting plan, not with simple "wall by wall" cutting.
Cutting walls independently (simple, without transferring remainders between walls). Each of the two 4.8 m walls is cut as 2 + 2 + 0.8 m — three pieces, i.e., three planks per wall. Each of the two 3.7 m walls is cut as 2 + 1.7 m — two pieces, i.e., two planks per wall. Total: 3 + 3 + 2 + 2 = 10 planks. This method is simpler to work with (no need to consolidate remainders into a common plan in advance), but uses one more plank than the minimum possible.
Optimized cutting plan (all remainders consolidated into a room-wide plan). Six 2.0 m pieces (two from each long wall and one from each short wall) come from six planks entirely, without waste. Two 1.7 m pieces (from the short walls) — each cannot fit alongside another segment in one plank, so they are cut from two separate planks with a 0.3 m remainder each. Two 0.8 m pieces (from the long walls) total 1.6 m — this is less than 2 m, so both pieces can be cut from one plank with a 0.4 m remainder. Total: 6 + 2 + 1 = 9 planks — exactly the lower bound, but the method requires a pre-planned cutting sheet and willingness to cut one plank into two pieces for different walls.
Both options are correct — the difference is not in mathematics, but in work organization. If a contractor without a pre-made cutting drawing is hired for installation, it is safer to plan for 10 planks: this makes on-site cutting easier without the risk of mistakes or mixing up blanks. If the cutting plan is prepared in advance (manually or from a drawing on the website), 9 planks are physically sufficient, and paying extra for a tenth plank is unnecessary.
Example 2: only front walls with a door opening, room 5.2 × 4.0 m
The second example shows a more complex configuration: KPU-118 is installed along three full load-bearing walls, while the fourth wall, 4.0 m long, is interrupted by a door opening 0.9 m wide in the center — that is, on both sides of the opening there remain two wall sections of (4.0 − 0.9) / 2 = 1.55 m each.
List of sections for cutting: two walls of 5.2 m, one wall of 4.0 m, two wall sections of 1.55 m. Minimum number of pieces per section: for 5.2 m — three pieces (e.g., 2 + 2 + 1.2 m), for 4.0 m — two pieces exactly 2.0 m each without waste, for each 1.55 m section — one piece (0.45 m allowance).
We count planks by sections: 3 + 3 + 2 + 1 + 1 = 10 planks. Next, we check whether this number can be reduced by combining remainders in a common cutting plan, as in the first example. The remainders here are two 1.2 m pieces (from the long walls) and two 1.55 m pieces (from the wall sections). Combining two 1.2 m pieces into one plank is impossible: 1.2 + 1.2 = 2.4 m — more than the plank length. Combining a 1.2 m piece with a 1.55 m piece is also impossible: 1.2 + 1.55 = 2.75 m. And two 1.55 m pieces together also do not fit: 1.55 + 1.55 = 3.1 m. Therefore, cutting optimization does not work here — the final count remains 10 planks regardless of the cutting order.
This is an important practical conclusion: the ability to save one or two planks by combining remnants depends on the specific wall and opening lengths in the room, and is not a universal rule. In example 1, savings were possible due to a fortunate match of remnant lengths (two pieces of 0.8 m together fit into one plank); in example 2, the remnant lengths do not allow this. Before including a reduced number of planks in the order, it is worth checking on paper whether the remnants of a specific room actually add up to 2 m — otherwise, the optimization will remain only on paper.
Order cost for both examples
At a price of 6,880 ₽ per plank, the difference between cutting methods is noticeable in money, not just in pieces.
| Scenario | Planks | Cost without a spare plank |
|---|---|---|
| Room 1 (4.8 × 3.7 m), cutting by walls independently | 10 | 68 800 ₽ |
| Room 1 (4.8 × 3.7 m), optimized cutting sheet | 9 | 61 920 ₽ |
| Room 2 (5.2 × 4.0 m), main walls with a door opening | 10 | 68 800 ₽ |
The difference between the two cutting methods for the same room 1 is 6,880 ₽ — that is, the cost of exactly one plank. It is justified if the customer is ready to agree in advance on a precise cutting sheet with the installer; if cutting will be done on-site without prior calculation, a more conservative number should be included in the budget.
What reserve to provide after layout
In addition to the number of planks determined by cutting, it is worth adding one plank as a reserve for the initial purchase. It covers the risk of damage when cutting corners — on a thin 5-millimeter profile, chipping with an inaccurate cut is more likely than on a massive cornice — and allows for repainting or replacing a section in the future without re-selecting a shade from a new production batch. For example 1, a practical order with reserve is 10–11 planks depending on the chosen cutting method, for example 2 — 11 planks.
Choosing adhesive by base type
For gluing polyurethane moldings to most bases (plaster, drywall, walls painted with water-based compositions), mounting adhesives on a polymer or acrylic base, specifically designed for polyurethane decorative moldings, are suitable. With a thin profile like KPU-118, what matters more is not so much the peel strength (the thickness and weight of the element are small) but the uniformity of application: the adhesive is applied in dots or a thin wavy line along the entire length of the strip, not in separate drops — otherwise, the thin profile may slightly bend in unglued areas, which will be noticeable under side lighting.
If the wall is painted with glossy or semi-gloss enamel, the adhesion of the mounting adhesive to such a surface decreases: the smooth paint film holds the adhesive composition worse than matte plaster. In this case, you should either lightly sand the strip under the future frieze with medium-grit sandpaper to increase adhesion, or check in advance with the adhesive manufacturer about its compatibility with the enamel coating — there is no universal solution for all types of enamel.
Preparing an already painted wall for frieze installation
If the cornice and wall are already fully painted and the renovation is formally complete, installing KPU-118 still requires minimal preparation of the strip under the future frieze. First, the strip of the wall at the gluing location needs to be dusted and degreased — even fresh paint becomes covered with household dust over time, which reduces adhesive adhesion. Second, if the wall has decorative plaster with a pronounced texture (bark beetle, relief Venetian), under a thin profile 5 mm thick, it is advisable to smooth the texture on the installation strip with putty — otherwise, the wall relief will show through the thin profile and prevent tight fitting along the entire length of the strip. A massive cornice masks this effect due to its own thickness, but thin moldings do not.
Treating joints and seams after installation
After gluing, all joints — corner and longitudinal — are treated with finishing putty or a special acrylic sealant for decorative moldings, which is sanded flush with the profile after drying. For a profile 5 mm thick, it is important not to overdo the putty layer at the joint: excess compound on a thin relief easily smears the contour of the carved pattern near the seam, and after drying, this area will differ from the rest of the profile even under paint. A reasonable amount is to fill only the joint gap itself, without extending onto the adjacent millimeters of the relief.
KPU-118 or wide KPU-114 — why these are different tasks
KPU-114 from the same molding line has a visible strip width of 100 mm, with the same plank length of 2000 mm and the same profile thickness of 5 mm. The difference of 60 mm in width changes not the decorativeness, but the function of the element.
KPU-118 at a width of 40 mm works as a thin graphic line — an addition to an existing cornice, not claiming the role of an independent large element. KPU-114 at a width of 100 mm can work as an independent wide border — for example, as a complete replacement for a cornice in interiors where a flat but noticeable accent is needed without the voluminous profile of a classic cornice. Installing KPU-114 in a pair with an already installed cornice with a small gap is a risky combination: two elements with a total height of 80 mm or more visually merge into one thick belt, losing the separation into "cornice" and "frieze." If the task is to add exactly a thin additional line under an already chosen cornice, KPU-118 is more accurate in scale; KPU-114 in this role is usually excessive.
| Parameter | KPU-118 | KPU-114 |
|---|---|---|
| Width of visible strip | 40 мм | 100 мм |
| Profile thickness | 5 мм | 5 мм |
| Plank length | 2000 мм | 2000 мм |
| Price per slat | 6 880 ₽ | See product card |
| Typical role | thin second belt under the cornice | standalone wide border |
| Risk when paired with a cornice without a large gap | Low | high (visual merging) |
Usage scenarios: table for quick decision
| Situation | Solution per KPU-118 | Reason |
|---|---|---|
| Ceiling 2.6–2.7 m, living room with full wall visibility | Solid perimeter, offset 30–50 mm | Room is fully visible, short offset preserves height |
| Ceiling about 3 m, dining area | Solid perimeter, offset 60–100 mm | Larger air volume allows a wider gap |
| High hall from 3.3 m | Solid perimeter or three-level system, offset 120–150 mm | Large scale of space requires a more expressive composition |
| Bedroom with a tall wardrobe along one wall | Only the front walls | The wall behind the cabinet is not visible — the frieze effect is lost there |
| Narrow corridor less than 1.5 m wide | Skip the frieze or limit it to the entry area | A continuous line enhances the narrow tunnel effect |
| Ceiling lower than 2.55 m | Skip the frieze | An extra horizontal line visually lowers the ceiling more than it decorates |
| The wall already has a molding frame at the same height | Skip the frieze or shift the level | Risk of visual striping from the third horizontal line |
Typical mistakes when ordering and installing
Ordering by formal division of the perimeter without considering cutting. As shown in the examples above, dividing the perimeter by 2 m can underestimate the actual need by one or two strips. Check: make a list of lengths of all wall sections to be finished and calculate the minimum number of pieces for each separately before summing.
Ignoring openings when calculating. As example 2 showed, a door or window opening does not always proportionally reduce material consumption — if the wall sections on the sides of the opening are shorter than 2 m, each of them still requires a separate full strip. Check: list each wall section as a separate calculation area, rather than subtracting the opening width from the total perimeter.
Same offset for rooms with different ceiling heights. Transferring a 40 mm offset from one room to another with a ceiling half a meter higher or lower can give a visually unsuccessful result. Check: before gluing the first strip, hold a sample against the wall at different heights and evaluate the proportions specifically in that room.
Tight glue joint without considering pattern alignment in the corner. If strips are glued without a preliminary dry fit, the carved pattern may not match in phase exactly at the corner, and this cannot be corrected after the glue dries. Check: always dry-fit both corner strips before gluing.
Thick layer of putty in the joint on a thin profile. Excess putty smears the carved outline near the seam. Check: apply the compound pointwise, strictly within the gap boundaries, and immediately remove excess with a spatula before it dries.
Installation on unsanded textured plaster without preparing the strip. The base relief shows through the thin profile and prevents tight adhesion. Check: run your hand along the strip of future installation — noticeable texture under your fingers means the strip should be leveled before gluing.
How to buy and what to consider when placing an order
Carved molding KPU-118 can order in the product card on the Stavros website; the product is shipped piece by piece from one plank, the exact production time as of the order date should be clarified with the manager. For a broader alternative, if the task is not a thin frieze but a standalone border, it is worth comparing it with decorative molding KPU-114 from the same line.
The full range of carved and smooth trim for selecting adjacent elements is in the section "Polyurethane Trim". If you need to select not only a frieze but also other elements for the upper wall area, it is worth checking the catalog of interior moldings and the general section moldings from polyurethane, which includes cornices, rosettes, and overlays for a comprehensive ceiling area design.
Before placing an order, it is useful to create your own cutting plan using the method from this article — with exact lengths of all wall sections — and attach it to the request for the manager: this reduces the risk of errors in quantity and allows you to discuss in advance where to place the joints during installation.
Frequently asked questions
Can KPU-118 be glued onto an already painted wall without touching the cornice?
Yes, installing the frieze does not require dismantling or reworking the cornice. The profile is glued separately onto a prepared (dust-free, and if necessary, lightly sanded) wall surface, so the already finished upper part of the wall does not need to be redone.
Can KPU-118 be mounted not strictly horizontally, but with a slope following an uneven ceiling?
The flexibility of the profile allows slight compensation for small deviations in the ceiling line—a few millimeters per meter. With a noticeable difference in ceiling height around the perimeter (more than 10–15 mm per 2 m), it is better to orient the frieze strictly by level rather than follow the ceiling's curvature: otherwise, the eye reads not the ceiling deviation but a "falling" decorative line, which looks worse than a small variable gap to the cornice.
What to do if the perimeter includes a niche or protrusion, such as a ventilation duct?
It is more logical not to wrap the niche or protrusion with the frieze along all inner and outer edges, but to break the line at the entrance to the niche and at its exit, treating the duct as a separate small section or leaving it without the frieze—otherwise, the number of additional cuts on the thin profile increases sharply, and the visual effect of detailing inside a narrow niche is usually minimal.
Do I need to buy an extra strip beyond the exact calculation if the cutting is already optimized for zero waste?
Yes, it is worth keeping a spare strip even with precise cutting without excess waste. The reason is not in cutting mathematics, but in the risk of damage during cutting: a thin profile with a thickness of 5 mm is more sensitive to chips at the cut than a massive cornice, and without a reserve, one spoiled blank during installation stops the work until a new delivery.
What to do if the ceiling height in the room is variable—for example, due to a sloped part of an attic?
In areas with variable ceiling height, the gap between the cornice and KPU-118 is logically made not fixed, but tied to a proportion—for example, maintaining a share of the wall height in a specific area rather than the same value in millimeters throughout the room. Here, a preliminary mock-up with painter's tape is more useful than any universal number.
Does the glue consumption for a 2-meter strip of KPU-118 differ from that for wide moldings like KPU-114?
With the same profile thickness (5 mm for both products), the glue contact strip for KPU-118 is approximately 2.5 times narrower than for KPU-114, due to the difference in the width of the visible strip (40 mm vs. 100 mm). Accordingly, glue consumption per linear meter for KPU-118 is lower, but the exact volume for a specific room should be clarified according to the glue manufacturer's instructions, since consumption also depends on the application method—spot or continuous wave.
Can leftovers from one room be used for another space in the same project?
Technically yes, if the leftover is longer than the minimum usable piece for the new area—usually pieces from 300–400 mm and longer, which can still be neatly secured and edge-finished. Shorter offcuts are practically better not to use: the risk of an uneven cut and visible seam outweighs the savings on one strip.
What to do if after cutting the number of strips turns out to be odd, but you want symmetry in the number of joints on opposite walls?
Symmetry of joint count and minimal strip count are different, sometimes conflicting goals. If visual symmetry is more important (e.g., in a representative space with an axial composition), it is worth deliberately planning one extra strip so that joints on opposite walls are mirrored; if the priority is minimal purchase budget, symmetry can be neglected, since a thin seam on a carved profile with careful finishing is barely noticeable.
Where to put a piece damaged during cutting if it turned out shorter than the required segment?
A short defective offcut can be used as a sample for testing paint color on other parts of the project or as material for practicing corner cuts before working with a full strip—thus the defect does not become a pure loss, but reduces the risk of error on the next cut.