Article Contents:
- What a furniture maker calls a shaped wooden blank
- Four types of formed base: what to choose for a specific job
- Geometric base: a sphere, cube, disc, or cone instead of turning it yourself
- Example: KN-012 conical figure with a pre-made hole
- When it is better to make a geometric element yourself
- Example: MN-145 turned leg
- Example: decorative overlay N-421
- What remains after purchasing a ready-made relief
- Example: molding MLD-006.1 and cutting calculation
- When a ready-made profile is not suitable
- Example of time calculation for a small batch
- Checking dimensions before ordering
- Why "fitting on site" can be dangerous
- An unpainted part as the basis for a unified furniture finish
- How to calculate order volume
- How does a shaped blank differ from a fully finished furniture part?
- Can finished wooden elements be additionally treated?
- Which is more cost-effective — buying a turned base or making it from a block?
- Which blanks are suitable for subsequent milling?
- When is it reasonable to buy a ready-made turned leg?
- Should I buy a separate sample before ordering a batch?
- Can a carved furniture facade be made from ready-made overlays?
- What should I check when buying a beech or oak blank for enamel finishing?
- Why can two parts of similar size differ in their suitability for a project?
- How do I order wooden blanks for furniture so that I can repeat the project later?
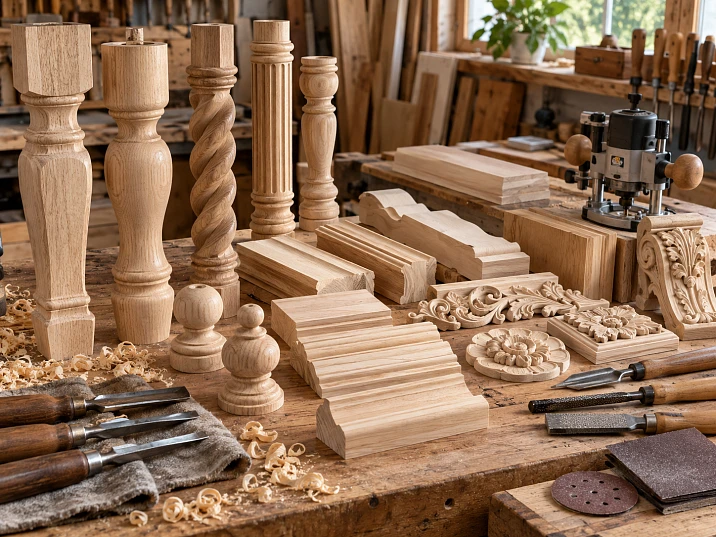
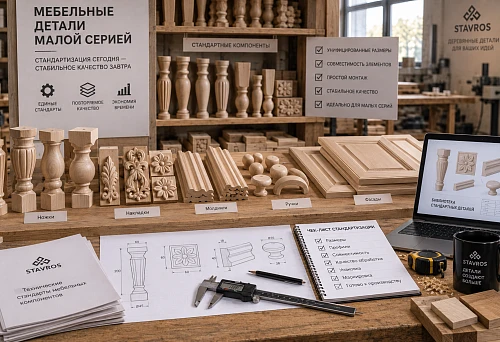
For twelve identical furniture posts, the workshop needs shaped transitions, round decorative inserts, and identical finials. All of these can be turned from a block. But shaped wooden blanks allow you to skip some machining operations if a suitable shape already exists in the catalog: perhaps all that remains is to make the mounting hole, fit the joint, and apply the finish. The most labor-intensive operation — creating the shape — would then not be needed at all.
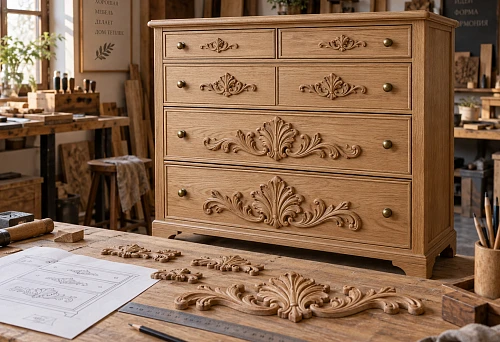
The situation with carved facades is similar. Instead of milling a complex floral relief directly on each door, you can make a flat facade and install a separate wooden overlay. And if identical shaped framing is required, there is no point in starting from a rectangular strip every time: a ready-made molding already has the required profile, and the work comes down to precise cutting and assembly.
Shaped wooden blanks should be chosen not by a photograph or a general name, but by which part of the shape has already been created and which operations will remain in the workshop. Sometimes it is enough to take a ready-made geometric element. Sometimes a turned leg or a carved overlay is needed. And for a profile of constant cross-section, linear molding is better suited. The difference between these solutions affects processing time, wood consumption, the number of machines required, and the ability to accurately reproduce the product.

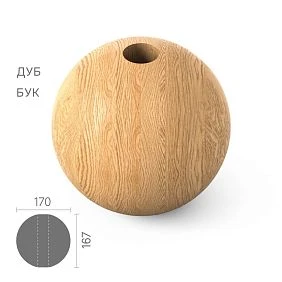
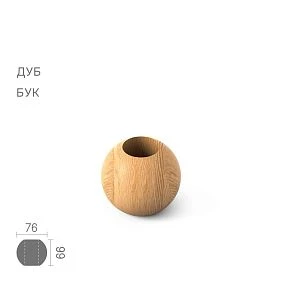
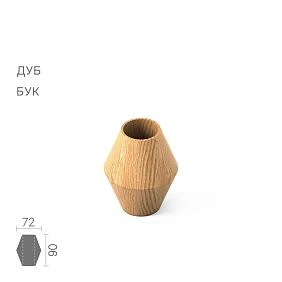
What a furniture maker calls a shaped wooden blank
In a joinery workshop, the word "blank" does not necessarily mean an unprocessed piece of wood. It can also refer to a part that has already been given its final external shape but has not yet undergone the operations required by a specific project: drilling, cross-cutting, fitting, assembly, or finishing.
Let's imagine a wooden ball with a ready-made through hole. For the manufacturer, this may be a finished product. For the craftsman assembling a decorative stand, it is a blank that still needs to be mounted on an axle, secured, and painted together with the other parts of the structure. Similarly, an unfinished furniture leg is a finished leg in shape, but it remains a blank for one's own furniture project if the craftsman must select the fastening, perform the finishing, and install the support.
The meaning of the word depends on the remaining technological work. This leads to a useful rule: before choosing wooden blanks for furniture, list the operations that must remain in your production. If your own non-standard geometry is important, a ready-made shape may only get in the way. But if the shape has already been approved and repeatability is needed, buying a block to reproduce a catalog relief is not always rational.
A decorative part and a structural part should be distinguished separately. A wooden rosette or overlay usually solves the task of surface decoration. A leg bears the load, and an element of a composite stand may be part of a connection unit. The external similarity of such products does not make them interchangeable. A ready-made decorative figure cannot automatically be considered a load-bearing support just because it is made of solid wood.




Four types of preformed base: what to choose for a specific job
The main difference between blanks is not in the degree of sanding. It is in the shaping already performed: what exactly will not have to be made from scratch.
| Type of base | What has already been formed | What usually remains with the craftsman | When the choice is justified |
|---|---|---|---|
| Geometric | Sphere, cube, cone, disc, bushing, or another volume | Check the fit, assemble, if necessary perform permissible local refinement and finishing | For composite posts, rods, decorative transitions, and modules |
| Turned | Rotationally symmetric shape: cone, waists, rings, smooth profile | Resolve the fastening, check the length and purpose, finish and install | For legs, balusters, posts, and furniture supports |
| Carved | Complex relief and contour of the ornament | Mark the position, check the fit and fastening, and apply the finish | For facades, panels, headboards, and frames |
| Profile | Constant complex cross-section along the entire length | Calculate the linear footage, cut, join, and finish | For frames, moldings, decorative bands, and edging |
The table does not mean that any purchased part may be freely drilled, shortened, or milled. Whether modification is possible is determined by its design. A shaped element may have a thin wall near a hole; a turned leg may have a finished fastening assembly; a carved overlay may have a relief that will be disrupted even by slight trimming of the edge. Before ordering, it is necessary to check not only the usable shape but also the place where intervention is planned.
There is no universal blank "for turning, milling, and carving at the same time." If most of the surface needs to be changed, ordering a part with an already finished complex pattern is pointless: the craftsman will pay for work that he will then remove on his own machine.
Our factory also produces:
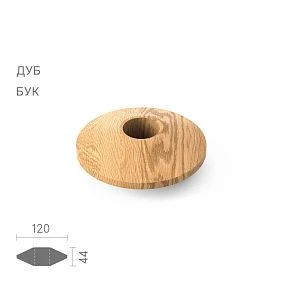
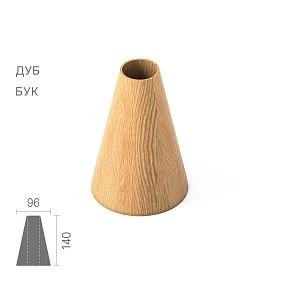
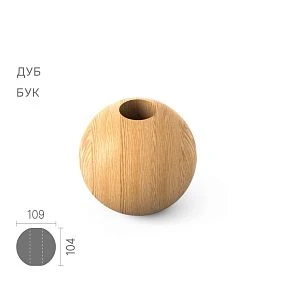
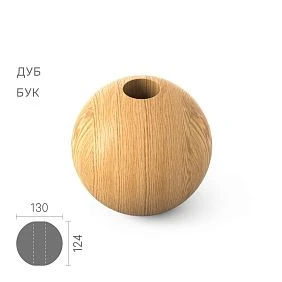
Geometric base: a sphere, cube, disc, or cone instead of independent turning
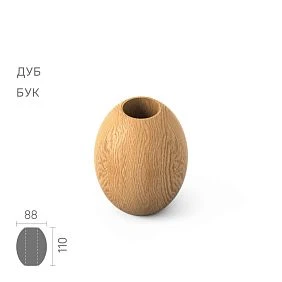
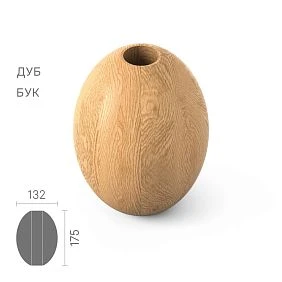
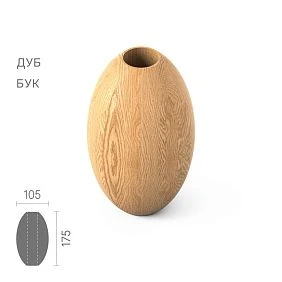
Geometric shapes made of solid wood are especially convenient when furniture is assembled from repeating decorative modules. A single post may alternate a wooden rod, a wide disc, a sphere, and a tapering transition. Individually, these shapes are not complex, but producing several dozen identical parts will require setting up equipment, controlling dimensions, and sanding each surface.
Ready-made elements allow you to shift your attention from making the shapes to designing the composition itself. In the section of wooden elements "Konstruktor" STAVROS three-dimensional geometric parts are presented that can be used as elements of composite furniture and interior structures.
Get Consultation
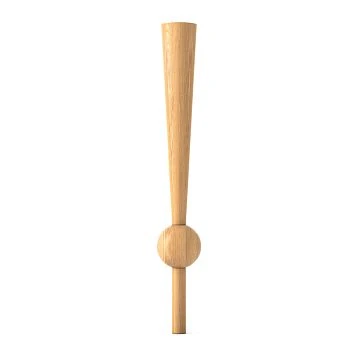
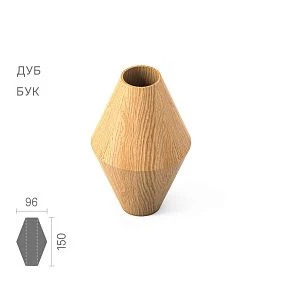
Example: conical shape KN-012 with a ready-made hole
Geometric figure KN-012 is available in beech and oak. For it, the product card lists a set of dimensions 140 × 96 × 96 × 34 mm according to designations A, B, C, D. The last value refers to the mounting hole with a diameter of 34 mm. The part is intended for use with a corresponding axle or rod; the specific fastening scheme should be selected based on the material of the parts being joined and the recommendations for the product.
Why is this more interesting than simply buying a shaped wooden blank with a similar silhouette? KN-012 has a hole, which means the craftsman does not necessarily have to arrange deep axial drilling of a complex part himself. But it is precisely the hole size that becomes a critical parameter. If the rod has a different actual diameter, a beautiful shape will not become a suitable module on its own.
There is also a less obvious problem: finishing inside the mounting channel. Even a thin layer of coating can reduce the internal clearance. For example, if the coating adds 0.1 mm on each side of the hole, its through size will decrease by 0.2 mm. This is a calculation example, not a characteristic of a specific coating. Therefore, during assembly, the channel should be protected from paint if this is provided for by the installation method, and a trial fit should be carried out before final finishing.
Another example is a wooden ball without a hole. If the project involves installation on a metal pin, the craftsman must determine whether precise drilling can be done while maintaining the center. For a spherical part, an error in direction is immediately noticeable: after assembly, the ball ends up offset relative to the axis. In this case, a base with a suitable ready-made hole may turn out to be much more convenient, even at a higher purchase price.
When it is better to make a geometric element yourself
You should not adapt the structure to a ready-made shape if a non-standard fit, an unusual combination of diameters, or a specific wall thickness at the connection point is required. This especially applies to parts that will bear load or serve as a support for fasteners. Sometimes it is cheaper and more reliable to turn a simple bushing of the required dimensions than to drill out a ready-made product and end up with a weakened wall.
In modular furniture, the convenience of a modular solution only appears after all interfaces have been checked: the shape, the rod, the joint, the base, and the finish must work together.
Turned blank: why start with a block if the shape already exists
Turning is appealing because it allows for a smooth, continuous surface: cones, cylinders, waists, and ring-shaped bulges. However, the mere ability to turn on a lathe does not mean that every furniture leg should reasonably be made on that lathe.
If a workshop needs four identical supports for a single small table, the time for setting up the machine and making a test piece is spread over just four items. If a small batch requires forty supports of the same shape, a different task arises — maintaining identical dimensions and profile rhythm throughout the entire batch. With manual turning, this requires templates and constant checking. With numerical control, it requires preparing the program, tooling, and machining parameters.
Buying an already formed support eliminates the main turning operation. At the same time, the craftsman can retain finishing, hardware selection, and furniture assembly. Such unpainted wooden furniture legs are presented in the STAVROS catalog.
Example: turned leg MN-145
In the product card of the turned furniture leg MN-145 length options are listed with dimension B = 44 mm; in particular, versions with A = 100, 150, and 200 mm are available, as well as other lengths. This is an example of a ready-made rotationally symmetric shape that does not need to be turned again just for a consistent appearance.
But the main thing in the product card is not the variety of sizes. The manufacturer describes MN-145 as a support for frameless structures, designed for light loads, and gives separate recommendations for using longer versions. Therefore, choosing it based only on the table height is incorrect. Before purchasing, you need to decide what force will be transmitted to the support, how it will be attached, and whether the specific version matches the furniture structure.
Suppose a craftsman is assembling a small wall-mounted console and finds a leg of the required height. If the fastener can be installed in the standard way and the load matches the model's purpose, buying a ready-made turned part saves machine time. But turning it into a universal leg for a heavy table, significantly shortening it in the attachment area, or machining the lower part without assessing the consequences is not acceptable.
A turned shape and structural suitability are different parameters. A ready-made profile frees you from lathe work, but not from checking stability, the support joint, and permissible use.
For a decorative post that does not bear significant operational load, the choice is usually wider. For an armchair, chair, or table, load calculation, stability, joint strength, and testing requirements for the finished furniture are added to the geometry.
Carved base: when a separate overlay is more convenient than carving across the entire facade
A large carved furniture facade can be produced in two fundamentally different ways. The first is to choose the material and form the pattern directly on the front side of the facade. The second is to make a flat surface and install a ready-made carved overlay.
In the second case, the complex relief is created separately from the main furniture part. This is convenient when the same ornament needs to be repeated on several chests of drawers, doors, headboards, or decorative panels. To replace a damaged element, it is also not necessary to remake the entire facade, although dismantling and the condition of the finish may create their own limitations.
In the carved wooden overlays for furniture you can choose an already manufactured relief. However, the overlay should be considered specifically as a separate decorative component, not as a piece of wood that can be arbitrarily reduced with a milling cutter.
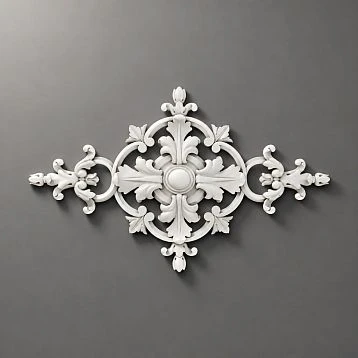
Example: decorative overlay N-421
for wooden decor N-421 the option 250 × 250 × 13 mm is specified. The first two values define the dimensions of the occupied field, the third — the thickness according to the product drawing. Already from these dimensions, you can check whether it makes sense to include the overlay in the project.
Suppose it is intended to be placed in the center of a facade 650 mm wide and 300 mm high. When centered, there will be 200 mm on each side in width, but only 25 mm on each side in height. If the facade has a molding frame or a handle is located nearby, this free space may not be enough. On a facade 360 mm high, the top and bottom margins will increase to 55 mm, but the final decision still depends on the frame, the handle, and the shape of the relief itself.
The example shows a limitation that is difficult to notice in a product photo: the size of the overlay must be checked against the actually free field, not the overall width of the chest of drawers. If the decorative element runs into the handle or frame, one should not assume that it can be trimmed without consequences. Trimming a complex relief often disrupts the composition and may leave exposed fibers on a highly visible area.
What remains after purchasing a ready-made relief
The craftsman marks the axis of the overlay, checks its fit, determines the fastening method and the painting sequence. If the overlay is to blend with the facade under enamel, it is more convenient to test the entire assembly on a sample in advance. It is important that surface irregularities, glue, and seams do not show after painting.
If, however, a natural wood texture is planned, the overlay and the facade must match in species, grain direction, and coating shade. Two elements both called “oak” are not obliged to look the same after oil or stain: the pattern and tone of a particular wood differ.
When ordering carved parts for furniture, one should distinguish in advance between cases where the overlay fully solves the task and cases where it requires too noticeable reworking. If the ornament pattern itself needs to be changed, it may be more correct to order a custom carved part or develop a different facade.
Profiled base: ready-made molding instead of milling each strip
The third situation is familiar to workshops that make decorative frames on doors and drawers. For an ordinary straight strip, sawing and planing are sometimes enough. But if each side of the frame requires convex and concave sections, grooves, and complex transitions, the rectangular strip will have to be profiled with a router. On a small batch, this operation can take a disproportionately long time.
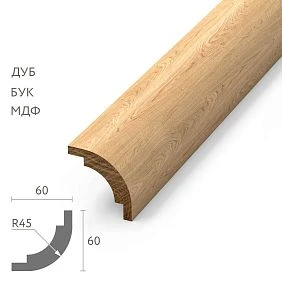
Ready-made moulding already has a constant cross-section. The craftsman can focus on other things: choosing the installation location, marking lengths, preparing cuts, assembling corners, and finishing. In the section wooden mouldings and trims STAVROS profile elements are presented that are applicable in furniture and interior finishing.
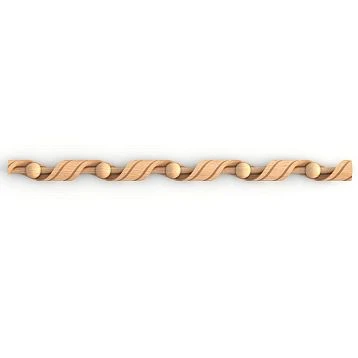
Example: moulding MLD-006.1 and cutting calculation
for wooden moulding MLD-006.1 a variant in beech or oak with a cross-section of 35 × 21 mm and a length of 2400 mm is specified. For the MDF version, this product card lists a different length — 2600 mm. Therefore, one cannot assume that for the same profile designation, all materials automatically have the same length.
Let's calculate a conditional frame with outer dimensions of 600 × 400 mm. For a simple calculation along the outer contour, the following is required:
2 × 600 + 2 × 400 = 2000 mm of profile.
One strip with a length of 2400 mm mathematically covers this requirement. But the actual cutting also depends on the kerf width, the length of the corner miters, the quality of the ends, and which edge the segments are measured along. If four parts must have an exactly specified outer length, the 45° cut is made according to the agreed marking of the long edge. One cannot add the same allowance to each side without understanding how the frame dimension is indicated on the drawing.
The remaining length after an ideal cutting layout is 400 mm. From this, losses for the kerf and, if necessary, trimming of the ends are subtracted. Therefore, such a remainder should not be pre-recorded as a full-fledged workpiece with a length of 400 mm. If the next frame needs a side of exactly 400 mm, the remainder may turn out to be too short.
For several frames, it is more useful to create a cutting map for the entire order rather than multiplying the number of strips by the number of frames. The ability to use offcuts depends on the length of the sides and the order of cuts. A complex profile pattern adds another factor: at the corner joints, the relief lines must align, and the face side of each part must face the correct direction.
When a ready-made profile is not suitable
If a project requires a special cross-section that is not available in the range, you should not try to obtain it by grinding away most of a ready-made molding. The result may be worse and more expensive than profiling it yourself. The same conclusion applies when non-standard flexible geometry is needed, which a straight profile cannot provide, or when it is impossible to match the joints by pattern.
A profiled blank saves work only when its cross-section itself matches the project. Length is relatively easy to adapt by cutting; the shape of the cross-section is far from always being so.
What is actually more profitable: buying a formed part or processing a timber block
The price of the blank by itself says nothing about savings. For a rectangular timber block, it may be significantly lower than for a ready-made turned or carved part. However, the block still needs to be turned into the required shape. In small-scale production, the cost of this work consists not only of wood consumption, but also of equipment setup, the craftsman's time, tool wear, and the risk of obtaining an unsuitable result.
To compare the two options, calculate the cost of the part in a condition suitable for installation, not the purchase price of the raw material.
| Cost item | Making the shape yourself | Buying a ready-made shaped base |
|---|---|---|
| Material | Wood with the necessary allowance for processing | Price of the selected item |
| Preparation | Drawing, model, tooling, program, or template | Part number search, drawing review, specification approval |
| Primary machining | Turning, threading, milling | Usually already completed for the selected shape |
| Subsequent operations | Drilling, fitting, sanding | Only necessary and permissible refinements |
| Losses | Offcuts, trial parts, defects | Offcuts from local rework, possible unsuitable sample |
| Part production | In-shop movements | Delivery and acceptance |
| Finishing and assembly | According to project requirements | According to the same project requirements, if supplied without coating |
The same operation cannot be counted twice in the calculation. For example, if both parts require enamel, the cost of painting is needed to determine the full cost of the furniture, but by itself it does not create an advantage for either option. Comparative savings appear on those operations that are actually reduced.
Example of time calculation for a small batch
Suppose a workshop needs 12 identical decorative elements. Purchasing a preformed base will save on average 18 minutes of mold-making per element. This is an example condition, not the measured performance of any machine.
We get: 12 × 18 = 216 minutes, that is, 3 hours 36 minutes.
Let us also assume that the finished form, taking delivery into account, costs 250 rubles more than our own material and the other identical costs. Additional expenses per batch: 12 × 250 = 3000 rubles.
Comparison threshold: 3000 ÷ 3.6 = approximately 833 rubles per hour of saved working time. If the actual cost of the freed-up time of the equipment and the worker is higher than this value, purchasing may turn out to be more profitable. If it is lower, doing it yourself may be cheaper.
At the same time, the calculation needs to be refined for a specific workshop. It may include the cost of setting up the machine, which is allocated across the entire batch, tooling expenses, the probability of defects, and delivery time. If a workshop is already producing hundreds of identical parts on set-up equipment, making them in-house can become more profitable than buying them. For a one-off custom piece with complex relief, it is the opposite: starting special processing for a single part may not pay off.
There is another factor that does not always fit into a simple table. Having freed up three and a half hours of a lathe, a workshop can use it for a more valuable operation. But if the machine is already idle that day anyway, saving machine time does not necessarily equal additional revenue. Therefore, the best option is determined by the load of real production, not by the general statement that “ready-made is always cheaper.”
Where the blank ends and the finished furniture part begins
Two parts may look identical but require completely different amounts of work before installation. For example, a cylindrical block and a turned leg of the same height have similar external dimensions. However, the first still needs to be formed, while the second has already received its final profile.
| Condition of the wooden base | What has already been done | What usually remains |
|---|---|---|
| Rough | Material of approximate size has been obtained | Most of the shaping and preparation |
| Planed | Base planes created and section defined | Contour machining, joints, finishing |
| Decorative | Three-dimensional form, relief, or complex profile obtained | Check of mating surfaces, permissible rework, final finish |
| Finished unfinished part | Shape matches the finished product | Fastening, coating, and installation per project |
| Finished coated part | Manufacturer-specified finish completed | Compatibility check, installation; modification may be undesirable |
This is a technological comparison, not five mandatory product classes. The same overlay can simultaneously be a finished product for sale and a blank for further furniture assembly.
The difference is especially noticeable at the design stage. If you need your own carving pattern, you should look for wood with a suitable volume for processing. If you need an existing pattern, it is more important to check the article number of the finished relief. And if the design involves, for example, a thin leg with a complex shaped transition, first of all look for a suitable ready-made support and only then decide whether it is worth turning it yourself.
Do not confuse shape and degree of surface preparation. A well-sanded rectangular part does not become shaped. And vice versa: the relief may be fully formed but still require additional preparation before a certain type of coating. These are different characteristics, and both must be reflected in the order.
Dimensions A, B, C, D and L: how not to make mistakes with the designations on the drawing
There is no universal interpretation of letter designations for all wooden products. In one product, A means length, in another — width; B can mean diameter, height, or the second overall dimension. Therefore, the rule “A is always width, C is always thickness” leads to errors.
In the catalog examples, this is easy to see:
- For the geometric figure KN-012, the size is indicated as A × B × C × D = 140 × 96 × 96 × 34 mm, where D refers to the hole diameter.
- For the turned leg MN-145, there is a version A × B = 150 × 44 mm: these values should be read according to the drawing of the leg itself.
- For the wooden molding MLD-006.1 made of beech or oak, the designation is A × C × L = 35 × 21 × 2400 mm, where L is the length of the strip.
- The wooden decor N-421 comes in a size A × B × C = 250 × 250 × 13 mm.
The outer dimension is only the beginning of the check. For a shaped wooden blank, the mounting seat size, distance to the nearest edge, grain direction, actual support area, and fastener position may matter more. With a carved overlay, you need to know not only the width but also the relief thickness: a decorative protrusion may conflict with a handle, an adjacent molding, or a moving furniture part.
For a profiled blank, a cross-section drawing does not replace information about the delivery length. For cutting, you need to separately check how many linear meters are required, from which standard lengths they will be obtained, and how much material will go to waste.
Checking dimensions before ordering
- Take the furniture working drawing and mark the location of the future part.
- Open the drawing of the selected item. Determine the meaning of each letter specifically on it.
- Compare the outer dimension of the element with the available space. Do not forget adjacent handles, frames, moving fronts, and gaps.
- Separately measure the mounting surfaces and joints. For the axis and hole, verify the actual dimensions, tolerances, and fastening method.
- Mark on the drawing the areas that must not be touched during modification: fastening points, thin bridges, thread edges, and support pads.
- If tolerances or the fastening method are not specified, request clarification before starting the batch.
The STAVROS website has a section of catalogs, drawings, and product models. It is useful during preliminary design, but the final execution still needs to be compared against the parameters of the selected product card.
Why “fitting on site” can be dangerous
With ordinary cutting of a wooden strip, removing a few millimeters in length can be a standard operation. For a shaped part, the same amount of processing sometimes changes its function.
Let’s imagine a bushing with a hole and relatively thin walls. Increasing the hole diameter reduces the thickness of the material around it. For a decorative element, this may worsen the appearance or the stability of the joint; for a load-bearing assembly, a separate strength check will be required. And if the upper section of a finished leg is shortened, the area intended for standard hardware may be removed.
Therefore, when choosing shaped wooden blanks for furniture, it is necessary to ask a second question after “does the size fit”: “Where can I safely perform the remaining processing?” If the answer is not obvious, one should choose another base, coordinate the modification with the manufacturer, or make the part according to one’s own drawing.
Which operations can be left to the workshop
It is most convenient to choose a blank when the remaining work is known in advance and does not affect the already created complex shape. For different types of base, this remaining work looks different.
| Base | Typical operation after purchase | What to check before performing it |
|---|---|---|
| Geometric shape | Assembly on the axis, joint sanding, painting | Fitting diameter, wall thickness, requirements for the adhesive joint |
| Turned leg | Installation of the fastener and finishing coat | Purpose of the support, installation method, fastening area |
| Carved overlay | Marking, fastening to the facade, painting | Fit, thickness and integrity of the relief, position of the handles |
| Molding | Cross-cutting, corner cut, joining | Cross-section, profile orientation, outer dimensions of the frame |
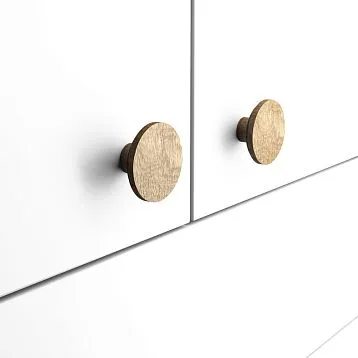
| Unpainted handle | Selection of fasteners, trial finishing | Installation type, hole positions, grip comfort after coating |
If the project states "remove 15 mm", that is not enough. You need to record from which side, along which reference the operation is performed, and whether it affects the fastener or the ornament. For a regular straight profile, these clarifications seem excessive. For a complex shape, the wrong side of the cut can ruin the part completely.
Drilling also requires different approaches. A massive geometric element may have enough material for an additional hole if this is confirmed by the drawing and the chosen design. On a thin carved overlay, the drill bit can emerge onto the face surface through a recess in the relief. On a turned leg, the hole must be coordinated with the direction and length of the fastener. One fastening scheme should not be transferred from one product group to another.
Milling has its own limitation: a complex shaped part does not always have a flat and stable base for clamping. Before assigning machining to the machine, the craftsman must understand what will hold the workpiece and whether the clamp will damage protruding elements. If there is no safe base, it is better to look for another part or change the operation technology.
Beech or oak, and why the species affects subsequent processing
Wood species are chosen not only by color. For a small joinery workshop, it matters how the material will be processed after purchase and what result is needed after finishing.
Beech is often used for parts under opaque enamel: its relatively even texture allows a uniformly painted surface to be obtained with suitable preparation. Oak is chosen when the characteristic wood texture needs to be preserved and shown under clear lacquer, oil, or tinting. But this is not a hard rule. Oak can also be painted, and beech can be tinted. The decision depends on the specific wood pattern, glued joints, surface quality, and the chosen coating system.
A shaped part exposes more end-grain and cross-grain areas than a simple flat strip. They can absorb the composition differently. On a carved overlay, stain can emphasize the recesses more strongly than the raised areas; on a turned leg, the transitions of the radii change the reflection of light. Therefore, the appearance in the untreated state does not always predict the final shade.
Glued parts require separate checking. If the coating is clear, the direction of the fibers and the appearance of the glue joints matter more than with dense enamel. The order should specify not only "beech" or "oak", but also the finish and preparation options available for the specific product for the chosen coating.
Unfinished part as a base for a unified furniture finish
When a furniture maker wants to achieve the same shade for the carcass, fronts, and decorative elements, it is more convenient to work with unfinished parts. They can be included in the overall finishing program: carry out a test stain, agree on the primer, enamel, lacquer, or oil, and check compatibility with the adhesive and fasteners.
The catalog presents separate groups of unfinished furniture handles and legs. But even if both parts are made from the same wood species, this is not a guarantee of the same visual result after coating. An overlay with deep relief, a smooth handle, and a turned leg will perceive light differently; moreover, on natural wood the grain pattern of individual parts varies.
If a contrasting finish is used, it is often more convenient to paint the part separately and only then install it. If the decor is to become part of a unified surface, the sequence may be different: first fitting and installation, then preparing the seams and painting the assembly. The choice depends on the substrate material, the relief, the adhesive requirements, and the ability to neatly treat hard-to-reach areas.
For elements with mounting holes or tight joints, special attention is paid to protective zones. The coating must not accidentally fill the fit and make assembly impossible. And decorative parts must not be glued over an unsuitable coating just because the outer surface already looks finished: the adhesive type must match both materials being joined and the substrate preparation.
First, one part: how to test a blank without risking the entire batch
A catalog drawing allows you to select a suitable base, but the final decision for a custom project is best made after working with the actual part. Especially if the workshop plans to use one SKU for several months or repeat the same furniture model.
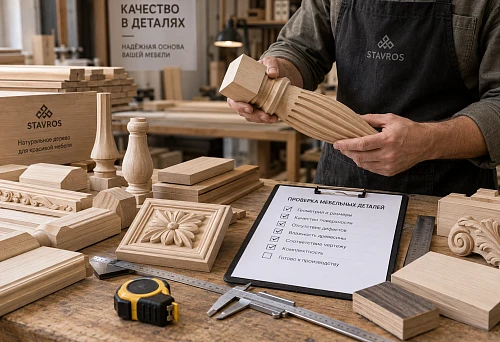
The test should answer specific questions: does the element fit within the allotted volume, is there enough space for fastening, is it convenient to perform the intended modification, does the texture match the chosen finish, and is the result repeatable on the next instance.
The working sequence can be as follows:
- Select the article number based on the drawing. Choose not only the pattern and size, but also the material, surface finish, and the intended mounting method.
- Obtain a single part or a suitable sample. If there is no ready-made sample for the required article number, check whether a trial order for the specific item is possible.
- Perform a dry fit. Place the element in its position without permanent fastening. Check the gaps, axes, adjacent parts, and tool access.
- Carry out the required modification. Use the same tools and methods that are planned for the main batch.
- Do a trial finish. Check the surface after priming, painting, or tinting, not just immediately after sanding.
- Assemble a control unit. For a leg, check the fastening and stability with regard to the furniture's purpose; for an overlay, check the seam appearance and fit; for a profile, check the corner joint.
- Record the result. Save the drawing, photo, article number, finish, and description of all remaining operations.
For comparing profiles and materials, you can use STAVROS product samples. At the same time, a set of molding samples does not replace testing a specific leg or an individual mounting scheme. The sample must represent the characteristic on which the decision depends.
For a serial order, it is important not to stop at the phrase “the first specimen fit.” You should check the repeatability of the most critical parameters: for example, the inner diameter and the geometry of the joint, if a composite post is assembled from the parts. If the project requires a certain tolerance, it must be agreed upon, rather than inferred from the fact that a single sample fit into place.
How to prepare an entry in a production specification
The purpose of a specification is to save another craftsman from having to guess again what was meant. An entry like "beautiful wooden leg, four pieces" is unsuitable for this. If the furniture model is reproduced six months later, it is important to get the same item code, the same finish, and the same processing sequence.
For each item, record the name, item code, card address, geometry according to the drawing, material, surface treatment option, installation location, quantity per product, and additional operations.
Below is an example of how a bill of materials can be organized for a hypothetical furniture project. The item codes and listed catalog dimensions are real, but the combination of parts in a single piece of furniture is provided only as a sample entry: structural compatibility must be verified separately.
| Detail | Item code and selected size | What to do after purchase | What to Check |
|---|---|---|---|
| Geometric element | KN-012, 140 × 96 × 96 × 34 mm | Assembly on the designated axis, finishing | Actual mounting diameter and fastening method |
| Turned leg | MN-145, variant 150 × 44 mm | Select standard mounting, finish | Purpose, permissible use, support position |
| Carved overlay | N-421, 250 × 250 × 13 mm | Mark out, secure, finish | Free facade field, relief depth, mounting |
| Profile element | MLD-006.1 in beech, 35 × 21 × 2400 mm | Create cutting plan, saw, assemble | Part lengths, profile, joint quality |
A real specification requires one more column: “Prohibited changes.” For example, you cannot replace the molding profile without a new joint check; you cannot use a different leg length without revisiting the proportions and stability; you cannot change the diameter of the mounting hole without evaluating the material around it.
For left and right parts that are not identical, always keep separate records. Even if mirrored items look the same in the overall image, their mounting surfaces and the direction of the relief may differ. Ordering one SKU instead of a pair can halt assembly.
How to calculate the order volume
Suppose a workshop produces eight identical chests of drawers. Each is intended to have four approved wooden legs and two identical carved overlays installed. The base requirement is:
- Legs: 8 × 4 = 32 pieces.
- Overlays: 8 × 2 = 16 pieces.
This quantity is without a reserve. Parts for a trial assembly, expected losses during in-house finishing, and possible spare elements for later repairs are accounted for separately. Increasing every quantity by 10% across the board is pointless: a whole turned leg and linear stock that is inevitably cut to size cannot be calculated using the same scheme.
For profile products, create a cutting map based on the actual supply lengths. For shaped elements, record the quantity per piece of furniture individually. If additional processing carries a risk of defects, estimate that risk based on the results of a trial operation, not on an arbitrarily chosen coefficient.
When a ready-made shaped base is not needed
Sometimes a workshop spends more time adapting a ready-made part than it would have spent making it itself. This is especially noticeable in three situations.
First — the non-standard shape is the main property of the product. A designer chair with a distinctive leg line will not become the same object if you substitute the closest similar support. Modifying a finished shape into a unique silhouette can be more difficult than turning a new one.
Second — the part is part of a load-bearing joint. If a precisely specified geometry of the tenon, fit, or fastener is required and it does not match the stock item, arbitrary trimming of a finished base creates unnecessary risks. Here it is wiser to design the part and the joint as a single assembly.
Third — the series is large enough to justify setting up in-house. When the same profile is produced continuously, tooling preparation is spread across a large number of items. Then in-house turning or milling can become an economically justified solution. This requires real data on production cost, equipment utilization, and defect rates.
There is also a simpler case: if the required shape is achieved with two ordinary straight cuts, buying an expensive shaped element provides no useful gain. The blank is chosen not for the complexity of its name, but to reduce the work that actually takes time.
Where to buy shaped wooden blanks and ready-made furniture components
A small workshop rarely needs just one product group. A composite post requires geometric elements, a chest of drawers requires legs and overlays, a facade requires moldings, and drawers require handles. When searching for wooden furniture blanks, it is useful to separate these tasks right away; otherwise, a single list ends up containing parts that perform fundamentally different functions.
At STAVROS, you can start your selection with of wood and MDF products and move on to the required shape type. For composite elements, the “Constructor” section is suitable; for furniture supports, the legs catalog; for relief decoration, decorative overlays. If you need already formed wooden profiles, it is wiser to open the moldings section rather than look for them among turning blanks.
For those planning to buy turned wooden items for further assembly, it is worth comparing not just one height or diameter, but the full design and purpose. When choosing carved wooden decor, check the dimensions, relief, and free space on the facade. When choosing a molding, determine the cross-section, delivery length, and joining method. These checks are usually more useful than ordering the most similar item from a catalog photo.
STAVROS has a separate section for furniture manufacturers terms of cooperation. It is advisable to clarify questions about available versions, quantities, lead times, and the possibility of supplying a specific item before starting furniture processing. The presence of a product category does not mean that any figure presented in it will be manufactured according to an arbitrary drawing or in an arbitrary material.
A small workshop may need just one element for fitting. In repeat production, by contrast, the constancy of the chosen shape and the correct recording of the item number are especially important. In both cases, the logic of selection is the same: first the geometry and method of further processing, then the specific version, and only after that the quantity and order.
Questions about shaped wooden blanks
How does a shaped blank differ from a fully finished furniture part?
A shaped blank is a base in which the required three-dimensional form, relief, or profile has already been formed. If drilling, fitting, or finishing remain for the project, the craftsman can use it as a blank. A fully finished part usually requires only the intended method of installation. The boundary is determined by the specific project: the same unpainted leg is already finished for one buyer, while for another it remains an element of further production.
Can finished wooden elements be further processed?
Yes, when the design of the product allows such an operation. Cutting molding to length is a normal part of its use. However, drilling out a sleeve, shortening a finished support, or trimming the edge of a carved ornament requires separate verification. Any shaped part cannot be considered a universal semi-finished product for free processing.
Which is more cost-effective — buying a turned base or making it from a block?
Compare the cost of obtaining the installed part. Add up the costs of material, setup, machine time, sanding, the risk of defects, and finishing for in-house manufacturing. For a finished element, take into account purchase, delivery, modification, and installation. For a one-off order, a finished form often saves preparatory work; for a long repeat series, in-house equipment may provide an advantage.
Which blanks are suitable for subsequent milling?
Those that have sufficient allowance and a reliable base for fixturing in the selected operation. If a significant portion of the volume is to be removed, it is better to choose a simple base rather than a finished complex relief. Machining a geometric part with a curved surface may require a special fixture; milling must not be performed without safe clamping.
When is it reasonable to buy a ready-made turned leg?
When its shape, height, mounting, and purpose already suit the project. Then the workshop does not need to replicate the turned profile. But the ready-made leg must match the expected load and the furniture's construction; choosing a similar height is not enough.
Should you buy a separate sample before a batch?
For a non-standard joint, complex relief, unusual finish, or regular repetition of the model, this is especially useful. First, test one item in a real assembly. If it is a standard molding, a profile sample will do; if the leg mounting is critical, you need a trial instance of the leg itself or a confirmed installation scheme.
Can a furniture facade with carving be made from ready-made overlays?
Yes. First, the facade and its free decorative field are designed, then an overlay with suitable dimensions and shape is selected. After checking the placement of handles, frames, and fasteners, the finishing sequence is determined. A carved overlay does not replace the structural part of the facade and must not interfere with its opening.
What should be checked when buying a beech or oak blank for enamel?
The material, surface quality, presence of glued joints, relief features, and compatibility with the selected primer and enamel. Beech is often convenient for opaque painting, but the final quality depends not on the name of the species, but on the preparation and the entire finishing system. A test paint is mandatory when exact matching to the furniture color is required.
Why can two parts of similar size differ in their suitability for a project?
Because the outer dimensions do not show the shape of the mounting surface, the location of fasteners, the wall thickness, the direction of the grain pattern, or the purpose of the product. For composite components, the mating dimensions are especially important, while for legs, the structural design and permitted application matter. You need to compare drawings, not just photographs.
How can I order wooden furniture blanks so that I can replicate the project later?
Save the product code, the exact link, the selected size, the wood species, the available surface finish, the approved sample, and the manufacturing operations after purchase. Separately note where the part is installed and how many units are required per piece of furniture. Then the next batch will start with a ready-made specification instead of searching for a similar shape.
When choosing a shaped wooden blank, first determine what the workshop must make itself and what it can already receive in a ready-made geometry. For a composite structure, this could be a geometric module with a fitting; for furniture on legs, a suitable turned support; for a facade, a carved overlay; for a frame, a profiled molding. A well-chosen base leaves the craftsman exactly the work for which their product is created and does not force them to repeat manufacturing operations that have already been completed.