Article Contents:
- The sofa in front of the slatted wall: when replacing furniture legs is enough
- What should be the result after the inspection
- Full-size template instead of photo-based assessment
- Mirror symmetry without separate left and right part numbers
- Beech for covering enamel
- Beech for tinting
- Oak with visible texture
- When oak is not justified
- Step 1. Determine the Material of the Mounting Surface
- Step 2. Measure the Thickness and Free Depth
- Step 3. Identify the Existing Thread
- Step 4. Check the Axis and Support Footprint
- Step 5. Check the Anti-Rotation Protection
- Step 6. Assess the Condition of Old Holes
- M8 Diagnostic Table
- When Four MN‑228 Are Possible
- When six supports are needed
- Central leg
- Modular and folding sofa
- Three calculation scenarios
- How to fill out the list
- Training example
- Robot vacuum cleaner and cleaning
- Seating for elderly people and children
- Armrests, tables, and window
- Three color strategies
- Scale of the leg relative to the body
- Example of checking against the layout
- Legs protruding into the walkway
- 1. Record the initial state
- 2. Prepare safe access
- 3. Check the flatness
- 4. Transfer the axes
- 5. Make a test node
- 6. Perform a dry build
- 7. Test under workload
- Order four MN-228 without checking under the sofa
- Accept any screw about 8 mm as a compatible M8
- Drill an 8 mm diameter hole for the insert
- Install the insert into the thin bottom panel
- Leave the leg not fully tightened for the correct rotation
- Turn the rear supports toward the baseboard
- Consider 140 mm as guaranteed clearance
- Lift the sofa without checking the unfolding mechanism
- Order oak based on a photo of the slat wall
- Paint all legs before the trial assembly
- Mix different furniture glides
- Do not take the sofa warranty into account
- Fix the price and stock in a long-term article
- When it is enough to paint the old legs
- When a mounting plate is needed
- When it is better to keep the factory diagram
- Technical specification for the manager
- Task for the furniture craftsman
- What to check upon receipt
- Final specification
- Checklist before payment
- Can I order one MN-228 for a trial before purchasing the set?
- What to do if the old leg has an M10 stud, but the MN-228 has M8?
- Will MN-228 fit a sofa with a metal frame?
- Can MN-228 be installed into an existing M8 insert without the included insert?
- What to do if after tightening the leg is pointing in the wrong direction?
- Can I install four MN-228 in the front and leave the old supports in the back?
- Is a spare leg needed for a set of six?
- Can MN-228 be shortened if the sofa has become too high?
- Will MN-228 fit a sofa with a linen drawer?
- What should be checked on a sofa with an electric drive?
- Can a floor glide be placed on an oval angled leg?
- How to choose a color if the slatted wall is already coated with oil?
- Is it necessary to remove the sofa from the slatted wall for installation?
- How to know that the central support is working?
- Can the sofa be moved closer to the wall after turning the rear MN-228?
- What to store after installation?
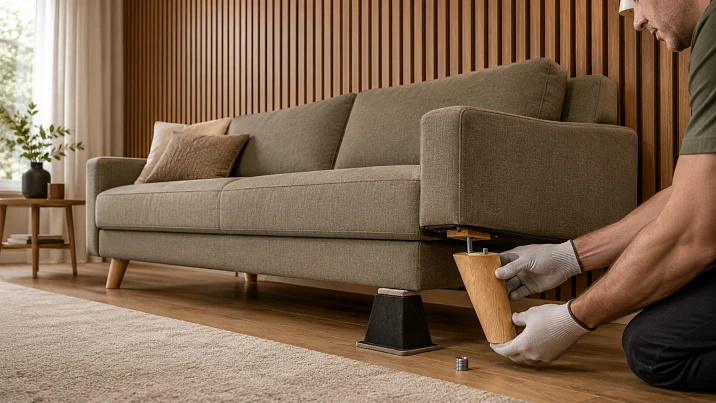
If the sofa matches in dimensions, seating, and upholstery, it is not necessary to replace it just because of a heavy bottom. The angled wooden legs MN-228 can open a gap under the body and make the silhouette lighter against vertical slats. But the purchase is ready only after four checks: the sofa construction allows replacing the supports; the mounting platform can safely accommodate an M8 fastener; the number of support points preserves the frame's design scheme; the new legs do not collide with the baseboard, wall, or transformation mechanism.
The most dangerous mistake is to see a thread of about 8 mm on the old leg and decide that MN-228 will screw in without modification. "M8" denotes the nominal size of the metric thread, but it does not confirm the depth of the existing insert, the type of stud, the condition of the wood, the thickness of the apron, or the permissible load direction. The MN-228 kit includes a self-tapping stud M8×60, a metal insert M8, and a screw 3.5×45, but this kit does not turn any lower sofa panel into a ready mounting platform.
The quantity also cannot be chosen from a photo. Four supports are not suitable for every sofa. If the factory frame had six legs, a separate central support, supports under the module joint, or the folding mechanism, reducing their number to four without coordination with the furniture manufacturer or designer is not allowed. A new wooden leg may be strong in itself, but the weak link remains the attachment point or an unsupported frame span.
The practical procedure is as follows: inspect the sofa from below, draw a diagram of the existing supports, measure the mounting platforms and clearances, make a full-size template of MN-228, determine the orientation of all legs, calculate the change in seating, and only then order the kit. If there is no access to the load-bearing frame or the sofa is under warranty, first obtain a conclusion from the manufacturer or a furniture specialist. The decorative result does not justify damaging the frame.
After checking, you can buy wooden legs for furniture in the general section and compare MN-228 with other modern supports. But for this scenario, the choice does not end with the shape: the required kit is determined by the specific sofa construction.
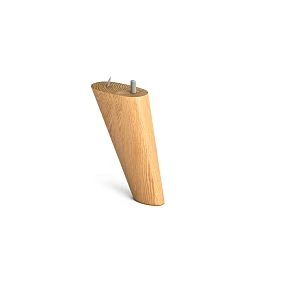
Sofa in front of a slatted wall: when replacing furniture legs is enough
Replacing supports is rational when the problem really lies in the lower part of the furniture. The sofa remains comfortable, its depth does not block the passage, the backrest correlates with the height of the slatted wall, the upholstery does not conflict with the finish, and the frame has no damage. Then a raised body and pronounced leg geometry change the proportion without buying new large furniture.
Against slatted panels, it is often not the sofa's volume itself that looks heavy, but the combination of three lines: a blind plinth almost at the floor, the vertical rhythm of the wall, and the absence of a visible shadow under the body. A support about 140 mm high can form an open lower belt. The floor becomes visible deeper under the furniture, and the body visually separates from the wall. The effect is assessed with a mockup, because the actual clearance depends on the sofa's lower edge, the mechanism, central supports, and the mounting assembly.
Legs will not fix a sofa that is too deep or too high. If the armrests cover a significant part of the panels, the backrest conflicts with the wall pattern, and the passage in front of the sofa is already insufficient, a new base will not solve the main problem. Similarly, replacing supports does not restore a loose frame, a broken stretcher, or a sagging seat base.
Before purchasing, five groups of conditions are checked.
| Check | Suitable for further calculation | Diagnosis or another solution is needed |
|---|---|---|
| Frame condition | Load-bearing elements are intact, attachment points are not damaged | Cracks, torn bushings, delamination, corrosion |
| Support layout | It is clear how many supports there are and what each one supports | Some legs are hidden, there is a mechanism or an unknown central support |
| Access to mounting | The bottom upholstery is removable without damage, or there are open areas | The unit is closed, intervention affects the upholstery and warranty |
| Height change | The new seating position is verified with a mockup | The lift makes the seat uncomfortable or interferes with folding |
| Gap near the wall | The trajectory of the inclined leg does not hit the baseboard or panels | The rear support hits the wall or requires dangerous shifting |
The warranty status is clarified separately. Drilling new holes, installing bushings, or changing the number of supports may be considered an intervention in the structure. If the sofa is new, written approval from the manufacturer may be more valuable than savings on self-installation.
Do not start by removing all old legs. First, photograph the bottom of the sofa, mark each position, measure the height and location, and record the type of fastening. One old support is removed for diagnostics, and the sofa is temporarily placed on safe stands under load-bearing elements, not on a thin facing panel.




What should be the result after the inspection
Before selecting the quantity, the buyer should have a top-view diagram with points O1, O2, O3 and so on, a cross-section of the bottom frame, a photo of the mounting, and a size table. It should indicate the distance from each axis to the edge of the sofa, the material of the mounting platform, its thickness, the diameter and depth of the existing thread, the distance to the baseboard, and the lowest part of the mechanism.
If this data is missing, we are only talking about a design idea so far. Ordering four or six MN‑228 units "for trial" is risky: returning an installed or damaged part from a test installation may be impossible, and a repeat batch may differ in shade.
Our factory also produces:
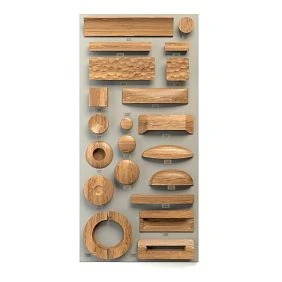
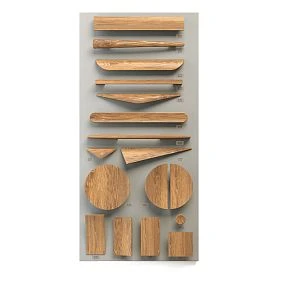
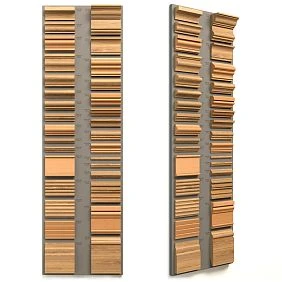
Modern furniture leg MN‑228: dimensions 140 × 42 × 112 mm and package contents
In the modern furniture leg MN‑228 presented as an inclined cone-shaped support with an oval cross-section. The card indicates application for sofas, nightstands, and dressers, two materials — beech and oak — and size A × B × C 140 × 42 × 112 mm.
Dimensions should be read together with the drawing. The value of 140 mm characterizes the main dimension of the model and is used in the card as the leg size, but the actual vertical distance from the sofa's mounting plane to the floor is checked against the DWG, a sample, or an installed mock-up. For an inclined part, the full length, vertical projection, and horizontal offset can be different values. To calculate the seat height, the installed vertical height is needed, and to check the wall, the horizontal displacement of the support point is needed.
The kit for one leg is specified by the manufacturer as follows:
| Element | Designation in the card | What needs to be checked on the sofa |
| Metric stud / self-tapping screw | M8×60, 1 pc. | Working length, threaded pair, depth, and mounting material |
| Metal insert nut | M8, outer size 12–15 mm × 12 mm, 1 pc. | Sufficient thickness and strength of the mounting surface, diameter of the pilot hole per instructions |
| Universal countersunk screw | 3.5×45 mm, 1 pc. | Purpose in the assembly, allowable depth, no exit into upholstery or mechanism |
The presence of these parts in the kit does not allow choosing the drill diameter "by the M8 digit." M8 refers to the internal metric thread of the insert nut and the mating part of the stud. The external thread of the insert nut has a larger diameter; the pilot hole depends on the specific part and base material. It is set according to the actual hardware and installation instructions, not by approximate screen measurement.
Also, the 3.5×45 screw cannot be automatically considered an anti-rotation lock or additional load-bearing fastener. The card confirms its presence, but the exact position in the assembly should be clarified per the product drawing and actual configuration. If the installer changes the standard scheme, they must justify the load transfer through the sofa frame.
Beech and oak on the card are presented as a "Prestige" sanding finish and in the selected "under enamel" configuration. For a transparent finish, the possibility of execution under tinting is separately clarified. The blank for enamel may have lamellas without matching by color and texture; a dense opaque coating hides this, while a transparent one reveals it.
Prices and stock levels change, so they are not fixed in the article. Before ordering, the selected material, current availability, preparation time, and configuration are checked directly in the card. For an available item, the manufacturer indicates shipment within three working days; the average production time for an unavailable option made to order is 5–10 working days.
Get Consultation
Full-size template instead of photo-based assessment
For the sofa, the side silhouette of the leg is cut out according to a drawing or traced from a real sample. On the template, the mounting plane, M8 axis, body edge, and floor contact point are marked. Four copies are placed under the sofa in the design orientation. This test shows:
-
how much the body will be visually raised;
-
where the lowest point of the inclined support will be;
-
whether it will extend into the passage beyond the armrest dimension;
-
whether the gap to the baseboard will be maintained;
-
whether access for cleaning will remain;
-
whether the support conflicts with the folding mechanism.
The small product card does not show the scale relative to a specific base. On a low sofa, a 140-millimeter leg can become the main element, while on a massive body it may only reveal a shadow. The decision is made after viewing from the front, side, and diagonally against a slatted wall.
Inclined wooden support: how the direction of legs changes the sofa's silhouette
MN-228 is not a neutral vertical cylinder. The tilt creates a directional vector. If all four or six supports are turned randomly, the sofa looks skewed even when installed level. The orientation is set on the plan before drilling.
The basic scheme for four corner points can spread the lower ends outward relative to the sofa's center: front legs forward and to the sides, rear legs backward and to the sides. This geometry visually widens the base. But this is not a universal instruction for load-bearing capacity. The allowable rotation depends on the platform on the leg itself, the position of the pin, the frame construction, and the manufacturer's recommendations.
Another composition directs the tilt only along the depth: front supports forward, rear supports backward. It emphasizes the sofa's profile but increases the risk of rear legs colliding with the baseboard. Rotating the tilt along the length creates a different rhythm and may conflict with vertical slats. All options are first checked with a mockup.
| Orientation scheme | Visual effect | What to check |
| Lower ends spread from the center | Stable, open silhouette | Extension beyond the body footprint and equal angles |
| Front forward, rear backward | Depth dynamics | Gap to wall and baseboard |
| Tilt along the length of the sofa | Horizontal movement | Symmetry relative to armrests and slatted wall |
| All supports in one direction | Pronounced asymmetry | Design justification and node acceptability; cannot be placed randomly |
Orientation affects the load-bearing scheme. The load from the body must pass through the fasteners and the leg wood to the contact point with the floor. If the mounting plate is designed for a vertical support, the new inclined part may create a different moment at the joint. This is assessed by a furniture designer or craftsman, especially for a heavy folding sofa.
To ensure all legs stand evenly, base axes are drawn on the bottom frame. At each position, a direction arrow is marked. Temporary markings O1–O6 are made on the rear part of the support. Rotation must not be aligned "by eye" after full tightening: M8 may jam in a position that does not match the adjacent leg.
Mirroring without different left and right articles
The card shows one model MN-228, not separate left and right parts. The mirrored appearance is created by rotating identical supports in plan, if the mounting geometry allows it. Before ordering a large set, it is useful to get one sample and check the full rotation, the position of the oval cross-section, and the ability to fix the required angle without loosening the thread.
If the required orientation is achieved only with an under-tightened connection, the mounting scheme is incorrect. The threaded assembly must be tightened and secured according to the instructions, and the rotation is set by the position of the insert, stud, additional element, or mounting platform provided by the installer.
Wooden sofa leg made of beech or oak: what to order for enamel and transparent finish
The wood species is chosen together with the finish and the interior task. Against slatted panels, legs can either blend into the color of the body, repeat the wood of the wall, or create a deliberate contrast. The word "oak" by itself does not guarantee a match with the oak veneer of the panels.
Beech under covering enamel
Beech has a calm structure and is often used under opaque painting. If the sofa is light, the wall panel is natural, and the legs should support the color of the baseboard or doors, the beech MN-228 under enamel becomes a rational starting point.
The color code does not solve everything. Gloss, texture, and the full coating cycle are compared. A matte leg next to a semi-gloss body is perceived differently, even if the shade matches. A test sample is made on the same material and under the room's lighting.
Beech for tinting
Semi-transparent finishing of beech is possible only after confirming a suitable category of blank and sample. The same toner looks different on beech and oak. You cannot choose "oak color" by name and expect beech to become visually identical to oak slats.
Beech can work as a close but not literal shade: for example, legs are made darker than the sofa and calmer than the wall. Then the difference in material becomes part of the composition, not an unsuccessful attempt at matching.
Oak with visible texture
Oak is logical when the natural pattern of the supports should support a slatted wall, table, windowsill, or door portal. Before ordering, request a version for tinting, sort the set from one batch, and make a test sample next to the panel. Even within oak, tone, porosity, grain direction, and reaction to oil, varnish, or stain vary.
For six supports, the variation is more noticeable than for four. The legs are visible in pairs, so they are sorted: those closest in pattern are placed at the front, the rest at the back or in less visible positions. With dense enamel, such sorting is less critical, but surface quality remains important.
When oak is not justified
If all supports are covered with opaque black enamel, and the project does not require solid oak specifically, the texture does not participate in the result. The choice may remain structural or status-related, but buying oak just as a "better" material is not necessary. It is wiser to allocate the budget to diagnostics and professional reinforcement of the base, if required.
| Task | Initial choice | Mandatory check |
| White or colored enamel | Beech under enamel | Primer and finish system, gloss match |
| Dark opaque painting | Beech or oak per project | Texture visibility after finish and budget |
| Support oak panels | Oak for tinting | Batch, paint-out, lighting, difference between veneer and solid wood |
| Get a calm wood tone | Beech after sample | Toning reaction and compatibility with upholstery |
| Maximally neutral bottom | Enamel in body color | How the slope is read through shadow, not color |
After choosing the wood species and finish, you can buy wooden sofa legs in the profile section. MN‑228 is compared with alternatives by installed height, direction, top platform area, and mounting method, not just by the front photo.
M8 mounting: what to check in the sofa base before buying MN‑228
The mounting block is the main purchase filter. If the base does not accept the insert and the load from the inclined support, a leg that matches in color and size should not be installed without modifying the frame.
Step 1. Determine the material of the mounting platform
Below there may be a massive wooden tsarga, plywood insert, particle board, thin decorative panel, metal frame, or a combined unit. Externally, they may be covered with black spunbond. The material is determined after safely opening the service area or from the sofa's documentation.
The threaded insert requires sufficient thickness and strength around the hole. If the platform is thin, delaminated, or located close to the edge, the external thread may destroy the material. Simply adding glue does not turn a weak panel into a load-bearing insert.
Step 2. Measure the thickness and free depth
You need to know not only the thickness of the visible part, but also what is behind it. A 3.5×45 mm self-tapping screw must not exit into the upholstery, spring block, electric drive wiring, or folding mechanism. The threaded insert must also not intersect hidden hardware.
The depth is checked via a cross-section, documentation, or controlled access. Blind drilling is dangerous. If the structure cannot be inspected, the work is handed over to a specialist or a manufacturer-provided adapter is used.
Step 3. Identify the existing thread
The old leg is removed and its stud is measured with a thread gauge. A caliper shows the outer diameter but does not confirm the pitch and condition of the thread. An existing M8 insert may be compatible, but it may also have insufficient depth, damaged threads, or an unsuitable location.
Compatibility must not be checked by force-threading a new stud. If the thread is tight from the first turns, the part is removed and the cause is determined. Misalignment can damage both the stud and the threaded insert.
Step 4. Check the axis and support point
The M8 axis must be located in the zone where the frame bears the load. Moving the point by 30–50 mm for the sake of a nice tilt can shift it from the side rail to thin sheathing. The plan marks the load-bearing beam, the edges of the platform, and the minimum offsets specified by the designer.
The top of the leg must rest as intended by its shape. If contact remains only around the stud, lateral load causes rocking. Drawing MN‑228 and the sample are applied to the bottom surface before drilling.
Step 5. Check protection against rotation
It is important to keep the angled leg in the specified orientation. Thread alone may be insufficient if the required rotation does not coincide with the moment of full tightening. The purpose of the included screw 3.5×45 and the locking scheme are clarified with the manufacturer or per the drawing. Adding through screws through the decorative part on your own is not allowed.
Step 6. Assess the condition of old holes
A broken insert, a crack along the grain, chipping of the board, or an oval hole require repair. A new part is not installed in a damaged location just because the thread still "catches." Reinforcement is designed so that the load is transferred to the healthy part of the frame.
M8 diagnostic table
| Question | Confirmed | If there is no answer |
| Is the existing thread exactly M8? | Checked with a gauge and documents | Do not buy as a direct replacement |
| Is there enough depth for the coupling? | There is measurement and allowance for the node | Select an adapter or rework the platform |
| Does the material hold the threaded insert? | There is a massive/calculated embedded part | Reinforce the frame according to the project |
| Does the axis align with the load-bearing frame? | Marked on the diagram | Do not drill the decorative bottom |
| Is the orientation fixed after tightening? | Trial assembly completed | Clarify the anti-rotation unit |
| Does the fastener not interfere with the mechanism? | Free zone checked | Disassemble and inspect the structure |
| Are all points in the same plane? | Checked with a rule | Fix the frame, do not compensate with tightening |
Complete parts and possible alternatives are convenient to view in the section Furniture leg hardwareBut the presence of a mounting plate, bushing, or stud in the catalog does not confirm its compatibility with a specific sofa. The transition unit is selected based on the frame material, load, and drawing.
How many furniture legs to order: four, six, or a set with a central leg
The quantity is determined not by the sofa length itself, but by load transfer. Longitudinal and transverse rails, the central beam, module joints, mechanism, drawer, armrests, and the location of factory legs are taken into account. The safest initial rule: do not reduce the number of standard points without calculation.
When four MN‑228 are possible
Four corner legs are considered for a compact sofa with a rigid frame that is originally designed for four points. Each new axis must align with a load-bearing zone. If the old legs were on mounting plates, replacing only the stud may require an adapter.
Even with four legs, you do not order "four by default," but a set after inspection. A broken one of the four legs leaves the sofa non-functional, so for a site with difficult redelivery, a spare part from the same batch may be useful. The spare is not included in the load-bearing scheme but is stored marked.
When six legs are needed
Six points are used if the factory frame has additional support for a long span, front rail, rear beam, or connection area. Placement is more important than a symmetrical picture. The two middle legs cannot be arbitrarily shifted toward the center if they must be under specific nodes.
The tilt of the middle MN‑228 may conflict with the mechanism or look excessive. Sometimes the visible corner legs are replaced with MN‑228, while the hidden middle ones retain a different type and the same installed height. Such a mixed set is allowed only after checking that all legs touch the floor simultaneously and work together under load.
Central leg
Central support is placed under the central beam or the point specified by the sofa manufacturer. It does not have to be MN‑228: a tilted designer leg at the geometric center may be inconvenient and noticeable. Often a vertical adjustable leg is needed, but its type, range, and load capacity are chosen based on the design.
The main condition is real contact with the floor in working condition. If the central support hangs 3–5 mm higher, it does not engage until the frame flexes. If it is set higher than the corner ones, the sofa rocks. Adjustment is performed on the actual floor and re-checked under load.
Modular and folding sofa
Each module may have its own scheme. Four MN‑228 for the entire corner sofa almost certainly do not replace the supports of two or three sections. First, a map of modules, connectors, and legs is compiled. In the joint area, adjacent supports may work as a pair or as a common base.
For a sofa-bed, all positions of the mechanism are checked. When unfolding, additional legs, rollers, or support arches may extend. Raising the main body changes their contact with the floor. If the pull-out part previously landed on one level, new 140-millimeter legs may disrupt the geometry.
Three calculated scenarios
| Scenario | Original scheme | What to order | What cannot be assumed |
| Compact sofa | 4 factory supports on a rigid frame | 4 MN‑228 after M8 check; if necessary, 1 spare | What any sofa up to a certain length always requires four |
| Long straight sofa | 6 supports or 4 + central | Preserve the number and functions of points; determine the central type separately | That the strength of each leg allows removing the middle ones |
| Modular sofa | Several groups of supports | List for each module, joint, and mechanism | That the set is counted as for one body |
How to format the list
| Position | Support type | Material/finish | Orientation | Mounting | Function |
| O1–O4 | MN‑228 | Beech/oak, specify | Per plan arrows | M8 per agreed node | Frame angles |
| O5–O6 | MN-228 or other type | Specify | By design | Specify | Middle support |
| C1 | Central support | Specify | Vertical/per design | Specify | Central beam |
| P1 | Spare MN-228 | Same batch | Not installed | Kit is stored | Repair reserve |
The number of MN-228 units purchased equals the number of confirmed positions for this model plus a deliberate reserve. The central leg of a different type and the hardware are counted as separate line items.
Wooden leg height 140 mm: how the seating and clearance under the sofa will change
You cannot simply add 140 mm to the existing sofa height. The old leg already raises the frame, and the new mounting hardware may change the position of the mounting plane. Two installed vertical measurements are needed: H_old и H_new.
Change in frame height:
ΔH = H_new − H_old.
New seat height with unchanged cushion design:
H_seat new = H_seat old + ΔH.
New clearance under the lowest fixed part of the body:
C_new = C_old + ΔH.
The last formula works only if the lowest part remains the same and the mechanism does not go lower. The central support, drawer, bracket, or motor may limit the actual clearance.
Worked example
Suppose the old installed leg provided 80 mm of vertical height, the seat was at 420 mm, and the minimum clearance under the body was 55 mm. After checking the drawing and a trial assembly, the installation vertical height of MN‑228 was confirmed as 140 mm.
Then:
ΔH = 140 − 80 = 60 mm.
New seat height = 420 + 60 = 480 mm.
Calculated clearance = 55 + 60 = 115 mm.
This is an example of a method, not a promise of results for any sofa. Raising by 60 mm noticeably changes the seating: knees, feet, and the angle of standing up end up in a different position. Before ordering, rigid stable pads are placed under the old supports to simulate ΔH, and several users test the seating. Such a trial is performed safely, without rocking, and only under load-bearing points.
Robot vacuum cleaner and cleaning
The leg height is not equal to the available clearance for the device. The minimum height along the entire entry path and the width between supports are measured. The device may encounter a central leg, hanging fabric, a crossbar, or the inclined part of MN‑228. The required gap is taken from the specifications of the specific robot, and a reasonable operational margin is added according to its instructions.
Seating for elderly people and children
A higher seating position sometimes makes standing up easier, but may leave the feet without full support for a person of short stature. For children, the fall height increases. There is no universally correct size here: the mock-up is tested by real sofa users.
Armrests, side tables, and window
The entire sofa is raised by ΔH. The armrest may become higher than the side table, the backrest may cover more slats or come closer to the windowsill, and outlets behind the sofa may become blocked. On the layout, the contour of the entire product is raised, not just new legs are drawn.
Wooden legs and slat panels: how to align direction, scale, and color
The slat wall sets a regular vertical rhythm. MN-228 adds four or six angled lines. Their task is to create controlled dynamics, not a random fan. First, the main composition of the sofa is determined, then it is checked against the slat spacing.
If the sofa is centered on the wall panel, it is useful to align the axis of the body with the axis of the slat field. The legs do not have to fall under specific slats, but the left and right pairs should look symmetrical. Shifting the sofa by half a step can make one outer leg visually "pressed" against a slat, while the other remains free.
A vertical wall and angled supports create good contrast when the angle is visible in the lower zone, while the top of the sofa remains calm. If the upholstery already has an active diagonal quilting, adding directional legs may overload the composition. The layout is evaluated from the usual entry point, not just frontally.
Three color strategies
-
Repeat the wood of the panels. Oak legs are tinted after a test sample next to the actual panel. A close but not absolute match is acceptable if the difference looks intentional.
-
Connect the legs to the body. Beech is stained to match the color of the lower frame or upholstery. The geometry is read through shadow, and the wood does not compete with the wall.
-
Support other details. The tone of the supports repeats the coffee table, door handles, baseboard, or lamp frame. Then the slat wall remains an independent background.
It is not worth simultaneously exactly copying the color of the panels, baseboard, and sofa if these surfaces already differ. One shade looks different on oak, beech, veneer, and painted MDF. It is better to gather samples on the floor in front of the wall and choose a hierarchy.
If the interior project is not yet finished, buy slat panels for walls for interior finishing should be done after checking their full removal, shade, and pitch. For an already finished wall, take a sample or exact finishing data to the store; a phone photo distorts color.
Scale of the leg relative to the body
The oval cross-section and overall dimensions of 140 × 42 × 112 mm should be evaluated under the actual base. On a thin modern sofa MN‑228, it may look proportional; on a very massive body, it may seem insufficiently substantial. This is not a matter of strength: visual scale and load-bearing capacity are checked separately.
A cardboard front template shows the width, and the side one shows the tilt. For six supports, add all positions: repeating one beautiful leg six times can make the bottom too fragmented. Sometimes it's better to hide the middle supports while preserving the functional scheme.
Baseboard behind the sofa: how to check that the angled support won't hit the wall
The rear legs of MN‑228 may shift the contact point toward the wall. If the sofa is pushed tight, the support hits the baseboard before the body does. The load starts transferring through the side of the leg, the baseboard gets scratched, and the sofa moves away from the slatted wall by an unplanned distance.
The check is done in plan and section. You need:
-
the distance from the axis of the rear mounting to the rear plane of the body;
-
the horizontal projection of the MN‑228 tilt in the chosen direction;
-
the thickness of the baseboard from the base wall;
-
full extension of the slat panel;
-
desired ventilation and operational clearance;
-
backrest trajectory when unfolding, if it moves.
The minimum clearance cannot be calculated solely from the number 112 mm without reading the drawing. This value is one of the product dimensions, and the actual displacement of the contact point depends on orientation. Use DWG or a physical sample.
Example of checking with a mockup
On a sheet of cardboard, draw the wall, baseboard, and bottom of the sofa at a 1:1 scale for the area of one leg. Transfer the M8 axis from the frame. Rotate the MN‑228 template to the design position. If the contour intersects the baseboard, the options are:
-
rotate the rear supports in the permissible direction;
-
move the sofa further from the wall;
-
change the location of mounting plates only after frame calculation;
-
choose a less inclined support;
-
change the plinth before installation if the interior is not yet finished.
You cannot file down the side of a leg or plinth without a design solution. Trimming changes the cross-section and finish of the support, and cutting into the plinth creates a visible defect when the sofa is moved.
If a different lower profile is needed, buy wooden skirting board it can be done after a joint cut of the wall, panel, plinth, and rear leg. For a finished slat wall, it is often more practical to adjust the sofa's position or choose a different support than to dismantle the finish.
Leg protrusion into the walkway
The front MN-228 legs are also checked. The lower end should not unexpectedly extend beyond the front line of the body into the area where people walk. This is especially important near a side passage: the angled outer leg may protrude beyond the armrest. The outline is marked with painter's tape on the floor, and the usual route is walked for several days before ordering.
Installing MN-228 legs: marking, trial assembly, and uniform orientation
Installation is performed after the design is approved. If frame reinforcement is required, it is done before finishing the legs and before final marking. Several people with safe supports should handle a heavy sofa; the furniture should not be placed on its back or armrest unless the manufacturer allows it.
1. Record the initial state
Photograph each factory point, measure the height of the old supports and the distances between axes. Mark the front, back, left, and right sides. Keep the standard parts until the new configuration is successfully accepted.
2. Prepare safe access
Only the intended service upholstery is removed. If access requires ripping the cover, disconnecting the electric drive, or disassembling the mechanism, the work is handed over to a specialist. The sofa is placed on stable supports under the load-bearing frame.
3. Check the plane
Mounting zones must be at the agreed height. A twisted frame cannot be leveled by varying leg tightening. A straightedge and measurement verify that the upper platforms of MN-228 will work simultaneously.
4. Transfer the axes
According to the diagram, mark the centers of M8 and the tilt arrows. For symmetry, use a template rather than individual measurements from the uneven edge of the upholstery. Before drilling, check for hidden elements.
5. Make a test assembly
On a sample of the same material or one available platform, install the insert according to the instructions. Check the fit, depth, absence of cracks, and rotation locking. The drill and tool are selected for the actual hardware; M8 is not a ready hole diameter.
6. Perform a dry assembly
All MN-228 are installed without final decorative finishing, and the sofa is carefully placed on a flat floor. Check contact, rocking, orientation, gaps, and mechanism operation. If one leg does not touch the floor, look for the cause in the frame plane, node height, or floor.
7. Check under working load
The sofa is loaded within the manufacturer's conditions: they sit on it n
Order four MN‑228 without looking under the sofa
The error occurs due to the familiar picture of a sofa on four legs. Under the body there may be two middle supports and a central support. Removing them creates an unsupported span, frame deflection, and mechanism misalignment. Prevention — a map of all factory support points before choosing the quantity.
Accept any screw about 8 mm as a compatible M8
The outer diameter does not show the pitch, depth, or condition of the thread. A force test damages the bushing. Prevention — a gauge, a drawing, and manual checking without force.
Drill an 8 mm diameter hole for the threaded insert
M8 refers to the internal thread, while the outer part of the threaded insert is larger. An incorrect hole can split the wood or fail to hold the part. Prevention — measure the supplied threaded insert and follow its instructions.
Install the threaded insert into a thin bottom panel
The decorative bottom is not a load-bearing rail. Under inclined load, the material chips. Prevention — find the frame or add a calculated insert connected to it.
Leave the leg undertightened for the sake of proper rotation
The orientation looks correct, but the threaded joint has play. The leg rotates and damages the seat. Prevention — design angle fixation rather than using weak tightening.
Rotate the rear supports toward the baseboard
The lower end rests against the wall, the sofa moves forward, and the load goes through the side of the leg. Prevention — a template in the plan with the actual protrusion of the baseboard and panel.
Consider 140 mm as a guaranteed clearance
Below the body there may be a mechanism, a central support, and fabric. The robot vacuum does not pass through, although the legs are high. Prevention — measure the minimum opening along the entire trajectory.
Lift the sofa without checking the unfolding
The pull-out section or an additional leg stops touching the floor in the design position. Prevention — a full cycle of the mechanism on a temporary height mockup.
Order oak based on a photo of a slat wall
The screen does not convey color, and solid wood does not automatically match veneer. Prevention — a sample, a category for tinting, and a test finish.
Paint all legs before trial assembly
During fitting, the coating gets damaged, and M8 incompatibility is discovered too late. Prevention — first test the structural assembly on a protected or test part, then complete the finishing.
Mix different floor glides
Different thicknesses change the installed height and load distribution. The sofa rocks, one leg gets overloaded. Prevention — the same floor protection system on all identical supports and separate adjustment of the central support.
Ignore the sofa warranty
New holes and reinforcements may void the right to repair. Prevention — coordinate the intervention before dismantling the standard supports.
Lock in the price and balance in a long-term article
Commercial data changes. Prevention — before payment, reopen the MN‑228 card and confirm the material, availability, cost, timelines, and set.
Who MN‑228 suits, and who needs a different furniture support
MN‑228 is suitable if the sofa needs a visually open bottom, the modern angled geometry matches the slat wall, the frame accepts M8 mounting or can be professionally adapted, and the lift does not disrupt the seating and mechanism.
A good candidate is a straight sofa with an accessible wooden frame, clear four or six points, sufficient gap from the wall, and a desire to use beech under enamel or oak with visible texture. The front part of the legs should remain visible; otherwise, the decorative shape does not justify the rework.
Another support is needed if:
-
the sofa has a metal frame with branded plates and no safe adapter;
-
the mounting is located in a thin slab;
-
the mechanism requires a strictly defined factory height;
-
the rear legs inevitably hit the baseboard;
-
the passage is too narrow for the tilted protrusion;
-
users find the new seat height uncomfortable;
-
adjustment is required on a highly uneven floor;
-
the interior needs a vertical neutral leg, not a pronounced diagonal;
-
The furniture is under warranty and the manufacturer prohibits modification;
-
It is impossible to preserve the central and intermediate supports.
When it is enough to paint the old legs
If the standard supports are structurally sound, match in height and mounting, but differ in color, it is cheaper and safer to refresh their finish. This is especially reasonable when the shape is barely visible under a low body. First, a test patch is made and compatibility with the old coating is checked.
When a mounting plate is needed
The plate can distribute the load and provide a threaded connection, but it is not a universal reinforcement. It must be attached to the load-bearing frame, and its holes and thickness must match the design. With an angled leg, the plate must also prevent rotation and not protrude from under the body.
When it is better to keep the factory configuration
For sofas with electric drive, recliner, complex unfolding, or integrated supports, a designer replacement may be unjustified. The external plinth can sometimes be lightened with color, shadow, a rug, or lighting adjustments without interfering with the structural part.
How to order a set of wooden legs MN‑228
The order is placed after filling out the sofa's technical card. It must include the furniture model, body dimensions, number of standard mounting points, frame material, installed height of the old legs, M8 confirmation, orientation diagram, finish, and the need for spares.
Technical specification for the manager
The phrase "order wooden legs MN-228" becomes a correct CTA only after a structural check. The manager confirms the product and configuration, while the compatibility of the frame must be confirmed by the sofa manufacturer, furniture designer, or installer who sees the base.
Task for the furniture craftsman
Preserve all load-bearing points of the factory scheme. Check the material and thickness of the platforms, existing threads, M8 depth, purpose of the included screw, anti-rotation protection, free zone to the mechanism, and clearance of the rear legs to the baseboard. Before full installation, perform one trial assembly, set up a height mock-up, and test the sofa in all positions.
Preserve all load-bearing points of the factory layout. Check the material and thickness of the platforms, existing threads, M8 depth, purpose of the included screw, rotation protection, clearance to the mechanism, and gap of the rear supports to the baseboard. Before full installation, complete one trial assembly, set up a height mockup, and test the sofa in all positions.
What to check upon receipt
-
article MN-228 and size 140 × 42 × 112 mm;
-
selected wood species for all parts;
-
uniform quality of finishing;
-
number of legs and individual hardware kits;
-
availability of M8×60 studs, M8 ferrules, and 3.5×45 screws in the required quantity;
-
absence of cracks, chips, and damage to threaded areas;
-
ability to match parts by tone into pairs;
-
compliance of the actual sample with DWG and the layout;
-
conditions for finishing and storage before installation.
Do not immediately screw the entire set into the sofa if one leg raises doubt. First, verify the delivery and perform a trial assembly at the designated position.
Final specification
| Position | Quantity | Material | Finish | Fastening | Note |
| MN-228 working | According to the sofa diagram | Beech/oak | Specify | M8 kit for each | Orientation O1-On |
| MN-228 reserve | 0/1/by project risk | Same batch | Same cycle | full set | Store marked |
| Central support | By design | Specify | Hidden/agreed | Separately | Do not replace MN-228 automatically |
| Mounting plates/embedded parts | By calculation | Specify | Hidden | As per project | Only to the support frame |
| Floor protectors | By number of supports | Under the floor covering | Uniform thickness | Per instructions | Do not change contact geometry |
Pre-payment checklist
-
Frame inspected, no damage or reinforcement designed;
-
Number MN-228 does not reduce factory scheme;
-
Central support calculated separately;
-
M8 confirmed with gauge and depth, not by eye;
-
Platform material holds the insert;
-
The complete screw does not fit into the mechanism and upholstery;
-
The orientation of all inclined supports is marked on the plan;
-
The rear legs do not collide with the baseboard;
-
The front legs do not protrude dangerously into the walkway;
-
The new seating position has been verified with a mockup
ΔH; -
The mechanism has gone through a full cycle at the new height;
-
Beech or oak was chosen together with the finish;
-
The paint sample was compared with the slat wall under working light;
-
The current price, availability, and lead time have been confirmed;
-
The delivery route and storage location have been prepared;
-
The warranty implications of changing the sofa have been clarified.
If the first ten points are not confirmed, the purchase remains an interior idea, not a finished order.
Conclusion: when the sofa can really be kept
The sofa in front of the slatted wall does not need to be replaced if its frame, seating, and mechanism are in good working order, and the problem is limited to a heavy visual base. MN‑228 adds an open gap and directed modern geometry, but requires more careful preparation than a vertical faceless support.
The size 140 × 42 × 112 mm is checked against the drawing in the specified orientation. For ergonomics, the difference between the old and new vertical height is calculated, not the full 140 mm added. For the wall and baseboard, the horizontal projection of the tilt is determined. For installation, the frame material, depth and condition of the M8 threads, the purpose of all included parts, and anti-rotation protection are examined.
Four legs are only one of the possible sets. A long sofa may require six supports, central support, or separate points under the mechanism. Reducing their number due to the assumed strength of MN‑228 is not allowed: the load-bearing capacity of the entire system is determined by the frame, fastening, and load distribution.
Beech is rational under enamel and calm finishes, oak when the texture supports slatted panels. For a transparent finish, a suitable blank category and a real test sample are needed. After these checks, the order contains not just the number of items, but the O1–On scheme, material, finish, orientation, fasteners, and reserve.
Frequently asked questions about replacing sofa legs with MN‑228
Can I order one MN‑228 for a trial before purchasing the full set?
This is reasonable for checking the scale, color, installed height, and fastening assembly, if current sales conditions allow ordering a single part. But the trial leg cannot be loaded as the sole support of the sofa. After the test, clarify the possibility of receiving the main set from the same batch, especially for oak under a transparent finish.
What to do if the old leg has an M10 stud, but the MN-228 has M8?
There is no direct interchangeability. A transition plate, a new embedded part, or another structure designed by a specialist is needed. Gluing M8 into a damaged M10 bushing with a random compound is not allowed: the connection has no controlled geometry or load-bearing capacity.
Will the MN-228 fit a sofa with a metal frame?
Only if there is a standard compatible thread or a specially designed adapter. A threaded insert for a wooden base is not installed into a thin metal wall as a universal solution. Welding, an embedded nut, or a plate require frame inspection and coating protection.
Can the MN-228 be installed into an existing M8 threaded insert without the included insert?
It is possible if the thread, depth, axis, bushing condition, and position after full tightening match. This is checked before installation. The included part remains as a reserve or is used in a new calculated assembly; two inserts are not placed one inside the other.
What to do if the leg faces the wrong direction after tightening?
Do not leave the connection loose and do not overtighten. The position is adjusted using the provided anti-rotation assembly, the orientation of the mounting part, or a transition plate. The solution must be confirmed by a specialist after examining the included fasteners.
Can I install four MN-228s in the front and leave the old supports in the back?
A mixed set is possible only with the same installed height and joint operation of all points. The difference in shape is not a problem in itself if the rear legs are hidden, but a difference in stiffness, height, or contact area causes rocking and overload. The scheme must be tested as a whole.
Is a spare leg needed for a set of six?
A spare is useful for complex tinting, remote delivery, or high downtime costs. It does not replace the calculated seventh support and is stored separately. If repeat purchase is quickly available and the finish is opaque, a spare may be optional.
Can the MN-228 be shortened if the sofa has become too high?
Self-trimming an angled leg changes the contact patch, geometry, symmetry, and protective coating. Without a new drawing, this is not recommended. It is wiser to check the height before ordering or choose a different model.
Will the MN-228 fit a sofa with a linen drawer?
Yes, if the fasteners do not cross the bottom and drawer guides, and the lift does not interfere with opening. The thin drawer bottom is not a platform for the threaded insert. The leg must be attached to the load-bearing frame around it.
What should be checked on a sofa with an electric drive?
Wires, power supply, motor, mechanism trajectory, stability in all positions, and manufacturer's height requirements. Before work, the furniture is safely de-energized according to the instructions. Self-modification may affect the warranty and electrical safety.
Can a floor glide be placed on an oval angled leg?
Only a part that fully matches the contact patch, flooring, and does not cause the leg to rest on its edge can be used. All floor glides must have a consistent thickness. A small round felt pad on an angled oval surface may shift.
How to choose a color if the slat wall is already coated with oil?
They take a panel sample or the exact leftover and perform a full test cycle on beech and oak. They evaluate it next to the sofa in daylight and evening lighting. The oil name and shade code do not guarantee the same result on veneer and solid wood.
Do I need to move the sofa away from the slat wall for installation?
The sofa is moved aside enough to safely flip or lift it according to the instructions, without hitting the panels or baseboard. The slat wall is protected with a rigid screen. Trying to change the rear legs in a narrow gap is dangerous for the person, furniture, and finish.
How to understand that the central support is working?
On an unloaded, level sofa, it should have the position specified by the manufacturer, and under working load it should engage without rocking or excessive lifting of the center. The exact adjustment is set by the design. If paper passes freely under the leg in all states, the contact needs to be checked.
Can the sofa be moved closer to the wall after rotating the rear MN‑228 legs?
Only if the new orientation is allowed by the mounting assembly and does not violate the load-bearing scheme. The mockup should show that the contact point does not collide with the baseboard, and the backrest and mechanism have the required clearance. The rotation is not performed just to save a few centimeters.
What should be stored after installation?
Keep one standard old leg, unused fasteners, DWG or a printed copy of the diagram, finish data, a marked repair sample, and photos of reinforcement points. These materials will help with repairs and the next sofa reupholstery.