Article Contents:
- A finished wooden part is not always ready for assembly
- Describe the final state of each item
- Four main routes for purchased parts
- Specify the next operation and the entire remaining route
- Legs: agree on the fastening before finishing the batch
- Handles: first the model and drawing, then drilling the front
- Overlays: dry layout determines the further sequence
- Moulding is sent for cutting with a cut list
- Sockets and central decor require precise alignment
- Brackets are first checked at the joint
- Machined elements: exclude operations already completed
- The route passport must accompany the part
- The sample goes through the entire route
- Prepared items are handed over for finishing
- Holding after coating is a separate stage
- Store parts according to order and condition
- Kit by product, not only by product group
- For a small batch, fix a repeatable kit
- Plan the transfer between workstations
- Where ready-made components shorten the production cycle
- Where to buy parts for a joinery workshop to match your route

The chest of drawers body is ready, but it cannot yet be mounted on its legs: two supports are being finished, and two are lying among the unfinished parts. The handles have been received, but the drilling of the fronts is designed for a different model. The moulding is also there — in whole strips, uncut. Formally, the components have been purchased. In reality, the kit is not yet ready for assembly.
After acceptance, parts for a joinery workshop need to be linked to a specific product and the remaining operations. Some will go for fitting, others for drilling or cutting, and still others for finishing. They will enter assembly after completing the agreed route. It is this organisation that makes it possible to use ready-made wooden components without sudden rework at the assembly table.

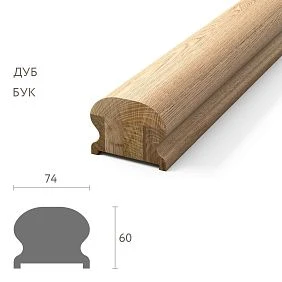

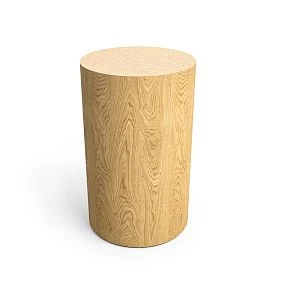
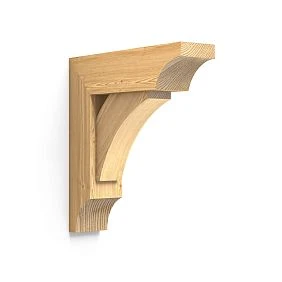
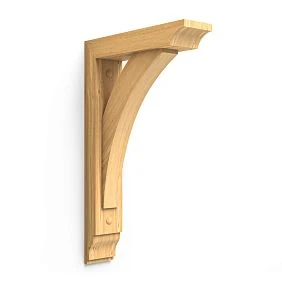
A ready-made wooden part is not always ready for assembly
The word “ready-made” may refer to shape, carving, turning or surface treatment. At the same time, the hole for the selected hardware, the coating and the connection to the body may still require work by the workshop.
An unfinished leg with its final profile already saves production from shaping. But before installation, the mounting joint must be confirmed, and the specified preparation and finishing must be carried out. Moulding has a ready-made cross-section, but it still has to be divided into lengths. A handle may have its fastening prepared, while drilling is required on the mating front.
Therefore, after incoming inspection it is useful to ask a different question: what exactly remains to be done with the accepted item before it is used in this order? There is no need to recheck the entire delivery instead of assigning a route. It is enough to transfer the acceptance results into the working documents and determine the next actions.




Describe the final state of each item
Each line of the specification must have an initial and a required state. For example: "leg without coating, fastening assembly approved" and "leg with white enamel, prepared for installation on the carcass". Between them are the operations that must be assigned and performed.
The final state does not always mean a separate part in the box. If the overlay is glued to the front and painted together with it, a finished front with the installed decor arrives at assembly. In this case, the overlay is closed out in the documents as used in the assembly rather than continuing to be listed as a missing separate item.
Describe the result in a verifiable way. "Prepare the handles" is an undefined task. "Finish according to sample O-02, preserve the mounting areas, deliver six pieces to the K-01 chest of drawers set" is a clear assignment. For recurring work, a short card linked to the drawing and specification is sufficient.
Our factory also produces:
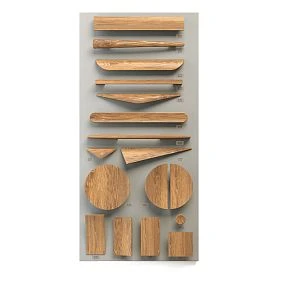
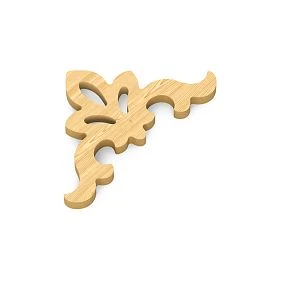
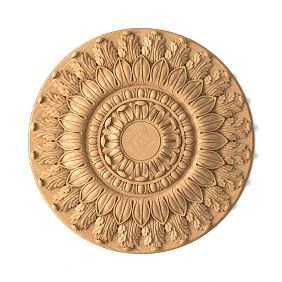
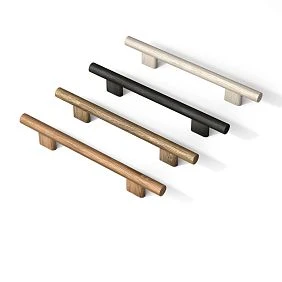
Four main routes for purchased parts
The route is chosen based on the actual condition of the item and the project requirements. The following table is a convenient internal workshop scheme, not a mandatory industry standard.
| Condition of the accepted item | Possible route | Condition for transfer onward |
|---|---|---|
| Coating and mounting part correspond to the project | Compatibility check → kitting → installation | Mating and fastener kit confirmed |
| Geometry and assembly are prepared, no coating | Fitting → finishing → curing → kitting | Surface, fits, and coating readiness accepted |
| Agreed mechanical rework required | Drilling or another operation → inspection → finishing → kitting | Rework completed according to the current drawing |
| Linear profile supplied in whole strips | Cutting → joining → fitting → finishing or assembly of the unit | Signed cut pieces of the required dimensions received |
Within a single furniture order, all four routes can operate simultaneously. At the same time, the geometry of the finished part does not permit any rework. If drilling or trimming was not provided for, their admissibility for the specific model and unit is checked first.
Get Consultation
Specify the next operation and the entire remaining route
A single "in progress" status is not enough. It does not explain where the part is, what it is waiting for, or who it should be handed over to. But the label "needs finishing" does not help much either if drilling still has to be done before painting.
Separate the two records: the next operation and the remaining operations. For a leg, the next one may be fastening inspection, followed by painting, curing, and kitting. After the stage is completed, the next operation changes, while the rest of the sequence remains.
| Current status | What this means for the workshop |
|---|---|
| Accepted, route assigned | Can be transferred to the specified workstation |
| Awaiting trial assembly | Do not start the serial operation yet |
| At drilling / cutting / finishing | The item is at a specific stage |
| Curing after coating | Application completed, further transfer still restricted |
| Rework required | There is a described deviation and a responsible person |
| Ready for kitting | All planned operations have been completed and accepted |
| Included in the product kit | The item is reserved for a specific assembly |
This way, components for the joinery workshop remain recognizable by product type, but additionally receive a clear production purpose.
For a waiting item, specify the reason for the stoppage. "Awaiting a sample" and "awaiting a decision on fasteners" require different actions. The person responsible for the decision and the date of the next check are also needed. Moving the box closer to assembly does not change the state of the part: the basis for a new status is a completed and accepted operation.
Legs: coordinate the mounting before finishing the batch
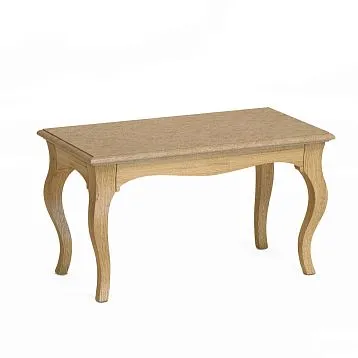
For accepted of wooden furniture legs the route begins with confirming the connection to the furniture. The height, top section and mounting area must match the project. You also need to know which mounting parts are already present and which are installed by the workshop.
If selected from STAVROS open boundless possibilities for designers, furniture makers, and anyone striving to create unique high-quality furniture., first check the trial assembly and the planned finish. This helps avoid a situation where a painted batch has to be returned for machining due to an unsuitable fit.
Installation of the stud, plate or other furniture hardware is placed in the route taking into account access and coating. In one assembly, it is more convenient to prepare the mounting before painting; in another, some hardware is installed after it. Seating and contact areas are marked in advance.
The four supports of one item after finishing are compared as a set: by workmanship, mounting height and appearance. At the same time, the same number of legs in the box does not yet confirm that each one belongs to the required order.
Handles: first the model and drawing, then drilling the front
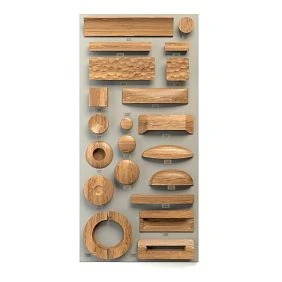
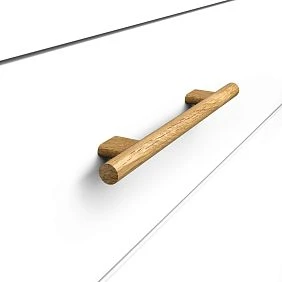
for wooden furniture handles it is important to separate two production objects: the handle itself and the front on which it is installed. The handle may only need finishing. The front needs drilling according to the agreed coordinates.
Before the fronts are sent to the machine, the article number and the dimensional version of the handle, the number of fixings, the center-to-center distance, the projection and the panel thickness are recorded. The overall length of the handle does not replace the distance between the holes. Changing the model requires checking the drilling drawing, even if the new handle looks similar to the previous one.
for furniture handles without coating the finish and the integrity of the fits are additionally agreed upon. A trial installation checks access to the fasteners, the convenience of the grip and the opening of the front next to adjacent elements.
In the route card it is useful to write directly: “do not drill the handle; drill the front according to drawing of such-and-such version.” Such a note eliminates an unnecessary operation and links two parallel routes before assembly.
Overlays: dry layout determines the further sequence
decorative inlays for furniture first they are laid out on the actual front or a verified mock-up. The scale, projection, offsets from the frame and handles, and the left and right sides are checked. If the pattern is directional, identical quantities of parts do not yet mean the correct pair.
After fitting, one of the options is chosen. The overlay can be joined to the base and the assembly finished as a whole. Or both parts are finished separately and joined later according to the specified technology. The choice depends on the construction, glue and coating; there is no universal requirement to “paint everything first.”
For example, glue manufacturer Titebond states that most of its woodworking glues are intended for unfinished wood. This principle cannot be automatically transferred to any mounting compound, but it shows why the condition of the contact surfaces must be agreed upon before painting.
In the task for the finisher, mark the areas that must remain free of coating if the chosen joint requires this. In the task for the assembler — the installation method and the permissible sequence. The trial assembly must follow exactly this route.
The moulding is sent for cutting with a cut list
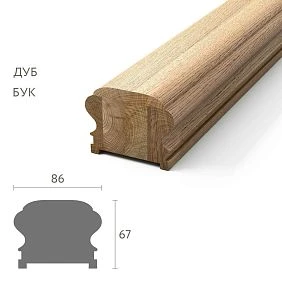
Wooden trim arrives as linear products, while a furniture set usually requires individual frame sides, friezes, or strips. Therefore, the entry in meters refers to purchasing and consumption, but does not replace the cutting specification.
Specify the length of each segment, quantity, angles, profile direction, and measurement method. For a miter joint, it is essential to know which edge the dimension is referenced to. For profiled moulding, the pattern at the joint is additionally taken into account. The length of the purchased strip is taken from the specific version, not from the usual size of a previous delivery.
After cutting, the parts are labeled in place: top, bottom, right and left sides, frame or front number. Then a dry fit is performed. Correcting a profile mismatch at this stage is easier than after finishing the entire set.
If the frame is painted as an assembly, its route includes pre-assembly. If the elements are installed already finished, end-grain treatment and coating protection during installation are provided separately. Waste, saw kerf, and fitting allowance are accounted for in the cutting map, rather than added by eye at the last moment.
Rosettes and central decor require precise positioning
for wooden rosettes the next operation is often preparing the layout. It is necessary to determine the installation center, the position relative to the frame and neighboring elements. The geometric center of a part and the visual center of a complex ornament may be perceived differently, so the final placement is approved on the layout.
If the rosette is repeated on several drawers, fix the coordinates in a template or drawing. It is not enough to give the assembler a single photo marked "centered": it is unclear whether alignment is required relative to the front, the free field, or the frame.
After the position is approved, the finishing and joining route to the base is selected. The central decor must return to the set of the item for which the composition was approved, especially if visually similar orders are in progress nearby.
Brackets are first checked at the joint
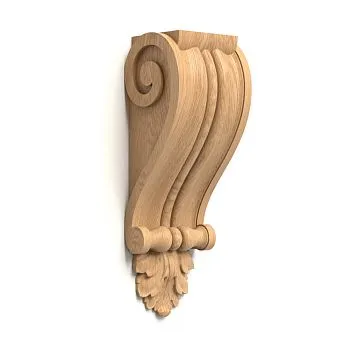
for wooden brackets the contact surfaces, orientation, and position relative to the shelf or carcass are important. Before finishing, check the actual fit and access to the fasteners. Paired elements are considered together.
Define the function separately. A decorative bracket and an element involved in supporting a shelf require different assembly verification. A massive appearance does not confirm load-bearing capacity. If the bracket functions within a structure, assembly readiness is determined by the design of the entire joint.
The routing must show when installation is performed: before shelf mounting, after it, or as part of a separate subassembly. A sequence error can block access to the fastener, even though all individual parts are formally ready.
Turned elements: exclude already completed operations
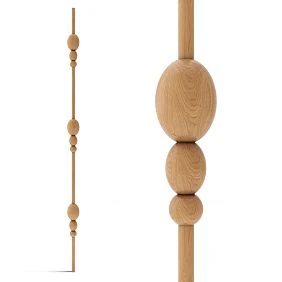
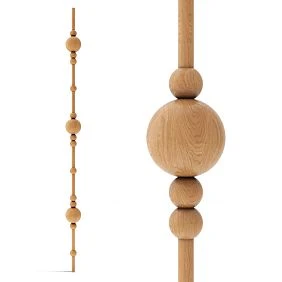
By purchasing finished turned elements, the workshop receives a formed profile. Only the operations required for the selected assembly remain in the work card. There is no need to transfer turning and drilling from the previous manufacturing routing from scratch into it.
Thus, for module KN-009 a through mounting hole of 34 mm is provided. This is a ready-made feature of the product that is taken into account when selecting the mating element. Automatically assigning re-drilling would be a mistake.
Before finishing, the fit of the assembled unit is checked, and then it is determined which surfaces are coated. Nominally matching dimensions still require a trial fit, especially if the coating will enter the joint. The decorative module does not thereby become an independent load-bearing support merely because it has a hole for an axle.
The routing passport must accompany the part
For a small workshop, a card on a tray and a shared order table will suffice. What matters more is not the accounting software, but consistent designations used by the technologist, finisher, and assembler.
| Field | What to record |
|---|---|
| Order and item | Order number, designation of the specific dresser, cabinet, or wardrobe |
| Position | Part number according to the specification |
| SKU and finish | Model, size variant, side if there is a pair |
| Quantity | Transferred to the operation, accepted after it, requires rework |
| Material | Wood species and agreed blank finish |
| Condition after acceptance | Uncoated, coated, prepared fastening, and other features |
| Route | Sequence of remaining operations |
| Next operation | Where the part is being transferred now |
| Finishing | Sample code and link to the working recipe |
| Mounting | Approved assembly and hardware set |
| Documents | Drawing and its version, sample inspection result |
| Responsible person and date | Who accepted the result and when further transfer is possible |
If the card exists only on the computer, the physical batch must still have a stable link to it. After one tray is split into two, both parts retain the order number and line items. Without this, the data in the table no longer describes the actual movement of parts.
Plan in advance how to preserve this link during painting. If a mark applied to the wood disappears after sanding or ends up under the coating, use a designation on the holder, tray, or a separate tag suitable for this process. Furniture parts for carpenters must return from the finishing area with the same project designations they had when they arrived there.
The sample goes through the entire route
Attaching a leg to the body and approving the proportions is not enough. The control sample must undergo the specified refinement, finishing, curing, and assembly check. Only in this way do problems that arise between operations become visible.
It is useful to approve not just a beautiful part, but the result of its application: a handle on the facade, a support in the fastening unit, an overlay on the base. For destructive tests, a separate sample is provided. A sample that has been damaged by testing cannot be considered a finished part of a furniture set.
Since the batch has already been accepted, checking the first unit becomes a condition for launching repetitive operations. If the sample is not suitable, the remaining parts retain their original state until a decision is made. Reworking twenty painted elements is usually more difficult than correcting the route on one.
The result is recorded with the words "approved for the project" along with the date, drawing version, and finish code. Approval of the shape does not mean automatic approval of new fasteners or a different coating formulation.
Prepared items are transferred to finishing
Before painting, operations that, according to the chosen technology, are performed on unfinished wood must be completed. This may include drilling, trimming, pre-assembly, or preparation of contact zones. Such tasks cannot be left undefined: the finishing area must receive a clear assignment.
In the information about the quality of wooden products STAVROS separates the execution of regluing and the quality of sanding. They help determine further preparation, but do not replace the working requirements of a specific coating system.
Combine parts into a finishing batch based on compatible technology, not just on the word "white." A beech leg, an oak handle, and another base may require different preparation for a consistent visual result. The finish code must link the target sample to the formulation for the corresponding material.
For selection and verification, use Product samples and suitable Mounting and finishing materials. When painting components from different orders together, keep their markings: combining them at the workplace does not cancel their belonging to a product.
Drying time after coating is a separate stage
The entry "painted" reports that the operation has been completed, but does not confirm that the parts can be immediately stacked, fasteners tightened, or parts packaged. Manufacturers of finishing materials distinguish between drying and final curing. For example, this is explained separately in Rubio Monocoat recommendations for oil-wax finishes.
For the product used, determine the permissible timeframes and conditions for subsequent actions according to its technical documentation. In the route card, note the application time and the moment when transfer to the next operation is allowed. Do not assign the same 24-hour waiting period to all enamels, varnishes, and oils.
Plan the placement of parts during drying time. They must remain identifiable, not come into contact in unacceptable ways, and not return to general stock before they are ready. Otherwise, the time saved on shaping will be spent correcting marks from stacking.
Store parts according to order and condition
Boxes labeled "handles," "legs," and "overlays" are convenient for inventory stock. For an active order, the group name needs the product number, article number, and current stage. Identical handles for clear finish and for enamel must not be mixed after being issued for work.
Divide storage locations at least into awaiting operations, on drying time, requiring a decision, and ready for assembly. A color label can speed up searching, but there must be a text entry next to it: color alone does not explain the reason for the delay.
If one part has been damaged, indicate it separately. The status of the entire batch must not hide the difference between nineteen finished pieces and one awaiting repair. Moving it to another tray is accompanied by a change in the location record.
Assemble by item, not just by product group
After completing the routes, assemble the kit for a specific piece of furniture. The assembler should receive a list of prepared items and know which elements are already installed in subassemblies.
Let's consider a conventional dresser for which the project provides four legs, six handles, two overlays, one socket, and eight molding segments. The example uses four segments of 900 mm and four of 400 mm; dimensions are set along the edge specified in the drawing.
| Position | Per chest of drawers | For five chests of drawers |
|---|---|---|
| Legs | 4 pcs. | 20 pcs. |
| Handles | 6 pcs. | 30 pcs. |
| Overlays | 2 pcs. | 10 pcs. |
| Rosettes | 1 pc. | 5 pcs. |
| 900 mm molding segments | 4 pcs. | 20 pcs. |
| 400 mm molding segments | 4 pcs. | 20 pcs. |
The sum of the finished molding lengths is 5.2 m per dresser and 26 m for five items. This is not the purchasing volume: to buy whole strips, cutting, saw kerf, angles, fitting, and available supply length are accounted for separately.
The kit is supplemented with the specified fasteners and an installation map. Spare parts are accounted for separately from the item requirement. If two overlays are already on the finished facade, the kit assembler marks them as part of the facade and does not require two more loose parts.
Handover is documented by list: what was issued separately, what is installed in a subassembly, and what is still missing. An incomplete kit may be handed over for a pre-planned partial assembly, but it must not be marked as fully ready. The assembler should see the limitation before starting work, not discover it when installing the last handle.
For a small series, lock in a repeatable kit
After checking the first item, approve the kit composition, drawings, operation sequence, and finish. The quantity for five or twenty items is obtained by multiplying the verified requirement, while keeping separate accounting for trial units and the reserve.
At the same time, completeness is monitored for each item. If for five chests of drawers there are twenty ready legs, but only twenty-eight handles when six are needed per unit, the handles are enough for four complete sets. With a sufficient quantity of the remaining items, this makes it possible to provide four chests of drawers. The average order readiness as a percentage will not show the limitation as clearly as the kit table.
Replacing an article number in the middle of a series requires an assessment of the related documents. A different handle may change the drilling pattern, a different leg may change the installation, and a different wood finish may change the tinting result. External similarity does not provide grounds to continue work according to the previous card without verification.
Plan transfers between workstations
Parts of one order can move in parallel. While the moulding is being cut, the handles may be in finishing, and the legs may be undergoing fastening inspection. But these branches have a common point: the finished kit for the corresponding assembly operation.
Set the completion date based on the actual route, including sample waiting, finishing, and curing. You should not rush completed items just to increase the number of processed parts if assembly is delayed by one unapproved component.
During transfer, note the quantity and the result of the stage. For example: “out of twelve, eleven were accepted, one part was returned for coating correction.” Then the kit assembler can see the shortage in advance and can plan rework or an additional order before the product reaches the assembly table. After correction, the item again undergoes the affected checks and only then returns to the finished kit; the previous acceptance mark does not confirm the result of the new work.
Where ready components shorten the production cycle
Ready solid wood parts for furniture save work where operations are genuinely eliminated. A purchased turned leg can remove profile manufacturing; a ready overlay can remove relief preparation; moulding can remove section milling. The remaining stages still need to be organized.
Check the route after changing the procurement method. If it still contains an operation that the supplier has already performed, remove it. If a new assembled structure has appeared, add its connection and inspection. This is how ready wooden elements for furniture become part of production, rather than just a replacement of one line in procurement.
It is useful to evaluate the result by the time to the finished kit and the amount of rework. A low price for an individual part helps little if it has to be transferred several times between drilling, finishing, and assembly because of an unprepared task.
Where to buy parts for a joinery workshop to match your workflow
In the STAVROS catalog you can select parts for a joinery workshop, by matching the finished shape with the operations that production retains. The general section presents different materials and product groups, so the execution of each item is checked in its product card.
If you need to buy wooden furniture parts for your own finishing, specify the item code, size, material, surface condition, and quantity. For a finished component with a coating, clarify installation and conformity to the approved sample. Decorative elements for a joinery workshop should be ordered with reference to the facade or assembly point where they will be installed.
Before reordering, save STAVROS product drawings together with your own specification and review conditions for manufacturers. The supplier will better understand the required execution, and the workshop will know which operations remain after receiving the batch. Such an order is passed to assembly as a set with confirmed readiness of each item.