






Article Contents:
- Where to buy wooden battens in Irkutsk and what to confirm before payment
- Finishing battens or construction lumber: the fundamental difference
- BR-001: sizes 20×20 and 40×40 mm, length and practical purpose
- Oak or beech: how the material changes the look of wooden mouldings
- Choosing a finish: clear coating, tinting or painting
- Vertical battens on the wall: rhythm, spacing and furniture
- Calculation for a wall 3.2 m wide and 2.4 m high
- Why linear metres do not equal the number of strips you need
- 40×40 mm timber block: when a larger cross-section works better
- Wooden batten RK-001 instead of a timber block: when it is the more suitable choice
- External corner piece UG-001: why it is needed alongside a timber block
- Moulding MLD-004 and timber block BR-001: different ways to frame a contour
- How to combine timber blocks, battens, mouldings and other profiles in one room
- Checking dimensions on site: which measurements are actually needed
- Wooden timber block in furniture parts: where it helps and where it hinders
- Frames made of timber block: how to account for joints and wood grain
- Installing timber blocks on a wall: substrate, fasteners and sequence
- Sawing and sanding: why end-face quality is more noticeable than long-edge quality
- Storage and acclimatization of wood after delivery to Irkutsk
- How to calculate a set for several rooms without extra reorders
- Price of a wooden bar: what to compare in the overall estimate
- Delivery of long-length moulding to Irkutsk: packaging and acceptance
- Mistakes that cause the order to be redone
- How to order solid wood moulding without confusion in the line items
- Control sheet: how to hand over an order without ambiguous designations
- Frequently asked questions from buyers of wooden bars in Irkutsk
- Can I order BR-001 of the same item code in two cross-sections at once?
- Do I have to choose oak if the doors in the room are oak?
- Can I install two bars instead of an outer corner?
- How can I tell that the item selected in the cart is solid wood and not MDF?
- Do I need to account for the saw kerf if all the parts are short?
- Can the battens be glued to an already painted wall?
- What should I do if the planks differ in shade after unpacking?
- Can I receive my order somewhere other than Irkutsk itself, in another town in the region?

For a decorative wall 3.2 metres wide, you can order eight wooden battens 2.4 metres long, or you can get the quantity wrong even with a correct calculation of the total length. The difference arises from how the parts are laid out, their cross-section, the sawing, and the junctions with the floor, ceiling and furniture. That is why you should start your purchase not with the number of linear metres, but with a small drawing: where each batten will go and what job it does.
It is especially useful for a buyer in Irkutsk to determine the set in advance. If, after receiving the batch, it turns out that one plank is missing to complete the composition or that the profile does not join well with the architrave, you will have to arrange an additional shipment. STAVROS has the BR-001 batten in oak and beech in two cross-sections in its catalogue, as well as slats, corners and mouldings that can be combined with it. These products perform different functions. Below we will look at them individually and put together a clear scheme for choosing and ordering.
Where to buy a wooden batten in Irkutsk and what to check before paying
The query "buy a wooden block in Irkutsk" can mean very different purchases. For structural battens, people usually look for construction lumber. For the visible edge of furniture, a wall composition or a decorative partition, a carefully finished profile is required: it is viewed from close up, it is touched by hand, and every joint remains in plain sight. Here we are talking specifically about the second case — finishing wooden moulding for interiors.
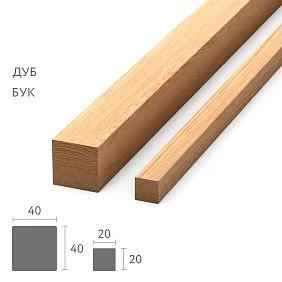
The main model in the catalogue is the wooden block BR-001, available in oak or beech. The product page presents square sections of 20×20 and 40×40 mm with a length of 2400 mm. To place an order, you choose not only the item code but also the wood species, size, finish quality and required quantity. If two sections are used in the same room, it is more convenient to list them as separate lines: this makes it easier to calculate the cutting plan and check the completeness of the order on receipt.
Do not assume that STAVROS has a warehouse or showroom in Irkutsk. Orders are placed remotely via the website and agreed communication channels, and the availability of delivery to a specific address, its cost and lead time should be confirmed before payment. Logistics directly influence the practical choice: long profiles are sometimes better consolidated into a single shipment together with corner pieces and battens than ordered piece by piece later.
Before getting in touch, prepare four things: a dimensioned drawing, a table of the required parts, your preferred wood species and a list of questions about the finish. If finishing work has already begun, photographs of corners and junctions are useful. They will not replace precise measurements, but they will show where a straight block is needed and where a special profile will be required.
Finishing block or construction lumber: what is the fundamental difference
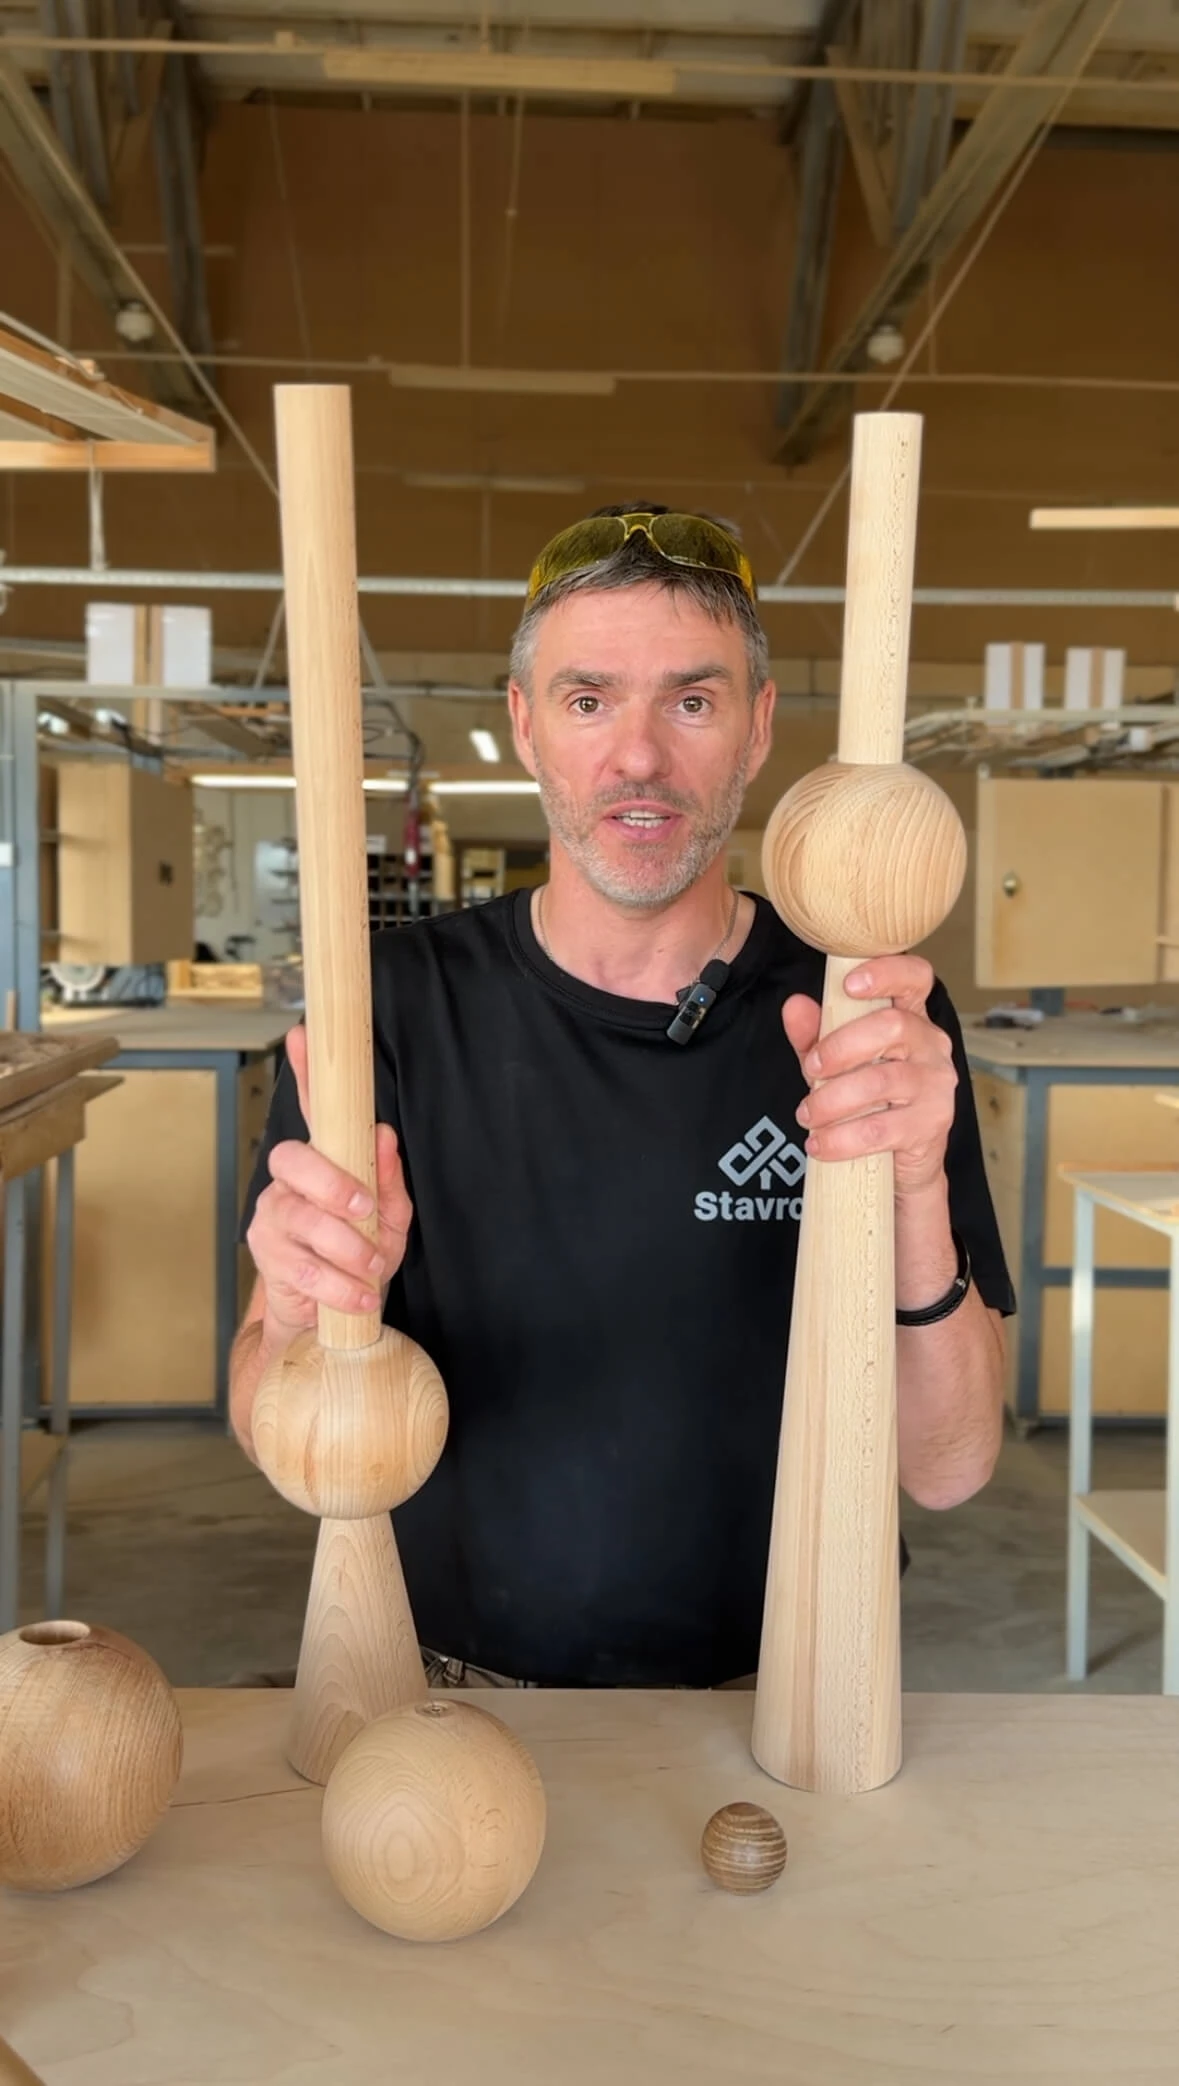
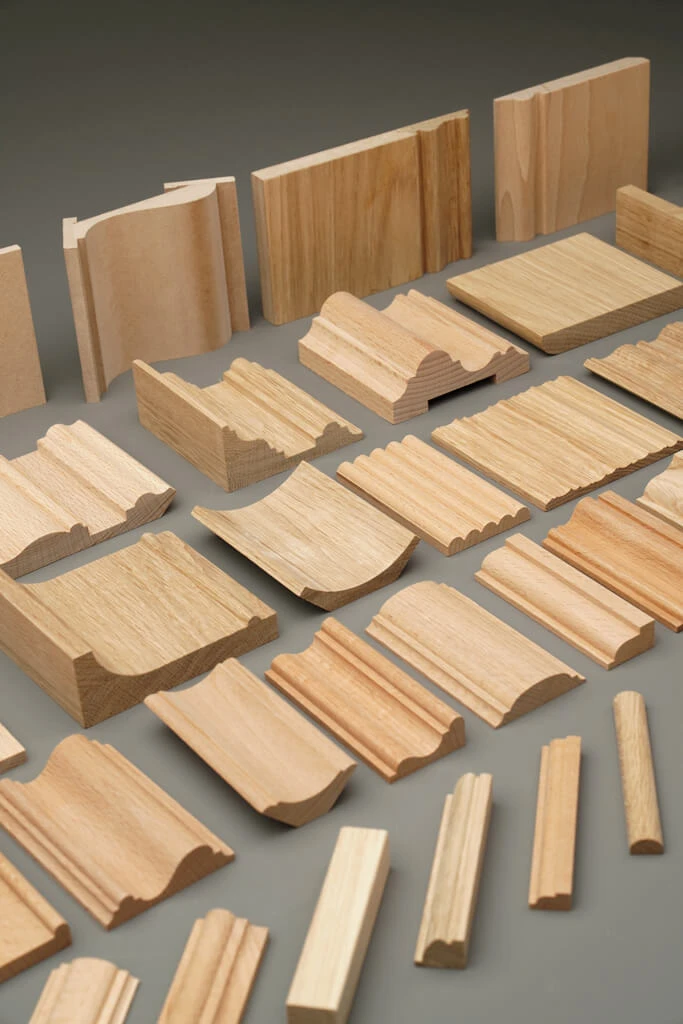
Construction and decorative blocks share the same basic geometric idea — an elongated wooden component of a specific cross-section. But the selection criteria differ. For concealed battens, what matters is the operating conditions of the structure, conformity with the design and strength. For a visible interior block, additional factors come into play: straight edges, surface finish, neat end faces, a consistent appearance of adjacent components and the quality of the joints. A good result does not happen automatically just because the wood is hard.
Imagine two wooden strips of the same length. The first is covered with sheet material, the second forms a frame on a light-coloured wall next to a window. A slight difference in shade is usually imperceptible in the first case; in the second, side lighting will emphasise it. If a visible component has a chip or an unsuccessful joint line, the decorative intent will be spoiled. That is why, before ordering, you need to decide which surfaces will remain exposed and from what distance they will be viewed.
In interiors, blocks are often used for strict linear layouts, framed compositions or a neat accent on a furniture front. However, a block does not automatically replace a load-bearing element. You cannot draw conclusions about the permissible load for a shelf, support post or free-standing partition solely from the designation "40×40" and the wood species. A critical structure requires separate calculations of fixings, spans, stability and actual operating conditions.
When comparing offers, do not confuse a sanded interior batten with any raw lumber of a similar size. Even if the nominal cross-section matches, the finish result and the amount of subsequent work will differ. Savings should be assessed together with the cost of fitting, painting and correcting defects, not just by the price of a single strip.
Our factory also produces:
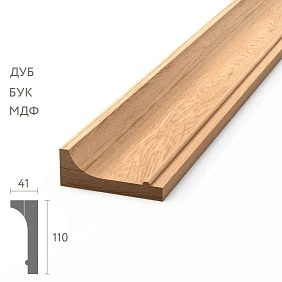
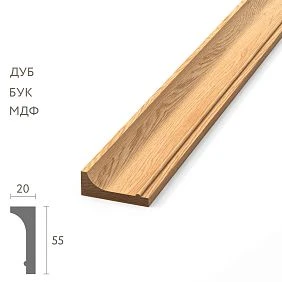
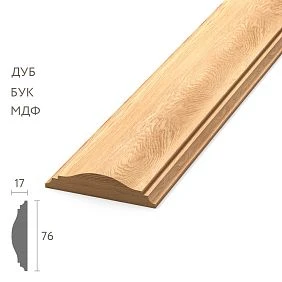
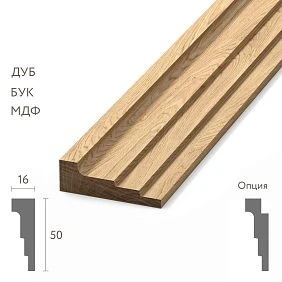
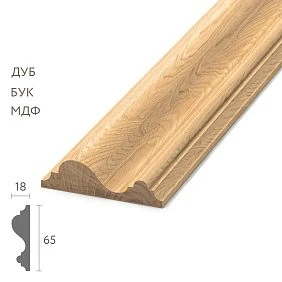
BR-001: sizes 20×20 and 40×40 mm, length and practical purpose
BR-001 has two confirmed cross-sections. 20×20 mm — a relatively thin square piece for small frames, applied lines, furniture elements and delicate decorative compositions. 40×40 mm gives twice the visible width of each face and protrudes into space much more noticeably. If both battens are placed side by side on the same wall, the larger profile will be perceived as a three-dimensional architectural line, while the thin one will read as a neat pattern.
| Model | Section | Length | When to consider |
|---|---|---|---|
| BR-001 | 20×20 mm | 2400 мм | Thin geometric trim, frame sections, furniture details |
| BR-001 | 40×40 mm | 2400 мм | Large decorative layout and three-dimensional elements when there is enough space |
The same length does not mean the sizes are interchangeable. You cannot make up a missing 20×20 piece from an offcut of 40×40 without additional processing and new approval of the appearance. In the order, specify the size of each item in full: “BR-001, beech, 20×20×2400” or “BR-001, oak, 40×40×2400”. This protects against errors far more reliably than the general designation “wooden batten”.
The cross-section also affects the junction points. If a tall skirting board is installed along the wall, a vertical 40×40 batten can end above it or cross it according to a specially designed scheme. The thin 20×20 option is easier to incorporate into a frame over a finished wall, but it can still conflict with sockets, protruding architraves or decorative lighting.
Note the 2400 mm length: it is convenient for many rooms, but it cannot be considered a universal floor-to-ceiling height. In a room with a ceiling height of 2600 mm, a single vertical piece will not cover the entire section. You will have to design either upper and lower gaps, or a joint, or another solution. This is the stage at which the composition is chosen, not after the goods have been unloaded.
Get Consultation
Oak or beech: how the material changes the look of wooden mouldings
For the same straight geometry, oak and beech give different visual impressions. Oak usually has a more pronounced grain pattern: visible pores and lines help emphasise the natural surface. Beech often looks smoother and calmer in texture. If a clear finish is planned that keeps the wood visible, these differences become part of the project rather than a secondary characteristic.
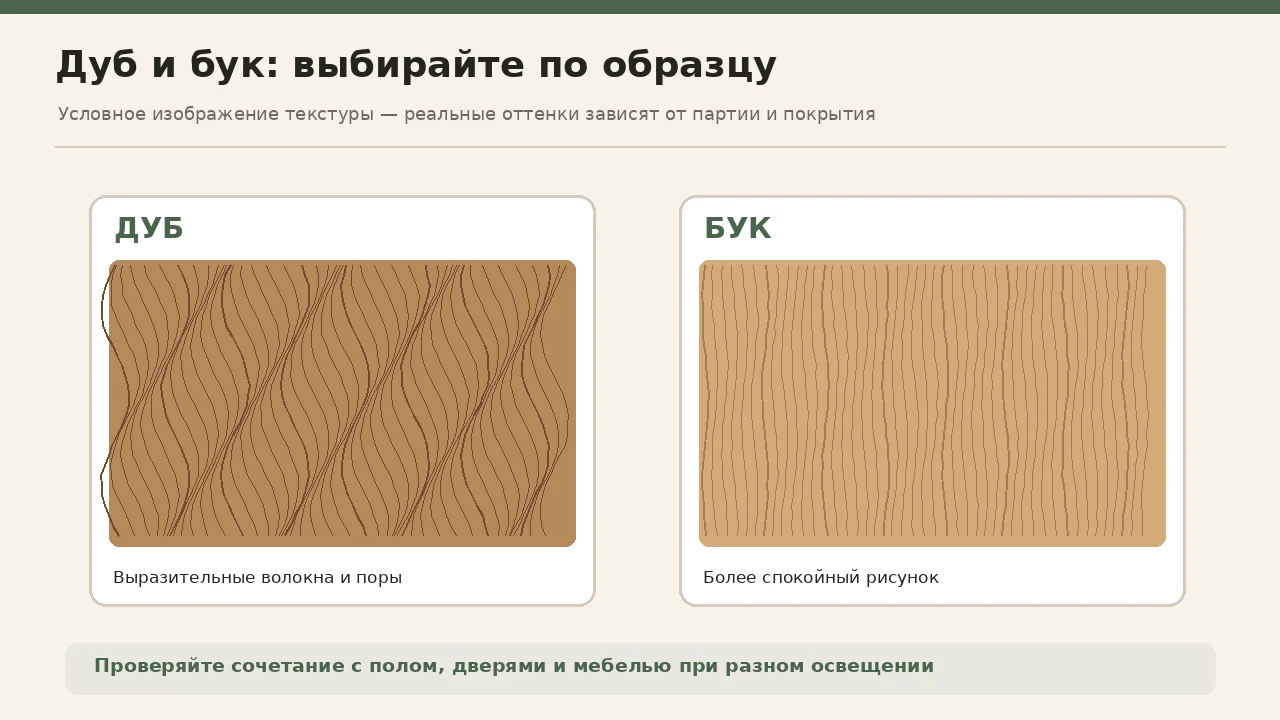
In a room with oak doors already installed, it makes sense to first compare samples of oak elements. But matching the species does not yet mean matching the colour. The shade varies depending on the specific batch of wood, sanding, coating and light. A warm oak floor and a light oak batten can look different. It is better to place real samples against the floor and architrave in daylight and evening lighting than to choose from a photo on a screen.
Beech is convenient where you need a calmer finishing line or want to prepare the product for painting, but the final decision depends on the coating and the specific surface quality. It cannot be claimed that any beech batten is necessarily more economical or better for enamel. What matters is the selected option in the product listing and the technological requirements of the paint manufacturer.
When designing a long wall, do not assume that all battens will be absolutely identical in grain pattern: natural wood is not uniform. Before installation, it is useful to lay the pieces out side by side and distribute the most similar in shade where they form a repeating rhythm. More noticeable differences can be assigned to separate small sections, if this does not conflict with the design.
There is also an operational condition. Wood reacts to changes in humidity and temperature. Rigidly fixing a solid piece between two immovable surfaces without allowing for possible movement of the material is a risk of stress or gaps. The fastening method and permissible gaps are chosen based on the construction and the recommendations of the system used, not on a universal figure for all rooms.
Choosing a finish: clear coating, tinting or painting
The finish should be chosen together with the wood, not after the profiles have been cut and fixed. If the goal is to preserve the wood grain, you should evaluate a test stain and lacquer in advance on a sample of the same species. If an opaque color is required for the wall composition, the compatibility of the primer, paint and surface matters more, as well as the quality of the end-grain preparation. The side face and a fresh cut absorb the composition differently.
The BR-001 card provides options related to preparation for subsequent finishing. These should not be understood as a promise that any paint will adhere equally well to wood without a primer. A specific coating has requirements for substrate dryness, sanding, number of coats and drying time. These requirements are usually more important than a random piece of advice to “paint immediately after installation.”
For long verticals on a light wall, opaque painting reduces the visual contrast of the wood fibers but increases the visibility of the joints. Where the profile is painted the same color as the wall, an uneven joint is read by its shadow. A transparent finish, on the other hand, can better show off a beautiful texture, but it does not hide the difference in shades of adjacent parts or sawing defects.
Check how the end will be finished at the ceiling, near furniture and at the floor. It is often on the end that saw marks are visible, which one additional coat of lacquer does not fix. If the element ends on an open plane, the end must be treated as an independent visible surface. When it is hidden by a casing or another profile, the requirements for decorative appearance may be different, but the exact size remains critical.
Vertical battens on the wall: rhythm, spacing and furniture
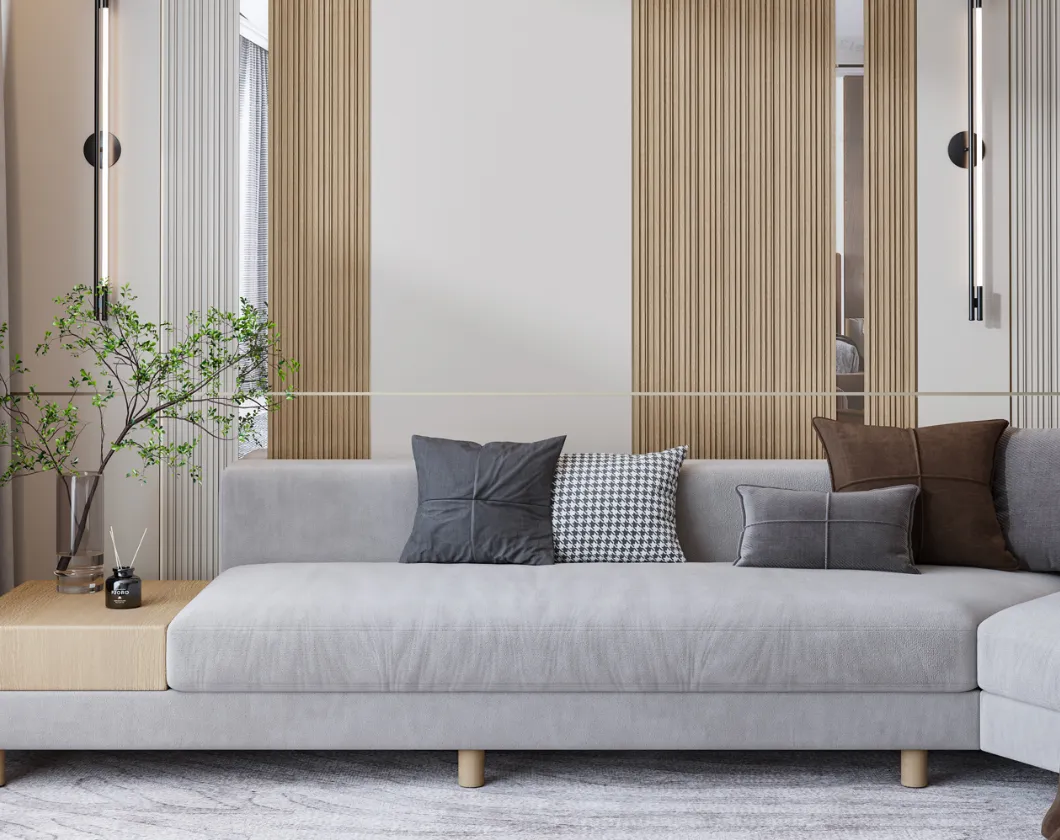
A decorative wall with vertical battens looks simple only in a drawing. On a real surface there are sockets, switches, doorways, furniture and light fixtures. If you mechanically divide the entire width into equal intervals, one profile may end up right in the middle of a socket, and the outermost one too close to the casing. Therefore, you first draw the constraints, then calculate the rhythm.
For example, the wall width is 3200 mm, and on one edge there is a cabinet 600 mm deep. It is unreasonable to divide all 3200 mm into equal parts if only 2600 mm is visible. The composition should be centered relative to the visible area, leaving technological clearances from the furniture and taking into account the width of each profile. Otherwise, a formally symmetrical layout will be perceived as shifted.
Side lighting is of particular importance. A 40×40 profile protrudes from the plane more than a 20×20 one, so its shadows are larger. This can be an advantage when decorating a calm wall without ornament. But in a narrow hallway, the same volume will add too much relief and make cleaning difficult. The choice of cross-section depends not only on the dimensions of the walls, but also on how a person moves past them.
In a multifunctional room, it is better to subordinate the lines to the furniture: next to the headboard, under the TV, or behind the dining table. If the decorative pattern crosses the boundary of furniture placement, the composition may lose its meaning when the furniture is rearranged. Decide in advance whether the wall finish should stand on its own or serve as a background for a specific piece.
Calculation for a wall 3.2 m wide and 2.4 m high
Let's consider a straight wall 3200×2400 mm without openings. The project requires eight vertical BR-001 battens 20×20 mm from the bottom mark to the top. If each vertical must have a finished length of exactly 2400 mm, eight original planks 2400 mm long look mathematically sufficient. But in practice the ends may need trimming, and the actual floor and ceiling often do not form a perfect rectangle.
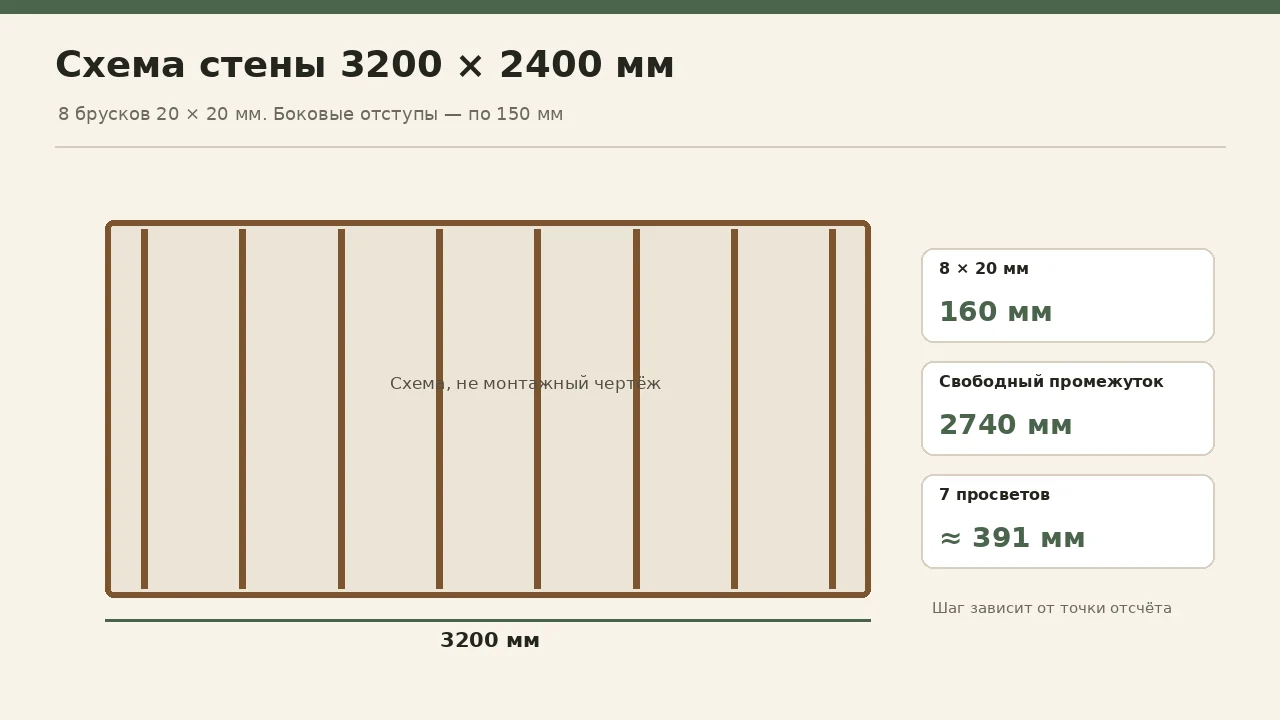
To get a manageable scheme, first choose offsets of 150 mm on both sides. Inside, 2900 mm remains horizontally. Eight profiles of 20 mm occupy 160 mm, leaving a free gap of 2740 mm. Between eight profiles there are seven gaps, so the theoretical clearance between adjacent battens is about 391 мм. The value is convenient for understanding the pattern, but before marking it must be coordinated with the actual edge offsets and with the placement of the furniture.
If the outer battens should not start 150 mm from the wall, but their axes should fall on these marks, the calculation changes. These two schemes must not be confused. On the working drawing it is useful to label not an abstract "pitch 390" but the distance between axes or between edges. The difference equals the width of the profile and becomes noticeable when there are many details in the composition.
At a room height of exactly 2400 mm, it is wiser to double-check each vertical separately and consider small, deliberate gaps than to try to force a strip between two surfaces. If the calculation requires additional trimming, the number of source blanks is determined from the cutting map rather than from the total length of "eight times 2.4".
Why linear meters do not equal the number of strips you need
A linear meter shows the sum of lengths, but says nothing about how many pieces can be obtained from a source blank. Imagine you need four segments of 600 mm each. The arithmetic gives exactly 2400 mm — one whole strip. However, the saw removes some material with every cut, and the ends may require squaring. Therefore, one 2400 mm strip does not always yield four finished 600 mm segments.
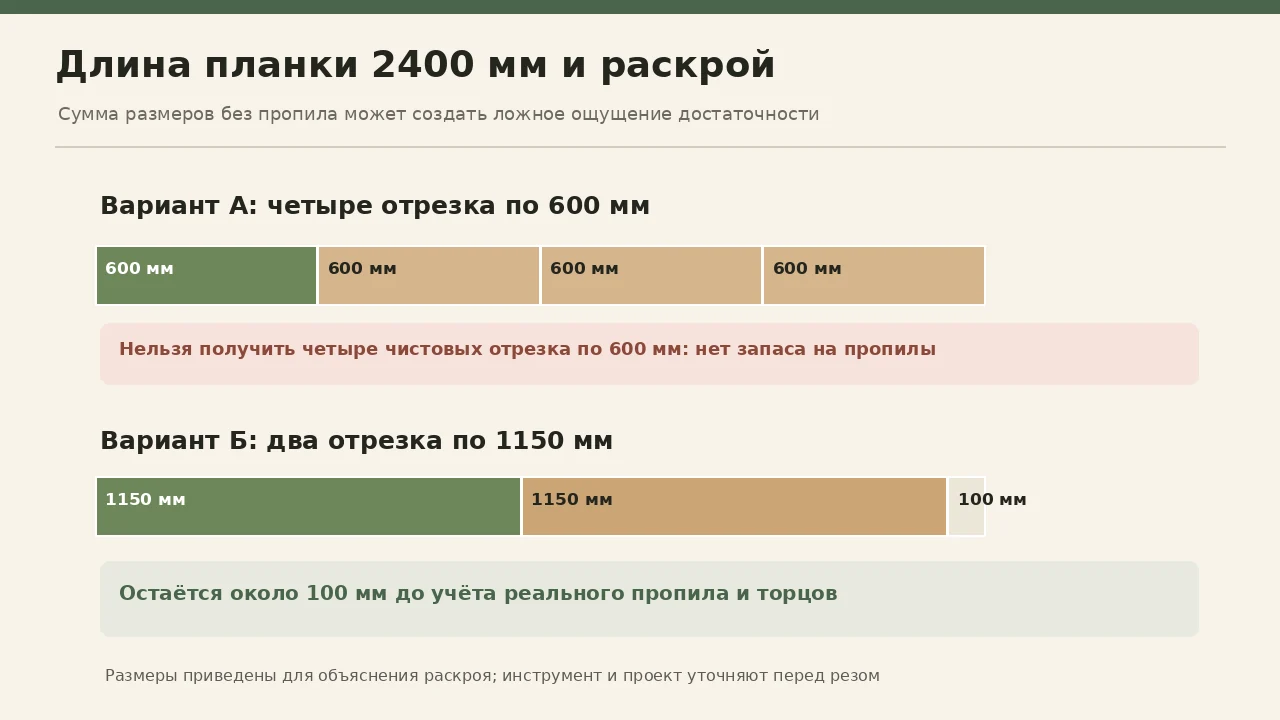
Another example: two pieces of 1150 mm are required. The sum is 2300 mm. If we assume a nominal 3 mm kerf for one separating cut and allow a small amount for squaring the ends, such segments can potentially be obtained from one 2400 mm strip. But the final cutting map should be made for the actual tool and end quality. The 3 mm value here is only an example, not a technological standard for any equipment.
If the pieces are of different lengths, cutting becomes a distribution task. One project may require 1700, 700, 1200, 1100 and 800 mm. The pair 1700+700 already gives 2400 mm with no allowance for the cut, so it cannot automatically be placed in one strip. However, 1200+1100 leaves 100 mm before accounting for the kerf, and 1700+600 may also turn out to be a convenient combination if a 600 mm piece is included in the project.
It is better not to try to "use every last millimeter" at the expense of the visible wood grain. Sometimes a theoretically economical cutting plan requires joining two pieces with different grain directions or creating a joint on the most prominent wall. In this case, one more strip may be a justified purchase. Savings are evaluated not only by the leftover but also by the quality of the final composition.
40×40 mm timber: when a larger cross-section works better
A large square profile creates a noticeable three-dimensional division of space. It is more often considered where the design should read from several meters away: on a high wall, a wide partition, or in combination with large furniture. At the same time, one 40×40 mm timber occupies twice the wall width of 20×20 mm, and its projection from the base also significantly affects the perceived depth.
In a small room with a narrow passage, such relief may be excessive. It is useful to make a temporary mock-up from cardboard or another safe material at the actual width and depth. Place it against the future installation location and look from the side, especially near the doorway. On a flat drawing, 40 mm is almost unnoticeable, but in real life it can affect door opening, access to a socket, and cleaning.
If a timber block is used as part of furniture, the decorative role should be separated from the structural one. A 40×40 profile does not automatically become an acceptable support for a heavy countertop. Stability depends on the connection scheme, fastening elements, grain direction, free length of the part, and the actual load. Such tasks require technical justification and a suitable design.
Large parts more often require pre-planned terminations. A vertical timber block that abruptly ends in the middle of a wall may look accidental. A coordinated termination works well: at the skirting line, at a horizontal band, or along the geometry of a doorway. First determine these lines, and then select the cut length.
Wooden slat RK-001 instead of a timber block: when it is the more suitable choice
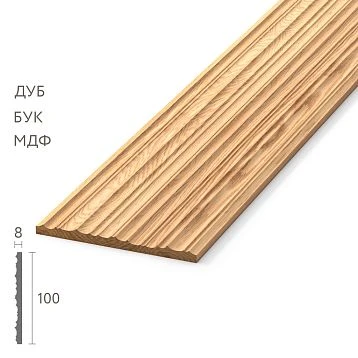
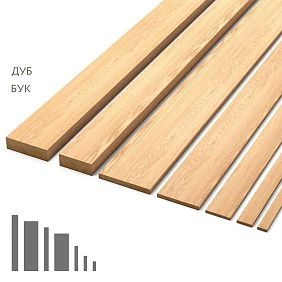
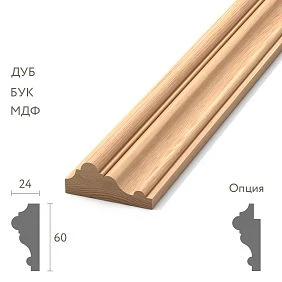
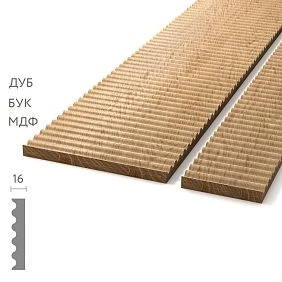
In interiors, slats and timber blocks are sometimes used to describe similar elongated parts, but for ordering it is important to distinguish their geometry. The square BR-001 forms visible side faces of equal width. A slat can be wide and comparatively thin: it works as an extended flat line rather than a three-dimensional square element. On a wall, the two solutions produce a different shadow, visual rhythm, and method of adjoining.
The STAVROS range includes Wooden Rail RK-001. Its product page presents various sizes and finishes in beech or oak. It should not be mechanically substituted for BR-001 simply because both items belong to wooden mouldings. For a frame where equal line thickness is required in two directions, a square timber block may be more logical. For a thin overlay strip on a plane with its wide side facing the viewer, a slat is the choice.
Consider a headboard 1800 mm wide. If the goal is several thin horizontal strips that merely suggest a division of the wall, a wide flat slat may prove unobtrusive. If protruding vertical posts with a noticeable shadow are desired, it is more appropriate to first evaluate a timber block. The point is not which product is "better in general," but the required volume and viewing distance.
Before purchasing, it is useful to make a small comparison on site. Draw the profile at full scale on heavy paper, cut out a mock-up, and hold it against the wall. Pay attention to the shadow near the window and the relationship with the casings. This simple technique demonstrates the difference more convincingly than a list of attractive names in a catalog.
External corner piece UG-001: why it is needed alongside a timber block
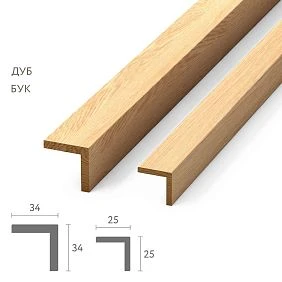
A timber block forms a straight line well, but it does not always neatly finish an external corner. On a protruding end of a furniture panel or wall box, a product of a different shape may be needed. An external wooden corner piece is intended specifically to cover two converging surfaces. If one tries to replace it with an ordinary square timber block, an excessive protrusion or an awkward joint will result.
For this task, the catalog provides wooden outer corner piece UG-001. It must be selected according to the size of the specific corner, the thickness of the finish and the expected length of the section. Beech and oak are also chosen here deliberately. Matching material does not guarantee matching texture or shade, so adjacent elements should preferably be coordinated using samples.
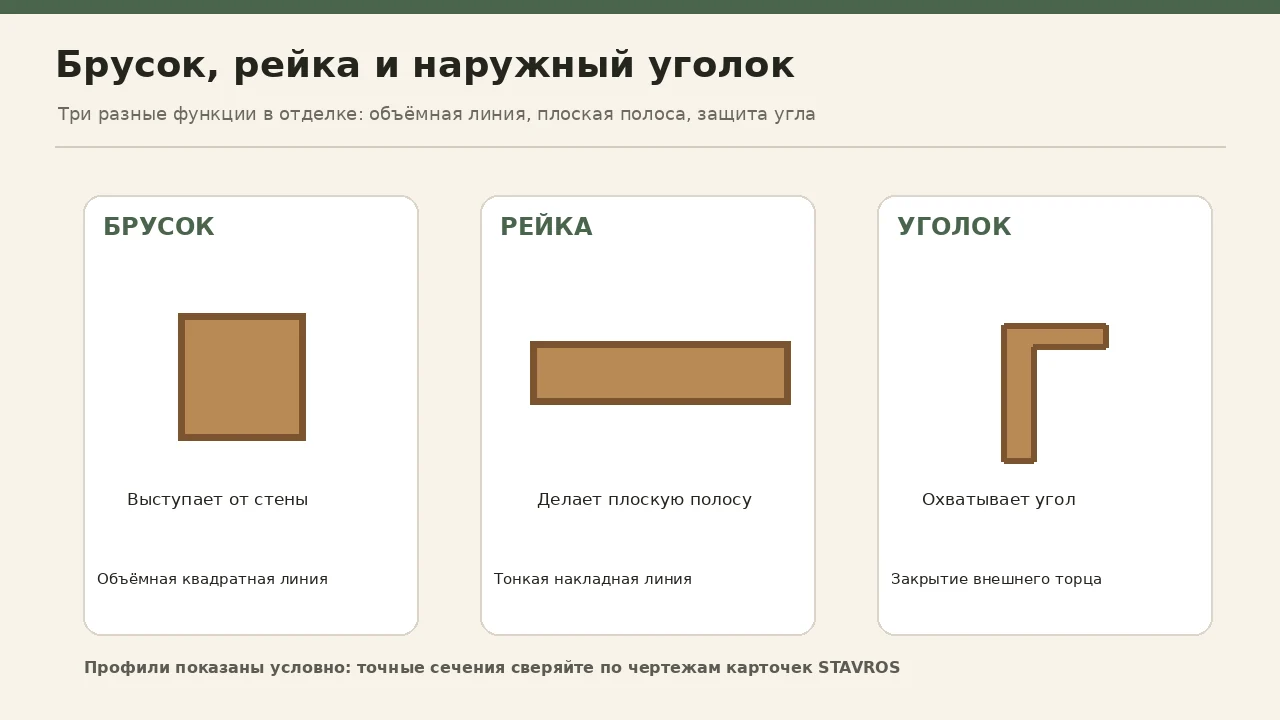
Imagine a decorative panel whose visible outer corner runs from the floor almost to the ceiling. If two blocks are simply placed against each other in this area, an awkward joint may form between them, which will have to be sanded and masked separately. A dedicated corner profile can provide a more continuous line — if the geometry of the panel and the dimensions of the corner piece are compatible. This must be checked against the drawing and actual measurements, not just the name “corner piece”.
The opposite situation — a flat frame on the wall that has no protruding outer corner. An outer profile may be superfluous here. It should not be added to the order automatically for every rectangle made of block. First identify the actual locations of outer junctions. If there are none, leave the corresponding specification line empty.
Moulding MLD-004 and block BR-001: different ways to shape a contour
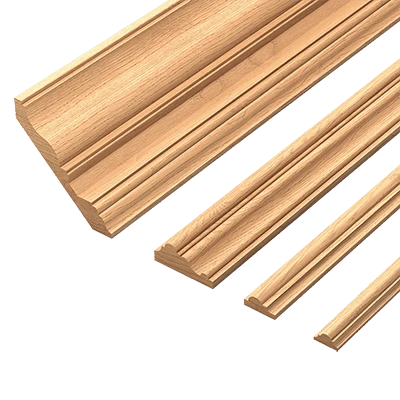
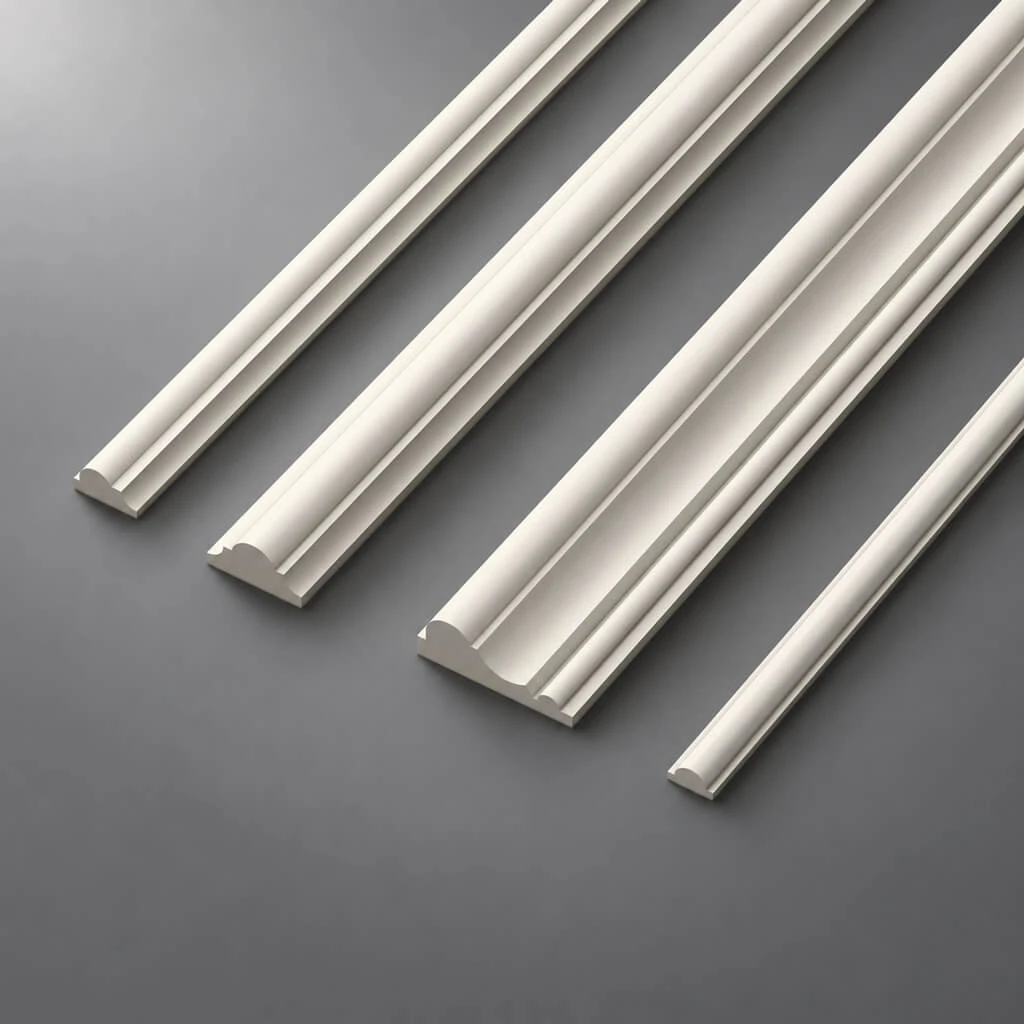
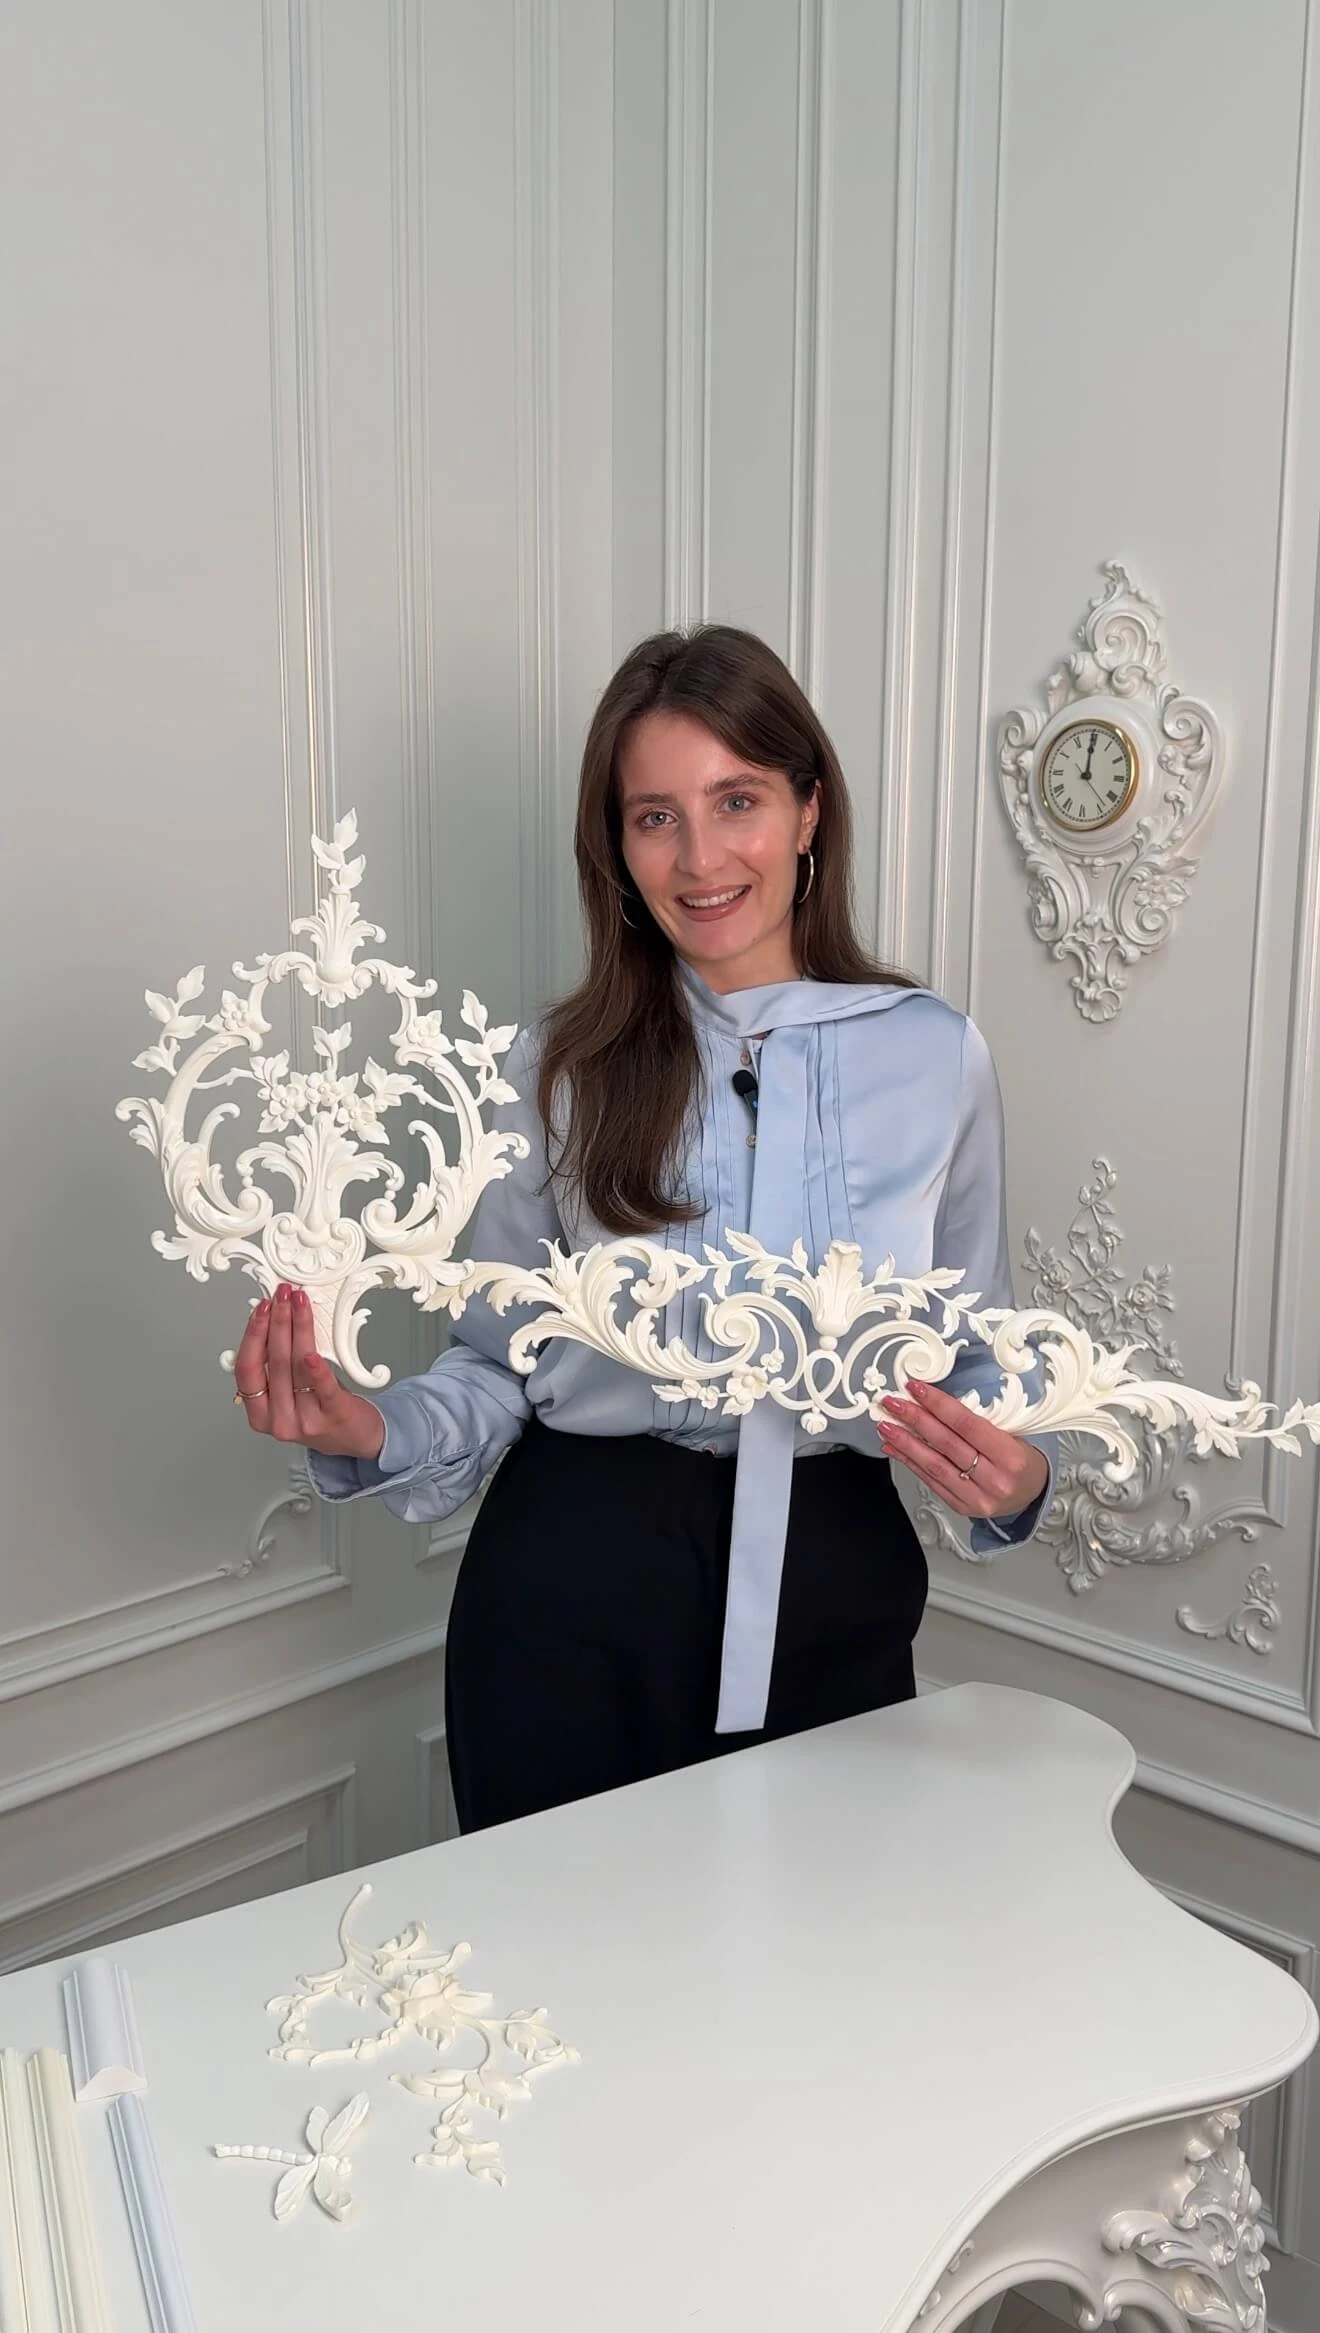
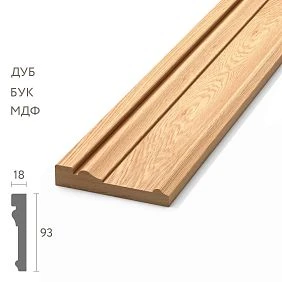
Moulding introduces not only a line into the interior but also a cross-sectional shape. The relief can cast a more complex shadow, and a smooth transition can soften the rigid geometry of the frame. A block, by contrast, emphasises right angles. Therefore, in a calm modern design, BR-001 is sufficient, while in a room with profiled architraves a decorative moulding may be required.
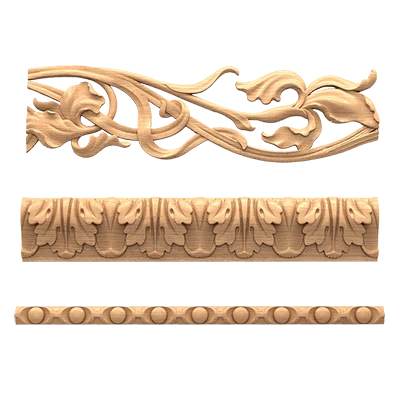
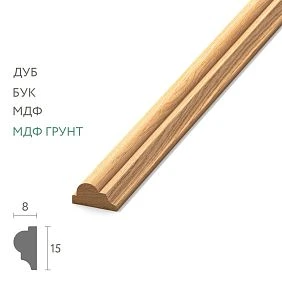
For example, Wooden Moulding MLD-004 is offered in several materials, including versions in oak and beech. This is fundamental: if the task is formulated as finishing in solid wood, choose the wooden option, not MDF merely because of a similar appearance in the photo. The product page for one model may combine several materials, and the name alone does not fix the selected version.
When combining a straight bar with a profiled piece, you should determine the hierarchy. If the molding runs along the perimeter of a decorative panel and thin straight lines are provided inside, the prominence of the relief must be coordinated with their thickness. If both elements are equally active, the composition can become overloaded. In practice, it is better to decide which profile is the main one and which serves as a calm complement.
Do not call the molding a "second bar" in the specification. These are different products with different cross-sections and installation technology. In the drawing, each item needs its own article number, material, length, and quantity. Then the components will not get mixed up and will be clear when reordering.
How to combine bars, slats, moldings, and other profiles in one room
It is more sensible to build the selection of trim around a completed task: decorating a wall, closing an end, finishing the transition to the floor, or emphasizing a doorway. If you open the general catalog and pick items you like without a plan, they may turn out to be incompatible in proportions. Even the same wood will not fix geometry that is too different.
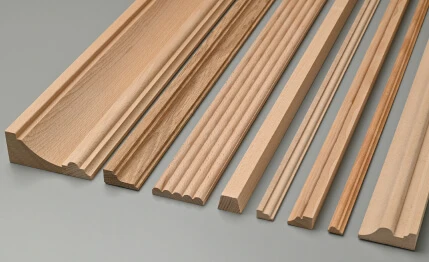
In the section wood trim items profiles of various types are presented. First, choose the main element. For a project with vertical square lines, that will be BR-001. Next, determine whether flatter lines RK-001 are needed, whether there really are open external corners for UG-001, and whether a decorative contour MLD-004 is required. This sequence keeps cost and installation complexity within reasonable limits.
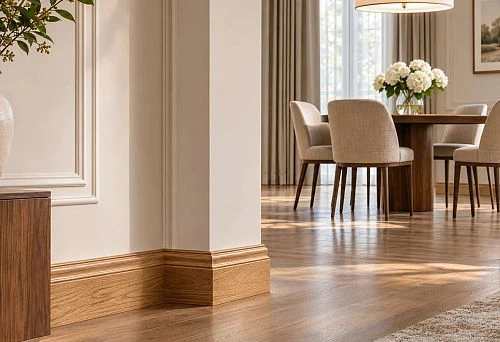
Adjacent elements should not merely be next to each other in the catalog but should perform a clear function. For example, a wooden skirting board can finish the lower junction of the wall to the floor, but its height must be coordinated with the end of the vertical bars. wooden baseboard PLT-003 should be considered as a separate product group rather than substituted for a bar. For the upper transition, sometimes it is worth evaluating Wooden Cornice KZ-001, if it matches the concept of the room.
Most important is not the number of profile types but the readability of the result. In a small room, one group of correctly selected verticals often works better than the simultaneous use of bars, several moldings, large cornices, and additional overlays. Rejecting an unnecessary item is just as much a part of competent selection as buying the right one.
Checking dimensions on site: which measurements are actually needed
A tape measure is useful, but a single overall wall width figure is not enough. For vertical components, measure the height at several points: at the left edge of the composition, in the middle, and on the right. Compare the values. If the ceiling or floor has a slight slope, identical finished lengths can produce different gaps. If installation is planned onto an existing skirting board, measure exactly the section between the lower and upper limits, not the full room height.
For horizontal components, check the width between actual abutments. On a wall with a door, the lower and upper widths of the visible section may differ due to the geometry of the opening or the finish. Do not correct this on paper with the assumption that "everything is level." It is better to specify the minimum dimension, the allowable gap, and the places where the joint will be hidden by another profile.
Pay special attention to sockets, switches, grilles, and wiring outlets. On the drawing, indicate their actual dimensions including frames, not just center points. A batten positioned 20 mm from the center of a socket may well run into its outer frame. Moving one line at the design stage is easier than redoing a finished wall.
Create a simple schedule: installation location, width or height of the section, cross-section, quantity, end type, and joining method. The actual order is generated from this table. If a craftsman performs the installation, give him the same schedule and agree on who is responsible for the final cutting. Otherwise, the customer may calculate parts based on the design length, while the craftsman adds a margin for his own technique.
Wooden batten in furniture components: where it helps and where it hinders
In furniture making, a batten can be used for a decorative frame, a closed structural surround, a neat edge, or visual division of a facade. But when it comes to a table, chair, bed, or other load-bearing structure, the requirements change. The article number and profile size do not replace a structural calculation. This is especially true for free spans, legs, fastenings, and joints that experience repeated loads.
Smaller dimensions matter for decorating a facade. For example, if two vertical strips of 20×20 mm are made on a 500 mm wide cabinet door, visually they will each occupy 20 mm. But the protrusion of the component may conflict with the handle, the adjacent door, or the opening zone. Check not only the front view but also the clearances in the open position.
Furniture surfaces are often made from materials that react differently to moisture. The method of attaching solid wood to another base should be chosen so as not to impede the permissible movement of the wood and not to damage the facade finish. On long sections, a rigid joint without allowance for expansion can lead to stresses. The finished fastening technique must be coordinated with the design of the specific furniture.
When the task is delicate framing, a 40×40 profile can be too bulky. When a deep visual upright is needed next to a heavy chest-of-drawers group, a small 20×20 section can look lost. The right choice is not found in a list of universal advantages, but in the relationship to the dimensions of the object, the viewing distance and the purpose of the part.
Timber frames: how to account for joints and wood grain
A rectangular frame seems like an easy task for four segments. But it is the corners that determine whether it will look neat. When joined at a right angle, one end face is visible unless a way to conceal it is provided. A mitre joint gives a different appearance of the joint, but requires precise geometry and high-quality finishing of both parts.
Let's take a frame with external dimensions of 800×600 mm made from 20×20 mm timber. You cannot simply write "two at 800 and two at 600" on the cutting list without specifying how the corner will be constructed. With an overlap joint and with a 45-degree mitre, the workpiece dimensions and the measuring line differ. On the drawing, state whether the number refers to the outer edge, the inner opening or the length of the straight section.
If there are several decorative frames, start marking out from the most noticeable one. In an interior with door casings, the geometric centre of the wall does not always coincide with the visual one. A frame positioned symmetrically relative to the whole wall may turn out to be asymmetrical relative to the furniture. One test layout with masking tape is enough to see such a defect before cutting.
With a transparent finish, take the grain direction into account. Even perfectly cut segments can be perceived differently if the wood pattern changes sharply on adjacent faces. It is useful to lay the parts out on the floor in the future rectangle and mark in pencil the pairs that look good together. This is a simple way to improve quality without buying additional decorative elements.
Mounting timber strips on the wall: substrate, fasteners and sequence
The mounting method depends on the substrate and the purpose. On a solid, prepared wall, decorative elements can be fixed with a suitable adhesive system; in other cases, mechanical fasteners or a combined solution are used. One method cannot be chosen for all situations. Old plaster, a painted surface, plasterboard and a solid wooden substrate differ in strength and bonding conditions.
First check whether the existing coating is firmly attached. If the paint is peeling, gluing to it does not make the substrate reliable. Separately assess the flatness of the wall: a long wooden strip will highlight a hollow if it is forced against the wall along its entire length. In some cases it is wiser to correct the plane than to try to compensate for the defect with the thickness of the adhesive layer.
Then transfer the axes and boundaries of the profiles onto the wall. Check several outer lines and the distances between them with a level. Do not mark out each subsequent upright solely from the previous one: a small error will accumulate. It is better to verify coordinates from one common base edge or reference axis. This technique is especially useful for a long repeating row.
When fastening, follow the manufacturer's instructions for the adhesive, primer and chosen fastener. For mechanical joints, the location of concealed utilities, the permissible drilling depth and the substrate construction are important. After installation, remove excess compound within the period specified by the manufacturer; dried adhesive can sometimes be difficult to remove from visible wood without damaging the future finish.
Sawing and sanding: why end-grain quality is more noticeable than the quality of a long edge
The factory face surface of a long block may be prepared neatly, while the end after a poor saw cut is not. In a frame composition there are several ends, and all of them are next to the joint locations. If the end is ragged, the geometry of the corner is disrupted even with a perfectly straight long edge. Therefore, prepare your tool before starting the cutting, not after the first chip appears.
It is better to saw a test piece from stock or an unnecessary section, then check the size and the quality of the line. Measure the resulting cut piece after cutting; a mark on the workpiece alone does not guarantee the size. For repeated short pieces, a length stop is useful, but it must be installed and checked, otherwise the whole batch will be equally wrong.
Sanding ends requires care. Too much rounding changes the joint angle, especially on a thin 20×20 mm block. If the end is to join in a tight butt joint, you must not thoughtlessly remove material from the edge. First check the geometry, then remove only burrs while maintaining the specified size.
When painting, an open end may absorb the compound more intensively than the longitudinal surface. A test coating allows you to determine whether separate preparation is needed. If the joint will be completely hidden, the decorative task changes, but strength and accuracy of fit still remain important. An experienced approach is to classify ends in advance as visible, connecting and hidden, rather than blindly treating them all the same way.
Storage and acclimatization of wood after delivery to Irkutsk
Long wooden products should not be installed immediately after being in sharply different transport conditions. After delivery, they are usually kept in the room where installation is planned, under normal operating heating and ventilation conditions. The specific duration depends on the condition of the goods and the manufacturer's instructions; a universal promise that "about twenty-four hours is enough" would be too crude.
Blocks should be stacked on a level base with suitable supports, avoiding sagging of long sections. Do not place the package so that one side is heated by a radiator while the other touches a cold exterior wall. A sharp difference in conditions can lead to a change in shape and complicate subsequent installation. A dry room does not mean that products can be stored directly next to a strong heat source.
After unpacking, inspect all the planks. Check the edges, straightness and dimensional conformity. If there is damage, record it before starting to saw and paint, while the condition on receipt can still be clearly distinguished from traces of further work. Set aside different sections and species into separate labeled groups — this will reduce the risk of using the wrong piece in the middle of installation.
Handle long, small-section parts with particular care. It is more convenient to carry them in a way that avoids strong bending and impacts of the ends against door frames. To carry several elements, you can use a flat supporting pad, but do not strap the package so tightly that it leaves dents. The outwardly simple wooden strip requires careful handling precisely because of its length.
How to calculate a set for several rooms without unnecessary reorders
One reasonable way to reduce the risk of a shortage is to draw up a consolidated list for all rooms, but not to combine different products into one line. A bedroom may need thin 20×20 oak bars, a hallway may need the same cross-section in beech, and a decorative partition may need 40×40. In total, this is not one type of material, even if all positions are called BR-001.
Suppose a bedroom needs six verticals of 2100 mm, and an office needs four horizontals of 1600 mm and four of 700 mm. For the bedroom, six 2400 mm blanks yield one whole element each with a remainder of about 300 mm before accounting for the saw kerf and trimming. For the office, each pair of 1600+700 has a total length of 2300 mm; if there is an acceptable allowance for the cut, it can be considered as a cutting option for one strip. This means the preliminary requirement for both rooms is ten strips of the corresponding cross-section, but the final quantity depends on defects, exact geometry, and the joint pattern.
This scheme is more useful than a general calculation of “divide the linear meters by 2.4.” If you have two rooms with different wood species, their offcuts cannot be combined without checking the appearance. If the cross-section matches but the finish must be different, it is better to keep a separate list at least until the finishing is complete. Otherwise, at the most critical moment, you may get a part that is the right size but the wrong texture.
Specify the allowance in the order consciously. For simple repetitive cutting, it can be small; for complex angles and long precise elements, a larger reserve is needed. There is no universal percentage that is equally reasonable for four short offcuts and dozens of strips with angled joints. The allowance should follow from the cutting plan and the number of complex joints.
Price of a wooden bar: what to compare in a consolidated estimate
The price of an individual strip is only part of the cost of the finished trim. To understand the budget, it is important to account separately for material, cutting, processing of visible ends, final coating, fasteners, packaging, delivery, and installation work. For a small order, transport costs can be a noticeable share of the budget; in a large project, material consumption and the labor intensity of joints often come to the fore.
The price of BR-001 is affected by the cross-section, the selected wood species, and the finish. A 40×40 oak bar cannot be compared with a 20×20 beech one by the number of pieces alone: they have different wood consumption and different purposes. First bring the options to the same functional goal — for example, finishing a specific wall — and only then compare the total according to the specification.
A useful form for a preliminary estimate consists of several lines: BR-001 with the exact size and material, additional profiles, consumables, processing, delivery. If some parts are needed under enamel and some under a clear coating, separate the finishing costs. This will prevent a situation where only one type of varnish is included in the order, and after unpacking it turns out that different surfaces require different compositions.
Do not rely on a price seen in an old article, even if the product code has not changed. Current terms, availability of the finish and delivery cost are checked immediately before placing an order. For a buyer in Irkutsk it is especially important to compare not "the price of one strip against the price of another strip", but the final price of a correctly selected set including delivery and a sufficient quantity of material.
Delivery of long-length mouldings to Irkutsk: packaging and acceptance
A length of 2400 mm is convenient during installation, but in transport it creates a separate risk: a long package may take an impact on its end or bend, even if its outer wrapping appears almost intact. The official STAVROS page lists delivery options across Russia and remote order placement. However, the specific method of transport, cost and lead times to Irkutsk or another settlement in the region should be agreed for the actual shipment.
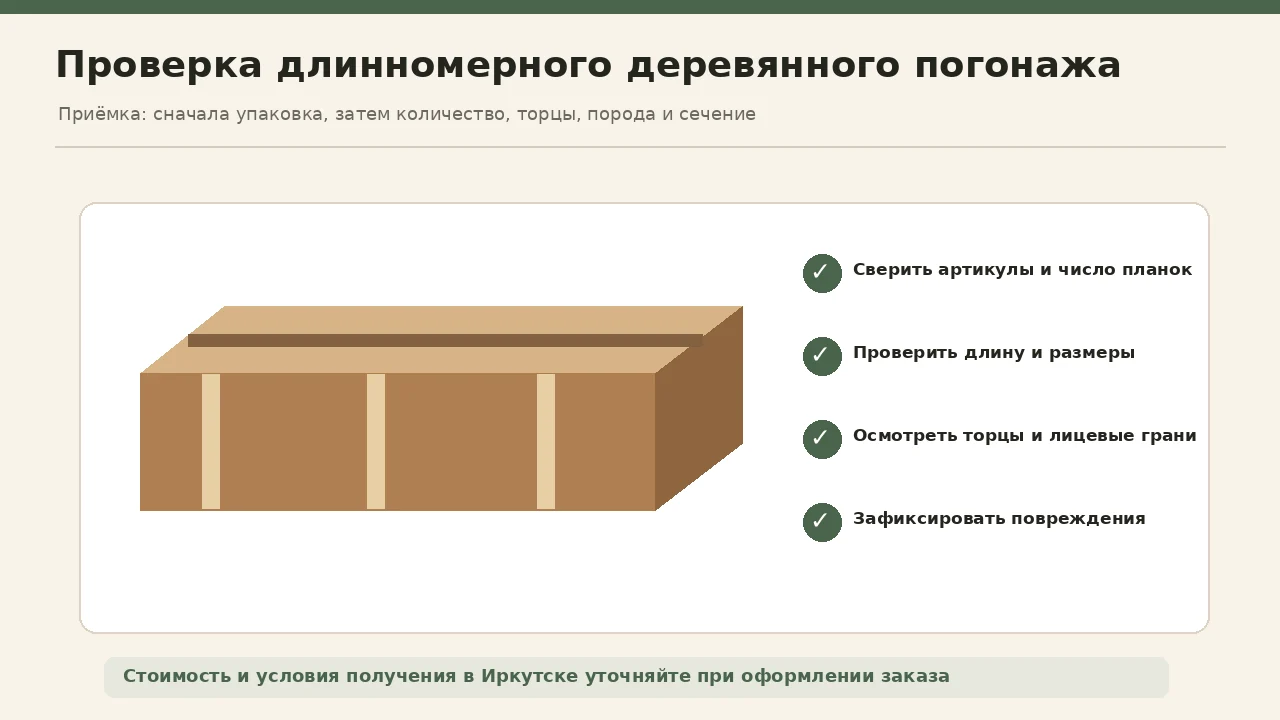
Before paying, clarify how long items will be packed and whether different profiles will be protected from rubbing against each other. Square-edged timber and decorative moulding with a protruding relief require careful handling. If they lie in the same bundle without separation, scuffing is possible under vibration. It is advisable to note in the order which surfaces will remain visible after installation.
On receipt, inspect the shipment before opening it and record any damage to the packaging. Then check the quantity, length, cross-section and condition of the main faces; recount the product codes against the delivery note. If oak and beech items look similar under certain lighting, rely not only on colour but also on the set labelling. Keep photographs of damage and discrepancies together with the order documents and notify the seller or carrier in the prescribed manner.
Do not postpone the check until installation day. If the fitter discovers a shortage after work has begun, the schedule will have to be changed and possibly the composition layout as well. Timely acceptance allows the issue to be resolved while the delivery circumstances and the condition of the packaging can still be reliably confirmed.
Mistakes that cause the order to be redone
The first mistake is choosing material by the single word "wooden" without specifying the species. If the project is designed for oak but a different option is accidentally selected in the cart, subsequent tinting will not necessarily ensure the same grain pattern. The correction starts with the exact line in the specification where the material is stated alongside the product code and size.
The second mistake is counting only the total number of linear metres. This overlooks saw cuts, the limited length of the original strip and the impossibility of obtaining certain sets of parts from a single blank. A short cutting plan solves the problem more reliably than mechanically adding a few percent to the entire volume.
The third mistake is designing equal gaps without allowing for the width of the batten. Eight lines on a wall 3.2 m wide do not occupy zero width. If only seven gaps are distributed and the profiles themselves are not subtracted, the outer margins will end up smaller than intended. The visible width of the profiles must always be counted separately from the gaps.
The fourth mistake is choosing adjacent trim from a photo without checking its purpose. A slat does not always replace a batten, a corner piece is not needed on a flat wall, and a moulding is not a universal way to close any gap. First determine the assembly point, then the model.
The fifth mistake is starting installation before acceptance and acclimatization of the wood in the room. Unsuitable storage conditions, unmarked damage and hasty finishing increase the risk of defects. The sixth is leaving the final choice of fastening to the last minutes without analyzing the wall. The substrate and load must be clear in advance.
How to order solid wood mouldings without confusion in the line items
When the drawing and the bill of materials are ready, all that remains is to turn them into a clear order. For each line, specify the product, exact size, wood species, quantity and intended finish. If some elements were replaced while working on the project, do not leave the old lines in the list "just in case". It is better to make one current revision of the specification and pass exactly that to the seller.
A guide to the range can be moulded products made of solid oak and beech. The same order may contain BR-001 and genuinely necessary accompanying profiles. It is better to state their purpose directly: batten for verticals, corner piece for the outer end, slat for a flat line. This allows you to check the set not by overall impression, but by the function of each product.
Payment terms and available delivery methods can be found on the page payment and delivery STAVROS. If the carrier or delivery method has not yet been chosen, discuss the length limits of the cargo unit in advance. Long-length material cannot be assessed by the same rules as a small box of decorative overlays.
Before confirming the order, a final check is useful: is the species specified consistently in the parts that will end up next to each other; are there definitely enough solid long planks; are external corners accounted for; has MDF been ordered instead of solid wood; is delivery agreed to the correct address in Irkutsk or the region. These checks take less time than re-purchasing after installation.
Control sheet: how to hand over an order without ambiguous designations
Before sending the request, it is useful to prepare a table that the buyer, manager and craftsman will understand in the same way. It shows not only how many profiles are required, but also why each of them is needed. Below is a training example; the quantity figures do not relate to a finished set for a specific room and must be replaced based on measurement results.
| Place of use | Product | Material and cross-section | Quantity in the example | What to recheck |
|---|---|---|---|---|
| Vertical wall pattern | BR-001 | Oak, 20×20×2400 mm | 8 slats | Finished height and end offsets |
| Horizontal strip near furniture | RK-001 | Beech, made to drawing | By cutting | Width and thickness of the specific slat |
| Protruding corner of the panel | UG-001 | Oak, selected size | Along the edge length | Compatibility with panel thickness |
| Decorative frame | MLD-004 | Beech, wooden finish | According to the frame diagram | Cut angles and selected coating |
This table intentionally shows different materials: it demonstrates how quickly a possible contradiction becomes noticeable. If the customer wants a uniform natural oak shade throughout the room, the appearance of beech elements will require separate approval or replacement. If everything is painted with opaque enamel, the combination may be acceptable, but only after checking surface preparation and approving the visual result.
A good schedule doesn't have to be complicated. It's enough to mark the sections on the drawing with letter codes and put the same letters in the list rows. Then, when one wall changes, you won't have to recalculate the entire order blindly: the specific section changes, its cutting map and the quantity of the corresponding material are updated.
For a remote purchase in Irkutsk, this is also a way to save on communication errors. In a phone conversation, you can confuse a "slat" and a "block," whereas a written line with the SKU, material, and exact size remains verifiable. Save the final version together with the order confirmation so you can later compare it with the delivered goods.
Frequently asked questions from buyers of wooden blocks in Irkutsk
Can I order BR-001 of the same SKU in two cross-sections at once?
Yes, the product page shows versions 20×20 and 40×40 mm with a length of 2400 mm. But for ordering and calculation, these are different variants. Their quantities must be specified separately, even if the material is the same.
Do I have to choose oak if the doors in the room are oak?
Not necessarily. The decision depends on whether the visible wood grain needs to match or an opaque finish is planned. In addition, oak products from different batches and with different finishes can differ noticeably. It's best to compare samples.
Can I install two blocks instead of an outer corner?
Sometimes this is geometrically possible, but the appearance and dimensions of the joint will be different. If you need to cover an open outer corner, first check the corresponding corner profile. Two ordinary parts cannot be considered a full replacement without a drawing.
How can I tell that solid wood, not MDF, is selected in the cart?
Check the material field for the specific product variant. Some moulding product pages combine several options. Do not rely solely on the model name, the photo, or the color of the finished product.
Do I need to account for saw kerf if all the parts are short?
Yes. Especially when cutting, where the sum of the finished lengths is almost equal to 2400 mm. The cut removes some wood, and the ends may need trimming. Without this, one strip may end up shorter than the expected set.
Can the blocks be glued to an already painted wall?
This depends on the strength of the old paint, the type of substrate, the chosen adhesive, and the design. If the coating is poorly adhered, the adhesive will not make it stronger. Follow the instructions for the fastening system and prepare the substrate if necessary.
What should I do if the strips differ in shade after unpacking?
Natural wood is not uniform. Before cutting, lay the items out next to each other and check whether they can be distributed harmoniously across the areas. If there is a clear mismatch with the ordered variant, record the details and contact the seller before installation.
Can I have my order delivered not in Irkutsk itself, but to another town in the region?
Delivery options should be confirmed at checkout for the specific address and cargo size. Do not assume that the conditions for central Irkutsk apply to any locality in the region without separate confirmation.
Read also: materials that will help you refine your choice
If a broader overview of wood species and application methods is needed, this article is useful how to choose wooden blocks and estimate their cost. It addresses the general task of material selection, whereas this material focuses on assembling an order of specific finishing trim for a customer in Irkutsk.
For relatively thin frame layout, a separate breakdown will be useful wooden block 20×20 for furniture and decor. When moving on to larger parts, it makes sense to read comparison of 20×20 and 40×40 blocks for finishing and assembly. These publications help to explore individual technical issues in greater depth without mixing all scenarios into a single instruction.
STAVROS wooden block and finishing trim: choosing with a real project in mind
For a practical order, three decisions matter: choose the exact cross-section of BR-001, determine the wood species, and prepare a cutting map based on the room dimensions. Then add only those accompanying profiles that solve a specific task — close off the outer edge, create a flat line, or shape a decorative contour. This saves time during selection, helps avoid unnecessary purchases, and makes the result predictable.
In Irkutsk, it is convenient to start an order with a bill of materials rather than an arbitrary number of strips. Before paying, check the current version in the STAVROS catalog, discuss delivery of long-length cargo, and save the specification until acceptance. When the dimensions, material, and purpose of each item are agreed upon, wooden trim becomes not a set of random parts but a clear part of the interior.