Article Contents:
- Not every moulding has to form a frame
- Three ways to finish a solid wood decorative moulding
- When a straight end looks finished
- Why the end grain should be included in the test finish
- The stopping point is chosen before the final finish
- What a profile return is
- Why a small return requires precise fitting
- A carved finial makes the end a separate accent
- A more compact end piece: N-436.1L and N-436.1R
- Left and right end pieces are ordered separately
- Compatibility starts with the profile and the part's role
- How to calculate the full line length with end caps
- Leave room for the thread, your hand, and the facade's movement
- A dry fit shows the axis and the transition of the relief
- Material and finish are coordinated for the entire set
- What sample is needed before ordering a batch
- What to record in the specification for an open line
- How to order molding with a matching end piece

On the drawing, a short decorative band looks like a finished line. On the finished cabinet, it has two ends: one is visible from the walkway side, the other ends up next to the handle. If the decision is postponed until installation, you have to choose between an open cut, reworking an already painted strip, and an end cap for which no space is left.
A decorative solid wood moulding requires a considered termination where it does not close into a frame or adjoin another part. A straight end, a profile return and a carved termination produce different silhouettes, occupy different amounts of space and are prepared for finishing in different ways. That is why they should be chosen together with the length of the line, not after cutting.
The furniture maker's task is to reconcile three things: what a person will see from a normal viewing point, how the parts will join, and whether the whole assembly will fit on the facade. Even a small profile end affects each of these.
Not every moulding has to form a frame
Wooden furniture mouldings can highlight a horizontal frieze, divide two zones of a facade, support the line of a countertop or form a short vertical accent. On a portal, the profile sometimes ends near the stile, while on a door it may end in the middle of an open field. These solutions have no obligatory continuation around the perimeter.
First, it is worth determining why the line is interrupted at this particular point. It may repeat the width of a drawer, mark the central part of a wardrobe or leave room for hardware. If the position of the end is hard to explain, a decorative termination alone will not fix the composition. It will only make an accidentally chosen point more conspicuous.
An open line has another characteristic: it is assessed from several sides. In a frontal sketch the end almost disappears, but at the entrance to the room it may become the first noticeable part of the decor. That is why the side view and the position of the furniture in the room are considered together with the facade.
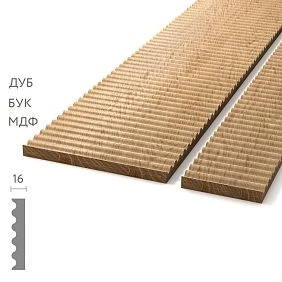
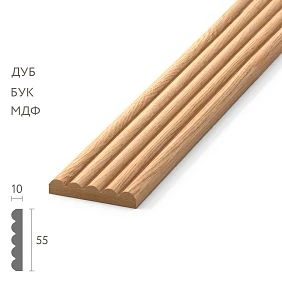
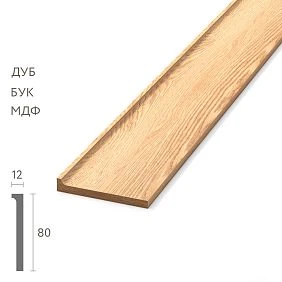
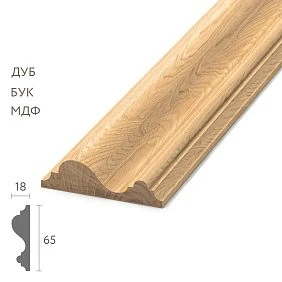
В catalogue of wooden mouldings, cornices and skirting boards the profile is chosen with the future termination in mind. This is especially important for a deep section: its open cut looks different from a thin line in a drawing.




Three ways to finish a decorative solid wood moulding
Each method has its own purpose. A straight end preserves calm geometry, a return removes the open section from the main view, and a finial makes the end an independent part of the ornament.
| Solution | What remains visible | When to consider | What to check in advance |
|---|---|---|---|
| Straight end | Finished cross-section | Minimalist decor, simple shape, close natural edge | Quality of the cut, edges and end-grain color |
| Profile return | Continuation of the relief onto the furniture surface | Three-dimensional line with a distinct open end | Joint geometry, profile protrusion, precision of the short part |
| Carved tip | Separate decorative finial | Ornamental composition with free space at the edges | Compatibility, left and right versions, full assembly size |
It is useful to compare options on the same front. If you change only the ending one at a time, it becomes clear where the line gains the desired expressiveness and where it starts to compete with the handle or the central overlay.
At the same time, the same method is not necessarily needed at every point of the furniture. One end of the band may abut the post, while the other remains open. The decision is made for each ending while preserving the overall logic of the product's design.
Our factory also produces:
When a straight end looks finished
A straight cut is appropriate for a simple profile that ends near a clear boundary or works as a short graphic accent. What matters here is not trying to make the end invisible, but the neatness of the visible surface itself. The cut must match the project in direction, and its edges must match the chosen character of the finish.
For example, on a small horizontal strip on a smooth door, a large carved termination may turn out to be more noticeable than the entire line. A prepared straight end preserves the original intent and does not require additional space. It looks especially convincing when both endings have the same treatment and the same indents from the field boundaries.
A bad impression is created not by exposed wood as such, but by traces of unfinished work: chips, an uneven cut, an untreated edge, accidental coating buildup. After installation, correcting them is less convenient, since a finished front is already nearby.
If a wooden furniture molding is supplied with a ready-made finish, trimming is possible, but the new cut requires an agreed finish restoration technology. It is better to test it on an offcut in advance: a color match on the face surface does not yet guarantee the same result on the end.
Get Consultation
Why the end must be included in the test stain
A cross-section reveals a different wood structure than a longitudinal surface. Therefore, stain, oil, or another coating may produce a different shade and intensity here. The result depends on the species, preparation, and specific composition; it would be incorrect to claim that any end will necessarily become darker.
A test on the face side alone does not answer the question of how the line will end. For a straight termination, you need a sample with the same cut, edge treatment and coating application sequence as planned for the product. It is examined from the front and the side, under the lighting in which the differences are actually noticeable.
Even under opaque enamel, tasks remain: removing raised grain, preparing the surface and achieving an even coating without excessive thickening at the edge. A thick layer of paint does not replace precise treatment of the cut.
On an oak profile with a clear finish, the end face sometimes becomes a natural part of the pattern. If the customer is happy with such an effect, it is recorded on the sample. If not, the preparation, coating system or the termination method itself is changed before the whole batch is launched, rather than trying to touch up the already installed strips in the same way.
The termination point is chosen before the final finishing
The marking must answer two different questions: where the wooden strip ends and where the edge of the entire composition is located. At a straight end, these points usually coincide. When a tip is added, the boundary of the decorative line shifts, and when a return is used, the geometry of the short return segment becomes important.
On the facade, first mark the available field, the axis of the line, the position of the handle and neighbouring elements. Then choose the termination method, calculate the parts and assemble the unit without glue. After checking, prepare the visible cuts and carry out the finishing according to the adopted technology. Individual painting operations may take place before or after assembly — this depends on the coating and the joint.
This sequence leaves room to change the length calmly. Shortening an already finished moulding is also possible, but it means additional processing and re-checking the colour on the new end face.
For a small series, it is useful to keep one approved drawing with the overall line dimension and the designation of each termination. Then the carpenter, finisher and assembler work from a single solution. The phrase “cut to fit on site” is acceptable only where the cut point itself and the method of restoring the surface are actually provided for by the design.
What a profile return is
A return is a short continuation of the moulding that turns its profile back towards the furniture surface. The main strip ends with an angled joint, and the return fragment covers the visible section. Seen from the side, the profile seems to go into the facade instead of breaking off with a cross cut.
Such a joint is useful on a deep waist band on a cabinet or on a decorative portal line whose end is clearly visible from the passage. It preserves the pattern of the profile itself and does not add a separate carved motif. Therefore, a return is also suitable when the ornament on the facade is already active enough.
In a simple joint with a 90° turn, the mating parts may have 45° cuts. But this is a condition of a specific geometry, not a universal setting for any moldings. The installation method and cross-section shape determine how the joint is constructed.
The length of the return segment is also not automatically equal to the width of the strip. It is determined by the actual projection of the installed profile, the base plane, and the joint lines. First a drawing or trial assembly is needed, then the dimension for cutting. Selecting a short fragment "roughly by thickness" often leaves a gap at the base.
Why a small return requires precise fitting
A short segment has a small joint area, and the protruding relief sections may be thin. Any mismatch shows immediately: one profile track continues evenly, the other forms a step. On a long strip the eye follows along the line, but at its end it lingers precisely on this transition.
For the return, the corresponding cross-section is used and the correct position of its face and mounting sides is preserved. Arbitrary rotation of the fragment is not always permissible: in an asymmetric profile, top and bottom differ. Even a part from the same strip must be applied in its design orientation, not assessed separately on the table.
The method of making and fixing the short element is chosen with suitable fixtures. Holding a small offcut by hand near the cutting tool for a single part is poor production practice. The joint design must allow a repeatable result to be achieved in a safe way.
Before finishing, check that the relief matches, the joint is tight, and the fit to the base is correct. If the return holds only after strong pressing, the cause of the skew must be identified. The adhesive layer must not compensate for incorrect geometry. For a series of facades, first perfect one joint, then transfer its dimensions to the others.
A carved tip makes the end a separate accent
The third method is to finish the profile with a ready-made carved part. It changes the character of the line: a directional ornament, an extension, or a scroll appears. Such a solution is especially noticeable on a smooth field where there is no other decor near the end.
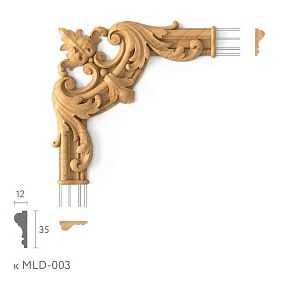
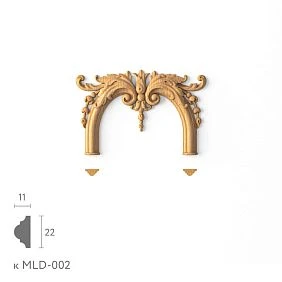
The STAVROS range includes left end cap N-363.1L и right N-363.1R, designated as components for MLD-002. This is an example of selecting an end piece within a specific system: first a compatible profile is chosen, then the required sides and the finish of the parts.
On a horizontal frieze, mirrored terminations can support the symmetry of a cabinet. On a short door rail, the same technique will occupy a significant part of the free field. That is why end caps are assessed together with the straight section: whether the line remains legible or only a small connecting fragment is visible between two large ends.
A finished thread does not eliminate the need for a trial fit. You need to check the fit, agree on the overall length and test the finish. An end cap is chosen for a complete pattern, not as a way to hide any unsuccessful cut: a damaged or improperly prepared end still requires correction.
A more compact termination: N-436.1L and N-436.1R
For the same MLD-002, the catalog presents N-436.1L and the matching N-436.1R. The product cards list dimensions of 85 × 34 × 16 mm. For comparison, the shown version N-363.1L is 106 × 43 × 17 mm. These data allow a preliminary assessment of scale, but do not replace a connection drawing.
A smaller size is useful where the decorative line is on a narrow drawer, next to a handle or within a limited field. However, compactness alone does not guarantee a suitable composition. The direction of the thread, the shape of the end point and the distance to the neighboring element are important.
Both options should be placed on the sketch at the same scale. Then check the chosen one at full size: a reduced image on screen hides the difference in ornament width. A paper outline helps estimate the space occupied, while the actual part also shows the projection above the facade.
The overall dimension of the finial cannot be added entirely to the length of the strip without understanding the fit. Part of the dimension may fall on the joint area. The actual addition to the overall line is determined after clarifying the geometry of the assembly.
Left and right ends are ordered separately
The designations L and R distinguish versions that form a mirror pair. Writing "two finials" is not enough: it easily results in two identical sides. For one horizontal line with two corresponding ends, the order must contain separate items — one left and one right element.
Rotating the left part by 180° does not turn it into the right one. It changes the direction of the ornament, and sometimes the position of the joint area. On a table such a substitution may seem acceptable, but on a facade one scroll will point up and the other down.
The side is verified against the image and drawing of the specific article. On the working sketch it is useful to immediately label the position of each part and the viewing direction. Then the designations do not change between marking from the front side and assembly from the back.
If the line is vertical, the possibility of rotating the set is checked separately. It is important how the thread reads after rotation and whether the intended joint is preserved. For a series of facades, the number of left and right ends is counted for each line type, especially when some profiles adjoin posts and require only one finial.
Compatibility starts with the profile and the role of the part
The label "for molding" does not mean compatibility with any wooden profile. The specific model and size version, the shape of the connection, the mounting plane and the transition of the relief are checked. Similar external dimensions do not yet guarantee that the parts will connect without a step.
В molding decor section there are elements with different purposes. For example, MLD-002U — corner element. Its role differs from that of the end cap, even when both parts belong to the same profile.
| Position on the sketch | Role | What should happen to the line |
|---|---|---|
| main moulding | straight section | Preserve direction and section pattern |
| Left or right end | completion | Stop the line at the specified point |
| Corner element | Corner finishing | Connect segments of different directions |
| Central connecting decor | Joint between segments | Connect the lines according to the accepted pattern |
Such a role map helps avoid substituting one task for another. A corner does not become an end piece just because it fits by width. If dimensions or designations raise doubts, use Drawings and catalogs and confirm the fit before ordering the set.
How to calculate the full length of a line with end caps
For the composition, the dimension between the outermost points of the finished decor matters. The length of the bar itself is only one of the components. With an overlay or overlapping joint, a simple sum of three full lengths overstates the total because the joint area is counted twice.
It is convenient to determine the open straight section between the agreed joint boundaries and the distance from each such boundary to the outer edge of the corresponding end cap. Then the overall dimension equals the sum of these three segments. Take all dimensions along the axis of the line.
Let us consider a conditional example not tied to the fit of specific product codes:
| Part of the calculation | Size |
|---|---|
| Visible straight section between the joint boundaries | 420 мм |
| From the left joint boundary to the outermost point of the decor | 55 мм |
| From the right joint boundary to the outermost point of the decor | 55 мм |
| Total length of the composition | 530 мм |
If the available field is 550 mm wide, centering will leave 10 mm on each side. Geometrically the line fits, but that is not yet enough to approve the design: a tight surrounding can visually compress the carving.
The size of the strip for cutting is calculated separately based on the joint design. It does not have to match the visible straight section. Both values are kept in the drawing so that the assembler does not mistake the size of the composition for the length of the blank.
Leave room for the carving, your hand, and the movement of the front
The end piece needs a free field around its outer contour. The distance is chosen based on the scale of the carving, the width of the adjacent frame, and the overall composition. There is no universal gap that works equally well on a large cabinet and a narrow drawer.
Pay especially close attention to the area near the handle. Matching contours on a flat sketch is only part of the task: fingers need room to grip, and a protruding scroll may end up under the palm. That is why the handle and the decor are fitted at the same time, taking into account their real height above the front.
Also check the fastener holes, the opening path, and the adjacent door. An end piece that does not interfere on a closed front may come closer to another part when moving. Such a collision is hard to see in a separate photo of the profile.
If the ends almost touch the frame or surround the handle with too dense an ornament, it is wiser to shorten the line, choose a smaller end piece, or go back to a straight end or a return. Trimming the edge of a finished carving for the sake of a few millimeters is only worth it in a specially agreed rework. Otherwise, the design for which the end piece was added at all changes.
A dry assembly shows the axis and the transition of the relief
Before the final finishing, the entire assembly is put together: the left end piece, the straight section, and the right end piece. Checking individual parts does not reveal accumulated offset and does not allow the overall width to be assessed. For a single open line, exactly one full trial composition is needed.
The basis is the agreed profile axis and its mounting plane. Relying only on the centers of the outer rectangles of the tips is risky: the ornament may protrude asymmetrically relative to the joint area. It is important that the lines of the section itself continue, rather than simply the geometric centers of the overall dimensions coinciding.
The parts are laid out on a base that reproduces the conditions of the facade. The position of the extreme points, the center of the composition, and the fit of the rear surfaces are checked. Then they look along the line: a small step in height is often more noticeable in raking light than when viewed directly.
If one part requires shimming or noticeable adjustment, this solution is recorded before the assembly is repeated. For a series, an individual correction for each pair cannot be left to the assembler's discretion. After checking, the parts are marked as belonging to the set so that the marking remains until installation and does not damage visible surfaces.
Material and finish are coordinated for the entire set
For the profile and the tips, matching wood species and preparation options are selected. Beech can be considered for opaque finishes, oak — when a pronounced grain is important, but this is not a rigid distribution: both species are used in different coating systems. The decision is confirmed on a sample.
Even the same species name does not guarantee a complete match of shade after tinting. A long strip and a carved element have different grain directions and surface areas. In the set, it is precisely their combination that is evaluated, and the requirements for the material are checked against product quality conditions.
The test coat includes the profile, the carving, and the visible end face if it remains in the selected assembly. The recesses of the ornament, the transition between parts, and the edges are checked. Excess coating can soften fine relief, while different preparation can emphasize the joint boundary.
The sequence of gluing and painting is chosen according to the technology of the specific joint. Surfaces for gluing are prepared in accordance with the adhesive requirements; the presence of coating on them is taken into account in advance. Mounting and finishing materials are selected for the base and operating conditions, not just for the color of the future facade.
What sample is needed before ordering a batch
A profile sample solves a limited task: it shows the cross-section, material, and surface reaction to the finish. In the section samples of trim products you can select a base for such a check by clarifying the availability of the required version. But a short fragment does not replace assembling a line with two ends.
To choose a straight end, it is enough to reproduce the cut itself and the coating. For a return, a joined test assembly is needed. For carved terminations — the selected left and right elements with a suitable profile. The more different parts involved in the termination, the less information an isolated painted sample of a single strip provides.
A 1:1 scale paper template is convenient for assessing the place on the facade. It helps compare the length, offsets, and handle position, but does not show the relief protrusion and the quality of fit. These issues are resolved by real assembly.
The approved sample is kept together with the material designation, coating composition, and drawing version. In a small batch, suitable parts of the test assembly can be counted in the total quantity if they will go into the product. This is reflected in the order in advance so as not to mistakenly buy a second full set.
What to record in the specification of an open line
The specification must link the parts to a specific facade. The entry “molding with decor” does not state the number of terminations, their sides, or the size of the finished composition. For a repeatable result, specify the profile model, the end-piece version, and a reference to the approved assembly.
Below is an example composition for four identical doors, each with one horizontal line with paired terminations. It is assumed that the dimensional version and the joint have already been checked.
| Detail | Per door | For four doors | Order note |
|---|---|---|---|
| MLD-002 | One segment according to the drawing | Four segments | Specify the length of each separately |
| N-363.1L | 1 pc. | 4 pcs. | left-hand version |
| N-363.1R | 1 pc. | 4 pcs. | right-hand version |
Four segments do not mean four product bars: the number of purchased lengths is determined by a separate cutting map. It takes into account the selected supply length and the actual processing losses.
The species, surface preparation, finish, overall composition size and drawing version are specified as common to the set. If a reserve is needed, it is calculated by parts and sides. An additional left end cap will not replace a damaged right one, so a general percentage without a breakdown is of little use here.
How to order a moulding with a suitable ending
Before buying a decorative solid wood moulding, determine how each open line will be finished. For a straight end, you will need a confirmed processing and painting result. For a return, a verified geometry of the short segment. For a carved ending, compatible parts on the required side and enough space on the facade.
Attach a sketch to the request showing the overall composition size, the selected item codes and the material requirements. If the line ends near a handle, frame or post, show their position: a photo of a single moulding does not explain the task in full. It is better to clarify an unclear junction using the drawing before purchase.
At STAVROS, the profile and decorative endings can be selected within a single project, checking compatibility against the cards of the specific products. The availability of all items, the selected finish and payment and delivery terms are confirmed for the actual order composition. The availability of the main moulding alone does not confirm the availability of both end caps.
The starting point remains the finished line on the furniture: with defined edges, a proven fit, and a coordinated finish. Once this assembly is approved, the choice of trim and components becomes a concrete specification by which the desired result can be manufactured and reproduced.