


Article Contents:
- What is a decorative false beam and why is it needed
- Real beam vs. decorative: function and form
- Why a ceiling with beams looks more expensive
- Complete shopping list: what you need for a ceiling with false beams
- Wooden items
- Polyurethane items
- Consumables
- Architectural logic of the ceiling system: how it works
- Three types of ceiling systems with false beams
- Beam spacing: proportion calculation
- Ceiling height and beam cross-section
- Wood on the ceiling: characteristics and application
- Timber: beam base or independent element
- Battens: three roles in the ceiling system
- Linear molding: decorative beam detailing
- Wooden decor at junction points
- Polyurethane on the ceiling: decorative infill and perimeter
- Coffered frame: molding between beams
- Ceiling cornice: connecting ceiling and wall
- Ceiling decor: corner consoles and overlays in coffers
- Keystones and key elements
- Ready-made ceiling systems by room type and style
- Classic living room ceiling: coffered system
- Soft classic in the bedroom: lightweight slats and delicate decor
- Kitchen-living room: beams as zoning
- Study: dark classic with monumental beams
- Country house: natural wood without paint
- Mistakes when choosing and installing decorative faux beams
- Mistake 1: heavy beams without calculating fastening
- Error 2: large beams in a low room
- Error 3: mismatch between tree scale and stucco
- Error 4: beams without connection to the cornice
- Error 5: not thinking through lighting
- Error 6: different finishes of wood and polyurethane without a system
- Error 7: not taking a profile reserve
- Material calculation: example for a room 5×4 m
- About the Company STAVROS
- FAQ: Answers to Popular Questions
- Can you combine wooden false beams and polyurethane stucco on the same ceiling?
- What to buy for decorative beams on the ceiling?
- Are false beams suitable for a low ceiling (up to 2.5 m)?
- How to correctly calculate the spacing between false beams?
- Do you need a ceiling cornice if you have false beams?
- How to paint wood and polyurethane in a single color?
- Can false beams be installed on a stretch ceiling?
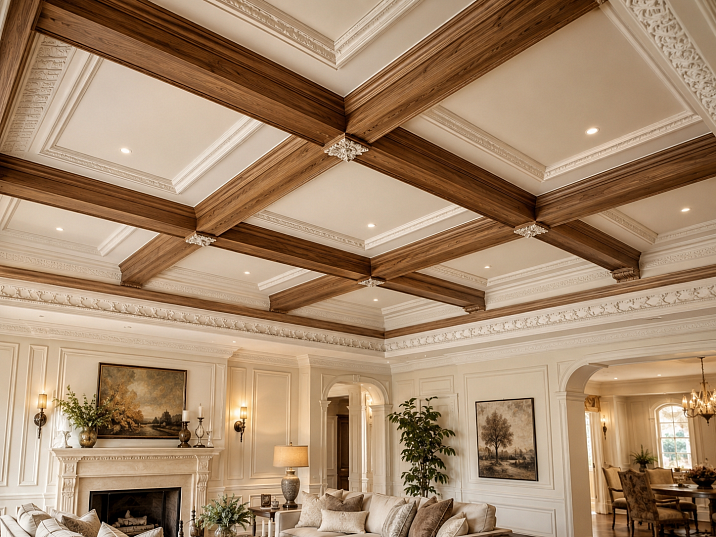
The ceiling is the fifth wall. That's what experienced designers say, and they are right: the ceiling occupies as much visual space as any of the four walls, yet remains the most ignored surface in most apartments. White paint, stretch fabric, at best a ceiling cornice at the joint. And nothing more.
Decorative false beams on the ceiling are a way to give the ceiling character, depth, and architectural logic for a reasonable budget and without major renovations. A wooden block and Wooden planks create rhythm and volume. Moldings made of polyurethane и Polyurethane Ceiling Moldings fill the space between the beams, frame the perimeter, and make the ceiling a complete decorative system. This article is about such a system—thoughtful, honest, and specific.


What is a decorative false beam and why is it needed
Before talking about materials, let's understand the essence of the object. Because a false beam is not about deception or imitation. It's about architectural language.


Real beam vs decorative: function and form
A real load-bearing floor beam holds the structure. It is hidden in the ceiling or exposed — depending on the architecture. In country houses with a wooden frame, exposed beams are a genuine structural detail. In a city apartment with a monolithic or panel ceiling, there are no visible beams.
A decorative false beam is an architectural technique that brings the visual effect of exposed beams into any space. It holds nothing. Its task is to structure the ceiling plane, create rhythm, add volume, and set the character of the room. It is an honest decorative object — and it is from this perspective that it should be chosen and assembled.
Our factory also produces:


Why a ceiling with beams looks more expensive
Psychologically, a person perceives horizontal elements on the ceiling as a sign of architectural complexity. Beams make the ceiling "not flat" — creating depth even where there is no real depth. The rhythm of the beams organizes the space: the room becomes more readable, its proportions clearer.
From a practical point of view: Wooden block or Solid Wood Planks, attached to the ceiling, plus Moldings made of polyurethane around the perimeter and between the beams — this is incomparably cheaper than a stretch ceiling with hidden lighting and many times simpler than plasterboard structures. But the visual result is richer than both options.
Get Consultation
Complete shopping list: what you need for a ceiling with false beams
The main mistake is to start installation without a complete set of materials. So let's start with that.
Wooden positions
A wooden block is the load-bearing base of a false beam. It is a rectangular solid wood block with a cross-section of 50×50 mm, 50×70 mm, or 50×100 mm, which is attached to the ceiling with self-tapping screws through perforations into the concrete slab. The block is the frame onto which side slats are subsequently sewn or cladding is applied. In a simpler version, the block itself serves as a false beam — a visible wooden element on the ceiling without additional cladding.
Wooden planks — for the side faces of the false beam and for decorative cladding of visible planes. A slat with a cross-section of 20×30 mm or 20×40 mm is sewn onto the side faces of the block, creating a U-shaped beam profile with a lower visible face and two side faces. Slats can also be used independently — as thin decorative horizontal accents on the ceiling, without the volume of the block.
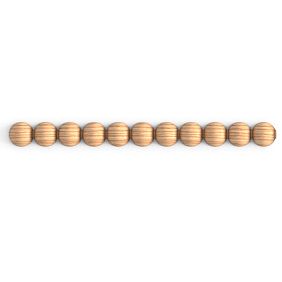
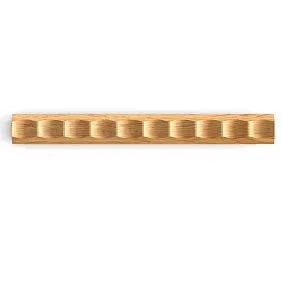
Pogonazh iz massiva — for profiled decorative planks that are applied along the bottom edge and side faces of the false beam, enriching its shape. Molding with a quarter-round, fillet, or stepped cross-section turns a straight block into an architecturally detailed element. Molding is also used for decorative crossbars between beams — horizontal planks that create a coffered pattern.
A solid wood cornice — for the transition line between the ceiling and wall in the wooden part of the interior. In chalet, rustic, or country styles, a wooden cornice is more organic than a polyurethane one. Thickness 20–25 mm, height 40–80 mm.
Polyurethane positions
Moldings made of polyurethane — for decorative frames on the ceiling plane between false beams. Molding forms rectangular coffers — ceiling "fields" bounded on two sides by beams and on two sides by molding crossbars. The profile height of the molding is 20–35 mm for the ceiling.
a polyurethane cornice — a ceiling cornice around the perimeter of the room, providing a smooth transition from the wall to the ceiling. The ceiling cornice and wooden false beams work as a single system: the cornice holds the perimeter, the beams hold the ceiling surface.
Polyurethane trim — for lightweight ceiling profiles between beams, at points where beams meet the wall, for horizontal accent lines on the ceiling plane.
polyurethane ceiling decor — applied ceiling elements: corner rosettes at intersections of molding lines on the ceiling, central overlays in coffers, decorative corner brackets at points where beams meet walls.
Decor for Molding — keystones, cartouches, and overlays in the centers of coffers and on horizontal moldings. The finishing touch that elevates the ceiling from the category of "well done" to the category of "done with intent."
Consumables
Self-tapping screws 4.5×75 mm for attaching the batten to the ceiling through dowels. Dowels 8×60 mm into the concrete slab. Finishing nails or a stapler for attaching the slats to the batten. Polyurethane adhesive (selection and application — in the article installation of polyurethane molding). Acrylic sealant. Acrylic primer. Ceiling paint (white matte or colored — depending on the concept). Oil or varnish for wooden elements — if they remain in their natural color. Spare for all profiles and slats — 10–15%.
Architectural logic of the ceiling system: how it works
A ceiling with false beams is not a chaotic set of wooden battens. It is a system with internal logic. Understanding this logic means achieving a result, not just a set of parts nailed to the ceiling.
Three types of ceiling systems with false beams
System 1: Parallel beams. Several parallel false beams of the same cross-section, spaced at equal intervals. This is the most common and versatile option. The beams can run along the long axis of the room (visually lengthening the room), across (widening it), or diagonally (for non-standard solutions).
System 2: Coffered ceiling. Transverse beams are supplemented with longitudinal ones, creating a grid that divides the ceiling into rectangular "coffers." In each coffer — either molding frame made of polyurethane, or a decorative ceiling elementor decorative painting in a darker tone. A coffered ceiling is a ceiling of high classicism, Empire style, English club interior.
System 3: Light slats as a rhythmic accent. Thin Wooden planks with a cross-section of 20×30 mm and a step of 15–25 cm create a rhythmic pattern on the ceiling without the volume of a full beam. This is soft classic or Scandinavian classicism: delicate, without extra weight, with a sense of order.
Beam spacing: proportion calculation
The spacing between beams determines the scale of the system. Proportion rule: the width of the space between beams should be 3–5 times the width of the beam itself. A beam with a cross-section of 80 mm — spacing 240–400 mm. A beam with a cross-section of 120 mm — spacing 360–600 mm. If this ratio is violated, the ceiling will look either overloaded (beams too frequent) or sparse (beams like random lines).
To calculate the spacing: divide the width of the room by the expected number of gaps. If the width is 4 m and 4 beams are needed, you get 5 gaps of 80 cm each. With a beam of 80 mm, this is a ratio of 1:10 — very light. For a richer feel — 3 beams with a width of 4 m: 4 gaps of 100 cm, beam 120 mm — ratio 1:8.3 — a good proportion.
Ceiling height and beam cross-section
This is a fundamental parameter. A beam visually reduces the height of the room by the full height of its cross-section. With a ceiling of 2.5 m, a beam 100 mm high is a ceiling perceived as 2.4 m. With a ceiling of 3.0 m, the same beam is practically unnoticeable as a 'lowering'.
| Ceiling Height | Max. beam height | Beam type |
|---|---|---|
| Up to 2.5 m | 40–60 mm | Thin slats |
| 2.5–2.8 m | 60–80 mm | Moderate bar |
| 2.8–3.2 m | 80–120 mm | Full beam |
| More than 3.2 m | 120–200 mm | Monumental beam |
Wood on the ceiling: characteristics and application
Bar: the base of the beam or an independent element
The wooden bar as the base of the false beam is mounted directly to the ceiling — it is the load-bearing part of the structure. It receives the screws and ensures the mechanical fixation of the entire beam. The cross-section of the bar is selected according to the desired beam proportions: 50×50 mm for a thin beam, 50×100 mm for a moderate one, 70×120 mm for a massive one.
In the "open bar" option — when the bar itself is a visible decorative element without cladding — its ends and side edges must be clean and properly processed. Pogonazh iz massiva with a profile section along the bottom edge of the bar — a simple way to refine a structural bar without additional cladding.
Slats: three roles in the ceiling system
Role one — beam cladding. Wooden planks They are sewn onto the side faces of the bar, forming a U-shaped beam profile. The bottom face of the bar remains visible or is also covered with a batten. The batten thickness is 15–20 mm, width — according to the desired height of the visible side face of the beam.
Role two — decorative rhythmic accents. Thin battens 20×30 mm without a bar base, attached directly to the ceiling with glue and finishing nails — this is a lightweight rhythmic system. They do not create the volume of a full beam, but give the ceiling a horizontal rhythm.
Role three — cross ties. Battens running across the main beams and mounted in the gaps between them turn the parallel system into a coffered grid. For this role, a 20×30 mm batten is sufficient — they create the coffered frame without pretending to be a full cross beam.
Linear molding: decorative detailing of the beam
Pogonazh iz massiva with a profile — this is the difference between a "bar on the ceiling" and an "architectural beam." Planks with a quarter profile on the lower edges of the beam create a shadow line that emphasizes the volume. A fillet profile on the side faces adds relief. A stepped cornice profile at the point where the beam meets the ceiling creates a capital transition characteristic of classical architecture.
Linear molding is also used for horizontal decorative belts along the walls at the level of the lower edge of the beams — connecting the ceiling system with the wall surfaces.
Wooden decor at junction points
Wooden decoration — applied carved or milled elements — is used at the points where beams meet walls. A corner corbel (bracket support) at the base of the beam near the wall is a characteristic technique for Romanesque, Renaissance, and Baroque ceilings. The corbel creates the feeling that the beam is not just "lying" on the wall, but is supported by a vertical structure.
Polyurethane on the ceiling: decorative filling and perimeter
Caisson frame: molding between beams
Imagine a ceiling with three parallel false beams: four strips of ceiling plane between the beams and against the walls. Each such strip can simply be painted — and the ceiling already looks good. Or each strip can be divided into rectangular caissons with a molding frame — and the ceiling becomes outstanding.
Moldings made of polyurethane Profiles with a height of 20–30 mm are mounted on the ceiling plane between the beams, dividing each strip into rectangular fields. The field proportion: width to length — 1:1.5 or 1:2. Too elongated caissons look restless. Square ones are too static. The golden ratio is 1:1.5.
Installing molding frames on the ceiling involves a special technique for corner joints. The article describes it in detail. installing polyurethane molding.
Ceiling cornice: connection between ceiling and wall
a polyurethane cornice Along the perimeter of the ceiling — the first and necessary detail of any ceiling with false beams. The cornice solves several tasks simultaneously. It hides the joint of the ceiling surface with the wall — the place where technological gaps and unevenness inevitably remain during installation. It creates a decorative horizontal band around the entire perimeter, which connects the ceiling plane with the wall. And it sets the scale for the entire ceiling system: the height of the cornice should be proportional to the height of the false beams.
Proportion rule: cornice height — 30–50% of beam height. Beam 100 mm — cornice 30–50 mm. Beam 150 mm — cornice 50–75 mm.
Decor for ceilings: corner consoles and overlays in caissons
polyurethane ceiling decor Covers several types of elements.
Corner consoles are mounted at the points where beams meet the walls from below — creating a sense of architectural support. A polyurethane console 150–200 mm high at this point is a classic technique dating back to Romanesque and Renaissance architecture.
Decorative inserts in coffers — central elements in ceiling fields: square, round, with geometric or floral ornament. They are placed in the center of each coffer and create a focal point within the frame.
Corner rosettes — at the intersection points of molding runs on the ceiling, where the longitudinal molding frame intersects with the transverse one. They hide joints and add decorative precision.
Keystones and key elements
Decor for Molding — keystones — are placed in the centers of horizontal molding runs or above the intersection points of beams with crossbars. A keystone 60–80 mm high is a small element with a powerful decorative effect. It introduces hierarchy into the ceiling system: it has central points and axes of symmetry.
Ready-made ceiling systems by room type and style
Classic ceiling in the living room: coffer system
Room: Living room with an area of 25–35 sq. m, ceiling height 2.8–3.2 m.
System: Three longitudinal false beams and two transverse ones, creating six coffers on the ceiling.
Wooden elements:
-
Bar 70×100 mm — longitudinal and transverse beams, attachment to the ceiling
-
Wooden planks 20×80 mm — side faces of the beams
-
Pogonazh iz massiva — profile strips along the lower edges of beams
Polyurethane elements:
-
Ceiling cornice along the perimeter — profile height 60 mm
-
Moldings 25 mm — frames inside the coffers
-
ceiling decor — overlays in the centers of the coffers
-
Corner consoles — at the points where beams meet walls
Finish: Single white enamel on the entire ceiling, beams, cornice, and decor. Or tinting the beams in a dark tone with a white ceiling background — a contrasting option.
Soft classic in the bedroom: light slats and delicate decor
Room: Bedroom with an area of 15–20 sq. m, ceiling height 2.5–2.7 m.
System: Five to seven thin decorative slats parallel with a spacing of 40–50 cm. Without the volume of a full beam.
Wooden elements:
-
Wooden planks 20×30 mm — mounting directly to the ceiling with glue and finishing nails
-
Pogonazh iz massiva — decorative horizontal strip along the wall continuing the slats
Polyurethane elements:
-
Thin Ceiling cornice — height 30–40 mm, moderate relief
-
Polyurethane trim — thin decorative rods between slats, if you want to add a molding rhythm
Finish: Uniform painting of the ceiling and slats in one tone — white or light gray. The slats then read as relief, not as a contrasting element. Soft, delicate, refined.
Kitchen-living room: beams as zoning
Situation: Open kitchen-living room without partitions. Need to visually separate the kitchen area and the lounge area without building walls.
Solution: One or two transverse false beams crossing the ceiling at the boundary of the zones. The beam on the ceiling works as a soft visual signal: "a different space begins here." This is more delicate than an arch, more honest than a partition, and simpler than any building structure.
Wooden elements:
-
Bar 50×80 mm — one transverse beam at the boundary of the zones
-
Wooden planks — side faces
-
Pogonazh iz massiva — profile along the bottom edge
Polyurethane elements:
-
Cornice along the perimeter — unified for both zones, preserves the integrity of the space
-
Moldings along the walls in the living room zone — create a rhythm that is absent in the kitchen zone, enhancing the difference between zones
Finish: Beam — natural wood with oil finish (warm accent). Cornice — white enamel matching the ceiling tone.
Study: dark classic with monumental beams
Room: Home office with an area of 15–18 sq. m, ceiling height 2.8–3.0 m.
System: Two longitudinal beams dividing the ceiling into three strips. Calm coffered rhythm without a complex molding system.
Wooden elements:
-
Bar 70×120 mm — monumental oak beams
-
Wooden planks 20×100 mm — side faces, dark oak with oil finish
-
Pogonazh iz massiva — strict profile along the bottom edge
Polyurethane elements:
-
Ceiling cornice made of molding profiles — height 50–60 mm, painted in a dark tone
-
Corner consoles at the points where beams meet walls — a monumental touch
-
Without molding frames in the coffers — strictness and asceticism
Finish: Wood — dark oil (wenge, walnut). Cornice and consoles — dark gray or anthracite enamel. Ceiling — dark gray-beige tone.
Country house: natural wood without paint
Feature: In a country interior — chalet, village house, rustic style house — wood should remain wood. Enamel and uniform painting are not needed here. The natural color of wood with an oil coating is the main decorative solution.
Wooden elements:
-
Bar 80×150 mm — massive beams made of pine, spruce or oak
-
Wooden planks — side edges, matching the main beam
-
Pogonazh iz massiva — minimal, straight profile
Polyurethane elements:
-
a polyurethane cornice — painted in wall color (beige, cream, natural white). Polyurethane is appropriate here specifically for the cornice: it does not deform from humidity changes in a country house
-
Polyurethane trim — along the perimeter at the points where beams meet the walls
Finish: Wood — natural oil with a mild antiseptic component. Cornice — white paint. The contrast of warm wood and white cornice is a classic of country style.
Mistakes when choosing and installing decorative false beams
Mistake 1: heavy beams without load calculation
A 80×150 mm, 5 m long beam weighs about 10–12 kg. Plus slats, trim, fasteners — total 15–18 kg per beam. This is a load that needs to be properly distributed: anchor bolts 8×80 mm into the concrete ceiling with a pitch of 40–50 cm. Fastening with glue for a full beam is insufficient. Glue is only for additional fixation.
Mistake 2: large beams in a low room
A beam 150 mm high in a room with a 2.4 m ceiling — this is a ceiling that starts to press down. The perception of height drops by 15–20 cm visually. With a low ceiling — thin slats 30–40 mm high or a moderate block 50×60 mm. Delicacy decides.
Error 3: mismatch in scale between wood and stucco
Rough rustic beams made of massive timber with coarse texture — and a thin elegant molding 15 mm high with fine ornament. The scale does not match. Rough wood needs larger stucco: a cornice 60–80 mm high, consoles with pronounced relief. For thin decorative slats — delicate Polyurethane Ceiling Moldings with a small profile.
Error 4: beams without connection to the cornice
False beams "hang" in the ceiling space, not connected to its perimeter: there is no cornice, the beams rest against the wall without an architectural transition. The result is incompleteness. A cornice made of polyurethane around the perimeter is a mandatory element of the system, not an option.
Error 5: not planning the lighting
False beams create shadows on the ceiling — especially with side lighting. If the lights are placed in spots, the beams can create a striped shadow pattern. Before installation, plan the lighting scheme: recessed lights between beams, hidden lighting along beams, surface-mounted lights on the beams themselves — all this requires planning before installation, not after.
Error 6: different finishes of wood and polyurethane without a system
Natural dark wood and white cornice — good. Uniform white enamel on everything — good. Natural wood and beige molding — acceptable. Natural wood, white cornice, beige molding, and gray consoles on the same ceiling — this is not a system, it's a collection of disparate solutions. Define the finish concept before purchasing materials.
Error 7: not ordering extra profile
Cutting corners, fixing cutting errors, small pieces to cover gaps — all of this consumes material. Trim, slats and moldings — with a 10–15% margin over the calculated length. Without a margin, one bad cut means a new order with delivery wait time.
Material calculation: example for a room 5×4 m
False beams: three longitudinal beams 5 m each. Cross beam in the center — 4 m long.
| Material | Calculation | Quantity |
|---|---|---|
| Timber 50×80 mm | 3 × 5 + 1 × 4 = 19 m | 21 m (10% margin) |
| Slat 20×60 mm | Side faces of beams: 2 × (3×5 + 1×4) = 38 m | 42 м |
| Profile molding | Along bottom faces: 3×5 + 1×4 = 19 m | 21 м |
| Polyurethane cornice | Room perimeter: (5+4)×2 = 18 m | 20 м |
| Molding for coffers | In gaps: approximately 24 m | 27 м |
| Ceiling decor | Overlays in coffers: 8 pcs. | 10 pcs. |
| Corner consoles | 8 points of beam attachment to walls | 8 pcs. |
| Dowels 8×60 mm | 6 per 1 m of timber: 21×6 = 126 pcs. | 140 pcs. |
About the company STAVROS
A ceiling system consists of dozens of elements, each of which must match the others in scale, quality, and style. That is why it is important to work with a manufacturer who works with both wood and polyurethane — and understands how they work together.
STAVROS is a St. Petersburg company founded in 2002. In its early years, it carried out restoration and decorative projects in the Konstantinovsky Palace, the Hermitage, the Sheremetev Mansion, the Alexander Palace, and the Trinity-Izmailovsky Cathedral. These are sites where ceiling decor undergoes the strictest professional control, and any mismatch in scale or style is excluded.
Today STAVROS produces a full range for ceiling systems: Wooden planks и Pogonazh iz massiva for false beams, Decorative Inserts made of wood, Moldings made of polyurethane, Ceiling decoration, Polyurethane trim и Decor for Molding. In-house production with CNC milling in St. Petersburg. Showrooms in St. Petersburg and Moscow. Delivery throughout Russia.
FAQ: Answers to popular questions
Is it possible to combine wooden false beams and polyurethane stucco on the same ceiling?
This is the most logical combination. Wood is for the beams themselves, the bars and slats that bear mechanical load and are fastened with self-tapping screws. Polyurethane moldings — for molding frames in coffers, ceiling cornice along the perimeter, consoles at junction points, and decor in coffers. A uniform paint color unites both materials.
What to buy for decorative ceiling beams?
Wooden bar for the frame, Wooden planks for cladding, Pogonazh iz massiva for profile parts, Moldings made of polyurethane for coffer frames, ceiling cornice, ceiling decor, fasteners, glue, sealant, primer, paint or wood oil.
Are false beams suitable for a low ceiling (up to 2.5 m)?
Yes, with the correct cross-section selection. Wooden planks With a height of 30–40 mm, they do not visually reduce the room's height — they create rhythm without being oppressive. Full beams with a cross-section of 100–150 mm with a ceiling of 2.5 m are uncomfortable. Rule: with a ceiling below 2.7 m, the beam height should not exceed 60 mm.
How to correctly calculate the spacing between false beams?
The room width is divided by the number of gaps (number of beams + 1). The spacing should be 3–5 times the beam width. For a room width of 4 m and three beams: 4 m / 4 gaps = 100 cm per gap. With a beam of 80 mm — ratio 1:12.5 — very light. With a beam of 120 mm — 1:8.3 — a good proportion.
Is a ceiling cornice necessary if there are false beams?
Absolutely. False beams structure the ceiling plane but do not solve the transition to the wall. a polyurethane cornice Around the perimeter, it hides the joint, creates a decorative horizontal belt, and visually completes the ceiling system. Beams without a cornice are incompleteness.
How to paint wood and polyurethane in a single color?
Both wood and polyurethane accept acrylic enamel well over acrylic primer. Sequence: priming (one coat), first coat of enamel, sanding with fine sandpaper (P220), second coat of enamel. With a uniform white or cream paint, the boundary between wood and polyurethane disappears — the surface reads as a monolithic architectural structure.
Can false beams be installed on a stretch ceiling?
No. The stretch ceiling fabric is not a load-bearing surface. False beams are only attached to the main ceiling: with dowels into concrete, anchors into brick, or self-tapping screws into wooden joists. If there is a stretch ceiling above the room, the beams are installed before it is mounted or in specially left access points to the ceiling.


