

















Article Contents:
- What Is a Flat Door Makeover?
- Flush Doors
- Hollow-Core Doors
- Solid-Core Doors
- Actual Paneled Doors
- Good Candidates for a Makeover
- Doors That Require Special Caution
- Consider Replacement When Necessary
- Common Door Widths
- Door Thickness Matters
- MLDPU-001: Fine Polyurethane Molding
- MLDPU-004: Slim Architectural Profile
- MLDPU-002: Classic Stepped Molding
- MLDPU-003: Wider Architectural Molding
- STAVROS Door Molding Comparison
- Polyurethane Molding
- MDF Molding
- Solid Wood
- STAVROS Wood and MDF Profiles
- 1. One Large Rectangular Panel
- 2. Two Stacked Panels
- 3. Two Tall Vertical Panels
- 4. Four-Panel Traditional Layout
- 5. Asymmetrical Contemporary Panels
- Establish the Horizontal Margins
- Establish the Vertical Layout
- Why the Proportions Work
- Check the Lockset
- Upper Frame
- Lower Frame
- Total Installed Molding
- Required Individual Cuts
- A Feasible Cutting Plan
- Cutting Schedule
- Purchased Material
- Nominal Offcuts
- Why a Wider Door Can Cost More to Decorate
- Always Check the Actual Cut Geometry
- Total Installed Molding
- Buying Material Door by Door
- Optimizing the Cuts Across All Six Doors
- Optimized Purchase Quantity
- Purchased Length
- Nominal Offcuts
- Comparing the Two Purchasing Methods
- Illustrative Material Cost Comparison
- Illustrative Dimensions
- Vertical Arrangement
- Decorative Molding Length
- Material Quantity
- Door Knobs and Rosettes
- Lever Handles
- Escutcheon Plates
- Hinges
- Doorstops
- Test the Entire Swing
- Avoid Aggressive Fastening
- Choose the Attachment System Carefully
- Do Not Remove Excessive Surface Material
- Additional Weight
- Remember the Real Objective
- Do Not Assume Surface Decoration Is Permitted
- Follow NFPA 80 and Listing Requirements
- Common Situations Requiring Caution
- Recommended Approach
- NPU-501: Elongated Floral Ornament
- NPU-505: Compact Vertical Decorative Accent
- Comparing the Two Appliques
- How Many Appliques Should One Door Have?
- MLDPU-002U
- Corner Compatibility Matters
- Recalculate the Straight Molding Lengths
- Modern Classical
- Neoclassical
- Traditional American Interior
- Art Deco
- Scandinavian-Inspired Interior
- English-Inspired Study
- French Country
- Molding and Door in One Color
- White Molding on a Colored Door
- Dark Monochromatic Doors
- Metallic Accents
- Coordinate the Door Casing
- Step 1: Inspect the Existing Door
- Step 2: Measure the Door
- Step 3: Choose the Decorative Layout
- Step 4: Check the Hardware Clearances
- Step 5: Remove the Door if Appropriate
- Step 6: Clean the Surface
- Step 7: Prepare the Bonding Surface
- Step 8: Mark the Frame Layout
- Step 9: Prepare the Molding Cuts
- Step 10: Dry-Fit the Frames
- Step 11: Test Adhesion
- Step 12: Apply the Adhesive
- Step 13: Position the Molding
- Step 14: Allow the Adhesive to Cure
- Step 15: Install Optional Appliques
- Step 16: Finish the Joints
- Step 17: Prepare for Painting
- Step 18: Paint the Door
- Step 19: Reinstall the Door
- Step 20: Inspect the Completed Makeover
- Painted Doors
- Laminate and Factory-Coated Surfaces
- Wood Veneer
- Polyurethane Trim
- Use a Complete Test
- Molding Cost
- Decorative Appliques
- Adhesive and Supplies
- Painting
- Labor
- Existing Door Condition
- Illustrative Cost Formula
- Avoid Misleading Comparisons
- One-Door Test Project
- Hallway Door Sets
- Whole-House Makeover
- Use the Same SKU for Repeated Frames
- Selecting the Profile Before Checking Clearances
- Using an Overly Complicated Layout
- Ignoring Hardware
- Using Incompatible Adhesive
- Removing Too Much of the Existing Surface
- Incorrect Miter Measurements
- Failing to Dry-Fit
- Applying Too Much Paint
- Installing Ornament Near Moving Parts
- Modifying a Fire-Rated Door Without Approval
- Ignoring Lead Paint in Older Homes
- Purchasing Without a Cut List
- Order by Exact SKU
- Confirm the Required Quantity
- Check Ornament Compatibility
- Request Samples Where Appropriate
- Confirm Delivery and Packaging
- Can You Add Molding to a Flat Interior Door?
- Can You Make a Hollow-Core Door Look Like a Paneled Door?
- What Is the Best Molding for a DIY Door Makeover?
- Can Polyurethane Molding Be Installed on Painted Doors?
- Can You Apply Molding to Laminate Doors?
- What Is the Difference Between Applied Molding and Real Door Panels?
- How Much Molding Is Needed for a 30 × 80-Inch Door?
- How Many Strips Are Needed for Six Doors?
- Can You Use Wood Molding Instead of Polyurethane?
- Can You Glue Polyurethane Molding to Hollow-Core Doors?
- Do You Need Nails for Door Molding?
- Do You Have to Remove the Door Before Installing Molding?
- Can You Paint Polyurethane Molding?
- Should You Paint the Door and Molding the Same Color?
- Can You Use Ornamental Appliques on Interior Doors?
- Can You Decorate a Pocket Door With Molding?
- Can You Decorate a Fire-Rated Door?
- How Long Does a Door Molding Makeover Take?
- Is a DIY Door Makeover Cheaper Than Replacing the Door?
- Where Can I Buy Polyurethane Molding for Interior Doors?

Replacing every interior door in a house can be expensive. Yet a complete replacement is not always necessary when the existing doors are structurally sound, operate correctly, and simply lack architectural character.
A plain flush door may be practical, but its uninterrupted surface can feel visually disconnected from a home with traditional baseboards, decorative wall molding, classical furniture, or carefully detailed cabinetry.
One way to change that appearance is to add decorative molding directly to the door face.
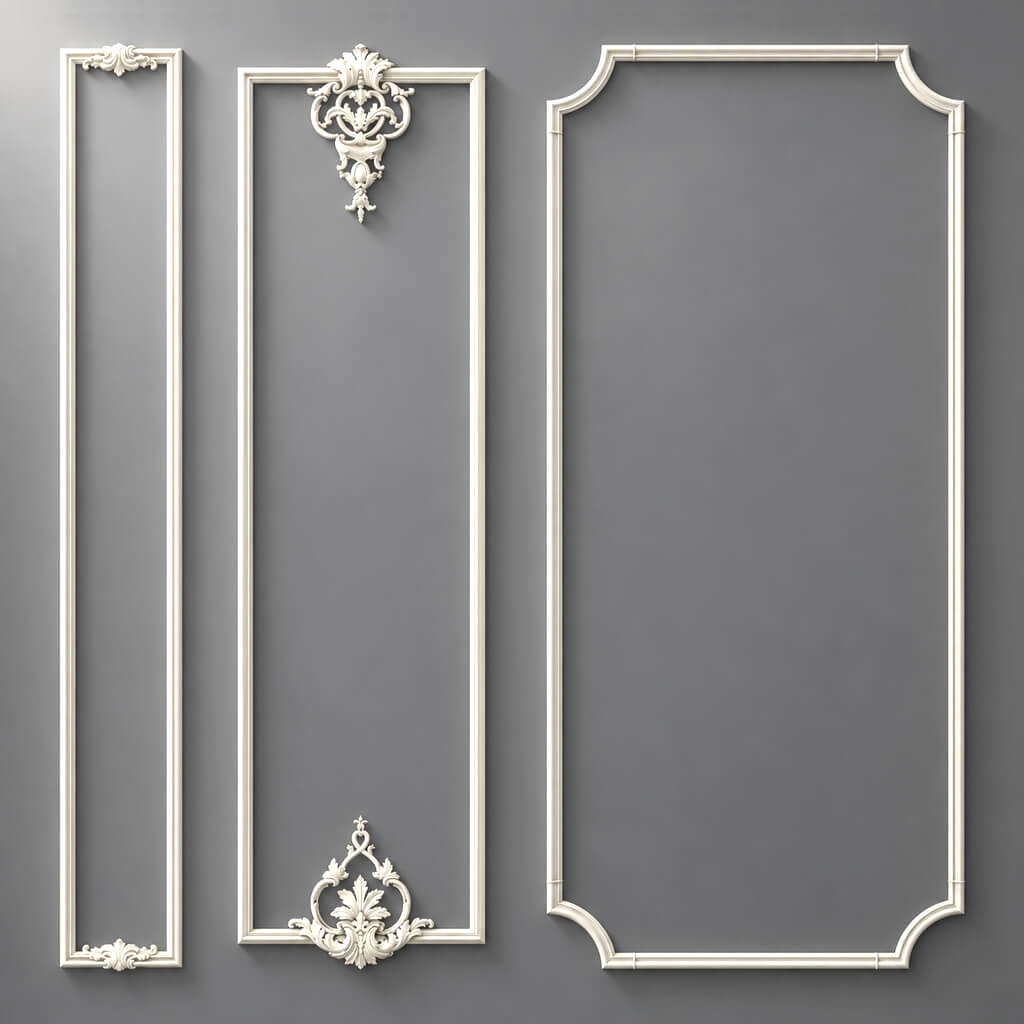
A narrow polyurethane profile can create the outline of a traditional panel. A more substantial stepped molding can introduce deeper architectural relief. Carefully selected ornamental appliques can transform a restrained door into a classical or neoclassical feature.
When the layout, proportions, and paint finish are coordinated, a simple door can acquire the visual character of a much more elaborate design.
A DIY interior door makeover with polyurethane molding can create the appearance of a paneled door without routing recessed panels into the existing door slab.
This is an important distinction.
The technique produces a simulated paneled door. It does not change the door's internal construction, turn a hollow-core door into a solid-core door, or reproduce every structural detail of traditional stile-and-rail joinery.
The result depends on how well the applied molding is designed and installed.
An attractive profile cannot compensate for poor proportions. An elaborate decorative applique may look inappropriate on a narrow door. Incorrectly positioned molding can interfere with the doorstop, hinges, lockset, or opening swing.
Surface preparation is equally important. Paint and adhesive that work on unfinished wood may not bond reliably to a factory-coated hardboard or laminate surface.
For American homeowners, these considerations are especially relevant because interior doors are commonly sold in standardized widths, including 24, 28, 30, 32, and 36 inches.
Those dimensions provide a practical basis for developing repeatable decorative layouts.
STAVROS offers polyurethane molding profiles, ornamental polyurethane trim, decorative door appliques, and molding corner details that can be evaluated for these projects.
This guide explains how to update a flat interior door with decorative molding, from choosing a profile and developing the panel layout to cutting, bonding, painting, and checking the finished door.
It also includes detailed material calculations for one door and a coordinated six-door renovation.
The objective is not to cover a plain door with as much decoration as possible.
It is to create a door whose proportions and architectural detail look intentional.



What Is a Flat Door Makeover?
A flat door makeover is a decorative renovation of an existing door slab.
The project typically retains the door's basic construction, hinges, frame, and locking hardware.
The appearance is changed by adding surface decoration and applying a new finish.
Depending on the style, that decoration may include simple rectangular molding, layered architectural profiles, selected ornamental appliques, or a combination of these elements.
The approach is particularly relevant to plain flush interior doors.




Flush Doors
A flush door has relatively flat faces without traditional raised or recessed panels.
Its core may be hollow, solid, or another engineered construction.
A flush door can be made from wood-based materials, hardboard, veneer, or other manufactured surfaces.
Наша фабрика также производит:



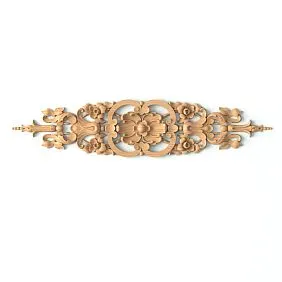
Смотреть весь Каталог продукции
Hollow-Core Doors
Many American interior doors use lightweight hollow-core construction.
The visible skins are typically supported by internal framing and a lightweight core arrangement.
Their exact construction depends on the manufacturer.
Decorative molding can be applied to certain hollow-core doors when the product, door surface, attachment system, and intended use are compatible.
However, the skin may be thin.
Aggressive sanding, inappropriate fasteners, or careless modifications can damage the door.
Получить консультацию
Solid-Core Doors
Solid-core interior doors generally contain a denser engineered core.
They are often heavier than comparable hollow-core products.
A decorative molding treatment can also be considered for certain solid-core doors.
The additional weight, attachment, and door operation must still be evaluated.
Actual Paneled Doors
A traditionally constructed paneled door may use stiles, rails, and separate panels.
Its appearance comes from the door's original construction.
Applied molding creates the visual suggestion of this geometry on an existing flat surface.
The two constructions should not be confused.
When Should You Decorate a Door Instead of Replacing It?
A decorative makeover is most appropriate when the door is already functioning correctly.
Before purchasing any molding, inspect the door.
Check whether it closes and latches properly.
Look for delamination, water damage, significant warping, cracked surfaces, and loose hinges.
If the door is structurally damaged, adding decorative trim is unlikely to solve the underlying problem.
Good Candidates for a Makeover
A plain painted bedroom door may be a good candidate.
A sound flush closet door may also be suitable, provided the added molding does not interfere with its opening mechanism.
A flat home office door can be an opportunity to introduce a more formal design.
Doors That Require Special Caution
Fire-rated doors require a different approach.
So do doors with unusual hardware, sliding or pocket-door mechanisms, existing glass, or limited opening clearance.
A pocket door, for example, may not have enough space to accommodate projecting molding without interference.
A bi-fold door may have closely spaced panels whose movement conflicts with applied ornament.
Do not assume that a decorative detail suitable for a conventional hinged door is appropriate for every door type.
Consider Replacement When Necessary
A door that is badly warped, incorrectly fitted, extensively damaged, or otherwise unsuitable may be better replaced.
The same applies when the desired appearance requires major changes to the door's construction.
A decorative makeover should improve a sound product, not conceal a serious defect.
Standard U.S. Interior Door Sizes
American interior door slabs are available in several common widths.
A height of 80 inches is frequently encountered in residential interiors.
Other heights, including 84 and 96 inches, are also available.
The actual door must be measured before designing its decoration.
Common Door Widths
| Nominal door width | Typical design consideration |
|---|---|
| 24 in | Narrow decorative frames and restrained profiles |
| 28 in | Compact classical panel layouts |
| 30 in | Versatile two-panel or selected four-panel designs |
| 32 in | Broader proportions for decorative compositions |
| 36 in | Larger panels and potentially more elaborate layouts |
These dimensions are common product categories, not a guarantee that an existing installed slab measures exactly the nominal width.
Doors may have been trimmed or adjusted during installation.
A decorative layout should use actual measured dimensions.
Door Thickness Matters
Many conventional residential interior doors are approximately 1⅜ inches thick.
Other constructions use different thicknesses.
The thickness matters when evaluating hardware and clearances.
However, the projection of the decorative molding is also important.
A molding attached to the door face adds thickness at its location.
That projection may interfere with the frame, adjacent wall, furniture, or another door.
Test the proposed molding in relation to the actual door swing.
Choosing the Best Decorative Molding for Interior Doors
The most important characteristics of a door molding are its face width, projection, cross-sectional shape, and surface compatibility.
A profile that works well around a large wall panel may be too substantial for a narrow door.
Similarly, a very thin profile may disappear on a tall double door.
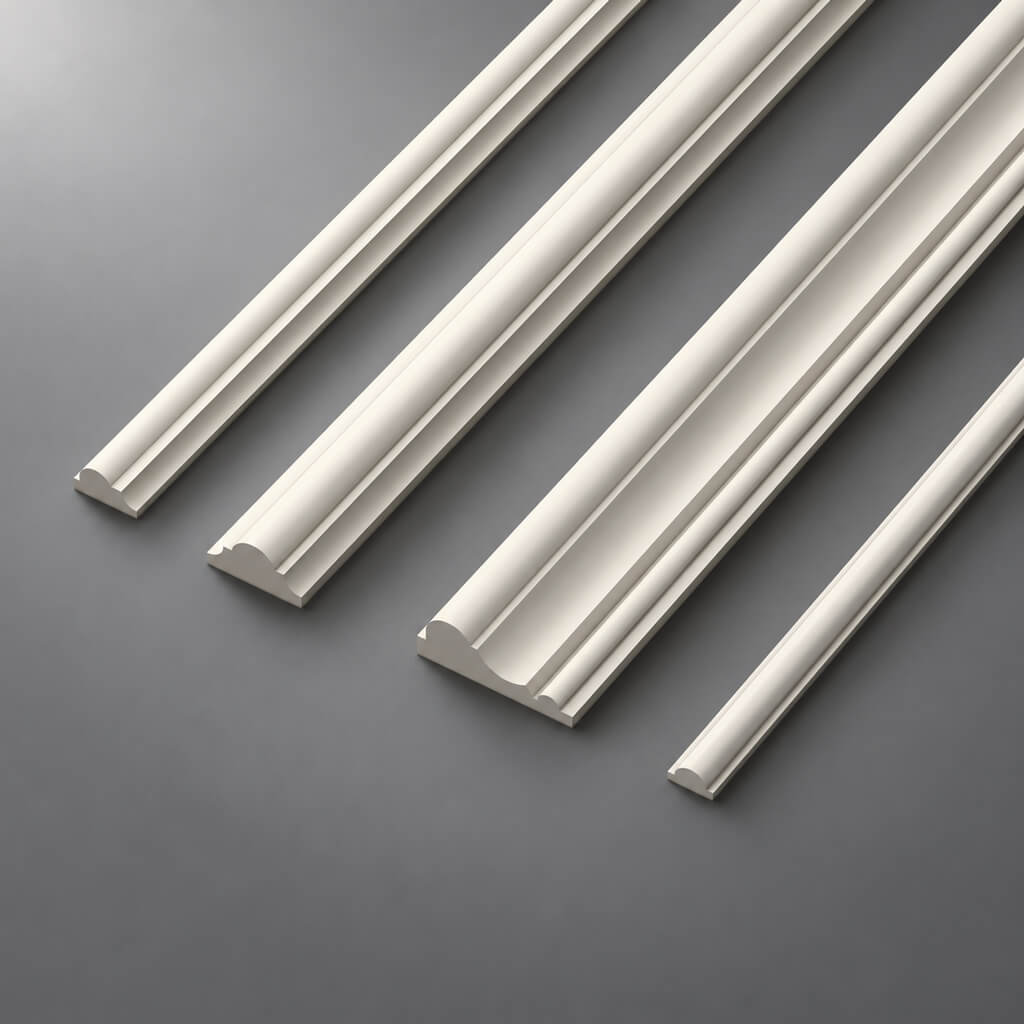
STAVROS offers several polyurethane moldings suitable for evaluating different decorative approaches.
MLDPU-001: Fine Polyurethane Molding
The STAVROS MLDPU-001 polyurethane molding measures:
Face width: 0.39 inches
Projection: 0.24 inches
Stock length: 102.36 inches
Material: polyurethane
Its narrow semicircular profile creates a relatively delicate line.
This makes it a candidate for small doors, restrained panel designs, and secondary decorative contours.
On a narrow 24-inch door, a fine profile may provide architectural detail without overwhelming the available surface.
It can also be considered for contemporary and Scandinavian-inspired interiors where the decorative effect should remain subtle.
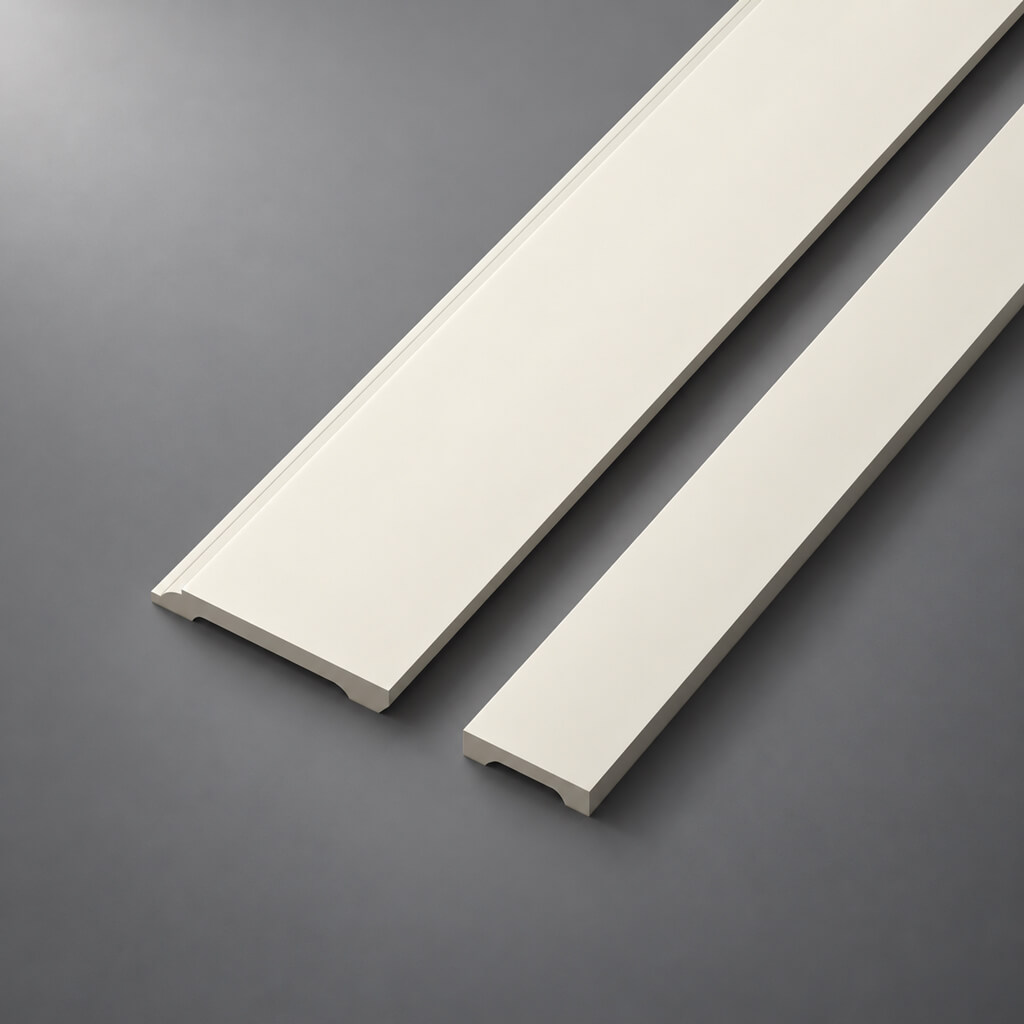
MLDPU-004: Slim Architectural Profile
The STAVROS MLDPU-004 polyurethane molding measures:
Face width: 0.59 inches
Projection: 0.31 inches
Stock length: 102.36 inches
Material: polyurethane
This profile offers a more defined relief than a simple narrow bead.
It can provide a restrained paneled appearance on standard interior doors.
MLDPU-004 is worth evaluating for a two-panel design on a bedroom or home office door.
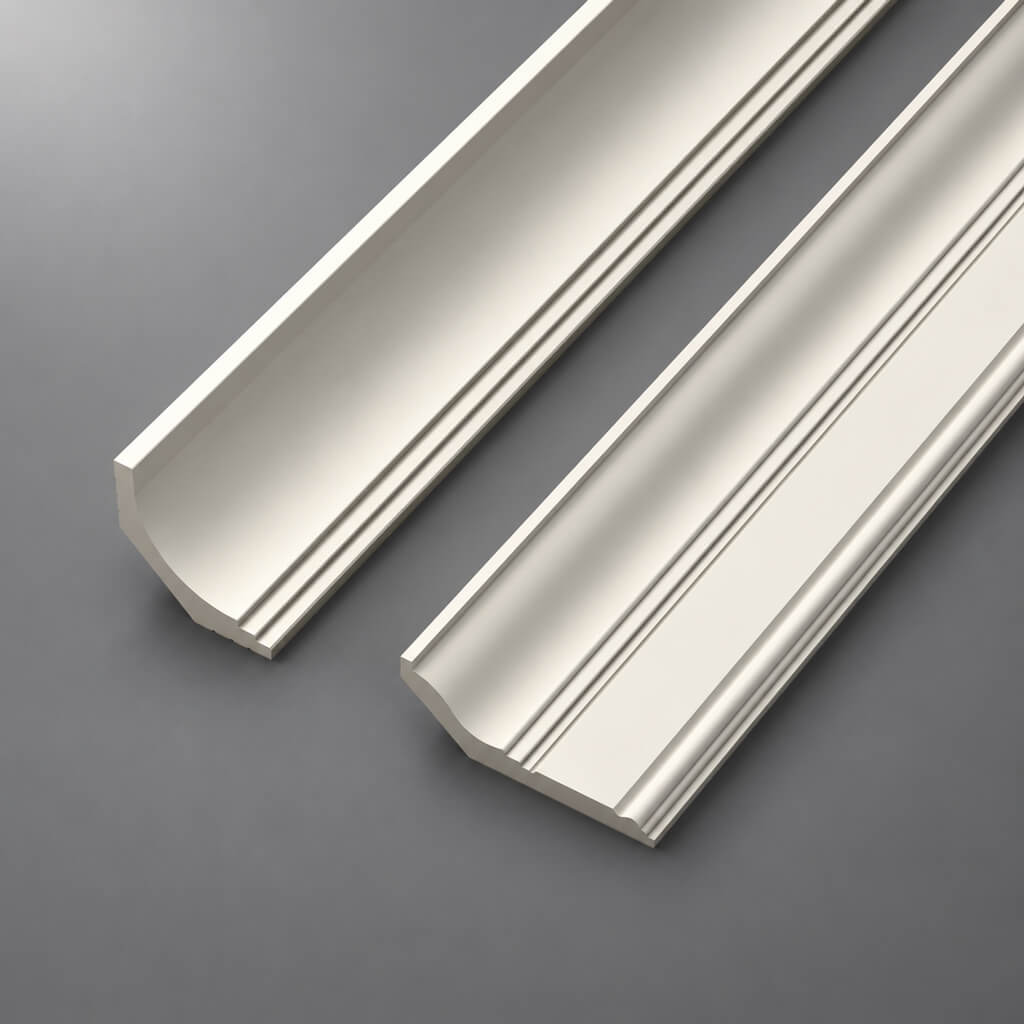
MLDPU-002: Classic Stepped Molding
The STAVROS MLDPU-002 polyurethane molding measures:
Face width: 0.87 inches
Projection: 0.43 inches
Stock length: 102.36 inches
Material: polyurethane
Its stepped cross-section and raised central detail create a distinct classical profile.
The molding can produce a relatively substantial outline around a simulated door panel.
It may be suitable for traditional and neoclassical interiors.
The 0.43-inch projection should be checked against the door's actual opening and hardware clearances.
MLDPU-003: Wider Architectural Molding
The STAVROS MLDPU-003 polyurethane molding measures:
Face width: 1.38 inches
Projection: 0.47 inches
Stock length: 102.36 inches
Material: polyurethane
This profile provides a stronger decorative border.
It may be appropriate for larger doors or carefully designed formal interiors.
However, its size can make a small door appear crowded.
It also introduces more projection than the narrow profiles.
The installation should therefore be reviewed for clearance before ordering.
STAVROS Door Molding Comparison
| Product | Face width | Projection | Stock length | Design character |
|---|---|---|---|---|
| MLDPU-001 | 0.39 in | 0.24 in | 102.36 in | Delicate and restrained |
| MLDPU-004 | 0.59 in | 0.31 in | 102.36 in | Slim architectural detailing |
| MLDPU-002 | 0.87 in | 0.43 in | 102.36 in | Defined classical relief |
| MLDPU-003 | 1.38 in | 0.47 in | 102.36 in | Substantial decorative framing |
The most appropriate product depends on the door dimensions, design style, and available clearance.
The widest profile is not automatically the best choice.
Polyurethane vs. MDF vs. Wood Molding for Door Makeovers
Polyurethane is not the only material used for decorative door trim.
Wood and MDF can also be appropriate.
The decision should be based on the underlying door, finishing method, intended appearance, and installation conditions.
| Material | Potential advantage | Main consideration |
|---|---|---|
| Polyurethane | Molded relief and a wide choice of decorative forms | Adhesive, paint and projection compatibility |
| MDF | Smooth paint-grade decorative trim | Moisture exposure and edge preparation |
| Solid wood | Natural grain and traditional material character | Wood movement, weight and finishing |
| Primed engineered trim | Convenient for certain painted applications | Manufacturer-specific substrate requirements |
Polyurethane Molding
Polyurethane decorative molding may be useful for raised panel outlines and ornamental detailing.
Its molded relief can create a classical appearance.
However, not every polyurethane product has the same density, flexibility, impact resistance, or coating requirements.
Check the selected SKU.
MDF Molding
MDF is often used for paint-grade interior millwork.
It may provide a relatively smooth surface.
For door applications, the edges and attachment method require appropriate preparation.
MDF is not automatically suitable for all damp environments.
Solid Wood
Wood molding can be an appropriate choice when natural grain is important.
It may also be used for painted traditional millwork.
However, wood movement and the condition of the existing door should be considered.
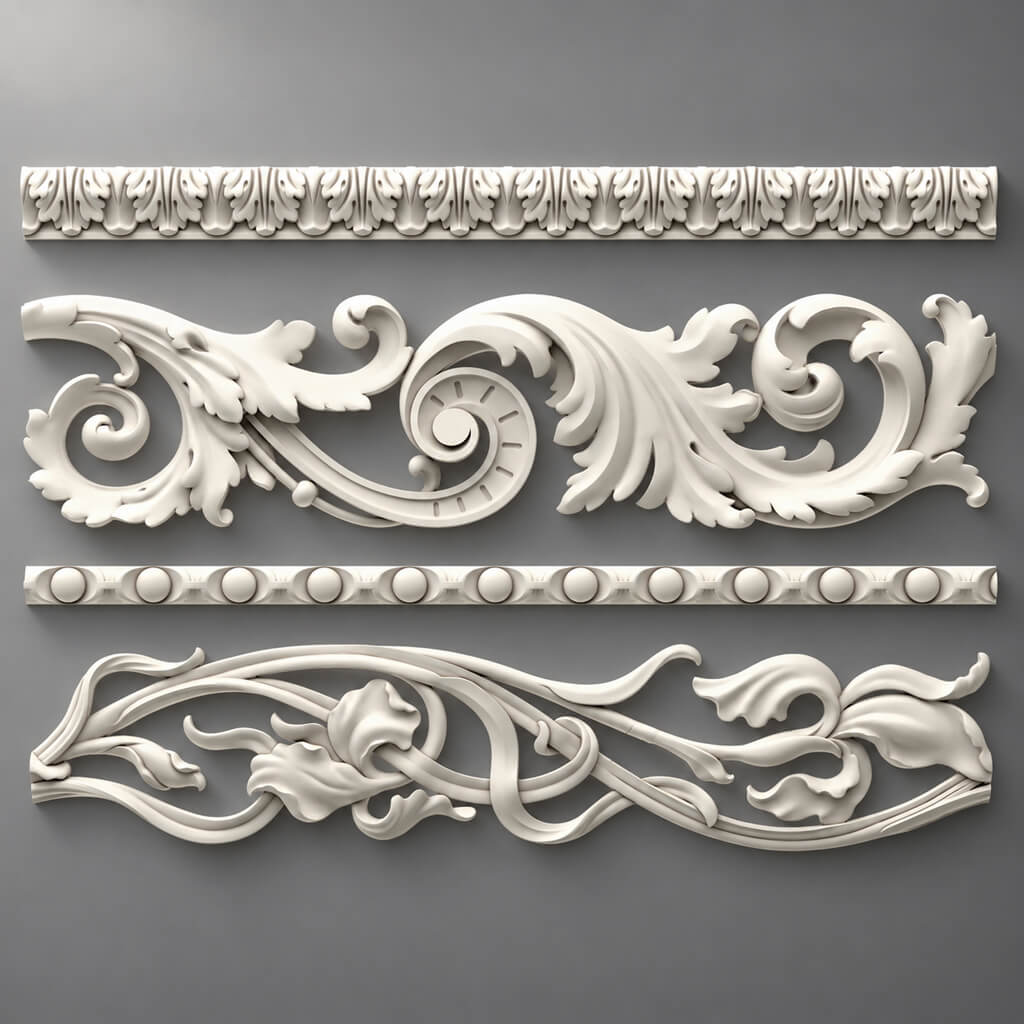
STAVROS Wood and MDF Profiles
STAVROS offers wood and MDF architectural trim in addition to its polyurethane products.
For a painted door makeover, both categories can be evaluated.
The material choice should be made deliberately rather than assuming every decorative profile performs the same way.
Five Door Panel Layouts for DIY Makeovers
The layout has a greater influence on the finished appearance than the number of decorative products used.
Well-proportioned frames create a convincing architectural pattern.
Incorrect proportions make even high-quality molding look misplaced.
1. One Large Rectangular Panel
This is one of the simplest designs.
A single rectangular molding frame is centered on the door.
It creates a restrained architectural feature without introducing several horizontal divisions.
The design can work well for modern classical interiors.
It is particularly useful for narrow doors.
A slim polyurethane molding provides enough detail without dominating the surface.
2. Two Stacked Panels
This is a familiar traditional arrangement.
One taller panel occupies the upper portion of the door.
One shorter panel occupies the lower portion.
The two panels share the same width and central axis.
The difference in height creates visual hierarchy.
The upper panel often feels lighter and more prominent.
The lower panel anchors the composition.
This is a useful starting point for a standard 30-inch-wide interior door.
3. Two Tall Vertical Panels
Another option is to divide the door into two narrow vertical frames.
The frames are positioned side by side.
This creates a strong vertical rhythm.
However, the available width must be sufficient.
On a narrow door, the panels can become too thin.
Door hardware may also interfere with the frame closest to the latch edge.
The design should be evaluated at full scale.
4. Four-Panel Traditional Layout
A four-panel design commonly uses two columns of decorative frames.
There are two upper frames and two lower frames.
The upper panels may be taller.
The lower panels may be closer to square.
This creates a traditional decorative rhythm.
It can work well on wider doors.
However, four separate frames increase the number of cuts and joints.
They also make hardware placement more challenging.
5. Asymmetrical Contemporary Panels
A contemporary door may use unequal rectangular fields.
For example, one large vertical frame may be paired with a smaller detail.
Asymmetry can work when it follows a clear visual logic.
But it is not necessarily appropriate for traditional interiors that rely on symmetry.
The designer should avoid placing a frame arbitrarily off-center.
How to Design a Two-Panel Door on a 30 × 80-Inch Slab
Let's develop a complete layout for a standard American interior door.
Assume the existing slab measures exactly:
Width: 30 inches
Height: 80 inches
The design will use two vertically stacked rectangular molding frames.
The molding will be attached to the surface.
The door's original construction will remain unchanged.
Establish the Horizontal Margins
Suppose the outer edges of the decorative frames are positioned 4.5 inches from each side of the door.
The outside frame width is:
30 − 4.5 − 4.5 = 21 inches.
Both frames will use that width.
Establish the Vertical Layout
For this example, use:
Top margin: 6 inches
Upper frame height: 35 inches
Gap between frames: 5 inches
Lower frame height: 27 inches
Bottom margin: 7 inches
Check the total:
6 + 35 + 5 + 27 + 7 = 80 inches.
The layout therefore fits within the nominal door height.
Why the Proportions Work
The upper frame is taller than the lower frame.
Both are centered on the door.
The horizontal gap creates a deliberate separation.
This produces a familiar traditional paneled appearance.
However, these are illustrative dimensions.
They should be adjusted if the existing handle, lockset, latch, or other hardware requires additional clearance.
Check the Lockset
On many American interior doors, the handle is positioned approximately 36 inches above the floor.
For a nominal 80-inch door, that corresponds to a centerline around 44 inches down from the top when the bottom of the door is near the finished floor.
In this example, the space between the decorative frames extends from 41 to 46 inches below the top.
That may provide a useful location for the handle.
But the actual hardware dimensions and position must be measured.
A large decorative rosette, backplate, or lever may need a wider clear area.
Never approve a decorative door layout without checking the hardware at full scale.
Panel Widths for 24-, 28-, 30-, 32- and 36-Inch Doors
The same general two-panel design can be adapted to several common door widths.
For comparison, assume the side margins remain 4.5 inches.
The upper and lower frame heights remain 35 and 27 inches.
The horizontal decorative frame width changes with the door.
| Door width | Side margin | Outside frame width |
|---|---|---|
| 24 in | 4.5 in | 15 in |
| 28 in | 4.5 in | 19 in |
| 30 in | 4.5 in | 21 in |
| 32 in | 4.5 in | 23 in |
| 36 in | 4.5 in | 27 in |
This is an illustrative design family.
The proportions should be checked individually.
A 15-inch-wide decorative field looks very different from a 27-inch-wide field.
The lockset clearance also changes with the chosen hardware.
A wider door may benefit from a different arrangement rather than simply enlarging the original frames.
How Much Polyurethane Molding Do You Need for One Door?
Now calculate the material for the 30 × 80-inch two-panel design.
The chosen profile is STAVROS MLDPU-002.
Its stock length is 102.36 inches.
For this example, the stated frame dimensions represent the outside long-point dimensions of the mitered pieces.
Upper Frame
The upper frame measures 21 × 35 inches.
Perimeter:
2 × (21 + 35) = 112 inches.
Lower Frame
The lower frame measures 21 × 27 inches.
Perimeter:
2 × (21 + 27) = 96 inches.
Total Installed Molding
112 + 96 = 208 inches.
Convert to feet:
208 ÷ 12 = 17.33 linear feet.
The door therefore requires approximately 17.33 installed linear feet of polyurethane molding.
But that is not the same as the purchased quantity.
Required Individual Cuts
| Piece length | Quantity |
|---|---|
| 35 in | 2 |
| 27 in | 2 |
| 21 in | 4 |
These eight finished pieces make the two decorative frames.
A Feasible Cutting Plan
One 102.36-inch strip can provide:
35 + 27 + 21 = 83 inches.
Use this arrangement for two strips.
That provides:
Two 35-inch pieces
Two 27-inch pieces
Two 21-inch pieces
The remaining requirement is two additional 21-inch pieces.
Cut them from a third strip.
Cutting Schedule
| STAVROS stock strip | Finished cuts |
|---|---|
| Strip 1 | 35 + 27 + 21 in |
| Strip 2 | 35 + 27 + 21 in |
| Strip 3 | 21 + 21 in |
Base material quantity: 3 full MLDPU-002 strips.
Purchased Material
3 × 102.36 = 307.08 inches.
Nominal Offcuts
307.08 − 208 = 99.08 inches.
The unused material is substantial because the project is small and uses fixed stock lengths.
Those offcuts may become useful when several doors share the same decorative layout.
This is one reason why a coordinated multi-door renovation can have better material efficiency than renovating each door independently.
Molding Quantity for Different Door Widths
Using the same two-panel layout and frame heights, the installed molding length changes with door width.
The following calculation assumes the outside long-point frame dimensions described above.
| Door width | Frame width | Installed molding | Feasible base stock strips |
|---|---|---|---|
| 24 in | 15 in | 15.33 ft | 2 |
| 28 in | 19 in | 16.67 ft | 2 |
| 30 in | 21 in | 17.33 ft | 3 |
| 32 in | 23 in | 18.00 ft | 3 |
| 36 in | 27 in | 19.33 ft | 3 |
The stock-strip quantities are based on the 102.36-inch STAVROS MLDPU profiles and feasible nominal cuts.
They do not include an additional reserve.
Why a Wider Door Can Cost More to Decorate
A small increase in frame width can change the number of purchased strips.
For example, the illustrated 28-inch door can be cut from two strips.
The 30-inch door requires three.
The difference arises because the cutting pieces no longer fit into the same stock arrangement.
This demonstrates why a material estimate should include a cutting plan rather than only the total decorative perimeter.
Always Check the Actual Cut Geometry
Mitered corners require accurate references.
The designer and installer should specify whether dimensions are measured to the long point, short point, or another consistent location.
Saw kerf and end trimming also consume material.
The final cut schedule should be reviewed with the actual profile and cutting method.
Six-Door Makeover: How to Reduce Molding Waste
Now consider a homeowner updating six identical 30 × 80-inch interior doors.
Each door receives the same two-panel arrangement.
The project requires:
Twelve 35-inch pieces
Twelve 27-inch pieces
Twenty-four 21-inch pieces
Total Installed Molding
One door:
208 inches.
Six doors:
6 × 208 = 1,248 inches.
Convert to feet:
1,248 ÷ 12 = 104 linear feet.
Buying Material Door by Door
If each door is cut independently using the previous three-strip plan:
6 × 3 = 18 strips.
That provides:
18 × 102.36 = 1,842.48 inches of purchased material.
Nominal unused material:
1,842.48 − 1,248 = 594.48 inches.
Optimizing the Cuts Across All Six Doors
Now combine all required pieces into one cutting schedule.
The stock strips can be used more efficiently.
A feasible plan is:
| Cutting pattern | Number of strips | Finished cuts per strip |
|---|---|---|
| Pattern A | 3 | 35 + 35 + 27 in |
| Pattern B | 1 | 35 + 27 + 21 in |
| Pattern C | 5 | 35 + 21 + 21 + 21 in |
| Pattern D | 4 | 27 + 27 + 21 + 21 in |
| Total | 13 | All required pieces |
Check the quantities.
The plan produces:
Twelve pieces measuring 35 inches
Twelve pieces measuring 27 inches
Twenty-four pieces measuring 21 inches
All 48 required molding pieces are accounted for.
Each cutting pattern fits within one 102.36-inch strip, with nominal room for cutting kerf.
Optimized Purchase Quantity
13 full MLDPU-002 strips.
Purchased Length
13 × 102.36 = 1,330.68 inches.
Nominal Offcuts
1,330.68 − 1,248 = 82.68 inches.
That represents approximately 6.21% of the purchased stock length.
Comparing the Two Purchasing Methods
| Method | Stock strips | Nominal unused material |
|---|---|---|
| Cut each door independently | 18 | 594.48 in |
| Optimize all six doors together | 13 | 82.68 in |
| Difference | 5 fewer strips | 511.80 in less nominal waste |
The optimized plan uses five fewer strips.
That is approximately 27.8% fewer purchased strips than the isolated three-strip-per-door approach.
This reduction is specific to the illustrated door layout and stock length.
It should not be treated as a universal saving for every decorative molding project.
Illustrative Material Cost Comparison
Suppose the molding costs $60 per full strip.
This is a hypothetical calculation, not a current STAVROS quotation.
Purchasing 18 strips would cost:
18 × $60 = $1,080.
Purchasing 13 strips would cost:
13 × $60 = $780.
The material difference would be:
$300.
Both approaches produce the same decorative frames.
The saving comes from the cutting plan, not from using a cheaper material.
This example demonstrates why a six-door makeover should be planned as one coordinated project.
Four-Panel Doors: A More Elaborate Traditional Layout
A four-panel composition can create a stronger classical appearance.
However, it requires more cuts and more careful planning.
Consider a 32 × 80-inch door.
The layout uses two decorative columns and two horizontal tiers.
Illustrative Dimensions
Assume:
Left margin: 4 inches
Right margin: 4 inches
Center gap: 3 inches
Available width for the two decorative columns:
32 − 4 − 4 − 3 = 21 inches.
Each column width:
21 ÷ 2 = 10.5 inches.
Vertical Arrangement
Suppose the upper panels measure 35 inches high.
The lower panels measure 25 inches high.
The remaining height is allocated to the top, bottom, and central margins.
One possible arrangement is:
Top: 6 inches
Upper panels: 35 inches
Center gap: 7 inches
Lower panels: 25 inches
Bottom: 7 inches
Total:
6 + 35 + 7 + 25 + 7 = 80 inches.
Decorative Molding Length
There are two upper frames, each measuring 10.5 × 35 inches.
Each upper perimeter:
2 × (10.5 + 35) = 91 inches.
Two upper frames:
182 inches.
There are two lower frames, each measuring 10.5 × 25 inches.
Each lower perimeter:
2 × (10.5 + 25) = 71 inches.
Two lower frames:
142 inches.
Grand total:
182 + 142 = 324 inches.
That equals:
27 linear feet of installed molding.
Material Quantity
The project requires:
Four 35-inch pieces
Four 25-inch pieces
Eight 10.5-inch pieces
A feasible preliminary cutting schedule can be developed using four 102.36-inch stock strips.
However, the available door width is limited.
The molding face width, hardware clearances, and actual frame geometry must be checked carefully.
The four-panel design should not be applied automatically to every 32-inch door.
Door Hardware Clearance: The Most Common Design Mistake
A decorative frame may look correctly proportioned on a drawing yet conflict with the existing door hardware.
This is particularly common on narrow doors.
Door Knobs and Rosettes
A round door knob typically has a mounting rosette or another decorative plate.
The molding must not interfere with that plate.
The distance from the latch edge to the knob center is commonly determined by the lockset backset.
But the actual hardware can vary.
Measure the installed hardware.
Lever Handles
A lever extends horizontally.
Its overall shape and operating movement may create conflicts that a small round knob does not.
The decorative molding should not obstruct normal use.
Escutcheon Plates
Some traditional doors use elongated decorative backplates.
These may occupy a substantial part of the door face.
A frame that works with a compact knob rosette may not work with a long escutcheon.
Hinges
Raised molding placed too close to the hinge edge may contact the jamb or another surface as the door opens.
The clearance depends on the door geometry and hinge arrangement.
Doorstops
A doorstop contacts the door to limit its travel or establish its closed position.
Decorative trim must not interfere with the intended contact or operation.
Test the Entire Swing
Before installing molding, use a representative sample of the selected profile.
Position it temporarily in the proposed location.
Open and close the door through its normal range.
Check the hinge side, latch side, adjacent wall, and any protruding hardware.
A layout should not be finalized solely from a front elevation.
Can You Add Molding to a Hollow-Core Door?
Often, yes, provided the door is otherwise suitable.
A hollow-core door can receive a decorative surface treatment without changing its internal construction.
However, its thin face skins require caution.
Avoid Aggressive Fastening
Do not assume that long nails or screws can be driven anywhere into the face of a hollow-core door.
The internal construction may provide limited fastening support.
An inappropriate fastener may puncture the skin, damage the core, or affect the finished appearance.
Choose the Attachment System Carefully
A suitable adhesive may be used for certain polyurethane-to-door applications.
The adhesive must be compatible with both the polyurethane and the door's existing surface.
The bond should be tested.
Do Not Remove Excessive Surface Material
Aggressive sanding can damage a thin hardboard or factory-coated skin.
Surface preparation should follow the door and finishing product requirements.
Additional Weight
Applied molding adds weight.
The amount depends on the product and decorative layout.
Check the door's hinges and operation.
Do not assume that every lightweight decorative product produces negligible loading when used across several panels.
Remember the Real Objective
A hollow-core makeover changes the appearance of the door.
It does not improve the door's core construction, sound isolation, or structural properties in any guaranteed way.
Can You Add Polyurethane Molding to Fire-Rated Doors?
A fire-rated door requires special treatment.
A labeled fire door is part of a tested assembly.
Its performance can depend on the door leaf, frame, seals, hardware, clearances, and approved construction details.
Adding decorative molding may constitute a modification that affects the listing or the approved assembly.
Do Not Assume Surface Decoration Is Permitted
A decorative applique attached with adhesive can still represent a change to the door assembly.
The fact that no holes are drilled does not automatically establish compliance.
Follow NFPA 80 and Listing Requirements
NFPA 80 governs aspects of fire door installation, inspection, maintenance, and modifications where applicable.
Certain field modifications require approval through the relevant listing organization.
Before changing a labeled fire door, consult the door manufacturer, applicable listing requirements, and the authority having jurisdiction.
Common Situations Requiring Caution
Certain doors between attached garages and living spaces may be subject to fire-protection requirements.
Fire-rated doors are also found in multifamily buildings, corridors, stair enclosures, and various commercial settings.
Do not remove labels, alter required clearances, obstruct hardware, or add unapproved decorative components.
Recommended Approach
For an ordinary DIY molding makeover, concentrate on a conventional non-fire-rated interior door that is suitable for the treatment.
If the existing door is fire-rated, do not modify it until the proposed work has been explicitly evaluated and approved through the appropriate process.
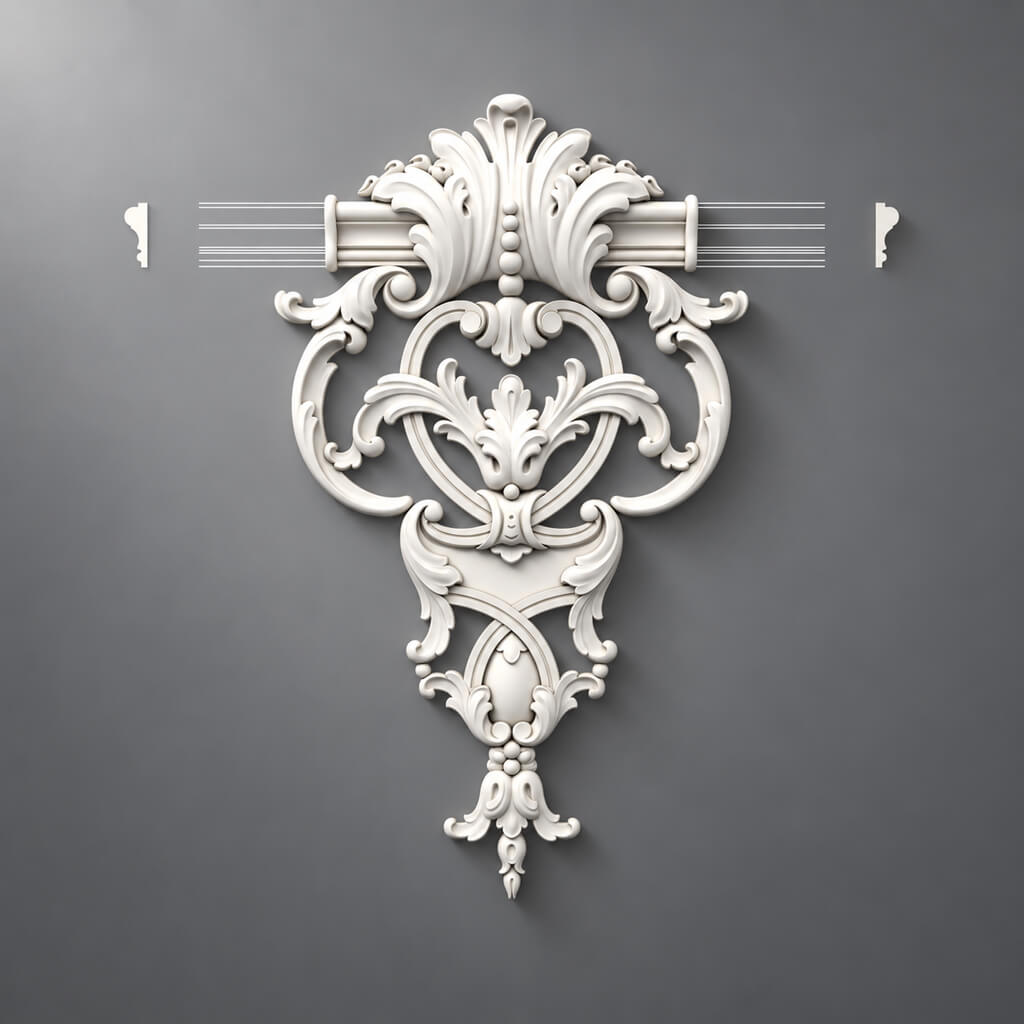
Polyurethane Door Appliques: Adding Classical Ornament
A rectangular frame creates architectural geometry.
An applique adds sculpted relief.
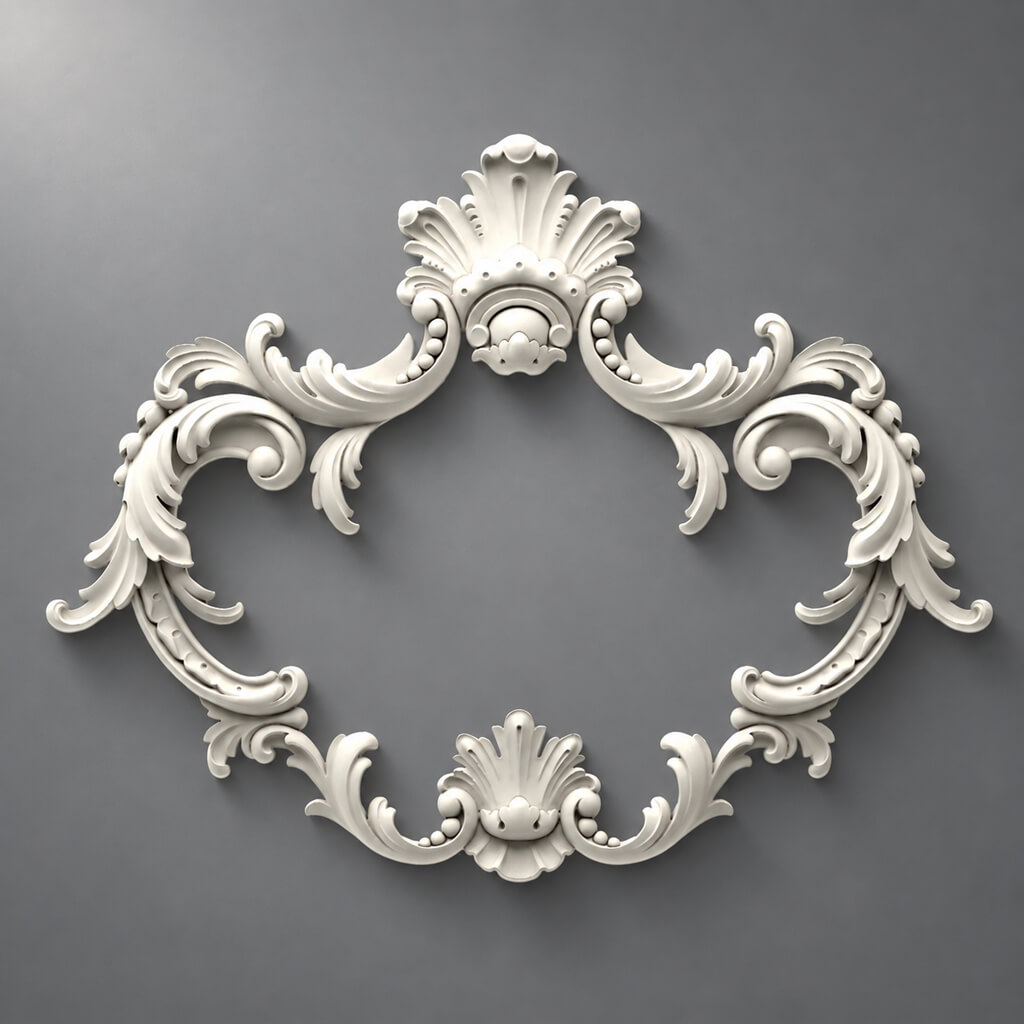
STAVROS offers decorative polyurethane onlays that can be considered for selected traditional and neoclassical door designs.
These elements are best used sparingly.
An ornamental applique should not compete with the lockset or make the door difficult to use.
NPU-501: Elongated Floral Ornament
The STAVROS NPU-501 polyurethane applique measures approximately:
Width: 2.28 inches
Height: 11.81 inches
Projection: 0.43 inches
Material: polyurethane
The elongated botanical pattern can create a classical focal point.
It may be positioned within a sufficiently large upper door panel.
The applique should be centered according to the design.
Its projection and location must be checked against any door hardware or adjacent surfaces.
NPU-505: Compact Vertical Decorative Accent
The STAVROS NPU-505 polyurethane applique measures approximately:
Width: 1.97 inches
Height: 8.98 inches
Projection: 0.39 inches
Material: polyurethane
Its narrower proportions can work in selected smaller decorative fields.
This may be a more restrained option for a typical residential door.
Comparing the Two Appliques
| Product | Dimensions | Potential application |
|---|---|---|
| NPU-501 | 2.28 × 11.81 × 0.43 in | Larger classical upper panel |
| NPU-505 | 1.97 × 8.98 × 0.39 in | Smaller ornamental accent |
Neither product should be treated as a structural reinforcement.
Both require compatible surface preparation and attachment.
How Many Appliques Should One Door Have?
A restrained two-panel door may use one central applique in the upper panel.
A more elaborate design might use paired decorative elements.
However, adding an ornament to every panel is not automatically desirable.
The molding frames already create depth.
Use ornamental decoration when it adds a clear focal point.
Molding Corners for Classical Door Panels
Traditional decorative doors sometimes feature ornamental corners.
These can add a more elaborate character than plain 45-degree mitered joints.
STAVROS offers polyurethane molding corner details.
MLDPU-002U
The STAVROS MLDPU-002U polyurethane corner element can be considered for decorative compositions using the appropriate molding system.
Its listed overall dimensions are approximately 6.77 × 6.77 inches, with a relief depth of 0.51 inches.
The component is substantially larger than a simple mitered corner.
It therefore changes the proportions of the frame.
Corner Compatibility Matters
Not every decorative corner fits every molding profile.
A corner made for a particular molding series should not be substituted merely because it looks similar.
Confirm the exact profile compatibility.
Recalculate the Straight Molding Lengths
A design using ornamental corners requires a different cutting schedule from a design using four ordinary mitered pieces.
The corner elements occupy part of the overall frame geometry.
Measure their exact connection dimensions.
Then calculate the straight molding runs between them.
The previous two-panel cutting examples assume ordinary mitered corners without additional corner ornaments.
Design Styles for a Polyurethane Door Makeover
The same basic door can support several architectural styles.
The visual outcome depends on the geometry, molding profile, ornament, color, and hardware.
Modern Classical
A modern classical door can use two stacked rectangular frames.
Choose a restrained molding profile.
Paint the door and molding in one color.
Warm white, cream, light gray, and muted taupe can create a cohesive result.
The emphasis is on proportion rather than elaborate ornament.
Neoclassical
A neoclassical design may use stepped molding.
Symmetrical upper and lower panels create an ordered composition.
A carefully chosen ornamental applique may add character.
However, heavy gilding or multiple competing ornaments are not necessary.
Traditional American Interior
A traditional door can use a familiar two-panel or four-panel layout.
White or another restrained painted finish may coordinate with existing baseboards and door casing.
The profile should relate to the surrounding millwork.
Art Deco
An Art Deco-inspired door may use stronger geometry.
A symmetrical arrangement of narrow and wide rectangular fields can introduce rhythm.
Dark paint with restrained metallic accents may create the intended character.
The design should avoid confusing classical floral ornament with geometric Art Deco detailing unless the combination is deliberate.
Scandinavian-Inspired Interior
A Scandinavian-inspired makeover generally benefits from simplicity.
A narrow profile such as MLDPU-001 may be sufficient.
The molding can be painted in the same color as the door.
A restrained design allows the door to remain visually quiet.
English-Inspired Study
A dark green, navy, or charcoal door with classical molding may complement a traditional study.
A stepped profile can produce stronger shadows.
An antique brass handle or other suitable hardware may complete the composition.
French Country
A soft ivory, pale blue, or muted sage finish can create a traditional country appearance.
Simple panel frames can be combined with restrained decorative detail.
A subtle aged glaze may emphasize the molding relief.
However, the finish should be coordinated rather than randomly distressed.
Should Door Molding Match the Walls or the Door?
The most effective color scheme depends on the desired visual relationship.
Molding and Door in One Color
This creates a relatively unified appearance.
The molding is visible primarily through relief and shadow.
It can make an applied frame look more integrated into the surface.
This is particularly suitable for simulated paneled doors.
White Molding on a Colored Door
A high-contrast combination creates a stronger decorative pattern.
It may suit a formal or eclectic interior.
However, it also emphasizes every alignment error.
The molding becomes a dominant graphic element.
Dark Monochromatic Doors
Deep navy, green, charcoal, and other dark colors can create a strong architectural effect.
When the molding shares the same finish, the relief remains visible under directional lighting.
The result can feel more restrained than using contrasting white trim.
Metallic Accents
Gold, bronze, or silver may be used sparingly.
An applique or selected decorative detail can receive metallic highlighting.
Applying metallic paint to every frame may create a much more elaborate effect.
Coordinate the Door Casing
The door slab and the casing are separate elements.
They do not necessarily need the same color.
But the relationship should be intentional.
A dark paneled door with white casing can work well.
A fully color-drenched door and frame can create another appearance.
The choice should relate to the overall interior scheme.
Tools and Materials for a DIY Door Makeover
The exact supplies depend on the existing door and selected molding.
A typical project may require the following items.
| Item | Purpose |
|---|---|
| Tape measure | Measure the door and frame layout |
| Straightedge | Establish straight reference lines |
| Combination square | Check alignment and corners |
| Pencil or suitable marking tool | Transfer the layout |
| Low-tack painter's tape | Temporary marking and protection |
| Miter saw or suitable miter box | Cut decorative molding |
| Fine-tooth blade appropriate to the material | Produce clean cuts |
| Compatible mounting adhesive | Attach decorative molding |
| Temporary support or approved tape | Hold the molding while bonding |
| Suitable filler or joint compound | Finish approved joints |
| Compatible primer | Prepare surfaces where required |
| Finish paint | Create the final appearance |
| Small roller and brushes | Apply coatings |
| Protective materials | Protect hardware and surrounding surfaces |
This is a planning reference, not a universal installation kit.
The adhesive and coating system should be selected for the specific door surface and molding.
Step-by-Step: How to Add Molding to a Flat Interior Door
The procedure should begin only after confirming that the door is suitable for modification.
The following sequence describes a conventional non-fire-rated interior door.
Step 1: Inspect the Existing Door
Check the slab for damage.
Verify that the hinges are secure.
Make sure the door closes and latches correctly.
Identify the existing surface material.
If the door is warped or damaged, address that condition before proceeding.
Step 2: Measure the Door
Record the actual width and height.
Measure the location of the handle and lockset.
Check the distance between the door face and surrounding surfaces.
Document any existing damage or irregularities.
Step 3: Choose the Decorative Layout
Draw the proposed frames to scale.
For a first project, a one-panel or two-panel design may be easier to execute than a four-panel arrangement.
Choose proportions that suit the door.
Step 4: Check the Hardware Clearances
Mark the handle and rosette area.
Check hinge-side and latch-side clearance.
Test a piece of the selected molding on the door face.
Open and close the door through its normal range.
Revise the layout where necessary.
Step 5: Remove the Door if Appropriate
Working horizontally can make measuring, cutting, and bonding easier.
If the door can be removed safely and its hardware permits it, position it on stable padded supports.
A heavy solid-core door may require assistance.
It is also possible to work on certain doors while they remain installed.
The correct approach depends on the project.
Step 6: Clean the Surface
Remove dust, grease, and contaminants using an approved cleaning method.
Allow the surface to dry.
Avoid using acetone or another strong solvent without confirming compatibility.
Some factory finishes and polymer components can be damaged by inappropriate solvents.
Step 7: Prepare the Bonding Surface
Follow the adhesive and door-finish manufacturers' instructions.
Some coatings may require light abrasion or a bonding primer.
Others may not.
On hollow-core doors, avoid aggressive sanding that could damage the thin face skin.
Step 8: Mark the Frame Layout
Begin with the main reference axes.
Transfer the outer frame dimensions.
Check the top and bottom margins.
Verify the central gap between panels.
Measure the diagonals of each rectangular frame to confirm it is square.
Use the actual frame dimensions rather than approximating by eye.
Step 9: Prepare the Molding Cuts
Use the selected molding profile and a suitable cutting method.
For mitered rectangular frames, cut the corners according to the required geometry.
Label the pieces.
Do not assume that all nominally equal dimensions will remain equal after an inaccurate miter cut.
Step 10: Dry-Fit the Frames
Place the pieces on the door without adhesive.
Check the corners.
Review their alignment with the door centerline.
Confirm the spaces around the lockset.
At this stage, small corrections are much easier than after bonding.
Step 11: Test Adhesion
Use a spare offcut and an appropriate test location.
Follow the adhesive manufacturer's procedure.
An adhesive that works on unfinished wood may perform differently on laminate, factory paint, or a coated hardboard skin.
A successful test is particularly important for doors with glossy or nonporous finishes.
Step 12: Apply the Adhesive
Use the quantity and application pattern specified for the selected adhesive.
Avoid excess material that can squeeze onto visible surfaces.
Apply the molding according to the approved bonding procedure.
Step 13: Position the Molding
Align each piece with the markings.
Maintain contact for the required time.
Use suitable temporary support where necessary.
Do not assume that a brief hand press provides the required holding time for every adhesive.
Step 14: Allow the Adhesive to Cure
Observe the specified cure time.
Temperature, humidity, adhesive type, and substrate condition can affect the process.
Do not reinstall or operate the door aggressively before the bonding system has reached the required condition.
Step 15: Install Optional Appliques
If the design includes a decorative polyurethane onlay, position it according to the approved layout.
Check its clearance from locks, handles, and adjacent surfaces.
Use a compatible attachment system.
Step 16: Finish the Joints
Inspect the molding corners and transitions.
Use the appropriate compatible joint-treatment materials.
Not every filler or sealant can be sanded.
For example, certain flexible sealants are designed to be tooled rather than sanded.
Select the correct material for the specific joint.
Step 17: Prepare for Painting
Protect hardware and surrounding surfaces.
If the finish requires primer, apply the specified product.
The door surface and polyurethane molding may require different preparation.
Step 18: Paint the Door
Apply the selected finish according to the coating manufacturer's instructions.
A small roller may be useful on flat surfaces.
A suitable brush can reach molding recesses.
Avoid heavy paint buildup that obscures the decorative relief.
Step 19: Reinstall the Door
Once the adhesive and coating system have reached the required condition, reinstall the door if it was removed.
Check alignment.
Verify that it opens, closes, and latches correctly.
Step 20: Inspect the Completed Makeover
Examine the molding under normal room lighting.
Check the alignment, corners, and painted finish.
Open the door fully.
Confirm that no decorative component contacts the frame, doorstop, or adjacent wall.
A door makeover is complete only when the decorative effect and normal operation both work correctly.
Painting Polyurethane Molding on Factory-Finished Doors
A factory-finished door may not accept paint in the same way as new primed trim.
The finish may be painted hardboard, wood veneer, laminate, or another material.
Each requires a compatible preparation system.
Painted Doors
If the existing paint is stable, the surface may be prepared for repainting using the selected coating system.
Loose or failing coatings need appropriate correction.
Laminate and Factory-Coated Surfaces
Smooth nonporous finishes can present adhesion challenges.
A compatible bonding primer may be required.
The exact procedure depends on the surface.
Do not assume that all laminate doors can be painted successfully using ordinary wall primer.
Wood Veneer
Wood veneer can be thin.
Aggressive sanding may damage it.
The finishing process should preserve the existing surface.
Polyurethane Trim
Some STAVROS polyurethane moldings are supplied primed.
However, factory priming does not establish compatibility with every paint.
Confirm the selected finishing system.
Use a Complete Test
A full sample should reproduce the intended preparation, adhesive, primer, and paint.
This helps identify compatibility problems before the entire door is decorated.
Interior Door Makeover Cost: Material, Labor and Finishing
A decorative door makeover is often considered because replacing multiple doors can involve significant expense.
But the correct comparison is between complete project alternatives.
Molding Cost
Calculate the number of full stock strips.
Do not rely solely on installed linear footage.
Decorative Appliques
Individual ornaments are typically purchased by piece.
Count the exact required quantities.
Adhesive and Supplies
Include compatible adhesive, filler, masking materials, and other consumables.
Painting
The finishing cost depends on the door's condition, required preparation, number of coats, and selected product system.
Labor
A DIY project uses the homeowner's time.
A professional installation adds paid labor.
A complex four-panel door generally requires more cutting and fitting than a simple single-panel design.
Existing Door Condition
A damaged or failing door may require repairs that change the economics of the project.
Illustrative Cost Formula
Total makeover cost = molding + appliques + adhesives and supplies + paint and preparation + labor + delivery
For a U.S. project ordering imported decorative products, applicable freight and import-related charges must also be included.
Avoid Misleading Comparisons
A decorated hollow-core door may look more traditional, but it does not become identical to a custom solid-wood paneled door.
The two products may still differ in weight, construction, durability, sound transmission, and other characteristics.
The decorative makeover should be evaluated for its visual result and actual cost—not marketed as a complete substitute for every feature of a higher-end door.
Should You Renovate One Door or All the Doors in a Home?
The correct decision depends on the design objective.
A single accent door can work well in a distinctive room.
But when several similar doors are visible along the same hallway, inconsistent styles may make the interior look fragmented.
One-Door Test Project
Starting with one conventional non-fire-rated door provides an opportunity to test the molding profile and finish.
It also reveals how much work the chosen layout requires.
Hallway Door Sets
Several doors along the same hallway can benefit from a consistent decorative language.
The layout does not necessarily have to be identical where door widths differ.
But the profile, finish, and proportions should relate to one another.
Whole-House Makeover
A complete renovation may use one principal molding profile throughout the home.
Individual door layouts can then be adapted to different widths.
This can create consistency.
It may also improve cutting efficiency when material requirements are planned across all doors.
Use the Same SKU for Repeated Frames
When appropriate, standardizing on one molding such as MLDPU-002 can simplify procurement.
However, don't force the same profile onto a door where its size or projection creates a problem.
Architectural consistency should not compromise functionality.
Common DIY Door Molding Mistakes
Selecting the Profile Before Checking Clearances
A beautiful molding may interfere with hinges or the doorstop.
Check the actual projection.
Using an Overly Complicated Layout
A four-panel design may look attractive in a photograph but be too crowded on a narrow door.
Choose proportions that suit the surface.
Ignoring Hardware
The decorative frame may conflict with a handle or backplate.
Measure and test first.
Using Incompatible Adhesive
Some adhesives will not bond reliably to certain factory coatings.
Others may damage polyurethane or the door finish.
Use a verified compatible system.
Removing Too Much of the Existing Surface
Aggressive sanding can damage thin door skins and veneers.
Prepare the surface carefully.
Incorrect Miter Measurements
A frame measured to the short points of the miters will have different outside dimensions from one measured to the long points.
Use consistent references.
Failing to Dry-Fit
Small cutting errors can become obvious when the completed frame is installed.
Test the geometry before bonding.
Applying Too Much Paint
Thick paint can obscure molding relief.
Follow the coating manufacturer's application recommendations.
Installing Ornament Near Moving Parts
Appliques should not interfere with hinges, latches, or other functional components.
Modifying a Fire-Rated Door Without Approval
A fire-rated door is part of a listed assembly.
Do not assume decorative modifications are permitted.
Ignoring Lead Paint in Older Homes
Doors in homes built before 1978 may have older lead-containing coatings.
Work that disturbs those surfaces requires appropriate precautions and may be subject to EPA requirements.
Purchasing Without a Cut List
The stock-strip quantity depends on the finished piece lengths.
The six-door example demonstrates why careful cutting schedules can materially reduce waste.
Lead Paint Safety in Older American Homes
Older painted doors require additional consideration.
For homes built before 1978, existing paint may contain lead.
Sanding, scraping, and other renovation activities can create hazardous dust.
The U.S. Environmental Protection Agency's Renovation, Repair and Painting Rule applies to many paid renovation activities that disturb painted surfaces in covered pre-1978 housing and child-occupied facilities.
Professional contractors performing covered work generally need appropriate certification and lead-safe procedures.
Homeowners working on their own homes may be treated differently under the federal rule, but that does not eliminate the health hazard.
State and local requirements may also apply.
Do not begin aggressive surface preparation on an older painted door without assessing the possibility of lead.
What to Buy From STAVROS for a DIY Interior Door Makeover
The required products depend on the intended appearance.
A restrained door may need only one molding profile.
A more formal composition may include an ornamental applique or compatible decorative corners.
| STAVROS product category | Door makeover application |
|---|---|
| Polyurethane Moldings | Simulated raised-panel frames |
| MLDPU-001 | Delicate door panel outlines |
| MLDPU-004 | Restrained architectural framing |
| MLDPU-002 | Defined classical door panels |
| MLDPU-003 | More substantial formal designs |
| Polyurethane Appliques | Decorative focal ornaments |
| Molding Corner Decor | Selected classical corner compositions |
| Wood and MDF Trim | Alternative paint-grade or natural wood profiles |
The profiles and ornaments are decorative products.
The existing door, hinges, locking hardware, and required safety characteristics remain separate considerations.
Purchasing STAVROS Polyurethane Molding for U.S. Projects
The English-language STAVROS catalog lists many product dimensions in inches and displays prices in U.S. dollars.
However, the company's published delivery information primarily describes Russia and certain neighboring markets.
Customers purchasing for projects in the United States should confirm international shipping availability, freight costs, customs responsibilities, lead times, and applicable commercial terms directly with STAVROS.
A price displayed in U.S. dollars does not establish domestic U.S. stock.
Order by Exact SKU
For example:
MLDPU-002 — polyurethane molding — 0.87 × 0.43 × 102.36 inches.
This identifies the exact product and dimensions.
Confirm the Required Quantity
Prepare the full cutting schedule before ordering.
For the illustrative 30 × 80-inch two-panel door, three stock strips are required when cutting the door independently.
For six identical doors, the optimized base cutting schedule uses thirteen strips.
The actual order may require a reserve depending on installation conditions and replacement availability.
Check Ornament Compatibility
A decorative corner must suit the selected molding.
An applique must fit within the available decorative field.
Review the product drawings before purchasing.
Request Samples Where Appropriate
Physical samples are useful for checking relief, scale, and clearance.
A sample can also help determine whether the molding works with the existing paint system.
Confirm Delivery and Packaging
Long profiles require suitable protection during shipping.
Any packaging requirements or additional charges should be included in the supplier quotation.
Frequently Asked Questions About DIY Interior Door Makeovers
Can You Add Molding to a Flat Interior Door?
Yes, certain flat interior doors can receive decorative molding when the door construction, surface, adhesive, and operational clearances are suitable.
Can You Make a Hollow-Core Door Look Like a Paneled Door?
Yes. Applied molding can create the visual impression of raised panels. However, it does not change the door's hollow-core construction.
What Is the Best Molding for a DIY Door Makeover?
A narrow or medium decorative profile is a practical starting point. STAVROS MLDPU-001, MLDPU-004, and MLDPU-002 provide different levels of relief.
Can Polyurethane Molding Be Installed on Painted Doors?
Often, yes, when the existing paint is sound and the attachment system is compatible. Surface preparation and adhesion testing may be required.
Can You Apply Molding to Laminate Doors?
Possibly, but laminate and other factory-coated surfaces can present adhesion challenges. Use a compatible system and test before proceeding.
What Is the Difference Between Applied Molding and Real Door Panels?
Applied molding creates decorative outlines on the existing surface. A traditionally paneled door has actual constructed panels and frame components.
How Much Molding Is Needed for a 30 × 80-Inch Door?
For the illustrated two-panel design, approximately 17.33 linear feet of molding is installed. The specified cutting plan requires three full STAVROS strips measuring 102.36 inches each.
How Many Strips Are Needed for Six Doors?
For six identical doors using the illustrated 21 × 35-inch and 21 × 27-inch panels, a coordinated cutting schedule can produce all required pieces from thirteen full MLDPU-002 strips.
Can You Use Wood Molding Instead of Polyurethane?
Yes, where suitable for the door and installation. STAVROS also offers wood and MDF decorative profiles.
Can You Glue Polyurethane Molding to Hollow-Core Doors?
Certain suitable adhesives can bond decorative polyurethane molding to compatible door surfaces. The exact product and bond must be verified.
Do You Need Nails for Door Molding?
Not necessarily. Some installations can use compatible adhesive systems. However, the appropriate method depends on the materials and manufacturer instructions.
Do not assume that nails are suitable for thin hollow-core door skins.
Do You Have to Remove the Door Before Installing Molding?
Not always. Working horizontally may make the project easier, but some doors can be decorated while installed. The decision depends on the door's weight, hardware, and work conditions.
Can You Paint Polyurethane Molding?
Yes, using a compatible coating system. Check whether the product is already factory-primed and follow the finishing instructions.
Should You Paint the Door and Molding the Same Color?
A monochromatic finish can create a unified simulated paneled appearance. Contrasting colors are also possible when used deliberately.
Can You Use Ornamental Appliques on Interior Doors?
Yes, where the applique fits the decorative field and does not interfere with hardware or normal operation. STAVROS NPU-501 and NPU-505 are examples of polyurethane decorative onlays.
Can You Decorate a Pocket Door With Molding?
A pocket door has limited clearance within its cavity. Projecting decorative molding may prevent normal operation. Do not modify it without confirming the required clearances and system compatibility.
Can You Decorate a Fire-Rated Door?
Do not assume so. Any proposed alteration to a labeled fire-rated door must be evaluated under the manufacturer's listing and applicable fire-door requirements.
How Long Does a Door Molding Makeover Take?
The schedule depends on layout complexity, cutting, adhesive curing, preparation, and painting. Manufacturer drying and curing requirements may extend the work over multiple days.
Is a DIY Door Makeover Cheaper Than Replacing the Door?
It may be, particularly when the existing door is sound. Compare the complete material, labor, finishing, and delivery costs. The decorated door will not necessarily have the same construction or performance as a new premium door.
Where Can I Buy Polyurethane Molding for Interior Doors?
Explore STAVROS polyurethane molding, ornamental door appliques, and decorative molding corners.
For U.S. projects, confirm product availability and international delivery terms before purchasing.
Final Thoughts: Create Better-Looking Interior Doors Through Proportion and Detail
A successful door makeover begins with the existing door.
Its dimensions, construction, hardware, and operating clearances determine what can reasonably be added.
The decorative layout should respond to those conditions.
A narrow door may need only one carefully positioned molding frame.
A standard 30-inch door can support a familiar two-panel design.
A wider door may accommodate a more elaborate four-panel arrangement.
A classical interior may benefit from selected ornamental appliques.
A modern room may look better with nothing more than a fine polyurethane border painted in the same color as the door.
STAVROS offers polyurethane molding profiles, decorative trim molding, and polyurethane onlays for creating these decorative compositions.
But the molding is only one part of the result.
Accurate measurements establish proportion.
A cutting schedule controls material use.
Compatible adhesives provide reliable attachment.
Proper preparation supports the paint finish.
And careful installation preserves normal door operation.
The material calculations in this guide also demonstrate why planning matters.
A single 30 × 80-inch door with two simulated panels requires 208 inches of installed molding.
When six identical doors are planned together, the required pieces can be cut from thirteen STAVROS stock strips rather than the eighteen strips used by separate door-by-door allocations.
The difference comes from better use of the material.
It does not require sacrificing the decorative design.
For American homeowners planning a budget-conscious interior renovation, this is the central lesson.
An impressive door makeover is not created by using the most ornate molding or the greatest quantity of decoration. It is created by choosing the right profile, designing convincing proportions, applying a compatible finish, and preserving the door's functional and safety requirements.
With those principles in place, a simple flush door can become a coordinated architectural feature that contributes to the character of the entire home.