Article Contents:
- Procurement starts with the scope boundary, not with quantities
- SCOPE RESPONSIBILITY MATRIX — the key document before the procurement schedule
- Landlord scope is a list for a specific project, not a universal standard
- Tenant fit-out also needs to be broken down by physical elements
- The phrase “the casing is included with the door” is too vague
- Cornice at the boundary between landlord ceiling and tenant interior
- DUPLICATE
- GAP
- MISMATCH
- TIMING GAP
- TENANT READY POINT: the design point marking the end of landlord scope
- Landlord handover must preserve the technical identity of the existing trim
- Tenant must not automatically copy the landlord profile
- When it makes sense to use a single SKU instead
- What exactly the landlord standardizes so as not to turn the fit-out into a copy of the common corridor
- Practical example: office entrance and five lines of responsibility
- How to use a HOLD POINT without stopping the entire fit-out
- Who issues the APPROVED interface
- How to link the Interface Register to two BOQs
- Duplicate check before issuing the PO
- GAP check: looking for elements that are not in any package
- MISMATCH check: when both were ordered but compatibility was not verified
- When a physical mock-up is needed
- How to document a mock-up result
- Fit-out for multiple tenants: how to avoid four different external portals in one corridor
- Make-good: technically separating what remains with the building from what leaves with the tenant
- Tenant AS-BUILT should return to the landlord record
- Why the landlord record is especially important in a multi-tenant building
- TBD REGISTER: undefined boundaries cannot be hidden in comments
- What to do if the landlord changes the base profile after the tenant has already ordered theirs
- Interface dependency map: one landlord item can affect multiple tenants
- How to handle vacant units
- How to account for built-in furniture at the scope boundary
- How to account for floor finish at the skirting boundary
- How to account for wall build-up at the architrave boundary
- How to account for the ceiling cornice with landlord MEP
- How to handle a single SKU procured by both parties but for different zones
- How to consolidate the procurement of a single SKU without losing ownership
- How to split the service reserve between landlord and tenant
- How to handle a landlord-supplied / tenant-installed item
- How to handle a tenant-supplied / landlord-installed item
- Schedule Interface Matrix: who must be ready by which date
- How to inspect the interface before installation
- Interface Inspection: who accepts the completed junction
- How to file an interface defect
- How to manage interface variations after installation
- Procurement Release Gate: when a specific line can be released to order
- How to avoid mixing landlord procurement and tenant procurement in a single register
- How to handle different names for the same item
- How to handle tenant design that uses a similar but not identical profile
- How to handle different door types on the same floor
- How to account for fire / access requirements without inventing standards
- How to run a reverse check: every interface must have five owners
- How to separate spare / service reserve after handover
- How to handle early handover of the landlord area while the tenant is still under construction
- How to work when the tenant wants to change a landlord item within their block
- How to preserve the possibility of a future make-good without excess stock
- How to verify landlord record readiness after tenant fit-out
- When a new purchase is not needed at all
- 1. Not defining landlord / tenant scope
- 2. Creating two independent specifications
- 3. Not identifying interface items
- 4. Buying the same skirting board twice
- 5. Not buying a door casing at all
- 6. Using different names for the same item
- 7. Not saving the landlord finish SKU
- 8. Choosing a "similar" tenant profile for a direct joint
- 9. Not checking the floor level
- 10. Landlord installs the end before tenant approval
- 11. Tenant removes a landlord item
- 12. Not assigning a Cost Owner for the transition
- 13. Assuming the door package is clear without checking
- 14. Not synchronizing schedules
- 15. Order tenant trim before APPROVED interface
- 16. Not passing source data to the next tenant
- 17. Not updating as-built documentation after fit-out
- 18. Unify the entire tenant design instead of several interfaces
- Who usually buys baseboards inside the tenant's office?
- Can the landlord and tenant use different baseboards at the same door?
- If the same SKU is purchased by both parties, is that a duplicate?
- When is tenant trim ready to order?
- What should be done if the tenant has not yet been found?
- Should the tenant duplicate the baseboard of the common corridor?
- Who pays for the transition piece?
- Why should the landlord obtain the tenant's AS-BUILT?
- What should be done if the landlord profile changed after the tenant's order?
- When is a mock-up needed?
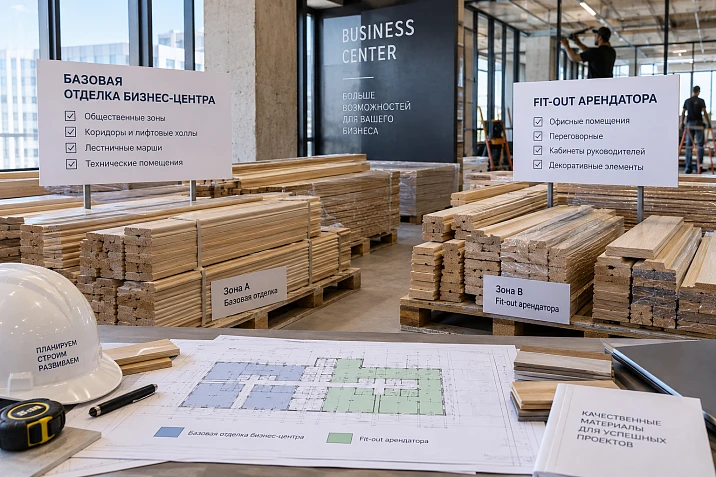
A business center is built according to the usual logic for commercial real estate: the building owner performs the base finish of the common areas and hands over the leased blocks in an agreed degree of readiness. Then tenants launch their own fit-out — meeting rooms, offices, reception, executive areas, built-in furniture, and decorative finishes.
The problem appears not within the clean landlord zone and not within the clean tenant zone, but at the junction of the two scopes. Who should order the baseboard at the office entrance? Is the trim on the tenant's side included in the owner's door package? Who buys the wooden cornice if the ceiling belongs to landlord works and the decorative interior belongs to tenant fit-out? Who is responsible for the transition between two baseboards of different heights?
If this is not determined before procurement, the project gets two opposite errors:
DUPLICATE — both parties bought the same element.
Or:
GAP — each side assumed the other was purchasing the element.
Therefore purchase of construction materials for fit-out should begin not with counting meters and not with two independent estimates. First, a technical boundary is established:
LANDLORD SCOPE → TENANT SCOPE → INTERFACE → SUPPLY OWNER → INSTALL OWNER → SKU → QUANTITY → PROCUREMENT.
In this article, the word landlord is used to denote the building owner's side, tenant — the tenant's side. Specific responsibilities are determined by the documents of a specific project; the article does not replace the contract and does not establish a universal legal allocation of responsibility.
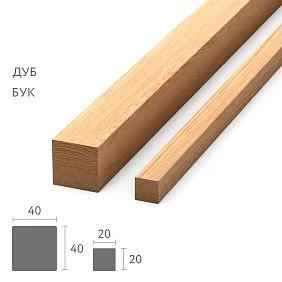
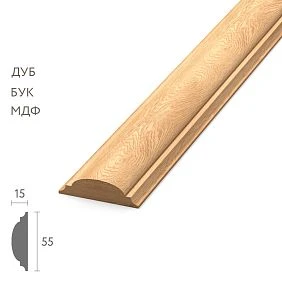
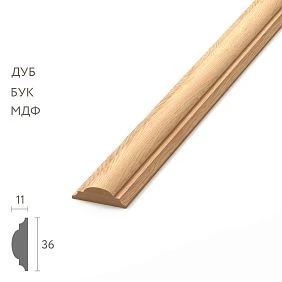
Procurement begins with the scope boundary, not with quantity
You can perfectly calculate 420 meters of skirting board and still buy the wrong responsibility. If the finishing line runs through the owner's common area and the tenant's office, the question of quantity is secondary.
First question:
who owns a specific element in a specific zone?
For example, an office block includes:
- common corridor — landlord;
- elevator lobby — landlord;
- exterior side of the entrance door — landlord;
- reception inside the block — tenant;
- meeting rooms — tenant;
- built-in wardrobes — tenant;
- junction at the entrance door — interface.
Until the last line is resolved, the two separate specifications are not yet ready for payment.




SCOPE RESPONSIBILITY MATRIX — the main document before the procurement list
For each item, supply must be separated from installation. This is important: the party that purchases the product is not always the same party that physically installs it.
| Code | Element | Zone | Supply | Install | Status |
|---|---|---|---|---|---|
| PLT-01 | Baseboard | Common corridor | LANDLORD | LANDLORD | APPROVED |
| PLT-02 | Baseboard | Tenant's office | TENANT | TENANT | APPROVED |
| MLD-01 | Molding | Meeting room | TENANT | TENANT | APPROVED |
| DR-01 | Casing | Office entrance | LANDLORD | TENANT | REVIEW |
| KZ-01 | Cornice | Reception | TENANT | TENANT | APPROVED |
For complex projects, it is convenient to use five basic options:
- LANDLORD — supplied and usually controlled by the building owner;
- TENANT — supplied by the tenant;
- LANDLORD SUPPLY / TENANT INSTALL — purchased by the landlord, installed by the tenant-side contractor;
- TENANT SUPPLY / LANDLORD INSTALL — purchased by the tenant, installed by the landlord-side contractor;
- TBD — the boundary has not yet been defined.
TBD is not a neutral line. It is a stop signal for the procurement of a specific interface item.
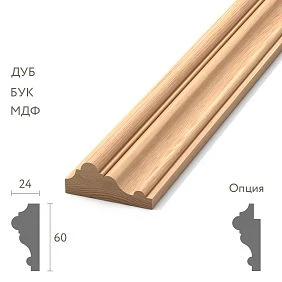
Our factory also produces:
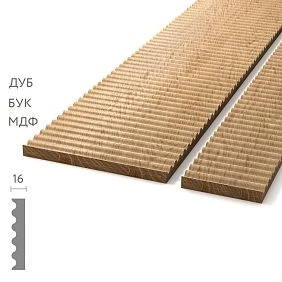
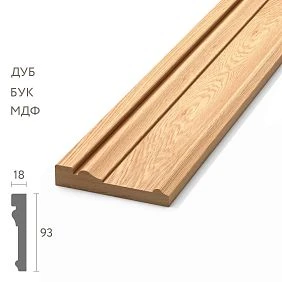
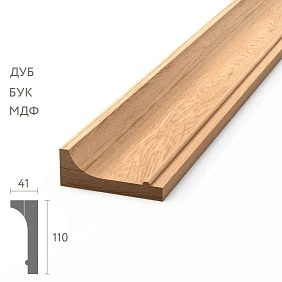
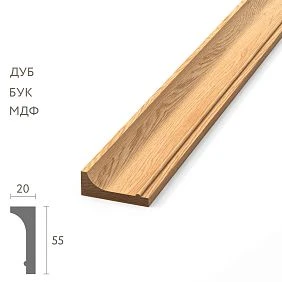
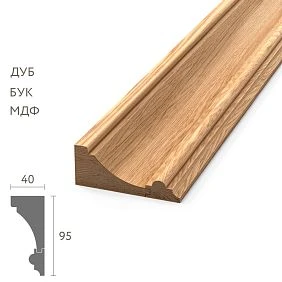
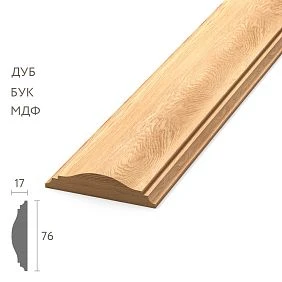
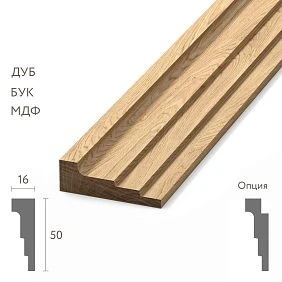
Landlord scope is a list for a specific project, not a universal standard
In one business center, the landlord hands over the leased block with a basic skirting board, doors, and finished door casings. In another, only with basic surfaces and a door opening. In a third, the owner maintains a unified external tenant portal but leaves the interior finishing entirely to the fit-out team.
Therefore, you cannot write:
"baseboard is always purchased by the landlord"
Or:
"door casing always belongs to the tenant".
A technical article works differently: it takes the contractual scope as a given fact and translates it into a procurement matrix.
Get Consultation
Tenant fit-out also needs to be broken down by physical elements
Tenant design is usually described by functional zones: open space, meeting rooms, reception, executive office, kitchen, lounge. For procurement, this is not enough.
Each zone must be broken down into elements:
- plinth;
- molding;
- cornice;
- platband;
- slat;
- wooden profile on furniture;
- interface with landlord door / wall / ceiling.
It is in the last line that duplication and gaps most often occur.
Why the baseboard most often falls on the landlord / tenant boundary
Wooden baseboard it runs as a continuous line along the walls. In the common corridor it may be part of the landlord finish, while inside the office it is part of the tenant design. They meet at a single door assembly.
If two teams choose the profile independently, the following are possible:
- different height;
- different thickness;
- different protruding geometry;
- mismatched end;
- step at the casing;
- conflict with the door frame;
- different finish logic.
Two correct SKUs on their own do not yet create a correct interface.
INTERFACE I-01: we align not two SKUs, but one shared node
It is convenient to assign joints their own IDs.
I-01 / LANDLORD PLT-A → TENANT PLT-B / entrance door D-01.
For the interface, the following are recorded:
- position of the boundary;
- landlord item;
- tenant item;
- height of both profiles;
- thickness;
- the material;
- finish;
- type of end;
- connection to the trim;
- supply owner;
- install owner;
- cost owner for a separate transition piece.
If the profiles are intentionally different, that is acceptable. The mistake is not in the difference, but in the fact that it was discovered after installation.
A door opening may belong to several procurement packages at once
wholesale purchase of building materials for office fit-out it is especially complex at the door, because a single physical assembly may consist of elements from different scopes.
For example:
- door leaf — LANDLORD;
- frame — LANDLORD;
- architrave on the common corridor side — LANDLORD;
- decorative trim on the office side — TENANT;
- skirting outside — LANDLORD;
- skirting inside — TENANT;
- transition piece — INTERFACE / TBD pending approval.
A single door assembly can generate six to seven procurement lines, even though it looks like one opening on the plan.
The phrase "the door casing is included with the door" is too vague
Need to clarify:
- which specific casing;
- on which side;
- what material it is made of;
- which profile;
- whether it is physically included in the door package;
- who is responsible for the decorative side of the tenant interior;
- who installs it after both finishes are completed.
Otherwise, the door company considers the package complete, while tenant design simultaneously specifies an additional wooden casing.
Wooden molding is more often part of tenant design, but not always
wooden molding it is often used in the tenant's meeting rooms, reception, and executive areas. But a premium-ready office may already have basic frames from the landlord.
Therefore, the rule "molding is always tenant" is incorrect. The Scope Matrix must reflect the specific project.
Particular care is taken with molding at the entrance portal: the exterior portion may support the visual language of the business center, while the interior portion supports the tenant's corporate interior.
Cornice at the boundary between the landlord ceiling and the tenant interior
wooden cornice may belong to tenant design, even if the ceiling is physically installed by the landlord team.
Before ordering, you need to check:
- available height;
- position of light fixtures;
- ventilation grilles;
- sprinklers and sensors;
- curtain rods;
- access panel access;
- existing ceiling profiles;
- who is permitted to access the landlord ceiling for installation of tenant items.
If the tenant cornice physically conflicts with landlord engineering, the issue cannot be resolved with a single procurement line item.
The technical boundary must be established before the estimate
wholesale purchase of building materials becomes safer if the order is as follows:
node → scope → interface → SKU → quantity → estimate.
Dangerous order:
landlord BOQ + tenant BOQ → two procurements → installation → conflict → attempt to define scope.
When both estimates have already been paid, DUPLICATE and MISMATCH become material issues, not just design errors.
Four types of conflicts: DUPLICATE, GAP, MISMATCH, and TIMING GAP
For the landlord / tenant interface, it is useful to use a simple classification.
DUPLICATE
Both parties purchased the same element. For example, the landlord BOQ includes baseboard to office perimeter, while the tenant BOQ includes decorative timber skirting throughout tenant premises. Without a precise boundary, both orders formally appear correct.
GAP
No one bought the element. The landlord considers it part of the tenant decorative fit-out, the tenant considers it part of the landlord door package.
MISMATCH
Both parties bought different, incompatible elements for the same junction. The money has already been spent, and the conflict is discovered at the wall.
TIMING GAP
Both elements are correct, but one is installed before the second is approved. For example, the landlord skirting has already been trimmed at the door, but the tenant profile has not yet been selected. Later, the termination has to be redone.
This classification helps discuss not "who is to blame," but the type of technical problem.
INTERFACE REGISTER — the second central document after the Scope Matrix
| Interface | Landlord item | Tenant item | Status | Decision |
|---|---|---|---|---|
| I-01 | PLT-A | PLT-B | REVIEW | Door threshold detail |
| I-02 | DR-A | MLD-C | APPROVED | Drawing ___ |
| I-03 | Ceiling | KZ-D | HOLD | Check MEP clearance |
The Scope Matrix answers: who supplies and who installs. The Interface Register answers: how two scopes physically meet.
Statuses:
- REVIEW — the junction is still under discussion;
- HOLD — there is a technical blocker;
- APPROVED — the decision is locked;
- INSTALLED — node completed;
- VERIFIED — joint accepted.
It is better not to release a mass order for an interface item until APPROVED.
We count the quantity only after APPROVED interface
wholesale purchases of building materials must begin after the technical node is no longer undefined.
For example, the tenant calculated PLT-B = 420 m. But I-01 LANDLORD PLT-A → TENANT PLT-B is still REVIEW. If, after approval, the transition point shifts 600 mm into the premises at each of the 20 entrances, the net meterage of the tenant skirting will change.
Therefore, “the meters have already been calculated” does not mean “the item is ready for order.”
Procurement readiness:
APPROVED INTERFACE + CONFIRMED SKU + CONFIRMED LENGTH + CONFIRMED ZONE + QUANTITY.
What to do if the tenant has not yet been selected
This is a common task for a developer: the business center is being built now, and the future tenant will appear later.
The landlord must decide in advance:
- where their fit-out ends;
- which element should remain neutral;
- which assemblies must not be closed up irreversibly;
- what must remain physically accessible for future fit-out;
- what information to hand over to the future designer;
- which landlord item must not be removed.
It is especially risky to finish a skirting board with a random short offcut, thinking “the tenant will cover it later.” Six months on, the new team will know neither the SKU nor the original logic.
TENANT READY POINT: the design point where the landlord scope ends
For the article, it is useful to introduce the concept of a TENANT READY POINT — not a market standard, but a project-specific tool.
This is the physical location and condition in which the landlord hands over the unit to the future fit-out.
Example of notation:
TRP-01 / Entrance D-01 / wall finish complete / landlord baseboard terminates at axis X / tenant continuation TBD.
For the Tenant Ready Point, the following are recorded:
- coordinate;
- existing landlord item;
- its SKU;
- the material;
- size;
- finish;
- permissible adjoining zone;
- prohibitions on dismantling;
- photo.
Landlord handover must preserve the technical identity of the existing trim
The phrase "there is already a wooden skirting board in the corridor" is almost useless for the future tenant team.
It is more useful to hand over:
- plans;
- photo;
- SKU of the existing trim;
- the material;
- cross-section;
- length;
- FINISH;
- a sample if needed;
- interface drawing;
- the termination point.
This way, the next designer can deliberately choose a continuation or a contrasting profile.
The tenant should not automatically copy the landlord profile
construction materials wholesale for a tenant fit-out are not obliged to literally repeat the common corridor. The tenant's interior may be intentionally different.
For example:
- the business center corridor — a concise PLT-A;
- executive office — tall decorative PLT-B;
- reception — PLT-C in a different FINISH.
This is fine if the transition is designed. Failure occurs when the differences are discovered after both parties have paid for and installed their elements.
When it makes sense to use a single SKU instead
A single SKU is convenient if:
- the transition should look continuous;
- the door does not visually divide the space;
- the business center brand requires uniformity;
- operations wants to unify the repair reserve;
- the tenant allows a landlord profile in their interior.
In this case, the landlord may provide the exact configuration as a preferred or required interface material. But this must be part of the project, not a verbal request.
Multiple tenants on the same floor require a COMMON INTERFACE STANDARD
A single floor may simultaneously contain Tenant A, Tenant B, Tenant C, and a shared LANDLORD zone. If each tenant chooses their own baseboard and door casing without junction rules, the corridor ends up with a set of random portals.
The COMMON INTERFACE STANDARD does not have to unify the tenant's entire interior. It may regulate only:
- the exterior door casing;
- the position where the landlord baseboard terminates;
- the maximum allowable protrusion of the tenant profile into the common area;
- the junction at the threshold;
- the finish transition point;
- prohibition of damage to the finished landlord finish.
Inside the office, the tenant retains design freedom.
What exactly does the landlord standardize so as not to turn the fit-out into a copy of the common corridor
A good standard is limited to interfaces, not the entire design concept.
For example, the building owner may standardize:
- the exterior side of the door portal;
- the line of the common corridor;
- the position of the joint;
- minimum clearance for tenant profile;
- areas where drilling or dismantling a landlord item is prohibited;
- the procedure for approving a non-standard interface.
This preserves overall visual order and does not cancel tenant identity.
The cost owner of the transition element must be a separate line item
There is no universal answer to who pays for the interface item. It depends on the contract and the commercial structure of the project.
In the Scope Matrix, it is useful to have separate fields:
- SUPPLY OWNER;
- INSTALL OWNER;
- COST OWNER;
- DESIGN OWNER;
- APPROVAL OWNER.
One party may design the assembly, another may purchase the component, and a third may install it. If this is not separated, responsibility becomes blurred.
Practical example: office entrance and five lines of responsibility
| Item | Zone | Supply | Install | Interface |
|---|---|---|---|---|
| Door leaf D-01 | Entrance | LANDLORD | LANDLORD | I-01 |
| External architrave DR-A | Corridor side | LANDLORD | LANDLORD | I-01 |
| Internal decorative trim MLD-C | Tenant side | TENANT | TENANT | I-01 |
| PLT-A | Corridor | LANDLORD | LANDLORD | I-01 |
| PLT-B | Office | TENANT | TENANT | I-01 |
Until I-01 is APPROVED, the five lines formally exist, but the assembly is not ready for final procurement.
Schedule alignment: two correct scopes can conflict in timing
Even when the Supply Owner is perfectly defined, the project may face a TIMING GAP. The landlord finish is ready earlier, the tenant item is not yet approved, but the construction schedule pushes the first party to close the assembly.
Typical scenario:
- landlord corridor is ready for handover;
- PLT-A is installed before the door opening;
- tenant PLT-B is still being selected;
- the door casing on the office side is not approved;
- the landlord contractor cuts their baseboard "to fit" on site;
- a month later, the new tenant profile requires a different junction.
The problem is not the SKU, but the sequence of works.
Therefore, the Interface Register must have a field:
INSTALL SEQUENCE / PREDECESSOR / SUCCESSOR.
| Interface | First | Second | Hold point |
|---|---|---|---|
| I-01 | Door set | Landlord PLT-A | Tenant PLT-B profile approved |
| I-02 | Landlord ceiling | Tenant KZ-D | MEP clearance confirmed |
If the hold point is not passed, the first party must not irreversibly close the interface.
How to use a HOLD POINT without stopping the entire finishing works
A HOLD applies to a specific node, not to the entire floor. The landlord can complete dozens of meters of corridor and stop only at Interface I-01. The tenant, in turn, can continue the internal fit-out without closing the transition until approval.
This gives two advantages:
- the schedule is not blocked completely;
- no rework of an already finished element occurs.
On the interface drawing, you can directly mark:
DO NOT CLOSE BEYOND AXIS X UNTIL I-01 APPROVED.
Who issues the APPROVED interface
A technical solution must have an owner. Otherwise, the landlord designer considers the assembly approved, the tenant consultant keeps changing the profile, and the procurement officer sees the status as "almost ready."
Useful fields in the Interface Register:
- Design Owner;
- Landlord Reviewer;
- Tenant Reviewer;
- Door / MEP reviewer if necessary;
- Final Approver;
- Approval date;
- drawing revision.
For the procurement officer, the only working signal is APPROVED with a revision, not correspondence saying "we seem to have agreed."
How to link the Interface Register to two BOQs
The Landlord BOQ and tenant BOQ do not need to be merged into one huge budget. But interface items must have a common reference.
For example:
| Interface | Landlord BOQ line | Tenant BOQ line | Status |
|---|---|---|---|
| I-01 | LL-PLT-034 | TN-PLT-018 | APPROVED |
| I-02 | LL-DR-011 | TN-MLD-006 | REVIEW |
This way the buyer sees that two commercial lines belong to the same physical assembly and does not check them in isolation.
Duplicate check before PO release
Before paying for purchases, it is useful to run an automatic or manual check for a possible duplicate.
They look for matches by:
- Zone ID;
- Interface ID;
- product type;
- SKU;
- geometric section;
- door assembly description;
- Room / Corridor boundary.
If the landlord BOQ and tenant BOQ contain skirting for the same side of the wall, the line receives DUPLICATE REVIEW.
This is especially useful before buy construction materials wholesale, because after two POs are placed, correction becomes a commercial task, not just a design one.
GAP check: looking for elements that are not in any package
The reverse check is built from interface to BOQ.
For each I-xx, specify:
- which physical elements are needed;
- whether they are in the landlord BOQ;
- whether they are in the tenant BOQ;
- whether there is a supply owner;
- whether there is an install owner;
- whether there is a cost owner;
- whether there is a deadline.
If the required trim is described in the drawing but is absent from both schedules, this is a GAP.
MISMATCH check: when both parties ordered, but compatibility was not verified
Duplication is at least noticeable by quantity. MISMATCH is more dangerous: both parties honestly bought their own elements, but they do not combine into a single assembly.
The check includes:
- height;
- thickness;
- projection from the wall;
- radius or end profile;
- finish;
- relation to the trim;
- threshold geometry;
- possibility of a clean finish.
If the parameters conflict, the interface remains REVIEW even with ready BOQs.
When a physical mock-up is needed
A drawing may not be enough if two profiles are visually complex or the joint is in a representative area.
A mock-up is useful:
- at the tenant's main entrance;
- in the executive reception;
- when baseboard heights differ;
- when combining an exterior casing and an interior molding;
- if one finish is transparent and the other is opaque;
- if you need to assess the actual gap and shadow.
A small physical assembly before mass purchasing is cheaper than redoing dozens of doors.
How to document the mock-up result
After approval:
- Interface ID;
- photo;
- SKU landlord;
- SKU tenant;
- finish codes;
- dimensions;
- approval date;
- drawing revision.
Next, the mock-up becomes a reference for installation, not just a pretty photograph.
Fit-out for multiple tenants: how to avoid four different exterior portals in one corridor
If there are four tenants on a floor, the landlord can preserve only the exterior visual layer, while leaving interior decisions to the tenants.
For example:
| Element | Common zone rule | Inside tenant |
|---|---|---|
| External architrave | Landlord standard | Free |
| Corridor skirting termination | Fixed coordinate | Continuation by tenant |
| Threshold interface | Approved detail | Tenant finish behind line |
| Wall moulding | None | Tenant design |
This way the corridor maintains a unified language, but the offices do not become identical.
What to do when a tenant changes
Tenant A has moved out, and Tenant B is launching a new fit-out. The landlord's millwork in the corridor remains. Inside the office, part of the tenant's millwork is dismantled.
The main task is not to lose the ownership boundary.
The landlord record must include:
- LANDLORD ELEMENT;
- TENANT ELEMENT;
- Interface ID;
- demolition boundary;
- existing landlord item SKU;
- finish;
- photo before the start of the new fit-out.
The new tenant must not accidentally dismantle the architrave or skirting that belongs to the common corridor package.
Make-good: technically separate what remains with the building from what leaves with the tenant
The article does not define the contractual obligations of make-good. But technically, AS-BUILT should make it possible to understand what physically belongs to which scope.
For example:
| Element | Ownership tag | At tenant exit |
|---|---|---|
| Corridor PLT-A | LANDLORD | Keep |
| External DR-A | LANDLORD | Keep |
| Internal MLD-C | TENANT | Review / remove per project |
| Executive KZ-D | TENANT | Review / remove per project |
Such marking does not replace the contract, but it reduces the risk of a physical error during dismantling.
Tenant AS-BUILT must be returned to the landlord record
After fit-out, the building owner must understand which interfaces are actually built now.
At a minimum, the following are returned:
- the actual tenant SKU at the interface;
- the point of adjacency;
- landlord item changes, if they were agreed upon;
- finish;
- photo of the unit;
- new Interface status — VERIFIED;
- handover date.
After five years, the landlord will be able to pass on to the next tenant not the original concept, but the actual current state.
Why the landlord record is especially important in a multi-tenant building
Without updating through several lease cycles, the owner ends up with dozens of portals but does not understand which elements are their asset, which were added by tenants, and which interfaces have already been modified.
A unified Interface Register becomes an operational document of the building, rather than disappearing after the first construction.
TBD REGISTER: undefined boundaries cannot be hidden in comments
In a complex fit-out, part of the interface remains undefined for a long time. For example, the tenant is still choosing the reception profile, the landlord door package has already been ordered, and the external architrave has been approved.
If you write "clarify later" in the note, the line can easily end up in the PO along with the rest.
It is better to keep a separate TBD Register:
| TBD ID | Interface | Open question | Owner | Due date | Procurement impact |
|---|---|---|---|---|---|
| TBD-01 | I-01 | Tenant PLT-B profile | Tenant designer | ___ | Hold PLT-B order |
| TBD-02 | I-03 | KZ-D clearance to vent | MEP / Tenant | ___ | Hold KZ-D |
This way, uncertainty becomes visible and has a resolution deadline.
Scope Freeze: when landlord and tenant procurement can be considered ready
Before issuing the PO, a Scope Freeze checkpoint is useful.
It occurs when:
- the main landlord / tenant zones are defined;
- TBDs for procured items are closed;
- interfaces APPROVED;
- SKUs are confirmed;
- materials and FINISH are confirmed;
- critical mock-ups approved;
- installation schedule agreed;
- supply / install / cost owner completed.
After Scope Freeze, the approved geometry can already be converted into quantities and POs.
What to do if the tenant changes the profile after Scope Freeze
A late change must not erase the old history. A Change Request is created.
For example:
CR-07 / I-01 / PLT-B → PLT-C.
Then check:
- whether PLT-B has been ordered;
- whether it has been produced;
- whether the junction point changes;
- whether landlord PLT-A needs to be redone;
- does the door frame change;
- does PLT-C affect the quantity;
- who is the Cost Owner of the change.
Late tenant change is not just a new BOQ line, but an interface change.
What to do if the landlord changes the base profile after the tenant has already ordered theirs
The reverse scenario is just as dangerous. The owner updates the corridor design and replaces PLT-A with PLT-X. The tenant has already purchased PLT-B, which was calculated for the previous thickness and height.
Before changing the landlord package, all dependent interfaces must be checked.
In the Change Impact Register:
| Landlord change | Affected interfaces | Tenant items | Action |
|---|---|---|---|
| PLT-A → PLT-X | I-01, I-04, I-07 | PLT-B, DR-C | Recheck dimensions |
This way, the landlord variation is not passed to the tenant team too late.
Interface dependency map: one landlord item can affect multiple tenants
In a multi-tenant building, one corridor profile repeats at dozens of entrances. If it changes, the impact is not limited to a single door.
A dependency map might look like this:
PLT-A → I-01 Tenant A / I-04 Tenant B / I-07 Tenant C / I-10 Vacant Unit.
This is especially important for future vacant units: a change to the landlord standard must be passed on to tenant designs that do not yet exist.
How to work with vacant units
Part of a floor may remain without a tenant. The landlord must finish the common area so that a future fit-out does not require demolishing a finished corridor.
For a vacant unit, it is useful to preserve:
- Tenant Ready Point;
- Interface ID;
- the existing SKU;
- sample / finish code;
- allowed connection zone;
- landlord element ownership;
- photo.
When a tenant appears a year later, the project will start not from guesswork, but from a ready interface package.
How to account for built-in furniture at the scope boundary
A built-in cabinet often belongs to the tenant fit-out, while the landlord baseboard already runs along the wall. If the furniture physically covers part of the line, you need to decide:
- landlord skirting passes behind the cabinet or ends before it;
- tenant removes the section or receives it unfinished;
- who is responsible for the termination point;
- what happens upon a future tenant change;
- whether a landlord profile is needed after make-good.
If this issue is not resolved before fit-out, the tenant may remove a landlord item that will be required for the next lease.
How to account for floor finish at the skirting boundary
Skirting is connected not only to the wall and door, but also to the floor covering. The landlord corridor may have one floor build-up, the tenant office another.
The interface check includes:
- finished floor level on both sides;
- coating thickness;
- threshold position;
- baseboard height from the actual floor;
- visual transition at the door casing.
Even identical PLT-A and PLT-B can look inconsistent if the clean levels differ.
How to account for wall build-up at the door casing boundary
The tenant may add a wall panel, cladding, or an additional finish layer. Then the interior door casing ends up on a different plane than the landlord door frame.
Before ordering, check:
- final thickness of the tenant wall build-up;
- available door casing width;
- joint with the molding;
- protrusion relative to the baseboard;
- the junction point to the door frame.
This is another reason not to consider the door package as "automatically closing everything."
How to account for the ceiling cornice in landlord MEP
Tenant decorative cornice may intersect with landlord engineering even after approval of the overall ceiling plan.
Check:
- inspection hatches;
- sensors;
- sprinklers;
- ventilation grilles;
- lighting fixtures;
- curtain niches;
- the minimum necessary access for maintenance.
If the cornice blocks landlord access, the Scope Matrix will not resolve the conflict — an interface drawing is needed.
How to handle a single SKU that both parties purchase, but for different zones
A matching SKU by itself does not mean DUPLICATE.
For example:
- LANDLORD buys PLT-A for corridor;
- TENANT buys the same PLT-A for reception;
- zone boundaries do not overlap.
These are two legitimate purchases of the same SKU.
To prevent the system from flagging them as a duplicate, Zone ID and Scope Owner are required.
PLT-A / LL-CORR-A
PLT-A / TN-REC-A
The duplicate check must compare not only the SKU but also the physical scope.
How to consolidate the purchase of a single SKU without losing ownership
Sometimes it is commercially convenient to order one large volume of PLT-A, even though part belongs to the landlord and part to the tenant. Even if the parties have agreed on a centralized purchase, ownership must be preserved within the registry.
| SKU | LL Qty | Tenant Qty | Total PO | Cost allocation |
|---|---|---|---|---|
| PLT-A | 120 | 80 | 200 | Separate ledger |
Physically, this is one PO, but the Scope Responsibility Matrix remains separate. Otherwise, in the event of a return, reserve, or tenant change, it is difficult to determine which part belonged to whom.
How to split the service reserve between landlord and tenant
After handover, spare planks may remain. Their ownership also cannot be considered obvious.
In the Reserve Register:
- SKU;
- scope owner;
- zone;
- quantity;
- finish;
- storage location;
- handover owner.
The landlord reserve for the corridor should not accidentally go toward repairing the tenant meeting room, even with the same SKU, if such a scheme has not been agreed upon.
How to handle a landlord-supplied / tenant-installed item
This is a special combination. The landlord purchased the item, and the tenant contractor installs it.
It is necessary to determine in advance:
- when the physical handover takes place;
- who checks the quantity;
- who stores the material until installation;
- who is responsible for damage after transfer;
- who manages the reserve;
- who handles replacement when there is an installation error.
Without this handover, the supply owner and install owner start arguing only after a shortage appears.
How to handle a tenant-supplied / landlord-installed item
The reverse scenario is also possible, for example if the landlord contractor must complete a common door assembly with material selected by the tenant.
It is necessary to record:
- latest delivery date;
- approved sample;
- quantity;
- installation sequence;
- what happens if tenant delivery is late;
- storage responsibility;
- interface inspection.
The TIMING GAP is especially sensitive here: the landlord contractor may leave the site before the tenant item arrives.
Schedule Interface Matrix: who must be ready by which date
| Interface | Landlord ready | Tenant material due | Install window | Status |
|---|---|---|---|---|
| I-01 | ___ | ___ | ___ | ON TRACK |
| I-02 | ___ | ___ | ___ | AT RISK |
The table shows the TIMING GAP before it turns into rework.
How to check the interface before installation
Before the two parties physically connect the elements, a short pre-install check is carried out.
- Correct Interface ID.
- Both sides use current SKUs.
- Finish matches approval.
- Dimensions match the drawing.
- The junction point is prepared.
- The sequence is clear.
- No new MEP / door / furniture conflict.
If any item is open, the assembly is not moved to INSTALL.
Interface Inspection: who accepts the finished junction
After installation, the landlord item and tenant item must undergo not two separate acceptances, but one joint interface check.
Checked:
- position of the boundary;
- profile junction;
- relation to the trim;
- height;
- thickness;
- finish;
- gaps;
- absence of damage to another party's scope;
- compliance with the approved drawing / mock-up.
After this, I-01 receives VERIFIED status. If the landlord contractor has accepted their PLT-A and the tenant contractor has accepted their PLT-B, but the common joint has not been inspected, the interface is not yet closed.
How to document an interface defect
The defect may relate not to the product itself, but to the joint between two correct items.
For example:
I-01 / MISMATCH AT JOINT / landlord PLT-A + tenant PLT-B.
Causes:
- incorrect termination point;
- thickness not taken into account;
- tenant changed the profile;
- landlord contractor cut before approval;
- casing installed with a different projection;
- floor level has changed.
The correction must account for both sides, rather than automatically being passed on to the last installer.
How to manage interface variations after installation
After completing I-01, the tenant may request a change to the internal skirting. If the change does not affect the landlord side, it is a pure tenant variation. If the new profile requires redoing the landlord termination, the variation becomes a joint interface change.
The Change Request must show:
- what is changing;
- which landlord elements are affected;
- which tenant elements are affected;
- whether dismantling is required;
- who purchases the new material;
- who installs;
- who pays for the rework;
- how AS-BUILT will be updated.
Procurement Release Gate: when a specific line can be released for order
For an interface item, it is useful to introduce a Procurement Release Gate.
A line receives READY TO ORDER if:
- Scope Owner is defined;
- Supply Owner is defined;
- Install Owner is defined;
- Interface APPROVED;
- SKU confirmed;
- material and FINISH are confirmed;
- quantity is calculated;
- no open TBD;
- timeline agreed.
If even one critical parameter is missing, the status remains HOLD FOR PROCUREMENT.
How not to mix landlord procurement and tenant procurement in one register
For overall control, a master register can be maintained, but ownership must be visible.
| Item | Scope | Supply owner | PO | Status |
|---|---|---|---|---|
| PLT-A | Corridor | LANDLORD | LL-PO-018 | ORDERED |
| PLT-B | Tenant office | TENANT | TN-PO-006 | ORDERED |
| DR-C | I-01 | LANDLORD | LL-PO-021 | READY |
This way one table shows readiness but does not erase financial and physical ownership.
How to handle different names for the same item
A landlord BOQ may say "timber skirting," a tenant BOQ may say "decorative baseboard," and a door package may say "door trim." If the names are not linked to an exact SKU and Interface ID, duplicate review becomes more difficult.
It is useful to have a Master Item Name:
PLT-A / Wooden skirting / landlord corridor.
And separate fields:
- Landlord description;
- Tenant description;
- Supplier SKU;
- Interface ID;
- Zone ID.
Thus, different specification languages do not create a false impression of different products.
How to work with a tenant design that uses a similar but not identical profile
The phrase "find a similar skirting board" is dangerous on a direct interface. A visually similar profile may differ by several millimeters in height, thickness, or projection.
If the tenant does not want to copy the landlord SKU, the following must be agreed upon:
- intentional difference;
- type of end;
- transition point;
- the joint with the architrave;
- finish relationship;
- possibility of future make-good.
Similarity is not a technical parameter.
How to work with doors of different types on the same floor
On a multi-tenant floor, there may be doors of different widths, fire ratings, designs, and configurations. One interface cannot be automatically copied to all openings.
The interface family might look like this:
- I-D01 — standard tenant entrance;
- I-D02 — double door;
- I-D03 — door with side panel;
- I-D04 — service entrance.
Each family has its own door casing, baseboard, and transition point. This allows standardizing recurring details without false universality.
How to account for fire / access requirements without inventing regulations
The article should not invent regulatory requirements for d
Practical case: one floor, three tenants, and a shared landlord zone
Let's consider a floor of a business center with three tenants. The shared corridor, elevator lobby, and exterior sides of the entrance doors are handled by the landlord. Tenant A is doing a minimalist office, Tenant B — a classic executive interior with moldings, Tenant C has not yet been selected and the space remains vacant.
| Zone | Landlord item | Tenant item | Interface | Status |
|---|---|---|---|---|
| Tenant A entrance | PLT-A + DR-A | PLT-B | I-A01 | APPROVED |
| Tenant B entrance | PLT-A + DR-A | PLT-C + MLD-C | I-B01 | MOCK-UP |
| Tenant C vacant | PLT-A + DR-A | TBD | I-C01 | TENANT READY POINT |
For Tenant A, the landlord and tenant profiles differ in height, but the junction is deliberately resolved with a door casing: both baseboards terminate on their respective sides and do not attempt to visually continue into each other.
For Tenant B, the interior tall baseboard PLT-C and the molding MLD-C form a more complex portal. A mock-up is required before procurement, because the exterior DR-A is already installed and a change in the thickness of the interior profile may affect the junction.
For Tenant C, the landlord must not improvise tenant finish. They complete the base building finish at the Tenant Ready Point and hand over to the future team the SKU PLT-A, DR-A, the termination coordinate, and demolition constraints.
On a single floor, three interfaces have three different solutions. This is exactly why the rule "make all entrances identical" is not always necessary, while a complete absence of an interface standard is a risk.
PROCUREMENT READINESS MATRIX: which lines are actually ready to order
| Item | Scope | Interface | SKU | Qty | Owner | Ready? |
|---|---|---|---|---|---|---|
| PLT-A | Landlord corridor | I-A01 / I-B01 / I-C01 | Confirmed | Confirmed | LANDLORD | YES |
| PLT-B | Tenant A | I-A01 | Confirmed | Confirmed | TENANT A | YES |
| PLT-C | Tenant B | I-B01 | Confirmed | Preliminary | TENANT B | NO — mock-up |
| Tenant C skirting | Vacant | I-C01 | TBD | 0 | Future tenant | NO |
The matrix protects against a typical mistake: all items already exist in the project, but not all are ready for procurement. Tenant B may have a selected SKU, but the quantity cannot be frozen until the mock-up. Tenant C should not appear in the current tenant PO at all.
How to run a reverse check: every interface must have five owners
Before Scope Freeze, it is useful to go through the Interface Register from the bottom up and verify five roles:
- DESIGN OWNER — who determines the technical solution;
- SUPPLY OWNER — who procures;
- INSTALL OWNER — who installs;
- COST OWNER — who bears the cost;
- APPROVAL OWNER — who has the right to close the interface.
If at least one role remains TBD, the node is not fully managed. This is especially important for small transition parts that easily fall out of both estimates.
How to separate spare / service reserve after handover
After fit-out completion, the landlord and tenant may have identical or similar spare strips. They must not be combined into a single unnamed reserve.
| SKU | Owner | Zone | Qty | Storage |
|---|---|---|---|---|
| PLT-A | LANDLORD | Corridor | 6 | LL Store |
| PLT-A | TENANT A | Reception | 3 | Tenant Store |
| PLT-C | TENANT B | Executive | 4 | Tenant Store |
Even if PLT-A is the same, the owner matters for future repairs and calculations. If the landlord reserve is temporarily used inside the tenant premises, this is a separate agreed movement, not an automatic right to a shared warehouse.
How to handle early handover of the landlord zone when the tenant is still under construction
A business center may begin operating common corridors while tenant fit-out continues. Then the landlord finish is already considered a completed asset, while the tenant's construction work is still ongoing nearby.
For interfaces, a mode is introduced:
LANDLORD FINISH HANDED OVER / TENANT WORKS ACTIVE.
The tenant contractor must know:
- which landlord elements cannot be dismantled;
- where their work area ends;
- how to protect the corridor finish;
- how to obtain temporary access;
- how to document damage;
- who approves the restoration.
This is no longer a routine procurement, but it directly affects the cost owner interface and the need for future replacement items.
How to proceed if the tenant wants to change a landlord item within their block
Sometimes the base skirting or trim has already been handed over with the premises, but the tenant design wants to replace it. You cannot simply assume that everything within the lease line automatically becomes tenant demolition.
First, check:
- is the element landlord property;
- is dismantling permitted;
- what must be restored upon make-good;
- should the original material be retained;
- is the interface common area being modified;
- who updates the landlord record.
If the tenant removes landlord PLT-A and installs PLT-B, AS-BUILT must show not only the new SKU but also the status of the original element.
How to preserve the possibility of a future make-good without excess stock
It is not always reasonable to store all dismantled landlord trim for several years. But the interface record should at least preserve:
- SKU;
- the material;
- size;
- finish;
- the original geometry;
- photo / drawing;
- availability of service reserve.
Then the future make-good can be designed deliberately, rather than from the memory of a former foreman.
How to verify landlord record readiness after tenant fit-out
Before closing out the tenant project, the landlord record must answer:
- Which interfaces have actually been built?
- Which landlord items have been modified?
- Which tenant items adjoin the common area?
- Which SKU is currently installed?
- Which service reserves exist?
- Which mock-ups / samples remain as reference?
- What constraints are needed for the future tenant?
If these questions can be answered without searching through old correspondence, the handover was done well.
When a new purchase is not needed at all
An interface review does not always lead to a purchase. The following situations are possible:
- the tenant deliberately continues with the existing landlord SKU;
- the landlord reserve has a sufficient agreed volume for a joint purchasing scheme;
- the existing architrave fully covers both sides of the door interface;
- The Tenant Ready Point does not require a transition piece;
- the change is resolved by the termination geometry, not by a new product.
The correct result of the Scope Matrix is not the maximum number of POs, but the absence of DUPLICATE and GAP.
Final reverse-check: go from each door back to the two procurements
Before releasing the final POs, it is useful to check the project not from BOQ to drawing, but the other way around — from each physical interface to its procurement sources. For each door, skirting transition, and ceiling junction, the team should be able to answer within a few minutes: which landlord item is installed here, which tenant item matches it, who supplies both elements, who installs them, and which document confirms the assembly.
If I-01 shows only landlord PLT-A and there is no tenant continuation, this is a GAP. If two tenant lines exist simultaneously for one side of a door, a DUPLICATE is possible. If both products are defined but there is no approval drawing, this is a MISMATCH risk. If everything is technically coordinated, but tenant delivery is later than the landlord contractor's completion, this is a TIMING GAP.
Such a reverse check is especially useful before bulk procurement, because it catches errors that are not visible within two separate estimates. Procurement is considered ready not when each side has checked its own BOQ, but when each interface has a complete chain: scope → item → owner → approval → quantity → schedule.
18 fit-out procurement mistakes
1. Not defining landlord / tenant scope
Why it happens: each side works from its own estimate. Consequence: duplication and GAP. How to prevent it: Scope Responsibility Matrix.
2. Creating two independent specifications
Cause: budgets are separated. Consequence: the interface is not checked. Prevention: an Interface Register links the BOQ.
3. Not identifying interface items
Cause: the element appears to be part of a regular room. Consequence: no one designs the junction. Prevention: I-xx codes.
4. Buying the same skirting board twice
Cause: overlap in perimeter. Consequence: surplus. Prevention: duplicate check by Zone ID.
5. Not buying any door casing at all
Cause: each side considers it the other's package. Consequence: open door interface. Prevention: GAP check.
6. Using different names for the same item
Cause: different BOQ terminology. Consequence: duplicate is not recognized. Prevention: Master Item Name + SKU.
7. Not saving the SKU of the landlord finish
Cause: the corridor is already finished. Consequence: the tenant selects by eye. Prevention: handover package.
8. Choosing a "similar" tenant profile for a direct junction
Cause: visually close. Consequence: thickness and height mismatch. Prevention: dimension check / mock-up.
9. Not checking floor level
Cause: only profiles are compared. Consequence: step at the door. Prevention: finished floor interface review.
10. Landlord installs the termination before tenant approval
Cause: schedule. Consequence: rework. Prevention: HOLD POINT.
11. Tenant removes landlord item
Cause: ownership is not tagged. Consequence: damage to common-area finish. Prevention: LANDLORD ELEMENT tag / record.
12. Not assigning a Cost Owner for the transition
Cause: the detail is small. Consequence: procurement stalls. Prevention: separate Cost Owner field.
13. Assuming the door package is clear without checking
Cause: "the architrave is included." Consequence: the inner trim is not closed. Prevention: side-specific door schedule.
14. Do not synchronize schedules
Cause: landlord and tenant contractors work independently. Consequence: TIMING GAP. Prevention: Schedule Interface Matrix.
15. Order tenant trim before APPROVED interface
Cause: the linear footage is already known. Consequence: late change of profile / quantity. Prevention: Procurement Release Gate.
16. Do not hand over the source data to the next tenant
Cause: the first fit-out is completed. Consequence: the interface history is lost. Prevention: landlord record.
17. Do not update the as-built documentation after fit-out
Cause: tenant handover is considered separate. Consequence: the owner does not know the current interface. Prevention: tenant AS-BUILT → landlord record.
18. Unify the entire tenant design instead of several interfaces
Reason: desire for order. Consequence: tenant loses design freedom. Prevention: Common Interface Standard only at the boundary.
Final landlord / tenant procurement workflow
LANDLORD DESIGN → TENANT DESIGN → SCOPE MATRIX → INTERFACE REGISTER → TBD CLOSEOUT → APPROVED JOINTS → SKU → QUANTITY → LANDLORD PROCUREMENT / TENANT PROCUREMENT → SCHEDULE ALIGNMENT → INSTALL → INTERFACE INSPECTION → TENANT AS-BUILT → LANDLORD RECORD.
- Obtain landlord base-build scope.
- Obtain tenant design scope.
- Break down linear trim by Zone ID.
- Fill in Supply Owner.
- Fill in Install Owner.
- Identify interface items.
- Create Interface ID.
- Check baseboard at doors.
- Check architraves on the sides.
- Check tenant cornice at landlord ceiling.
- Create TBD Register.
- Create Tenant Ready Points for vacant / future areas.
- Approve mock-up if needed.
- Close interfaces in APPROVED.
- Perform Duplicate / GAP / Mismatch check.
- Pass Scope Freeze.
- Calculate the quantity.
- Issue PO by owner.
- Approve Schedule Interface Matrix.
- Perform pre-install check.
- Install both sides.
- Perform Interface Inspection.
- Close VERIFIED.
- Hand over tenant AS-BUILT to landlord.
- Update landlord record and reserve.
Bottom line: two correct orders do not guarantee a correct overall assembly
The landlord may perfectly procure skirting for the common corridor, and the tenant may perfectly procure their own decorative profile. But if there is no agreed interface between them, a technical and commercial error appears at the door.
Therefore, the central logic of fit-out procurement:
WHO OWNS → WHERE IT ENDS → WHAT MEETS IT → WHO SUPPLIES → WHO INSTALLS → APPROVE → BUY.
The Scope Responsibility Matrix protects against duplicates and unclosed items. The Interface Register protects against incompatible junctions. The Tenant Ready Point preserves a clear boundary for future tenants. The Landlord Record preserves this history after several fit-out cycles.
Only after that does it make sense to count meters and pieces. Otherwise, the project risks very precisely calculating material that will be bought by the wrong party or that won't align with the adjacent finish.
Frequently asked questions
Who usually buys baseboards inside the tenant's office?
There is no universal rule. This is determined by the specific landlord / tenant scope. The article suggests fixing the Supply Owner in the Scope Responsibility Matrix.
Can the landlord and tenant use different baseboards at the same door?
Yes. The interface must be coordinated: height, thickness, termination point, door casing, and visual transition.
If the same SKU is bought by both parties, is that a duplicate?
Not necessarily. If the SKU goes into different physical zones, these are two legitimate purchases. A duplicate is determined by scope, not by article number.
When is the tenant trim ready to order?
When the interface is APPROVED, the SKU and FINISH are confirmed, the quantity is calculated, and there is no open TBD affecting the item.
What should be done if the tenant has not yet been found?
Landlord records the Tenant Ready Point, existing SKU, finish, and the permissible future connection point.
Does the tenant need to copy the baseboard of the common corridor?
No, if the project allows a different design. It is important to resolve the transition with quality.
Who pays for the transition piece?
It depends on the specific contract and the allocation of responsibility. In the Matrix, there must be a separate Cost Owner.
Why should the landlord obtain the tenant AS-BUILT?
To preserve the actual state of the interface for operations, the next tenant, and make-good.
What should be done if the landlord profile changed after the tenant order?
Initiate a Change Impact Review for all dependent interfaces before installation.
When is a mock-up needed?
When a drawing is not enough to assess a complex or species transition: varying heights, relief, finish, door portal, or reception area.