Article Contents:
- Wooden skirting board PLT-005 120×16 mm: which four versions can actually be ordered
- MDF skirting board PLT‑005 120×16×2600 mm
- Moisture-resistant MDF skirting board PLT‑005 120×16×2600 mm
- Oak skirting board PLT‑005 120×16×2400 mm
- Beech skirting board PLT‑005 120×16×2400 mm
- The height of 120 mm is responsible for the appearance
- The thickness of 16 mm is responsible for the actual protrusion from the wall
- Where does the conflict appear with a 12 mm gap?
- Why can't 4 mm be compensated by strong tightening of the furniture?
- What to measure before buying PLT-005 for a room with built-in furniture
- Actual gap between the wardrobe side and the wall
- Is there a furniture filler at the wall?
- Wardrobe's own plinth
- Position of facades relative to the side panel
- Wall curvature near the furniture
- Rigid 16 mm template: the most useful check before paying for PLT-005
- Step 1. Apply the template to the wall near the cabinet
- Step 2. Check the entire height range of 0–120 mm
- Step 3. Check the door trim and external corners
- Step 4. Mark the end point
- End PLT-005 at the cabinet side: when this is a normal and even better solution
- The cabinet is truly permanent
- The cabinet's own plinth already forms the bottom line
- The end of PLT-005 can be made meaningful
- The end point does not fall into an open wall section
- What happens to the quantity
- Do you need to run a wooden baseboard behind a built-in wardrobe
- When it doesn't make practical sense
- When the absence of a baseboard becomes a problem when dismantling furniture
- How a built-in wardrobe differs from a freestanding one
- Why the decision affects the order
- PLT-005 and furniture baseboard are not the same thing
- Floor PLT-005
- Furniture plinth of the wardrobe
- Where two lines meet
- Why one product cannot be automatically replaced with another
- Four ways to solve the PLT-005 junction with an already manufactured cabinet
- Option A. End PLT-005 at the side panel
- Option B. Make a short return of the profile to the wall
- Option C. Solve the transition through a furniture filler
- Option D. Change the position of the cabinet
- Is it worth moving the finished cabinet away from the wall for PLT-005
- What the interior loses when the gap is increased
- What happens to the facades
- When is a furniture extension more rational than moving the cabinet body?
- When it is easier to end the baseboard earlier
- Regular MDF
- Moisture-resistant MDF
- Oak and beech
- Open end of PLT-005 near the cabinet: the joint must be designed before finishing
- End under covering enamel
- End of oak baseboard
- End of beech profile
- Profile return instead of a simple cut end
- MDF 2600 mm: full perimeter
- MDF 2600 mm: cabinet excluded
- Oak 2400 mm: full perimeter
- Oak 2400 mm: cabinet excluded
- Beech 2400 mm
- Total length does not equal the number of whole PLT-005 planks
- MDF 2600 mm and long wall 3300 mm
- Solid wood 2400 mm and the same wall
- Why you cannot blindly subtract the cabinet width
- Buy wooden floor plinth: 120×16 mm template must be applied not only to the cabinet
- Door casing
- External corner
- Wall panel
- Built-in furniture in other rooms
- When PLT-005 near a finished cabinet is not yet needed to order
- The cabinet is not yet leveled
- The furniture maker promises to 'install an add-on piece later'
- It is not determined whether the cabinet will be dismantled
- When the wooden baseboard PLT-005 can already be purchased
- If the cabinet is already installed flush: how to check the possibility of a furniture add-on piece
- The add-on piece is located between the cabinet and the wall
- The add-on piece extends forward to the facade plane
- The extension piece is already made
- The extension piece can be redone
- The wall is uneven: the nominal gap of 12 mm may vary in height and length
- Checking the minimum
- Do not try to chisel the wall without a project
- Do not mill an arbitrary recess in the cabinet side panel
- PLT-005 near the hinged door: check not only the side panel, but also the door trajectory
- The door protrudes beyond the side panel
- The handle extends toward the wall
- Handleless facade
- If the cabinet has its own plinth 120 mm high: matching height does not make the lines identical
- Furniture plinth is recessed
- Furniture plinth is flush with the facade plane
- Plinth is removable
- If the built-in cabinet is later removed: how to preserve the ability to restore the baseboard
- Keep the long remainder
- Keep the finish formula
- Photograph the hidden wall
- Reserve PLT-005: when an additional strip is really needed
- When the reserve is already in the cutting layout
- Why two 400 mm remnants are not equal to one 800 mm piece
- Delivery PLT-005: length 2400/2600 mm must be checked after the final quantity
- Why the furniture is already in place — this is a separate logistics risk
- Decision matrix for the 12 mm gap: what to do before ordering PLT-005
- Mistake 1. Looking only at the 120 mm height
- Mistake 2. Assuming oak is thinner than MDF
- Mistake 3. Ordering the plinth along the full perimeter before deciding on the wardrobe
- Error 4. Subtracting the wardrobe width without an endpoint
- Error 5. Move the body 4 mm without checking the fronts
- Error 6. Milling the wardrobe side for the plinth "in place"
- Error 7. Leave a rough exposed end
- Error 8. Confusing the furniture base with the floor plinth PLT-005
- Error 9. Run PLT-005 behind the built-in cabinet only for the "full perimeter"
- Error 10. Not checking the trajectory of the outermost facade
- Error 11. Using the old MDF map after switching to oak
- Error 12. Counting two short offcuts as one long piece
- Error 13. Painting the end after installation "as it turns out"
- Error 14. Ordering a long-length item before the control measurement of the wall
- Error 15. Do not leave documentation for the hidden area
- When it is better not to buy PLT-005 for this unit at all
- How to coordinate the assembly between the designer, furniture maker, and installer
- Checklist before paying for PLT-005
- If PLT-005 does not go behind the cabinet: what happens to the floor and wall junction
- The floor covering has its own expansion gap
- The wall behind the cabinet remains finished
- The cabinet's own plinth covers the visible edge
- Boundary scenarios: the same 12 mm gap may require different solutions
- Cabinet is wedged between two walls
- One side is open, the other is against the wall
- Cabinet stands next to a door trim
- Cabinet has a deeply recessed plinth
- Cabinet is installed on a floating floor
- Cabinet is currently assembled in the workshop but not installed
- Actual gap of 16–18 mm: even then, PLT-005 should not be automatically routed behind the cabinet
- If the gap is 8–10 mm: reducing the thickness of PLT-005 itself should not be considered a standard solution
- What is the thickness of the wooden skirting board PLT-005?
- What is the height of PLT-005?
- Will PLT-005 fit into a 12 mm gap between the wardrobe and the wall?
- Can I take an oak PLT-005 instead of MDF so that it fits?
- Do I need to run the skirting board behind the built-in wardrobe?
- Can I end PLT-005 at the side of the wardrobe?
- How to finish the end of the skirting board near furniture?
- Should I move the wardrobe 4 mm away from the wall for the skirting board?
- How does the floor PLT-005 differ from a furniture plinth?
- What is the length of PLT-005 made of MDF?
- What is the length of oak PLT-005?
- Is there a PLT-005 made of beech?
- How to calculate the quantity if there will be no baseboard behind the wardrobe?
- Can I simply subtract the cabinet width from the room perimeter?
- How to check the profile before ordering?
- Is an extra plank needed as a spare?
- How to find out the current price of PLT-005?
- What should I do if the cabinet is removed in a few years?
- Can I buy PLT-005 while the cabinet is not yet installed?
- Final specification PLT-005 for the room with a built-in wardrobe
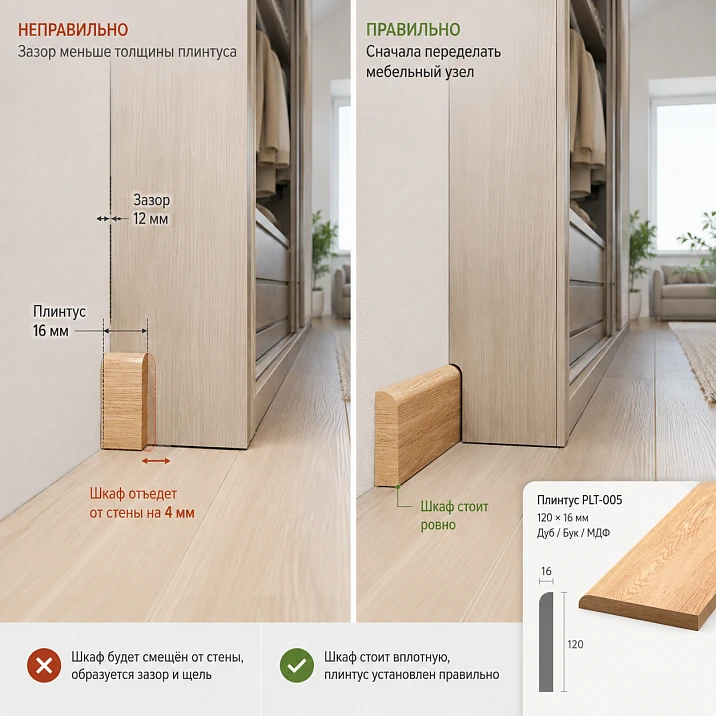
The built-in wardrobe is already manufactured and calculated almost flush to the wall. 12 mm is left between its side panel and the finished wall. According to the interior design, a tall wooden skirting board PLT‑005 with a height of 120 mm is selected in the room. In the product card, all four versions of PLT‑005 confirm a thickness of 16 mm. This means that if you try to run the profile between the wall and the finished wardrobe side panel, a direct geometric conflict arises:
16 − 12 = 4 mm.
These four millimeters cannot be "eliminated by choosing a different PLT‑005 material." Regular MDF, moisture-resistant MDF, beech, and oak all have the same cross-section of 120×16 mm. The standard length changes — 2600 mm for MDF and 2400 mm for solid wood — but the nominal thickness remains 16 mm. Therefore, switching from MDF to oak does not make the profile thinner and does not save the 12 mm furniture gap.
The first decision before purchasing is not the material, but the joint itself near the cabinet. You need to determine whether PLT‑005 should extend behind the built-in furniture at all. If the cabinet is permanent and its own plinth already forms the bottom line, it is often more rational to end the floor skirting at the cabinet side and neatly finish the end. If the project requires a continuous wall line or the furniture may be dismantled in the future, you need to check the furniture filler, the possibility of changing the cabinet position, or another transition method.
Buying the entire volume of PLT-005 before this check is risky. The actual endpoint near the cabinet is unknown, and the open room footage is also unknown. An error in one 12-millimeter gap can change not only one short piece, but the entire 2400/2600 mm layout.
After agreeing on the furniture joint, you can buy wooden skirting board PLT-005 120×16 mm already in the correct quantity and material. Below is the verification sequence from the rigid 16 mm template to the final list.
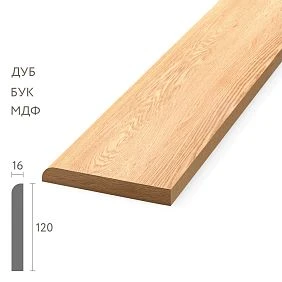
Wooden skirting PLT-005 120×16 mm: which four versions can actually be ordered
The current PLT-005 card confirms one feature important for this article: the height and thickness are the same for all four versions. They differ in material, standard length, price, and current availability.
| PLT-005 version | Size | Price at the time of check | Current status |
|---|---|---|---|
| Moisture-resistant MDF | 120×16×2600 mm | 2 550 ₽ | Made to order, 5–10 days |
| MDF | 120×16×2600 mm | 2 050 ₽ | in stock in St. Petersburg — 50 pcs. |
| Oak | 120×16×2400 mm | 7 030 ₽ | in stock SPb — 25 pcs. |
| Beech | 120×16×2400 mm | 5 140 ₽ | in stock in St. Petersburg — 10 pcs. |
The card additionally confirms the preparation of MDF for enamel, the average production time for the missing item is 5–10 days, shipment of the warehouse item within three working days, and a rigid packaging frame costing 390 ₽. Before payment, the price and stock must be rechecked.




MDF skirting board PLT-005 120×16×2600 mm
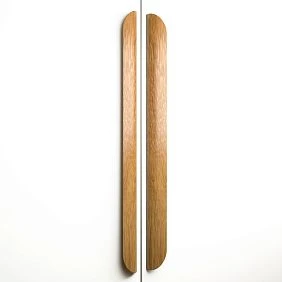
MDF is rational for covering paint when natural texture is not needed. The length of 2600 mm is useful on long walls, but it is the 16 mm thickness that determines the conflict with the finished cabinet.
Our factory also produces:

Moisture-resistant MDF skirting board PLT-005 120×16×2600 mm
The geometry fully matches regular MDF. If 12 mm is not enough for the standard version, the moisture-resistant one will not fit either. It is chosen based on the operational task, not as a way to reduce the protrusion.
Get Consultation
Oak skirting board PLT‑005 120×16×2400 mm
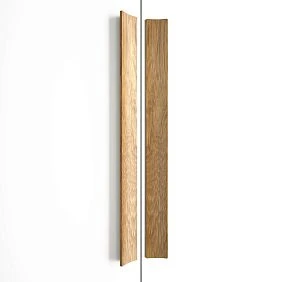
Oak retains the same 120×16 mm. Natural wood changes the appearance and finishing technology, but does not solve the furniture conflict. The standard length is reduced to 2400 mm, so after selecting the unit, the quantity must be recalculated.
Beech skirting board PLT-005 120×16×2400 mm
Beech also has a thickness of 16 mm. If the project is switched from MDF to beech, the furniture gap remains insufficient by exactly the same 4 mm.
Wide wooden baseboard PLT-005 and built-in cabinet: why exactly 16 mm becomes decisive
In a typical skirting board selection, the buyer primarily looks at the height. For PLT‑005, this is 120 mm — a noticeable bottom line, suitable for a tall architrave and a classic interior scale. But near an already manufactured wardrobe, the height ceases to be the main parameter.
The 120 mm height is responsible for the appearance
It determines how active the bottom line will be, how the profile relates to doors, panels, and furniture. The height does not answer the question of whether PLT‑005 will fit between the wall and the side panel.
The 16 mm thickness is responsible for the actual projection from the wall
If the skirting board is installed on the wall, its front plane nominally stands off from the wall by the profile thickness. In a narrow furniture gap, it is precisely 16 mm that is compared with the available space.
Where the conflict arises with a 12 mm gap
In the article's condition, the final gap between the wall and the cabinet is 12 mm. The profile is 16 mm. Even without accounting for wall curvature, finish, and installation tolerances, 4 mm is missing. Therefore, the option of "just insert the plinth between the cabinet and the wall" can no longer be considered workable.
Why 4 mm cannot be compensated by strong tightening of the furniture
A built-in cabinet is aligned according to its own geometry. Pressing the side panel against the protruding PLT‑005, bending the body, or forcing the profile to work as a gasket is weak practice. The furniture structure, facade gaps, and wall attachment must remain as specified by the furniture project.
The key principle of this article: 120 mm is a design parameter, 16 mm is an installation parameter for the specific assembly with the cabinet.
Checking geometry before ordering: measurements and the PLT-005 template
What to measure before buying PLT-005 for a room with built-in furniture
Before purchasing, one control sheet is enough. What is needed is not abstract room dimensions, but the actual geometry around the cabinet.
| Parameter | What to measure | Why |
|---|---|---|
| G1 | minimum gap between side panel and wall at the floor | compare with 16 mm |
| G2 | gap at a height of 120 mm | check the curvature of the wall |
| G3 | gap above the baseboard | understand if the furniture is tilted |
| F | protrusion of the decorative side panel/facade | determine the visible end |
| B | width of the furniture extension at the wall | check integration feasibility |
| P | own furniture plinth | understand if PLT-005 is needed behind the cabinet |
| W | wall curvature in the 0–120 mm section | do not consider a single measurement sufficient |
actual gap between the wardrobe side panel and the wall
12 mm in the scenario is a design condition. On site, the actual minimum value needs to be measured. If it is 14 mm at the top and 10 mm at the bottom, for PLT-005 the tightest section within its height is important.
Is there a furniture filler panel at the wall
The filler panel can be a decorative panel that covers the technical gap between the cabinet body and the wall. If it is already planned, sometimes it is easier to solve the transition of the floor plinth through it than to move the entire cabinet.
Cabinet's own plinth
A built-in cabinet often has its own lower base plinth. If it completely covers the bottom of the furniture area, running PLT-005 behind the cabinet body may be pointless. But the solution depends on what should remain after possible furniture dismantling.
position of the fronts relative to the side panel
If the front protrudes forward, the visible end of PLT-005 should be assessed not by the hidden cabinet body, but by the finished furniture plane. Sometimes the plinth end is much deeper than the front and is visually unobtrusive, sometimes — on the contrary, it is in plain sight.
Curvature of the wall near furniture
The tall PLT‑005 occupies a 120 mm strip. If the wall is convex right at the floor, the actual available gap may be less than 12 mm. A single measurement at countertop or shoulder level is not sufficient.
Rigid 16 mm template: the most useful check before paying for PLT-005
Before delivery of the long item, you can simulate the actual profile protrusion. You need a rigid template 16 mm thick and at least 120 mm high. It does not have to replicate the relief of PLT-005: the task is to check the occupied space.
Step 1. Apply the template to the wall near the cabinet
If with a 12 mm gap the template hits the furniture and does not lie flat against the wall, the conflict is physically confirmed. This is more useful than arguing over a drawing: the cabinet maker, designer, and client all see the same geometry.
Step 2. Check the entire height range 0–120 mm
The wall may recede inward or protrude. The template should be run along the entire height of the future baseboard, not just placed at the floor.
Step 3. Check the door trim and external corners
Since the template is already made, it is convenient to check critical junctions in the room. PLT‑005 may conflict not only with the cabinet, but also with the trim, decorative panel, or furniture side panel elsewhere.
Step 4. Mark the end point
On the wall, mark the actual line where PLT‑005 should end if it does not go behind the cabinet. After that, the open perimeter can be calculated.
If you plan to use it wood trim items in several rooms, one such template is useful for adjacent profiles too: it shows where the thickness of the molding conflicts with furniture before ordering.
How to solve the junction of PLT-005 with an already manufactured cabinet
Ending PLT-005 at the cabinet side panel: when this is a normal and even better solution
A built-in cabinet is not an ordinary dresser that can be moved tomorrow. If it is designed for a permanent location, has its own base, and covers the wall from floor to ceiling, the floor PLT‑005 does not have to run behind it just for formal continuity.
The cabinet is truly permanent
If furniture dismantling is not planned and there is no visible finish behind the cabinet, the plinth can end at the side panel. This reduces the length and eliminates the 12/16 mm conflict without reworking the cabinet.
The cabinet's own base already forms the bottom line
The furniture plinth covers the supports and the bottom of the body. The floor PLT-005 fits it as a separate architectural line. Such a joint can be designed neatly and logically.
The end of PLT-005 can be made meaningful
The ending should not look like a random cut five centimeters from the cabinet. It is better to tie the end to the front plane of the side panel, a decorative extension, or another clear vertical line.
The ending point does not fall into an open section of the wall
If a narrow strip of bare wall remains between the baseboard and the cabinet, the solution looks unfinished. It is better to move the point closer to the furniture plane or cover the transition with an extension.
What happens to the quantity
If a wardrobe takes up, for example, 2400 mm of wall, excluding the hidden section can remove almost an entire plank of solid wood or MDF. But you cannot automatically subtract the wardrobe's width from the total perimeter: you need to calculate only the segment where PLT‑005 actually does not run.
Do you need to run a wooden baseboard behind a built-in wardrobe
There is no universal rule that the baseboard must run along the entire perimeter. For built-in furniture, the issue is resolved by function.
When it makes no practical sense
- the cabinet occupies the space permanently;
- its own plinth covers the bottom;
- there is no visible section of wall behind the furniture;
- PLT-005 prevents the cabinet from aligning with the design axis;
- the profile cannot be serviced or seen after installation.
When the absence of a plinth becomes a problem during furniture dismantling
If the cabinet is potentially removed in a few years, a section of wall without baseboard will be exposed behind it. This is not necessarily a reason to move the unit now, but the client must understand the consequence. You can keep the repair stock PLT‑005 from the same batch and document the finish.
How a built-in cabinet differs from a freestanding one
For freestanding furniture, it is usually more logical to keep the baseboard behind it, because the furniture can be moved. A built-in cabinet effectively becomes part of the room's architecture, so the baseboard line can legitimately end at the furniture.
Why the decision affects the order
If there is no profile behind the cabinet, its width and adjacent returns must be excluded from the cutting plan. If the baseboard does run behind the furniture, the 12-millimeter gap requires reworking the joint.
Furniture base, open end, and PLT-005 finish
PLT-005 and furniture baseboard are not the same thing
In search, the expression "furniture baseboard" is often used for the plinth or decorative profile of the cabinet itself. PLT-005 in this article is a floor wooden baseboard/trim that works along the wall and floor junction.
Floor PLT‑005
Runs along the wall, covers the lower junction of the finish, and forms the architectural line of the room.
Furniture base of the cabinet
Refers to the body, covers the legs, fasteners, or the lower structure of the furniture. It can be removable and has its own geometry.
Where the two lines meet
Usually on the side panel or furniture filler. That's where you need to decide the PLT‑005 end cap and the appearance of the transition.
Why you cannot automatically replace one product with another
If a cabinet has a base 100–120 mm high, it does not necessarily mean it functions as a floor plinth throughout the room. Likewise, PLT‑005 does not become a furniture base just because it has a suitable height.
Four ways to solve the junction of PLT-005 with an already manufactured cabinet
When 12 mm conflicts with 16 mm, there is no single correct scheme. The choice depends on the furniture design and whether the skirting board must be continuous.
Option A. End PLT‑005 at the side panel
The most straightforward solution for a permanent built-in cabinet. The furniture remains in its designated place, and the profile gets a neat end cap. You only need to choose the correct ending point and recalculate the open perimeter.
Option B. Make a short return of the profile to the wall
If a simple straight end is too noticeable, the designer can provide a short return that leads the line into the side plane. The specific geometry depends on the relief of PLT‑005 and the furniture; it's better to check it on a mockup first.
Option C. Solve the transition with a furniture filler strip
A decorative filler piece can cover the technical area and provide a clear plane that PLT‑005 meets. This is a furniture solution, so its dimensions and fastening must be confirmed by the cabinetmaker.
Option D. Change the position of the wardrobe
Moving the cabinet away from the wall is only possible if the facade gaps, fastening, filler pieces, and the overall geometry of the built-in furniture allow it. This should not be the first reaction to a 4 mm conflict.
Should you move a finished wardrobe away from the wall for PLT-005
If the gap is increased from 12 to at least 16 mm, the profile theoretically gets space. But the cabinet also changes position.
What the interior loses when the gap is increased
The visible gap at the wall may grow, the width of the filler strip may change, the symmetry of the facades may be lost, or a gap may appear at the adjacent cabinet.
What happens to the facades
Built-in furniture is often calculated to the millimeter relative to the wall and adjacent sections. Shifting the cabinet by 4–6 mm can change the shadow gaps and the position of the front plane.
When a furniture filler is more rational than moving the cabinet body
If the cabinet design allows changing only the decorative panel at the wall, this is usually less risky than moving the entire cabinet. But the specific decision is made by the furniture maker.
When it's easier to finish the plinth earlier
If PLT‑005 behind the cabinet is not functionally needed and the open end can be finished cleanly, reworking the furniture for a few centimeters of hidden plinth is rarely justified.
PLT-005 made of MDF or solid wood: the furniture conflict remains the same
Sometimes after discovering a 12-millimeter gap, the client suggests "taking oak instead of MDF — maybe it's thicker." This doesn't work for PLT-005. The card confirms one thickness of 16 mm in all four versions.
| Material | Thickness | Cabinet gap | Space deficit | Resolves the conflict? |
|---|---|---|---|---|
| MDF | 16 мм | 12 мм | 4 мм | No |
| Moisture-resistant MDF | 16 мм | 12 мм | 4 мм | No |
| Beech | 16 мм | 12 мм | 4 мм | No |
| Oak | 16 мм | 12 мм | 4 мм | No |
Regular MDF
Suitable for covering paint, but does not become thinner due to processing. If the joint requires passing between a wall and a cabinet, the joint itself needs to be changed.
Water-resistant MDF
Selected based on operating conditions. In a room with a cabinet, it can be used in the hallway or another risk zone, but geometrically it's identical to regular MDF.
Oak and beech
Solid wood changes the visual result and the standard length to 2400 mm. The thickness remains 16 mm. Therefore, switching to natural wood can change the cost and the joint map, but won't provide the missing 4 mm.
Before choosing a finish, it is useful to open the section materials and quality of wooden moldings and agree on which preparation option is needed for the selected enamel or tinting.
Open end of PLT-005 near the cabinet: the joint needs to be designed before finishing
If the baseboard ends in front of built-in furniture, the end becomes part of the interior. This is not a technical "trim" that can be left as is.
End grain under covering enamel
A fresh cut needs to be prepared using the same system as the profile: sanding, primer, and enamel should provide a finished edge. The end grain is especially noticeable if the cabinet does not protrude forward and the person sees the transition from the side.
End grain of oak baseboard
On solid wood, the grain pattern is visible. A straight end can be beautiful if it is evenly processed and integrated into the furniture vertical. If the end is too exposed, the designer may choose a return or another furniture transition.
End grain of a beech profile
The same requirements apply: clean geometry and consistent finish. Beech should not be considered a "technical" material that can be finished more roughly just because it will be painted.
Return of the profile instead of a simple trimmed end
A short return to the side wall can make the ending more architectural. But it adds a separate small piece and two cuts. The number of such returns needs to be included in the cutting plan, otherwise there will be no suitable material left for them at the end of installation.
Before finishing, you can use tips for finishing and installing wooden plinth as a basic reference page, and coordinate the specific end technology with the master who performs the finish.
Price of wooden plinth PLT-005: how a ready-made wardrobe changes the real cost of the order
A built-in cabinet can reduce the open perimeter and thereby remove an entire strip. But the effect depends on the material and cutting.
Let's take a model room with four wall sections:
- A — 4200 mm;
- B — 3300 mm;
- C — 2700 mm;
- D — 1900 mm.
Full open perimeter without considering the cabinet:
4200 + 3300 + 2700 + 1900 = 12,100 mm.
Suppose the built-in wardrobe occupies 2400 mm on wall A, and after agreement it is decided not to run PLT-005 behind the furniture. Then the open part of A becomes:
4200 − 2400 = 1800 mm.
New open perimeter:
1800 + 3300 + 2700 + 1900 = 9700 mm.
MDF 2600 mm: full perimeter
Mathematical minimum:
12,100 ÷ 2600 ≈ 4.65 → 5 planks.
Cost of regular MDF:
5 × 2 050 = 10 250 ₽.
Moisture-resistant:
5 × 2 550 = 12 750 ₽.
MDF 2600 mm: cabinet excluded
9700 ÷ 2600 ≈ 3.73 → minimum 4 strips.
A practical layout is possible, for example, like this:
- B = 2600 + 700;
- C = 2000 + 700;
- D = 1900;
- A = 1800.
Two pieces of 700 mm each can be obtained in combination with A and D from two rods: 1900+700=2600 and 1800+700=2500. In total, four whole strips are indeed enough.
Cost of regular MDF:
4 × 2 050 = 8 200 ₽.
Savings versus full perimeter — 2,050 ₽, that is, the cost of one plank.
Oak 2400 mm: full perimeter
12 100 ÷ 2400 ≈ 5.04 → minimum 6 planks.
Cost:
6 × 7 030 = 42 180 ₽.
Oak 2400 mm: wardrobe excluded
9700 ÷ 2400 ≈ 4.04 → minimum 5 planks.
Cost:
5 × 7 030 = 35 150 ₽.
Savings — 7,030 ₽. This clearly shows: the decision 'no plinth behind the built-in cabinet' can change not only installation, but also the budget.
Beech 2400 mm
Full perimeter — 6 planks:
6 × 5 140 = 30 840 ₽.
After excluding 2400 mm behind the cabinet — 5 planks:
5 × 5 140 = 25 700 ₽.
Savings — 5,140 ₽.
Cutting and quantity of PLT-005 after excluding the section behind the cabinet
Total length does not equal the number of whole PLT-005 strips
The calculation above shows the mathematical minimum, but in a real order you need to check how long walls are divided into installation parts. The plinth has straight joints, corners, doorways, and open ends.
MDF 2600 mm and a long wall of 3300 mm
You can use 2600+700 mm. This is one straight joint. If the 700 mm remainder is already needed for another wall, the layout can be very efficient.
A 2400 mm array and the same wall
For example, 2400+900 mm. The remainder of the second plank can go to a short section, but the layout itself differs from MDF. Therefore, after changing the material, the quantity is recalculated from scratch.
Why you can't blindly subtract the cabinet width
If PLT‑005 does not end exactly at the cabinet edge, but makes a return or approaches a furniture filler, the exposed length differs from the simple formula "wall minus cabinet". An actual endpoint is needed.
Buy wooden floor baseboard: the 120×16 mm profile should be applied not only to the cabinet
Before payment, it's useful to run the 16 mm template through all critical points in the room. This is especially important if a tall profile is chosen: a thickness conflict may be discovered at doors and built-in panels only after delivery.
Door casing
Check whether PLT‑005 protrudes beyond the front plane of the trim and how the transition will be handled. If the profile is also used as a trim, this is a separate design scenario, already covered on other pages.
External corner
On an external corner, the 16 mm thickness is clearly visible. You need to understand how the two parts meet and whether there is enough space next to the furniture.
Wall panel
If the panel has its own thickness, the baseboard may end up deeper or shallower than the front plane. This needs to be seen before purchasing.
Built-in furniture in other rooms
One 12/16 mm conflict often means that the furniture maker did not account for the floor profile at all in the project. It is worth quickly checking the other cabinets and kitchens while the PLT‑005 order has not yet been placed.
When to buy PLT-005 and when to stop the order
When PLT-005 near a ready cabinet does not need to be ordered yet
There are situations where even the correct article number is better not to purchase temporarily. The reason is not the product itself, but that the key component is not yet determined.
- the actual 12 mm gap has not been checked after the final installation of the cabinet;
- the furniture has not yet been leveled and may shift;
- it is unclear whether there is a decorative extension at the wall;
- it has not been decided whether PLT-005 goes behind the cabinet;
- the end point of the profile is not defined;
- the open end is not designed;
- the material is still changing between MDF, oak, and beech;
- the quantity is calculated along the full perimeter without accounting for furniture;
- door trims and other 16-millimeter conflicts not checked.
Cabinet not yet leveled
Even a finished cabinet can receive a few millimeters of correction during final installation. Until the side panel is fixed, 12 mm cannot be considered the final dimension.
The furniture maker promises to "install the extension later"
You need to see its actual size and the facade plane. The extension can completely change the endpoint of the baseboard and the exposed length.
It is not determined whether the cabinet will be dismantled
For permanent built-in furniture, the absence of PLT-005 behind the cabinet may be logical. If the cabinet is temporary, the solution needs to be assessed differently.
When the wooden baseboard PLT-005 can already be purchased
The order is ready when the furniture issue is turned into specific dimensions.
- The cabinet is installed and secured.
- The minimum gap is measured in the height zone of 0–120 mm.
- The thickness of PLT‑005 is confirmed — 16 mm.
- It is decided whether the profile passes behind the furniture.
- If not, an endpoint is marked.
- A simple end or a return is determined.
- Material selected.
- A map of 2600 mm for MDF or 2400 mm for solid wood is built.
- Whole slats and reserve were calculated.
- Price, availability, and delivery have been re-checked.
After this, procurement no longer depends on improvisation during installation.
Furniture boundary conditions: filler strip, curved wall, facade, and plinth
If the cabinet is already installed flush: how to check the possibility of a furniture extension piece.
A furniture filler strip is one of the cleanest ways to connect a floor profile to a built-in cabinet body, but it is not a universal "4 mm overlay." It is designed by the furniture maker.
The extension is located between the cabinet and the wall
It can cover the technical gap and create a visible vertical plane that PLT-005 meets. Then the plinth ends not at the raw side of the cabinet body, but at a finished furniture element.
The filler panel extends forward to the facade plane
In this option, the end of the plinth may be partially hidden. But you need to check whether too large a step in depth appears.
The extension piece is already manufactured
If its width and position are fixed, it cannot be assumed that it will necessarily accept the 16mm PLT‑005. A template must be applied and the actual plane checked.
The extension piece can be redone
This is often cheaper and safer than moving the entire cabinet. But the decision depends on the construction, finish, and how much the filler panel is connected to the facades.
The wall is curved: the nominal 12mm gap may vary along the height and length
On built-in furniture, the conflict may not be constant. For example, at the floor the gap is 10 mm, at a height of 120 mm it is 13 mm, and a meter along the cabinet it is 15 mm. Then you cannot use the average value.
We check the minimum
For a profile with a thickness of 16 mm, the tightest zone it must pass through is critical. If 10 mm remains somewhere, these 6 mm of deficit are not compensated by the adjacent 18 mm section.
Do not try to chisel the wall without a project
If the finishing is ready, cutting into the wall for a baseboard can damage the plaster, waterproofing, electrical wiring, or simply create an uneven line. This method should not be the first option.
Do not mill an arbitrary recess into the cabinet side panel
The furniture side panel may contain fasteners, dowels, ties, or decorative trim. Any cutout must be part of the furniture design.
PLT-005 near a hinged facade: not only the side panel but also the door trajectory must be checked
If the cabinet starts next to a wall and its outermost door opens toward that wall, a tall baseboard may affect the opening. Even if the profile ends before the side panel, its end or return must not fall into the door's trajectory.
The facade protrudes beyond the side panel
Then the visible furniture boundary is not where the hidden side panel is. The end point of PLT-005 should be tied to the actual facade or extension piece.
The handle extends to the wall
Need to check whether it touches the baseboard when fully opened. This is especially important for the tall 120 mm profile near the lower part of the door.
Handleless facade
There is no conflict with the handle, but the door's trajectory remains. The 120×16 mm template allows checking it in a minute.
If the cabinet has its own plinth 120 mm high: matching height does not make the lines identical
The cabinet's own plinth may have the same height of 120 mm as PLT‑005. In the visualization, it seems the two parts will simply continue each other. But you need to check the thickness, offset, material, and position of the front plane.
Furniture plinth is recessed
PLT-005 may protrude forward relative to it. Then a direct end-to-end connection will look like a step.
Furniture plinth is in the plane of the facade
The floor profile may be deeper or shallower. Sometimes it is better to end it at the side panel and not try to form a continuous line.
Plinth is removable
PLT-005 should not block its removal if there are adjustable legs or service elements behind the plinth.
Hidden area, reserve, and future cabinet dismantling
If the built-in cabinet is later removed: how to preserve the ability to restore the skirting board
Choosing not to run PLT-005 behind permanent furniture may be optimal now, but it is worth considering future renovations.
Keep a long leftover piece
If a fragment from the same batch remains after cutting, it can be marked as a reserve for the area behind the cabinet. This is especially useful for oak due to natural variability.
Preserve the finish formula
RAL/NCS, gloss level, primer, and technology should be recorded in the as-built documentation. In a few years, matching an 'approximately similar white' will be more difficult.
Photograph the hidden wall
Before furniture installation, the location of wiring and existing finishes can be documented. This will help with future dismantling and restoration of the bottom line.
Reserve PLT-005: when an additional strip is really needed
After excluding the area behind the cabinet, the quantity may decrease by one board. Don't automatically add it back to the order as 'spare'. First, assess the real risks.
An additional plank is justified if:
- there are complex external corners;
- The long species-specific part is used almost entirely;
- the open end/return has not yet been worked out on the mockup;
- Repeat delivery of 2400/2600 mm is difficult;
- natural oak needs to be kept from the same batch;
- Existing remnants are shorter than the critical part.
When the reserve is already in the cutting layout
In the model MDF map, after four planks, about 700 mm of total nominal material remains. But the sum is not important—the individual fragments are. If the longest remnant is 600–700 mm and the critical part near the cabinet is shorter, it can already serve as a reserve.
Why two remnants of 400 mm are not equal to one 800-millimeter piece
They are physically separate. Using them instead of one long part is only possible at the cost of an additional direct joint, which may be unacceptable.
Delivery PLT-005: length 2400/2600 mm must be checked after the final quantity
When the furniture unit is resolved and the number of planks has decreased or changed, logistics need to be updated. The conditions can be checked on the page delivery conditions for wooden baseboards.
In practice, they check:
- how many whole planks are being shipped;
- what the standard length is — 2400 or 2600 mm;
- how many packaging frames are required by count;
- whether the long item fits into the elevator and corridor;
- where to store it before installation;
- who receives and verifies the material.
Why the furniture is already in place — this is a separate logistics risk
After installing the built-in wardrobe, there is less free space for storing long items. Slats should not be thrown along the furniture so that they are damaged by facades or other crews. It is better to determine the storage location before delivery.
Solution and transfer of the node to production
Decision matrix for a 12 mm gap: what to do before ordering PLT-005
| Condition | What to do | What not to do |
|---|---|---|
| The wardrobe is permanent, PLT‑005 is not needed behind it | finish the profile at the side panel/extension | move the cabinet body only for the hidden baseboard |
| the cabinet may be removable, the wall must remain finished | check the possibility of changing the furniture unit or keep a repair reserve | ignore the future exposed wall |
| there is a furniture extension | use it as a design boundary after verification | cut PLT-005 along a random cabinet line |
| gap less than 16 mm along the entire height | do not attempt to run the profile behind the cabinet without rework | clamp the baseboard between the furniture and the wall |
| the gap is larger in some places, smaller in others than 16 mm | focus on the minimum actual zone | calculate by the average value |
| a continuous PLT‑005 line is needed | first coordinate the furniture modification | buy the entire volume before resolving the joint |
Typical mistakes when ordering PLT-005 next to a built-in wardrobe
Mistake 1. Looking only at the 120 mm height
The profile is liked by scale, but the 16 mm thickness is not verified. As a result, the wardrobe does not fit into its designated place.
Mistake 2. Assuming that oak is thinner than MDF
All four versions of PLT-005 have 16 mm. Changing the material does not solve the 12-millimeter gap.
Error 3. Ordering the plinth along the full perimeter before deciding on the cabinet
After excluding the hidden section, an extra whole plank remains.
Error 4. Subtracting the cabinet width without the end point
If a return or furniture extension is needed, the actual open length differs.
Mistake 5. Moving the cabinet body 4 mm without checking the facades
The shift can disrupt symmetry, extensions, and furniture fastening.
Error 6. Milling the cabinet side for the plinth "in place"
The panel may contain fasteners and finishing. Rework must be coordinated with the furniture maker.
Error 7. Leave a rough open end
The plinth ends on visible furniture and looks unfinished.
Mistake 8. Confusing the furniture base with the floor plinth PLT‑005
The two elements serve different functions and do not automatically replace each other.
Mistake 9. Running PLT‑005 behind the built-in wardrobe just for the sake of a "full perimeter"
Profile is hidden, interferes with furniture, and increases the order without practical benefit.
Error 10. Not checking the trajectory of the outermost facade
The end or return of the plinth may obstruct the door opening.
Error 11. Using the old MDF map after switching to oak
The length changes from 2600 to 2400 mm, so the quantity and joints become different.
Error 12. Counting two short remnants as one long piece
This is only possible with an additional joint, which may end up visible.
Error 13. Painting the end after installation "as it turns out"
On the side of the cabinet, the defect is especially noticeable in side light.
Error 14. Ordering a long piece before the control measurement of the wall
The actual exposed area differs after installing extensions and the cabinet.
Error 15. Not leaving documentation for the hidden section
During future dismantling, no one knows why there is no baseboard behind the cabinet and which profile is needed for restoration.
When it is better not to buy PLT-005 at all for this assembly
Sometimes the right conclusion is to abandon the chosen profile specifically in a particular room or near the cabinet.
This option is worth considering if:
- the cabinet cannot be moved, and the baseboard must definitely run continuously;
- the furniture extension cannot be modified;
- the open end of PLT‑005 is visually unacceptable;
- another, thinner profile preserves the interior task better;
- the furniture plinth already forms a complete bottom line, and a separate floor profile only duplicates it;
- the transition through the furniture creates a too complex and expensive joint.
In this case, one first returns to the choice of baseboard, rather than buying PLT-005 just because it was already specified in an early design project.
How to coordinate the joint between the designer, furniture maker, and installer
The 12/16 mm conflict lies at the boundary of three professions. The designer is responsible for the visible line, the furniture maker for the cabinet and extensions, and the installer for the actual connection of the profile. If each solves only their own part, the error is transferred to the object.
After that, you can order PLT-005 baseboard without the risk that after delivery it turns out: the cabinet and the 16-mm profile physically want to occupy the same space.
Pre-payment checklist PLT-005
- the cabinet is installed and leveled;
- the gap is measured at least at several points;
- the thickness of PLT-005 of 16 mm is confirmed;
- it is decided whether the profile passes behind the cabinet;
- if not — the endpoint is marked on the facade;
- the open end or return is designed;
- the trajectory of the outermost facade is checked;
- the furniture plinth is not confused with the floor skirting board;
- material selected;
- an up-to-date 2600/2400 mm map is built;
- remnants are checked as separate physical parts;
- reserve justified;
- long-length delivery is confirmed;
- finish of fresh ends agreed.
If PLT-005 does not go behind the cabinet: what happens with the floor and wall junction
Waiving the baseboard behind built-in furniture does not mean the hidden area can be left in an arbitrary state. Before installing the cabinet, check how the floor and wall are finished and whether PLT-005 performed a technical function there.
The floor covering has its own expansion gap
Its construction must comply with the requirements of the specific covering. There is no need to fill or compress such a gap just because a cabinet will be on top. If the floor manufacturer requires free movement of the covering, the furniture assembly must preserve that.
The wall behind the cabinet remains finished
If the furniture is ever dismantled, neat basic finishing near the floor will simplify restoration. It is not necessary to paint the hidden wall to the decorative level of the living room, but the assembly must not be accidentally damaged by installation.
The cabinet's own plinth covers the visible edge
Then PLT-005 behind the cabinet is not needed as a decorative cover. It is the furniture plinth that handles the visible bottom line in this area.
Boundary gaps and non-standard scenarios
Boundary scenarios: the same 12 mm gap may require different solutions
Cabinet is wedged between two walls
If the furniture stands in a niche from wall to wall, PLT-005 may not fit the side panels along the long straight at all: the plinth ends at the left portal and reappears on the right. In such a layout, the 12/16 mm conflict does not require reworking the cabinet if hidden areas do not need a floor profile.
One side is open, the other is against a wall
Then the exposed side becomes the main joint. On the hidden side, PLT-005 can be terminated inside the niche, while on the visible side, a neat end cap or return can be made. It is not necessary to solve the left and right sides identically if the architecture differs.
The cabinet stands next to a door trim
The endpoint of the plinth can compete with two verticals at once: the side panel of the cabinet and the trim. Here it is useful to decide which line is the main one. Sometimes PLT‑005 is better brought to the trim, and the furniture extension starts higher; sometimes — the opposite.
The cabinet has a deeply recessed plinth
The visible side panel can stand almost flush against the wall, while the base is pushed inward by a few centimeters. Then the plinth can physically run along the wall in the base area, but it still won't be visible from the front. Before complicating the installation, you need to understand what function this will serve.
The cabinet is installed on a floating floor covering
Here you can't decide only on decor. You need to cross-check the floor manufacturer's requirements and the furniture structure so that the cabinet body and plinth don't block the necessary movement of the covering. The article doesn't set a universal compensation gap size: it depends on the specific floor material and the manufacturer's instructions.
The cabinet is currently assembled in the workshop, but not installed yet.
This is the best time for correction. You can make a full-size mockup of PLT‑005 and check the side panel before delivering the furniture to the site. If a different extension is needed, the furniture maker can still change it without dismantling the finished cabinet.
Actual gap of 16–18 mm: even then, you don't need to automatically run PLT-005 behind the cabinet.
Suppose after final installation it turns out to be 17 mm instead of 12 mm. Formally, PLT-005 with a thickness of 16 mm already fits. But having one millimeter of free space doesn't answer whether the profile is needed behind the cabinet and whether it can be properly installed.
Need to check:
- is there room for actual installation and finishing;
- doesn't the side panel press against the front face of the profile due to a curved wall;
- is it possible to bring a long strip behind an already installed cabinet;
- doesn't the PLT-005 block the furniture plinth;
- is there any point in buying the hidden section.
That is, 16 mm is a necessary geometric condition for the nominal profile to pass, but not an automatic permission for installation. That is why a template and a furniture cutout are more useful than a simple comparison of two numbers.
If the gap is 8–10 mm: reducing the thickness of the PLT-005 itself cannot be considered a standard solution.
When the free space is noticeably less than 16 mm, the idea arises to grind down or cut out the rear part of the profile. For a finished commercial product, this cannot be accepted as a standard approach without confirmation from the manufacturer and designer.
Causes:
- the cross-section of the product changes;
- the rigidity may change;
- the contact surface may be affected;
- a non-standard part arises that is difficult to replace;
- the installation crew receives a separate technology for only one section.
If the cabinet is permanent, it is much more rational to first check the architectural termination PLT‑005 before the furniture. Non-standard modification of the profile itself is considered only as a design solution, not as a way to save an already erroneous gap.
Quick check in 5 minutes before the invoice
If you need to make a decision without a long discussion, it is enough to go through five control questions. First, is the minimum finished gap in the 0–120 mm zone measured? If it is less than 16 mm, PLT‑005 behind the side panel without changing the assembly does not pass. Second, is a floor plinth behind a permanent built-in cabinet functionally needed? If not, it is easier to design a beautiful finish in front of the furniture. Third, does the finish point coincide with the visible vertical of the side panel or extension? If not, it needs to be corrected before cutting.
Fourthly, has the material been selected before calculating the quantity? MDF and moisture-resistant MDF have a length of 2600 mm, oak and beech — 2400 mm, although all remain 16 mm thick. Fifthly, is there a ready map of open walls after excluding the wardrobe? Only after this does the line "PLT‑005 — N pcs." become justified. If at least one answer is missing, it is better not to fix the count: it is in these five places that the majority of errors on this topic occur.
FAQ about PLT-005 next to a built-in cabinet
What is the thickness of the wooden plinth PLT‑005?
16 mm in all four confirmed versions: regular MDF, moisture-resistant MDF, beech, and oak.
What is the height of PLT‑005?
120 mm.
Will PLT‑005 fit into the 12 mm gap between the wardrobe and the wall?
No, based on nominal geometry: the profile is 16 mm, which is 4 mm thicker than the available gap. The actual joint needs to be re-measured on site.
Can I take an oak PLT‑005 instead of MDF so that it fits?
No. The oak version is also 16 mm thick.
Do I need to run the skirting board behind the built-in wardrobe?
Not necessarily. If the wardrobe is permanent, has its own plinth, and fully covers the wall section, PLT-005 can be finished at the furniture side panel or extension piece.
Can I finish the PLT-005 at the cabinet side panel?
Yes, if the end point looks intentional, the edge is finished, and the profile does not interfere with the facade.
How should I finish the baseboard edge near the furniture?
Options are a clean straight edge, a short return, or a transition through a furniture extension piece. The specific joint is chosen based on the wardrobe door and the PLT-005 profile.
Should the cabinet be moved 4 mm away from the wall for the baseboard?
Only if the cabinet maker confirms that the change will not affect the facades, extension pieces, mounting, or symmetry. For a permanent built-in cabinet, it is often simpler to finish the skirting board in front of the furniture.
How does floor PLT-005 differ from a furniture plinth?
PLT-005 works along the wall and floor junction. The furniture base belongs to the cabinet body and can be removable. They do not automatically replace each other.
What is the length of PLT-005 made of MDF?
2600 mm for regular and moisture-resistant MDF.
What is the length of the oak PLT-005?
2400 mm.
Is there a PLT-005 in beech?
Yes, the beech version has dimensions of 120×16×2400 mm.
How to calculate the quantity if there will be no baseboard behind the cabinet?
First, determine the exact end points on both sides of the furniture, then count only the open wall segments and divide them by 2600 mm for MDF or 2400 mm for solid wood.
Can I simply subtract the cabinet width from the room perimeter?
Only if PLT‑005 ends exactly at the edges of the cabinet body. Returns, extensions, or an offset decorative side panel change the actual length.
How to check the profile before ordering?
Make a rigid template 120×16 mm and apply it to the wall, cabinet, trim, and external corners.
Is an additional spare plank needed?
Only if existing remnants cannot replace a critical part or repeat delivery would create serious risk.
How to find out the current price of PLT‑005?
Check the product card right before payment, because price and availability change.
What to do if the cabinet is removed after a few years?
Keep a large remnant of PLT‑005 from the same batch and finish data. Then the area hidden today can be restored.
Can I buy PLT‑005 while the cabinet is not yet installed?
The material can be chosen in advance, but the final quantity near built-in furniture is better calculated after a control positioning of the cabinet and measuring the actual gap.
Final specification and readiness for ordering
Final specification PLT-005 for room with built-in wardrobe
| Parameter | Final entry |
|---|---|
| Product | PLT‑005 |
| Cross-section | 120×16 mm |
| Material | MDF / moisture-resistant MDF / beech / oak |
| Factory length | 2600 / 2400 mm |
| wardrobe gap | actual measurement, scenario — 12 mm |
| conflict | at 12 mm deficit 4 mm |
| skirting board behind wardrobe | Yes / no |
| end point | according to approved furniture facade |
| end/return | Designed |
| open perimeter | after excluding furniture |
| Quantity | Per map 2400/2600 mm |
| Reserve | by critical detail |
| Finish | Approved |
| Delivery | Checked |
Result: with a 12 mm gap, first the cabinet is decided, then PLT-005 16 mm is purchased
In this situation, there is no problem of choosing between MDF, beech, and oak: all PLT‑005 versions have the same thickness of 16 mm. With an actual gap of 12 mm, any of them lacks 4 mm of space. Therefore, changing the material inside PLT‑005 is pointless if the goal is simply to "squeeze" the profile behind the cabinet.
The first question is whether a floor plinth is needed behind built-in furniture at all. If the cabinet is permanent and its own base covers the bottom line, it is often better to end PLT‑005 at the side panel or furniture extension. If the profile must be continuous, first modify the furniture unit and only then approve the order.
A model calculation shows the commercial consequence. In a room with a full open perimeter of 12.1 m, regular MDF requires at least five planks; if a built-in cabinet covers 2.4 m of wall and PLT‑005 is not needed behind it, the open perimeter decreases to 9.7 m and you can fit into four planks. For oak, a similar transition reduces the minimum from six to five strips.
Working sequence: install the cabinet → measure the minimum gap at a height of 0–120 mm → apply the 16 mm template → decide whether PLT‑005 is needed behind the furniture → choose the end point and end cap → choose the material → build a 2600/2400 mm map → check leftovers and reserve → confirm finish and delivery → place the order.