Article Contents:
- What is an inset handle and why it works where others fail
- Where the inset handle works best
- Technical parameters of inset wooden handles
- Recess depth
- Handle length
- Wood species
- Handle profile
- What is an "expensive facade" and what role do moldings play in it
- Wooden moldings vs polyurethane moldings: what's the difference
- How to place moldings on a cabinet facade
- Frame composition
- Vertical division
- Upper belt
- Bottom line
- How to properly combine a recessed handle and molding
- Marking template: why it is needed
- Polyurethane decor for cabinet facades: what to choose
- Polyurethane moldings for cabinets
- Polyurethane overlays
- Decorative stucco for the upper belt of a cabinet
- Decor for solid wood furniture
- Ready-made solutions for different types of cabinets
- Wardrobe: long inset handles and calm moldings
- Hallway cabinet: strictness and convenience
- Ceiling-height cabinet: an architectural solution
- Classic bedroom cabinet: wooden handle and frame molding
- Cabinet for painting: monolithic facade
- Table: selection of inset handles and moldings by cabinet type
- Installation: from marking to final painting
- Stage 1: Marking
- Step 2: Installing the handle
- Step 3: Installing moldings
- Step 4: Priming
- Stage 5: Painting
- Mistakes when choosing handles and moldings for a cabinet
- Buying handles without measuring the facade thickness
- Installing a handle in line with the molding
- Choosing a molding that is too wide for a narrow facade
- Not considering grip comfort in a narrow space
- Gluing decorative overlays in a constant touch zone
- Not doing a test painting
- Not buying a spare molding
- FAQ: Questions about recessed handles and moldings for cabinets
- About the Company STAVROS
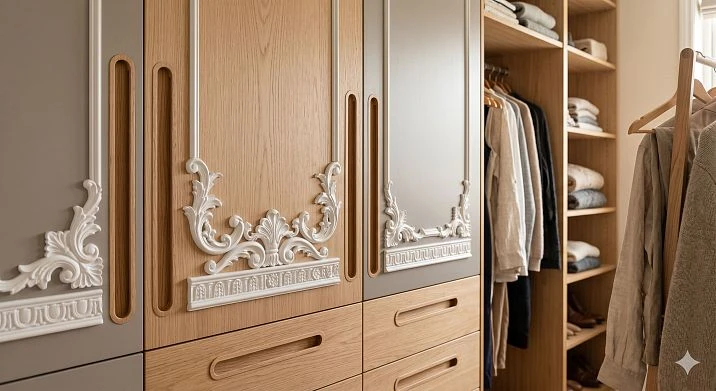
There is one paradox that everyone who has ever built a built-in wardrobe or dressing room knows: the cleaner and neater the facade should look, the harder it is to choose fittings for it. A protruding bracket disrupts the plane. A push-latch looks random. A metal handle on a painted wooden facade is a compromise that is immediately visible.
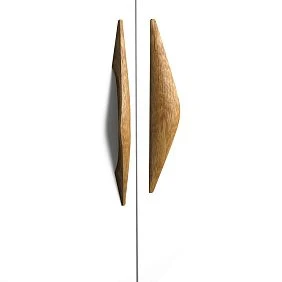
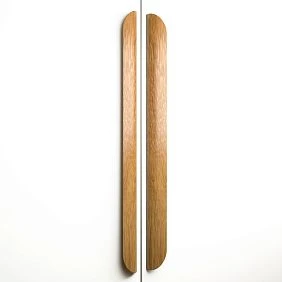
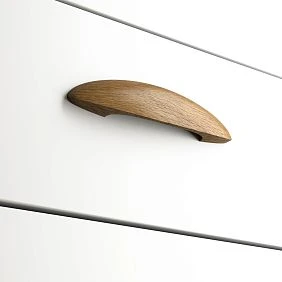
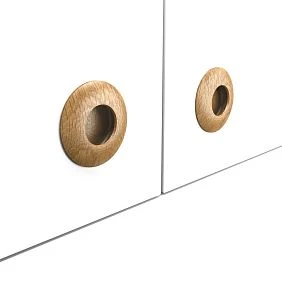
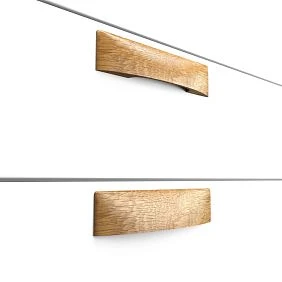
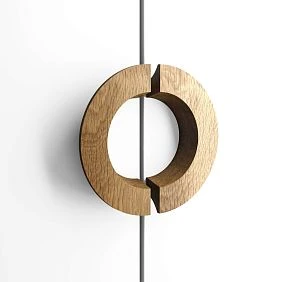
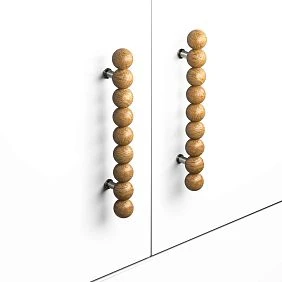
Mortise wooden handles — a solution that resolves this conflict. They are recessed into the facade, do not protrude forward, do not catch in narrow dressing room passages, and do not disrupt the architecture of a tall floor-to-ceiling wardrobe. At the same time, they Moldings for furniture и polyurethane furniture decor transform the facade from a simply painted panel into a true architectural surface — with relief, shadow, and structure.
It is this combination — a recessed handle as a functional element and polyurethane decor as an architectural tool — that delivers the result that interior magazines call an "expensive facade." Let's break it down into parts: what to buy, how to place it, and what mistakes to avoid.
What is a recessed handle and why does it work where others fail
A recessed handle fundamentally differs from a surface-mounted one. A surface-mounted handle (bracket, knob, rail) is installed on top of the facade — it protrudes forward by 30–60 mm. A recessed handle is embedded into the body of the facade: a groove is milled, the handle is inserted into it, and the surface remains almost flat. The grip is achieved through the recess, which fits comfortably in the palm.
This is not just an aesthetic choice. It is a structural solution that changes the functionality of the furniture.




Where a recessed handle works best
Dressing room with a narrow passage. The width of the passage between sections is 60–70 cm — this is the standard for most built-in dressing rooms. A protruding bracket in such a space constantly catches on clothes, bags, and elbows. A recessed handle — a clean plane: nothing catches, the grip is comfortable.
Floor-to-ceiling wardrobe. A tall wardrobe with facades of 2.4–2.7 m is perceived as an architectural element of the room, not as furniture. Protruding handles at such a height look like fittings — a small detail on a large plane. A recessed handle preserves the monolithic nature of the facade.
Built-in wardrobe in a niche. A wardrobe built into a niche "from wall to wall" is a wall with doors. A protruding handle disrupts the illusion of a single plane. A recessed one supports it.
Furniture for painting. When the wardrobe, walls, and moldings are painted in a single color, a protruding metal element becomes an accent that no one planned. A wooden recessed handle, painted in the same color, is an invisible but functional element.
Narrow facades. A facade 30–40 cm wide (for narrow sections, drawers, nightstands) leaves no room for a normal-sized handle. A recessed handle fits into any format.
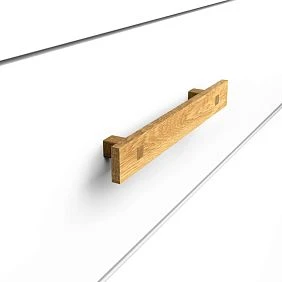
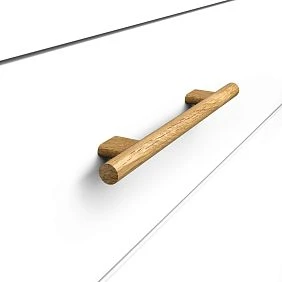
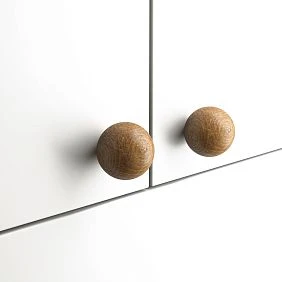
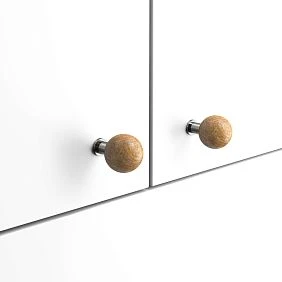
Our factory also produces:
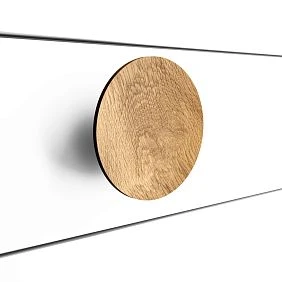
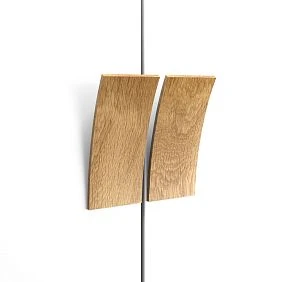
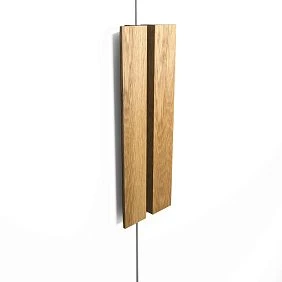
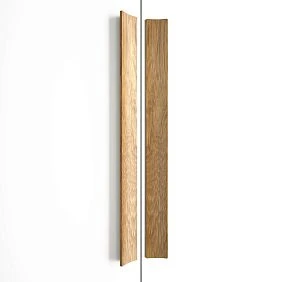
Technical parameters of recessed wooden handles
Before choosing a handle, you need to understand the technical parameters. Otherwise — mismatch, rework, frustration.
Get Consultation
Recess depth
To install a recessed handle in a facade, a recess is milled — a depression into which the handle fits flush or with slight sinking. The standard recess depth for wooden recessed handles is 12–18 mm. This means the facade must be at least 18–22 mm thick so that the recess does not go through and weaken the structure.
For MDF facades 16 mm — some thin recessed handles with a recess of 10–12 mm. For facades 18–22 mm — standard handles.
Handle length
Wooden long handles — for tall facades and wardrobes up to the ceiling. Length from 200 to 600 mm and more. A long handle is convenient for a facade 600 mm high and above: one grip in the center replaces two separate fastenings.
For drawers — short handles 60–120 mm. For wardrobe doors — 150–300 mm. For tall wardrobe doors — 300–600 mm.
Tree species
Wooden wardrobe handles made from beech, oak, ash, birch. For a handle that will be painted in the color of the facade — beech or birch: even texture, takes paint well, texture does not show through the finish. For open wood (varnish, oil) — oak or ash: expressive texture, durability.
Handle profile
Wooden Handle of the mortise type may have:
-
rectangular profile with rounded edges — modern, laconic;
-
profile with a fillet along the top edge — more classic;
-
profile with a chamfer — graphic, for a modern interior.
For a classic or neoclassical cabinet with moldings — a handle with a soft fillet or heel profile. For a minimalist or modern cabinet — rectangular with rounding.
What is an "expensive facade" and what role do moldings play in it
Ask yourself: why do some cabinets look expensive and others do not, at a comparable price? The answer is in the surface. A smooth flat slab without structure is perceived as cheap regardless of the material. A facade with relief — with a molding frame, applied profile, vertical division — is perceived as complex, made with intention.
It is Moldings for furniture и Polyurethane appliqués create this structure. They work as architectural details of the facade: break the plane into parts, create shadow, add visual weight — and all this without increasing the cost of the cabinet body itself.
Wooden moldings vs polyurethane moldings: what's the difference
Two types of moldings are used for furniture.
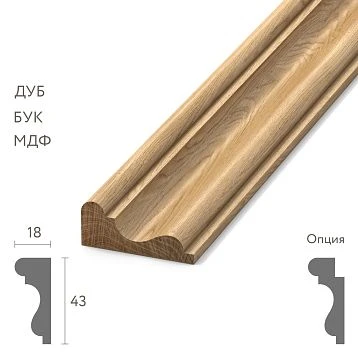
solid wood furniture moldings — wooden profiles that are glued directly onto the facade. They work well for furniture with an open wood texture (lacquer, oil), perfectly match the material of wooden handles, and are easy to paint.
Moldings made of polyurethane — lightweight, flexible, with a uniform surface without texture. Ideal for facades to be painted: a single surface after primer and paint looks monolithic. Polyurethane does not swell from humidity and does not crack with temperature changes — important for hallways and cabinets near windows.
For cabinets to be painted — polyurethane moldings. For cabinets with exposed wood — wooden moldings. You can combine: wooden handles + polyurethane moldings with a single paint job give a monolithic result.
How to place moldings on a cabinet facade
This is the most frequently asked question: how exactly to arrange moldings so that the facade looks architectural, not chaotic?
Frame composition
A classic technique is a frame panel: molding along the perimeter of the facade, indented 30–50 mm from the edge. On a facade 600–900 mm high — one frame covering 80–85% of the area. On a tall facade 1200–1800 mm — the frame is divided into upper and lower parts (ratio 1:2 or 1:1.5 in favor of the lower part).
Molding indentation from the facade edge: 30 mm for narrow facades (300–400 mm), 40–50 mm for standard ones (450–600 mm), 50–60 mm for wide ones (600–800 mm).
Vertical division
On wide fronts (600–800 mm), moldings create vertical division: one vertical profile in the center divides the front into two equal parts. Each part gets its own frame. This is a solution for wardrobes and large cabinets where a wide surface needs to be broken up.
Upper belt
On cabinets up to the ceiling or tall cabinets, the upper horizontal molding creates a visual "belt" — a transition from the main field of the front to the upper zone. This imitates an architectural frieze characteristic of classic furniture.
Bottom line
A horizontal molding on the lower part of the front — the cabinet's "base". Visually "grounds" the furniture, creating a sense of solidity. Especially important for cabinets without legs that stand on the floor.
How to properly combine a recessed handle and molding
This is a key practical question, and precise marking is needed here.
The recessed handle is installed along the vertical axis of the front, in the area of comfortable grip. For a cabinet door — at a height of 900–1100 mm from the floor (palm level of a standing person). For a drawer — at the center of the drawer's height.
The molding frame should be designed so that the handle does not fall on the profile line. Options:
Handle inside the frame. Molding frame around the perimeter of the front, handle inside the frame — along the vertical axis. The handle does not cross the molding. This is the cleanest option: the frame borders the front, the handle is a functional element inside.
Handle outside the frame. On a tall facade with two frames — one in the upper zone and one in the lower — the handle is installed in the neutral strip between the frames. This option is convenient for facades 1500–1800 mm.
Handle on the neutral strip. With vertical division of the facade, the handle is installed in the central vertical field without molding.
Marking template: why it is needed
Before installing handles and moldings, an accurate template with dimensions of all elements on each facade is needed. This is a paper drawing or marking directly on the facade with a pencil and level.
Without a template: handles end up in different places on adjacent facades, moldings are not aligned horizontally, frames are of different sizes on identical doors. This is chaos that is immediately visible.
With a template: everything is identical, everything is aligned, everything reads as a system.
Polyurethane decor for cabinet facades: what to choose
polyurethane decor for furniture facades includes several categories, each of which performs its own function.
Polyurethane moldings for cabinets
Moldings made of polyurethane for furniture — linear profiles forming frame panels on facades. The choice of profile depends on the cabinet style.
For a classic cabinet — a profile with a cutout and a shelf: it creates a characteristic shadow that imitates a traditional panel. For a neoclassical one — a stricter profile with a heel. For a modern one — a flat profile with a chamfer: clean and geometric.
Molding width for the facade: 15–25 mm. Wider moldings on furniture look heavy and are only appropriate on very large facades (width from 600 mm).
Polyurethane overlays
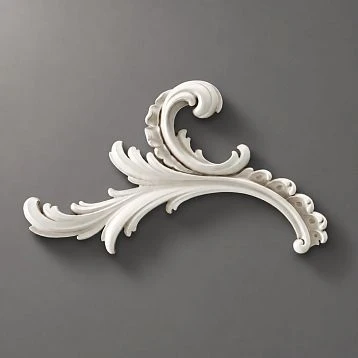
Polyurethane appliqués — point decorative elements: corner rosettes for intersections of frame moldings, central medallions, decorative overlays on the central part of the facade.
On furniture, overlays work on the principle of accent decor: one corner insert in each corner of the frame panel visually "closes" the frame and adds elegance. The central medallion is a decorative element in the center of the lower part of the door or drawer.
Principally: overlays cannot be placed in the area of constant hand contact — they are attached with glue and are not designed for mechanical load. The decorative zone is the upper third of the facade or central parts that the hand does not reach during opening.
Decorative stucco for the upper belt of the cabinet
Decorative stucco made of polyurethane is used in the upper zone of the cabinet — as a decorative cornice or crowning belt. This is especially relevant for cabinets that do not reach the ceiling: the stucco element in the upper part makes the cabinet architecturally "complete".
Height of the upper cornice made of moldings from polyurethane for the cabinet: 50–70 mm. Projection: 20–35 mm. A more massive cornice on furniture looks disproportionate.
Decor for solid wood furniture
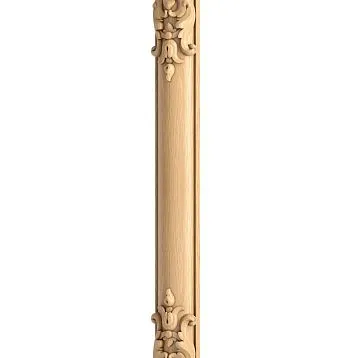
decor for furniture Made from natural wood — wooden overlays, medallions, profile frames. For cabinets with an open wood texture, wooden decor creates a material unity with the body. A wooden overlay made of the same material as the facade, when varnished, looks like part of the solid wood.
Ready-made solutions for different types of cabinets
Wardrobe: long recessed handles and calm moldings
A wardrobe is a functional space with high frequency of use. Here are important:
-
handles that are comfortable for unconscious grip (in the dark, with loaded hands, in a hurry);
-
decor that does not protrude into a narrow passage;
-
surfaces that are easy to clean.
Solution for the wardrobe:
-
Wooden long handles recessed type, length 250–400 mm — for convenient grip at any height;
-
Moldings made of polyurethane — thin profile 15–20 mm, frame panels on each facade;
-
no protruding overlays in the passage area;
-
uniform painting of handles, moldings, and facades.
Hallway wardrobe: strictness and convenience
The hallway is a high-traffic area: the wardrobe is opened several times a day, often while wearing a coat and carrying bags. The facade must be durable and easy to clean.
Solution for the hallway wardrobe:
-
Mortise wooden handles — without protrusions, durable, made of hardwood;
-
Moldings for furniture — vertical profiles structuring the facade;
-
polyurethane moldings for frame panels when painting in a single tone;
-
lower base molding for the visual 'seating' of the wardrobe.
Ceiling-height wardrobe: an architectural solution
A wardrobe up to the ceiling is not furniture in the usual sense. It is built-in room architecture. The facades occupy an entire wall, and they are subject to architectural requirements.
Solution for a tall wardrobe:
-
Wooden long handles — length 400–600 mm, located along the vertical axis of the facade;
-
vertical moldings along the entire height of the facade — structure the plane;
-
horizontal molding belt at a height of 2100–2200 mm (ceiling transition level);
-
Polyurethane appliqués in the upper zone (above the touch zone);
-
uniform painting — walls, moldings, and handles in the same color.
Classic wardrobe in the bedroom: wooden handle and frame molding
The bedroom is a more intimate space than the living room. Delicate decor that does not overwhelm is more appropriate here.
Solution for a classic wardrobe in the bedroom:
-
Wooden handles with a moderate cove profile — for varnish or painting;
-
frame moldings made of polyurethane with a classic profile;
-
decor for furniture — a wooden overlay on the lower part of the door;
-
a polyurethane cornice at the top of the cabinet — if there is space to the ceiling.
Cabinet for painting: monolithic facade
This is the most requested scenario today: a cabinet painted in the same color as the walls. Such a cabinet "dissolves" into the wall, turning into an architectural plane with doors.
Key solutions:
-
Mortise wooden handles made of beech for painting — painted in the same color as the facade;
-
Moldings made of polyurethane — glued to the facade, primed and painted together with it;
-
a single primer for polyurethane and MDF — necessary for compatibility;
-
a single paint — the same color for the facade, moldings and handles;
-
Molding joints — sealant + sanding before painting.
With a single paint job, the boundary between the wooden handle and the polyurethane molding disappears: only the shape and relief remain. This is how the 'expensive and monolithic' effect is achieved.
Table: selection of inset handles and moldings by cabinet type
| Cabinet type | Handle | Length | Molding | Decorative element |
|---|---|---|---|---|
| Wardrobe | Inset wooden | 250–400 mm | Thin PU 15–20 mm | Without overlays |
| Hallway | Inset wooden | 150–250 mm | Vertical wooden | Bottom profile |
| Floor-to-ceiling cabinet | Long inset | 400–600 mm | PU vertical | Upper belt |
| Classic bedroom | Wooden with profile | 150–200 mm | Frame PU with rounding | Wooden overlay |
| Cabinet for painting | Inset beech for painting | 150–300 mm | PU for painting | Corner inserts |
| Dresser / drawers | Short inset | 80–120 mm | Horizontal profile | Central overlay |
Installation: from marking to final painting
Stage 1: marking
Create a diagram of each facade with exact dimensions. Mark:
-
the central axis of the facade vertically and horizontally;
-
handle installation location (center of handle + offset from edge);
-
frame molding outline (offset from edges);
-
placement of corner inserts (at molding intersections).
This can be done on paper or by marking directly on the facade with a pencil.
Step 2: Installing the Handle
For a recessed handle:
-
Mark the recess outline using the handle template.
-
Use a router to cut a groove of the required depth.
-
Check the handle fit: it should sit flush or with a slight recess of 1–2 mm.
-
Apply glue along the perimeter of the groove or screw screws through the back end of the facade.
-
Hold until complete polymerization.
Step 3: Installation of moldings
Moldings on the facade are attached Mounting adhesive for polyurethane — in a zigzag pattern on the back side of the profile. Press for 30–60 seconds, securing with masking tape until set.
Corner joints of moldings — cut at 45° using a miter box or jigsaw with a guide. After installing all moldings — apply sealant to joints and areas adjacent to the facade, sand with fine paper (180–240 grit).
Step 4: Priming
The facade, moldings, and handle are primed with adhesion primer. For MDF — use a special primer-insulator to prevent resin bleed and fiber raising. For polyurethane — use a universal adhesion primer. Apply two coats with drying between them.
Step 5: Painting
Two coats of finish paint. After the first coat — light sanding with 320-grit paper. After the second — finish. For a high-quality result, use water-based paint with added enamel or special furniture enamel.
Check the shade match on the handle and molding: if different coatings are applied, one may yellow, the other may not. Use the same can of paint for all facade elements.
Mistakes when choosing handles and moldings for a cabinet
Buying handles without measuring the facade thickness
A recessed handle requires a specific groove depth. If the handle is designed for a 15 mm groove but the facade is 16 mm thick, durability is questionable. Always check the groove depth when purchasing.
Installing a handle in line with the molding
The molding frame and handle should exist in different zones of the facade. A handle in line with the molding means either it's impossible to grip properly or the profile gets damaged.
Choosing a molding that is too wide for a narrow facade
A 40 mm wide molding on a 300 mm facade is overkill. For narrow facades, use profiles 12–18 mm.
Not considering grip comfort in a narrow space
Before finalizing the handle choice, check if it's comfortable to insert your hand into the groove in the open position. Sometimes the correct groove depth on the drawing turns out to be insufficient in reality, especially for people with large hands.
Glue decorative overlays in the constant touch zone
A polyurethane overlay glued in the area where the hand touches the facade when opening will quickly peel off or chip. Decorative polyurethane — only in the zone above the grip line.
Do not perform test painting
Wooden handles and polyurethane moldings react differently to primer and paint. Without a test, discrepancies in gloss, shade, or texture through the paint may occur. Always paint a test sample.
Do not take a reserve of moldings
Moldings are trimmed to the length of the facades — and trimming produces waste. A 10–15% reserve is a mandatory minimum. Molding from a different batch may differ slightly, but on light paint this will be noticeable.
FAQ: questions about inset handles and moldings for cabinets
When is it better to choose inset wooden handles?
For built-in cabinets, walk-in closets, hallway cabinets, tall facades up to the ceiling, and any furniture for painting where protruding hardware disrupts the clean plane. Mortise wooden handles — the optimal choice where both function and aesthetics are important.
Can you combine inset handles and polyurethane moldings?
Yes, that's the right combination. The main thing is to design the facade in advance so that the handle does not fall on the molding line and remains in a comfortable grip zone.
Is polyurethane decor suitable for furniture to be painted?
Yes. polyurethane decor With proper priming and painting, it creates a monolithic surface. It cannot be placed in an area of constant mechanical contact.
What to buy for a wardrobe with classic facades?
Mortise wooden handles or Wooden long handles, Moldings made of polyurethane for frame panels, Polyurethane appliqués for corner inserts, glue, primer, paint, sealant, and spare.
What handle length to choose for a tall facade?
For a facade 900–1200 mm — handle 200–300 mm. For a facade 1500–2000 mm — 300–500 mm. For a floor-to-ceiling wardrobe — 400–600 mm.
How to properly place the molding and handle on the same facade?
Handle — on the vertical axis, in the grip zone (900–1100 mm from the floor). Molding frame — indented from the edges, the handle should be inside the frame or in the neutral zone between frames. Gap between the handle and molding — at least 30–40 mm.
What to use to attach polyurethane moldings to the cabinet facade?
Assembly adhesive for polyurethane, applied in a zigzag pattern to the back surface of the profile. More details in the article what to glue polyurethane molding with.
About the company STAVROS
The entire range for decorating cabinet and wardrobe facades — Mortise wooden handles, Wooden long handles, cabinet handles with and without coating, solid wood furniture moldings, Moldings made of polyurethane, Polyurethane appliqués, Decor for Solid Wood Furniture и Polyurethane moldings — is manufactured and supplied by STAVROS.
STAVROS — a Russian manufacturer of products made from natural wood and polyurethane for furniture, architectural finishing, and interior decor. Founded in St. Petersburg in 2002. Completed projects include the Hermitage, Konstantinovsky Palace, Alexander Palace, and Trinity-Izmailovsky Cathedral. The standard of profile precision, surface uniformity, and technological compatibility of materials, developed on restoration projects, is applied to every product — from a decorative medallion to a furniture handle.
Order Mortise wooden handles и Moldings made of polyurethane for cabinets, get a consultation on selecting a set for your project — on the STAVROS website. Contact us to confirm shipping to your destination., order from one unit, assistance in calculating the quantity.