Article Contents:
- Renovating an operating facility and a standard initial purchase are different tasks
- First the survey, then ordering materials
- The main challenge is determining which profile is already installed
- How to identify wooden baseboard at an existing facility
- General view of the area
- Close-up of the front surface
- End face
- Sizes
- Option A — replace only 800 mm
- Option B — replace the section from the corner to the doorway
- Option C — replace the baseboard throughout the entire room
- 1. Ordering material before the survey
- 2. Identifying the profile from a front-facing photo alone
- 3. Measuring only the width
- 4. Do not preserve a reference sample
- 5. Treating damaged linear meters as the purchase quantity
- 6. Mixing old and new material without labeling
- 7. Issuing the entire order to the crew
- 8. Storing trim in a passageway
- 9. Start with the entire floor at once
- 10. Not checking the visual match of the finish
- 11. Arbitrarily replacing the profile with an analog
- 12. Using the operational reserve for the current installation
- 13. Not keeping a replacement history
- 14. Not accounting for the actual working window
- 15. Throwing away all old elements
- 16. Considering one profile universal for all zones
- 17. Not checking edge sections and corners

In an operating hotel, you cannot treat renovation the same way as on a new construction site. Imagine a hotel with 42 rooms, where 38 rooms continue to welcome guests. In the first-floor corridor, the wooden skirting board is damaged, in four rooms the moulding needs to be replaced, several doorways have damaged architraves, and in the restaurant the cornice is locally damaged. You cannot close the entire property for a week: some areas must remain accessible, guests continue to check in, the restaurant operates on schedule, staff need passageways, and the renovation crew only gets short working windows.
In such a situation, the procurement task changes. It is not enough to simply find a similar profile and deliver the required number of metres. First, you need to understand what is actually already installed, how this profile looks in cross-section, what material it is made of, what finish it has, where the natural boundaries of replacement lie, and how the new material will look next to the old one. Then the property is divided into renovation phases, a specific set of materials is assembled for each shift, a trial section is completed, the result is checked, and only after that do you move on to the next zone.
The correct sequence for an operating commercial property looks like this:
survey → profile identification → reference sample → damage map → test replacement → calculation of sections → renovation phases → set for the shift → local installation window → quality control → return of the zone to operation → operational reserve.
It is precisely in such a scenario construction supplies wholesale that procurement is not about filling a warehouse, but about managed local replacement, in which the property continues to operate.
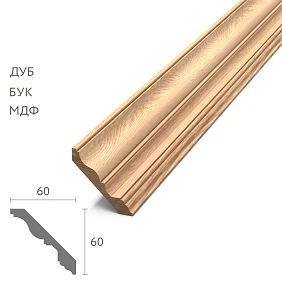
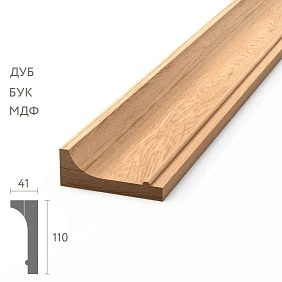
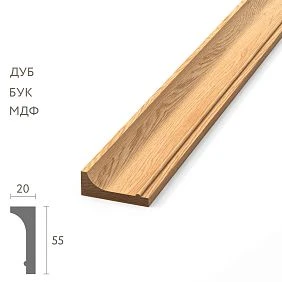
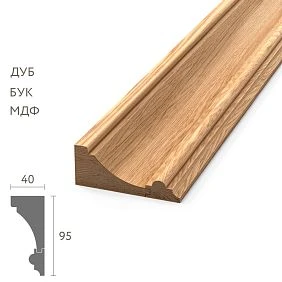
Renovating an occupied property and a standard initial purchase are different tasks
On a new property, trim can be received in large batches, temporarily stored in a prepared area, and handed over to installers sequentially as rooms become ready. A working hotel, restaurant, or office operates by different rules. There are visitors, furniture, cleaning, staff, schedules, and areas that cannot be taken out of service for long.
Even the simple question of "where to put the material" becomes part of the project. Long bundles of baseboard in a hotel corridor obstruct passage and look like unfinished renovation. Open packages in a restaurant cannot be left between shifts. In an office, after the work window ends, the space must again become suitable for employees.
Constraints of an occupied property usually include the inability to close all rooms at once, limited hours for noisy or dusty work, the need to keep passages clear, a small temporary storage area, furniture and equipment that cannot be quickly removed, the need to return some areas to normal appearance daily, dependence on room occupancy or the office schedule, and mandatory cleaning after each local shift.
Because of this, the optimal purchase for a new property may turn out to be inconvenient for renovating an occupied one. A large batch by itself does not solve the task. It is necessary to determine in advance which products will be needed on a specific date and in a specific area.




First an inspection, then ordering materials
Starting with an order is one of the most expensive mistakes. Before purchasing, a defect list must be compiled. It shows not only the total footage of damage, but also the context of each section: room, product type, intended profile, length, nature of the defect, priority, and the available repair window.
| Room | What is damaged | Profile | Section length | Condition | Urgency |
|---|---|---|---|---|---|
| 1st floor corridor | Baseboard | PLT-___ | 14 м | Chips and local damage | High |
| Number 203 | Molding | MLD-___ | 4 м | One section of the frame is damaged | Medium |
| Number 208 | Molding | MLD-___ | 6 м | Crack and chip | High |
| Restaurant | Cornice | KZ-___ | 3 м | Local damage | Medium |
Such a table quickly shows that “27 meters of damage” is too rough a figure. These are different profiles, different rooms, and different access scenarios.
At this stage, selection can begin construction goods wholesale, but only after the actual list of tasks is clear. If the item code is unknown, a temporary code is entered in the schedule instead, and profile identification is launched separately.
Our factory also produces:
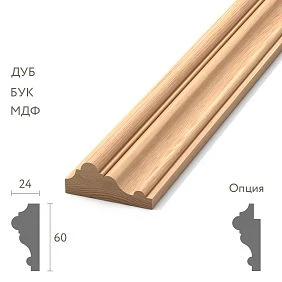
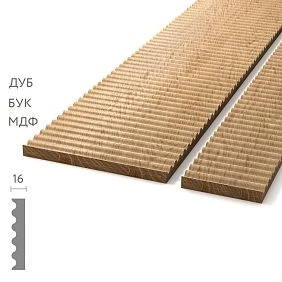
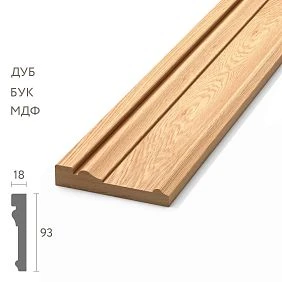
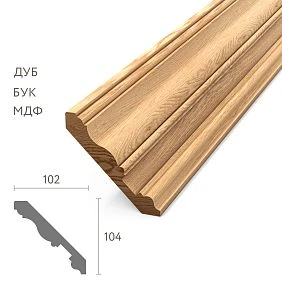
The main problem is determining which profile is already installed
For local repairs, matching the existing finish is more important than simply having new trim available. The phrase "I need a similar baseboard" is too vague. Even two profiles with the same overall width can differ in radius, chamfer, groove, protrusion, or the geometry of the back side.
For identification, it is desirable to obtain the article number of the old order if the documents have been preserved; the exact purpose of the product; the width and height of the cross-section; the length of the elements used; the material; general-view photographs; end-face photographs; close-up photographs of the relief; a description or sample of the existing finish; a control physical fragment if it can be safely removed.
The best-case scenario is to find the old specification and confirm the article number. But even having an old document does not remove the need for verification: over the years, local repairs may have been carried out, and the profile actually installed in a specific area may differ from the original design.
Get Consultation
How to identify a wooden baseboard on an existing site
A single frontal photograph is not enough for a baseboard. It shows the general style but provides almost no information about the cross-section. It is the end face that makes it possible to understand the geometry of the profile.
General view of the area
The photo should show the baseboard in context: the floor, the wall, the doorway, and adjacent corners. This helps to understand where the natural boundaries of the future replacement run.
Close-up of the front surface
It shows the relief, radii, grooves, chamfers, and the character of the finish. It is desirable to place a ruler or another scale reference next to it.
End face
The end-face shot is the most informative for comparing profiles. If the damaged element is going to be dismantled anyway, a small control fragment can be removed and the cross-section measured directly.
Dimensions
It is necessary to record not only the nominal height of the skirting board, but also the thickness, protruding parts, depth of rebates, and, if necessary, the dimensions of relief areas. For a complex profile, a simple sketch with dimensions is useful.
If the old skirting board is painted in an opaque color, determining the material from a photograph is risky. It is better to rely on documentation or a physical sample.
How to identify a wooden moulding if the article number is unknown
A moulding is often more difficult to identify because it may be part of a framed composition and its end face is inaccessible without dismantling. But the principle is the same: first we gather as much measurable information as possible, then compare it with the catalog.
- Photograph the entire frame or a section of the wall.
- Take a close-up of the moulding at a right angle.
- Measure the overall width of the profile.
- If possible, measure the projection from the wall.
- Record the shape of the central grooves, fillets, and chamfers.
- Photograph the corner of the frame, where the relief is most clearly visible.
- Determine the material from documentation or a sample, if possible.
- Match the identified features with specific product codes.
If a match by photo looks convincing, that is still not a reason to purchase the entire batch. The next stage is a physical check of one element or sample on site. For replacing a visible section on a single wall, even a small difference in geometry can create a noticeable step at the joint between the old and new molding.
Why the same width does not mean the same profile
Let's imagine two profiles 40 mm wide and 15 mm thick. In the size table they look identical. But the first has a soft radius on the face and one central groove, while the second has a chamfer and two small steps. If you join them end to end, the joint will immediately reveal the replacement.
| Parameter | Profile A | Profile B |
|---|---|---|
| Overall width | 40 мм | 40 мм |
| Total thickness | 15 мм | 15 мм |
| Top edge | Radius | Chamfer |
| Central relief | One groove | Two steps |
| Joint with the old profile | Matches only with identical geometry | Visually different |
That is why replacement is sought by cross-section and relief, not by the two main overall dimensions. The longer the continuous profile line, the more noticeable the difference.
Materials in bulk: why a test area is needed first
Before purchasing materials in bulk for the entire active site, it is worth completing one controlled repair module. This could be one wall, one doorway, one hotel room, or a small section of corridor.
The test area should show whether the profile matches geometrically, how the joint between the new and old material looks, how noticeable the difference in shade and finish is, how dismantling is performed without damaging the adjacent finish, what the actual material consumption is, what offcuts remain, and how much time the full work cycle takes, including cleanup.
After a trial replacement, the calculation for the entire batch becomes more accurate. Sometimes it turns out that a local 800 mm joint looks worse than replacing the entire section from the corner to the doorway. Then the purchase volume increases, but the quality of the result also improves.
Old and new wooden trim does not necessarily look the same even when the profile matches
Wood and finish change with use. An old baseboard may have faded from light, darkened, developed a patina, picked up cleaning marks, local scratches, and multiple touch-ups. A new profile may have the same geometry but look different.
The difference is influenced by the age of the existing material, the natural wood grain, the material batch, tinting or painting, gloss level, fading, soiling, and previous local repairs.
Therefore, promising a "perfect match" based on the article number alone is incorrect. An exact profile solves the geometric part of the task, but the visual result must be checked on a sample.
Local replacement or replacing the entire wall: how to decide
Suppose 800 mm of baseboard on a long wall is damaged. There are three basic scenarios.
Option A — replace only 800 mm
Minimal material consumption. Suitable if the joints can be placed in inconspicuous spots, the new profile and finish match well, and the baseboard line itself does not emphasize the connection.
Option B — replace the section from the corner to the doorway
Consumption is higher, but a natural boundary appears. Often such a repair looks neater because the new material does not try to blend into a long old line.
Option C — replace the skirting board throughout the entire room
The most material-intensive option, but sometimes it is the only one that gives a visually cohesive result. This is especially relevant if the old covering has changed significantly in shade or the profile cannot be accurately matched.
The choice cannot be reduced to the rule of "taking the shortest section." For an operating commercial property, the cost of material must be weighed against the quality of the result and the risk of rework.
Wholesale construction materials for a hotel: dividing the property into renovation phases
After the survey and trial replacement, a phasing plan is drawn up. It answers the question: which rooms can be safely taken out of service simultaneously and for how long.
| Queue | Zone | Work window | Composition | Transition condition |
|---|---|---|---|---|
| 1 | Rooms 203 and 208 | Between checkout and the next check-in | Molding | Acceptance and cleaning |
| 2 | First floor corridor | Approved low-traffic window | Baseboard | Passage fully restored |
| 3 | Restaurant | After closing or during the sanitary window | Cornice | Area ready for work |
| 4 | Backup queue | Based on actual load | Remaining local sections | Material set confirmed |
ROOM OUT / WORK / QC / ROOM IN: hotel room renovation model
For a room, it is convenient to use a short status cycle.
ROOM OUT — the room is temporarily taken off sale or unavailable to the guest.
WORK — dismantling, preparation, and installation of new trim are underway.
QC — geometry, joints, finish, cleanliness, and completeness are checked.
ROOM IN — the room has been returned to service.
This model is useful because the renovation does not end with the word “installed.” A room cannot be considered returned to service until waste, tools, and packaging have been removed and the surface has passed a visual inspection.
How to renovate a restaurant without fully closing
In a restaurant, the constraints are different. What matters here is the operating time of the kitchen and dining rooms, preparation for service, cleaning, and the impossibility of leaving the renovation area unfinished by opening time.
In practice, it is possible to renovate one dining room while another is operating, carry out work after closing, use a sanitary or technical window, limit work to one wall, or split dismantling and installation into different stages. The main thing is not to make universal promises about timing: the specific window is determined by the site itself.
For a restaurant, the DAY KIT system is especially useful — a kit for a specific shift.
How to work in an office that cannot be fully vacated
In an office, renovation can be tied to rooms, floors, meeting rooms, or weekends. But there is another problem here: furniture, cable channels, workstations, and constant movement of employees.
The site can be divided into individual rooms, groups of rooms, meeting rooms, corridors, reception, floors, or wings of the building. The working criterion is simple: the zone must be either under renovation or fully returned to operation.
Bulk construction material cannot be distributed simultaneously across the entire operating site
On a new site, temporary placement of a large batch is often handled by a separate storage zone. In an operating hotel or restaurant, there may be almost no free space. Therefore construction material wholesale it is better to keep it in a controlled buffer zone and deliver it to work areas only for a specific window.
The buffer zone should allow profiles to be separated by article numbers, prevent new items from being mixed with dismantled ones, preserve an operational reserve, assemble replacement sets, and protect material from accidental damage.
DAY KIT — a set of material for one renovation shift
DAY KIT is one of the most useful tools for renovating an operating site. Instead of handing the entire batch to the crew for a specific shift, only the set associated with the approved work zone is issued.
| DAY KIT No. 07 — rooms 203 and 208 | ||
|---|---|---|
| Position | Quantity | Note |
| PLT-___ | 8 pcs. | Skirting board sections |
| MLD-___ | 6 pcs. | Frames in two rooms |
| Reference sample | 1 | Do not use during installation |
| Room layout | 1 set | With replacement sections |
| Section schedule | 1 | For verification after works |
DAY KIT can also include the necessary consumables if they are clearly defined by the project and work technology. But the idea remains the same: the kit is limited to the task of one shift.
Why DAY KIT is better than general material issue
Installers receive exactly the SKU and quantity needed in a specific area. The risk of mixing up similar profiles is reduced, there is no need to open extra packages, the operational reserve is physically separated, and the remaining stock after the shift is easy to check.
Wholesale building materials: damaged linear meters and procurement linear meters are not the same thing
For local replacement wholesale building materials you cannot calculate based only on the sum of damaged lengths. For example, an inspection showed 7.8 m of damage. This does not yet mean that the purchase should be 7.8 m plus a conventional 10%.
First, the actual replacement sections are determined. For example: 1850, 1850, 940, 940, and 620 mm. The sum of these segments is 6200 mm. But the procurement volume depends on the commercial length of the specific profile, the configuration of the joints, and the possibility of rational cutting.
Therefore, three quantities need to be distinguished: the damaged length, the length of the architectural sections actually being replaced, and the procurement quantity of whole commercial units. They rarely coincide.
Why you cannot simply add the standard 10%
A percentage allowance is convenient for a preliminary estimate, but it is weak for short sections of varying sizes. For local repairs, cutting depends more on the specific lengths.
Suppose five segments are needed: 1850, 1850, 940, 940, and 620 mm. If the commercial length of the specific profile is such that two long segments cannot be obtained from one strip, a simple 10% addition does not explain how many whole elements to buy.
Practical procedure:
- Record all sections to be replaced.
- Add the actual allowances if they are needed for cutting and joints.
- Find out the commercial length of the selected profile.
- Distribute the cut segments across whole products.
- Determine the reserve separately if it is justified.
This is how the stock turns from a familiar number into a manageable decision.
Example of a cutting map for a repair shift
| Section | Length | Room | Purpose |
|---|---|---|---|
| A1 | 1850 мм | Corridor | From corner to opening |
| A2 | 1850 мм | Corridor | Second side |
| B1 | 940 мм | Number 203 | Local frame |
| B2 | 940 мм | Number 208 | Local frame |
| C1 | 620 мм | Number 208 | Short section |
Next, these segments are distributed across the actual commercial length of the selected SKU. Until the SKU and its length are confirmed, it is impossible to honestly state the number of whole planks, so this figure should not be invented in advance in the working calculation.
What to do with dismantled wooden trim
After dismantling, the material does not need to be automatically thrown away. It should be divided into categories.
Damaged and unusable material is sent to waste according to the procedure adopted at the site.
Intact fragments may prove useful for local reuse if their condition and geometry allow.
Reference fragment — kept as a sample of the old finish.
A reference sample is especially valuable if the old article number is unknown. It contains the actual cross-section, material, finish, and signs of wear. After a few years, such a piece may prove more informative than photographs.
How to preserve a sample of the old finish
The sample should not be just a piece of skirting board in a storage room. It needs to be labeled.
HOTEL / FLOOR-2 / PLT-___ / OLD SAMPLE / 2026
It is useful to attach to the sample photographs of the installation location, cross-section dimensions, the article number if found, the confirmed material, a description of the finish, the new order number, the renovation date, and the area of the site.
It is better to keep not only the old sample but also a small new reference fragment from the replacement batch. Then, during the next renovation, you can compare three points at once: the original finish, the material from the last renovation, and the current condition on the wall.
What to do if the original article number no longer exists
This is one of the most difficult situations. The old profile has been identified, but it can no longer be ordered in its previous form, or the confirmed article number is no longer available in the current catalog.
- Keep the old sample.
- Verify the exact article number and documentation.
- Check whether current production or supply is possible.
- If an exact match is unavailable, select a replacement candidate.
- Compare the cross-section and texture.
- Create a test section.
- Evaluate the joint and finish.
- Approve the replacement in writing within the project.
- Only after that, consider the main batch.
You cannot silently replace a missing profile with an "almost identical" one. On a long visual line, this can be noticeable even to a non-specialist.
When it is better not to use an analogue at all
There are cases when a similar profile is worse than a larger replacement of an entire section.
Particular caution is needed with analogues on long hotel corridors, continuous ceiling cornices, moulding compositions on a single wall, paired door portals, and symmetrical reception areas.
If the exact profile is unavailable, it is better to consider replacing the completed architectural line. For example, replace the entire cornice on one wall rather than inserting one metre of a different profile in the middle.
Wholesale building materials: a repair reserve is formed after the work is completed
After the main repair is completed and the actual profile is confirmed, it makes sense to form a small operational stock. This is exactly where wholesale building materials become a tool for the future maintenance of the property.
The reserve is not needed to compensate for a poor calculation of the current repair. It is intended for future local damage, when a precisely matching profile from the same procurement history will be needed again.
It is convenient to form the reserve after the final cutting. First, it is clear which whole products remain, which usable offcuts have practical value, and which profiles are truly critical for the project.
What to put in the operational reserve
For each key profile, you can store several whole products or another agreed-upon quantity, the exact article number, material, dimensions, a photo of the profile and the end face, the order number, delivery date, a reference sample, finish details, and a list of the areas where this profile is used.
There is no universal reserve quantity. It depends on the scale of the project, the number of identical sections, the likelihood of damage, the complexity of reordering, and the available storage space.
How not to use the operational reserve for current installation
A common mistake: the reserve physically sits next to the main batch and is gradually used up when one strip is missing on the next shift.
To prevent this, the reserve is assigned a separate status, the packaging is labeled, it is not included in the DAY KIT without a separate decision, the remaining quantity is tracked, and the reason is recorded when it is used.
If the repair reserve regularly has to be used before the current project is completed, this is a signal to check the calculation, the cutting, or the actual consumption.
Replacement history: a document that becomes more valuable over time
| Date | Room | Was | Installed | Batch / order | Remainder |
|---|---|---|---|---|---|
| 12.09.2026 | 1st floor corridor | PLT-___ | PLT-___ | Order ___ | ___ |
| 13.09.2026 | Number 203 | MLD-___ | MLD-___ | Order ___ | ___ |
In three years, this document may be more useful than old correspondence. It shows what is actually installed in each zone, when the replacement occurred, and which batch the material came from.
Wholesale building materials: how to link purchasing to the room map
For a large project, it is useful to link wholesale construction materials not only to the specification, but also to the floor plan. Each line of the defect report gets a zone code.
- H-01-COR — first-floor corridor;
- H-203 — room 203;
- H-208 — room 208;
- REST-A — main restaurant hall.
The same code is carried over into the DAY KIT, the replacement log, and the remaining stock labeling. Then any plank or box of material is linked to a specific task.
How to accept a trial section
A trial section cannot be considered successful just because the new profile has physically been secured. Acceptance must answer several questions.
- Does the profile geometry match?
- Does the height and position match relative to the old line?
- How noticeable is the joint?
- How does the color look under daylight and artificial lighting?
- Was the adjacent finish damaged during removal?
- Can this technology be reliably repeated on the remaining sections?
- How long did the operation take?
- What was the actual material consumption?
If the result is unsatisfactory, not only the installation technology but also the procurement scenario itself is adjusted. For example, instead of a local patch, a decision is made to replace the entire section between architectural boundaries.
How to calculate the actual number of shifts
After the trial section, actual productivity emerges. Suppose one crew can consistently complete two rooms with the same type of renovation within the available window, including demolition, installation, inspection, and cleaning.
If there are eight such rooms, a minimum of four shifts is needed under unchanged conditions. But zones of a different type are added to this — corridor, restaurant, reception.
Calculating shifts is useful not only for the schedule. It determines the number of DAY KITs and the volume of material that needs to be prepared in advance in the buffer zone.
What to do if the new finish on the trial section differs noticeably
If the geometry matches but the color or gloss does not, there are several options.
The first is to select or adjust the finishing system for the new profile. The second is to extend the replacement boundary to a natural architectural termination. The third is to replace the entire profile in the room or zone if a local match is unattainable. The fourth is to consciously accept the visible difference as a temporary solution, but this must be a management decision for the site, not an accidental outcome.
The key is to detect the difference on the test section, not after installing the entire batch.
How to plan demolition so as not to damage adjacent finishes
In local repairs, the cost of an error is often determined not by the price of a new profile, but by damage to what was not originally planned to be replaced. When removing a skirting board, you can damage the wall, the floor covering, or an adjacent element. When dismantling a moulding, you can affect the paint inside the frame.
Therefore, the defect list must be accompanied by a demolition boundary map. Before work begins, the crew understands where the section being replaced ends and what must remain undamaged.
If safe demolition of a local fragment is practically impossible, this is another argument in favour of replacing a longer completed section.
How to organise a clean handover of the room back into operation
For an active property, installation readiness and operational readiness are different things. The skirting board may be installed, but the room still cannot be given to a guest if packaging, dust, tools remain inside, or visual inspection has not been completed.
Before the ROOM IN status or a similar zone status, check: the profile is installed, joints are accepted, adjacent finishes are not damaged, leftover material is removed, tools are taken out, passages are clear, surfaces are cleaned, and the work log is updated.
When phased repairs are not suitable
Local phased replacement is useful, but not universal. It is poorly suited if the profile cannot be reliably matched, the old finish differs greatly from the new one, damage covers most of the room, or dismantling local sections inevitably destroys adjacent finishes.
In such a case, a series of small repairs can produce a more patchy and expensive result than a single planned closure of the zone with full profile replacement.
The goal is to minimise downtime where the local scheme genuinely allows quality to be preserved, rather than forcing the property to be repaired piece by piece at any cost.
Fifteen mistakes when repairing wooden trim on an active site
1. Ordering material before the survey
Cause: the desire to shorten timelines. Consequence: the batch is calculated from approximate data. Prevention: first a defect list and identification.
2. Identifying the profile only from a frontal photograph
Cause: the profile looks familiar visually. Consequence: the style matches, but not the cross-section. Prevention: take the end face, dimensions, and relief.
3. Measuring only the width
Cause: width is the easiest to access. Consequence: two different profiles are mistakenly considered identical. Prevention: record the full cross-section.
4. Not keeping a control sample
Cause: the old fragment is perceived as waste. Consequence: during the next repair, the data has to be restored from scratch. Prevention: label and store the sample.
5. Treating damaged meters as the purchase quantity
Cause: it seems that square footage is the only figure needed. Consequence: replacement boundaries and cutting layouts are not taken into account. Prevention: count sections and product units.
6. Mix old and new material without labeling
Cause: after dismantling, everything is stacked next to each other. Consequence: usable old parts and new material get mixed up. Prevention: separate OLD / NEW / RESERVE zones.
7. Issue the entire order to the crew
Cause: it is easier not to kit shifts. Consequence: extra packages in work areas, SKU confusion, reserve consumption. Prevention: DAY KIT.
8. Store linear trim in the passageway
Cause: there is no designated buffer zone. Consequence: the site looks like a construction site, and the risk of material damage and interference with operations increases. Prevention: organize controlled temporary storage.
9. Start with the entire floor at once
Cause: the profile seems suitable. Consequence: the error is replicated. Prevention: one test section.
10. Do not check the visual match of the finish
Cause: the article number matched. Consequence: the new section stands out in shade or sheen. Prevention: evaluate a sample under real lighting.
11. Arbitrarily replace the profile with an analogue
Cause: the original article number is unavailable. Consequence: the continuous line changes its relief. Prevention: test section and approval of the replacement.
12. Use the operational reserve for the current installation
Cause: one plank is the closest. Consequence: after repairing the facility, the reserve is effectively gone. Prevention: separate labeling and issue.
13. Do not keep a history of replacements
Cause: the repair seems minor. Consequence: a year later, it is unknown what is installed in a specific area. Prevention: replacement log.
14. Do not account for the actual working window
Cause: only the installation time was estimated. Consequence: dismantling, preparation, cleaning, and inspection were forgotten. Prevention: count the entire cycle ROOM OUT → WORK → QC → ROOM IN.
15. Throw away all old elements
Cause: dismantled items are considered trash. Consequence: the reference sample and usable fragments are lost. Prevention: sort after dismantling.
16. Treating one profile as universal for all zones
Cause: the project states "wooden skirting" without article numbers. Consequence: different floors or previous renovations may have different products installed. Prevention: inspect zones separately.
17. Not checking edge sections and corners
Cause: the calculation is based on straight sections. Consequence: additional joints and short pieces arise on site. Prevention: map each architectural section.
Ready-made algorithm for procurement and replacement
- Inspect the site room by room.
- Draw up a defect report.
- Determine which profiles are installed.
- Find old specifications and orders, if they have been preserved.
- Take photos of the general view and the end face.
- Take exact measurements.
- Keep a reference sample.
- Match the profile with the current assortment.
- Select a test area.
- Obtain a small volume for testing.
- Perform a trial replacement.
- Check the geometry, joint, and finish.
- Determine the architectural boundaries of the replacement.
- Create a map of segments.
- Check the product length of a specific SKU.
- Perform cutting by whole items.
- Determine the reserve separately.
- Split the object into repair phases.
- Assign work windows.
- Create a buffer storage zone.
- Assemble a DAY KIT for each shift.
- Take a specific zone out of service.
- Perform dismantling and installation.
- Conduct QC.
- Remove materials and tools.
- Return the room to operation.
- Update the replacement log.
- Keep the old and new control samples.
- After completion, create an operational reserve.
Which product groups should be included in such a procurement
At an existing site, the list may include several types of wooden trim. In the STAVROS catalog, trim products are presented as a separate group with baseboards, moldings, cornices, casings, and other profiles. For the article, it is important not to mix them into a single depersonalized "wood" line item.
If the lower line of the wall is being repaired, they look for and check Wooden baseboard. If the wall frame is being restored — a specific wooden molding. For the upper line of the wall — wooden cornice.
Within each type, the SKU, material, cross-section, and other confirmed characteristics are then recorded. It is precisely this accuracy that makes it possible to perform local repairs rather than a general stylistic replacement.
How not to turn an article about repairs into an article about a warehouse
The buffer zone, DAY KIT, and operational reserve are present in the process, but they are not its main subject. The main object of management is the active zone, which must be temporarily taken out of service, restored, and returned to operation with minimal intervention.
Therefore, all material operations must be subordinated to the repair cycle. The buffer is needed so as not to clutter the active premises. The DAY KIT is needed so that a specific shift does not receive excess material. The reserve is needed so that the next local replacement does not start from scratch.
What to do if a hotel has multiple generations of the same profile
In properties that have been renovated over the years, the same corridor or floor may contain several similar but not identical profiles. For example, one skirting board was originally installed, five years later part of it was replaced with an equivalent, and even later a different material was used in one room.
| Zone | Profile | Identification status | Action |
|---|---|---|---|
| 1st floor | PLT-A | Confirmed | Exact match |
| 2nd floor | PLT-B | Confirmed | Separate batch |
| Rooms after 2023 renovation | PLT-C | Partially confirmed | Sample and test |
This way, the property does not try to forcibly unify its renovation history under a single new SKU.
How to prioritize renovations
Not every defect requires the same urgency. Priority can be determined by a combination of several factors: visibility to guests or clients, risk of further deterioration, impact on operations, availability of the space for repairs, n