Article Contents:
- Why installation does not mean the risk is over
- The most vulnerable stage is the final days before handover
- Risk map for skirting boards, mouldings and cornices
- Why skirting boards need protection first
- Which areas of the skirting board are most vulnerable
- Protection must match the type of risk
- SPLASH / DUST PROTECTION
- IMPACT PROTECTION
- RAW / PREPARED WOOD
- PAINTED
- LACQUERED
- OILED
- RED ROUTE
- YELLOW ROUTE
- GREEN ZONE
- Can skirting boards be taped with painter's tape?
- Is there enough film?
- Which areas need the strongest protection?
- Should the trim be photographed before protection?
- Who is responsible for temporary protection?
- When should the protection be removed?
- What to do if the protection gets wet?
- What to do after removing the protection?
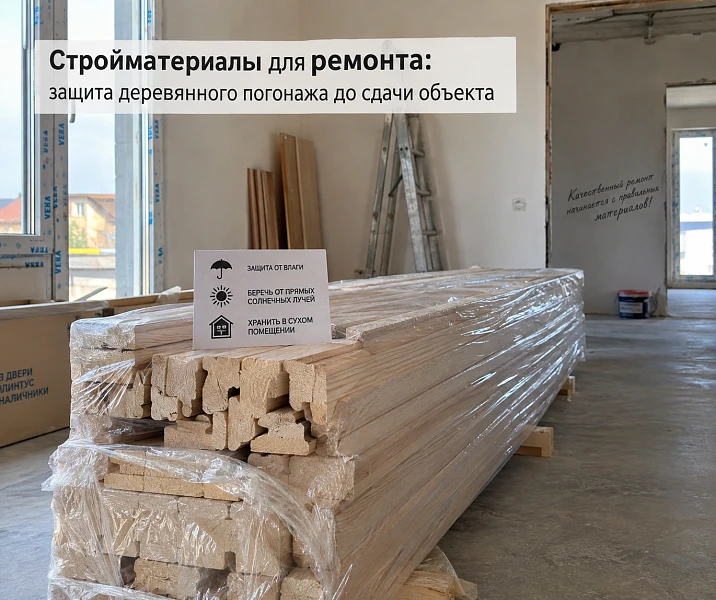
The site already has 640 m of wooden skirting board, 820 m of moulding and 230 m of cornice installed. There are 18 days left until handover. During this time, painters, electricians, furniture installers, lighting installers, cleaners and technical supervision will still pass through the rooms.
At this stage, a dangerous illusion arises: since the trim is already installed, the risk is over. In practice, the opposite is true. Before installation, the material can be taken to the warehouse, not issued to the crew, or the delivery can be postponed. After installation, the skirting board, moulding and cornice become part of the finished interior and at the same time end up in the path of other contractors.
Therefore building materials for renovation at the final stage require a separate process:
INSTALLATION COMPLETE → CONDITION CHECK → PHOTO FIXATION → TEMPORARY PROTECTION → PROTECTION INSPECTION → READY FOR FINAL CLEAN → PROTECTION REMOVAL → FINAL CONDITION CHECK → HANDOVER.
Main principle:
the installed wooden trim has not yet been handed over to the customer — meaning its condition must be managed and protected until handover.
To select specific skirting boards, moldings, and cornices, you can use the section STAVROS wooden molding, but after installation the task is no longer about the product. It becomes risk management for the finished trim.
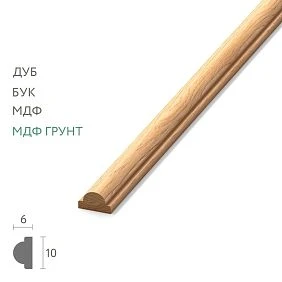
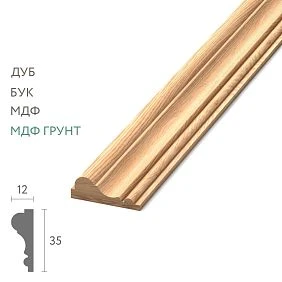
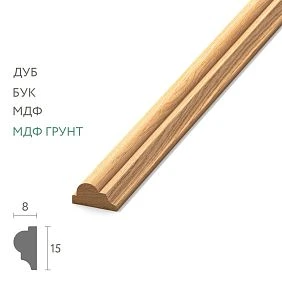
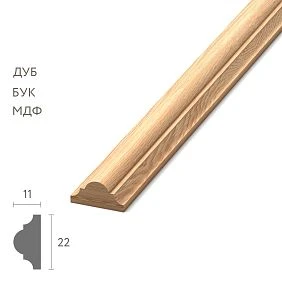

Why installation does not mean the end of risk
Before installation, the main threats are clear:
- transportation;
- unloading;
- storage;
- mis-sorting;
- packaging damage.
After installation, new ones appear:
- furniture impacts;
- staircase;
- construction dust;
- paint drips;
- sealant;
- Glue;
- water from cleaning;
- tools;
- carts;
- dirty shoes;
- boxes;
- large panels and cabinets.
The main difference is that linear trim can no longer simply be moved to a safe room.
It is fixed to the wall, at the floor or under the ceiling and must survive the remaining work exactly where it is installed.
Therefore, after installation it is useful to introduce a separate status:
INSTALLED
does not yet mean:
HANDED OVER.
There must exist between them:
INSTALLED & PROTECTED.




The most vulnerable stage is the last days before handover
The closer the project is to handover, the more different specialists try to finish their part at the same time.
In one corridor, the following may intersect:
- furniture makers with long panels;
- electricians with ladders;
- cleaning with a cart;
- painters with local touch-ups;
- customer representatives;
- technical supervision.
At the same time, the room already looks visually finished.
That is why a new scratch on the baseboard or a chip on the corner of the molding is often discovered only during the final inspection.
If temporary protection was not a separate task, an argument begins:
who damaged it and when?
A TEMPORARY PROTECTION PLAN is needed not only for physical protection. It creates clear accountability between installation and handover.
Our factory also produces:
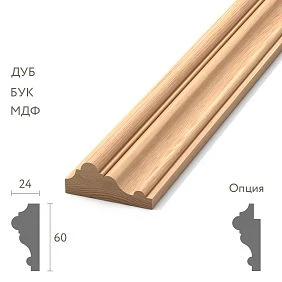
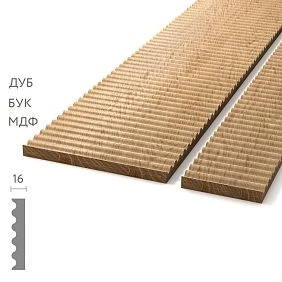
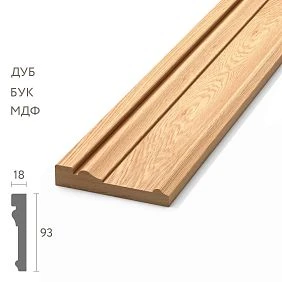
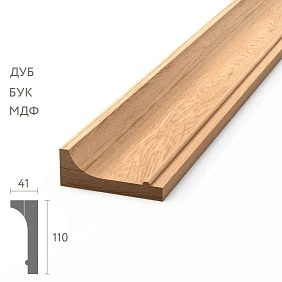
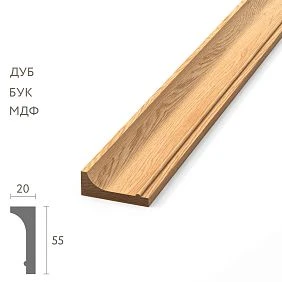
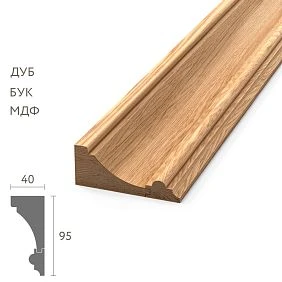
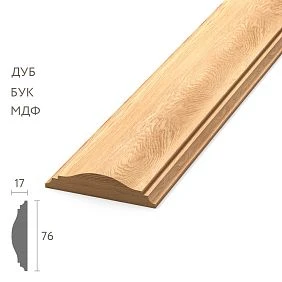
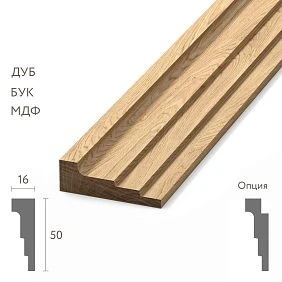
Risk map for skirting boards, moulding and cornice
Different subsequent works create different threats.
| Work | Skirting board | Moulding | Cornice | | --- | --- | --- | --- | | Paint touch-ups | paint, dust | paint | paint | | Furniture assembly | impact, scratch | local impact | usually lower | | Electrical work | tools, boxes | dust, tools | ladder | | Light installation | usually lower | ladder | high ladder risk | | Cleaning | water, chemicals, carts | wet cleaning nearby | dust | | Moving furniture | high risk | medium | low | | Technical supervision / inspection | passage | passage | ladders during inspections |
This table does not automatically assign specific protection.
It answers the first question:
what exactly are we protecting against?
Only after that is a temporary system selected.
Get Consultation
Why the skirting board needs to be protected first
A wooden skirting board is located in the most heavily used area of the room.
At its height, the following move:
- footwear;
- vacuum cleaners;
- construction containers;
- carts;
- edges of furniture boxes;
- lower parts of cabinets;
- tools.
Therefore, a thin film can protect the skirting board from dust and occasional splashes, but it does almost nothing to address the mechanical issue.
If the main threat is impact from furniture, you need protection that absorbs the contact itself and does not transmit a direct blow to the decorative surface.
Which areas of the skirting board are most vulnerable
It is not necessary to cover all 640 or 1000 m equally.
First, identify HIGH TRAFFIC ZONES:
- external corners;
- doorways;
- corridors;
- elevator lobbies;
- room entrances;
- furniture routes;
- temporary unloading areas;
- areas near service rooms.
For example, in a room, the far wall is hardly used after furniture installation is complete.
And the area by the door is crossed dozens of times every day.
Reinforced protection is needed primarily where there is a real mechanical risk.
Protection must match the type of risk
For temporary protection, it is useful to separate two tasks.
SPLASH / DUST PROTECTION
Protection from:
- dust;
- paint;
- minor splashes;
- contamination.
For this task, a cover or film can be used if it suits the conditions of the object.
IMPACT PROTECTION
Protection from:
- furniture;
- stairs;
- carts;
- boxes;
- tool.
Here a mechanical barrier is already required: cardboard, a protective profile, a rigid screen, a local corner protector, or restricted access — depending on the specific assembly and finish.
A single thin layer does not have to solve both tasks.
Why construction tape should not be thoughtlessly stuck directly onto finished wood
Phrase:
let's just tape over the baseboard with tape
is dangerous because of its versatility.
Adhesive tape can behave differently on:
- enamel;
- lacquer;
- oil;
- primed surface;
- fresh finish;
- old coating.
Risks depend on the specific system:
- adhesive layer trace;
- change in gloss;
- interaction with a coating that has not yet fully stabilized;
- damage to a weak finish during removal.
Therefore, the working rule:
before mass application, test the compatibility of the specific tape and the specific finish on an inconspicuous area and observe the tape and coating manufacturer's restrictions.
If it is possible to secure the protection on an adjacent surface without contact with the finished wood, this should also be considered.
Low-tack does not automatically mean safe
Low adhesion is a useful characteristic, but not an absolute guarantee.
The tape has:
- recommended surfaces;
- application conditions;
- allowable contact time;
- removal conditions.
Therefore, you cannot assign a single universal tape type for the entire project without testing.
Especially if the following are used simultaneously:
- enameled baseboard;
- lacquered cornice;
- oil-based molding;
- raw profile that will be finished later.
The TEMPORARY PROTECTION PLAN must account for the actual finish.
Wooden molding: the main risk is local work on a finished wall
After installing moldings, the following often continues nearby:
- touch-ups;
- wall repair;
- socket installation;
- electrical;
- furniture mounting;
- installation of the decor.
The molding is already directly on the work surface.
Therefore, before starting temporary protection, it is useful to take four actions:
- inspect the surface;
- take a photo;
- remove dust;
- only then cover it.
If contamination is already under the protection, after removal it is impossible to determine exactly when it appeared.
The outer corners of molding frames require special attention
A frame has places that protrude into the space more than others.
The outer corner may be hit by:
- staircase;
- box;
- tools;
- furniture panel.
If a construction route passes through the room, a local corner protector may be more useful than a continuous thin film along the entire wall.
That is, protection is designed not "by area," but according to the actual risk geometry.
The cornice is located high, but not outside the risk zone
After installing the cornice on site, the following may still be working:
- electricians;
- lighting installers;
- ventilation specialists;
- curtain installers;
- cleaning at height.
The main mechanical risk is the ladder.
When being carried and turned, its upper part is often right at cornice height.
Therefore, before working at height it is useful to determine:
- the ladder route;
- installation location;
- the turning point;
- the nearest moldings;
- the nearest cornice.
This is organizational protection, which is sometimes more effective than additional film.
Material for renovation: temporary protection should be purchased in advance
When material for repair has already been purchased and installed, TEMPORARY PROTECTION should not arise as an improvisation.
On a weak site, temporary protection is assembled from:
- cardboard scraps;
- random tape;
- film remnants;
- furniture packaging.
The problem is not only in appearance.
No one knows:
- whether the materials are compatible with the finish;
- will there be enough of them;
- who will install;
- when to replace the damaged section;
- who will remove it.
For a large project, temporary protection must have its own supply line and its own person in charge.
TEMPORARY PROTECTION — a separate area of responsibility
It is useful to define in advance:
| Parameter | Answer | | --- | --- | | Who selects the protection system | ___ | | Who purchases | ___ | | Who installs | ___ | | Who accepts after installation | ___ | | Who inspects | ___ | | Who restores damaged protection | ___ | | Who authorizes removal | ___ | | Who accepts the trim after removal | ___ |
This way, protection stops being “everyone’s job.”
If no one is assigned, it effectively becomes no one’s job.
Protection Register: how not to lose control by zones
On a large site, a single general phrase "trim is protected" is not enough.
It is convenient to keep a register:
| Zone | SKU | Protection installed | Risk | Last inspection | Status | | --- | --- | --- | --- | --- | --- | | Lobby | PLT-A | yes | HIGH | 11.09 | OK | | Corridor 3F | MLD-B | yes | MEDIUM | 11.09 | REPAIR PROTECTION | | Room 305 | PLT-A | yes | LOW | 10.09 | OK | | Lobby ceiling | KZ-A | partially | HIGH | 11.09 | HOLD |
The register is not needed for bureaucracy.
It shows where protection has stopped performing its function and where a new risk has appeared before handover.
It is especially useful to update it after furniture is brought in, high-altitude work, and final cleaning.
The protection system depends on the trim finish
All surfaces cannot be treated the same way.
Conventionally, they can be divided:
RAW / PREPARED WOOD
Wood without a final protective coating or prepared for further finishing.
PAINTED
Enamel or another painted surface.
LACQUERED
Lacquer coating.
OILED
Oil-based system.
The specific protective material and the possibility of contact with the tape are checked specifically for the actual coating.
A safe solution should not be transferred from one type of finish to another without verification.
The protection should not hide the condition for a month
Bad scheme:
closed → taped up → forgotten until handover.
Temporary protection itself is subjected to stress.
It can:
- to tear;
- get wet;
- shift;
- peel off;
- lose rigidity;
- accumulate dirt.
Therefore, PROTECTION INSPECTION must exist.
The frequency depends on the intensity of work.
RED ROUTE can be checked more often than a closed room that almost no one enters.
The film protects against paint, but hardly protects against impact
This is one of the most common defects of temporary protection.
The baseboard is neatly covered with film.
The furniture assembler brings in the wardrobe and presses the box against the wall.
The film remains intact, but a dent or scratch appears underneath it.
The reason is simple:
SPLASH PROTECTION ≠ IMPACT PROTECTION.
If the risk is mechanical, you need a system that creates a physical gap or a rigid outer layer.
Impact protection should not itself scratch the surface
A rigid outer shield is only useful when its inner side is safe for the finish.
If rigid cardboard or a plastic profile constantly rubs against the lacquer, the protection itself can become a source of damage.
Therefore, a mechanical scheme often requires:
a delicate intermediate layer → a more rigid outer layer.
But specific materials are selected after testing on the finish and checking the site conditions.
Moisture: protection must not become a trap
After cleaning or localized wet work, water can get behind the temporary cover.
If the protection is not inspected, moisture goes unnoticed.
The lower area of the baseboard is especially monitored.
Working rule:
avoid standing water near wood and its joints; after wet work, check the condition of the lower area and the protection.
This does not mean "a wooden baseboard cannot be wiped."
This refers specifically to prolonged contact with water and hidden moisture behind the temporary protection.
Repair and construction products: the route of other materials determines the level of protection
If repair and construction products continue to move around the site after installation of the trim, a movement map needs to be created.
For example, furniture is brought in:
elevator → lobby → corridor → room door → room.
These are the sections of the baseboard that receive the maximum load.
There is no point in reinforcing protection equally in a closed office and in an elevator lobby.
RED ROUTE, YELLOW ROUTE, GREEN ZONE
It is convenient to use three levels for the facility.
RED ROUTE
Intensive movement of furniture, boxes, equipment, and crews.
Enhanced mechanical protection and control are required.
YELLOW ROUTE
Periodic movement.
Protection remains, but the load is lower.
GREEN ZONE
The room is essentially finished and access is restricted.
The main protection here can be organizational:
FINISHED / RESTRICTED ACCESS.
The fewer people who enter, the lower the risk.
Construction and repair goods: the route needs to be updated after every major operation
When construction and repair goods continue to arrive in batches, the RED ROUTE may change.
Today furniture goes through the 2nd floor corridor.
Tomorrow the same corridor is closed, and large equipment is brought in through another hall.
Therefore, temporary protection is not a fixed scheme for the whole month.
After every major operation it is useful to check:
- whether the route has changed;
- have new HIGH TRAFFIC ZONES appeared;
- can part of the old protection be removed;
- where a mechanical barrier needs to be added.
Thus, protection follows the real construction flow, not an outdated plan.
The most effective protection is sometimes a closed door
After the room is completed, it is not always necessary to build an increasingly complex protective enclosure.
Sometimes access control works better.
Only the following are allowed into the room:
- technical supervision;
- final cleaning;
- commissioning;
- authorized persons.
If the furniture has been brought in, the electrical work is finished, and the painting work is completed, the room should not remain a transit zone.
Photo documentation is required before protection
Status:
CONDITION BEFORE PROTECTION.
Photograph:
- general view;
- external corners;
- door junctions;
- long passage walls;
- existing defects;
- complex joints.
This creates a starting point.
After removing the protection, a scratch appeared — the condition can be compared.
Without a photo, the conversation quickly turns into:
it was there before
Cons:
it wasn't there before.
Photo documentation must be linked to the zone and SKU
There's no need to take a thousand unnamed photos.
Example:
FLOOR-03 / ROOM-305 / PLT-A / BEFORE-PROTECTION / 11.09.2026
For molding:
LOBBY / MLD-B / OUTER-CORNER-02 / BEFORE-PROTECTION
Then the photo can be found and linked to a specific defect.
This is especially useful if the site is large and several contractors are working simultaneously.
The installer has handed over — responsibility must transfer
A good chain:
INSTALLATION COMPLETE
↓
CONDITION ACCEPTED
↓
PROTECTION INSTALLED
↓
AREA HANDED TO MAIN CONTRACTOR / RESPONSIBLE PARTY
Now it's clear who is responsible for its preservation going forward.
If the trim was installed by one contractor, and a week later a furniture installer touched it, the installer shouldn't automatically be responsible for the entire period until handover.
But for this, the handover of condition must be documented.
What to document when handing over a completed area
Minimum entry:
- area;
- date;
- SKU;
- condition;
- protection installed / not installed;
- photo;
- remarks;
- who handed over;
- who accepted;
- next type of work.
For example:
ROOM-305 / PLT-A / CONDITION ACCEPTED / PROTECTION INSTALLED / HANDOVER TO MAIN CONTRACTOR.
Such a record is much more useful than a spoken phrase:
the room is ready.
It separates installation quality from subsequent damage.
What to do if the protection is damaged
Torn protection is no longer confirmed protection.
If the cardboard is:
- shifted;
- torn;
- wet;
- torn off;
an inspection must be carried out.
First, the trim itself is checked.
If it is intact, the protection is restored.
If damage has already occurred, a defect procedure is initiated.
There is no need to wait for the final removal.
What to do if the baseboard or molding itself is damaged
Work sequence:
- stop work directly nearby;
- take a photo;
- determine the zone;
- identify the SKU;
- describe the defect;
- determine whether repair is possible;
- if a new element is needed — check the reserve;
- after correction, restore temporary protection.
The problem should not be hidden until handover.
The earlier it is found, the more options there are for correction before final cleaning.
Materials for finishing works: protection must take into account the remaining schedule
If materials for finishing works create different risks at different stages, the TEMPORARY PROTECTION PLAN must change along with the schedule.
For example:
- days 1–5 — RED ROUTE, enhanced protection;
- days 6–12 — furniture is complete, only electrical work remains;
- days 13–16 — final cleaning;
- days 17–18 — removal of protection and snagging.
This way, protection lives alongside the project rather than just staying up until the last day.
When to remove protection
Not by the principle:
it seems everything is already finished.
A milestone is needed:
READY FOR FINAL CLEAN.
By that point, the work that could require them again must be completed:
- heavy carrying-in;
- active painting;
- drilling;
- dust cutting;
- mass movement of equipment.
After that, temporary protection can be prepared for removal.
Removing the protection is a separate operation
Do not rush.
Especially important:
- do not pull the tape with a jerk;
- do not cut the protection with a sharp tool right against the wood;
- do not drag cardboard over the surface;
- do not leave pieces of adhesive material unnoticed.
After removal, the following is performed:
FINAL CONDITION CHECK.
It is compared with the condition before protection.
Moulding checklist before handover
Check:
- surface;
- external corners;
- internal joints;
- door junctions;
- endings;
- scratches;
- chips;
- glue marks;
- tape marks;
- paint splatters;
- contamination;
- signs of moisture;
- compliance with the reference appearance.
There is no need to wait for the overall snag list of the site.
For decorative moulding, a separate list is useful.
Snag List for moulding
Example:
| ID | Zone | SKU | Issue | Action | | --- | --- | --- | --- | --- | | PG-01 | 305 | PLT-A | scratch | local repair | | PG-02 | Lobby | MLD-B | chip | replacement | | PG-03 | 401 | KZ-A | contamination | cleaning and inspection | | PG-04 | Corridor | PLT-A | damaged corner | assess repair / replacement |
Each row receives a status:
OPEN → IN PROGRESS → CLOSED.
Only after critical defects are closed is the zone ready for handover.
Which protection to choose by risk type
| Risk | Primary function of protection | | --- | --- | | Dust | covering | | Paint | masking + covering | | Furniture impact | mechanical screen | | Staircase | local rigid / corner protector | | Wet cleaning | control of the lower zone and absence of standing water | | Intensive traffic | reinforced protection + access restriction | | Local works | temporary covering of a specific zone |
The table does not assign a specific brand.
The protection material is selected after checking compatibility with the finish and the site conditions.
When additional protection is no longer needed
There is no need to keep the trim under a complex system until the very last day if:
- heavy works are closed;
- furniture has been moved in;
- electrical work is completed;
- premises are closed;
- movement is restricted;
- only a controlled handover lies ahead.
Excessive protection also creates work:
- it needs to be inspected;
- it can get wet;
- it can leave contamination;
- it will have to be removed.
Therefore, the protection plan must include not only the installation date but also the removal condition.
Temporary protection mistakes
Mistake: thin film against furniture impact.
Cause — splash and impact risk are confused. Consequence — protection is visually present, but the baseboard is damaged. Solution — mechanical barrier.
Mistake: tape directly on the finished surface.
Cause — no compatibility test. Consequence — mark or damage to the coating. Solution — test and manufacturer requirements.
Mistake: covered and forgotten.
Cause — protection is considered a one-time job. Consequence — wet or shifted protection goes unnoticed. Solution — inspection.
Mistake: the same protection for the entire site.
Cause — it is easier to purchase. Consequence — RED ROUTE is under-protected, GREEN ZONE is over-protected. Solution — risk zoning.
Error: no photos before protection.
Cause — everything looks perfect. Consequence — dispute after removal. Solution — CONDITION BEFORE PROTECTION.
Error: protection is removed before heavy work is finished.
Cause — you want to show the finished interior. Consequence — a defect appears in the last two days. Solution — milestone READY FOR FINAL CLEAN.
Final algorithm
- Install baseboards, moldings, and cornices.
- Perform the initial acceptance inspection.
- Record the condition in photos.
- Compile a list of remaining work.
- Build a risk map.
- Mark RED / YELLOW / GREEN zones.
- Identify splash and impact risks.
- Select a protection system for the specific finish.
- Check compatibility of tapes and contact materials.
- Install temporary protection.
- Create a Protection Register.
- Record the transfer of responsibility.
- Conduct PROTECTION INSPECTION periodically.
- Immediately restore damaged protection.
- Record molding defects as they appear.
- After heavy and dirty work is completed, assign READY FOR FINAL CLEAN.
- Carefully remove the protection.
- Perform the FINAL CONDITION CHECK.
- Create a separate snag list for the trim.
- Close out the defects.
- Only after that, hand over the area to the client.
This way, the installed wooden decor goes through the final days of renovation as a controlled finished finish, not as an unprotected part of the construction site.
Questions about protecting the trim before handover
Can the baseboard be taped with painter's tape?
Only after checking the compatibility of the specific tape with the specific finish and taking into account the manufacturers' recommendations.
Is the film sufficient?
It can be useful against dust and splashes, but on its own it offers almost no protection against mechanical impact from furniture or a ladder.
Which areas need the strongest protection?
Doors, corridors, elevator lobbies, external corners, and furniture delivery routes.
Should trim be photographed before protection?
Yes. Photos create a baseline for comparison after removal.
Who is responsible for temporary protection?
The specific role depends on the project, but there must be one designated person responsible for the condition of the finished area.
When should protection be removed?
After the READY FOR FINAL CLEAN milestone, once heavy, dusty, and painting work that could damage the trim has been completed.
What should be done if the protection gets wet?
Check the trim itself and the lower zone, eliminate the source of moisture and restore protection. Do not leave moisture hidden.
What to do after removing the protection?
Conduct a FINAL CONDITION CHECK, create a snag list and close defects before handover.