Article Contents:
- The construction cycle does not end at the moment of installation
- FINISH PROTECTION STATUS turns the request to "take care of the finish" into a manageable process
- Why installed skirting boards are especially vulnerable before handover
- Wooden baseboard
- Wooden molding
- Wooden curtain rod
- Wooden skirting board: the most dangerous zones
- External corners require separate protection
- Do not apply protection to the front surface without checking compatibility
- Protection should not turn into a hermetic shell "just in case"
- Furniture makers create increased risk not because they work poorly
- Baseboard and built-in wardrobe: protection is needed before the junction is completed
- Doorways are a separate HIGH RISK JUNCTION
- Wooden molding: risk appears during late wall work
- Finished molding must not be used as temporary support
- Wooden cornice: the main risk comes from ladders and ceiling work
- Who is responsible for restoring removed protection
- Construction dust is also a risk to the finished decor
- A cutting zone reduces several risks at once
- Wet cleaning should not turn into flooding the finish
- How to hand over the premises to cleaning
- Why a photograph does not replace a visual inspection
- Early detection is shorter than the final repair cycle
- Damage after installation must have a cause, not just a photo
- How to use the damage map together with the Risk Map
- Removing protection too early is a risk, leaving it too long is also a risk
- How to determine READY FOR HANDOVER status
- How to protect a finished room from being reopened
- How to handle temporary furniture storage inside a finished room
- How to work with carts in finished corridors
- How to protect the baseboard near the elevator
- How to work with metal stepladders and scaffolding near the cornice
- How to work with cables, extension cords, and vacuum cleaners
- How to handle painting work after trim installation
- How to account for different finishes of the same profile
- How to check protection on a sample
- How to keep a PROTECTION CHECK log
- How to build a Protection Matrix by types of remaining work
- How to work in a room where furniture installers and electricians are working at the same time
- How to handle late plumbing installation
- How to work with interior equipment and large appliances
- How to use RESTRICTED ACCESS without a full work stoppage
- How to mark FINISH PROTECTION STATUS physically
- How to handle temporary tool storage
- How to remove a temporary storage area from a finished corridor
- How to analyze repeated damage to the same corner
- How to handle very long routes in a hotel
- How to account for changes in the delivery route
- How to protect the area near temporary unloading
- How to handle late ceiling work above a finished cornice
- How to calculate the cost of damage without made-up standards
- How to tell if a protection plan is too complex
- How to tell if a protection plan is too rough
- ROOM READINESS MATRIX: when a room can be closed for heavy work
- How to handle re-access after READY FOR HANDOVER
- How to distinguish cosmetic soiling from damage
- How to file a damage ticket so it supports protection, not just repairs
- When physical protection is no longer needed
- How to perform a final protection reconciliation before handover
- Practical scenario: protection allowed closing the floor without a new reorder
- How to verify that protection actually reduces damage rather than existing formally
- How to hand over the protection process to operations
- How to check the readiness of the protection system before a major move-in
- Why the room status must be updated immediately after a scope change
- 1. Considering the trim work complete immediately after installation
- 2. Not accounting for remaining work
- 3. Protecting the entire site the same way
- 4. Not designating a furniture route
- 5. Not protecting external corners
- 6. Applying tape to the finish without testing
- 7. Leaving protection unattended for a long time
- 8. Sealing wood hermetically when it is not necessary
- 9. Removing protection and not restoring it
- 10. Not assign a Protection Owner
- 11. Lean materials against moldings
- 12. Place a ladder on finished decor
- 13. Cut material next to finished trim
- 14. Not notify cleaning
- 15. Use abrasive cleaning without testing
- 16. Not perform PRE-PROTECTION CONDITION
- 17. Wait for the punch list instead of reacting to a fresh defect
- 18. Use the reserve without recording it
- 19. Not analyze the recurring cause
- 20. Remove protection before completing heavy work
- Should the entire baseboard be protected the same way?
- Can painter's tape be applied directly to a painted baseboard?
- When should temporary protection be removed?
- What should be done if electricians need to remove the protection?
- Should every wall be photographed?
- Why is cleaning considered a risk?
- Can a spare plank be used for fresh damage?
- What should be done if one corner is damaged again?
- When does a space receive RESTRICTED ACCESS?
- How is protection related to the punch list?
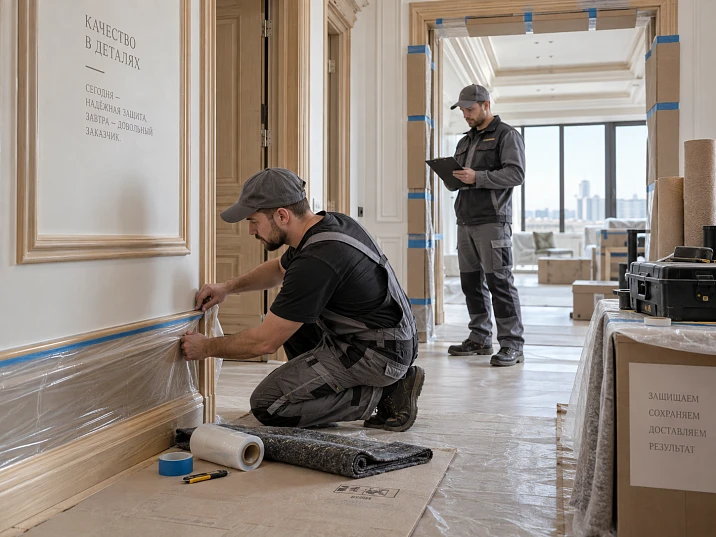
The hotel has about a kilometer of wooden trim installed. The main procurement is complete, the baseboards and moldings have been accepted by the installation crew, and some rooms already look visually finished. But there are still several weeks until opening: built-in furniture is being brought into the rooms, doors and light fixtures are being installed, the last cables are being laid, plumbing work is being carried out, interior equipment is being moved in, and final cleaning is underway.
It is precisely during this period that the finished wooden trim becomes especially vulnerable. The new baseboard runs along the route of carts and boxes, outer corners take point impacts, moldings end up near the late installation of mirrors and wall sconces, and cornices are at risk during work with stepladders and ceiling equipment.
If this stage is not managed, the project returns to the procurement cycle after installation:
defect → repair → reorder → waiting → installation → re-acceptance.
Therefore building materials wholesale in fact do not end at the moment the last plank is installed. The procurement cycle is completed only after protection, final inspection, and handover of the finished interior to operations.
Working outline of the article:
FINISH INSTALLED → RISK MAP → FINISH PROTECTION PLAN → PROTECTED → OTHER TRADES → PROTECTION CHECK → DAMAGE RESPONSE → FINAL CONDITION CHECK → PUNCH LIST → HANDOVER.
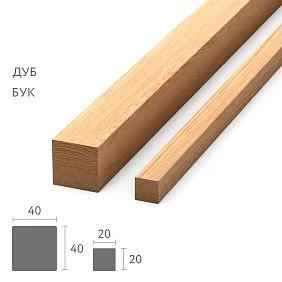
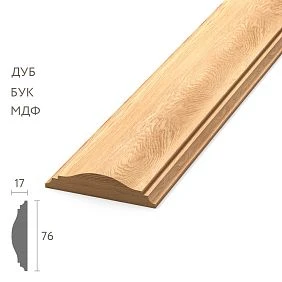
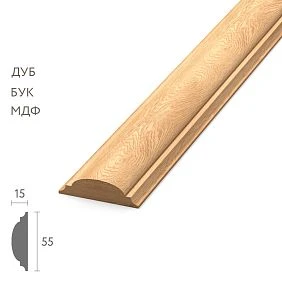
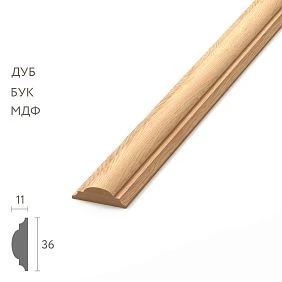
The construction cycle does not end at the moment of installation
Wooden moulding has one more stage after installation — the period of temporary construction use. The element is already in the interior as a finished trim, but the space is not yet operating in normal mode.
During this period, the following pass through it:
- furniture installers;
- door crews;
- electricians;
- plumbers;
- lighting installers;
- cleaning teams;
- equipment delivery services;
- commissions for resolving defects.
If after installation the moulding is simply "considered finished," each subsequent contractor gets access to the surface without a clear status and rules.
The working chain is longer:
order → delivery → storage → installation → protection → inspection → protection removal → final check → handover.




FINISH PROTECTION STATUS turns the request to “take care of the finish” into a managed process
The phrase “be careful, this is already the finish” is too vague. On a large site, it is better to have a room status.
| Status | What does it mean | Access mode |
|---|---|---|
| OPEN WORKS | Finish not yet completed | Standard construction mode |
| FINISH INSTALLED | Trim is installed, but protection has not yet been accepted | Cautious access |
| PROTECTED | Temporary protection measures installed | Work along the approved route |
| RESTRICTED ACCESS | Dirty work is almost finished | Only approved crews |
| READY FOR HANDOVER | Heavy work is complete | Final inspection |
Status is not needed for formality's sake. It answers a practical question: can a wardrobe be brought in now, can local protection be removed, can dusty work be carried out, or does access already need to be coordinated.
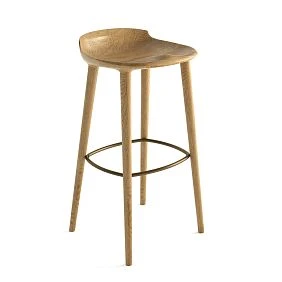
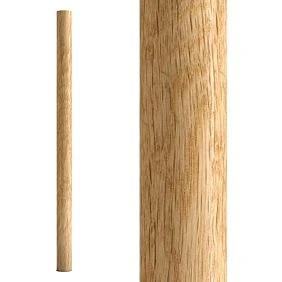
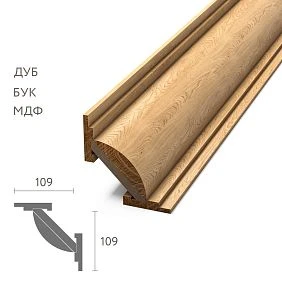
Our factory also produces:





Why an installed skirting board is especially vulnerable before handover
After installation Wooden baseboard ends up exactly where most late-stage movements take place.
It:
- runs along the routes of boxes and carts;
- is located at wheel level;
- runs alongside doorways;
- abuts built-in furniture;
- ends up next to temporary storage areas;
- is exposed to cleaning equipment;
- may be hit by tools or a leaning component.
Before normal operation begins, it already endures several weeks of increased construction traffic.
Get Consultation
RISK MAP: the entire site cannot be protected equally
Temporary protection must match the actual risk. If every meter is sealed the same way, the site will spend a lot of time and materials where almost no one works, while exterior corners along the furniture route remain insufficiently protected.
| Category | Examples | Priority |
|---|---|---|
| HIGH TRAFFIC | Lobby, elevator halls, corridors, furniture delivery routes | Maximum |
| MEDIUM | Finished rooms where individual specialists are still working | Local protection |
| LOW | Enclosed spaces with no further work | Access control |
The Risk Map is built before the last heavy crews arrive, not after the first damage.
materials in bulk: different profiles have different risk scenarios
Wooden skirting board
The main risk is impact, dirt, carts, boxes, wet cleaning, furniture and footwear.
Wooden moulding
The risk is associated with scratches, protruding relief, late installation of mirrors, sconces, TVs and decorative panels.
Wooden cornice
Household contact is lower, but ceiling work, stepladders, light fixtures, cameras, sensors, curtains, and ventilation elements remain.
Therefore, one universal protection for the entire trim is usually weaker than several local solutions.
Wooden skirting board: the most hazardous areas
Pay especially close attention to protecting:
- external corners;
- doorways;
- elevator lobbies;
- furniture delivery routes;
- corridors;
- areas near the temporary storage;
- built-in wardrobe installation locations;
- turning zones for large furniture.
A single external corner can be far more important than ten meters of straight wall, because it is the first to take a point impact from a box or wardrobe.
External corners require separate protection
A straight section often lets an object slide along the wall. A protruding corner takes the impact over a small area. Therefore, protection must be reinforced at specific points.
Working idea:
- do not cover only the front surface;
- create a physical buffer around the protrusion;
- do not transfer the load through the protection itself onto the painted profile;
- check the corner after every heavy impact.
The principle matters more than the specific protection material: the system must absorb the impact and not damage the finish.
construction material wholesale: the protection must be removable and compatible with the finish
You cannot simply advise “glue something stronger directly to the baseboard.” Temporary protection can itself become a source of damage.
It must not:
- leaving adhesive;
- damage the enamel, oil, lacquer, or tint;
- scratch the surface;
- create point pressure;
- retain unwanted moisture;
- deform the long profile;
- interfere with the inspection.
The specific method of protection is chosen based on the actual finish and tested on a sample or hidden area.
We do not apply protection to the front surface without checking compatibility
Even tape with the familiar name "painter's" is not universally safe for any coating and any duration.
Before use:
- check the instructions for the specific material;
- do a test on a sample or hidden area;
- evaluate removal without leaving a trace;
- do not leave the system without periodic monitoring;
- do not assume that the behavior after an hour and after a week will be the same.
Work especially carefully with painted, lacquered, oiled, and tinted surfaces.
Protection should not turn into a hermetic shell "just in case"
The goal is to mechanically protect the finished finish without creating a new problematic regime for the wood and finish.
Therefore, a temporary system should:
- protect against impacts and contamination;
- remain controllable;
- not create unnecessary sealed space;
- be removable without damage;
- allow the surface to be inspected on schedule.
"Seal until handover" is a weak principle. What's needed is controllable temporary protection.
wholesale construction materials: first we protect the heavy delivery route
If dozens of cabinets will be brought through the site, the main risk zone is known in advance:
unloading point → elevator → corridor → doorway → room.
This HEAVY DELIVERY ROUTE is protected first.
On the route, mark:
- external corners;
- narrow turns;
- doorways;
- baseboards by the elevator;
- temporary furniture turnaround areas;
- cart staging zones.
This way the site works proactively, not after the first chip.
HEAVY DELIVERY ROUTE should be a separate layer of the FINISH PROTECTION PLAN
It is convenient to keep the route as a separate line of the plan.
| Route | Finish at risk | Protection | Check point |
|---|---|---|---|
| Loading → Lift | Baseboard, corners | Powerful | After each major delivery |
| Lift → Corridor A | Baseboard | Route | Daily |
| Corridor A → Rooms 201–220 | Baseboards, door frames | Local | Before / after moving in |
If the route changes, the protection plan is updated too.
Furniture movers create increased risk not because they work poorly
The reason is objective: furniture is large, heavy, and often blocks the field of view. Several people carry one wardrobe, the box is turned in doorways, and the trolley catches the lower level of the wall.
Therefore, before moving furniture in, it is useful to:
- check the route;
- cover the corners;
- remove unnecessary tools from the passage;
- do not store materials along the route;
- show the sensitive zones to the crew;
- perform a condition check after the move-in.
This is risk management, not blaming the contractor.
Skirting board and built-in wardrobe: protection is needed until the junction is complete
Even if the junction with the built-in wardrobe is designed in advance, the installed skirting board remains vulnerable until the furniture is finally in place. The wardrobe is turned, moved across the floor, its position adjusted, and plinth elements are removed and reinstalled.
Before installing the wardrobe, it is useful to:
- record the condition of the skirting board;
- protect the nearest external corner;
- do not use the skirting board as a support;
- remove long tools from the narrow passage;
- after installation, check the furniture ↔ skirting board joint;
- restore protection if other work remains in the room.
This way, a properly designed junction does not turn into a repair task in the final week.
Doorways — a separate HIGH RISK JUNCTION
Several contractors work simultaneously in the door area: the door crew, painters, electricians, furniture installers, and finishers. This is where skirting boards, door casings, extension jambs, doors, and furniture routes most often meet.
For a doorway, it is useful to have a separate card:
| Door ID | Finish installed | Remaining works | Protection | Status |
|---|---|---|---|---|
| D-214-01 | PLT-A + TRIM-B | Door adjustment / furniture | Corner + local face protection | PROTECTED |
If the door is still being adjusted, the area cannot be considered fully closed just because the skirting board has already been installed.
Wooden moulding: risk arises during late wall work
wooden molding is located above the floor, but this does not make it safe. After its installation, the following are often still mounted on the wall:
- wall lamp;
- mirrors;
- TVs;
- paintings;
- decorative panels;
- sockets and switches;
- sensors and automation components.
A tool, level, cable, ladder, or panel can hit the relief. Therefore FINISH INSTALLED must be a visible status for all later wall contractors.
Finished molding must not be used as temporary support
On a construction site, "just for a minute" solutions often appear: lean a level, place a panel, secure a cable, rest a box. For installed wooden decor, this is already use for purposes other than intended.
The rule is simple:
finished profile ≠ support surface.
In the FINISH PROTECTION PLAN, it can be separately specified that tools, furniture panels, and ladders must not be rested on finished moldings, baseboards, and cornices.
Wooden cornice: the main risk comes from ladders and ceiling work
wooden cornice has less contact with carts, but is near another type of work:
- lighting fixtures;
- sensors;
- the camera;
- curtain rods;
- ventilation grilles;
- ceiling cleaning;
- work with stepladders.
With curtain rods, protection is often built not so much around the profile itself as around the rules for working with stepladders and access to the ceiling area.
wholesale building materials: a unified FINISH PROTECTION PLAN is needed
Protection should not be a set of random pieces of cardboard, but a clear object-specific plan.
| Zone | Linear molding | Remaining works | Risk | Protection | Responsible |
|---|---|---|---|---|---|
| Lobby | PLT-A | Furniture / equipment | High | Reinforced route | ___ |
| Corridor 2 | PLT-A | Lighting / cleaning | Medium | Local | ___ |
| Room 212 | MLD-A | Mirror / wall light | Medium | Local | ___ |
| Room 214 | All set | No | Low | Restricted access | ___ |
In the plan, it's important not only what to protect with, but also what work is still ahead. The same profile in two rooms can carry different risk due to different remaining scope.
Protection without regular monitoring quickly stops being protection
Typical scenario:
- Monday — the corner is protected;
- Wednesday — the furniture installers remove part of the protection to get through;
- Friday — no one restored it;
- the following Monday — the corner is damaged.
That's why a status is needed:
PROTECTION CHECKED.
The inspection must confirm:
- the protection is physically in place;
- it does not damage the finish;
- it has not gotten wet;
- it has not become a trap for construction dust;
- after another crew's access, it has been restored.
Who is responsible for restoring removed protection
There is no universal position. On one project it is the general contractor, on another a finishing contractor, a site foreman, or a dedicated protection team.
But responsibility must be assigned. The wording "whoever removed it puts it back" works poorly when there are dozens of people and shifts on site.
In the FINISH PROTECTION PLAN, it is useful to have a field:
PROTECTION OWNER.
REMOVE → WORK → INSPECT → RESTORE
If an electrician or furniture installer needs access to a protected area, temporary removal of the protection must be controlled.
- REMOVE — protection is removed only in the required area.
- WORK — the specific task is performed.
- INSPECT — the condition of the trim is checked.
- RESTORE — protection is restored if other work is still ongoing.
This is a simple chain, but it eliminates the main flaw of temporary protection: “removed and forgotten.”
Construction dust is also a risk to the finished decor
Not all damage looks like a chip. Dust gets into the relief of moldings, settles in corners, mixes with moisture during cleaning, and increases the scope of subsequent cleaning.
After FINISH INSTALLED, it is useful to localize:
- cutting;
- sanding;
- drilling;
- cutting of panel materials;
- work with gypsum and putty.
Dusty operations are better moved to a separate cutting zone or isolated locally, rather than performed right next to finished trim.
A cutting zone reduces several risks at once
A separate cutting zone reduces:
- dust near the finish;
- accidental impacts from long tools;
- temporary storage of offcuts by the walls;
- movement of saws and stepladders inside finished rooms;
- risk of leaning material against the molding.
It is especially useful to move the repetitive cutting of furniture, panels, and cable ducts out of finished rooms.
Wet cleaning should not turn into flooding the finish.
Wooden trim does not require a ban on any wet cleaning, but the cleaning crew must understand that they are dealing with a finished wooden surface, not a rough wall.
At the construction stage, the task is:
- do not flood the baseboard when mopping the floor;
- do not use harsh abrasives without testing;
- do not leave cleaning agent on the surface;
- do not scrub the texture with a random tool;
- do not use the same dirty equipment for the floor and decor.
The specific cleaning method must match the actual finish.
Final cleaning is one of the last high-risk operations
Cleaning brings water, chemicals, carts, cables, vacuum cleaners, and a large number of movements along the wall to the site.
Therefore, the READY FOR HANDOVER status cannot be issued automatically before final cleaning.
For cleaning, it is useful to prepare:
- list of sensitive surfaces;
- equipment route;
- rules for removing local protection;
- person responsible for inspection after cleaning;
- photos of existing damage before start.
How to hand over the room for cleaning
Before you begin:
- Show already installed trim.
- Mark external corners.
- Record existing damage.
- Approve local removal of protection.
- Explain that no pouring or abrasive cleaning is allowed without verification.
After cleaning, a condition check is performed. Only after that can the protection be finally removed.
wholesale building materials: photo documentation is needed after installation, not only upon delivery
After accepting the installation, it is useful to create a condition:
PRE-PROTECTION CONDITION.
The photos show how the trim looked before furniture, cleaning, and later work.
No need to photograph every centimeter. Focus:
- external corners;
- feature walls;
- door assemblies;
- corridors;
- furniture routes;
- areas of major later works.
If damage appears later, the checkpoint helps determine at which stage it occurred.
CONDITION CHECKPOINTS: five control states
| Checkpoint | Moment | What we check |
|---|---|---|
| CP1 | Installation of trim is complete | Initial condition |
| CP2 | Before bringing in furniture | Protection and route |
| CP3 | After furniture | Dents, joints, corners |
| CP4 | After final cleaning | Finish, dirt, protection remnants |
| CP5 | Before handover | Final condition |
Checkpoint — not just a photo. It's a quick physical walkthrough.
Why a photo doesn't replace a visual inspection
A photo may not show:
- a small chip;
- a scratch visible under side light;
- a weak fastening area;
- adhesive residue after tape removal;
- localized change in gloss.
Before changing the FINISH PROTECTION status, a brief visual condition check is needed.
What to do in case of new damage before the final punch list
There is no need to wait for the general acceptance if the defect is detected immediately. The earlier it is recorded, the easier it is to understand the cause and close it while the required crew and material are still on site.
DAMAGE RESPONSE card:
- Zone ID;
- SKU;
- type of damage;
- date;
- stage of work;
- REPAIR or REPLACEMENT REVIEW;
- responsible person;
- used reserve.
Early detection is shorter than the final repair cycle
One damaged baseboard is discovered immediately after furniture is brought in. The crew is still on site, remnants are available, the area is open. The fix can be done within the current front.
If the same defect is found three weeks later on the punch list, a separate chain appears: find the SKU, check the remaining stock, create an order, wait for delivery, open the finished room, perform the replacement, and accept the area again.
Therefore, the protection plan should include a response to fresh damage, not just prevention.
How not to spend the installation and operational reserve on unaccounted damage
At the final stage, there is almost always some amount of spare trim left near the site. The problem begins when one spare plank is taken "for a minute," the damage is covered up, and the remaining stock in the documents stays the same.
After each DAMAGE RESPONSE, the balance must be updated.
| SKU | Reserve before | Used for damage | Reserve after | Need to restore? |
|---|---|---|---|---|
| PLT-A | 8 pcs. | 2 pcs. | 6 pcs. | Review |
| MLD-A | 5 pcs. | 1 pc. | 4 pcs. | No / Review |
It is also better not to mix the installation reserve and the operational reserve. The first is needed until construction is completed, the second should remain after handover.
Damage after installation must have a cause, not just a photo
Categories can be kept simple:
- INSTALLATION;
- OTHER TRADE;
- MOVING / FURNITURE;
- CLEANING;
- UNKNOWN.
The reason is recorded not for the sake of conflict between contractors, but for prevention. If nine damages appeared on the furniture route in a week, the next step is to strengthen route protection, not just order nine more skirting boards.
The Pareto of damages shows where protection is actually not working
Example of weekly statistics:
| Source | Quantity | Share of the problem | Action |
|---|---|---|---|
| Furniture moving | 9 | Primary | Strengthen HEAVY DELIVERY ROUTE |
| Cleaning | 3 | Medium | Revise cleaning staff briefing |
| Electrical works | 1 | Low | Local protection at the bar |
This is how FINISH PROTECTION PLAN becomes a living document. It is adjusted based on actual damages, rather than remaining unchanged until the end of the project.
How to use the damage map together with the Risk Map
The Risk Map predicts where the risk is high. The Damage Map shows where damage is already occurring. Comparing the two maps is useful:
- if damage occurs in HIGH TRAFFIC — protection is insufficient;
- if damage occurs in LOW — the zone status may be outdated;
- if one outer corner is damaged repeatedly — a different protection design is needed;
- if cleaning damages only one type of finish — separate training is needed specifically for it.
This way, the site is not limited to generic calls to "work more carefully."
When protection can be removed
Not when the trim has "been in place for a long time," but when the work that actually creates the risk is completed in the zone:
- heavy movements;
- bringing in furniture;
- main electrical work;
- dusty operations;
- work with stepladders near the decor;
- installation of built-in wardrobes;
- final cleaning.
After removal, a FINAL CONDITION CHECK is performed. If the room has not passed it, the READY FOR HANDOVER status is still premature.
Removing protection too early is a risk, leaving it too long is also a risk
Removing it too early obviously exposes the surface to impacts and contamination. But uncontrolled protection over a long period also creates problems:
- fresh damage is not visible underneath it;
- adhesive materials age;
- the protective layer may shift;
- dust gets underneath it;
- the surface condition is no longer being monitored;
- the defect is discovered already at the final acceptance.
Therefore, temporary protection is precisely a temporary managed layer with inspection dates.
How to link protection status and punch list
After removing protection:
FINAL CONDITION CHECK → remarks → PUNCH LIST.
Up to this point, the article is responsible for preventing damage. After the punch list appears, a different process begins — repair / remount / stock / reserve / buy. This helps avoid mixing two separate tasks.
How to determine READY FOR HANDOVER status
A room is ready for this status if:
- the main heavy work is completed;
- protection removed or agreed to remain until the final stage;
- condition check completed;
- new damages recorded;
- open repair issues transferred to the punch list;
- service reserve recalculated;
- access restricted until handover to operations.
READY FOR HANDOVER — not a visual feeling of "everything seems ready," but the result of a checkpoint.
How to protect a finished space from being reopened
After the READY FOR HANDOVER status, sometimes a contractor suddenly returns to the room: a socket needs adjusting, a sensor needs replacing, or a furniture part needs to be brought in. It is precisely these "five minutes" that often cause the final damage.
A useful process:
ACCESS REQUEST → LOCAL PROTECTION → WORK → CONDITION CHECK → CLOSE ACCESS.
This way, a finished space does not turn back into OPEN WORKS without control.
How to handle temporary furniture storage inside a finished room
Even if the furniture is not being installed yet, boxes and panels may be temporarily placed along the wall. This is a risk for the baseboard and moldings.
Rules:
- do not lean heavy panels against trim;
- leave a safe gap from the finished wall;
- do not place boxes on protruding decorative elements;
- do not block access to protection;
- do not place sharp metal parts near corners.
The best solution is a dedicated staging area, not a finished room.
How to handle carts in finished corridors
A cart is dangerous not only because of its wheels. When turning, a protruding load can hit a corner or molding. Therefore, the HEAVY DELIVERY ROUTE must account not only for the width of the passage but also for the dimensions of the load.
In narrow areas it is useful to:
- limit speed;
- assign a second person at turns;
- remove temporary obstacles;
- protect corners;
- do not park carts flush against the wall.
How to protect the baseboard near the elevator
The elevator lobby combines high traffic, cart turning, temporary placement of boxes, and waiting for cargo. Here, protection should be above average.
It is useful to highlight:
- the corners at the elevator exit;
- baseboard opposite the doors;
- furniture turning area;
- areas where the load is temporarily placed on the floor;
- trolley waiting area.
The elevator lobby Risk Map can be a separate visual for the article.
How to work with metal stepladders and scaffolding near the cornice
For an already installed cornice, not only the ladder itself is dangerous, but also moving it. One person carries the stepladder horizontally and may hit the protruding profile.
Rules:
- carry the tool in a folded safe position;
- do not lean on the finished decor;
- do not place the upper part next to the cornice without a gap;
- protect the adjacent profile during prolonged operation;
- after the work, perform a local condition check.
How to work with cables, extension cords, and vacuum cleaners
A cable routed along the baseboard can collect dirt and rub against protruding relief. The vacuum cleaner and its body move at the same height as the baseboard.
Therefore, the cleaning and installation route must account for:
- the cable routing location;
- connection points;
- equipment turning;
- corner protection;
- absence of prolonged friction against the wooden profile.
How to handle painting work after trim installation
If local wall painting remains after installing molding or baseboard, splatter, tape, and tools pose a risk.
Before work:
- check compatibility of temporary protection with the finish;
- protect the profile without direct aggressive adhesion;
- do not use trim as a support;
- after work, remove contamination using an approved method;
- check for tape marks before moving to READY FOR HANDOVER.
How to account for different finishes of the same profile
The same SKU may be painted with enamel in the rooms and tinted in the lobby. The protection system does not have to be the same.
FINISH PROTECTION PLAN should know:
- SKU;
- the material;
- FINISH;
- risk;
- acceptable method of temporary protection;
- frequency of inspection.
This way the object avoids a universal solution that is safe for one coating and undesirable for another.
How to test protection on a sample
If there is a separate sample or spare plank of the same FINISH, it is better to test temporary protection on it. This allows you to see:
- whether adhesive remains;
- whether the gloss changes;
- whether the backing scratches the surface;
- how the protection is removed after several hours or days;
- whether the protection material needs to be replaced.
The test result is recorded and applied to identical configurations.
How to keep a PROTECTION CHECK log
| Date | Zone | Status | Finding | Action |
|---|---|---|---|---|
| ___ | Lobby | PROTECTED | Corner guard shifted | Restore |
| ___ | Room 212 | PROTECTED | No issue | Keep |
| ___ | Corridor 2 | DAMAGE | Scratch after delivery | Repair review |
The log should not be complicated. Its purpose is to show which zones were actually checked and where protection needs to be restored.
How to build a Protection Matrix by types of remaining work
In one room, after installing trim, several later tasks may remain at once. The risk is different for each of them.
| Remaining work | Main risk | What to protect | Inspection |
|---|---|---|---|
| Furniture | Impact / friction | Baseboard, corners, doors | Before and after moving in |
| Electrical fixtures | Stairs / tools | Molding, cornice | After access |
| Cleaning | Moisture / equipment | Baseboard, lower walls | After cleaning |
| Doors | Tools / junction | Baseboard, trim | After adjustment |
| Paintings / mirrors | Drilling / ladder | Molding | After installation |
Such a matrix helps to understand in advance where mechanical protection is needed and where access restriction and local control are more important.
How to work with a space where furniture installers and electricians are present at the same time
If Room 212 has PROTECTED status, but two crews enter it at once, the protection must account for their interaction.
For example, furniture installers temporarily remove a protection corner to let a wardrobe through, while electricians set up a stepladder at the same time. Without coordination, one contractor cancels protection that the other considers active.
In such spaces, it is useful to:
- assign a temporary access window;
- do not run two conflicting operations at the same time;
- remove protection only in the required area;
- perform a general condition check after the window is completed;
- restore the PROTECTED status.
How to handle late plumbing installation
Plumbing work may seem unrelated to trim, but it brings tools, packaging, water, and passage through finished rooms.
Especially important:
- bathrooms and corridors next to finished door units;
- equipment transfer route;
- temporary placement of boxes;
- protection of the baseboard at the entrance;
- control after wet operations.
If water has reached the floor, this does not yet mean an emergency leak item, but the cleaning regime must exclude prolonged contact with the finished wooden trim.
How to work with interior equipment and large appliances
TVs, minibars, safes, refrigerators and other equipment are often brought into already finished rooms. Their weight and shape create a different risk than ordinary furniture.
Before bringing in:
- measure the route;
- remove temporary obstacles;
- protect narrow corners;
- check the doorway;
- do not place equipment flush against the baseboard until its final position.
After installation — a separate CP condition check in the passage area.
How to use RESTRICTED ACCESS without a full work stoppage
RESTRICTED ACCESS does not mean "no one can enter." It means that access is controlled by purpose.
You can allow:
- electricians for a specific task;
- cleaning staff after briefing;
- furniture crew along the route;
- technical commission;
- facilities service.
But free movement and temporary storage in such a room are no longer permitted.
How to indicate FINISH PROTECTION STATUS physically
The status should be visible not only in Excel. At the entrance to the room, you can use a simple card:
ROOM 214 / PROTECTED / ACCESS BY APPROVAL / NEXT CHECK: ___.
For HIGH TRAFFIC zones, you can add pictograms: furniture route, no storage, no cutting, protect corners.
The main thing is that a person who comes to the site for the first time immediately understands the room's mode of use.
How to handle temporary tool storage
A finished room often turns into a convenient place for tools: cases, levels, vacuums, and cables are placed along the wall. This creates constant contact with the baseboard.
After FINISH INSTALLED, you need to determine:
- tool parking zone;
- charging location;
- stepladder location;
- trash location;
- prohibition on storing anything along the finished trim.
This way, protection works organizationally, not just physically.
How to remove temporary storage from a finished corridor
After skirting boards are installed, the corridor should not remain a buffer for boxes. Boxes narrow the passage, force carts to move closer to the wall, and can themselves fall onto the trim.
If temporary storage is unavoidable, it is separated from the wall and the traffic route. But before READY FOR HANDOVER, the corridor is fully cleared.
How to analyze repeated damage to the same corner
If a corner is damaged a second time, the problem is not "careless people" but the system.
Need to check:
- route width;
- furniture dimensions;
- type of protection;
- height of the protective element;
- presence of a guide person;
- turning point;
- temporary obstacles.
Repeat damage should automatically trigger a review of the FINISH PROTECTION PLAN.
How to handle very long routes in a hotel
If furniture is moved through dozens of meters of corridor, it is impossible to control the entire length equally every minute. Therefore, the route is divided into segments.
For example:
- Segment A — Loading → Lift;
- Segment B — Lift → Corridor 2;
- Segment C — Corridor 2 → Room cluster 201–210;
- Segment D — Rooms 211–220.
Each segment gets a responsible person and checkpoints. If damage occurs, it is possible to localize which section had weak protection.
How to account for a change in the delivery route
If the main elevator is temporarily closed and the furniture is routed through another corridor, the Risk Map must be updated before movement begins.
You cannot continue using the old protection and assume that the new route is "similar." The new path may have different angles, narrower doors, and a different baseboard.
How to protect the area near a temporary unloading zone
A temporary zone often appears in front of the room or elevator, where boxes stand for a few minutes. This is where the risk of pressure on the baseboard and wall contamination arises.
The staging area should:
- have a setback from the wall;
- not block the protection;
- not be located on an outer corner;
- not force carts to go around boxes closer to the baseboard.
How to handle late ceiling work above a finished cornice
If ceiling contractors continue installing lighting after the cornice, it is necessary to locally protect not only the profile itself but also the surrounding area.
Useful:
- secure the position of the stepladder;
Practical example: a hotel with three weeks until opening
Imagine a project where skirting boards, mouldings and cornices have been installed across five floors. Three weeks remain until opening. Furniture is being moved into Floor 2 and Floor 3, Floor 4 is awaiting final cleaning, lighting is being finished in the lobby, and Floor 5 is already closed for major works.
Statuses:
Zone Status Remaining works Risk Action Floor 2 PROTECTED Furniture High HEAVY DELIVERY ROUTE Floor 3 FINISH INSTALLED Furniture + doors High Complete protection before delivery Floor 4 PROTECTED Final cleaning Medium Cleaning briefing + CP4 Lobby PROTECTED Lighting Medium Cornice / ladder control Floor 5 RESTRICTED ACCESS None Low Final condition check A week later, the Damage Map shows:
- Floor 2 — 5 impacts along the furniture route;
- Floor 3 — 2 chips near the doors;
- Floor 4 — 1 soiling after cleaning;
- Lobby — 0;
- Floor 5 — 0.
The solution is not to reinforce protection equally on all floors. The HEAVY DELIVERY ROUTE on Floor 2 and the door assemblies on Floor 3 are reinforced, while Floor 5 is moved to READY FOR HANDOVER after the final inspection.
How to calculate the cost of damage without invented standards
There is no need to invent a universal cost per chip or percentages of "savings from protection". But a project can estimate its own damage cost based on actual data.
For each case, the following are recorded:
- material from reserve;
- new order, if needed;
- repair turnaround time;
- rework;
- additional delivery;
- re-inspection;
- zone delay, if it occurs.
After a few weeks, it becomes clear which types of damage actually create additional costs.
How to tell that a protection plan is too complex
The system should not require a separate report for every unit. If foremen stop updating statuses because the form is too heavy, the protection exists only on paper.
At a minimum, it is enough to:
- Zone ID;
- Finish Protection Status;
- Risk level;
- Remaining works;
- Protection owner;
- Last check;
- Open damage issues.
Detail is added only where the risk is higher.
How to tell that a protection plan is too coarse
If the entire floor is marked HIGH RISK with no distinctions, the team doesn't understand where to direct its efforts. The risk map should highlight specific nodes:
- corners;
- Doors;
- elevators;
- routes;
- staging zones;
- late ceiling work.
Otherwise the status becomes a general red fill with no action.
PROTECTION HANDOVER: how to hand over a completed zone from one crew to another
One of the weak points of protection is a change of contractor. The furniture makers finished their work, the protection was partially removed, and in the evening an electrician enters the room. If no one has handed over the state of the zone, the new participant starts working in a space that formally remains PROTECTED but in fact no longer is.
A short handover should answer five questions:
- which FINISH PROTECTION STATUS is currently in effect;
- which protection elements have been temporarily removed;
- are there already open damage issues;
- which areas cannot be used as support or staging area;
- who is responsible for restoring protection after new work.
For a small room, this can be a single entry in the log. For a lobby or corridor, a physical mark on the plan is useful.
ROOM READINESS MATRIX: when a room can be closed for heavy work
Room Furniture Doors Electrical Cleaning Finish status 211 Done Done Done Done READY FOR HANDOVER 212 Done Done Open Pending PROTECTED 213 Pending Done Done Pending FINISH INSTALLED This matrix helps avoid removing protection based on a feeling. If electrical work and cleaning are still open in Room 212, the READY FOR HANDOVER status is premature, even if the furniture is already in place.
How to handle re-access after READY FOR HANDOVER
Sometimes a room that has already been closed is opened again: to replace a sensor, set up a TV, or bring in a furniture item. Such access should temporarily lower the status.
For example:
READY FOR HANDOVER → TEMPORARY ACCESS → LOCAL PROTECTION → WORK → CONDITION CHECK → READY FOR HANDOVER.
This prevents the situation where the last ten minutes of technical work create a defect in an already accepted space.
How to distinguish cosmetic soiling from damage
Not every spot should go into the repair order. During a condition check, it helps to separate:
- CLEANING — soiling that can be removed in an acceptable way;
- FINISH REPAIR — a local surface defect;
- PROFILE DAMAGE — a chip, crack, or deformation of the item itself;
- REPLACEMENT REVIEW — an assessment of part replacement is needed.
This way, the Damage Map does not overstate the actual number of material damages.
How to file a damage ticket so that it supports protection, not just repair
Minimum card:
Field Value Damage ID D-017 Zone Corridor 2 / corner C SKU PLT-A Type Impact Stage Furniture delivery Decision Repair review Protection action Upgrade corner guard The last field is especially important. A damage ticket should change the protection plan; otherwise, the site is simply repairing the consequences.
When physical protection is no longer needed
Protection should not be maintained out of inertia. If the room is closed, there is no heavy work, access is limited, cleaning is complete, and a condition check has been performed, extra cardboard or temporary coverings may be unnecessary.
In such an area, it is better to:
- remove temporary protection;
- inspect the surface;
- change the room status to RESTRICTED ACCESS or READY FOR HANDOVER;
- do not allow re-stacking.
This is an important “when not needed” scenario: protection is useful only as long as the corresponding risk exists.
How to perform the final protection reconciliation before handover
Before handover, it is necessary to reconcile not only the punch list, but also the protection process itself.
Checked:
- Are there any areas with the old PROTECTED status where work has already been completed?
- Have all temporary protection materials been removed?
- Are there any traces of adhesive, dust, or contamination after removal?
- Have all damage issues been transferred to the punch list or closed.
- Has the reserve balance been updated after repairs.
- Are there any temporary staging areas in finished rooms.
- Are there CP5s for high-risk zones.
- Do all rooms have a final status.
After this, protection ceases to be an active construction process and the site transitions to normal operation.
Practical scenario: protection allowed the floor to be closed without a new additional order
On Floor 4, after installing the skirting board, three risky operations remained: moving in cabinets, adjusting the lighting, and final cleaning. Before they began, the external corners and the furniture route were reinforced, and a separate briefing was given to the cleaning team.
During the move-in, one protective corner was hit, but the skirting board underneath remained intact. After delivery, the protection was restored. The electricians worked only with locally removed protection, after which the area was inspected. After cleaning, CP4 revealed no defects.
Result: the trim required neither repair nor replacement. The Service Reserve was fully preserved. This is the normal outcome of good protection: the process is visible in the documents but does not create a new order.
How to verify that protection actually reduces damage rather than existing only formally
The protection process must have a measurable practical result, but without invented industry percentages. A project can compare its own data by weeks or floors.
Useful internal metrics:
- number of damage issues per 100 completed rooms;
- number of damages on the HEAVY DELIVERY ROUTE;
- how many times protection was removed and not restored;
- how many spare planks were used for repairs;
- how many cases required a new order;
- which contractors or operations most often coincide with the damage stage.
If, after reinforcing the furniture route, the number of impacts on the baseboard noticeably decreased on the following floors, this confirms that the change was correct. If not, the route itself or the protection design needs to be changed, not just another layer of cardboard added.
How to hand over protection during operation
During handover to operation, the full construction protection log is not needed. But it is useful to hand over the final state and history of critical zones:
- current SKU list;
- Service Reserve;
- storage location of the reserve;
- closed damage issues, if they changed the actual composition;
- AS-BUILT after replacements;
- specific care requirements for particular finishes.
Temporary protection ends at this point. Its task was to bring the finished surface through the final construction operations without extra repairs.
How to check the readiness of the protection system before a major move-in
A day before mass furniture delivery, a short pre-delivery audit is useful. It takes less time than repairs after the move-in, and it checks exactly the points that will be under load.
Before starting, confirm: the route is clear of temporary boxes, outer corners are protected, doorways have the required clearance, room status is up to date, the Protection Owner is assigned, and a condition check has been performed at the start of the route. If one section is temporarily not ready, the route is adjusted before the cargo arrives.
This is how HEAVY DELIVERY ROUTE becomes not a diagram on paper, but a genuinely prepared logistics route through the finished finishes.
Why the room status must be updated immediately after a scope change
If heavy work suddenly returns to a finished room, its status must change the same day. Otherwise the log will still show READY FOR HANDOVER, even though physically the room has become a risk zone again. A quick status update synchronizes access, protection owner, and control checkpoints with the real situation.
20 typical mistakes at the protection stage
1. Considering the trim work complete immediately after installation
Why it happens: the installation crew has finished the work. Consequence: subsequent contractors receive finished finishes without a protection regime. How to prevent: FINISH INSTALLED → PROTECTED.
2. Not accounting for remaining works
Cause: they look only at the readiness of the trim work. Consequence: protection does not match the future risk. Prevention: FINISH PROTECTION PLAN with remaining works.
3. Protecting the entire site equally
Cause: it is easier that way. Consequence: resources are spent in LOW, while HIGH remains weak. Prevention: Risk Map.
4. Not marking out the furniture route
Cause: furniture will be brought in "as usual." Consequence: impacts to corners and baseboards. Prevention: HEAVY DELIVERY ROUTE.
5. Not protecting external corners
Cause: only straight walls were covered. Consequence: a pinpoint chip in the most vulnerable spot. Prevention: separate corner protection.
6. Applying tape to the finish without testing
Cause: the material is assumed to be "painter's tape." Consequence: adhesive residue, surface change, or coating damage. Prevention: sample / hidden-area test.
7. Leaving protection unattended for a long time
Cause: "we put it up before handover." Consequence: the protection shifts or begins to cause damage itself. Prevention: PROTECTION CHECKED.
8. Sealing wood airtight unnecessarily
Cause: it seems that the tighter, the safer. Consequence: the protection creates new undesirable conditions. Prevention: mechanical, controlled protection.
9. Remove protection and do not restore it
Cause: brief access is needed. Consequence: the area remains open until the end of the shift. Prevention: REMOVE → WORK → INSPECT → RESTORE.
10. Do not assign a Protection Owner
Cause: responsibility is considered shared. Consequence: no one restores the protection. Prevention: a specific owner.
11. Leaning materials against moldings
Cause: a convenient ready-made wall. Consequence: scratches and pressure. Prevention: staging area.
12. Placing a ladder on finished decor
Cause: close to the needed point. Consequence: damage to the molding or cornice. Prevention: independent ladder position.
13. Cutting material next to finished trim
Cause: saving time. Consequence: dust and impacts. Prevention: cutting zone.
14. Not warning the cleaning team
Cause: cleaning is considered safe. Consequence: water, chemicals, and equipment create defects. Prevention: cleaning briefing.
15. Using abrasive cleaning without checking
Cause: need to remove the stain quickly. Consequence: damage to the finish. Prevention: cleaning method based on the actual coating.
16. Not performing PRE-PROTECTION CONDITION
Cause: the finish is new, there "should be no" damage. Consequence: later it is unclear when the defect occurred. Prevention: checkpoint CP1.
17. Waiting for the punch list instead of responding to a fresh defect
Cause: "we'll collect everything together later." Consequence: repair becomes a separate cycle. Prevention: DAMAGE RESPONSE immediately.
18. Using the reserve without recording it
Cause: the stock is physically accessible. Consequence: by handover, the reserve disappears. Prevention: Reserve Balance.
19. Do not analyze recurring causes
Cause: each defect is closed separately. Consequence: new damage continues. Prevention: Pareto + Damage Map.
20. Remove protection before completing heavy works
Cause: the room visually already looks finished. Consequence: the final furniture move-in damages the finish. Prevention: removal criteria.
Final workflow for protecting installed trim
INSTALLATION COMPLETE → CONDITION CHECK → RISK MAP → FINISH PROTECTION PLAN → HIGH-RISK ROUTES → PROTECTED → OTHER TRADES → REGULAR CHECK → DAMAGE RESPONSE → RESTORE PROTECTION → HEAVY WORKS COMPLETE → REMOVE → FINAL CONDITION CHECK → PUNCH LIST → HANDOVER.
- Accept installed trim.
- Assign FINISH INSTALLED.
- Compile a list of remaining works.
- Build a Risk Map.
- Mark as HIGH / MEDIUM / LOW.
- Determine HEAVY DELIVERY ROUTE.
- Protect external corners.
- Check protection compatibility with FINISH.
- Assign Protection Owner.
- Set status to PROTECTED.
- Mark the mode at the room entrance.
- Perform CP1.
- Perform CP2 before furniture.
- Perform CP3 after furniture.
- Conduct Protection Check.
- When removing protection, use REMOVE → WORK → INSPECT → RESTORE.
- Localize the cutting zone.
- Instruct cleaning.
- After cleaning, perform CP4.
- Immediately log DAMAGE RESPONSE.
- Update Reserve Balance.
- Analyze repeat damages.
- After completing heavy work, remove protection.
- Perform FINAL CONDITION CHECK / CP5.
- Submit remarks to the punch list.
- Move the room to READY FOR HANDOVER.
Bottom line: post-installation protection is a separate stage of the construction cycle
Finished wooden trim remains part of the construction site as long as heavy crews, furniture, equipment, cleaning, and final technical work pass through the room.
Therefore, protection should not be a request to "be careful," but a managed system:
STATUS → RISK → PROTECTION → ACCESS → CHECK → DAMAGE RESPONSE → FINAL CONDITION.
The main goal is not to make the interior inaccessible to all contractors, but to allow the remaining work to be completed without a new cycle of repairs and additional orders.
If protection status, routes, checkpoints, and reserve balance are maintained consistently, the last week of construction will not destroy the result of previous months.
Frequently asked questions
Should the entire baseboard be protected equally?
No. Priority is higher for external corners, doors, elevator lobbies, furniture routes, and late-work areas.
Can painter's tape be applied directly to a painted baseboard?
You cannot assume that any tape is automatically compatible. The specific material and finish must be tested on a sample or a hidden area.
When should temporary protection be removed?
After completing heavy, dusty, and risky work in the area, then perform a final condition check.
What should be done if electricians need to remove the protection?
Use REMOVE → WORK → INSPECT → RESTORE. The area must not be left open without supervision.
Do you need to photograph every wall?
No. Critical points are sufficient: corners, doors, routes, feature walls, and areas of later work.
Why is cleaning considered a risk?
It brings water, chemicals, carts, cables, and equipment that operate at skirting board level.
Can a spare plank be used for fresh damage?
Yes, but the usage must be recorded and the installation or operational reserve balance must be updated.
What should be done if one corner is damaged again?
Review the route and the protection design. A repeated defect indicates a systemic problem, not an isolated accident.
When does a space receive RESTRICTED ACCESS?
When the main dirty and heavy work is finished, but the facility has not yet been handed over to operations and separate controlled access remains possible.
How is protection related to the punch list?
After the protection is removed, a FINAL CONDITION CHECK is performed. All remaining issues are transferred to a separate punch-list process.