Article Contents:
- The material is accepted — the installation is not yet accepted
- Where objective acceptance begins: defining the REFERENCE
- The first question: was the approved product actually installed
- Construction products should be accepted in two passes
- PASS 1 — GEOMETRY
- PASS 2 — FINISH
- GEOMETRY ACCEPTANCE
- FINISH ACCEPTANCE
- OPEN
- RECTIFIED
- REINSPECTED
- CLOSED
- How does installation acceptance differ from material acceptance?
- Should numerical tolerances be specified for joints?
- How to inspect the skirting board?
- How to accept moulding frames?
- Why first-off inspection?
- What does RECTIFIED mean?
- Can 100% of installed trim be accepted if some remarks are open?
- What to keep after acceptance?
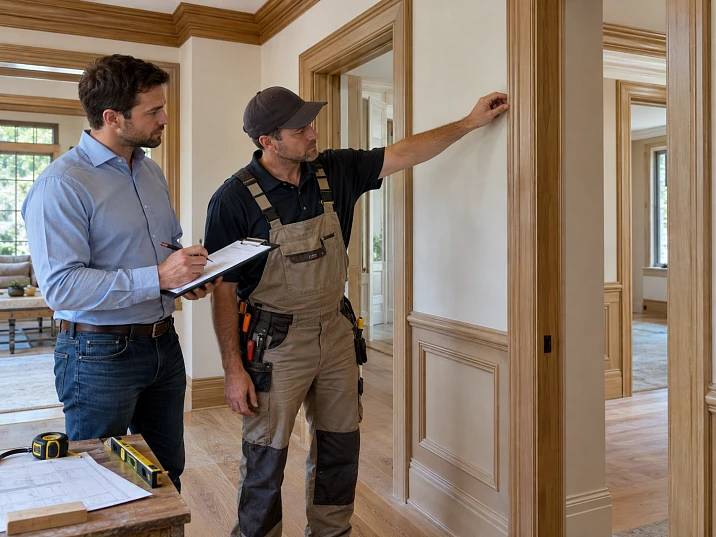
The skirting board is installed around the perimeter, the moulding frames are assembled, and the cornice has closed the upper line of the room. Visually, the interior already looks complete. But the phrase "everything looks nice" does not yet mean that the installation can be accepted and payment closed.
A completed job requires a different order:
approved reference → verification of correct products → overall geometry → joints and corners → abutments → surface and finish → functional units → snag list → corrections → re-inspection → INSTALLATION ACCEPTED.
This is exactly how one should accept wooden moldings STAVROS, if the skirting board, moulding, and cornice are part of the architectural system of the interior.
The main mistake when accepting construction products is confusing product quality with installation quality. A good profile can be cut poorly, installed with a noticeable step, damaged by glue, or finished awkwardly near a door. And vice versa: neat installation does not make a moulding correct if a different article has been installed.
Therefore, before final payment, what is checked is not "liked / did not like," but whether the result matches the previously approved project and clear quality criteria.

Material accepted — installation not yet accepted
There are several different control stages on site.
| Stage | What is checked | | --- | --- | | Product acceptance | SKU, material, length, quantity, condition | | Before installation | layout, units, sample, project version | | After installation | lines, joints, corners, abutments, surface | | Final acceptance | elimination of remarks, re-inspection, completeness of the result |
If the PLT-A batch was correctly received at the warehouse, this only confirms the quality of the incoming material.
After installation, new questions arise:
- whether the top line runs straight;
- whether the corners are assembled uniformly;
- how the butt joints are made;
- what happened at the architraves;
- whether there are installation-related stains;
- whether the finish matches the approved reference sample;
- whether the functional unit works after installation.
These questions already relate to the quality of installation.




Where objective acceptance begins: defining the REFERENCE
Before the inspection, you need to answer:
What do we compare the finished result against?
The REFERENCE may include:
- the current drawing;
- the final specification;
- the approved layout;
- physical sample;
- mock-up;
- approved finish;
- the approved junction detail;
- the locked project revision.
Without a reference, it is impossible to distinguish:
the contractor did it incorrectly
from:
the customer expected otherwise, but this was never documented anywhere.
It is especially dangerous to invent numerical tolerances already at acceptance. If the project requires a specific maximum gap, height deviation, or another measurable criterion, it must be established before installation in the technical specification or installation standard.
Our factory also produces:



The first question: whether the approved product was actually installed
Do not start by looking for beautiful joints.
First, the product item itself is verified:
- article number;
- the material;
- profile;
- size;
- finish;
- application area.
Let's imagine:
in the specification — MLD-A;
on the wall — a visually similar MLD-B.
Even if the frame is assembled perfectly, the installation does not match the project.
Therefore, the chain must remain connected:
design → SKU → specification → delivery to site → installation → final inspection.
If a different SKU was agreed during the work, the change must be included in the as-built documentation.
Get Consultation
Construction products should be accepted in two passes
Mixing all criteria into one chaotic inspection is inconvenient.
Two main passes are more practical.
PASS 1 — GEOMETRY
Checked:
- lines;
- dimensions;
- joints;
- corners;
- junctions;
- repeatability of modules;
- position relative to neighboring elements.
PASS 2 — FINISH
Checked:
- scratches;
- chips;
- glue marks;
- stains;
- retouching;
- coating differences;
- damage to an adjacent wall or floor;
- contamination after installation.
This way, the inspector doesn't switch every second between the geometry of the frame and a small dot on the finish.
How to inspect a wooden baseboard: follow the route of the room
It's better to inspect the baseboard not in random fragments, but along a sequential route:
entrance → wall 1 → inner corner → wall 2 → outer corner → door → furniture junction → next wall.
Each section has its place in the logic of the room.
This helps avoid missing:
- a short segment behind the door;
- a visible end;
- a transition to the wardrobe;
- an open outer corner;
- repeat joint on the long wall.
After the full route, it becomes clear whether the baseboard is one continuous line or a set of separate, well-installed fragments.
The first thing in a baseboard is the continuity of the line
The main visual test is performed from a distance.
The baseboard should be perceived as a single architectural line.
Look:
- whether there are any height jumps;
- whether a step appears between adjacent strips;
- whether the top edge "wanders";
- whether the line ends logically;
- whether there are any sections where the profile suddenly changes position.
Inspection from only 20–30 cm away poorly reveals the overall geometry.
That is why two modes are needed:
GENERAL VIEW — assessment of the entire line;
DETAIL VIEW — checking specific joints and surfaces.
Why you shouldn't inspect skirting only "at eye level"
Let's imagine a long corridor.
There is no obvious defect on any individual plank.
But one plank is installed slightly higher than its neighbor, the next one drops lower, and after several joints the top line begins to "wave."
Up close, this is hard to see.
From several meters away, the overall rhythm becomes apparent.
That is exactly why a large architectural line is first assessed in perspective, and only then does one inspect each joint up close.
How to evaluate a straight joint between two planks
At the joint, the following are checked:
- profile match;
- absence of a visually rough step;
- neatness of the seam;
- absence of chipping;
- absence of rough adhesive contamination;
- continuity of the finish.
A universal criterion cannot be specified in the article:
joint of maximum 0.5 mm.
Such a tolerance must be based on the specific project, profile, technology, and a pre-established installation standard.
If there is no numerical criterion, acceptance remains visual against the approved reference.
Why tolerance cannot be invented on the day of payment
The installer must understand in advance what will be considered an acceptable result.
Otherwise, a typical dispute arises:
customer:
I expected a completely invisible seam;
contractor:
for this profile, this joint is normal.
The problem is not necessarily someone's bad faith.
The project had no common reference.
Therefore, for a repeatable large object, it is better to accept one first-off assembly or mock-up in advance and make it the actual benchmark.
Internal corners of a wooden skirting board
At the internal corner, check:
- whether the profile aligns;
- whether there is a visually rough gap;
- whether the logic of the relief is preserved;
- whether there are any chips;
- whether one part protrudes relative to another;
- whether there is any noticeable sloppy retouching.
It is better to inspect not only strictly frontally.
Shift your viewing angle: some steps and gaps become more noticeable when the angle of view changes.
External corners require stricter attention
External corner:
- more visible;
- located closer to the passage;
- more often subjected to impact;
- shows the quality of the joint between two visible planes at once.
It is useful to inspect it from several directions.
If the relief is complex, not only the cut line is checked, but also the alignment of all profile elements.
One neat external corner is better to approve as FIRST-OFF APPROVED, and then require a repeatable result.
Skirting board — architrave: one of the main control joints
The transition is checked:
baseboard → casing.
Typical defects:
- the skirting board accidentally protrudes more;
- an unapproved step appears;
- the end is finished roughly;
- a gap is visible;
- the reliefs conflict;
- the end face is treated differently from the main surface.
If the unit was approved in the mock-up, the finished object is compared against that exact reference.
Then disputes are resolved faster: the "as it should be" already exists physically.
Molding is approved not by individual strips, but by the entire composition
For a framed layout, a single rail is too small a unit of acceptance.
The main unit is the module.
Checked:
- frame width;
- height;
- position relative to the floor;
- position relative to the ceiling;
- offset from the door;
- repeatability of adjacent frames;
- symmetry;
- corners.
You can perfectly assemble all four sides of a single frame and still ruin the composition if the next frame sits 15 mm higher.
MODULE TO MODULE: compare adjacent frames
Let's imagine:
first frame — 1200 × 2400 mm;
second — 1215 × 2390 mm.
Difference in width:
1215 − 1200 = 15 mm.
By height:
2400 − 2390 = 10 mm.
Each corner can be neat.
But the entire wall will start to look uneven.
Therefore, molding acceptance should include checking not only a single module but also repeatability:
MODULE 1 → MODULE 2 → MODULE 3.
How to check verticals and horizontals of moldings
are used:
- design dimensions;
- reference axes;
- tape measure;
- level;
- laser tool, if used on the site;
- references to doors, floor, and ceiling.
Not:
it looks level to the eye.
For repeated frames, measurement control is especially useful in the first zone.
If the first room deviates from the design axis and the error goes unnoticed, the crew may reproduce it dozens of times.
A 45° joint — a small detail with big visual impact
At the corners of the moulding frame, check:
- relief match;
- cleanliness of the joint;
- absence of chipping;
- absence of a noticeable step;
- neatness of the finish;
- absence of rough touch-ups.
The more complex the profile, the more noticeable an unsuccessful corner is in the light.
But acceptance should not turn into a search for a microscopic defect under magnification if, under the actual conditions of the room, it is not perceived and the project does not establish a special finish class.
Materials for finishing work are accepted as a finished assembly
The moulding may be installed correctly, but around it:
- paint is damaged;
- adhesive residue remains;
- wallpaper is torn;
- touch-up differs in tone;
- the adjacent surface is soiled.
Therefore, finishing materials cannot be assessed in isolation at the final stage.
Accepted:
profile + its junction + adjacent finish after installation is complete.
Installation is considered complete only when the new decorative element has left no uncovered damage around it.
Wooden cornice: the main check is the continuity of the top line
A cornice is best assessed from several points:
- from the entrance;
- from the center of the room;
- along the long wall;
- in oblique light.
Checked:
- joints;
- profile match;
- the top and bottom lines;
- corners;
- visual "sagging";
- finish;
- installation marks on the ceiling and wall.
The cornice is located high up, so a small joint up close may be insignificant, while a jump in the overall line is very noticeable from the center of the room.
Why oblique light is useful
Frontal light masks some defects.
Grazing light can reveal:
- a step;
- a wave;
- surface damage;
- a difference in finish;
- sloppy touch-up.
But the inspection must remain reasonable.
There is no need to create an artificial spotlight at an extreme angle that would never occur in actual use, just to search for a micro-defect.
The criterion is the approved quality under real room conditions.
Geometry and surface are two independent results
The profile may be installed geometrically correctly but ruined by glue.
And vice versa: the surface is perfect, but the frame is misaligned.
Therefore:
GEOMETRY ACCEPTANCE
- lines;
- the axes;
- corners;
- joints;
- dimensions;
- repeatability.
FINISH ACCEPTANCE
- coating;
- color;
- scratches;
- Glue;
- stains;
- retouching;
- adjacent surfaces.
One successful pass does not replace another.
The natural texture of wood is not automatically a defect
Natural wood has visual variability.
Therefore, you cannot compare each plank to a perfect monochrome computer fill.
REFERENCE must take into account:
- approved material;
- physical sample;
- the selected finishing method;
- the agreed-upon character of the natural surface.
If the project required a specific visual selection or special sorting, the criterion must be established in advance.
Otherwise, a natural difference in pattern by itself does not prove a installation defect.
Finishing building materials must be accepted as a system
The baseboard may be installed perfectly.
But nearby:
- the parquet is scratched;
- the wall paint is damaged;
- the junction is done roughly;
- traces of sealant are left.
The final assembly cannot be considered complete.
Finishing building materials at the acceptance stage are assessed together with the surfaces with which they form a visible composition.
This is especially important after corrections: the retouching of the profile itself may be neat, while the adjacent wall remains damaged.
FIRST-OFF INSPECTION: the first completed assembly must be accepted separately
On a large project, one should not wait for all rooms to be finished.
The first completed element of each repeated type undergoes a separate inspection.
For example:
- first external corner;
- first door assembly;
- first frame;
- first complex corner of the cornice;
- first visible termination.
After acceptance, the status is set:
FIRST-OFF APPROVED.
Now the crew has a clear reference for the result.
If the first-off is not accepted, it is better to stop mass repetition of the unit until it is corrected.
At a hotel property, first one completed room is accepted
Let's imagine 80 identical rooms.
First, the following is fully completed:
ROOM 101 — FIRST COMPLETED ROOM.
It checks:
- plinth;
- Moldings;
- cornice;
- Baseboards;
- corners;
- finish;
- installation contamination;
- functional units.
After approval, the room becomes:
QUALITY BENCHMARK.
But the benchmark does not free the remaining rooms from control.
It only records what the result should be.
Why you shouldn't accept work for the first time after the 80th room
If one recurring error is discovered only after 80 rooms are completed, the scale of correction becomes enormous.
For example, the same step on the door casing was repeated in every room.
If there are four identical door units per room:
80 × 4 = 320 potential corrections.
If the problem was noticed in ROOM 101, one unit is corrected, after which the crew changes the technology.
That is why zonal acceptance is better than a final "big walkthrough" at the very end.
Zonal acceptance: hand over the project in stages
Working scheme:
ZONE 1 → INSPECT → SNAG → RECTIFY → REINSPECT → ACCEPT
Then:
ZONE 2 → ...
Advantages:
- errors don't multiply;
- the contractor understands expectations faster;
- part of the project can be closed out earlier;
- it's easier to track issues;
- a huge snag list doesn't pile up on the last day.
For long corridors, a zone can be a floor.
For a hotel, it's a group of rooms.
For a large apartment, it's a separate block of rooms.
What cannot be assessed visually alone
Beautiful does not always mean functional.
In some assemblies, after installation, you need to check:
- service access;
- removability of the adjacent element;
- absence of blocking of an engineering component;
- possibility of standard maintenance;
- operation of a door or furniture next to the skirting board.
For example, if a wooden skirting board runs next to an in-floor convector, after installation you need to check again the standard removal of the service grille and access to the equipment.
An assembly is considered accepted only if it both looks correct and remains functional.
Adhesive must not become part of the design
Installation contamination is checked on:
- front surface;
- wall;
- floor;
- corners;
- finish coating.
Phrase:
cleaning will remove it later
does not automatically close the remark.
Some contamination is harder to remove after full curing, and aggressive cleaning can damage the finish.
Therefore, the glue trace is recorded in the snag list immediately upon detection.
Retouching or replacement: there is no universal answer
Not every defect requires a complete plank replacement.
But not every problem can be considered resolved after local touch-up.
The decision depends on:
- scale of the defect;
- type of coating;
- visibility of the area;
- position relative to light;
- approved quality level;
- possibility of achieving a comparable result after repair.
The main rule:
First the defect is recorded, then the method of correction is agreed upon, and only after that is retouching or replacement performed.
You cannot first hide the problem and then try to prove that it was insignificant.
Snag Register: a remark must have an exact location
Bad:
remarks about the skirting board on the second floor.
Good:
ROOM 204 / WALL B / PLT-A / OUTER CORNER.
And the description:
a visible step at the joint; check the alignment and re-present.
Then the contractor understands:
- where;
- which SKU;
- which assembly;
- what exactly was not accepted.
This speeds up correction and re-inspection.
Main acceptance table
| ID | Zone | Product | Issue | Status | | --- | --- | --- | --- | --- | | PG-001 | 204 / Wall B | PLT-A | outer corner | OPEN | | PG-002 | Lobby | MLD-A | frame joint | OPEN | | PG-003 | 301 | KZ-A | glue mark | RECTIFIED | | PG-004 | Corridor 2F | PLT-A | line | CLOSED |
Additionally useful:
- photo;
- date;
- responsible person;
- correction method;
- re-inspection date.
A photo of the issue must show the context
A single close-up of a gap is useless if it is impossible to understand where it is located.
For a serious issue, three shots are better:
- general view of the room or wall;
- medium shot of the area;
- defect detail.
Then PG-002 can be found without lengthy explanations.
If the object is large, it is useful to use the same remark ID in the file name.
OPEN → RECTIFIED → REINSPECTED → CLOSED
The status should reflect the actual state.
OPEN
The remark is confirmed and not fixed.
RECTIFIED
The assignee reports that it has been fixed.
REINSPECTED
The reviewer performed a re-inspection.
CLOSED
The result is accepted.
This is important: RECTIFIED does not yet mean CLOSED.
Phrase:
the installer said everything was fixed
is not the final acceptance.
Why the installation percentage does not equal the percentage of accepted work
Let's imagine:
100% of the trim is installed.
But out of 80 rooms, 12 still have open issues.
Share of rooms with open issues:
12 / 80 × 100% = 15%.
Accordingly, without accounting for differences in volume:
85% of rooms passed without open issues.
That is:
INSTALLATION COMPLETE = 100%
does not mean:
ACCEPTED = 100%.
To pay for and close out a stage, it is important to distinguish between physical completion and accepted work.
When a space receives ACCEPTED status
A room or area can be considered accepted when:
- the correct SKUs are installed;
- the result matches the reference;
- critical issues are closed;
- a re-inspection has been completed;
- adjacent surfaces are restored;
- functional units are checked;
- remaining acceptable items are agreed separately.
If a critical snag item remains open in the room, the status ACCEPTED is premature.
What to save before final payment
Before closing the installation stage, it is useful to save:
- final snag register;
- list of CLOSED items;
- photos of key assemblies;
- as-built changes;
- list of actually installed SKUs;
- approved project changes;
- reference / mock-up;
- the date of final acceptance.
If repairs are needed a year later, this information helps to understand what was actually installed.
It is especially important to record changes that were agreed on site "as built".
As-built: don't leave changes only in correspondence
If during installation:
- the SKU changed;
- the termination type changed;
- a different assembly appeared;
- the application area was moved;
the final documentation must reflect this.
You cannot leave the old specification and assume that everyone still remembers the actual solution.
After a few months, the participants' memory will fade, and the repair order will be based on the wrong line.
When a detailed inspection is excessive
Not every small repair needs a complex digital snag register.
The process can be simplified if:
- the scope is small;
- there are few nodes;
- one crew is working;
- there are no repeated dozens of rooms;
- the reference is clear;
- there are few remarks.
But even then, the basic steps remain:
correct SKU → geometry → surface → junctions → functionality → corrections → re-check.
The complexity of documentation can be reduced.
The acceptance logic itself should not be removed.
Mistakes when accepting installation
Mistake: accepting based only on overall impression.
The reason is that the interior looks finished. The consequence is that recurring defects are missed. The solution is a route and a checklist.
Mistake: looking only for micro-defects up close.
The reason is that the inspector approaches each strip. The consequence is that a crooked overall line is missed. The solution is GENERAL VIEW + DETAIL VIEW.
Mistake: not checking the SKU.
Cause — the profile looks similar. Consequence — the wrong product is accepted. Solution — verify against the specification.
Error: the numerical tolerance is invented after installation.
Cause — a dispute about quality. Consequence — the parties have different expectations. Solution — criteria before work begins.
Error: inspecting each slat instead of the composition.
Cause — local joints are easier to see. Consequence — the frames differ from one another. Solution — MODULE TO MODULE.
Error: considering RECTIFIED a closed remark.
Cause — the contractor reported a fix. Consequence — the defect may remain. Solution — REINSPECTION.
Final checklist before INSTALLATION ACCEPTED
Before closing the work, check:
- Correct SKUs are installed.
- Material matches the project.
- Finish matches the reference.
- The top line of the skirting is visually continuous.
- Straight joints accepted.
- Internal corners accepted.
- External corners accepted.
- Skirting—architrave junctions match the project.
- Moulding frames have correct geometry.
- Adjacent frames repeat the approved module.
- Moulding corners accepted.
- The cornice has a continuous line.
- The finish has no unclosed defects.
- Installation contamination has been removed.
- Adjacent surfaces are not damaged.
- Functional units are operational.
- All critical snag items are closed.
- Re-inspection has been completed.
- As-built changes are saved.
- The zone has received the status
ACCEPTED.
Only after this does the completed installation turn into truly accepted work.
Questions before final payment
How does installation acceptance differ from material acceptance?
Material acceptance checks the product before installation. Installation acceptance checks the finished lines, assemblies, joints, finish, and functionality.
Should numerical tolerances be specified for joints?
Only if the project truly requires them. They should be determined before installation, not invented on the day of acceptance.
How should the skirting board be checked?
First the entire line from a distance, then walk through the room sequentially and check joints, corners, ends, and abutments.
How should moulding frames be accepted?
Not just individual strips. The geometry of entire frames and their repeatability among themselves need to be compared.
Why first-off inspection?
To accept the first unit of a certain type once and not replicate the same mistake across the entire object.
What does RECTIFIED mean?
The contractor considers the remark corrected. It becomes closed after re-inspection and CLOSED status.
Can 100% of the installed trim be accepted if some remarks are open?
Physical installation may be 100% complete, but the percentage of accepted work remains lower until critical remarks are closed.
What to keep after acceptance?
Snag register, closed remarks, photos of key units, as-built changes, actually installed SKUs, and the date of final ACCEPTED.