Article Contents:
- Short answer: when MLD-004 is suitable for replacing the old profile
- MLD-004 in numbers: what is confirmed and what requires a drawing
- Why a noticeable strip remains after dismantling
- Shade difference
- Adhesive residue
- Paint chips
- Old holes
- Level difference
- Chips in corners
- Trace from trimming and marking
- Prepare a damage map
- Measure on both sides of the axis
- Record the maximum value
- Look under side lighting
- Do not wipe the trace before measuring
- Cardboard version
- Multi-layer version
- Plastic or plywood version
- Why the template doesn't replace a real sample
- New profile fully covers the trace with margin
- New profile covers the color but doesn't cover the glue
- Profile covers straight sections but not corners
- Profile is narrower than the old trace
- Restore the coating locally
- Resize the frame
- Select a wider profile
- Repaint the entire facade
- The frame margins are decreasing
- The corners are becoming more massive
- The old holes may end up at the edge of the base
- The joints require new marking
- What to check in each corner
- When the corner piece is useful
- When a 45° cut is simpler
- Why you can't use the old corner without checking
- First determine the type of coating
- Do a test in an inconspicuous place
- Do not scrape metal on the front surface
- After cleaning, measure the trace again
- Local repair or full repainting
- The molding is installed after the coating stabilizes
- MLD-004 made of beech
- MLD-004 made of oak
- MLD-004 made of MDF
- Mixing materials without a sample is risky
- Paint before installation
- Painting after installation
- Combined approach
- Measure the four sides
- Compare opposite sides
- Check the diagonals
- Do not fix one facade separately
- Condition of the finish coating
- Cleanliness
- Matting
- Test bonding
- Step 1. Measure the length of each side
- Step 2. Determine the measurement line
- Step 3. Account for angles
- Step 4. Create a cutting plan based on available lengths
- Step 5. Add allowance deliberately
- Assign numbers to the facades
- Mark each side
- Store in sets
- Make a control door
- Do not check only against the first door
- The hole is inside a stable zone
- The hole falls at the edge of the new molding
- The hole goes outside
- Multiple holes weakened the MDF
- Compare 15 mm with the old strip and stop
- Measure only one straight section
- Apply a paper strip instead of a cross-section
- Order a batch without a sample
- Glue the profile over the old adhesive
- Shift each side separately
- Keep old cuts
- Choose beech, oak, or MDF only by price
- Consider MLD-004U a universal angle
- Apply glue without a test
- Calculate only the perimeter
- Fail to mark parts
- Try to hide a deep chip with molding
- Repaint only the molding without a color sample
- Order the same length for different materials
- Do not check a number of facades entirely
- Accept the old frame as an exact template
- Leave a visible mark inside the frame
- Consider the sample unnecessary for one door
- Will MLD-004 cover a 12 mm wide mark?
- Does section 15 × 8 mm mean width 15 mm?
- Can I measure the old strip instead of the trace?
- How many points need to be measured on one side of the frame?
- What should be measured at the corners?
- Can I glue the new molding over the old glue?
- Do I need to repaint the facade?
- Which material to choose for enamel?
- When to choose oak?
- Will MLD-004U fit the old frame?
- Can I keep the old corner elements?
- Which is better: MLD-004U or a 45° miter cut?
- What is OMLD-005 for?
- Can I use TYTAN on a painted facade?
- How many MLD-004 should I order?
- Is it necessary to have the same material on all facades?
- Can the molding be replaced on only one door?
- How do I check the frame for squareness?
- What should I do if the old mark is wider than MLD-004?
- Can the old hole be covered with molding?
- How can I check the profile without buying the entire batch?
- Do I need to buy a spare?
- Can MLD-004 be turned the other way to cover a wider strip?
- Can molding be used on a film facade?
- What should I do if the new frame covers the mark but comes too close to the handle?
- Is it worth keeping the old frame axis?
- Can I order long strips first and check the sample later?
- Where can I see other moldings for furniture?
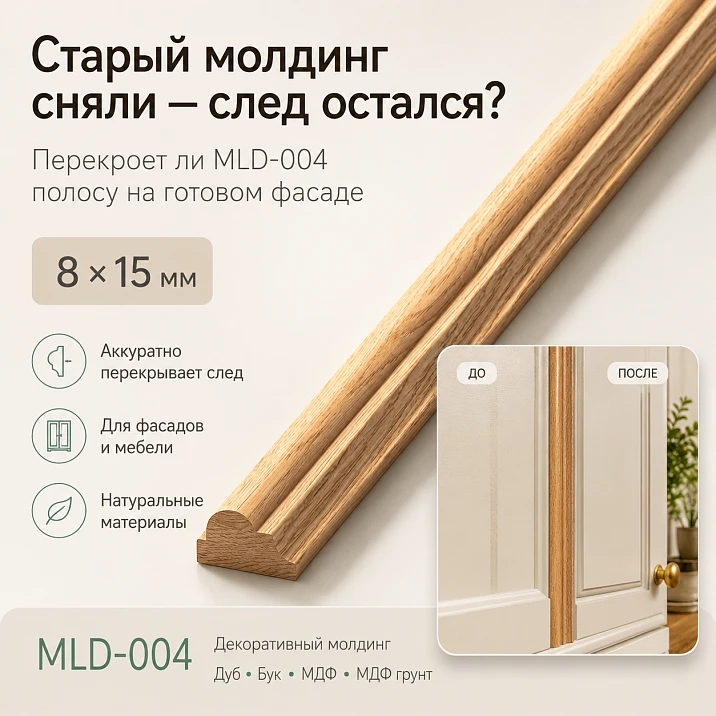
The old frame was carefully dismantled. The molding came off, the facade did not crack, and the door geometry was preserved. But instead of a clean surface, a rectangular outline remained: in some places the paint is lighter, in others darker, with a layer of dried glue visible along the edges, chips appeared in the corners, and old holes opened up in one area. A natural thought arises: cover it all with a new profile and not repaint the entire facade.
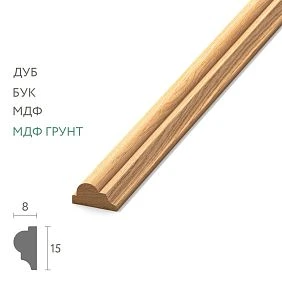
Wooden molding MLD-004 with a cross-section of 15 × 8 mm can indeed be considered for restoring an existing furniture frame. However, the answer to the main question—whether MLD-004 will cover the trace of the old molding—cannot be obtained from a single number in the card. The overall profile dimension does not automatically equal the width of its contact plane. The rounded front part, installation direction, and actual contact area are determined by the cross-sectional shape. Therefore, a new profile may look wider than the old one in a photo but leave a visible strip on one side. The opposite situation is also possible: a small-looking molding completely covers the trace because its base is positioned favorably.
The buyer needs to measure not the removed strip, but what remains on the facade. The old profile could have been uneven, glue could have extended beyond its boundaries, paint could have faded only on one side, and in the corners the damaged area is often wider than on straight sections. It is the actual trace that determines whether MLD-004 is suitable for repair.
The correct order is as follows: inspect the facade under side light, measure the strip at several points, open the drawing of the new profile, determine the actual contact plane, make a cross-section template, and apply a physical sample to the most complex area. Only after such a check does it make sense to buy wooden molding MLD-004 in the required material and length.
Short answer: when MLD-004 is suitable for replacing the old profile
MLD-004 is suitable for restoring the frame if its actual overlap zone completely covers the old strip on straight sections and in corners, the profile fits evenly against the prepared surface, and the new frame geometry does not exceed the allowable facade margins.
Before ordering, not just one but several parameters must match:
-
width of the damaged strip;
-
cross-sectional shape of MLD-004;
-
actual contact plane;
-
profile height above the facade;
-
position of old holes;
-
dimensions of the existing frame;
-
condition of each corner;
-
material and finish of the new molding;
-
joining diagram;
-
available plank lengths;
-
compatibility of the selected adhesive with the facade and profile material.
The confirmed cross-section of MLD-004 is 15 × 8 mm. The card offers options with lengths of 1000, 2400, and 2600 mm in beech, oak, or MDF. For beech, an enamel finish is available; for oak, a tinting finish; the sanding quality is specified as "Prestige". Current combinations of material, length, preparation, price, and availability must be re-checked before placing an order.
If the old mark is wider than the actual overlap area, the molding will not solve the problem on its own. Then local coating restoration, a new larger frame, or a different profile will be required. In such a case, it is better to choose a profile wider than MLD-004, rather than trying to hide the damage with a too-narrow plank.




MLD-004 in numbers: what is confirmed and what requires a drawing
| Parameter | Confirmed data | What to check before replacement |
|---|---|---|
| Article number | MLD-004 | Match of the article number in the card, drawing, and order |
| Type | Wooden furniture and interior molding | Whether the profile is suitable specifically for an overlay frame on a finished facade |
| Cross-section | 15 × 8 mm | Which side faces the facade and what is the contact plane |
| Lengths | 1000, 2400, and 2600 mm | What length is available for the selected material |
| Materials | Beech, oak, MDF | Compatibility with the existing facade finish |
| Preparation of beech | For enamel | Suitable for covering paint after agreed preparation |
| Oak preparation | For tinting | Suitable when the visible wood texture needs to be preserved |
| Sanding quality | «Prestige» | Whether additional finishing is needed in a specific project |
| Drawing | Available in the product card | Cross-section shape, orientation, base, and working width |
| Related items | MLD-004U and TYTAN mounting adhesive are listed next to the product | Compatibility with the old frame and old covering is checked separately |
The table provides product specifications but does not replace a trial fit. Especially dangerous is the reasoning: "The old trace is 13 mm, the new molding is 15 mm, so there is room." If 15 mm is the profile height, and the side adjacent to the facade is 8 mm or an even narrower area, the trace will remain visible. Even with correct orientation, the rounding can reduce the actual width of the covered zone.
Therefore, the next step after the table is to look at the MLD-004 drawing and transfer the cross-section to paper at a 1:1 scale.
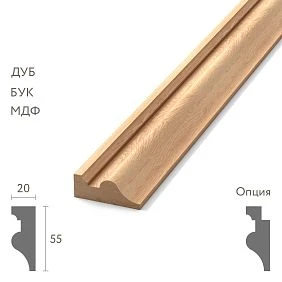
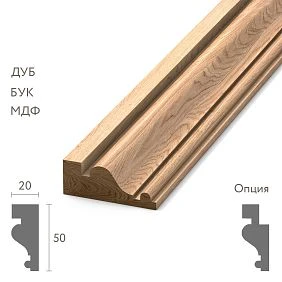
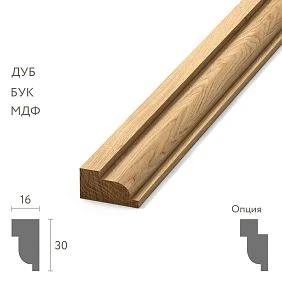
Our factory also produces:





Why a noticeable stripe remains after dismantling
The trace from the old molding rarely consists of a single neat rectangle. Usually, it is several defects superimposed on each other.
Get Consultation
Shade difference
The area under the old strip was shielded from light, cleaning, and natural aging of the coating. The exposed part of the facade could slightly fade, yellow, or become duller. After removal, a band of a different tone appears, although the surface remains smooth.
Such a trace seems harmless, but its boundary can be wider than the previous profile. The paint may have changed not strictly along the edge, but gradually, especially if dust accumulated around the molding or care products were used.
Adhesive residue
Adhesive extends beyond the base of the strip when pressed. After removal, part remains on the facade, forming a shiny, matte, or yellowish outline. Attempting to immediately cover it with a new molding is risky: an uneven layer prevents a tight fit and creates wobbling.
Paint chips
If the adhesive's bond to the coating turned out to be stronger than the paint's adhesion to the substrate, fragments of enamel are removed along with the old profile. The edge of the chip is often jagged and extends beyond the original frame.
Old holes
Some frames were fixed not only with adhesive. Holes may be located in the center of the old molding, closer to the edge, or in the corners. The new profile must either safely cover them, or the facade will need to be restored before installation.
Level difference
A thick adhesive layer, primer, putty, or an area without a finish coating may have remained under the old strip. After removal, the surface becomes stepped. The new molding is not required to level such relief.
Chips in corners
When removing the frame, the load concentrates at the joints. It is the corners that often turn out to be the widest damaged area. If you measure only the middle of the long side, you can get a false sense of margin.
Trace from trimming and marking
Pencil lines, knife marks, sanding traces, and local areas of different gloss may remain on the facade. Some of them will be covered by the new profile, some will remain outside.
You need to measure not the old molding, but the actual trace
The removed strip is useful as a sample of the previous geometry, but the decision on covering is made based on the facade. The old molding could have a width of 12 mm, and the glue strip — 16 mm. In the corner, the damage could have grown to 20 mm. If you focus only on the profile, the new product will be chosen incorrectly.
Prepare a damage map
Draw the facade on a sheet or print a photo. Divide each side of the old frame into at least three zones:
-
the beginning;
-
middle;
-
end.
Separately mark the four corners. On each section, record the maximum width of the visible trace.
For a large door, it is useful to add intermediate points at equal distances. The longer the side, the higher the chance that the old molding was glued with a slight deviation.
Measure on both sides of the axis
If the position of the center of the old strip is known, measure the trace separately inward and outward from the frame. The strip may be asymmetric. For example, the outer edge is clean, but the glue has come out inward by 3–4 mm.
The new molding can be shifted, but then the size of the frame and the distance to the edges of the facade will change. The shift cannot be done locally on only one section — the line will become broken.
Record the maximum value
For each straight section, record not the average, but the maximum width of the damage. The average value says nothing about the point where the strip will come out.
Look under side lighting
Frontal light hides the level difference. Direct the lamp along the surface. Residues of glue, chips, and steps will cast shadows. Photograph with a ruler to preserve the scale.
Do not wipe the trace before measuring
Attempting to clean the surface immediately may smear the adhesive or enlarge the damage. First, record the initial condition, then choose a safe restoration technique.
How to document measurement results
| Frame section | Color band width | Adhesive trace width | Chips and holes | Maximum overlap area |
| Top side, left | By measurement | By measurement | Description | Maximum value |
| Top side, center | By measurement | By measurement | Description | Maximum value |
| Top side, right | By measurement | By measurement | Description | Maximum value |
| Right side | By points | By points | Description | Maximum value |
| Bottom side | By points | By points | Description | Maximum value |
| Left side | By points | By points | Description | Maximum value |
| Each corner | Separately | Separately | Separately | Maximum by corner |
Such a table turns repair from a guess into a technical task. After it, you can compare the trace not with abstract 15 × 8 mm, but with the real cross-section and working plane of MLD-004.
Cross-section 15 × 8 mm: why two numbers still don't give the overlap width
The cross-section of a molding is the contour visible at the end of the strip. It includes a front face, side edges, rounded corners, and a plane that adjoins the base. For covering an old trace, the latter is especially important.
Imagine a profile shaped like a quarter circle. Its overall dimension may be 15 mm along one axis and 8 mm along the other. However, part of the bottom edge may be rounded. Adhesive is applied not to the entire outer rectangle, but to the available contact area. If you place a paper rectangle of 15 × 8 mm, it will show only the overall dimension, not the actual fit.
Before ordering, you need to determine from the DWG:
-
which side of the profile faces the facade;
-
the width of the straight section of the base;
-
the presence of rounding at the edge;
-
the height of the molding above the surface;
-
the position of the decorative bulge;
-
the direction of the shadow;
-
the possible area for adhesive application;
-
admissibility of a small offset relative to the old axis.
The drawing must be printed without scaling. Check the control dimension with a ruler. A printer error of even a few percent is noticeable on a narrow profile.
Cross-section template instead of a paper rectangle
For a preliminary check, make not a strip 15 mm wide, but a template of the actual end face.
Option made of thick cardboard
Print the cross-section at 1:1 scale, glue it onto cardboard, and cut it out along the contour. Apply the template with its end face to the facade at several points. Mark where the base passes and which defects extend beyond its boundaries.
Option made of several layers
To see the height, glue several identical cardboard pieces together. You will get a short three-dimensional sample. It will help assess how the new profile will change the relief of the frame.
Option made of plastic or plywood
For a series of facades, a more rigid template is useful. It can be moved along the trace without deforming the contour.
Why the template does not replace a real sample
Cardboard shows the shape but does not convey rigidity, milling precision, texture, sanding, or actual fit. It is suitable for filtering out clearly unsuitable options. The final decision is better made based on the physical profile.
Sample before the batch: the most reliable way to check overlap
If there are several frames, the error multiplies by the number of facades. The cost of a short sample is incomparable to redoing all the furniture. For professional work, you can order a set of molding samples and compare profiles directly on site.
The sample is applied not to the neatest area, but to the most damaged one:
-
to the widest glue residue;
-
to a corner with a chip;
-
to an area with an old hole;
-
to a place with a level difference;
-
to the facade where the frame is located closest to the edge.
The check is carried out in three positions:
-
along the previous axis of the frame;
-
with the minimum possible inward offset;
-
with the minimum possible outward offset.
Each offset is evaluated across the entire facade. You cannot cover a defect in one place and create uneven gaps on the other sides.
A separate material explains why order a molding sample before purchasing the main batch. In repairing a finished facade, a physical trial is especially valuable: here you need to align not only the scale, but also the specific trace.
Width decision: four possible scenarios
The new profile completely covers the trace with a margin.
This is the most convenient option. On straight sections and in corners, the damage remains under the contact or face zone of the profile. However, the facade still needs to be cleaned, leveled, and checked for adhesion.
The margin must exist on both sides of the trace. If the molding covers the strip only due to an exact boundary match, any deviation during installation will become noticeable.
The new profile covers the color but does not cover the adhesive.
The color strip may be narrow, and dried adhesive may protrude further. You cannot glue a new molding over an uneven bead. Residues will have to be removed or the surface brought to a state acceptable for installation.
The profile covers straight sections but not corners.
This happens when old joints were made roughly or wide decorative corners were used. Possible solutions:
-
local corner restoration;
-
a new frame with corner elements;
-
changing the frame size;
-
choosing a wider profile;
-
full repainting of the facade.
The profile of the old trace is already there
MLD-004 is not suitable as a simple masking. It can only be used after surface restoration or in a new frame that covers the damage with other geometry.
The old molding was wider than MLD-004
The wide old profile leaves a strip that the narrow new molding will not cover. Attempting to place MLD-004 in the center creates two visible lines at the edges. Shifting hides one side but emphasizes the other.
There are several honest solutions.
Locally restore the coating
The facade is cleaned, defects are leveled, and the finish is restored in the visible area. The technology depends on the material and coating. After repair, MLD-004 can be used as a new decorative frame, not as a patch.
Change the frame size
The new profile is not placed along the previous contour, but so that the old strip is inside or outside the new composition and is restored separately. This option requires full marking of all facades.
Choose a wider profile
In this section you can choose a different molding for the furniture facade with a suitable working width. You need to compare not the name and overall dimension, but the drawings.
Repaint the entire facade
Sometimes local intervention is more noticeable than full finishing. This especially applies to old enamel, faded color, and complex patina.
The old profile was already MLD-004
A wider new molding often covers the trace, but creates other issues.
The frame margins decrease
If you keep the previous axis, the wide profile will take up more space inward and outward. The distance to the facade edge, panel, handle, and adjacent decor will decrease.
Corners become more massive
Even if the outer frame size is preserved, the new profile can visually overload a small door.
Old holes may end up near the edge of the base
A hole that was centered on a narrow strip may end up close to the edge of the new contact surface after replacement. The surface needs to be restored.
Joints require new marking
Old cut lines cannot be transferred automatically. The position of the corner vertex depends on the profile and frame geometry.
Straight sections and corners are measured separately
On a straight side, the molding works as a continuous line. In a corner, two pieces meet, along with adhesive layers, old cuts, and possible decorative elements. Therefore, the corner is an independent joint.
What to check in each corner
-
width of damage diagonally;
-
paint tear;
-
old hole;
-
glue seam;
-
frame right angle accuracy;
-
position of old cut lines;
-
possibility of a new cut;
-
place for MLD-004U;
-
distance to the facade edge.
Take large photos of each corner with a ruler. Do not combine them into one overall assessment: the top-left corner may be almost intact, while the bottom-right may require repair.
MLD-004U or a new 45° cut
For the MLD-004 system, there is corner element MLD-004U measuring 135 × 135 × 10 mm. It can become part of a new composition, but it is not an automatic replacement for the old corner.
When the corner element is useful
-
old joints are severely damaged;
-
the project allows for a more expressive corner;
-
all four corners can be styled identically;
-
the facade dimensions allow for the element to be placed;
-
the material and finish are coordinated;
-
the drawings for MLD-004 and MLD-004U match in the system.
When you drink at 45°, it's easier
-
The old frame was laconic;
-
Corner elements overload the facade;
-
Fields are limited;
-
Damage is locally repaired;
-
The craftsman can precisely execute and assemble the joint.
Why you can't use the old corner without checking
The old part could have a different cross-section, groove depth, or thickness. Even if the molding fits visually, a gap may remain between surfaces. First, compare the ends and drawings.
Also remember that the total height of MLD-004U is 10 mm, and the MLD-004 profile has a cross-section of 15 × 8 mm. These numbers cannot be compared as proof of a ready fit. The corner element was designed for the system, but the specific assembly depends on the orientation of the parts and the drawing.
Glue residue: the molding should not lie on bumps
A new level requires a flat support. If a hard bead of adhesive remains underneath, the profile is pressed only at individual points. As a result:
-
rocking appears;
-
a gap is visible along the edge;
-
the frame goes out of plane;
-
the joints separate;
-
the adhesive of the new layer works unpredictably;
-
the coating may crack when pressed.
Removing the old compound depends on its chemistry and the facade coating. It is not possible to recommend a single product for enamel, varnish, film, veneer, and solid wood.
First, determine the type of coating
You need to understand what the facade is finished with:
-
with enamel;
-
with varnish;
-
with film;
-
with veneer;
-
with oil;
-
with another compound.
Do a test in an inconspicuous place
Any cleaner, solvent, heat, or mechanical tool can change the gloss and color. The test should replicate the actual technique but be done where any possible trace won't be noticeable.
Do not scrape metal on the front surface
A hard tool can easily leave a groove. The cleaning method is chosen by a specialist based on the material and coating thickness.
After cleaning, measure the trace again
The damage boundary may expand. Old adhesive concealed paint chipping or a step. Final fitting is performed only on a prepared surface.
When the facade needs local restoration
MLD-004 is a decorative profile. It does not replace base repair. Restoration is required if the following are found:
-
deep chips;
-
paint peeling;
-
loose MDF;
-
open holes near the edge of the future profile;
-
cracks;
-
significant level difference;
-
coating swelling;
-
trace extending beyond the new frame;
-
damage to the facade edge;
-
door deformation.
Local repair or full repainting
Local restoration is rational when the damage is small, the color is reproducible, and the boundary can be hidden under the frame. Full repainting is preferable if:
-
the facade is faded;
-
the shade is difficult to match;
-
defects run along the entire perimeter;
-
the coating is peeling;
-
the color of the entire furniture is changing;
-
The frame is moved to a new location.
The molding is installed after the coating has stabilized.
Do not glue the profile onto undried primer, weak paint, or fresh coating without observing the required technological timeframes. The conditions are set by the finishing system.
MDF, beech, or oak for already painted furniture
Choosing the material cannot be turned into an abstract comparison of wood species. In this task, the key is how the new molding will be finished and matched with the existing facade.
MLD-004 made of beech
Beech has a dense, relatively calm surface. In the card, it is offered with preparation for enamel. This is a natural option when the frame is planned to be painted with an opaque coating in the color of the facade.
Need to check:
-
compatibility of primer and enamel;
-
matching gloss;
-
quality of the ends;
-
possible appearance of joints;
-
the need to paint before or after installation.
MLD-004 made of oak
Oak is chosen when the texture should remain visible under tinting or transparent finishing. On a painted facade, an oak profile creates a deliberate contrast. If it is painted over with dense enamel, the pronounced porosity may show through the coating.
MLD-004 made of MDF
MDF is rational for opaque finishing and stable geometry, but specific preparation, length, and compatibility with the project should be checked against the card. Edges require careful treatment, as they absorb finishing materials differently than the surface.
Mixing materials without a sample is risky
Even the same color on beech, oak, and MDF looks different due to texture and absorption. For multiple facades, it is better to do a test coating on the chosen material.
Finishing a new profile: before or after installation
Both scenarios are possible, but the decision depends on the project.
Painting before installation
Advantages:
-
it is easier to treat the profile from all sides;
-
the facade gets less dirty;
-
easier to control uniformity;
-
you can check the color in advance.
Limitations:
-
joints and ends will require finishing;
-
glue must not get on the painted front surface;
-
the contact area must be compatible with the mounting system;
-
when trimming, an untreated end is exposed.
Painting after installation
Advantages:
-
the frame can be combined with the facade in one color;
-
joints are finished on site;
-
the trace of local restoration is easier to hide with overall finishing.
Limitations:
-
careful surface protection is required;
-
harder to paint narrow areas;
-
repairs become more extensive;
-
the old finish must be compatible with the new system.
Combined approach
The profile is primed and partially painted in advance, then after installation, joints are finished and a final coat is applied. The technique is coordinated with the material and coating.
The old frame might not have been rectangular
Even if the lines appear visually straight, measure the diagonals. The old molding could have been installed with a slight skew, follow a deformed facade, or have different offsets.
Measure the four fields
Record the distances:
-
from the top frame to the top edge;
-
from the bottom frame to the bottom edge;
-
from the left frame to the left edge;
-
from the right frame to the right edge.
Compare the opposite sides
If the difference is noticeable, you need to decide: repeat the old geometry to overlap the trace, or align the new frame and restore the exposed areas.
Check the diagonals
Equal diagonals confirm rectangularity with equal sides. But you need to measure using one system — for example, along the inner corners of the future frame.
Do not fix one facade separately
In a row of doors, the common line is important. If one frame is aligned while the others repeat the old skew, the difference will become noticeable.
Molding on an already painted facade: four adhesion checks
The coating may look intact but still adhere poorly to the base. New glue will attach to the paint, but the paint itself will come off along with the molding. Therefore, not only the compatibility of the glue is checked, but also the strength of all layers.
Condition of the finish coating
The surface must not have peeling edges, bubbles, or loose areas.
Cleanliness
Grease, silicone polishes, and household chemicals impair adhesion. The degreasing method is chosen based on the coating.
Matting
Some systems require matting, others do not. Old enamel must not be sanded automatically: it can widen the visible mark and change the gloss.
Test bonding
The test is performed on compatible samples. After curing, not only the peel strength but also the condition of the paint is assessed.
Assembly adhesive: an accessory product, not a universal solution
The MLD-004 card lists among the accessory products Transparent assembly adhesive TYTAN. This is a real internal link, but it does not imply automatic compatibility with any old paint, varnish, film, or restoration layer.
Before application, check:
-
molding material;
-
facade coating;
-
condition of old paint;
-
presence of primer;
-
surface cleanliness;
-
contact area;
-
fixation time;
-
suitability for vertical surfaces;
-
possibility of temporary pressing;
-
impact on future finishing.
The test is carried out on a separate sample or an inconspicuous area. If the adhesive softens the coating, leaves a stain, or only adheres to weak paint, it cannot be used according to the chosen scheme.
There is no need to apply an excessive layer hoping to compensate for unevenness. Thick adhesive may extend beyond the edge and repeat the problem of the old frame.
How to calculate the amount of MLD-004 for an existing frame
Clean perimeter — only the original number. You cannot mechanically add a universal percentage of allowance: consumption depends on the length of the strips, cutting pattern, number of corners, defects, and number of facades.
Step 1. Measure the length of each side
For a rectangular frame, record two verticals and two horizontals. Do not multiply one dimension by two until both sides are checked. The old contour could have a slight difference, especially if the molding was trimmed by hand.
Step 2. Determine the measurement line
The size can be taken:
-
along the outer edge;
-
along the inner edge;
-
along the profile axis;
-
between the vertices of the cuts.
Select a system that matches the drawing and assembly method. You cannot measure one side along the outer edge and the other along the center.
Step 3. Account for angles
When cutting at 45°, the workpiece length is determined by a specific profile edge. When using MLD-004U, straight sections may end differently. The size of a corner element cannot simply be subtracted from the perimeter without a joint diagram.
Step 4. Create a cutting map based on available lengths
MLD-004 is available in 1000, 2400, and 2600 mm configurations. Not every length is available in every material. You need to match:
-
material;
-
the length of facade parts;
-
the number of full segments;
-
remnants;
-
the direction of the wood grain;
-
defects in workpieces;
-
the possibility of using the remainder on another side.
Step 5. Add reserve deliberately
Reserve is needed for a test cut, defects, damage during finishing, and possible replacement. It is determined by the actual cutting layout, not by a customary percentage.
Example calculation without a made-up percentage
Suppose there is one frame with two vertical pieces of 700 mm each and two horizontal pieces of 400 mm each. Net perimeter:
700 + 700 + 400 + 400 = 2200 mm.
But one 2400 mm plank does not necessarily yield all four pieces. After two cuts of 700 mm, 1000 mm remains, from which two pieces of 400 mm can be obtained, leaving a technological remainder, if the cut width and end quality allow. Such a layout potentially fits into one plank, but only after checking:
-
allowances;
-
cuts;
-
defects;
-
profile direction;
-
control cut.
For four identical facades, it is more profitable to create a common cutting map rather than repeat the calculation for one door. The remainder from a long plank can be useful on the short side of an adjacent facade.
Why you cannot calculate only the net perimeter
The net perimeter does not account for:
-
the saw kerf width;
-
test cuts;
-
end defect;
-
knots and wood defects;
-
texture direction;
-
the need to match the pattern;
-
first corner error;
-
replacement of a damaged part;
-
different side sizes;
-
residues that cannot be used;
-
MLD-004U;
-
connecting elements;
-
a separate sample.
Therefore, buying "exactly 8.8 m for four frames" may result in a shortage of a short section, even though the total length formally matches.
Several identical facades: marking matters more than speed
When there are many frames, parts are easy to mix up. The profiles look the same, but the actual door sizes may differ.
Assign numbers to the facades
For example: K-01, K-02, K-03. The number is indicated on the drawing, packaging, and the back side of the parts in a safe place.
Mark each side
Use clear notations:
-
T — top;
-
B — bottom;
-
L — left;
-
P — right.
Store as sets
Parts of one frame are stored separately. Corners and trim samples are kept with the set.
Make a test door
First complete one facade: preparation, fitting, cutting, finishing, and installation. After evaluating the result, transfer the technique to the rest.
Don't check only against the first door
Even mass-produced furniture has tolerances, and the old trace could have varied. Each facade needs to be inspected.
What to do with old holes
The hole under the new molding cannot always be left without repair.
The hole is inside a stable zone
If it does not weaken the base, does not fall on the edge of the contact plane, and is covered by the profile, the specialist determines the restoration method.
The hole falls at the edge of the new molding
The edge may remain visible or break during pressing. Repair is needed before installation.
The hole goes outside
The molding will not hide it. You will have to restore the coating or change the frame geometry.
Several holes weakened the MDF
A porous or damaged area cannot be considered a reliable base for glue and fasteners. The condition is assessed by a furniture maker.
What to order together with MLD-004
| What to add to the order or check | Why is this needed | When it is especially useful | Link | ||||||||||||||||||||||||||||||
| MLD-004 | Main profile for the new frame | The trace is confirmed to overlap | Molding MLD-004 15 × 8 mm | ||||||||||||||||||||||||||||||
| Profiles of a different cross-section | Find a wider working surface | MLD-004 is already of the old trace | View all wooden moldings | ||||||||||||||||||||||||||||||
| MLD-004U | Assemble a new decorative corner | Old joints are damaged or the composition is changing | Ready-made corner for the MLD-004 system | ||||||||||||||||||||||||||||||
| OMLD-005 | Compare real profiles | Many frames or complex trace | Wooden molding samples OMLD-005 | ||||||||||||||||||||||||||||||
| TYTAN Prof. Classic Fix | Consider transparent mounting compound | After checking the base and test bonding | Check adhesive for the selected base | ||||||||||||||||||||||||||||||
| Materials for restoration | Remove traces and restore coating | There are chips, holes, and a difference | Selected to match the actual facade and finish | ||||||||||||||||||||||||||||||
| Template and cutting map | Save geometry and quantity | Multiple facades |
ManufacturingPractical scenario: serial cabinet with six doorsThe main difficulty is repeatability. The mark on each door may differ, although the old frame was the same model. You need to:
Buying molding only to the size of the first door is dangerous. Practical scenario: a chest of drawers with small frontsA cross-section of 15 × 8 mm may look convincing on a wardrobe and too massive on a small drawer. Even if the profile overlaps the trace, you need to check the visual scale. The frame must not:
If MLD-004 is too large, the surface is restored and a different profile is chosen. This is a case where technical compatibility does not yet mean a good result. Practical scenario: one damaged cornerSometimes the straight sides are preserved, and the problem is concentrated in one joint. Full frame replacement is not always justified. Options:
You cannot place a single decorative corner MLD-004U only in the damaged area if the other three remain mitered and the project does not imply asymmetry. Practical scenario: facade near the handle or lockThe old molding could run close to the handle, keyhole, or decorative plate. The new profile with a different relief may interfere with grip, touch the handle rosette, or create too narrow a gap for painting. Check:
If the handle is also planned to be replaced, the entire composition is agreed upon first, rather than installing the molding according to the old markings. Practical scenario: paneled doorOn a frame-and-panel facade, the old strip could be located on the flat field between the edge and the inner relief. The new molding must fit entirely within this band. It is not allowed for one edge of the profile to lie on the flat surface while the other falls onto the bevel of the panel. The fit will become uneven. The cross-section template is applied not only to the trace but also to the adjacent relief. Practical scenario: facade with film coatingA film-coated facade requires special caution. The adhesive of the old molding could have pulled the coating, and heat and solvents could damage it even more. If the film has lifted, a bubble has formed, or the edge has peeled off, the new molding should not be used as a means to press down the defect. First, assess the possibility of repairing the cladding itself. Practical scenario: painted door, not a furniture facadeMLD-004 can be used in interior frame compositions, but a door leaf differs from a furniture door in scale, movement, and operating conditions. On a door, the profile experiences vibration when closing, and the trace may be located near the panel or trim. Check:
The article focuses on furniture facades, so the door project requires a separate calculation. Mistakes that leave the trace visibleCompare 15 mm with the old strip and stopThe overall dimension does not confirm the contact width. A drawing and a sample are needed. Measure only one straight sectionThe widest damage is often in a corner or near a joint. Apply a paper strip instead of a cross-sectionThe rectangle does not show rounding and the base. Order a batch without a sampleThe error repeats on all facades, and returning already trimmed and painted parts is impossible. Glue the profile over the old adhesiveThe frame does not fit and leaves gaps. Shift each side separatelyThe rectangle turns into a broken composition. Save old cutsA new section requires a new cutting geometry. Choose beech, oak, or MDF only by priceThe material must match the finish and facade. Consider MLD-004U a universal angleOld dimensions and system may not match. Apply glue without a testThe composition may be incompatible with old paint. Calculate only the perimeterCuts, defects, angles, and cutting map are not accounted for. Do not mark partsPlanks of different doors get mixed up. Trying to hide a deep chip with moldingThe profile does not reinforce the destroyed base. Repainting only the molding without a color sampleThe new enamel differs from the old facade. Ordering the same length for different materialsConfigurations of MLD-004 depend on the material and the card. Not checking the entire row of facadesOne frame looks level, but the top lines on adjacent doors diverge. Taking the old frame as an exact templateOld geometry could be curved. It doesn't always need to be repeated. Leave a visible trace within the frameThe buyer controls only the outer border, while the light stripe remains on the panel side. Consider the sample unnecessary for one doorA single facade can also be expensive or irreplaceable. An error on the only door leaf is no less serious. Who MLD-004 is suitable for frame restorationThe profile should be considered when:
MLD-004 is especially rational when a neat wooden molding for furniture is required, and the old frame had a cross-section close in scale. The profile can be used on a cabinet, dresser, kitchen door, or another prepared surface if the actual fit is confirmed. When it is better to avoid MLD-004Another profile or a full repair is needed if:
Rejecting an unsuitable product is part of a smart choice, not a failure. Sometimes it is better to first restore the coating and then choose a thinner molding. In another situation, it is more advantageous to immediately View all wooden moldings and find a profile with a larger contact surface. Order sheet MLD-004
Such a list helps the manager and the craftsman talk about the same profile. The phrase "need a molding roughly like the old one" contains no data for ordering. Checklist before payment
After that, you can Select MLD-004 from MDF, beech, or oak and place an order without assuming that the profile will "surely cover everything". How to buy MLD-004 on STAVROSIn the product card, you need to check sequentially:
If the profile does not cover the trace, return to the catalog of linear products and compare other cross-sections. Do not choose the next option just because of a larger number — check the working plane again. For a large batch, it is reasonable to perform molding approval based on a physical sample and only then order full-size strips. FAQ: answers before replacing the old moldingWill MLD-004 cover a 12 mm wide mark?It cannot be answered with a single number. You need to determine the actual contact and face area of the profile from the drawing, and then apply the sample to the mark. If the 12 mm wide damage is located asymmetrically or extends beyond the base at the corner, the overall dimension of 15 × 8 mm does not guarantee coverage. Does the cross-section of 15 × 8 mm mean a width of 15 mm?Not necessarily. The numbers specify the overall dimension along two axes, and the installation direction and base are checked against the DWG. For repair, the side that actually lies on the facade is important. Can I measure the old strip instead of the mark?No. Glue, chips, and color differences may extend beyond the boundaries of the old profile. The removed part is used as an additional sample, but the decision is made based on the actual damaged area. How many points need to be measured on one side of the frame?At minimum, the beginning, middle, and end, and for the long side — additional intermediate sections. Each corner is measured separately. The final size is chosen based on the widest defect, not the average value. What to measure at the corners?The maximum width of the damage, old cuts, holes, chips, adhesive differences, and the distance to the facade edges. It is useful to take a separate close-up photo of each corner with a ruler. Can a new molding be glued over old adhesive?Such installation cannot be considered acceptable without preparation. An uneven layer interferes with adhesion and bonding. The old compound is removed using a method compatible with the facade coating, after which the surface is measured again. Is it necessary to repaint the facade?This depends on the width of the trace, the condition of the coating, and the possibility of local restoration. If defects are visible, the color has faded, or the enamel is peeling, a full repaint may be more reliable than local repair. What material to choose for enamel?The card provides for beech under enamel; MDF is also considered for covering solutions after checking the available configuration. The final primer and paint system is agreed upon based on a sample. When to choose oak?Oak is appropriate when visible wood texture and a tinted finish are needed. Its color and porosity are compared with existing furniture on a real sample. Will MLD-004U fit an old frame?Only after comparing dimensions, drawings, and angles. There is no automatic compatibility with the old system, even if the elements look similar externally. Can I keep the old corner elements?Only possible with an exact match of the cross-section, rebate depth, and fit. Visual similarity is not enough. The new molding sample must be physically joined with the old corner. What is better: MLD-004U or a 45° miter cut?The decision depends on the composition and damage. MLD-004U creates an expressive decorative corner, while a miter cut keeps a calmer frame. Both options require new marking. Why is OMLD-005 needed?The set allows you to apply real profiles to the facade, compare the geometry, and see which option covers the mark. This is especially useful before ordering a batch for several doors. Can TYTAN be used on a painted facade?The possibility is determined by a test and the instructions. The old coating must be durable and compatible with the compound. Glue that works well with wood may still adhere poorly to weak paint. How many MLD-004 should I order?Create a cutting map for each side, strip lengths, cuts, angles, and reserve. The net perimeter is not enough. For multiple facades, cutting is calculated jointly. Is the same material needed on all facades?For a uniform color and texture, it is better to use a coordinated configuration. Mixing materials is only possible after color samples, otherwise beech, oak, and MDF will differ under the same coating. Can the molding be replaced on only one door?Yes, if the profile, color, gloss, and geometry match the others. In a row, even a slight difference is noticeable, so the control door is compared with the entire furniture set. How to check the frame for squareness?Measure the sides, margins, and diagonals in one coordinate system. The equality of diagonals is evaluated together with the side lengths and the position of the old trace. What to do if the old trace is wider than MLD-004?Restore the facade, change the frame geometry, or choose a profile with a larger working width. A wide strip cannot be hidden by locally shifting one plank. Can the old hole be covered with molding?Only if the base is restored and the hole does not weaken the mounting area. A simple overlap is not always safe, especially if the hole is near the edge of the contact plane. How to check a profile without buying the entire batch?Print the cross-section at 1:1 scale, make a three-dimensional template, and order a physical sample or set of samples. Check the most damaged area, not the cleanest one. Is it necessary to buy a spare?The reserve is determined by the cutting map, test cuts, defect risk, and the number of facades. There is no universal percentage. Sometimes one additional strip is more rational than a large number of short remnants. Can the MLD-004 be turned the other way to cover a wider strip?The orientation cannot be changed arbitrarily. The profile must be installed in a position corresponding to its cross-section, decorative logic, and method of fit. Any rotation must be checked against the drawing. Can molding be used on a film facade?Only after checking the condition of the film and the compatibility of the adhesive. If the coating has lifted or is peeling, the molding must not be used to mask the defect. What to do if the new frame covers the mark but comes too close to the handle?You need to change the frame size, choose a different profile, or move the handle only after a separate project. A narrow gap is inconvenient for gripping, painting, and cleaning. Is it worth keeping the old frame axis?Yes, if it is geometrically correct and allows full coverage of the damage. If the axis was shifted or the frame is skewed, first compare two scenarios: repeating the old contour and a new straight layout with restoration of the exposed areas. Can I order long slats first and check the sample later?This order increases the risk. The sample is needed before the main batch, especially if the task is to cover a specific trace. After trimming and finishing, the mistake will become more expensive. Where can I see other moldings for furniture?In the category you can buy wooden molding for furniture after comparing drawings, materials, and the actual contact plane. Ready sequence of actions before purchaseTo avoid returning to individual fragments of the article, assemble the process into one sequence.
This process may seem long, but most steps take less time than fixing a single visible strip after installation. A frame without an old trace starts not with glue, but with measurement.MLD-004 is a specific decorative profile with a cross-section of 15 × 8 mm, options in beech, oak, and MDF, and several lengths. It can serve as a neat base for a restored frame on a cabinet, dresser, or kitchen front. But the product does not promise to automatically cover everything left after removal. Before ordering, you need to measure the actual strip, study the cross-section, determine the contact plane, check the corners, clean the front, and apply a sample. If the trace is covered, the material and finish are matched, and a cutting plan is made, you can confidently proceed to purchase. If the profile is for a damaged area, the right solution is to restore the coating or choose a different cross-section. STAVROS company allows you to complete this route within a single catalog: check the MLD-004 card, compare linear footage, order samples, select a corner element, and consider the accompanying mounting compound. An informed choice protects the finished front from a second failed rework. First the actual trace and drawing, then the sample and cutting plan—and only after that order MLD-004. |