Article Contents:
- First, separate the two systems: the cornice works, KPU-006 only decorates the edge
- What is known for sure about KPU-006 and why the size should be read as A × C × L
- The main check is not the distance to the cornice, but the dynamic clearance of the curtain
- Three niche dimensions that need to be taken before ordering
- A 1:1 template gives more information than a visualization
- When KPU-006 does not interfere with the fabric, but interferes with the cornice
- One, two, or three curtain lines: why the same niche gives different solutions
- One row and a light panel
- Tulle and dense curtain on two rows
- Several rows and voluminous draping
- Motorized curtain rod
- Measure only the width of the edge
- Assess the gap with the curtain closed and stationary
- Not checking the end of the track
- Considering two slats as a ready-made cut
- Gluing onto weak paint
- Considering a carved profile as a way to hide curvature
- Highlighting the ornament with contrast before checking the joints
- Close the technical detail "for beauty"
- Can you first glue KPU-006 and then check the curtain movement?
- Do I need to continue KPU-006 on the side ends of the curtain niche?
- What to do if one edge of the niche has access to the runners, and the other is closed by a wall?
- Can KPU-006 be glued onto a removable front panel of the niche?
- Is a third KPU-006 needed for a 3.2 m niche "as a spare"?
- Can the leftover KPU-006 after trimming be used as a color sample?
- What to do if the curtain only touches when the window is open and there is strong air movement?
- Will KPU-006 fit a curved curtain niche?
- Does the KPU-006 joint need to be exactly in the center of the window?
- Can the molding be installed only over the window area, rather than along the entire length of the niche?
- If KPU-006 does not interfere with the curtains, can the installation be considered guaranteed correct?
- Where to look for other options if KPU-006 did not pass the fitting?
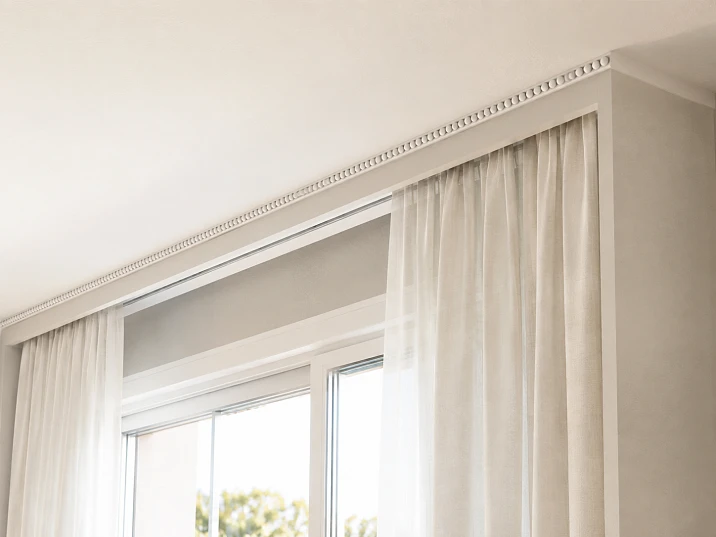
The hidden ceiling cornice is already working: the guide is fixed in the niche, the runners move along the track, and the curtains open and close. But the front edge of the box looks too plain. A logical idea arises — to add a narrow carved line of polyurethane along it, without disassembling the finished structure. For such a task, the carved molding KPU-006 with dimensions A × C × L = 11 × 9 × 2000 mm can be considered.
Direct answer: yes, KPU-006 can be considered for finishing the front edge of a ready-made curtain niche, if after installation it remains outside the working path of the fabric, runners, and the service area of the cornice. Buying the full length based only on a photo of the niche is not worth it. Here, it is not the 11 mm itself that matters, but the entire geometry of the assembly: the position of the track relative to the edge, the depth of the relief, the actual thickness of the folds, the way the curtains open, the presence of multiple rows, access to the stoppers, and the ability to remove the runner or hook after installing the decor.
The length of one strip of KPU-006 is 2000 mm, the material is polyurethane. As of the check on August 16, 2026, the product card shows a price of 3,060 ₽ per piece and an average production time to order of 3–7 days. For a niche 3.2 m long, the arithmetic minimum is two strips: a total of 4 m of material and 6,120 ₽ at the specified price. But before ordering, you need to check not only the total length, but also the cutting, the location of the joint, and the possibility of aligning the carved pattern without an inconvenient short fragment.
Product card: buy carved molding KPU-006 made of polyurethane.
First, separate the two systems: the cornice works, KPU-006 only trims the edge.
In this task, it is especially easy to confuse decorative and functional elements. A hidden ceiling cornice is a system that directly holds the curtains and ensures their movement. Depending on the design, the niche may contain one or more tracks, runners, stops, connectors, fasteners, a motorized system drive, wiring, and sometimes lighting. Each of these components has its own work and maintenance zone.
KPU-006 does not replace the cornice and should not take on the function of a curtain profile. It is a carved polyurethane molding, i.e., a decorative part that, in the scenario under consideration, is proposed to be glued to an existing face edge. Its task is to change the appearance of the niche's outer line: make it more cohesive, add relief, and tie the curtain zone to other moldings in the interior.
This separation of functions provides a simple criterion for a correct decision. Decoration is acceptable as long as it does not impair the operation of the functional system. If, after gluing, the curtain starts to catch on the relief, folds rub against the protrusion, access to the stop is blocked, or the runner can only be removed together with the decorative strip, the finishing is technically unsuccessful, even if it looks visually appealing.
This is especially important for already completed renovations. When a niche is designed from scratch, distances can be planned in advance. In a finished assembly, changing the track position, box width, or niche depth is often much more difficult than abandoning a specific decorative profile. Therefore, the sequence here is the reverse of the usual molding selection: the niche is not adjusted to fit KPU-006, but KPU-006 is only approved for installation after checking the existing niche.
There is also a second important conclusion. Not every free visible edge is a free mounting spot. It may look empty, but directly behind it runs a moving curtain. Therefore, the assessment "there are 11 mm on the edge, so everything fits" is insufficient. You need to look at the assembly in cross-section: the outer plane of the box, the gluing spot, the KPU-006 profile, the niche boundary, the nearest track, and the maximum dynamic dimension of the fabric.




What is known for certain about KPU-006 and why the size should be read as A × C × L
In the current STAVROS KPU-006 card, it is listed as a polyurethane product with size A × C × L = 11 × 9 × 2000 mm. That is, the manufacturer separately designates parameters A, C, and L, rather than just giving three unnamed numbers. The length L is clear for calculation: 2000 mm. The cross-section parameters are A = 11 mm and C = 9 mm.
For a finished curtain niche, this is fundamental. You cannot automatically decide that the first digit in all possible positions of the product is always the "vertical height," and the second is the "protrusion toward the curtain." The actual orientation depends on which side the profile is applied to a specific edge. The card gives designations A and C; for the final fit, it is reasonable to check the product drawing or do a trial fit with a real sample.
Practically, this means the following. For a preliminary check, you can make a rigid template of the cross-section 11 × 9 mm and apply it to the intended mounting spot. But the template must replicate exactly the chosen orientation of KPU-006. If the profile is rotated differently, both which part occupies the face plane and how close the decoration comes to the curtain will change.
| Parameter | KPU-006 | What does this mean for the curtain niche |
|---|---|---|
| Product type | Carved molding | decorative detail, not a working curtain rod |
| Material | Polyurethane | the product is intended for decorative finishing |
| A | 11 мм | one of the cross-section dimensions; checked in the selected orientation |
| C | 9 мм | second cross-section dimension; important for assessing proximity to the work area |
| L | 2000 мм | Length of one plank |
| Price as of 16.08.2026 | 3,060 ₽/pc. | for 2 slats — 6,120 ₽ excluding related materials |
| Production time on order | On average 3–7 days | it is better to place the order after checking the assembly and cutting |
A narrow profile is a strong point of KPU-006 in the task at hand: the profile does not turn the edge of the niche into a massive cornice. But "narrow" does not mean "guaranteed safe." Even a few millimeters can matter if the nearest curtain already passes close to the edge, especially when the fabric gathers into a voluminous fold.
Therefore, before ordering, two different facts need to be confirmed. First: there is a continuous spot on the front plane itself for gluing the profile. Second: after gluing, the relief does not enter the dynamic envelope of the curtain and does not block service access. These checks cannot be replaced by a single ruler applied to the outer side of the box.
Our factory also produces:
The main check is not the distance to the cornice, but the dynamic envelope of the curtain
The position of the guide itself does not yet show whether KPU-006 will interfere. The cornice may be far enough from the edge, but the fabric on the runners does not follow the geometric axis of the profile. It forms folds, shifts during movement, deflects when touched by hand, and gathers into a thicker bundle at the edge when fully open.
Therefore, it is useful to think not in terms of the track line, but in terms of the curtain's working corridor. This is the space that the fabric actually occupies in all normal positions: fully closed, half open, gathered at the wall, passing through the track joint, moving after washing and re-hanging. If there is both a sheer and a dense curtain, the working corridors need to be assessed for each layer separately.
The simplest method is observation on an already installed system. First, fully open and close the curtains several times. Look not only at the middle of the window, where the fabric usually moves calmly, but at the zones where it gathers into a bundle, unfolds, touches the slope or the adjacent panel. Then temporarily attach a template imitating KPU-006 to the front edge. After that, repeat the full cycle.
The check should answer four questions:
-
does the fabric touch the template during normal movement;
-
does the most protruding fold touch it when fully closed;
-
does the bundle of the gathered curtain approach the decor when fully open;
-
Does contact occur if the fabric is slightly pushed by hand toward the edge?
The last point is needed not for an artificial "stress test," but because a real curtain does not move like a rigid plate. It gets brushed during cleaning, with an open window, and when using the windowsill. If the system works only with perfectly still fabric and starts to catch on slight lateral deviation, the gap is too dependent on chance.
There is no need to invent a universal safe clearance figure. It varies for different fabrics, fold types, number of rows, and curtain rod configurations. It is much more reliable to test the specific set at a 1:1 scale. You already have an advantage: the rod and curtains are installed, so a future obstruction can be seen before purchase, rather than calculated from an abstract scheme.
Get Consultation
Three niche dimensions to take before ordering
For KPU-006 on a finished curtain niche, it is useful to measure not one "gap to the curtain," but three independent parameters. They answer different questions and therefore do not replace each other.
The first parameter is a continuous mounting strip on the front edge. Measure the plane along the entire length of the future decorative line. It is important to find the narrowest spot, not the average value. On the box, there may be local differences in putty, a bend in the stretch ceiling fabric, the end of a profile, a drywall joint, an access cover, or a section where the edge becomes narrower.
The second parameter is the distance from the intended outer boundary of KPU-006 to the nearest dynamic dimension of the fabric. It is better to assess this with a template, because a ruler shows static geometry, not actual movement. Look at the most unfavorable section: often it is not the center of the niche, but the edge where the fabric gathers into a dense bundle.
The third parameter is the service corridor. Determine where the stopper is removed, how the runners are extracted, where the connector is, whether there is access to the fasteners, and whether the decorative or technical cover of the rod can be removed. Sometimes the curtain moves freely, but the decor blocks the only service path. Such an installation will not reveal the problem immediately, but at the first need to replace a runner.
| What to measure | Where to measure | Which question it answers |
| Mounting strip | along the entire front edge, especially at joints and near walls | whether there is a base for KPU-006 without sagging and bypasses |
| Dynamic gap | at the nearest curtain in all positions | whether the fabric will catch on the relief |
| Service corridor | at stops, track ends, connectors, and fasteners | whether the cornice will remain serviceable |
If at least one of the three checks fails, increasing the number of slats or changing the joint location will not solve the problem. You need to change the orientation of the decor, move it to another plane, or choose a more compact profile.
There is another useful habit: measuring the edge not only at the beginning and end, but at several points along the entire length. A finished box is rarely absolutely perfect. For narrow ornamental molding, a local unevenness can create a noticeable wave, especially if side light runs along the edge.
A 1:1 template provides more information than a visualization
For this purchase, a mock-up made of cardboard, plastic, or dense foam board is more useful than a pretty render. Its task is not to reproduce the ornament, but to show the actual cross-sectional dimension of KPU-006 at the installation site.
Make a short sample about 150–250 mm long with a cross-section corresponding to 11 × 9 mm. Mark which side models A and which models C. Apply the template to the front edge exactly as the molding is intended to be installed. Temporarily secure it with painter's tape on the outside so that the tape itself does not protrude into the niche and distort the check.
Next, you need not just one look, but a small cycle of tests.
First, close the curtain slowly. Look at the nearest fold as it passes by the template. Then repeat the movement at a normal pace. After that, fully open the fabric and assess the fabric bundle at the wall: it is often thicker than a single fold in the center. If there are several rows, check each one separately and together. If the curtains open from the center, test both edges. If the fabric is asymmetrical, do not automatically transfer the result from one side to the other.
After checking the movement, remove one end runner or perform the operation that is usually done when servicing a specific curtain rod. If the template interferes with your hand, screwdriver, removal of the stopper, or the runner's exit, the decor needs to be shifted or replaced. This stage is often skipped because in everyday use, service access is not visually needed.
Finally, look at the mock-up from usual viewpoints: from the entrance, from the sofa or bed, from the center of the room. Narrow carved molding should work as a neat line, not as a random jagged edge. If the ornament is barely readable from below due to height and shadow, it makes sense to ask yourself a commercial question: does the visible effect justify the purchase and installation at all.
The advantage of a template is that it can lead to both a positive and a negative decision. A good pre-order test does not have to confirm the purchase. Its goal is to prevent a situation where two or three strips have already been ordered, and after gluing it turns out that the curtain regularly catches the relief.
When KPU-006 does not interfere with the fabric, but interferes with the curtain rod
The working trajectory of the curtain is only half the task. The second half is servicing the hidden cornice. In many systems, access is organized from the end: the limiter is removed, after which the runners can be pulled out of the guide. Others have removable elements, connectors, mounting points, or electrical components. The specific scheme depends on the installed product.
If KPU-006 runs continuously along the entire front edge, check whether the decorative strip is positioned opposite the point where you need to bring the tool or remove the part. Pay special attention to four zones:
-
the ends of the guide near the side walls;
-
the joints where two parts of a long track connect;
-
areas with additional fasteners or a service cover;
-
the motor, wiring, and drive, if the cornice is automatic.
With decorative trim, there is a temptation to "finish everything up to the wall" so the line looks continuous. But a technical gap is sometimes more useful than absolute decorative continuity. If service access is needed from one end, it is better to decide in advance how to finish KPU-006 near that area than to cut out a glued fragment after renovation.
Do not glue the molding to a part that itself must be periodically removed if the removal method is not planned in advance. For example, if the front edge is a removable service panel, the decor can increase its dimensions and turn simple removal into a complex one. In such a case, you can finish the removable element itself, but only if it still freely comes off as a whole after adding the profile.
A separate situation is a stretch ceiling and the niche junction. KPU-006 cannot be used as a way to "press down" or accidentally cover the technical part of the ceiling system if it must remain accessible or has its own profile. The decorative strip must be attached to a calculated rigid base, not replace the structural fastening of the ceiling.
Thus, the test "the curtain does not catch" does not yet mean "you can glue." Before purchasing, a second positive answer is needed: the cornice will remain accessible for typical maintenance operations.
One, two, or three curtain tracks: why the same niche yields different solutions
The dimensions of KPU-006 do not change, but the requirements for free space noticeably depend on the curtain configuration. This is a good example of why you cannot transfer a result from one room to another based only on the niche width.
One row and a light fabric
With a single track and a relatively calm fold, the fabric closest to the front edge may have a large clearance relative to the decor. In this scenario, KPU-006 is often easier to check: one dynamic corridor, one fabric bundle, fewer service elements. But even here, a template is needed, especially if the guide is offset toward the outer edge of the niche.
Tulle and a heavy curtain on two rows
Here, the outer row may run noticeably closer to the front edge. The inner tulle does not pose a problem, but the heavy curtain does. Checking only the fabric nearest the window is pointless: the critical row is the one located closest to the future molding.
Multiple rows and voluminous draping
The more fabric and the more complex the fold, the less useful an assessment along the track axis becomes. The fabric occupies volume, adjacent rows affect each other, and when opened, a dense bundle forms. If curtains are already installed, this is not a reason to abandon the decor, but an opportunity to check the actual configuration without assumptions.
Motorized curtain rod
An automatic system introduces an additional criterion: access to the drive, connections, and wiring. KPU-006 may not touch the fabric at all, but it can become inconvenient if its continuous line covers the place where the motor or cover is removed. In such a node, the decor is designed around the service logic of the equipment.
| System | Main risk | What to check with the template |
| 1 row | local fold touch | fabric movement and package at the wall |
| 2 rows | outer row closer to the edge | both curtains separately and simultaneously |
| 3 or more rows | total fabric volume | outermost row and access to tracks |
| Motorized curtain rod | equipment service | removing the drive, access to wiring and end faces |
None of these scenarios require a "universal safe gap" in millimeters. The solution is determined by the actual system. This makes the article useful precisely after installation: instead of theoretical selection, you check the existing mechanics.
For a 3.2 m niche, two strips are needed, but the cutting must be done before payment
With length, the calculation is simple. One KPU-006 has L = 2000 mm. If the decorative line must run exactly 3200 mm, one strip is physically short.
3200 / 2000 = 1,6.
Rounding goes up to a whole number of items: arithmetically, 2 strips are needed. Their total length is 4000 mm, meaning after covering the route, 800 mm of source material remains before accounting for trimming and pattern matching.
At a price of 3,060 ₽ per piece, the cost of two strips at the time of check is:
2 × 3 060 = 6 120 ₽.
This is the correct calculation of quantity by length, but it is not yet a ready cutting map. Carved molding differs from a completely smooth strip in that at the joint, not only geometry matters, but also the visual continuation of the ornament. The KPU-006 card confirms the product length, but the data used does not include a confirmed pattern repeat step, so it cannot be promised in advance that an arbitrary 1200 mm segment will join with a whole two-meter strip without additional pattern adjustment.
There are several reasonable layout schemes. For example, the joint can be placed not at the very edge, but in a less noticeable area. The trimming can be distributed between two ends if the pattern and niche architecture allow. Sometimes it is visually better to make the joint along the axis of the opening; sometimes, on the contrary, the center is the most noticeable place and it is better to shift the joint. There is no universal answer without seeing the ornament and the actual length.
What definitely should not be done is to start gluing a whole two-meter strip from the left wall, and then automatically cover the remaining 1200 mm with the first piece that comes to hand. Before applying glue, lay out both strips, mark the 3200 mm line, and select the joint location according to the pattern. If for quality matching you have to noticeably shift the cut, check whether the available 800 mm of total remainder is sufficient.
Therefore, the formulation for purchase is this: for a straight line of 3.2 m, two KPU-006 strips are the mathematical minimum and provide sufficient total length; final sufficiency is confirmed after laying out the ornament and trimming.
If the niche is longer, has side returns, or the molding is planned not only along the front, each actual section must be calculated, not the window width. First, a route is drawn up, then cutting is done according to two-meter products, and only after that the quantity.
Where to place the joint so it doesn't become the main element of the edge
A narrow decorative line is perceived as a whole, so an untidy joint can be more noticeable than the ornament itself. In a curtain niche, there is an additional complication: a person looks at it from below, and side light from the window or backlighting can emphasize the depth difference.
Before cutting, place two KPU-006 pieces side by side on a flat surface and find sections of the pattern that naturally continue each other. There is no need to assume that the geometric center of the niche is automatically the best place for the connection. First, determine where the edge is most often visible.
If the niche is located opposite the entrance, the central joint may fall directly on the axis of view. If the curtains are usually closed, part of the line may visually get lost against the background of folds. If there is backlighting, the most sensitive area is where light slides along the relief and creates a long shadow. It is better to move the joint away from such a place if the pattern layout allows.
A technically good joint must solve three tasks at once: maintain a straight base line, not create a step on the front surface, and not break the pattern with an obvious cut-off. Therefore, two segments are first dry-fitted. Glue should not be the first tool for adjustment.
Separately check the edge of the box itself for straightness. If the base has a wave, two precisely joined strips may diverge on the plane after pressing. This is especially noticeable on a long line. Local preparation of the base before installation often gives a cleaner result than trying to compensate for the difference with a thick layer of glue.
The remainder after cutting is not necessarily waste. It can be saved for test painting, testing glue on a similar surface, or future local repairs. But planning a separate visible section from a short remainder in advance is only worth it when the ornament and the connection are truly suitable.
Installation on an already painted edge: the weak point may not be the glue, but the finishing layer
When the niche is already finished, KPU-006 often has to be glued not to "raw" drywall or plaster, but to a final painted surface. In such a situation, the entire adhesion chain must be assessed: molding → glue → paint → primer/putty → base. If the paint holds poorly, a strong mounting compound will not fix the weak lower layer.
Before starting work, inspect the edge. It should be free of peeling paint, chalky residue, construction dust, greasy stains, and loose areas. Pay special attention to the ends of plasterboard boxes: they may look even on the outside, but locally have chips in the putty or damage after installing the cornice.
In the KPU-006 card, among related products, KUDO "Kleit Vse" HIGH TACK mounting adhesive is listed. On the page of this adhesive, STAVROS indicates a consumption of up to 16 linear meters when applied in a single line. This is a useful reference for the assortment, but the choice of compound should still take into account the specific finish of your edge and the instructions of the adhesive itself. Do not transfer the application method of one compound to another.
On a finished niche, it is useful to first do a small test on an inconspicuous area or a separate sample. Its purpose is to check not only whether it "stuck," but also what happens to the finish paint after load. If, when tearing off the test element, the paint comes off in a layer with the base, the problem lies below the adhesive joint.
During installation, the cornice and fabric must be protected from adhesive, dust, and subsequent painting. It is more practical to remove the curtains if this can be done easily without risk to the system. If they cannot be removed, the fabric is pulled aside and covered so that it does not touch fresh adhesive or primer. The track is also protected: material that gets into the working path can impair the movement of the gliders.
Do not try to use the KPU-006 itself to level a severely curved edge. The narrow profile will either follow a noticeable wave in the base or come off in places. First correct the plane, then install the decor.
Painting KPU-006 to match the color of the box or making it an accent
A curtain niche has a feature: the decorative line is located high and is often visible at an acute angle. Therefore, color affects not only the style, but also how well the relief is read.
The calmest option is to paint KPU-006 in the same color as the face edge. Then the carved pattern is revealed mainly through shadows, and the profile itself looks like part of the box's architecture. This approach is especially logical if the room already has many decorative details and the new line should complete the niche rather than compete with the curtains.
A contrasting color makes the 11-millimeter strip more noticeable. This can be justified when you need to tie the edge to other decor: for example, painted moldings, hardware, or a dark ceiling accent. But contrast simultaneously emphasizes all joints and possible unevenness of the line. The stronger the color difference, the more important the quality of cutting and the straightness of the base.
There is also a third option—a slight tonal difference within the same color scheme. It allows the ornament to be read up close but does not turn the narrow edge into a graphic stripe. This option should be checked with a test paint on a leftover piece of material, because a small sample in hand and a two-meter line under the ceiling are perceived differently.
If you paint the product after gluing, you need to especially well cover the track and curtains. For a narrow edge, it is often more convenient to do the main preparation and painting of the decor before installation, and after installation carefully finish the joint and cut areas. The specific finishing technology depends on the chosen coating; you should follow the recommendations for finishing polyurethane decor and the paint manufacturer.
Finally, do not evaluate the color only with general lighting on. Look at the edge during the day when light comes from the window from below and from the side. It is this kind of light that often most strongly reveals the relief and joints.
Lighting in a niche changes the requirements for relief and line cleanliness
If there is already LED lighting inside the hidden cornice, KPU-006 needs to be checked with the light on. The light fixture can change both the visual effect and the functional geometry.
The first question is whether the profile blocks the light output. Narrow molding takes up little space, but if the tape or lighting profile is located directly at the front edge, even a small additional relief can change the light pattern. Instead of even lighting, you will get a harsh shadow strip or a repeat of the ornament on the adjacent surface. Sometimes this is beautiful, sometimes it looks like a random defect.
The second question is the visibility of joints. Sliding light along a carved profile makes micro-differences more noticeable. Therefore, with lighting, dry layout, a level base, and careful finishing of the joint are especially important.
The third question is maintenance of the lighting itself. If the block, profile, or wiring is accessible through the front part of the niche, the decorative line should not turn their replacement into destructive dismantling. For a finished system, first find out how the tape is changed or the diffuser is removed, and only then plan continuous decor.
The check is simple: temporarily install the KPU-006 template, turn on the lighting in evening mode, and look at the line from usual points. Then make sure the template does not obstruct access to the lighting elements. This test answers both aesthetic and technical questions at the same time.
If the effect turns out too "fragmented," the solution is not necessarily to abandon all stucco. You can choose a calmer profile without a pronounced ornament in the polyurethane moldings section, or leave the edge smooth altogether. In the hidden light zone, the absence of additional decor sometimes looks better than relief that creates an unwanted shadow.
When KPU-006 fits especially well, and when the purchase is questionable
The scenario is successful if the front edge already has a smooth rigid surface, there is space around the cornice, the curtains do not approach the future profile even when gathered, and track maintenance is performed without interfering with this edge. Then KPU-006 provides a thin ornamental line without restructuring the niche.
Another good scenario is an interior where polyurethane molding decor is already used, but a large ceiling cornice around the curtain area would be excessive. Trim with a small cross-section can connect the niche with existing details without taking away the curtains' role as the main vertical element.
The purchase is questionable if the nearest curtain already periodically touches the front edge without decor. Adding relief will reduce the existing clearance. In this case, one cannot rely on the soft fabric to "move away on its own": constant friction can hinder movement and soil both the fabric and the protruding parts of the decor.
A niche where the only access to stoppers or runners is located directly behind the future strip is also not a good candidate. Leaving a technical system unmaintained for the sake of a continuous ornament is unreasonable.
Separately, KPU-006 should be rejected if the mounting strip is too narrow or uneven and part of the profile would have to be effectively suspended over a void. A narrow decorative detail requires a proper base along the entire gluing line.
Finally, there is a purely visual rejection. If, when testing from the floor, the 11-millimeter line is barely readable, and the niche is high and always covered by heavy curtains, the cost of material and installation may not yield a noticeable result. In this case, an empty smooth edge is not a "flaw" but a complete solution.
| Situation | Decision on KPU-006 |
| Curtain far from the edge, track serviced from the other side | good candidate after testing |
| Outer row passes close, but the template does not touch the fabric in all modes | possible, check stock and curtain package |
| The fabric already touches the edge without decor | better not to add a protruding profile |
| Behind the edge there is a stop or service node | first preserve access; continuous line is not a priority |
| The base is loose or paint is peeling | first repair the base |
| The ornament is not visible from the usual point | assess whether a purchase is needed at all |
A commercially correct solution sometimes ends with rejecting the product. For an already finished unit, this is better than buying two strips and then reworking the curtain system.
If 9 mm on parameter C turn out to be excessive: what to look at instead of KPU-006
If a fitting reveals a conflict, it is not necessary to abandon the idea of a decorative line. You can change the type of finish itself.
The first alternative is another carved molding with a smaller cross-sectional dimension in the critical direction. For example, in the current STAVROS assortment, KPU-034 has dimensions A × C × L = 10 × 6 × 2000 mm. This does not automatically mean compatibility with your niche: it also needs to be oriented and fitted. But its parameter C is smaller, so this profile makes sense to compare if the approach to the curtain was the reason for rejecting KPU-006.
The second alternative is a regular polyurethane molding without a pronounced carved pattern. A smooth or more subdued line may have a different cross-section, less visual activity, and simpler joining. Selection is made not by category name, but by the actual drawing of a specific profile. You can view options in the section buy polyurethane moldings.
The third alternative is decor not on the front edge, but on the adjacent fixed plane. Sometimes moving the line a few centimeters outward completely removes it from the curtain working area. But this is already a different composition: instead of finishing the niche end, you get a ceiling or wall line that needs to be evaluated together with the rest of the architecture.
The fourth alternative is not to add a profile. If the edge is smooth, painted, and visually clean, the absence of molding may be the best option for a modern interior. Especially when the main decorative work is done by the curtains themselves, lighting, or wall panels.
For a broader selection, you can go to the section Buy polyurethane trim. The point of going there is not to find an "almost identical" product, but to compare cross-sectional dimensions, pattern, and length of items with the real constraints of your niche.
Why the front edge must be level along its entire length, not just at the measurement point
The KPU-006 profile is narrow, and that is why a long base wave can be more noticeable than on a massive cornice. On an edge 3.2 m long, a small deviation turns into a visually readable arc, especially if the nearby ceiling horizontal remains perfectly straight.
Before installation, apply a long straightedge or a level batten to the front surface. Look not only for pits and bumps, but also for local paint runs, putty "steps" at sheet joints, and damaged corners. Carved relief does not automatically mask the geometry of the base. It can distract the eye from a minor surface defect, but the line of its upper and lower edges will still show the wave.
The joints between two slats are especially sensitive. If one half is glued to a slightly more protruding surface, a depth step appears at the joint. It cannot be completely corrected by merely aligning the pattern. Therefore, the area of the future joint should preferably be chosen on a stable section of the edge.
There is a practical order: first check the surface and prepare it if necessary; then perform a dry layout; after that, determine the joint and trimming; and only then glue. Rearranging these steps often leads to having to fight with the geometry already on the decorative product.
If the edge itself has a deliberate radius or noticeable curvature, a straight KPU-006 cannot automatically be considered suitable. The presence of polyurethane as a material does not mean that a specific carved profile is designed to bend to your radius. For a curved niche, a separate check of the permissible bending of the specific product or a different type of finishing is required.
How not to ruin finished curtains during installation and finishing
The repair risk here is unusual: decorative work is performed next to already functioning textiles and precise track mechanics. This means that preparing the work area is more important than the speed of gluing.
If the design allows, it is better to temporarily remove the curtains. This opens access to the edge, allows you to see the track, and prevents accidental contact of the fabric with glue, primer, or paint. Removal makes sense only when you know in advance how to return the runners and hooks; this is why service access is checked before installing KPU-006.
If the panel remains in place, it should be moved away from the work area and completely covered with protective material. You cannot rely on the fact that "the glue is applied in a thin line and nothing will drip." On a long route, there is always trimming, moving parts, and pressing, and the carved profile requires careful joint treatment.
The curtain rod track is protected separately. Dust from surface preparation and remnants of finishing materials must not get into the runner path. After completing the work, remove the protection
Post-installation check: what should remain unchanged after a day, a week, and after removing the curtains
The finished curtain niche has another level of verification that is not visible at the moment of gluing. A decorative profile is considered successfully installed not when it is simply glued evenly, but when, after completion of the work, all previous functions of the assembly are preserved. It is useful to check this immediately after finishing and again during normal use.
The first checkpoint is the free movement of the runners along the entire length. After removing the protection, run the curtains several times from one extreme position to the other. Listen not only to the sound of the track, but also to the sound of the fabric: a light periodic rustling against the relief may be the first sign of contact that is not visible from the floor. If contact occurs in one place, compare it with the local bend of the edge, the KPU-006 joint, or the position of the nearest curtain rod mounting.
The second point is the position of the fabric after re-hanging. Even if the curtain did not touch the template before installation, after washing, removal, or rearranging the hooks, the folds may gather slightly differently. Therefore, the system should have not a random zero clearance, but a normal actual margin, confirmed by movement. If the decorative line is safe only in one perfectly aligned hook position, the solution is too sensitive to maintenance.
The third point is the joint of two strips. After final finishing, it is assessed not from a distance of 20 cm, but from the usual viewing point. On the ceiling edge, a microscopic connection line may be acceptable if it does not create a step and does not destroy the ornament. Trying to make the joint completely invisible with an excessive layer of finishing material sometimes gives a worse result: the relief around the connection loses clarity and turns into a smooth spot.
The fourth point is the ends of the decorative line. If KPU-006 ends before the service area, the ending should look deliberate. An uneven short "tail" near the wall is perceived as a cutting error, while a cleanly trimmed edge with a clear technological indentation looks like part of the structure. The precise finishing of the end depends on the profile and the project, so it is not worth promising a universal cutting method in advance without viewing the cross-section.
The fifth point is access after final painting. Masking tape, joint sealing, or the finishing coating should not accidentally "glue" the removable service cover to the adjacent surface. If there is an opening element nearby, perform its dismantling after all finishing operations are completed, not just with the rough template.
The sixth point is the cleanliness of the relief. KPU-006 has a carved pattern, and the curtain area is where fabric constantly moves and air from the window circulates. Dust is more noticeable on the relief than on a smooth painted edge. Before purchasing, it is worth assessing access for regular dry cleaning: if the molding ends up deep inside a narrow niche and cannot be reached without removing the curtains, the decorative effect carries an operational cost that is better understood in advance.
The seventh point is the seasonal change of textiles. In summer, a light set may hang in the room, and in winter, a denser one. If such a replacement is planned, the template should be checked with the most voluminous of the actually used curtains. Otherwise, KPU-006 will pass the test with tulle but end up in the path of the winter drape. The same applies to replacing a regular gather with a more voluminous tape: it is not the cornice that changes, but the actual dimensions of the fabric.
The eighth point is the window in ventilation mode. For a niche next to an opening sash, air movement can regularly deflect light fabric outward. If this happens in normal life, such a situation should be considered standard, not accidental. Contact with the carved edge during every ventilation session is sufficient reason to change the solution.
These checks do not require special instruments. They simply move the assessment of the decor from the category of "fits on the edge" to the category of "did not change the operation of the finished system." For a hidden cornice, it is the second criterion that matters more.
Mistakes that make a suitable KPU-006 an unsuccessful purchase
Measure only the edge width
The error occurs when the buyer sees a free front strip and compares it with only one profile size. The consequence is that the KPU-006 physically fits on the base but ends up too close to the fabric. This can only be avoided by simultaneously checking the mounting strip and the dynamic corridor of the curtain.
Assess the gap with a stationary closed curtain
In the closed state, folds may lie calmly, but when opened, they can gather into a much more voluminous bundle. If the test is performed only in one position, the conflict will appear after installation. A full opening and closing cycle is needed.
Not checking the end of the track
In the center of the niche everything works, but at the end there is a stopper that can no longer be removed. The solution is to perform a real service operation before gluing and determine where access needs to be left.
Considering two planks as a ready-made cut
Two planks do indeed cover 3.2 m in total length, but the joint location and pattern remain a separate task. The error leads to an accidental break in the ornament or a short noticeable extension. A dry layout of both planks is needed before cutting.
Glue onto weak paint
The mounting compound holds, but the finish layer peels off with it. The reason is a weak substrate in the adhesion chain. Before work, check the strength of the coating and eliminate peeling areas.
Consider a carved profile as a way to hide curvature
If the box is wavy, KPU-006 repeats or emphasizes the line. Trying to level everything with glue creates uneven fit. First, fix the base.
Highlight the ornament with contrast before checking the joints
Contrast painting enhances not only the pattern but also geometric defects. First, assess the quality of the line and joints, then decide how strongly to emphasize it with color.
Hide a technical detail "for beauty"
The error is especially unpleasant in motorized and complex systems. The decor looks finished until repair is needed. The correct priority is the opposite: maintainability is preserved, and the decorative layout adapts to it.
Practical algorithm: from the finished cornice to ordering KPU-006
This task is convenient to go through in a strict sequence. It takes less time than redoing already glued decor.
Step 1. Fix the actual route. Measure only the front edge you really want to finish. Do not automatically add side returns if KPU-006 is not planned there.
Step 2. Inspect the base. Check that the edge is rigid, even, continuous, and without peeling finish.
Step 3. Clarify the profile orientation. Use the card notations A = 11 mm, C = 9 mm, L = 2000 mm. Do not substitute A and C with the words "width" and "protrusion" until you have determined the actual fit on your surface.
Step 4. Make a 1:1 template. The short mock-up should replicate the selected cross-section and orientation.
Step 5. Check the fabric movement. Run each panel along the entire length, including into the gathered position. For multiple rows, check them separately and together.
Step 6. Check maintenance. Remove the stop or slider as intended by your system. Ensure that future decor does not block access.
Step 7. Check lighting and technical elements. If present, turn on the light and determine how the tape, profile, drive, and wiring are serviced.
Step 8. Calculate the quantity. For a straight section of 3200 mm, use the minimum calculated above — 2 slats of 2000 mm each; no need to recalculate the same route.
Step 9. Plan the joint layout. Before purchasing, it is useful to at least determine the desired connection zone; after receiving the material, perform a dry alignment of the pattern before cutting.
Step 10. Assess the visibility of the result. Look at the template from the floor. If the effect is too subtle, you can stop before ordering.
Step 11. Choose mounting and finishing materials for your base. Card KPU-006 shows the accompanying mounting adhesive, but compatibility with a specific paint or surface must be checked separately.
Step 12. Only after this, place your order. For the niche in question of 3.2 m, you can order 2 strips KPU-006 11 × 9 × 2000 mm, if all functional tests are passed.
This order protects against two opposite mistakes: buying an unsuitable profile or, conversely, rejecting a good solution only because of uncertainty that can be easily resolved with a template.
What to buy for a 3.2 m niche and what budget to consider before installation
If after trying KPU-006 it does not interfere with the curtain and maintenance, the basic product part is simple: 2 strips of 2000 mm each. As of August 16, 2026, the price of one strip in the product card is 3,060 ₽, so the material for the decorative line amounts to 6,120 ₽.
This is exactly the cost of two KPU-006, not the full work budget. Separately, mounting adhesive, materials for base preparation, primer, and finishing coating may be required. Their quantity depends on the condition of the edge and the chosen technology. Do not add a conditional "standard percentage" to the cost without understanding the scope of work.
If after the template it turns out that parameter C in the chosen orientation creates a conflict, instead of buying "just in case," proceed to comparing other profiles. You can view alternatives in the section Buy polyurethane trim. If a calmer non-cut contour is needed — in the section buy polyurethane moldings.
If KPU-006 is suitable and this exact pattern is needed, the product card remains the most direct next step: buy carved molding KPU-006 made of polyurethane.
For a project where polyurethane decor and decorative molding are used not only in the niche but also in other areas of the room, it is more useful to first see the overall range of polyurethane products: You can buy ready-made stucco matching the Baroque style. Calculate the quantity: linear meters of cornices and moldings, number of rosettes, pilasters, consoles, corner elements. Add a ten to fifteen percent allowance for trimming.This helps avoid assembling a ceiling composition from random individual elements.
The commercial outcome here must be specific. For 3.2 m, two strips are the correct arithmetic minimum. But they should only be purchased after three positive answers: the profile fits on the edge, the curtain does not come into contact with it, and the cornice remains serviceable.
Result: can KPU-006 be installed on the front edge of a hidden cornice
Yes, if KPU-006 is installed on a rigid, flat front surface and remains outside the dynamic clearance of the curtains and the service zone of the cornice after installation. The mere fact that the profile has cross-sectional dimensions A = 11 mm and C = 9 mm does not replace a fitting: on the finished object, the specific orientation and actual fabric trajectory must be checked.
The most reliable pre-order check is a 1:1 template. It should simulate the 11 × 9 mm cross-section in the chosen seating. With the template, fully open and close all panels, check the curtain stack at the wall, access to stops and runners, and the operation of lighting or a motorized drive, if present. If no function is degraded, the decorative line technically makes sense.
For a straight edge 3.2 m long, a minimum of 2 KPU-006 strips of 2000 mm each is required. At a price of 3,060 ₽/pc., this is 6,120 ₽ for the linear material itself at the time of checking. Before cutting, the two strips are laid out dry and the joint location is chosen considering the carved pattern; a random 2000 + 1200 mm connection should not be considered a finished aesthetic solution.
If the profile comes too close to the fabric, blocks maintenance, or creates an undesirable shadow from lighting, the correct result of the check is to choose different linear material, a calmer molding, or leave the edge without additional decor. For an already installed hidden cornice, functionality is more important than the continuity of the ornament.
FAQ
Can KPU-006 be glued first and then the curtain movement checked?
Technically, physically, this is possible, but for a finished niche, the order is unreasonable. After gluing, the check ceases to be pre-order and becomes a test of the finished finish. If the curtain catches the profile, you will have to either change the position of the fabric or cornice, or dismantle the decor. A short 1:1 template allows you to obtain the same information without risk to the surface.
Is it necessary to continue KPU-006 on the side ends of the curtain niche?
Not necessarily. The side return is a separate section of the composition. If the profile looks complete from the front, and turning to the side leads to a stop, wall, or curtain bundle, it is better to finish the line on the front part. Continuing the pattern just for the sake of the principle "go around the entire box" is not necessary.
What to do if one edge of the niche has access to the runners, and the other is closed by a wall?
The service edge must be preserved. Before laying out KPU-006, find out how much space is required to remove the stop and pull out the runners. The decorative line can be finished earlier, form a technically justified gap, or choose installation on a removable element — depending on the cornice design. The only serviceable end cannot be closed.
Can KPU-006 be glued onto a removable front panel of the niche?
This option can be considered if the panel itself remains removable after adding the decor, and its increased size does not interfere with dismantling. This should be checked with a template: temporarily add an equivalent of 11 × 9 mm and try to remove/install the front part with the same movement used during maintenance.
Is a third KPU-006 needed for a 3.2 m niche "as a spare"?
By net length, two strips give 4 m, meaning for 3.2 m there is 0.8 m of original spare. Automatically buying a third one just based on a universal percentage is not required. But the final quantity depends on the actual pattern matching, defects, side sections, and the chosen layout. First, make a cutting map for the two strips. If it does not work out without an undesirable seam or additional sections, then the third element becomes justified, not just "insurance."
Can the leftover KPU-006 after trimming be used as a color sample?
Yes, this is a practical use of the leftover. On it, you can test the primer and finish coating, compare the box color and a contrasting option, and also evaluate how the relief looks under side light. Such a sample is more useful than experimenting directly on an already glued two-meter line.
What to do if the curtain only touches when the window is open and there is strong air movement?
This is still a functional contact. If an open window is a normal operating mode for the room, it should be included in the check. You can change the position of the decorative line, choose a profile with a smaller critical dimension, or abandon the protruding relief. A solution that only works in completely still air does not match the real room scenario.
Will KPU-006 fit a curved curtain niche?
You cannot make such a conclusion from the single characteristic of "polyurethane." For carved molding, the design of the specific profile and the allowable bending radius, if any, are important. If the front edge has a radius, you need to separately confirm the possibility of bending KPU-006 according to the drawing or with the manufacturer. For a straight card strip, you cannot promise safe installation on a curved surface without such confirmation.
Do I need to make the KPU-006 joint exactly in the center of the window?
No. The center is just one of the options. The joint location is chosen based on the pattern, base quality, light direction, and viewing points. Sometimes a central joint is symmetrical and barely noticeable; sometimes the center is the most visible spot, and the joint is better shifted. First the layout, then the cutting.
Can the molding be installed only on the section above the window, not along the entire length of the niche?
Yes, if such a finish looks intentional and does not create random breaks. But this is no longer "finishing the entire front edge," but a local decorative insert. Its boundaries should ideally be tied to the architecture: slopes, piers, the window center, or another element of the composition. Functionally, a local section is sometimes even more convenient because it leaves service areas open.
If KPU-006 does not interfere with the curtains, can the installation be considered definitely correct?
No. Free movement of the fabric is only one criterion. You also need to check the strength of the base, curtain rod maintenance, the ability to work with lighting or a motor, joint quality, edge straightness, and the actual visibility of the decor. A correct purchase passes all these checks together.
Where can I look at other options if KPU-006 did not pass the trial?
First, determine the cause of the rejection. If the issue is with the size or pattern, compare other products in the section polyurethane molding. If a calmer contour is needed, compare polyurethane moldings by their actual cross-section. If the task has expanded to designing the entire ceiling, the section is useful for polyurethane ceiling decor.