Article Contents:
- Chandelier as a system: what to evaluate before choosing a rosette
- Rosette for a horn chandelier: balancing classic and scale
- What is a horn chandelier from a decorative perspective
- Which rosette is suitable for a horn chandelier
- Horn chandelier in a modern interior
- Rosette for a pendant chandelier: lightness as a principle
- What is a pendant chandelier
- The logic of a rosette for a pendant
- Three or four pendants in one group
- Socket for a flat light fixture: technique matters more than decor
- What is a flat light fixture
- The gap problem
- What to check before buying a socket for a flat light fixture
- Smooth socket for a flat light fixture
- Socket for a modern chandelier: honesty of form
- What is a modern chandelier
- What this means for the socket
- Modern chandelier and "accidental classic"
- Socket for a classic chandelier: decor as a system
- Classic chandelier and its ceiling requirements
- Relief socket for a classic chandelier
- Cornice and moldings as part of a classic system
- Special types of chandeliers: what else you need to know
- Socket for a crystal chandelier
- Socket for a chandelier with fabric shades
- Socket for a wrought iron chandelier in country style or wrought iron pendant
- Socket for a ring chandelier (LED ring)
- Universal table: chandelier type — socket type
- How to choose the diameter of a ceiling rosette for a chandelier: algorithm
- What to check before buying: technical checklist
- What to buy together with a ceiling rosette for a chandelier
- Minimum set
- Extended set
- Five scenarios: ceiling rosette for a chandelier in real interiors
- Installing a ceiling rosette for a chandelier: key points
- Frequently Asked Questions
- About the Company STAVROS
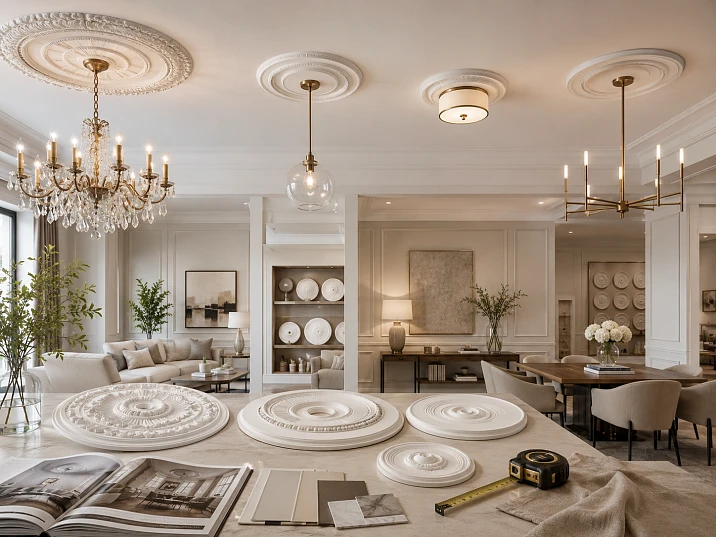
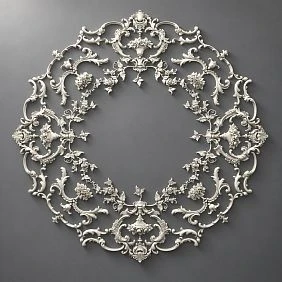
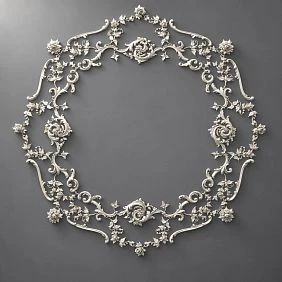
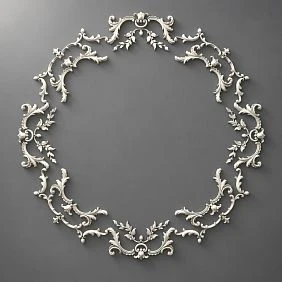
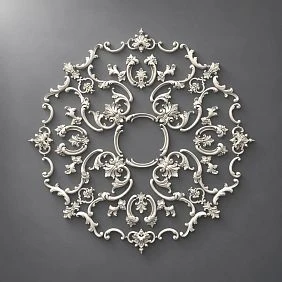
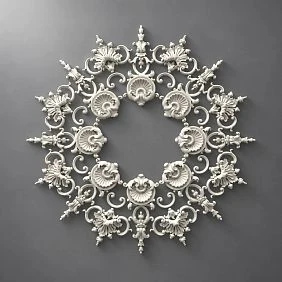
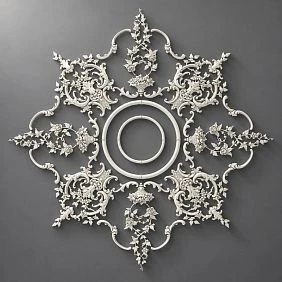
A polyurethane ceiling rosette for a chandelier should be chosen not only for beauty but also according to the type of light fixture: a multi-arm, pendant, flush, classic, and modern chandelier require different diameters, reliefs, shapes, and installation logic. This is not an abstract rule — it is a practical guide that prevents mistakes. Let's break down each type of light fixture separately and in detail.
The chandelier as a system: what to evaluate before choosing a rosette
Before opening the rosette catalog, you need to carefully look at the chandelier. Not at its photo on the internet — but at the actual light fixture that is already hanging or that you are going to hang.
What exactly is evaluated?
Lamp shape. Vertical, horizontal, volumetric, flat, asymmetrical? The shape determines which rosette visually "holds" it.
Base or "cup" diameter. The diameter of the decorative cap that covers the mounting point is the starting point for choosing the rosette diameter.
Lamp height. How far does the chandelier "descend" from the ceiling? A flat lampshade 5 cm from the ceiling follows one logic of selection. A multi-tiered structure 70 cm long follows a completely different one.
Visual weight. Is the chandelier visually massive? Does it have volume, complexity, decorative richness?
Style and material. Crystal, frosted glass, metal, rustic wood — each material "speaks" in its own way. The rosette should speak the same language.
Mounting method. Hook, mounting plate, pipe — this affects the size of the rosette's central hole.
Only after evaluating these parameters can you consciously choose a polyurethane rosette for the chandelier. Otherwise — a blind purchase.




Rosette for a multi-arm chandelier: a balance of classicism and scale
Our factory also produces:

What is a multi-arm chandelier from a decorative perspective
A multi-arm chandelier is a classic in the truest sense. Several arms extending from a central body, each holding a lamp or shade. The diameter of such a chandelier can range from 40 to 100 cm or more. It occupies horizontal space, 'spreading out' to the sides. This is a chandelier with character — voluminous, expressive, with a clear decorative presence.
Multi-arm chandeliers come in classic styles (bronze, gold, crystal, stucco details), neoclassical (matte nickel, clean forms, delicate decor), country/Provencal (wrought iron, rustic texture), and Art Deco (geometric arms, brass, amber glass).
Get Consultation
Which ceiling medallion suits a multi-arm chandelier
A multi-arm chandelier already 'speaks' through its horizontal spread. Its arms create a circular motion around the center. The medallion should support this center — creating an architectural 'core' for it.
Shape: round — without a doubt. A multi-arm chandelier always has circular symmetry, and a round medallion perfectly matches this logic.
Diameter: guideline — 60–80% of the chandelier's diameter. If the chandelier is 60 cm in diameter, the medallion should be 360–480 mm. The medallion should not extend beyond the arms — otherwise it 'flattens' the chandelier. But it should not be lost under the central body of the fixture.
Relief: moderate. A multi-arm chandelier is itself decoratively active. A rich acanthus relief under a multi-arm classic chandelier risks overload. A laurel wreath, delicate leaves, concentric profile bands — these are the right choice.
Painting: white to match the ceiling. For a chandelier with gold fittings — delicate gilding of the relief details. This creates a 'bridge' between the medallion and the fixture.
What to check: the diameter of the chandelier's decorative 'cup'. It covers the mounting point — and the medallion frames it from the outside. The central hole of the medallion should be slightly larger than the cup or match its diameter.
Horn chandelier in a modern interior
If a horn chandelier is chosen as a "classic accent" in a modern space — the rosette should support this accent delicately. A smooth or softly embossed ceiling rose under the chandelier with a clean profile ring is the right solution. It does not overload the modern ceiling but creates a "finished look" for the classic light fixture.
Rosette for a pendant chandelier: lightness as a principle
What is a pendant chandelier
A pendant chandelier is a light fixture on a cable, cord, thin pipe, or rod. It can be small and minimalist (a single shade on a cord) or large and designer (several shades on cables in one group). The main characteristic of a pendant chandelier is its lightness. Even a large pendant is visually perceived as "floating" — because the attachment point to the ceiling is intentionally minimized.
This creates special requirements for the rosette.
The logic of the rosette for a pendant
If a pendant chandelier is intentionally "light" — a heavy decorative rosette destroys this logic. It "grounds" what should float. This does not mean the rosette is unnecessary — it is needed to cover the attachment point. But it should not be "more important" than the light fixture itself.
Shape: round — for most pendants. If several pendants are arranged in a row — an oval rosette along the axis of their arrangement.
Diameter: small or medium. The diameter of the decorative "cup" of the pendant is often small — 50–80 mm. A canopy with a diameter of 240–340 mm creates the right proportion: noticeable enough to be present, modest enough not to overpower the light fixture.
Relief: low or smooth. For a modern minimalist pendant — a smooth canopy with a profile ring or one delicate band. For a neo-classical pendant — a soft laurel or geometric ornament.
Painting: strictly in the color of the ceiling. A pendant chandelier does not need a "frame" — it needs a neat "anchor" point on the ceiling. A canopy in the same color as the ceiling does this delicately and professionally.
Three or four pendants in one group
Design technique: several pendants come out of one ceiling junction. In this case, one canopy frames the entire junction. Check: the central hole of the canopy must accommodate all exiting cords or cables, and the diameter must cover the entire mounting area.
Canopy for a flush mount light: technique over decoration
What is a flush mount light
A flush mount ceiling light — a "chandelier" in the common sense — is an LED panel, a flat shade, a high-tech light, or a modernist "puck" that attaches to the ceiling flush or nearly flush. The distance from the ceiling to the bottom point of such a light is 3–10 cm, sometimes less.
It is precisely this proximity to the ceiling that creates the main technical problem when choosing a canopy.
The gap problem
If a high-relief ceiling rosette (15–25 mm) is installed around a flat light fixture that itself protrudes 5–7 cm from the ceiling, a conflict arises. Either the light fixture overlaps the rosette (if its diameter matches the rosette's inner area), or an untidy gap forms between the lower surface of the light fixture and the rosette's relief.
Therefore, for a flat light fixture, choose a polyurethane ceiling rosette with a low relief — no more than 8–12 mm. This allows the rosette to be installed around the light fixture without conflict.
What to check before buying a rosette for a flat light fixture
This is the mandatory sequence:
-
Measure the diameter of the light fixture's mounting plate (the part that contacts the ceiling).
-
Measure the diameter of the lampshade itself — its lower surface.
-
Choose a rosette with an inner opening slightly larger than the mounting plate.
-
Ensure the rosette's relief does not create a gap between the ceiling and the lower surface of the lampshade.
-
Check that the central hole of the socket matches the cable hole in the ceiling lamp.
Smooth socket for a flat light fixture
For most flat modern light fixtures, the best choice is a smooth round socket with a profile rim. Low relief, clean shape, painted to match the ceiling. The socket is present — but does not conflict with the shape of the fixture or the geometry of the flat base.
Socket for a modern chandelier: honesty of form
What is a modern chandelier
"Modern chandelier" is a broad category. This includes: geometric metal structures, Scandinavian wooden and metal pendants, minimalist rings with built-in LEDs, designer light fixtures, asymmetrical structures.
Common feature: deliberate simplicity of form, no classical ornamentation, clean materials.
What this means for the socket
A modern chandelier is a statement in the language of minimalism. A classic relief socket under such a fixture creates a stylistic "break" — the two elements speak different languages.
It doesn't mean the socket is unnecessary. It means the socket must be honest: simple, clean, without historical ornamentation.
A smooth round rosette with a single profile band is the best choice for most modern chandeliers. It covers the mounting point, creates a clean frame, and avoids style conflicts.
A geometric rosette is for light fixtures with a clear geometric shape. A ring with concentric relief bands under a ring-shaped LED chandelier is a style match that works.
A square rosette is for when the light fixture is square or rectangular, and the interior is built on strict rectilinear axes.
A modern chandelier and 'accidental classic'
One common mistake: buying a rosette with a rich acanthus relief for a modern chandelier 'because it's beautiful.' The rosette is beautiful on its own, but next to a geometric matte light fixture, it looks out of place. The rule is simple: Buy a ceiling rosette for a chandelier — it's not about buying a rosette you like, but buying one that suits that specific light fixture.
Rosette for a classic chandelier: decor as a system
A classic chandelier and its ceiling requirements
A classic chandelier is a historically grounded statement. It emerged in eras when ceilings were adorned with stucco, cornices, coffers, and paintings. It was part of an architectural system—not random decor, but an element of a thoughtful program.
That's why a classic chandelier 'asks' not just for a rosette, but for a system. One rosette is the minimum. A rosette plus a cornice is already architecture.
Relief rosette for a classic chandelier
For a classic chandelier, a relief model is suitable. Acanthus ornament, laurel wreath, multi-tiered profile — this is the language that a classic chandelier understands and responds to.
Diameter — proportionate to the chandelier. For a classic living room with a chandelier diameter of 70–90 cm — a rosette of 450–550 mm. For more compact classic — 360–440 mm.
Painting: white base — historical norm. Delicate gilding of details with gold chandelier fittings. No "full gilding" — this is overload. Accent on 20–30% of the relief area, no more.
Cornice and moldings as part of a classic system
A classic chandelier with a relief rosette requires a coordinated ceiling context. Ceiling molding — a cornice along the perimeter — completes this system. Moldings made of polyurethane around the rosette create a "picture frame" for the entire ceiling center.
The ornament of the cornice and the ornament of the rosette — one stylistic family. Acanthus rosette + acanthus cornice. Laurel rosette + laurel or profile cornice.
Special types of chandeliers: what else you need to know
Socket for a crystal chandelier
A crystal chandelier is a story in itself. Sparkle, pendants, multiple tiers. The selection principle: the more complex the chandelier, the simpler the socket. Moderate relief, clean form, painted white. Delicate gilding — if the hardware is gold.
The main thing is not to create a "competing decorative pole." Polyurethane socket for a chandelier for a crystal light fixture should be an architectural base, not an independent decorative object.
Socket for a chandelier with fabric shades
Chandeliers with fabric shades are soft, warm, often in Provence or classic style. A socket with organic relief suits them: laurel wreath, delicate leaves, soft profile. No strict geometry — fabric and geometry don't "rhyme."
Socket for a wrought-iron chandelier in country style or a wrought-iron pendant
Wrought-iron chandeliers are rustic in spirit. Sometimes deliberately "rough" decorative elements are chosen for them — with a handcrafted feel. But if such a chandelier hangs in a modern apartment, the socket should be neutral. Don't try to "play" country on the ceiling — it looks artificial.
Socket for a ring chandelier (LED ring)
LED ring — pure geometry. A circle embedded in the ceiling plane or located a few centimeters from it. A concentric rosette is ideal for such a fixture: several profile rings increasing towards the perimeter. This creates the feeling that the rosette continues the logic of the ring-shaped light fixture.
Universal table: chandelier type — rosette type
| Chandelier type | Rosette shape | Diameter | Relief | Painting |
|---|---|---|---|---|
| Classic arm | Round | Medium/large | Moderate | White, possibly gold plating |
| Modern arm | Round | Medium | Low/smooth | Strictly matching the ceiling color |
| Laconic pendant | Round | Small | Smooth/low | Matching the ceiling |
| Suspension group | Round/oval | Medium | Low | Matching the ceiling |
| Flat light fixture | Round | Proportional | Low | Matching the ceiling |
| Classic | Round | Large | Saturated | White, gold detailing |
| Crystal | Round | Large | Moderate | White, delicate gold |
| Modern geometry | Round/geometric | Small/medium | smooth | Matching the ceiling |
| LED ring | Concentric round | Proportional | Low profile | Matching the ceiling |
| Wrought/rustic | Round neutral | Medium | Low | Matching the ceiling |
How to choose the diameter of a socket for a chandelier: algorithm
Diameter is the main technical parameter. A mistake here cannot be fixed with a "beautiful relief".
Step one: measure the diameter of the chandelier base. This is the "cup" or mounting plate that touches the ceiling. The central hole of the socket should be slightly larger than this diameter — so that the socket can "sit" around the cup without resting on it.
Step two: evaluate the chandelier's "span." What is the maximum diameter created by the fixture (arms, shades, pendants)? The rosette should not extend beyond this diameter by more than 30–40%.
Step three: consider the ceiling height. Low ceiling — smaller diameter. High ceiling — can be larger.
Step four: consider the room area. Guideline: the rosette diameter in mm is approximately 1/10 of the room area in m². A 20 m² room — rosette about 200–220 mm. Adjust upward for high ceilings and large chandeliers.
Step five: visual check. Print or draw a circle of the required diameter on paper and hold it to the ceiling next to the chandelier. Evaluate the proportion.
What to check before purchase: technical checklist
Before clicking "Add to cart," go through this list.
-
Chandelier type — determines the logic for choosing relief and shape.
-
Chandelier base diameter — determines the minimum diameter of the rosette's central hole.
-
Chandelier "span" diameter — upper limit of the rosette diameter.
-
Rosette relief height — for flat fixtures: no more than 10–12 mm.
-
The central hole is compatible with the chandelier mounting bracket.
-
Weight of the rosette — for stretch ceilings: polyurethane is always lightweight, but check the installation scheme.
-
The ornament style matches the style of the chandelier and the interior.
-
Type of glue — specialized for polyurethane moldings.
-
Sealant — acrylic for sealing the joint.
-
Paint — water-based in the color of the ceiling.
What to buy together with the chandelier rosette
The rosette is the central element, but a complete result is always a set.
Minimum set
-
Rosette under chandelier of the required diameter and relief.
-
Glue for polyurethane molding.
-
Acrylic sealant.
-
Acrylic primer.
-
Water-based paint in the color of the ceiling.
Extended set
-
Moldings made of polyurethane — for the frame contour around the socket.
-
Perimeter cornice from the section Ceiling molding.
-
Decorative Inserts for corner elements.
| Task | What to buy |
|---|---|
| Design a chandelier with arms | Round socket with moderate relief |
| Design a pendant light | Smooth or low-relief socket |
| Design a flush mount light | Socket with low relief up to 12 mm |
| Design a modern chandelier | Smooth or geometric socket |
| Install a classic chandelier | Relief rosette + cornice |
| Assemble a complete mounting kit | Rosette + glue + sealant + primer + paint |
Five scenarios: chandelier rosette in real interiors
Scenario one: living room 24 m², ceiling 2.9 m, classic branched chandelier with a diameter of 70 cm, gold fittings.
Round rosette 440 mm, laurel relief. White with gilded profile bands. Cornice around the perimeter made of ceiling moldings — laurel ornament, matching the rosette. Result: a classic living room with a ceiling system where the chandelier is the main character.
Scenario two: bedroom 16 m², ceiling 2.7 m, pendant chandelier on a cord — one matte lampshade.
Round smooth rosette 280 mm, profiled rim. White. No frames. Result: a delicate ceiling framing that 'anchors' the cord without decorative noise.
Scenario three: kitchen 12 m², ceiling 2.6 m, flat LED light fixture with a diameter of 40 cm.
Round smooth rosette 400 mm, relief no more than 8 mm. White. The diameter with margin covers the mounting area of the light fixture. The relief does not create a gap. Result: neat ceiling design without conflict with the flat light fixture.
Scenario four: office 14 m², ceiling 2.8 m, modern geometric chandelier — metal ring with built-in LED.
Concentric round rosette 360 mm, three profile rings. White. Result: the rosette "responds" to the ring shape of the chandelier — a unified geometric language.
Scenario five: hall 3 × 5 m, ceiling 3.0 m, rustic wrought iron crown chandelier.
Round smooth rosette 320 mm, one delicate profile. White. No ornaments — the rustic wrought iron light fixture does not need competing decor. Result: a neutral, clean ceiling base that "holds" the wrought iron crown without stylistic dissonance.
Mounting the rosette under the chandelier: key points
Proper installation starts with proper preparation. A complete step-by-step algorithm is in the guide on installing polyurethane molding. Here — specifics of mounting the rosette specifically under the chandelier.
Centering is critical. The rosette must be installed exactly in the center of the mounting hole. The slightest shift is noticeable after the chandelier is installed — the light fixture will "look away" from the center of the rosette.
Installation order. First — the socket. Then — sealant. Then — drying for 12–24 hours. Then — primer and painting. Then — the chandelier. Not the other way around.
Central hole. If the standard hole does not match the chandelier's mounting assembly — polyurethane can be easily trimmed with a sharp knife. This is one of the main advantages of the material.
Painting before or after the chandelier. Before — is always more convenient. After installing the chandelier, painting the socket around the light fixture is difficult and there is a risk of staining the fixture.
Frequently asked questions
Which socket to choose for a multi-arm chandelier?
Round, with moderate relief, diameter 60–80% of the chandelier's 'span'. For classic fixtures — laurel or acanthus ornament, delicate gilding with gold fixtures.
Is a socket needed for a pendant chandelier on a cord?
Yes — it covers the mounting point on the ceiling. But you need to choose a small, smooth or low-relief one, strictly matching the ceiling color.
Can a relief socket be used with a flat LED light fixture?
Yes, if the relief height does not create a gap between the ceiling and the lower surface of the shade. For most flat fixtures — relief no higher than 8–10 mm.
What diameter socket is needed for a large chandelier?
Guide: 60–80% of the chandelier's maximum 'span'. For a chandelier with a diameter of 90 cm — a socket of 480–540 mm. buy a ceiling rosette for a chandelier of the required diameter can be found in the STAVROS catalog.
What to buy together with the chandelier socket?
Glue, acrylic sealant, primer, paint in the color of the ceiling. For a classic chandelier — additionally Moldings and a cornice from the section Ceiling molding. The entire range polyurethane products — in the STAVROS catalog.
Can I trim the central hole of the socket myself?
Yes. Polyurethane can be cut easily with a sharp utility or construction knife. Trim along the outer contour of the chandelier's mounting plate — with a small allowance.
How to choose between a smooth and a relief chandelier socket?
If the chandelier is decoratively active — choose a smooth or low-relief one. If the chandelier is laconic — the socket can take on more decoration. The principle of reverse activity: the more complex the light fixture, the simpler the socket.
About the company STAVROS
STAVROS — manufacturer and supplier polyurethane products for residential and commercial interiors. The catalog includes — Rosettes under chandeliers made of polyurethane for all types of fixtures: classic and modern, branched and pendant, crystal and flat. Also — Moldings and cornices, Ceiling molding и Decorative Inserts — everything for creating complete ceiling systems. STAVROS operates throughout Russia, providing delivery and professional consultations on selection. When you need not just a socket, but the right socket — STAVROS helps you find exactly that.