Article Contents:
- Why sockets and switches should be considered before purchasing panels
- Where the 'panel + electrical' task most often arises
- TV area: sockets, cables, and lighting simultaneously
- Wall behind the sofa with sconces
- Bedroom at the head of the bed
- Hallway with switch and intercom
- Kitchen-living room with lighting
- Study with work sockets
- Decorative wall with LED strip
- How to mark the wall in advance: step-by-step logic
- Step 1. Determine the slatted finishing area
- Step 2. Fix the baseboard height
- Step 3. Mark the slat spacing on the wall
- Step 4. Adjust the socket positions
- Step 5. Determine the switch locations
- Step 6. Account for the molding and corner piece
- How to cut slatted panels for sockets
- Why you should not make a rough cutout
- The right tool and sequence
- Precise marking is the key to everything
- How to fix minor errors
- Slat panels and lighting: light as part of the system
- Vertical lighting between the panel and the wall
- TV zone lighting
- Lighting behind the headboard in the bedroom
- Light lines next to the slats
- Why the baseboard and molding should support the lighting composition
- How to connect a slat wall to the baseboard
- Why you can't choose "any" baseboard
- MDF baseboard: for monochrome and painting
- Wooden baseboard: for natural tones
- Baseboard height with lighting
- Baseboard with cable channel
- Molding and corner around the area with sockets and lighting
- Molding separates the slatted area from the smooth wall
- Corner covers the outer end
- Extension strip helps create symmetry
- Trim products for complex junctions
- Mistakes when installing slatted panels around electrical
- What to buy for a neat wall with sockets and lighting
- Decision table: zone — task — element
- FAQ: Answers to Key Questions
- About the Company STAVROS

There comes a moment when the idea of a beautiful slatted wall meets reality. You look at the wall and see: here's a socket — right in the middle of the future panel area. Here's a switch — at the very edge. Here's a TV cable that needs to go somewhere. Here's a trace from the future LED lighting. And the question becomes specific: how to combine all this so that slatted panels for walls they look well-thought-out, not like a set of patches around the electricals?
There is an answer. Moreover — it's not as complicated as it seems at first. You just need the right sequence of actions, proper marking, and an understanding of which trim elements cover each specific joint. This article covers everything essential: from the first mark on the wall to the last profile at the baseboard.


Why sockets and switches need to be considered before buying panels
Here's a paradox that almost everyone faces: first they order Rafter panels, then they start marking — and discover that the socket ended up exactly at the joint of two panels. Or the switch lands in the middle of a slat, where it's impossible to cut cleanly.
This is not a coincidence. It's the result of one oversight: the electricals were not included in the marking scheme before ordering the material.
A slatted wall is a system with rhythm. The slats run at a certain pitch, the panels have a fixed width, the baseboard occupies the lower zone. If you 'insert' a socket into this system as a given, without considering its position relative to the slats — you'll end up with either an ugly cut at the joint, or a socket frame that overlaps the adjacent slat. Both ruin the aesthetics of the slatted wall.
The correct logic is the reverse: first the layout scheme — then ordering panels and electrical work. The position of sockets and switches is aligned with the slat pitch. Cutouts are made in the right places. Socket frames fit into the gaps between the slats.
It is this approach that allows slatted wall panels to look as if the electrical work was designed together with the finish — because that's how it should be.


Where the task of 'panel + electrical work' most often arises
Not every wall has sockets. But there are several areas where the question of 'how to design slatted panels together with electrical work' almost always arises.
Our factory also produces:


TV zone: sockets, cables, and lighting simultaneously
The most electrically saturated place. TV socket, power socket for the TV, sockets for media players and audio, TV cable and HDMI cable, often wires for LED lighting. All of this is concentrated on one wall. slatted panel for the television should unite this space into a single architectural composition — not turn into a background with wires sticking out everywhere.
Get Consultation
Wall behind the sofa with sconces
The sofa area in the living room or bedroom often has wall lights — sconces. Two sconces symmetrically on either side of the sofa, one in the center, or a pair above the headboard — each requires a recessed box in the wall. decorative slatted panels behind the sofa, an accent wall is created, but the wires for the sconces must be routed strictly in the right place before the panel is installed.
Bedroom at the head of the bed
The headboard is the most decorative place in the bedroom. Here, slatted panels create a "frame" behind the bed. But this is also where outlets for charging phones, switches for bedside lamps, and sometimes wires for headboard lighting are often located. All of this must be accounted for in the installation plan in advance.
Entryway with switch and intercom
In the entryway, there is always a switch at the entrance — one or a group. Often, an intercom panel, doorbell button, or smart home controller. If Slatted wall panels run along the walls of the entryway — all these elements fall within the slatted finish area.
Kitchen-living room with lighting
In an open-plan layout, the wall between the kitchen and living room often becomes an accent wall. It features Slatted panels with lighting, decorative shelves, switches, and lighting controls for the entire space. Here, the task becomes more complex: it is a public space where every detail is visible.
Home office with work outlets
The work area in the office includes outlets for the computer, monitor, printer, and chargers. Sometimes — work area lighting. If the office is decorated with MDF slatted panels — the work outlets must be neatly integrated into the slatted system.
Decorative wall with LED strip
An LED strip between the slats or behind the panel is one of the most popular decorative techniques. It creates a soft vertical glow that emphasizes the rhythm of the slats. But this requires a wire that must be laid before the panel is installed. Here — special care is needed: the wires must not be visible.
How to mark up the wall in advance: step-by-step logic
Marking up the wall for slatted panels considering the electrical work is not a five-minute pencil job. It is a full-fledged design stage on which the result depends.
Step 1. Determine the slatted finishing area
First of all — where exactly the panels go. The entire wall from corner to corner? Only the lower part? An accent area of a certain width in the center? This determines which outlets and switches fall within the slatted finishing area.
Step 2. Fix the height of the baseboard
MDF Skirting Board or Wooden baseboard — the lower horizon of the entire system. Its height — 70, 80, 100, 120 mm — must be determined before marking. Why? Because the lower edge of the slatted panel starts above the baseboard. This means the first slat from the bottom starts at a certain height. Knowing this point helps understand where the sockets will be relative to the slat rhythm.
Step 3. Mark the slat pitch on the wall
How to install slatted panels — a separate issue, but already at the marking stage, you need to apply at least an approximate slat pitch on the wall. If the slats are spaced 30 mm apart — draw this rhythm across the entire height of the wall. Now it's clear: does the socket fall on a slat, in the gap between slats, or on the edge?
The ideal position for a socket is in the gap between slats, with a small offset from each. Then the cutout in the panel base is minimal, the socket frame does not overlap the slats, and the entire structure looks as if it was designed that way.
Step 4. Adjust the socket position
If the sockets are not yet installed — this is the golden moment. Shift the junction box 15–20 mm to the side that falls into the inter-slat gap. The electrician can do this easily, and the result will be fundamentally different.
If the sockets are already installed — the task becomes more complicated. But it does not become unsolvable: precise marking, the right tool, and a careful cutout in the panel base yield an acceptable result.
Step 5. Determine locations for switches
Switches are an even more noticeable element than sockets: they are at hand level and have a larger frame. It is important that the switch frame does not overlap the slats on the sides: it should be located in the gap or right at the edge of a slat, but not 'ride over' it.
The standard height for a switch is 90–100 cm from the floor. Check where it falls in the slat rhythm. If necessary — shift it before installation.
Step 6. Account for space for molding and corner piece
If there will be molding around the perimeter of the slat zone wooden molding or Wooden corner bracket — their width eats up several centimeters along the edges of the zone. Sockets and switches located at the very edge of the slat zone may end up directly under the profile. Keep this in mind when marking.
How to cut slat panels for sockets
The question "what to cut slat panels with» — one of the most practical for installation. And it becomes more critical when you need to make a cut that is not just straight, but rectangular — for a socket or switch.
Why you shouldn't make a rough cut
A rough cut creates three problems at once:
First — a visible gap. A standard-sized socket frame (86×86 mm) must cover the cutout around its entire perimeter. If the cutout is made with a hand-held allowance, the frame won't cover it, and a gap will be visible between the frame and the slat.
Second — MDF delamination. The MDF base of the slat panel can delaminate with rough sawing. This is especially critical at the edges of the cutout: delamination cannot be hidden by the frame later.
Third — damage to the slat. If the cutout touches the slat, the slat cracks or deforms. It cannot be replaced without completely relaying the panel.
The right tool and sequence
For cutting a hole for a socket in MDF slat panel the following are suitable:
-
Electric jigsaw with a fine-tooth wood blade (for a clean cut without splitting). Mark a rectangle the size of the socket box + 2 mm margin on each side. First drill starter holes at the corners, then cut along the line with the jigsaw.
-
Multi-tool (oscillating tool) — if maximum precision in tight spaces is needed. The oscillating tool blade cuts strictly along the marking without blade travel inertia.
-
Router with a straight bit — for a perfectly straight rectangular cut with clean edges. Requires a template but delivers a professional result.
Accurate marking is the key to everything
Before cutting, make a paper template the size of the socket frame. Place the template at the desired location on the panel and trace around it. Check that the edges of the template do not fall on the battens. If they do, shift the template or reconsider the socket box position.
Cut along the inner perimeter of the frame, not the perimeter of the socket box: the frame should overlap the cut with a small overlap of 3–5 mm on each side.
How to cover up minor mistakes
The cutout turned out a bit larger than needed? There are several ways:
-
Use an extension frame (expanding frame) that covers a larger area.
-
Install a frame from a socket block (cover for 2–3 outlets) — it is wider than standard.
-
Apply finishing putty along the edges of the cutout, sand it down, and paint it to match the panel.
As a last resort — molding MLD-019 in the form of a rectangular frame around the socket will turn a forced solution into a deliberate decorative accent.
Slat panels and lighting: light as part of the system
This is a special section — not just about "how to connect a wire," but about how lighting transforms a slat wall from good to outstanding.
Vertical lighting between the panel and the wall
One of the most striking techniques. Wall slat panels with backlighting are mounted with a small gap from the wall — 15–25 mm. An LED strip is laid in this gap, providing a soft diffused glow between the panel and the wall. Light "leaks" out from the bottom and sides, creating the impression that the wall is glowing from within.
Preparation is critical for this technique: the LED strip is installed before mounting the panel, and the wire is routed to the desired location (nearest outlet or junction box). After the panel is installed, the wire is hidden behind it.
TV zone backlighting
Accent lighting behind the TV is not just decor — it's functional. It reduces the contrast between the bright screen and the dark wall, easing eye strain. Technically: an LED strip around the perimeter of the TV or around the perimeter of the slat zone behind it. The wire runs along a hidden path through a hole in the panel to the outlet.
Important nuance: place the outlet for the backlighting in the same slat zone as the backlighting itself. The wire from the LED strip should not run across the front surface of the panel.
Backlighting behind the headboard in the bedroom
Slatted wall panels behind the bed with backlighting is now one of the most sought-after interior techniques. Warm light from the bottom or side of the slat zone creates a cozy halo around the headboard.
Scheme: panel on a pedestal away from the wall + LED strip along the bottom or side edge. The outlet for connection is hidden behind the panel or built into the nearby baseboard. The switch is next to the bed, within easy reach.
Light lines next to the slats
A lesser-known but very elegant technique: narrow light strips not behind the panel, but between the slats. This requires a special LED profile — an aluminum channel that attaches to the panel base between the slats and creates a thin line of light along the vertical slat.
Result: a slatted wall with thin light strokes — strict, architectural, without being overloaded with light.
Why the baseboard and molding should support the lighting composition
When the wall is illuminated, the lower and side horizons become even more noticeable. Wooden baseboard In a dark tone, it "grounds" the glowing area, creating a clear lower contour. wooden molding On the sides and top of the slatted zone — a frame for the light spot.
Without these profiles, the backlight looks unfinished: there is light, but it is only held by the panel itself. The molding and baseboard create an architectural frame that gives the lighting effect scale and completeness.
How to connect a slatted wall with a baseboard
The baseboard is the lower horizon of the wall. It is always present — regardless of whether there is a slatted panel or not. But with a slatted panel, its role changes: it becomes not just a technical detail, but part of the system.
Why you can't choose "any" baseboard
slatted panels for interior wall finishing have a vertical rhythm, a pronounced relief, and a certain thickness. A baseboard that conflicts in style with the panel destroys the system in the lowest and most noticeable place. The choice of baseboard must be deliberate.
MDF baseboard: for monochrome and painting
buy MDF skirting board and paint together with slatted panel for painting in a single color — a classic monochrome technique. MDF baseboard provides a perfectly smooth surface for enamel: no pores, no fibers, no uneven paint absorption. The profile geometry is clear and even. For modern, Scandinavian, minimalist interiors — an optimal choice.
Advantages:
-
Perfectly smooth surface for painting.
-
Clear profile geometry without defects.
-
Affordable price for large areas.
-
Cuts well without chipping.
Wooden baseboard: for natural tones
solid wood baseboard — for interiors where the texture of natural material is important. Paired with oak slatted panel a wooden baseboard creates a unified 'wooden' system with natural texture around the entire perimeter of the wall.
Advantages:
-
Natural wood texture.
-
Expressive shaped profile for classic interiors.
-
Harmonizes well with parquet and engineered wood flooring.
-
Under varnish — reveals the natural beauty of the material.
Baseboard height with lighting
If the slatted wall has bottom lighting — through the gap between the panel and the floor — a baseboard is needed that either completely covers this gap or creates a controlled light output.
For the 'floating panel' effect with bottom lighting, no baseboard is used at all: light exits along the entire lower perimeter. But then the bottom edge of the panel must be perfectly finished. For a closed lighting scheme — the baseboard is installed flush, without a gap at the bottom.
Baseboard with cable channel
Special baseboards with cable channels solve two tasks at once: they close the bottom gap of the slatted panel and hide wires for lighting or other electrical elements. This is especially convenient in the TV area and office, where there are many cables and their visibility is undesirable.
Molding and corner around the area with outlets and lighting
When a slatted wall contains electrical elements — profiles around the perimeter of the area play an even more important role. They not only frame the edge: they create a 'frame' that visually brings everything together — slats, outlets, lighting — into a single composition.
The molding separates the slatted zone from the smooth wall.
Where the slatted zone ends and the painted wall begins — the transition must be clear. Buy wooden molding and install it vertically along the side edges of the slatted zone — this solves two tasks at once: to close the panel end and create a decorative border between the slatted and smooth surface.
In the area with sockets, this molding additionally "tells" the observer: the sockets are part of the slatted zone, a deliberate element built into the system.
The corner piece covers the outer end.
Wooden angle along the side end of the slatted zone — technically protects the cut, aesthetically creates a clean vertical finish line. In the area with lighting, the corner piece covers the place where the LED strip goes behind the panel and prevents the technical joint from being visible.
An additional slat helps achieve symmetry.
If the width of the slatted zone is not a multiple of the panel width — the last slat on the left or right ends up narrower than the others. If a socket or switch is located on the same side, the asymmetry is especially noticeable.
Decorative wooden slat of the required cross-section "completes" the symmetry: the outer slats on both sides become identical. The socket then ends up exactly where it should be — in the gap, without disrupting the rhythm.
Linear products for complex junctions.
wood trim items — glazing beads, layouts, transition profiles — indispensable where standard corner and molding fail. Non-standard joint near a socket block, transition to a built-in wardrobe with electrical wiring, abutment to a column or wall protrusion — for each such place there is a profile from the linear molding category.
Mistakes when installing slatted panels around electrical wiring
Let's analyze specific miscalculations — real ones, not theoretical.
Place a socket at the joint of two panels. The joint of panels is the place where there is a small technological gap between them. A socket at the joint means: the frame covers the gap, and the gap itself "walks" behind the frame. At the slightest movement of the panels (due to deformation), the frame warps. The socket should be in the center of one panel.
Forget about the thickness of the panel. A slatted panel is not just a sheet: it protrudes from the wall by 30–40 mm. If the socket was mounted flush with the wall — after installing the panel, it will be "recessed" into the wall by the thickness of the base. You need extension rings for the socket box or sockets with an extended mounting pin.
Place the switch too close to the slat. The switch frame covers the cutout — but it should not overhang the adjacent slat. The distance from the edge of the frame to the adjacent slat is at least 5 mm. Otherwise, the frame will press against the slat or warp during installation.
Not account for the height of the baseboard when marking. A baseboard 120 mm high "eats up" the lower 12 cm of the wall. If there was a socket in this area — after installing the baseboard, it will be covered. Double-check the height of all sockets and compare with the planned height of the baseboard.
Make a cutout without a template. A cutout "by eye" is almost always a cutout with a skew or extra millimeters. A paper or cardboard template the size of the frame + 10 minutes — saves 3 hours of rework.
Not leave space for the socket frame. The cutout for the socket box (diameter 68 mm) is an opening for the cup, not for the frame. The socket frame 86×86 mm covers the cutout with a margin. If you cut a square exactly 86×86 for the frame — the frame will fit tightly without overlap, and the slightest misalignment will expose the edge of the cutout.
Install backlighting without a well-thought-out profile. An LED strip simply "stuffed" behind the panel is a solution that looks beautiful for three months. Then the strip peels off, the wire becomes visible through the gaps. You need an aluminum profile for LED or a special fixing layout.
Do not leave the panel end open. If there is backlighting, the panel end glows — and if it is open, the light "bleeds" unevenly along the edge. Wooden corner bracket or molding MLD-019 covers the end and controls where the light goes.
What to buy for a neat wall with outlets and lighting
Final kit for those ready to order.
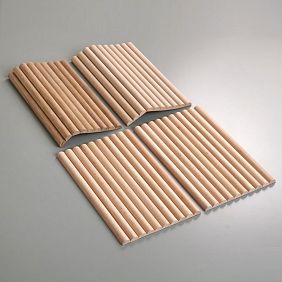
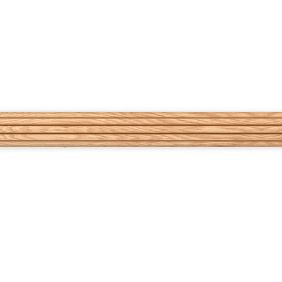
slatted panels for walls — in three versions: PAN-001 with decorative coating, PAN-002 primed for painting, PAN-003 under the oak tree. For illuminated zones — primed for painting in the desired tone.
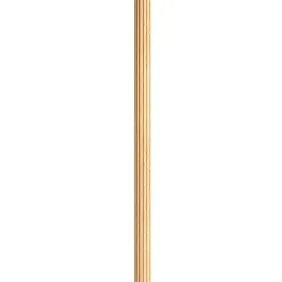
Wooden batten RK-001 — for additional elements, width extension, continuing the rhythm of battens in non-standard places. Indispensable for aligning symmetry near sockets.
Decorative wooden slat — for accent solutions and a wide range of additional sections.
MDF Skirting Board — for monochrome systems under painting. Clear geometry, smooth surface, cuts well near socket blocks and door frames.
solid wood baseboard — for natural interiors with wood texture. For illuminated zones — in a dark tone to 'ground' the light composition.
molding MLD-019 — for a decorative frame around the batten area, for transition to a painted wall, for accenting the TV zone. In areas with sockets — creates a 'frame' that unifies electrical and finishing elements.
Wooden corner UG-001 — for open ends, external corner transitions, controlling light output in illuminated panels.
wood trim items — for non-standard joints near socket blocks, boxes, built-in elements.
More about installation techniques in the article How to attach slat panels to the wall.
Decision table: zone — task — element
| Zone and task | Recommended element |
|---|---|
| Socket cutout in panel | Precise template + jigsaw or multitool |
| Socket on the end of the slatted zone | molding MLD-019 as framing |
| Lighting behind the panel | LED strip + mounting profile before installation |
| Bottom gap at the floor in the TV zone | MDF Skirting Board For painting |
| Wires for backlighting | Hidden route + cable channel in the baseboard |
| Open end of the illuminated zone | Wooden corner bracket |
| Asymmetric rhythm of slats | Additional slat |
| Transition to the painted wall | wooden molding |
| Non-standard joint at the socket block | Trimming Items |
| Natural interior with wood | Wooden baseboard + corner piece |
FAQ: Answers to Key Questions
Can sockets be installed on slatted panels?
Yes, this is standard practice. It is important to position the socket boxes correctly — in the gap between the slats, not under the slat. For already installed sockets, make a precise cutout in the panel base, taking into account the material thickness.
What to use to cut slatted panels for a socket?
An electric jigsaw with a fine-tooth wood blade, a multitool, or a router with a template. More details on the technique in the article what to cut slat panels with. The main rule: template first, then cut.
How to arrange a switch on a wall with slatted panels?
The switch is placed in the gap between the slats. The switch frame should not overlap adjacent slats. When mounting on decorative slatted panels — use socket box extenders to compensate for the base thickness.
Can I install lighting next to slatted panels?
Yes, and this is one of the most striking techniques. Options: LED strip behind the panel with a gap, bottom lighting (floating effect), light lines between the slats. All wires are laid before panel installation. Details in the material Slatted panels with lighting.
Which baseboard to choose for slatted panels with lighting?
If the system is for painting — MDF Skirting Board in the same color. For a natural wood system — Wooden baseboard in a dark tone that "grounds" the light composition.
How to hide wires behind a slatted wall?
Wires are laid along the wall before installing the panel: either in a groove or on cable clips in the place where they will be behind the panel base. After installing the panel, the wires are completely hidden. For LED lighting — bring the wire to a pre-planned location (to a hidden socket or to a baseboard with a cable channel).
Is a molding needed around the slatted area?
Not necessarily, but it is advisable — especially if the area does not occupy the entire wall from corner to corner. wooden molding creates a frame that gathers the slatted area into a complete composition. In a TV area with lighting, the molding is especially important: it controls the perception of the light spot.
How not to ruin the slatted panel with a cutout for a socket?
Use a template. Cut along the inner perimeter of the frame, not along the perimeter of the socket box. Make starting holes at the corners. After cutting, sand the edges of the cutout and prime the end. The socket frame should overlap the cutout with a margin of 3–5 mm on each side.
About the company STAVROS
A slat wall with outlets and lighting is not improvisation, it's a system. It works correctly only when each element is paired with another: panel + slat + baseboard + molding + corner + linear profile.
STAVROS produces a full range for such a system: Rafter panels in three versions, Wooden planks и Decorative Planks, Moldings, Wooden corner pieces, MDF Skirting Board и Wooden baseboard, Trimming Items.
STAVROS — when outlets, lighting, and slats work together. Like one wall. Like one system.