Article Contents:
- Moisture map: where in the bathroom can slat panels be used
- Direct wet zone
- Splash and steam zone
- Dry zone of the toilet
- Where slat panels in the bathroom deliver maximum results
- Where in the bathroom slat panels should not be used or are risky
- Which slat panels are suitable for bathroom and toilet
- MDF panels for painting: moisture resistance plus flexibility
- Wooden slat panels: wood in the bathroom — the rules of the game
- Decorative slat panels for an accent wall
- Material selection by zone: decision table
- Why baseboard in the bathroom is more important than anywhere else
- Which baseboard to choose for slat panels in the bathroom
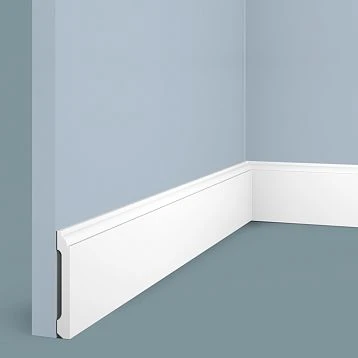
- Moisture-resistant baseboard for painting
- Wooden baseboard with protective coating
- Polyurethane baseboard
- Baseboard matching tile color
- Baseboard matching door color
- Baseboard height: practical logic
- How to design the joint between slatted panels and tiles
- Option one: the panel starts above the tile baseboard
- Option two: panel-to-tile joint in the same plane
- Option three: molding as a decorative divider
- Sealing the joint: silicone as the final line of defense
- How to close the ends of slatted panels in a bathroom
- Side ends at a wall or corner
- End at a door casing
- Top end with partial wall height
- End at a mirror and furniture
- Color and style of slatted panels for the bathroom
- White and light panels for a small bathroom
- Wooden tone in the bathroom: spa atmosphere
- Dark panels as an accent
- Panels matching the door and furniture color
- Combining slatted panels with tiles: three approaches
- Mistakes when choosing slatted panels for the bathroom
- Where to buy slatted panels and accessories for the bathroom
- FAQ: Answers to Popular Questions
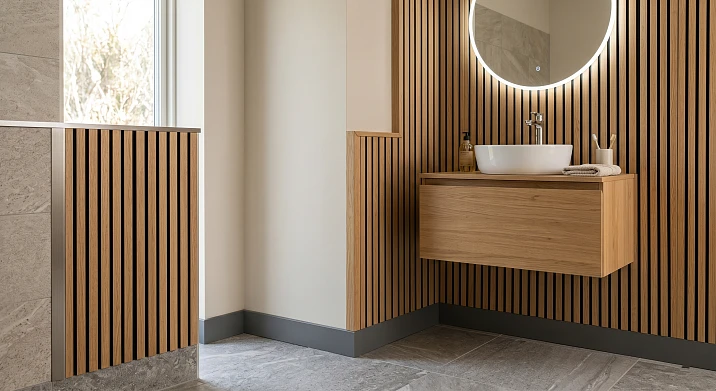
slatted panels for bathrooms — this is not fantasy or a bold experiment. It is a very real design solution that works in bathrooms of various sizes: from a compact combined bathroom in a city apartment to a spacious bathroom with a shower area and a bathtub area. But it only works when the choice is made consciously: with an understanding of the humidity regime, the correct choice of material, a well-thought-out bottom joint, closed ends, and a coordinated baseboard.
That is exactly what this is about — here, in detail, without general phrases. Because the bathroom does not forgive 'approximately good enough'.
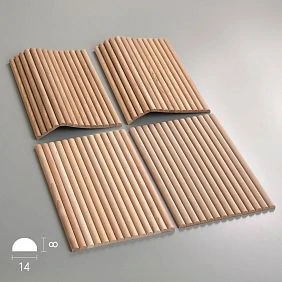
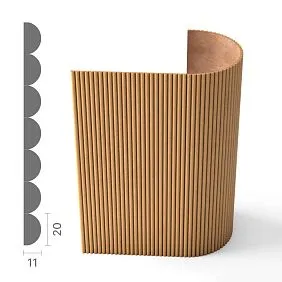
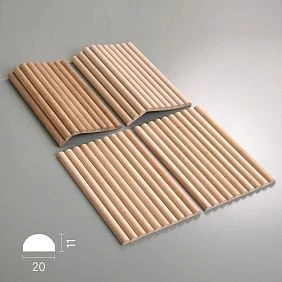
Humidity map: where in the bathroom can slatted panels be used
Before choosing a panel, color, and material, you need to answer one question: in which zone is the installation planned? The bathroom is not uniform in terms of humidity — there are zones with fundamentally different conditions.




Direct wetting zone
The shower area, inner walls near the bathtub, the area around the mixer — here water is constantly present, hitting the walls with direct splashes. This is a zone for tiles, glass blocks, and special moisture-resistant coatings. Slatted panels of any type are impractical and short-lived here — even the most moisture-resistant materials perform significantly worse than tiles under constant direct wetting.
Our factory also produces:

Splash and steam zone
Walls near the bathtub, sink, mirror with washbasin — here water appears regularly, but not as direct streams: it's splashes and condensation. Slatted panels in this zone are possible with the right choice of material, protective coating, and careful sealing of the bottom edge and all joints.
Get Consultation
Dry zone of the bathroom
The wall behind the toilet installation, the wall opposite the bathtub, the area near the entrance, the walls of the toilet room — these are relatively dry zones where humidity is higher than in living rooms, but there is no direct wetting. It is here that slatted panels for the bathroom work most effectively and durably.
Where slatted panels in the bathroom deliver maximum results
Let's break down specific positions:
The wall behind the toilet installation — a slatted panel here creates an expressive wooden backdrop for the plumbing. The surface stays dry, the visual effect is maximum. Dark slatted panels with a white or gray installation block — this is a modern toilet where you want to stop your gaze.
The wall at the bathroom entrance — the first thing you see when opening the door. A slatted accent wall here sets the character of the entire room: it's a wooden tone, natural texture, architectural rhythm that turns a standard bathroom into something memorable.
The wall opposite the bathtub — a decorative backdrop visible from the tub during water procedures. There is no direct wetting, visual contact is maximum. It is here that a wooden slatted wall creates an atmosphere — warm, natural, spa-like.
Decorative niche — a small volume finished with slatted panels creates an accent element inside the bathroom: a shelf for candles and accessories in a wooden slatted niche looks like a designer detail from a magazine.
Wall in a guest toilet — guest bathrooms are typically small and without a shower. Humidity is moderate, a visual accent is needed — slatted panels here are ideal for a full accent wall or decorative block.
Where in the bathroom slatted panels should not be used or are risky
An expert section more important than all the previous ones. Because knowing where you can't is more valuable than knowing where it's beautiful.
Inside the shower area — absolutely not. Even when treated with hydrophobic compounds, slats in the shower cabin experience daily direct wetting. Water flows into the grooves, lingers, creating an environment for mold. This is a matter of not several years, but several months.
Close to the bathtub without protection — a wall that is flush with the edge of the bathtub receives regular splashes. If panels are installed next to the bathtub, the lower edge should be raised above the potential wetting zone — or protected with a tile border with silicone sealing.
Without ventilation — slatted panels in a bathroom without working ventilation and without an air gap behind the panels is a ticking time bomb. Condensation will accumulate behind the cladding, the wall will become damp, and mold will appear on the invisible side. Ventilated installation with a 10–15 mm gap behind the panel is mandatory.
On an unprepared damp wall — if the wall regularly becomes damp (leaks, freezing), slatted panels will not hide or solve the problem. First, eliminate the cause, then apply decorative finishing.
Without closing the lower ends — an open lower end of MDF or even treated wood in a damp room is an entry point for moisture. Without a baseboard, without an end profile, without sealing, the lower edge will begin to deteriorate within the first year.
Which slatted panels are suitable for the bathroom and toilet
Choosing a material in high humidity conditions is not a matter of taste, but a matter of functional suitability for the environment.
MDF panels for painting: moisture resistance plus flexibility
MDF slatted panel for painting — one of the most reasonable options for a bathroom when used correctly. The MDF base with moisture-resistant additives is itself more resistant to moisture than regular MDF, but the key protective layer is the proper finishing paint. Semi-matte or matte moisture-resistant enamels applied in 2–3 layers create a sealed surface that moisture cannot penetrate from above or below — provided all ends and joints are sealed.
The main advantage of MDF panels for painting in the bathroom: precise color matching. Any shade from the paint catalog — white, light gray, dusty blue, warm beige — is reproduced perfectly and coordinates with tiles, furniture, and baseboards.
Important limitation: panels for painting are suitable for dry zones and splash zones — provided high-quality painting. They are not suitable for direct wetting zones, even with the highest quality paint.
Wooden slat panels: wood in the bathroom — the rules of the game
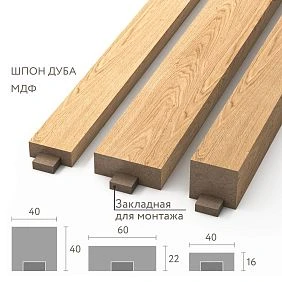
oak slat panel in the bathroom — it's not a risk, but a design solution with clear rules. Oak is one of the densest hardwoods: 700–750 kg/m³, high concentration of tannins, natural moisture resistance. With proper coating — water-repellent oil, yacht varnish, two-component polyurethane enamel — a wooden slat panel in the dry zone of the bathroom will last for many years.
Rule for wooden panels in the bathroom: dry zone, high-quality protective coating, all ends sealed, bottom joint sealed, ventilation working. Under these conditions, wood in the bathroom creates an atmosphere that no other material can replicate.
Wood in the bathroom is a natural spa. Warm texture, living grain pattern, the scent of wood in a steamy atmosphere. It's a Japanese bathhouse, a Scandinavian bathhouse, an Italian wellness hotel in your city apartment.
Decorative slatted panels for an accent wall
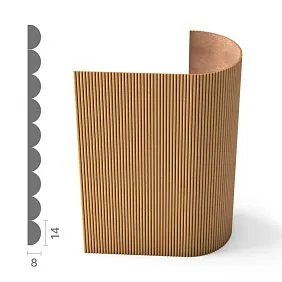
decorative slatted panels with a pronounced three-dimensional relief are used for an accent wall in the bathroom: the wall behind the installation, the wall at the entrance, the wall opposite the bathtub. The pronounced relief of the slats creates a living light-and-shadow surface that changes with any change in lighting. For a bathroom with good accent lighting, this is especially effective: side light reveals the depth of the relief, the wall becomes sculptural.
Material selection by zone: decision table
| Zone | Recommended material | Limitations |
|---|---|---|
| Wall behind the installation | Oak, MDF for painting | Ventilated installation |
| Wall at the entrance | Oak, MDF for painting | Ends are closed |
| Wall opposite the bathtub | Oak with oil finish, MDF | Splash-proof paint |
| Next to the sink | Moisture-resistant MDF for painting | Sealing the bottom joint |
| Inside the shower | Not recommended | — |
| Guest toilet | Oak, MDF, any option | Standard conditions |
Why baseboard in the bathroom is more important than anywhere else
In living rooms, baseboard is a decorative element and a technological transition. In the bathroom and toilet, it performs an additional critical function: protective. It is the lower joint — the point where the wall meets the floor — that is the main vulnerable spot of all slatted finishes in a wet room.
Water in the bathroom inevitably gets on the floor — splashes, puddles after a shower, condensation. If the lower edge of the slatted panel is not protected, water stands at the base of the finish. With capillary absorption — especially in MDF — moisture rises along the end, the substrate swells, paint begins to bubble and peel, and a black mold edge appears along the lower edge. This happens quietly, behind the baseboard — and is discovered when rework is already needed.
A properly installed Wooden baseboard or moisture-resistant profile:
-
covers the lower end of the panel, eliminating its contact with the floor surface
-
creates a strictly horizontal line, hiding floor unevenness
-
serves as a base for a layer of silicone sealant along the lower edge — a continuous, waterproof seam between the baseboard and the floor
-
visually completes the slatted wall, creating a clear lower boundary
Without a baseboard in the bathroom, there is no finished slatted wall. This is a rule without exceptions.
Which skirting board to choose for slatted panels in the bathroom
Here begins a substantive discussion. The skirting board in a bathroom is not just a "board by the floor." It is a system that must coordinate with the panels in material, color, and thickness, and functionally withstand high humidity and allow for reliable sealing.
Moisture-resistant skirting board for painting
The best choice for a bathroom with slatted MDF panels for painting is a moisture-resistant MDF skirting board for painting. It is painted in the same color as the panels — or in an accent contrasting tone. The surface is uniform, without natural defects, and the paint applies perfectly. The silicone seam along the bottom edge is applied neatly on the smooth surface of the skirting board — the result is tidy and reliable.
Wooden skirting board with protective coating
Wooden baseboard made of oak or beech with a moisture-resistant coating — oil with a high moisture protection index or yacht varnish — works in dry and moderately humid areas of the bathroom. It creates an organic pair with wooden slatted panels: the same wood species, a unified system.
Height of wooden skirting board for the bathroom: 60 mm — standard; 80 mm — for more reliable protection of the lower part of the wall; 100 mm and above — for bathrooms with tiled floors, where beautiful proportions require a more substantial skirting board.
Polyurethane skirting board
Polyurethane Items — a polyurethane skirting board is a separate category, especially valuable in wet rooms. Polyurethane does not swell, deform, or rot when in contact with moisture. A polyurethane skirting board with ready-made painting in the desired color is a ready-made solution with minimal maintenance. For bathrooms that require a neutral white or painted profile without organic bases — an optimal choice.
Skirting board in tile color
When floor tiles have a pronounced tone — light beige, dark gray, rich terracotta — a baseboard of the same shade creates a horizontal band that "connects" the floor to the wall. Slatted panels above this band read as an independent decorative zone, clearly separated from the flooring.
Baseboard in the color of the door
In a bathroom where the door has a pronounced tone — dark walnut, white enamel, gray paint — a baseboard of the same color creates a horizontal rhythm that unites all vertical wooden elements into a single system. Wooden casings matching the baseboard enhance this effect: the door becomes part of a wooden frame system, within which the slatted wall reads as an independent architectural block.
Baseboard height: practical logic
In a small combined bathroom of 3–4 m², a high baseboard (100+ mm) will overload the lower zone and create a feeling of "the baseboard absorbs the space." Here — 60–70 mm, concise and functional.
In a spacious bathroom of 8–12 m² with high ceilings, a high baseboard of 100–120 mm creates architectural solidity that makes the space significant, not just large.
How to design the joint between slatted panels and tiles
This is one of the most technically complex nodes in a bathroom with slatted panels. Tile and wood (or MDF) are materials of different character, with different thicknesses, different coefficients of thermal expansion, and fundamentally different surfaces. Joining them beautifully is a task that requires preliminary design, not "figuring it out as we go."
Option one: the panel starts above the tile baseboard
The most common and technologically sound solution. The tile runs from the floor to a certain height — for example, 60–90 cm. Above that — wooden or MDF panels. At the junction of the two materials — a horizontal wooden molding or decorative dividing strip. The molding covers the top edge of the tile and the bottom end of the panel simultaneously, creating a clear horizontal line — an architectural "belt" on the wall.
This solution provides maximum protection: the area prone to wetness is covered with tile, the slatted panels start higher — at a safe distance from water.
Option two: panel-to-tile joint in the same plane
If the tile and slatted panels are installed on the same surface with minimal thickness difference, the joint between them is closed with:
-
a thin metal strip — an aluminum divider profile
-
a wooden molding glued into the joint with a silicone seam on both sides
-
a wide silicone seam in a matching color — for a minimalist solution without additional profiles
Option three: molding as a decorative divider
wooden molding installed horizontally at the junction of two zones turns into an architectural element. This is not just a technical solution — it is a decorative horizontal line that sets the rhythm of the wall and separates finishing zones with architectural logic.
Molding from the same species as the slatted panels is tinted to the same color — then the transition from the tiled area to the wooden area reads as a designed transition, not a random joint.
Sealing the joint: silicone as the final line of defense
In any of the listed solutions, the joint between wood (or MDF) and tile must be filled with sanitary silicone sealant. Specifically sanitary — with antifungal additives that prevent the formation of black residue. The seam is applied continuously, carefully smoothed, creating a waterproof line.
Silicone color: transparent — for minimalist solutions, white — for white trims and moldings, tinted to match wood — for maximum invisibility.
How to close the ends of slatted panels in a bathroom
Ends in a wet room are priority number one after the bottom joint. An open cut in a humid environment is an open door for water.
Side ends at a wall or corner
If the panels end at a wall or corner, the end goes into the corner and is closed with a corner profile. For wooden panels — a corner strip from the same species, treated with the same compound. For MDF for painting — an MDF or plastic corner profile, painted to match. The joint between the profile and the wall — silicone sealant.
End at a door trim
With the correct installation sequence: first panels, then trims. wooden casing covers the side end of the panel — the cut goes under the trim, the joint is automatically closed. The line between the trim and the panel is a thin silicone seam.
If the trims are already installed — the end of the panel is covered with a thin layout from wooden trim. The layout is tinted to match the nearest element — the panel or the trim.
The top end with a partial wall height
When slatted panels do not reach the ceiling, the top end is covered with a horizontal molding. In the bathroom, the molding along the top edge of the panel field is not just a decorative detail, but also protection of the top cut from condensation that flows down the wall when the surface cools sharply.
The end near the mirror and furniture
Slatted panels next to the mirror: the side end near the mirror is covered with an end strip or profile. The mirror is mounted over the panels with a 2–3 mm gap, the gap is filled with transparent silicone.
Slatted panels next to furniture (vanity cabinet, wardrobe): if the furniture is flush against the wall, the side end of the panel goes behind the furniture. If there is a gap — an end strip.
Color and style of slatted panels for the bathroom
In the bathroom, color determines not only aesthetics but also the sense of space. A small bathroom and a large bathroom require fundamentally different color solutions.
White and light panels for a small bathroom
White, cream, and light gray slatted panels in a small bathroom are a professional answer to the question of how to make a cramped space feel more spacious. A light monochrome surface with a vertical slatted rhythm works in two directions at once: the light tone visually expands the space, while the vertical rhythm of the slats stretches it upward. As a result, a 3–4 m² bathroom with white slatted panels looks significantly more spacious than the same bathroom with a smooth dark wall.
MDF slatted panel for painting in white or light gray enamel is the optimal tool for this effect. A perfectly smooth surface, precise color, minimalist character.
Wood tone in the bathroom: spa atmosphere
The natural texture of wood in the bathroom is that very effect of an expensive wellness hotel that you want to recreate at home. Warm honey oak, ashy smoky ash, golden larch — in the steam atmosphere of the bathroom, wood reveals itself in a special way: its pattern becomes deeper, its color richer.
oak slat panel in the bathroom is a choice for those who want not just function from this space, but an impression. And with proper protection, it is a long-lasting result that does not require rework.
Dark panels as an accent
Dark slatted panels — dark oak, anthracite, graphite in paint — create an intimate, warm, immersive atmosphere. This looks beautiful in bathrooms with good accent lighting: side light reveals the relief of the slats, making the surface appear voluminous.
An important condition for dark panels in the bathroom: the room must be sufficiently large or very well lit. In a small 2–3 m² bathroom, dark wall panels will create a feeling of a 'box' — not the effect most people expect.
Panels matching the door and furniture color
When slatted panels, the door, and bathroom furniture are in a single tone, the space reads as designed, not assembled from different parts. This doesn't mean 'everything is the same' — it means 'everything is coordinated.' Paintable panels offer absolute freedom here: any door color, any furniture color can be reproduced on the panels with precision down to the RAL code.
Combining slat panels with tiles: three approaches
| Approach | Tiles | Panels | Effect |
|---|---|---|---|
| Contrast | White glossy | Dark oak | Graphic rigor, expensive |
| Tonal unity | Beige matte | Natural oak | Warmth, naturalness, spa |
| Monochrome | Dark gray | MDF anthracite | Strictness, minimalism |
Mistakes when choosing slat panels for a bathroom
A bathroom is a room that punishes mistakes quickly and noticeably. Here's what you should consider in advance.
-
Choosing panels only from a photo — the screen doesn't convey the real color under specific lighting conditions. A sample in your bathroom, under your light, is the only way to make the right decision.
-
Not considering the wet zone — panels in the direct splash zone without protection will start to deteriorate in the first year.
-
Not sealing the bottom end — an open bottom cut near the floor in a humid environment = mold and swelling within a few months.
-
Installing panels without a baseboard — no bottom protection, no sealing, no completeness.
-
Leaving ends unsealed — an open side cut in a bathroom is a point of moisture and dirt accumulation.
-
Not providing ventilation behind the panels — installation flush against the wall without a gap creates a condensation zone.
-
Mixing too many textures — tiles + wood + stucco + metal inserts + several colors. A bathroom with two or three materials looks more convincing than one with six.
-
Not matching panels with doors and architraves — if the architraves are white and the panels are warm wood without a unifying tone, the boundary between them looks random
-
Not planning cutouts for pipes and sockets — behind the toilet installation, in the sink area there may be hidden pipelines and connection points. They need to be marked on the installation diagram before purchasing panels
-
Not calculating the joint with the ceiling — the top edge of the panels must be covered: with a molding, a cornice, or go under a stretch ceiling
Where to buy slatted panels and accessories for the bathroom
Choosing slatted panels for the bathroom is choosing a system, not a separate product. You need the panels themselves, a skirting board for the bottom unit, moldings for joints and horizontal transitions, trim for ends and corners, architraves for doorways. All these elements must be manufactured to uniform standards, from coordinated materials, with precise tolerances — then everything fits into place, not adjusted haphazardly.
In the STAVROS catalog:
-
Rafter panels — oak, MDF for painting, decorative with relief, several slat profiles and substrate width
-
decorative slatted panels — with pronounced relief for accent walls in the bathroom
-
Primed MDF slat panel — ideal base for painting for the bathroom
-
Oak Slat Panel — natural solid wood for a spa atmosphere in dry areas of the bathroom
-
Wooden baseboard — several profiles and heights for the bottom unit of the slatted wall
-
Wooden moldings — for joints, horizontal transitions, top finishes
-
Wooden trim — end strips, corner profiles, trims for all abutments
-
Wooden casings — for door openings in a unified system with slatted finish
-
Polyurethane Items — skirting boards, moldings, profiles, moisture-resistant, for wet areas of the bathroom
When the entire set comes from one source — the skirting board is matched to the panel in thickness, the molding covers the end without trimming, the linear profile for the corner matches in profile. This is not just convenience — it's the difference between a finish that looks designed and a finish that looks assembled.
FAQ: Answers to popular questions
Can slatted panels be installed in the bathroom at all?
Yes, but only in dry zones and zones of moderate splashing — not in shower cabins and not in areas of direct wetting. With the right choice of material, protective coating, closed ends, sealed bottom joint, and working ventilation, slatted panels in the bathroom will last for many years without loss of appearance.
Which material is best for slatted panels in the bathroom?
For splash zones — MDF with moisture-resistant paint in 2–3 layers, all ends closed. For dry zones — oak with oil or varnish coating. For a guest toilet — any option: humidity there is moderate, conditions are closer to a living room.
Which skirting board to choose for a bathroom with slatted panels?
Moisture-resistant MDF baseboard for painting — for monochrome solutions; wooden baseboard with moisture-protective coating — for wooden panels; polyurethane baseboard — for maximum moisture resistance without organic bases. Height — 60–80 mm for a standard bathroom, 100 mm for spacious bathrooms.
Is sealing of joints necessary when installing slatted panels in the bathroom?
Mandatory — in the lower joint (between the baseboard and the floor), in the joint of panels with tiles, in places adjacent to pipes and plumbing. Sanitary silicone sealant with antifungal additives is the standard for the bathroom. Without sealing, moisture will find its way into any gap, no matter how neat the joint looks from the outside.
How to properly close the ends of slatted panels in the bathroom?
Trims are mounted over the panels — they cover the side ends at door openings. For other ends — end strips made of the same material, corner profiles for internal and external corners, moldings from linear elements. All joints of end elements with tiles or walls — sanitary silicone.
How to design the area between tiles and slatted panels?
The best way is a horizontal molding or decorative strip at the junction of two materials. The molding hides the top edge of the tile and the bottom end of the panel, creating a clear horizontal transition line. The joint between the molding and the tile is a silicone seam. This is technically reliable and aesthetically complete.
Are slatted panels in a small bathroom cramped?
Not cramped if chosen correctly: light tone, wide slat spacing of 40–60 mm, moderate relief height. The vertical rhythm of the slats visually stretches the space upward, the light color expands it. A gross mistake is dark, massive slats in a small bathroom: this creates pressure, not an atmosphere.