Article Contents:
- Where exactly to use slat panels on the balcony and loggia
- Insulated loggia: a full-fledged living area
- Glazed balcony without insulation: a conditional zone
- Accent wall on the loggia: study, relaxation area, storage
- Study on the loggia: concentration and atmosphere
- Storage area and mini-relaxation zone
- Which panels to choose for the balcony and loggia: comparing materials
- MDF panels for the loggia: practicality first
- Wooden slatted panels for an insulated loggia
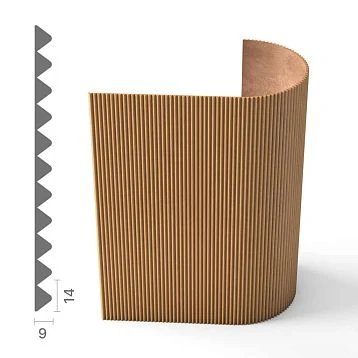
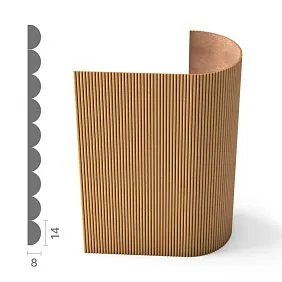
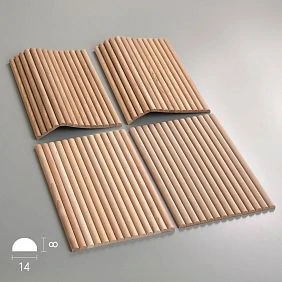
- Decorative slatted panels: volume and relief
- When wood without protection doesn't work
- Comparative table of materials for a balcony
- Why a baseboard on a balcony is more than a decorative detail
- Which baseboard to choose for slatted panels on a balcony and loggia
- Wooden baseboard for an insulated loggia
- MDF baseboard for painting: color precision
- Baseboard matching the balcony floor color
- Baseboard matching the balcony door and frame color
- High baseboard for a balcony: yes or no
- How to design the junction with a window, slopes and balcony door
- Panel connection to window slope
- Transition to windowsill
- Joint of slatted panels with balcony door
- Molding as an architectural divider
- How to design corners and ends of slatted panels on a balcony and loggia
- Inner corner of the loggia
- Outer corner near the balcony door
- Side end of the panel at the window
- Top end and ceiling transition
- Bottom joint: baseboard plus sealant
- Color of slatted panels for balcony and loggia: how not to make a mistake
- Light panels for a small balcony
- Wood-look panels for a warm effect
- Panels for painting: color control
- Dark panels on the balcony: caution
- Panels matching the balcony door and frame color
- Contrast baseboard as an accent
- Panels and baseboard in the same shade: unity from bottom to top
- Mistakes when choosing and installing slatted panels for the balcony
- Where to buy slatted panels, skirting boards, and additional elements for a balcony
- FAQ: Answers to Popular Questions
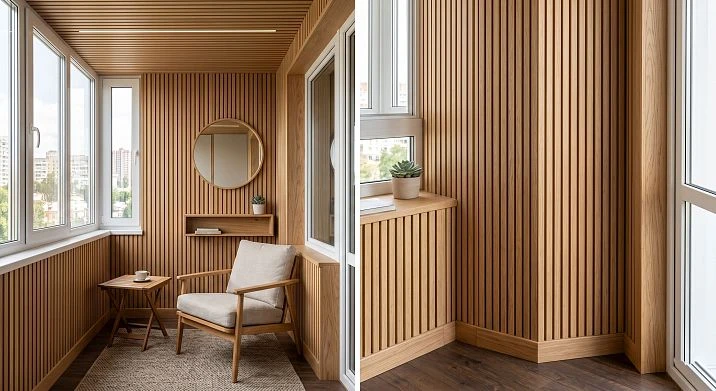
Slatted panels for the balcony — one of the most expressive answers to this question. The vertical wooden rhythm turns a gray concrete loggia into a full-fledged room. But this result is only possible with a systematic approach: when not only the choice of the panel itself is thought out, but also the skirting board under it, the window slopes, the junction with the balcony door, the ends at the corners, and the lower transition to the floor. Without these details, the slatted wall looks unfinished.
That is exactly what this is about. Let's break it down in order: from material selection to the last end profile. No generalities, no fluff — only what you really need to know before starting to finish a balcony with slatted panels.

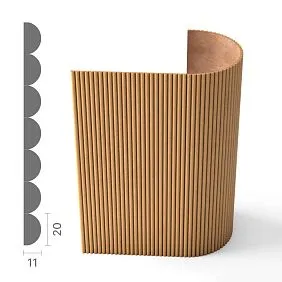
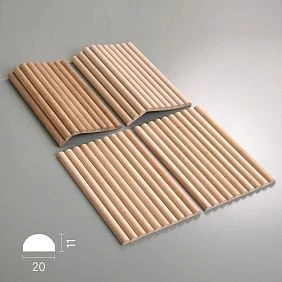
Where exactly to use slatted panels on a balcony and loggia
A balcony is not a single plane. It is a space with its own structure: several walls, floor, ceiling, window unit, balcony door, possibly built-in storage. Understanding where slatted panels will have the maximum effect means placing the accents correctly.




Insulated loggia: a full-fledged living area
An insulated loggia with good glazing is an ideal space for decorative slatted panels. Here, the temperature regime is stable, humidity is under control, and the walls accept the same finish as in living rooms. Slatted panels on the side and end walls of the loggia form a wooden "cocoon" — a space that feels visually and tactilely completely different from plaster or wallpaper.
It is on the insulated loggia that wooden slatted panels made of oak — natural solid wood with proper coating will last here for a long time, revealing its texture with each passing year.
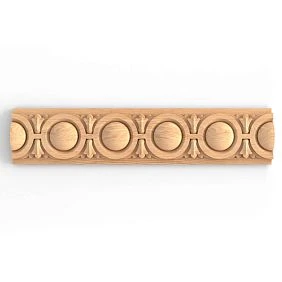
Our factory also produces:



Glazed balcony without insulation: zone of conditions
On a glazed but uninsulated balcony, the conditions are different. In summer — heat, in winter — significantly colder than in the apartment. Humidity fluctuations. Condensation on the windows during transitional seasons. Here Painted MDF plank panels with a moisture-resistant base and hard enamel — a more cautious choice than natural wood without additional protection.
Get Consultation
Accent wall on the loggia: study, relaxation area, storage
Slatted panels for the loggia do not necessarily cover all walls entirely. One accent slatted wall — the end wall, behind the desk, behind the sofa, or behind the storage area — already creates the character of the space. The other walls can be painted in a neutral tone: the contrast between the slatted relief and the smooth wall works expressively.
The wall by the balcony door is another scenario. Rack panel here creates a "frame" around the doorway, which visually connects the interior of the loggia with the room. This is especially interesting when slatted panels are also present in the room itself — then the balcony door becomes an architectural transition from one wooden environment to another.
Office on the loggia: focus and atmosphere
A loggia as a home office is an increasingly popular scenario. Slatted panels on the wall behind the desk create a professional, focused background. Wood reduces psychological tension, the wooden texture calms the eye. For video calls — an expressive, non-home background. For work — a visual focal point that organizes the space.
Storage area and mini-relaxation zone
Shelves for storage integrated into the slatted wall of the loggia is another popular scenario. The slatted background behind open shelves creates a structured, thoughtful look. A chair by the window with a slatted wall behind it — a small reading nook that, with proper finishing, looks like a full-fledged living area.
Which panels to choose for the balcony and loggia: comparing materials
The operating conditions of the balcony and loggia determine the choice of panel material more precisely than any aesthetic preferences. Let's analyze each option honestly.
MDF panels for the loggia: practicality first
Primed MDF slatted panel for painting — a universal choice for the loggia with any level of glazing and insulation. MDF with a density of 750 kg/m³ and higher with a moisture-resistant binder tolerates moderate humidity fluctuations without deformation. The final hard enamel with water-repellent properties creates a protective barrier that withstands condensation, accidental drops, and wet cleaning.
The key advantage of MDF for the balcony: precise geometry without deformations. Wood expands and contracts with humidity changes — on the balcony this leads to gaps. MDF with good paint is significantly more stable.
For MDF panels on the balcony, high-quality preparation of the bottom edge is important: it is closed wooden skirting board or with a special profile with sealing of the joint along the floor — this protects the bottom cut from capillary moisture absorption.
Wooden slatted panels for an insulated loggia
Oak wooden slatted panel on an insulated loggia — this is a choice in favor of a natural material that lives and breathes. Oak works with humidity changes, but with proper coating — two-component polyurethane varnish or special oil with hard wax additives — this process remains within acceptable limits.
Wooden slatted panels imitating wood on the balcony create a warm, natural interior that radically differs from a standard concrete loggia. This is an investment in the quality of the environment that pays off through the atmosphere.
Condition: an insulated loggia with sealed glazing, without direct exposure to precipitation. If the balcony is open or partially open — wooden panels without special external impregnation are not suitable.
Decorative slatted panels: volume and relief
decorative slatted panels with a pronounced three-dimensional relief work well on an accent wall of a closed loggia. A relief of 15–25 mm creates a sculptural surface that plays with daylight and evening lighting. If the loggia has spot lighting — decorative panels with deep relief look especially expressive.
When wood without protection does not work
On an open balcony without glazing, on a loggia with poor glazing seals, or in regions with high precipitation — neither decorative nor wooden panels without special outdoor protection work. In such conditions, either special outdoor materials are needed, or slatted panels are installed only in a protected area — near the inner end wall, away from direct moisture exposure.
Comparative table of balcony materials
| Material | Insulated loggia | Glazed balcony | Installation conditions |
|---|---|---|---|
| MDF for painting, moisture-resistant | Excellent | Good | Closed end + enamel |
| Oak with varnish/oil | Excellent | Caution | Hard coating, closed ends |
| Decorative MDF panels | Excellent | Good | As for MDF |
| Panels for painting | Excellent | Good | Hard washable enamel |
Why a skirting board on a balcony is more than just a decorative detail
Here's a question few ask when planning balcony finishing: what happens to the bottom edge of the slatted panel near the floor? It seems insignificant — until it turns out that this very joint determines the durability of the entire finish.
The balcony floor is a surface with a special mode. Street dust accumulates here, brought in when the door is opened. Condensation may occur here during transitional seasons. When cleaning, it's the floor that gets washed, and water regularly contacts the area of the bottom joint. If the bottom end of the slatted panel is open and directly adjacent to the floor without a skirting board — moisture rises through the end into the material. MDF begins to swell. Paint peels off. The bottom edge of the panel deforms.
Wooden baseboard under slatted panels on a balcony or loggia performs the following functions simultaneously:
-
completely covers the bottom end of the backing and slats from contact with the floor surface and moisture
-
creates a clear horizontal bottom line that 'grounds' the slatted wall and visually completes it
-
takes on mechanical impact during cleaning — mop, vacuum cleaner, bucket of water
-
hides the technological gap between the panel and the floor, which is necessary to compensate for linear expansion
-
when there is a sealing joint between the baseboard and the floor, it creates a completely waterproof lower assembly
Skipping the baseboard on the balcony means risking that after one or two seasons, the lower edge of the finish will start showing traces of moisture. It won't be possible to fix this unnoticed.
Baseboard height for the balcony: 60–80 mm is optimal for most loggias. In small balconies (3–5 m²), a high baseboard of 100 mm or more creates visual heaviness near the floor, visually lowering the already small space. The exception is a loggia with a high ceiling of 2.7 m and above: here a baseboard of 80–100 mm is proportional and appropriate.
Which baseboard to choose for slatted panels on the balcony and loggia
Choosing a baseboard for a balcony slatted wall is both an aesthetic and technical decision. Let's analyze all options considering operating conditions.
Wooden baseboard for an insulated loggia
Wooden baseboard made of oak with a hard coating is the first choice for insulated loggias with wooden slatted panels. Unity of material: oak on the wall and oak near the floor. A single tone, a single coating — the system looks designed, not assembled from random elements.
Wooden baseboard profile for the balcony: preferably rectangular with a small chamfer on the top edge. A complex cornice profile is inappropriate on the balcony — the space is too small for lavish decor. Minimalism of a rectangular profile baseboard is what is needed.
A wooden baseboard for the balcony requires a high-quality coating: two-component polyurethane varnish or oil with wax-containing additives. Such a coating withstands wet cleaning and does not change color under moderate exposure to moisture.
MDF baseboard for painting: color precision
For a loggia with slatted panels for painting — MDF molding or an MDF baseboard for painting in the exact color of the panels creates a perfectly aligned color field. A white baseboard under white panels — the wall and its lower base read as a single volume. A gray baseboard under gray panels — a monochrome system with pronounced geometry.
For an MDF baseboard on the balcony, a high-quality finishing enamel is important: semi-matte or matte, with a water-repellent effect. The lower joint of the baseboard with the floor is sealed with transparent acrylic sealant.
Baseboard matching the balcony floor color
When the flooring on the loggia has a pronounced tone — warm beige laminate, dark porcelain stoneware, light gray tiles — the baseboard can be chosen close to the floor color. This creates a "wide floor" effect, which visually expands the small balcony space: the boundary between the floor and wall becomes less pronounced.
This technique is especially effective on small balconies of 3–4 m²: light floor + light baseboard + light slatted panels = a space that appears significantly more spacious than it actually is.
Baseboard matching the balcony door and frame color
If the balcony door has a pronounced frame tone — white, dark walnut, anthracite — a baseboard of the same color creates a horizontal architectural rhythm. Vertical window and door frames, horizontal baseboard at the floor — the balcony space is structured with clear lines.
High baseboard for the balcony: yes or no
A high baseboard of 100–120 mm on the loggia is only appropriate with sufficient ceiling height (from 2.6 m) and area (from 6–8 m²). On a small balcony of 3–4 m² with a ceiling of 2.4 m, a high baseboard creates disproportion. For such spaces — a baseboard of 60–70 mm, no more.
How to design the junction with a window, slopes, and balcony door
This is the most technically complex node when finishing a balcony with slatted panels. The balcony block is simultaneously a window opening, a door opening, slopes, a window sill, and a frame. All these elements exist before the installation of the panels, and each of them creates an abutment point that needs to be neatly designed.
Abutment of panels to the window slope
The side slope of the window block is the vertical surface between the frame and the wall. The slatted panel on the side wall of the loggia approaches this slope at a 90° angle. There are three design options.
Option 1: the panel is brought flush to the slope. The end of the panel abuts the slope surface. The gap between the end and the slope is minimal, sealed with transparent silicone. For this, the end of the panel must be carefully cut along the plane of the slope — this requires precise measurement.
Option 2: vertical trim strip. Wooden trim In the form of a thin vertical layout, it is mounted between the end of the panel and the slope. This is a decorative vertical profile that creates a clear transition line and hides any inaccuracies in the joint.
Option 3: slope made of slatted panel. The slope itself is also finished with slatted panels or a smooth wooden sheet in the same color. Then the abutment between the side wall and the slope is a transition between two homogeneous surfaces, which is designed with a corner profile made of wooden trim.
Transition to the window sill
The window sill creates a horizontal plane that 'interrupts' the vertical slatted rhythm of the wall. The slatted panel under the window sill ends at its lower edge. The joint between the end of the panel and the end of the window sill is designed wooden molding in a horizontal position — a small horizontal profile that creates a clear transition line between the vertical slatted surface and the horizontal plane of the windowsill.
Joint of slatted panels with the balcony door
The balcony door is an opening with or without trim, depending on the door block design. If the balcony block is equipped with trim — the scheme is the same as in the hallway: wooden casing is mounted on top of the slatted panel, covering its side end. This is a standard solution where the trim serves as both an extension element and an end profile simultaneously.
If the balcony block has no pronounced trim — a vertical extension strip from the molding is used, which creates a neat transition between the slatted panel and the door frame. The gap between the strip and the frame is minimal, sealed with transparent silicone or acrylic in the matching color.
Molding as an architectural divider
wooden molding horizontally along the windowsill line or vertically along the end of the slatted area — it is an architectural tool that makes transitions between materials intentional and clear. The molding says: here one surface ends and another begins. Without molding, the same transition looks random — a joint of two materials without visual justification.
How to design corners and ends of slatted panels on the balcony and loggia
On the balcony — especially a rectangular one — there are more corner connections than it seems at first glance. Two side corners, the top end at the ceiling, the bottom at the floor, ends at the window block. Each of them requires a solution.
Inner corner of the loggia
Internal corner — the intersection of two side walls — is one of the most visible joints on the loggia. A slatted panel of one wall goes into the corner, the second panel butts against it. Corner Trim — a wooden corner batten — is mounted in the corner, covering both ends simultaneously. The profile of the corner batten is rectangular or rounded, depending on the loggia interior style.
For MDF panels to be painted: the MDF corner profile is painted the same color — the corner becomes invisible.
External corner near the balcony door
If the slatted panel wraps around an external corner — at the loggia entrance from the room side — the external edge corner is finished with a corner protective profile made of wooden trim. This protects the edge from chipping and provides a decorative vertical line. On the loggia, this corner is bumped during passage — the corner profile absorbs mechanical impact, protecting the slatted panel.
Side end of the panel at the window
The side end of the slatted panel facing the window unit — this is the MDF edge or wood end. Without protection, it looks unfinished and, in the presence of moisture, begins to deteriorate first. A vertical trim strip made of trim or Molding along the side edge covers the end and creates a decorative vertical line along the edge of the slatted field.
Top end and ceiling transition
The top end of the slatted panel is covered by a horizontal molding or goes under the ceiling plinth from wooden trim. If the panels go to the full height of the wall, the top joint with the ceiling is covered by a ceiling plinth. For a loggia, a simple profile ceiling plinth — rectangular or with a minimal chamfer — looks proportional.
Bottom joint: plinth plus sealant
The bottom assembly is discussed above — we will only repeat the key point: the end of the panel at the floor is covered wooden skirting board with a technological gap of 5–8 mm between the bottom edge of the panel and the floor. The gap is needed to compensate for expansion during temperature changes. The joint of the plinth with the floor is sealed with transparent acrylic sealant — this completely protects the bottom assembly from water during cleaning.
Color of slatted panels for balcony and loggia: how not to make a mistake
A small space does not forgive mistakes easily. On a balcony of 4–6 m², the color scheme of the panels determines the perception of the entire space — and does so convincingly. Therefore, the choice of color should be approached thoughtfully.
Light panels for a small balcony
White, cream, light gray slatted panels on a small balcony of 3–5 m² are a classic with an impeccable result. The light tone reflects natural light, the space feels open. The vertical slatted rhythm in a light tone stretches the walls upward — the balcony seems taller.
MDF slatted panel for painting in white or light gray matte enamel — an ideal base for this solution. Matte surface without glare, light relief, precise tone. A light plinth of the same tone completes the system.
Wood-look panels for a warm effect
Wooden panels on the loggia — or wood-look panels — create a feeling that no other material can convey. It's warmth, naturalness, coziness. Combined with a wooden floor or warm wood-look flooring — Oak Slat Panels they turn a concrete loggia into a wooden pavilion.
The wood tone is chosen considering the floor: light floor — light oak or birch on the walls; warm medium floor tone — natural or honey oak; dark floor — light or medium panels to avoid creating a "tunnel" effect.
Paintable panels: color control
Paintable lath panels on the balcony — it's a fine-tuning tool. Want a warm ochre tone that creates a feeling of sunlight even on a cloudy day? Please. Want a fresh mint shade that echoes the view from the window? Possible. Paintable panels are color in RAL with precision down to 0.1 shade.
Dark panels on the balcony: caution
Dark slatted panels on the loggia — an expressive solution suitable for large and well-lit spaces. For a small balcony of 3–4 m², dark panels create a feeling of confinement, amplified by limited natural light. If you want a dark accent — only on one end wall, combined with light side walls and good artificial light.
Panels matching the balcony door and frame color
When slatted panels are tinted the same color as the balcony block frame — the system looks cohesive. White frames + white slatted panels = a minimalist, light loggia. Dark anthracite frame profile + dark panels = a modern, restrained balcony with character. This is the principle of color consistency — one of the main tools in finishing small spaces.
Contrasting baseboard as an accent
A dark baseboard on a light slatted wall is a design technique that adds structure to the space. It is a horizontal accent line near the floor that "holds" the wall. On the balcony, be cautious: in a small space, too much contrast in the baseboard can fragment an already limited volume.
Panels and baseboard in the same shade: unity from bottom to top
When panels and baseboard are in the same tone, the wall reads as a single volume from floor to ceiling. There is no horizontal break. No color change near the floor. This is a monolithic, architectural solution—effective for both small and large loggias.
Mistakes when choosing and installing slatted panels for the balcony
-
Installing panels without a baseboard—the lower end without protection on the balcony deteriorates faster than anything else
-
Not accounting for humidity fluctuations—wooden panels without proper coating on an uninsulated balcony will develop cracks and gaps after one or two seasons
-
Not planning the junction with the window unit—the panel end near the window without an additional trim looks unfinished and is not protected from moisture running down the frame
-
Leaving open ends—any exposed cut of MDF or wood on the balcony with moderate humidity starts to absorb moisture
-
Choosing dark panels for a small balcony—a dark tone in three to four meters of enclosed space creates psychological pressure
-
Not coordinating slat panels with flooring — panels in a warm honey tone against a cold gray floor — is a stylistic conflict that is immediately visible
-
Forgetting about slopes and window sills — if slopes and window sills are not coordinated with slat panels in tone and material, they become foreign elements against the wooden wall
-
Not providing additional elements — ordering panels without moldings, corner profiles, and end strips means leaving all joints uncovered
-
Using wood without coating — natural wood without varnish or oil on a balcony, even in an enclosed space, quickly turns gray and loses its appearance
-
Mixing incompatible tones — warm oak on the wall and a cold white frame, a warm beige baseboard under cold gray panels — such mismatches are striking
Where to buy slat panels, baseboards, and additional elements for the balcony
Balcony and loggia are spaces where details are constantly visible and from close range. There is no long wall that could "dissolve" a careless joint or mismatched tone. Every element of the system is in plain sight.
The STAVROS catalog offers a complete set for systematic finishing of the balcony and loggia with slat panels:
-
Rafter panels — oak, MDF for painting, decorative with relief, several profiles
-
decorative slatted panels — with a three-dimensional relief for an accent wall of an enclosed loggia
-
Primed MDF slat panel — paintable in any color, moisture-resistant base for balcony conditions
-
Oak Slat Panel — natural solid wood for a warm wooden loggia
-
Wooden baseboard — for a reliable bottom joint of a slatted balcony wall
-
Wooden moldings — for horizontal transitions at the windowsill, along the top edge, and decorative frame elements
-
Wooden trim — corner profiles, end strips, vertical layouts for all junctions on the balcony
-
Wooden casings — for balcony door openings in a coordinated wooden system
-
All solid wood products — complete catalog for finishing and trim elements
A set from a single manufacturer is not just a logistical convenience. It is confidence that the tones will match, the profiles will align, and the tolerances will be met. The panel will fit the baseboard without a gap. The molding will cover the end on the first try. The trim for the corner will match the thickness of the underlayment without adjustment. The balcony loggia after finishing will look like a designed space—not the result of several separate purchases from different places.
FAQ: Answers to popular questions
Can slatted panels be used on a balcony?
Yes, and this is one of the best solutions for finishing a closed loggia and a glazed balcony. On an insulated loggia, both wooden panels and MDF for painting are suitable. On a glazed balcony without insulation, MDF with a moisture-resistant base and hard enamel is primarily used. On an open balcony without glazing, only materials for exterior use with weather-resistant impregnation are suitable.
Which baseboard to choose for slatted panels on the balcony?
Wooden baseboard matching the panels — for insulated loggias with wooden panels. MDF for painting — for balconies with a monochrome system. Height: 60–80 mm for most balconies and loggias. A mandatory condition is sealing the joint between the baseboard and the floor with transparent acrylic sealant.
How to finish the joint between slatted panels and the window slope?
Three options: bring the panel flush to the slope with silicone sealing; use a vertical trim strip from the molding between the panel end and the slope; finish the slope itself with wood material and trim the corner with a corner profile. The optimal solution depends on the slope material and its width.
Which slatted panels to choose for a small loggia?
Light MDF panels for painting with a moderate slat relief of 12–15 mm. A vertical rhythm stretches the space upward. A light tone visually expands it. Baseboard — matching the panels, 60–70 mm high. Moldings and end profiles — from molding of the same color.
What to do with the ends of slatted panels near the window on the balcony?
The ends are covered with a vertical trim strip from wooden molding or a decorative molding. If there are trims on the balcony block, the trim is mounted over the panel, covering the end. No open cut of MDF or wood on the balcony should remain unprotected.
How to make the balcony visually warmer with slatted panels?
Choose wooden slatted panels made of oak with matte oil or tinted wooden panels in a warm honey shade. Baseboard from the same wood species. Lighting — warm white light 2700–3000 K. Floor covering — warm laminate or parquet board imitating wood. This set turns a concrete loggia into a wooden corner where you want to stay.