Article Contents:
- Why a symmetrical frame can turn out to be inconvenient
- What MLD-057 is and why its dimensions matter for the hand
- Twelve millimeters that disappear on the drawing and appear under the fingers
- First the handle, then the molding: the correct order for marking the facade
- Determine the handle type
- Measure the full dimension
- Check the protrusion from the facade
- Mark the mounting holes
- Determine the grip direction
- Physically place the handle
- The old handle remains
- The handle changes, the holes are preserved
- The holes are transferred
- The handle is replaced with a button
- How many fingers fit under the bracket
- Where are the knuckles
- What is the offset of the bracket
- Where is the nearest horizontal line of the frame
- Can the drawer be opened with one hand
- Side view
- Top view
- Open door
- Fully extended drawer
- Grip with right and left hand
- Top and bottom row of furniture
- Increase the inner margin
- Change proportions
- Move the handle
- Choose a bracket with a larger offset
- Choose a larger button
- Use a recessed handle
- Avoid the nearest side of the frame
- Choose a flatter profile
- Replacing the handle
- Moving the handle
- Local modification of the frame
- Replacing the facade
- Accepting the constraint
- MDF
- Oak
- Oak
- Example of preliminary calculation
- From a wide frame
- From a flat decorative strip
- From a carved overlay
- From a shaped handle
- From a wall profile
- Marking the frame without the handle installed
- Measuring the distance to the axis
- Drawing the profile with a flat line
- Considering a compact molding safe
- Checking only the appearance
- Not considering the grip direction
- First gluing the frames, then choosing the handles
- Immediately manufacturing the entire series
- Transferring the top drawer solution to the bottom one
- Choose a handle only by style
- Forgetting about old holes
- Paint the entire batch before trial assembly
- Use one common perimeter for different facades
- Do not save the repair remainder
- What size does MLD-057 have?
- Can MLD-057 interfere with the handle?
- What distance should be left between the handle and the molding?
- Why can't you measure from the handle axis?
- What reach is needed for a pull handle?
- Do you need to buy the handle or the molding first?
- Can you leave the old holes?
- What to do if the new handle doesn't match the holes?
- Can you install the handle inside the frame?
- Is MLD-057 suitable for a small drawer?
- How to make a template for 12 mm thickness?
- Is painter's tape enough?
- Who should check the grip?
- Do I need to make a control facade?
- Is MLD-057 suitable for a kitchen?
- Can I use the profile on a cabinet?
- What to choose for a painted facade?
- What is the length of beech and oak?
- How to calculate MLD-057 for a frame?
- Can I sum up all frames with one total length?
- What to do if the molding is already in the way?
- Can I just take a handle with a larger offset?
- Where to buy MLD-057?
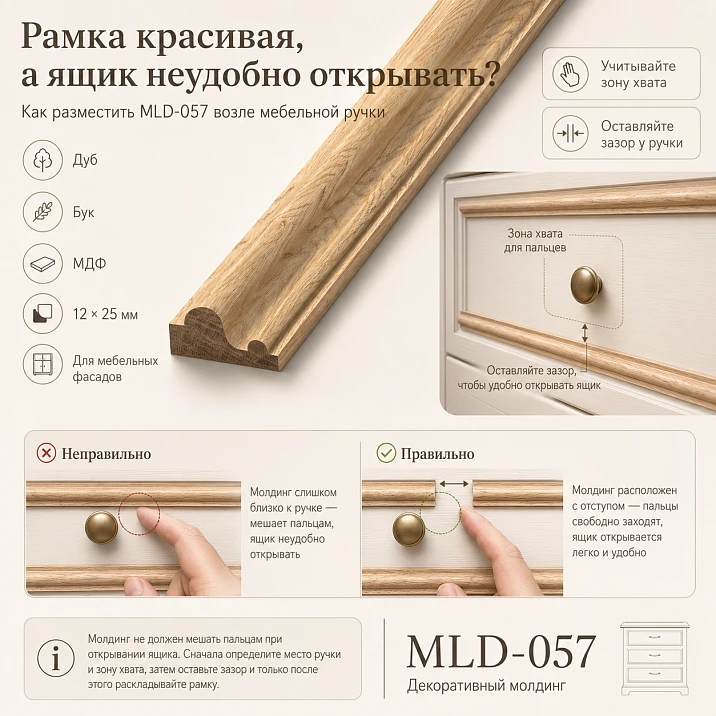
The dresser is ready. The facades are painted, the handles are strictly centered, and the decorative frames form a neat rhythm. In the photo, the furniture looks flawless: even gaps, straight corners, and precise proportions. But when you pull the top drawer toward you, your fingers hit the rounded protrusion of the frame. You have to catch the handle with your fingertips, your wrist turns at an awkward angle, and marks from nails and knuckles gradually appear on the fresh enamel.
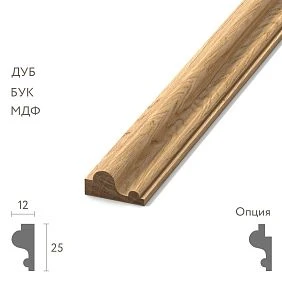
This happens when furniture molding is perceived only as a line on the facade. On the drawing, MLD-057 looks like a strip 25 mm wide. In reality, the profile has volume and protrudes 12 mm above the mounting plane. These twelve millimeters end up exactly where the hand passes: under the bracket, to the side of the button, near the edge of the rail handle, or next to old holes that were decided to keep.
The symmetry of the facade by itself does not guarantee a comfortable grip. The frame can be impeccably centered relative to the door and still interfere with daily use of the furniture. Therefore, buying furniture molding MLD-057 sized 25 × 12 mm is better after checking not only the facade pattern but also the movement of the hand.
The correct sequence does not start with the decorative frame. First, determine the position of the handle, its protrusion, shape, mounting points, and grip method. Then mark the working zone of the fingers on the facade. Only after that build the inner boundary of MLD-057, create a three-dimensional mockup, and calculate the number of strips.
The main principle is simple: furniture should remain comfortable after decoration. A beautiful profile does not have to retreat infinitely far from the handle, but there should be enough space between them for a real grip. Not an imaginary finger on a diagram, but the palm of a person who will open this drawer in the morning, in the evening, in a hurry, with a wet hand, or with heavy dishes inside.
Why a symmetrical frame can turn out to be uncomfortable
The designer starts with geometry. He measures the facade, sets equal gaps from the four edges, draws central axes, and inscribes a rectangle. The handle usually ends up in the middle of the composition. From the front view, everything looks convincing.
The hand acts differently. It does not move along central axes and does not touch the facade at one conditional point. When gripping, the fingers go under the handle, bend, approach the plane, and the knuckles pass near the nearest protruding element.
For a handle-bracket, the working movement starts from below or above — depending on the height of the drawer and the person's habit. Fingers pass under the arc, and the back of the hand approaches the facade. For a button, the thumb and index finger grip the handle from both sides. For a long rail model, the palm can shift along the entire gripping part.
Therefore, the same distance from the handle axis to the four sides of the frame proves nothing. For convenience, you need to measure the distance:
-
not to the center of the mounting holes;
-
not to the conditional axis of the bracket;
-
not to the edge of the decorative handle plate;
-
but from the actual body of the handle and the trajectory of the fingers to the nearest protrusion of MLD-057.
Let's imagine a drawer facade 180 mm high. The handle is installed in the center. The frame is drawn with an equal indent of 25 mm from each edge. On paper, there is a free field between the handle and the bottom horizontal line. But the profile protrudes by 12 mm, and the hand enters under the bracket from below. The fingers fit, but the knuckles touch the rounded surface of the molding.
The designer can increase the inner field by just a few millimeters and visually lose almost nothing. For the hand, this adjustment will be decisive.
That is why MLD-057 cannot be placed only according to the frontal sketch. You need a side view, a real handle, and a physical check.




What is MLD-057 and why its dimensions are important for the hand
MLD-057 is a compact rounded molding for furniture, decorative frames, and interior trims. Its cross-section is 25 × 12 mm.
The 25 mm width determines how much space the profile occupies on the facade plane. The 12 mm protrusion shows how far the rounded part extends forward. Both figures matter for the composition, but the second is especially critical for ergonomics.
| Parameter | MDF | Beech | Oak |
|---|---|---|---|
| Profile Width | 25 мм | 25 мм | 25 мм |
| Projection above the surface | 12 мм | 12 мм | 12 мм |
| Length of one plank | 2600 мм | 2400 мм | 2400 мм |
| Application | Furniture frames, facades, interiors | Furniture frames, facades, interiors | Furniture frames, facades, interiors |
| Preparation | For enamel | Checked in the selected position | Checked in the selected position |
The card presents versions made of MDF, beech, and oak. The material is chosen after determining the facade task and future finishing. But regardless of the version, the profile maintains the dimensions of 25 × 12 mm. This means that any option needs to be checked next to the handle in volume.
The 25 mm width makes MLD-057 more compact than many expressive furniture moldings. Thanks to this, it suits small doors, drawers, cabinets, chests, and wardrobes where large decor would take up too much space. However, the word "compact" does not mean "flat" and certainly does not guarantee that the profile will not get in the way of fingers.
The 12 mm protrusion is comparable to the space that the hand uses near the facade. When the distance from the handle to the frame is small, these millimeters turn out to be not a decorative detail but a physical obstacle.
Before developing the layout, it is useful to look at the dimensions of MLD-057 and transfer the cross-section to the drawing at a 1:1 scale. A reduced image on the screen does not give a sense of the real volume.
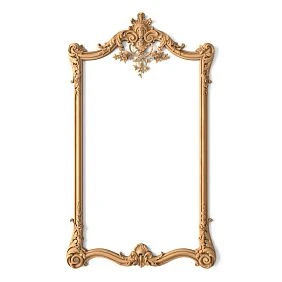
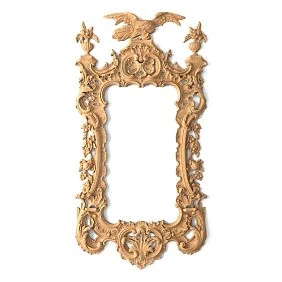
Our factory also produces:
Twelve millimeters that disappear on the drawing and appear under the fingers
The front view shows the width of the molding but almost hides its depth. On a flat layout, MLD-057 turns into two parallel lines. It seems that enough air remains between the frame and the handle.
From the side, the situation changes. The rounded profile rises above the facade by 12 mm. The hand that should freely reach the handle encounters not a drawn boundary, but real relief.
The protrusion affects several actions at once:
-
how deeply fingers go under the bracket;
-
whether the knuckles touch the facade or the molding;
-
whether the button can be grasped from the side;
-
whether the wrist angle has to change;
-
whether there is room for a grip with a glove;
-
whether it is convenient to open a heavy drawer with one hand;
-
do the nails catch on the painted surface;
-
can the handle be quickly found by touch.
Consider a bracket handle. Its projection from the facade may seem sufficient. But the hand does not enter strictly perpendicularly. The fingers bend under the gripping part, and the knuckles approach the surface. If MLD-057 passes directly under the bracket, the useful depth decreases.
With a button, the problem manifests differently. The thumb ends up on one side, the index or middle finger on the other. The frame may be positioned not at the bottom but at the side, and still interfere. With a small internal field, the fingers have to wrap around the button with their tips.
For a vertical handle on a cabinet door, the hand moves from the side. The nearest vertical of the frame may run parallel to the handle and restrict the grip along its entire length.
Therefore, on the technical drawing of MLD-057, it is necessary to show not only the front view. A cross-section is required:
-
the plane of the facade;
-
a profile 12 mm high;
-
the handle body;
-
the handle projection;
-
conditional finger trajectory;
-
nearest point of possible contact.
Without such a cut, the assessment remains decorative, not operational.
Get Consultation
First the handle, then the molding: the correct order for marking the facade
In furniture projects, the opposite is often done. First, the frame is drawn because it sets the composition. Then they try to "fit" the handle inside. This approach only works when the handle position can be freely changed.
On existing furniture, the holes are already drilled. On new furniture, the handle position may depend on the facade construction, guides, the style of the entire series, or neighboring doors. Therefore, before marking MLD-057, the initial handle data must be fixed.
Determine the handle type
Bracket, knob, rail model, wooden handle, recessed grip, and profile system require different hand movements. The same internal field cannot be used for each shape.
Measure the full dimension
The center distance shows the distance between mounting screws. It is not equal to the full length of the handle. Decorative bases and protruding ends may approach the molding closer than the holes.
Check the protrusion from the facade
It is the protrusion that creates space for fingers. In the guide on how to check the protrusion and grip comfort of a furniture handle, for brackets it is suggested to focus not only on the center-to-center distance, but also on the actual grip depth. A minimum protrusion of about 30 mm can be a starting point, and a range of roughly 35–45 mm usually gives fingers more freedom. But the final check is done on the specific handle.
Mark the mounting holes
On existing furniture, these are fixed points. Moving them will require repairing the facade or a new handle that can cover the old holes. On a new product, the position can still be adjusted, but doing so after cutting the frames is too late.
Determine the grip direction
The same drawer may be opened by different people from the top or bottom. A cabinet door may be opened with the right or left hand. The mockup should account for the main scenarios.
Place the handle physically
Even a precise drawing does not replace the actual part. The handle has rounding, thickness, curvature, and tactile shape that are difficult to assess from two dimensions.
Only after this is the inner border of the frame constructed.
Old holes are not a trifle, but the main constraint of the entire composition
When updating a dresser, nightstand, or cabinet, the position of the handle is often already set. One or two holes remain in the facade. The client wants to keep them to avoid repairing the surface.
Such a solution is reasonable, but it changes the design order. The center of the frame can no longer be chosen independently of the handle.
Four situations are possible.
The old handle remains
Then its full size, projection, and grip method are known. MLD-057 is placed around the existing part.
The handle changes, the holes are preserved
The new model must have a suitable center-to-center distance or cover the previous mounting points. Its body may be larger than the old one, and the projection smaller. The frame check is performed anew.
The holes are relocated
Old holes will need to be closed and the surface restored. Only after the technology is confirmed can the handle be shifted for the sake of composition.
The handle is replaced with a button
One button will not cover two old holes if they are located far apart. A decorative base, repair, or another solution will be needed.
The bad scenario looks like this: the frame has already been glued and painted, and then it turns out the old bracket is inconvenient to grip. The client chooses a new handle with a larger projection, but its center-to-center distance does not match the holes. A simple marking error turns into redoing the entire facade.
Therefore, in the technical specification, it should be stated directly:
-
keep the existing holes;
-
cover the existing holes with the new handle;
-
holes may be relocated;
-
the handle position is not yet approved.
The phrase "handle centered" is insufficient.
How to determine the working grip zone, not just the distance to the axis
The distance from the center of the handle to the molding is convenient to measure, but it says little about usability. Two brackets with the same mounting holes can have different lengths, thicknesses, and shapes. One has a body that almost coincides with the centerline, while the other has ends protruding far beyond the screws.
The working zone is built from the actual body of the handle.
For a bracket handle, note:
-
the space under the grip part;
-
the depth of finger entry;
-
the position of the knuckles;
-
the palm approach area;
-
the nearest horizontal or vertical molding.
For a button, note the circle or oval in which fingers move around the handle.
For the railing model, the entire length of the gripping part is taken into account, because a person may grab not strictly in the middle.
The practical scheme consists of two contours.
The first contour is the body of the handle in plan.
The second is the hand movement zone. It is wider than the handle itself and depends on the grip method.
After that, draw the inner line of the MLD-057 frame so that it does not intersect the working area.
In the article about what gap to leave between the handle and protruding decor, a guideline of approximately 20–25 mm between the handle body and the nearest volumetric element can be used as an initial check. But this is not a universal guarantee.
Why can't you just leave 25 mm everywhere?
-
handles have different projections;
-
fingers have different sizes;
-
a heavy box requires a more confident grip;
-
the upper drawer is opened at a different angle than the lower one;
-
a button is grasped differently than a bracket;
-
MLD-057 has a rounded profile, not a vertical wall;
-
the facade can be positioned above or below hand level.
The number helps to start the layout. The hand makes the decision on the mockup.
Bracket handle inside the MLD-057 frame
The bracket seems the most obvious option: between two supports there is a gripping arc that fingers go under. But it is here that the molding most often ends up in the work area.
Not only the length of the handle is checked.
How many fingers fit under the bracket
For a small drawer, two or three fingers are sometimes enough. A wide, heavy drawer is more convenient to pull with four. If the frame forces you to grip the bracket with your fingertips, the load is distributed worse.
Where the knuckles are
Fingers may fit under the handle, but the knuckles will press against MLD-057. Such contact is especially unpleasant on lower drawers, which are opened from bottom to top.
What is the bracket's offset
The closer the gripping part is to the facade, the stronger the molding affects the hand. A handle with a large offset can solve the problem without changing the frame. But it must match in style, mounting, and old holes.
Where the nearest horizontal line of the frame runs
On a drawer, the handle is often located closer to the top. The top or bottom line of MLD-057 may fall under the fingers depending on the direction of the grip.
Can the drawer be opened with one hand
The mockup is checked not only with a light movement of an empty drawer. A normal working grip is needed.
A conditional facade 220 mm high can look symmetrical with a rectangular frame centered vertically. But if the handle is slightly above the middle, the inner field below it should be made larger. The frame will become mathematically less equal, but operationally correct.
This is an important conclusion: asymmetry relative to the facade sometimes creates more harmonious furniture because it takes into account the handle and real movement.
Button handle: the molding interferes not from below, but from all sides
The button is often considered a safe alternative to the bracket. It takes up little space and is attached with one screw. But fingers grip it from the side, so the working area extends around the handle.
If MLD-057 comes too close on the right or left, the thumb or index finger meets a 12 mm protrusion. When the frame is tight at the top and bottom, the button is difficult to hook.
Button check includes:
-
diameter or full dimension;
-
protrusion height;
-
leg shape;
-
ability to grip with two fingers;
-
thumb space;
-
index finger space;
-
distance to all four sides of the frame;
-
direction of the main movement.
For a round button, a perfectly round free zone is not always necessary. On a horizontal box, the hand more often approaches from below or above. On a cabinet door, from the side. Therefore, the inner field can be adapted to the movement.
A low button next to MLD-057 is especially risky. A 12 mm high profile may end up almost at the level of the gripping part. Fingers touch not the handle, but the frame.
Replacing a bracket with a button helps only after physical testing. A small handle cannot be considered automatically comfortable.
Long rail handle and parallel molding line
A rail handle creates a long horizontal or vertical line. It is often placed inside a rectangular frame, repeating the direction of the nearest section of MLD-057.
Visually, parallel lines look neat. Ergonomically, they may be too close along the entire length.
A person is not obliged to grip the rail strictly in the center. The palm shifts to where it is comfortable. Therefore, the gap is checked along the entire gripping part.
Special attention is paid to the ends. A long handle may come closer to the vertical sides of the frame than to the horizontal ones. If the ends are bent toward the facade, fingers need space near the supports.
With a vertical handle on the cabinet, the nearest vertical MLD-057 can accompany the hand during the entire movement. A small gap, tolerable on a short button, is felt constantly here.
Recessed handle and applied molding: collision of different levels
A recessed handle does not protrude as much as a bracket. It seems that a frame can be placed closer next to it. But the hand must enter the recess, and this requires free space in front of the facade.
MLD-057 can interfere with bringing fingers to the recess. Especially if the horizontal section is located directly in front of the handle entrance.
The recessed grip needs to be checked:
-
with an open palm;
-
when moving from above or below;
-
at the actual height of the facade;
-
taking into account the thickness of the molding;
-
on a fully assembled door.
Not every facade allows simultaneous installation of a recessed handle and an overlay frame. The solution depends on the design.
Why the front view is insufficient
The frontal sketch answers the question of whether the lines are positioned beautifully. For convenience, additional views are needed.
Side view
Shows the 12 mm protrusion of MLD-057 and the handle offset. Here you can see whether the hand can approach the gripping part.
Top view
Useful for a vertical handle or button. It shows the lateral space for the thumb.
Open door
The hand changes position after the movement starts. On a swing door, the hand moves in an arc, and the molding may catch the fingers not at the moment of grip, but later.
Fully extended drawer
A heavy drawer sometimes has to be held by the handle longer. The inconvenient protrusion becomes more noticeable.
Grip with right and left hand
On a symmetrical facade, the result may differ, especially near the side edge of the cabinet.
Upper and lower row of furniture
The same unit opens at different angles. A mockup at eye level does not replace checking the bottom drawer.
Full-size mockup MLD-057: how to check the facade before purchasing a batch
For testing, it is not necessary to immediately cut expensive material. A volumetric template is needed that replicates the 25 mm width and 12 mm protrusion.
you will need:
-
a facade or sheet matching its size;
-
strips of cardboard 25 mm wide;
-
gaskets 12 mm thick;
-
masking tape;
-
real handle;
-
ruler;
-
pencil;
-
hole template.
Work sequence:
-
Transfer the facade dimensions to full scale.
-
Mark existing or planned handle holes.
-
Install the handle on the facade or make a rigid mock-up with the actual offset.
-
Mark out the decorative frame.
-
Secure the 25 mm wide strips.
-
Raise them 12 mm above the plane using spacers.
-
Check the front view.
-
Grip the handle with your working hand.
-
Open and close the facade several times.
-
Repeat the grip with the other hand.
-
Ask another person to check.
-
Adjust the inner border of the frame.
-
Fix the final dimensions.
-
Only after this, calculate MLD-057.
Why is volume needed, not just painter's tape? The tape shows a width of 25 mm, but the hand passes over it without obstruction. The main problem lies precisely in the height of 12 mm.
A physical sample of the profile gives an even more accurate result. You can order a molding sample before making the facade and install it next to the selected handle.
The presence of a specific article number in the set should be clarified. For an ergonomic check, a fragment that preserves the full cross-section of MLD-057 is needed.
Why the mockup should be checked by several people
Palms differ. What is comfortable for the designer may be tight for the furniture owner. One person has long fingers, another has a wide hand. Someone grabs the bracket from above, someone from below.
For family furniture, it is useful to invite those who will use it daily to the mockup. This especially applies to:
-
kitchen drawers;
-
a dresser in the bedroom;
-
children's furniture;
-
hallway cabinets;
-
cabinet in the bathroom;
-
sideboard with heavy dishes.
There is no need to design the facade for the maximum palm size of all possible people. But testing with several users quickly reveals a field that is too tight.
A child is tested separately if the furniture is intended for a children's room. The handle may be located high, and the child pulls it from below at a different angle.
When the center of the handle and the center of the frame should not coincide
Symmetry seems safe because it is easy to explain. But a furniture facade is perceived together with the handle, not separately from it.
The frame can be shifted if:
-
the handle is fixed using old holes;
-
the upper and lower grips require different space;
-
The facade has uneven fields;
-
There is an adjacent door nearby;
-
The handle looks visually heavy;
-
The upper part of the facade is overlapped by the countertop;
-
The lower edge is less noticeable;
-
It is necessary to preserve convenience.
The offset should not look like a random mistake. It is supported by the entire series of facades.
For example, on three drawers of a chest, the inner frame field can be made slightly higher from the bottom, because the handles are taken from below. If the same proportion is repeated, the composition looks cohesive.
Sometimes it is better to shift not the entire frame, but only the nearest horizontal line. Another option is to abandon the closed rectangle and use three sides.
What to do if MLD-057 turned out to be too close to the handle
The problem was found on the mockup — that's good news. There are more options than after gluing.
Increase the inner margin
The most direct solution. The frame moves closer to the edges of the facade, and the handle gets more space.
Change the proportions
Horizontal margins can be left as is, and vertical ones increased. Or vice versa.
Shift the handle
Suitable for a new facade if the construction and design allow other holes.
Choose a bracket with a larger offset
The hand moves away from the facade and molding. Need to check the full height, style, and mounting.
Choose a larger button
It is easier to grip, but it takes up more visual space.
Use a recessed handle
The solution requires a separate check of access to the grip.
Discard the nearest side of the frame
For example, the bottom horizontal is not installed under the handle. The composition becomes open.
Choose a flatter profile
If there is objectively little free space, MLD-057 may not suit a specific facade.
For comparing different sections, it is useful to first choose the compact MLD-057 or the wide MLD-053. However, the smaller width itself does not solve the grip issue: each profile's actual protrusion is checked.
If the frame is already glued
After installation, the choice narrows, but the situation is not always hopeless.
The first step is to determine where exactly the contact occurs:
-
fingers do not fit under the handle;
-
knuckles touch the molding;
-
the thumb rests on the side;
-
nails catch the enamel;
-
the hand has to be twisted.
Next, possible changes are assessed.
Replacing the handle
A bracket with a large offset can provide more space. The new model should fit the holes or cover the old ones.
Moving the handle
Will require facade repair. For painted MDF this may be technically feasible, but the decision is made after assessing the finish.
Local frame modification
Sometimes the nearest horizontal can be removed and replaced with a different composition. Such repair affects the coating.
Replacing the facade
For mass-produced furniture, a new facade is often more reasonable than complex restoration.
Accepting the limitation
Only suitable when the grip remains safe and tolerable. Constant hand contact with fresh enamel cannot be considered normal.
The main lesson: the cost of a mockup is incomparable to redoing a painted series.
Series of drawers: one control front before the entire batch
A chest of five drawers looks like a repeating system. There is a desire to immediately cut identical frames. But the height of the drawers, the position of the hands, and the force required to open them may differ.
The top drawer is grasped from above or directly. The bottom one is more often grasped from below, tilting the wrist. A wide, deep drawer is heavier than a small one and requires a confident grip.
Therefore, the algorithm is as follows:
-
select one typical front;
-
install a real handle;
-
assemble the MLD-057 frame on the mockup;
-
check the grip;
-
manufacture the control front;
-
install it on the furniture;
-
test it in the real position;
-
After approval, transfer the solution to the remaining elements.
If facades differ in height, a single control sample may not be enough. The top and bottom rows are checked separately.
The list must preserve individual dimensions:
-
box Ya-01;
-
box Ya-02;
-
door D-01;
-
door D-02.
The general line "frames for the dresser — 5 pcs." hides differences.
MLD-057 on the nightstand: a small facade does not forgive extra millimeters
On a bedside or furniture nightstand, facades are often small. A frame 25 mm wide takes up a noticeable portion of the surface. The handle is located near the top or central horizontal line.
Here, the following are especially important:
-
full handle dimensions;
-
inner field;
-
distance to the edges of the facade;
-
drawer height;
-
method of opening from a sitting or standing position.
The user reaches for the bedside table from the side. The hand approaches differently than to a frontal dresser. A frame that is convenient for direct testing may interfere in the actual position near the bed.
It is useful to place the mockup at the actual height.
MLD-057 on a kitchen facade
The kitchen imposes higher requirements on grip. Hands may be wet, occupied, or gloved. Drawers with dishes and food can be heavy.
The compact frame suits classic and modern facades, but before ordering, check:
-
opening lower drawers from the top;
-
opening upper doors from below;
-
position near the countertop;
-
distance to adjacent fronts;
-
handle in a wet hand;
-
cleaning the relief;
-
durability of the selected finish;
-
access to hinges and adjustment.
In the kitchen, you cannot settle for a grip with just two fingertips. Furniture is used frequently, and minor discomfort quickly becomes annoying.
MLD-057 may be suitable for a frame on a kitchen front when the handle has sufficient projection and the inner field is checked at full scale.
MLD-057 on a tall cabinet
On a swing door of a cabinet, the handle is often placed vertically. The frame repeats the elongated shape of the facade, and the nearest vertical line runs close to the palm.
Check:
-
distance along the entire length of the handle;
-
grip with the right and left hand;
-
movement of the door after the start of opening;
-
ability to grab the handle higher or lower;
-
position of the adjacent door;
-
protrusion of the molding near the joint of the facades.
If the handle is long, the user chooses a convenient point. The frame should not limit only the middle and interfere closer to the ends.
MLD-057 on a sideboard and display case
On sideboards and display cases, the decorative role of the frame is especially noticeable. Wooden handles, knobs, brass brackets, and other expressive shapes are often used here.
The molding should support the handle in scale, but not surround it too tightly. Glass inserts, panels, and carved elements may be nearby.
Before choosing, it is useful view wooden handles for facades and compare several shapes together with sample MLD-057.
The handle and molding are best perceived as a set. First, evaluate the composition, then the grip, after which specify the material and finish.
How to choose material MLD-057 after frame approval
Ergonomics are the same for a 25 × 12 mm cross-section, but the material affects the length of the strip, finish, and appearance.
MDF (740–760 kg/m³, emission class E1/E0) provides ideal geometry, uniformity, and better base for enamel: high adhesion, smooth surface, absence of knots and cracks.
The strip has a length of 2600 mm and is prepared for enamel. This option is suitable for solid-colored painted facades.
Advantages for frames:
-
single color with the facade;
-
calm surface;
-
the ability to connect several elements with one enamel;
-
length 2600 mm, convenient for cutting series.
Before full painting, a test assembly is done. After finishing, the profile becomes more expensive to redo.
Beech
The length of the strip is 2400 mm. Specific preparation is checked in the selected position. Beech can be considered for furniture made of natural materials and coordinated finishing.
Oak
The length is also 2400 mm. Oak profile is chosen when the wood grain pattern or combination with oak facades is important.
At the corners of the frame, the pattern meets at an angle. It is advisable to pre-lay out the strips and coordinate them.
For ordering, you can choose MLD-057 from MDF, beech, or oak, but the material is fixed before the cutting map. Different lengths change the number of whole products.
How to calculate MLD-057 after checking the handle
The molding is calculated only based on the final frame. The preliminary rectangle may change after a hand test.
For each facade, record:
-
external size of the door or drawer;
-
handle position;
-
internal width of the frame;
-
internal height;
-
external width of the frame;
-
external height;
-
lengths of vertical parts;
-
lengths of horizontal parts;
-
number of corners;
-
material;
-
length of the original strip;
-
pattern direction;
-
test material;
-
reserve.
For a simple rectangular frame, the preliminary perimeter can be represented as the sum of two vertical and two horizontal parts. But in the work card, each blank is listed separately.
Example of a conditional list:
| Facade | Detail | Length | Quantity |
|---|---|---|---|
| Ya-01 | Left vertical | According to the approved drawing | 1 |
| Ya-01 | Right vertical | According to the approved drawing | 1 |
| Ya-01 | Top horizontal | According to the approved drawing | 1 |
| Ya-01 | Bottom horizontal | According to the approved drawing | 1 |
| Ya-02 | Frame kit | Separate card | 1 |
Why shouldn't you limit yourself to the overall perimeter? The remainder after one horizontal cut may fit another frame. The map helps distribute parts across planks of 2400 or 2600 mm.
Example of preliminary calculation
Suppose after the layout, a frame with an external size of 500 × 180 mm is approved.
Preliminary sum of four sides:
2 × 500 + 2 × 180 = 1360 mm.
This is a reference, not the final order length. Corner cuts, measuring base, test pieces, and cutting map are specified separately.
For four identical facades, the nominal footage will be 5440 mm. But this does not mean automatically purchasing exactly that amount. You need to lay out eight long and eight short pieces across whole planks.
The MDF 2600 mm option and the solid wood 2400 mm option will give different leftovers.
Reserve without universal percentages
Adding the same ten percent to any frame is convenient, but not always reasonable. The reserve depends on the project.
More material will be needed when:
-
frames are small and have many corners;
-
natural wood parts are matched by pattern;
-
first independent assembly is performed;
-
facades differ from each other;
-
a control sample is needed;
-
complex painting is provided;
-
some parts may require re-cutting.
A smaller reserve is possible in serial production with a precise map and refined technology.
Separately distinguished:
-
test frame;
-
control facade;
-
cutting allowance;
-
repair remainder.
These items cannot be dissolved into one vague percentage.
What to include in the technical specification
The correct entry looks like this:
| Field | Example |
| Product | MLD-057 |
| Purpose | Frame on a furniture facade |
| Cross-section | 25 × 12 mm |
| Facade | Box K-03 |
| Handle type | Bracket |
| Center-to-center distance | Based on the selected handle |
| Handle offset | By card and sample measurement |
| Existing holes | Save |
| Work area | Checked on mockup |
| Internal frame size | According to the approved drawing |
| Material | MDF |
| Plank length | 2600 мм |
| Finishing | Enamel per project |
| Number of facades | According to the list |
| Control facade | Produce before cutting the batch |
| Reserve | as a separate line |
For a cabinet, indicate the handle direction. For a series of drawers, specify the number of each front. For oak, specify the order of parts and the approved finish sample.
What to buy together with MLD-057
| Position | Why it's needed | What to check | Page |
| MLD-057 | Main decorative frame | Section, material, length, availability | Order a compact molding for a furniture front |
| Furniture handle | Defines the working grip zone | Reach, dimensions, center distance | Choose a furniture handle with a convenient reach |
| Sample MLD-057 | Needed for a 1:1 mockup | Full cross-section 25 × 12 mm | order a molding sample before making the facade |
| Other furniture moldings | Needed for scale comparison | Width and protrusion of profiles | STAVROS furniture molding catalog |
| Control facade | Checks actual opening | Handle, frame, and trim together | Manufactured according to the project |
| Finishing materials | Needed for finishing | Compatibility with the selected base | Selected after the material is approved |
No need to buy a random handle for an already finished frame. The molding and hardware are chosen as a connected system.
How not to confuse MLD-057 with similar furniture decor
MLD-057 is a compact rounded profile. It differs from a wide flat overlay, carved ornament, slat, and a more massive molding.
From a wide frame
A wide profile reduces the inner field more and visually weighs down a small facade.
From a flat decorative strip
A flat part has less effect on finger movement. MLD-057 has a 12 mm protrusion.
From a carved overlay
The overlay occupies a local area. MLD-057 forms a continuous contour and can run near the handle over a long length.
From the shaped handle
The molding does not replace hardware and is not designed for gripping.
From the wall profile
Physically, the molding can be used in interiors, but the article focuses specifically on furniture facades, where the hand constantly contacts the surface.
General material on how to choose a molding for a furniture facade, helps compare purpose and scale. For MLD-057, after selection, a separate ergonomic check is added.
Who MLD-057 suits
The profile should be considered when:
- a compact rounded frame is needed;
- the facade is large enough for a 25 mm wide field;
- the handle is chosen in advance;
- you can make a mockup;
- the internal size does not interfere with the grip;
- the material is coordinated with the finish;
- the series starts with a control facade;
- it is required to link several doors with a single rhythm.
MLD-057 is suitable for dressers, nightstands, cabinets, sideboards, display cases, and other furniture structures if the frame does not cross the work area.
When the profile may not fit
Another option is needed if:
- the facade is too small;
- the handle is positioned almost at the edge due to fixed holes;
- the free field does not allow for an offset;
- a very flat decor is needed;
- The box is heavy, and the bracket has a small offset;
- The handle cannot be replaced;
- The mockup shows constant hand contact;
- The frame interferes with opening the adjacent facade;
- The profile conflicts with hinges or mechanisms.
Do not force MLD-057 to work where the facade geometry objectively leaves no room.
Errors after which a beautiful facade has to be redone
Marking the frame without the installed handle
The diagram does not account for the actual body of the hardware.
Measure the distance to the axis
Fingers interact with the edge of the handle, not its center.
Draw the profile with a flat line
This eliminates the 12 mm protrusion.
Consider the compact molding safe
Small width does not negate volume.
Check only the appearance
The facade must be opened by hand.
Do not consider the direction of grip
The upper and lower drawers work differently.
First glue the frames, then choose the handles
The hardware may not fit or align with the holes.
Produce the entire series at once
The error repeats on every facade.
Transfer the top drawer solution to the bottom one
The height and angle of the brush change.
Choose a handle only by style
A beautiful low bracket may turn out to be uncomfortable.
Forget about old holes
The new composition clashes with immovable points.
Paint the entire batch before a trial assembly
Adjustment becomes more difficult.
Use one common perimeter for different facades
The cutting map loses accuracy.
Cannot save the repair remainder
There is nothing to replace the damaged part with.
Check before placing the order
-
A specific handle type is selected.
-
Its full dimension is measured.
-
The center distance is checked.
-
The offset from the facade is measured.
-
Old holes are marked.
-
The capture direction is determined.
-
The working area is marked from the handle body.
-
The MLD-057 protrusion of 12 mm is taken into account.
-
A 1:1 scale mockup is made.
-
The frame is checked with the right and left hand.
-
The upper or lower opening angle is checked.
-
The internal dimension is approved.
-
MDF, beech, or oak is selected.
-
The length of 2600 or 2400 mm is taken into account.
-
A map of each frame is compiled.
-
Control facade is highlighted.
-
A justified reserve has been added.
-
Finishing is selected.
-
The current price has been verified.
-
Availability has been checked.
-
Specification is prepared.
How to order MLD-057 on the STAVROS website
First open the card and check the price and availability of MLD-057. Then select the material and length of the plank.
Do not give the manager only the total length. It is more useful to specify:
- Number of facades;
- external dimensions of the frames;
- the material;
- selected finish;
- part numbers;
- need for a sample;
- number of whole planks;
- reserve.
In parallel, you need to select a handle for the MLD-057 frame and physically check it.
For a wide selection, you can open the section and buy furniture molding after comparing cross-sections. But the article query MLD-057 leads to a specific card.
FAQ: answers to questions about MLD-057 near the furniture handle
What size does MLD-057 have?
The profile cross-section is 25 × 12 mm. The width on the plane is 25 mm, the protrusion above the facade is 12 mm.
Can MLD-057 interfere with the handle?
Yes, if the frame falls within the finger working zone. Pay special attention to the space under the bracket and to the side of the button.
What distance should be left between the handle and the molding?
A guideline of approximately 20–25 mm from the handle body to the nearest protruding decor helps start the layout. The final distance is checked by hand on the mockup.
Why can't you measure from the handle axis?
The axis does not show the full dimension. The bracket or button body may come significantly closer to the molding.
What offset is needed for a bracket handle?
The minimum guideline is about 30 mm, and a range of approximately 35–45 mm often provides more finger space. The specific handle still needs to be checked.
Do you need to buy the handle or molding first?
First, select and measure the handle, then place the frame. The molding can be chosen based on a sample, but the final cutting is done after the hardware is approved.
Can old holes be left?
Yes, if the handle remains comfortable inside the new frame. The old holes need to be transferred to the layout.
What to do if the new handle does not match the holes?
Choose a model with a suitable center-to-center distance, use a handle that covers the old holes, or arrange for facade repair.
Can the handle be installed inside the frame?
Yes, if the inner area is sufficient for the handle body and hand movement.
Is MLD-057 suitable for a small drawer?
The possibility depends on the size of the facade and the handle. The profile is compact but takes up 25 mm in width and protrudes 12 mm.
How to make a layout with a thickness of 12 mm?
Use a strip 25 mm wide and a spacer 12 mm thick. Attach it to the facade next to the actual handle.
Is painter's tape sufficient?
No. The tape shows boundaries but does not simulate a protrusion.
Who should check the grip?
At minimum, the designer and the future furniture user. For family furniture, checking by several people is useful.
Is it necessary to make a control facade?
For a series of identical drawers or doors, this is the most reliable way to avoid repeating a mistake.
Is MLD-057 suitable for a kitchen?
It may be suitable if the frame does not interfere with frequent and confident gripping. Additionally, the finish and facade construction are checked.
Can the profile be used on a cabinet?
Yes. On a vertical handle, the side gap is checked along the entire length.
What to choose for a painted facade?
MDF profile 2600 mm long prepared for enamel. The exact finishing system is agreed separately.
What is the length of beech and oak?
Confirmed strip length is 2400 mm.
How to calculate MLD-057 for a frame?
After the internal size is approved, a list of two vertical and two horizontal parts for each facade is compiled.
Can all frames be summed up by one total length?
For budget — preliminary. For order, a cutting map by whole strips is needed.
What to do if the molding already interferes?
Check handle replacement, relocation of mounting, local frame modification, or manufacturing a new facade.
Can we simply take a handle with a larger offset?
Sometimes this solves the problem, but the new model must match the holes, style, and overall dimensions.
Where to buy MLD-057?
The molding can be ordered on the STAVROS website after selecting the material, checking the frame on the mockup, and calculating the full strips.
The frame is assessed by eye, the furniture by hand
MLD-057, measuring 25 × 12 mm, helps create a compact rounded frame on a dresser, nightstand, cabinet, kitchen front, or display case. The profile does not overload a small surface as much as a large molding and can support a neat rhythm for an entire furniture series.
But the decorative frame does not exist separately from the handle. Twelve millimeters of protrusion can land exactly where fingers move. Therefore, the final position of MLD-057 is determined not by symmetry alone.
Before ordering, four things need to be done: install the actual handle, mark its working zone, assemble a three-dimensional mockup of the profile, and check the grip on a control front. After that, the frames are calculated, MDF, beech, or oak is selected, and a cutting map is compiled.
STAVROS offers furniture moldings, wooden handles, and samples that allow you to assemble a coordinated set before launching the entire batch. A professional approach begins with a simple action: grab the handle before the decorative frame becomes a permanent part of the front. It is the hand that will show faster than any drawing whether enough space has been left next to MLD-057.