Article Contents:
- Painting is not the finish, it's the concept
- What does 'rosette for painting' mean: material and its properties
- Three color strategies: how to choose yours
- Strategy one: rosette in ceiling color — 'blend in'
- Strategy two: rosette in warm white on a cool ceiling (or vice versa) — 'nuance'
- Strategy three: rosette in a contrasting color — 'accent'
- Smooth or textured: how the type of rosette changes the painting result
- Smooth rosette for painting
- Socket with moderate relief for painting
- Relief socket with rich ornament for painting
- How to paint a polyurethane ceiling rosette
- Water-emulsion paint
- Acrylic paint
- Paint with gold or bronze effect
- Primer: a mandatory step
- When to paint: before or after installation
- Painting after installation — standard approach
- Painting before installation — for special cases
- Gilding — after full painting
- Joint treatment: how the rosette 'disappears' into the ceiling
- Socket in the system: color, moldings, cornice
- Socket and moldings: unified color scheme
- Socket and cornice: common language
- Socket and chandelier: metal and paint
- Painting and interior style: how color works in different contexts
- Classic and neoclassic
- Modern classic (transitional)
- Provence and romantic style
- Art Deco
- Colored ceiling
- How to choose a socket model for painting: step-by-step guide
- What to check before buying: final checklist
- What to buy together with a socket for painting
- Minimum set
- Extended kit for ceiling system
- Five real scenarios: painting a rosette in specific interiors
- Typical mistakes when painting a rosette
- Frequently Asked Questions
- About the Company STAVROS
Painting is not the finish, it's the concept
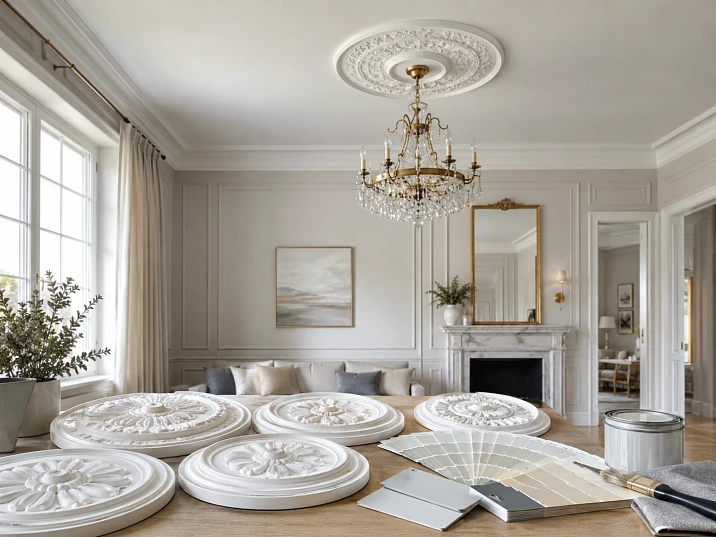
Most buyers think about painting the rosette last: first they chose the model, then bought the glue, then hung it — and only then asked the question: "What to paint with?" This is the wrong sequence. The color of the rosette should be decided before purchase, because it influences the choice of model.
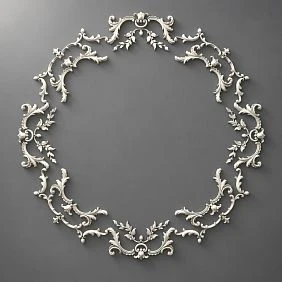
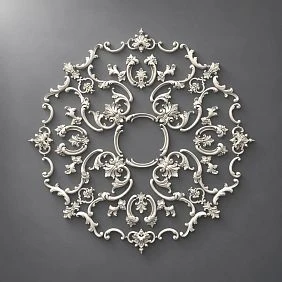
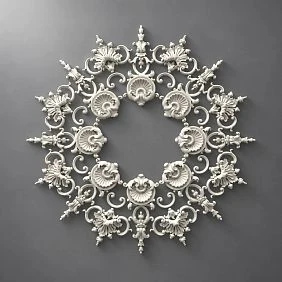
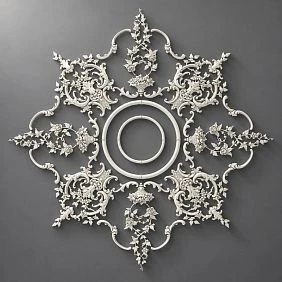
Why? Because a smooth rosette and a textured rosette, painted in the same white color, give fundamentally different results. The smooth one disappears into the ceiling — it is only read in oblique light. The textured one, in the same white, creates a lively play of light and shadow — the ornament "breathes" without needing any contrast. And a rosette with rich relief, painted in a contrasting color, becomes an independent decorative object — it attracts the eye and requires a well-thought-out environment.
Hence a simple conclusion: first — the color solution, then — the choice of model. Or both decisions simultaneously, in tandem. This is how the correct approach to polyurethane ceiling rosettes for painting works.




What does "rosette for painting" mean: material and its properties
A "paintable" rosette is a polyurethane product without factory decorative coating: no gilding, no tinting, no final varnish. A white or slightly cream matte surface that accepts any paint evenly and without special preparation.
Polyurethane as a material has several properties that make it ideal specifically for final painting.
Non-porous surface. The paint does not "sink in," does not require multiple coats, and lays evenly from the first layer after priming. This is important for achieving a uniform, flawless result.
Precise relief. Every acanthus leaf, every profile band, every geometric detail is reproduced with casting precision. After painting, the relief becomes even more expressive — the paint emphasizes the transitions and depth of the ornament.
Resistance to paints. Water-based, acrylic, alkyd paints — all are compatible with polyurethane. The surface does not dissolve, deform, or lose its relief.
Possibility of repainting. If after a few years you decide to change the interior color or repaint the ceiling — a polyurethane rosette for painting it is easy to repaint in a new color without dismantling. Sand the old layer, prime, apply a new one — that's it.
Our factory also produces:
Three color strategies: how to choose yours
Before choosing a model, you need to decide one key question: what role will the rosette play in the ceiling's color scheme. There are three fundamentally different approaches.
Get Consultation
Strategy one: socket in the color of the ceiling — "blend in"
The socket is painted the same color as the ceiling. It "blends into" the plane, perceived as an organic part of the ceiling, not as an overlay element. The relief is only read through the play of light and shadow.
This is the most universal and foolproof solution. It works in any interior, with any chandelier, at any ceiling height.
When to choose:
-
Low ceiling (up to 2.7 m) — a white monolith creates a sense of height.
-
The chandelier is decoratively active — it doesn't need a competitor in the form of a contrasting socket.
-
The interior is built on subtle nuances, not flashy accents.
-
The socket's relief is rich — it "works" through light and shadow without color contrast.
-
You want the effect of "the molding was always there," not "I just bought an overlay."
Strategy two: socket in warm white on a cold ceiling (or vice versa) — "nuance"
This is a delicate contrast: not a fundamental color change, but a tonal shift. The ceiling is cool white — the socket is cream. The ceiling is beige — the socket is whiter. The difference is minimal, almost imperceptible — but it exists, and it creates a sense of the socket being "highlighted" without being flashy.
This is a professional technique used by designers. It requires a trained eye and understanding, but yields a very high-quality result.
When to choose:
-
The ceiling is painted in a warm shade (ivory, cashmere, cappuccino).
-
The rosette needs to be "defined" but not highlighted.
-
The interior is delicate, with a nuanced color scheme.
Strategy three: rosette in a contrasting color — "accent"
The rosette is painted in a fundamentally different color — gold, bronze, anthracite, gray, wall color. It becomes a decorative object that draws the eye.
This is a bold solution that requires a well-thought-out context. The contrasting rosette should be connected to other interior elements — chandelier hardware, molding color, furniture shade.
When to choose:
-
High ceiling — from 3.0 m and above.
-
Classic interior with rich decor.
-
Large chandelier that needs a striking architectural frame.
-
There is Moldings made of polyurethane or a cornice of the same color, creating a unified color scheme.
-
Gilding of relief bands on a white base is the most common "contrast" option.
Smooth or embossed: how the type of rosette changes the painting result
The shape of the relief is not just aesthetics. It's how paint "works" on the surface.
Smooth rosette for painting
A smooth rosette with a profiled rim becomes almost invisible when painted in the ceiling color. This is a deliberate technique: an "embedded" accent that doesn't announce itself. The shape is visible, the ornament is not.
With a contrasting color, a smooth rosette turns into a pure geometric object — a circle or square highlighted on the ceiling. Minimalistic and decisive.
Best scenarios: modern classic, laconic interior, low ceiling, light neutral tones.
Rosette with moderate relief for painting
One or two ornamental belts, a delicate leaf wreath, concentric profile rings. When painted in the ceiling color — soft, lively chiaroscuro. With a nuanced color difference — the relief "appears", creating soft volume. When gilded — each element of the relief becomes a visible accent.
Best scenarios: bedroom, living room, study, neoclassical with moderate decor.
Relief rosette with rich ornamentation for painting
Acanthus leaves, laurel wreaths, multi-tiered relief. When painted white — monumental stucco in the traditional sense. The relief creates deep shadows, the ornament "lives" in any lighting. When gilding details — a luxurious classic accent.
Best scenarios: classic living room, hall with high ceiling, formal rooms.
| Relief type | Painting in ceiling color | Tone nuance | Gilding / contrast |
|---|---|---|---|
| Smooth | Almost invisible | Geometric accent | Clean minimalist object |
| Moderate relief | Soft chiaroscuro | Subtle volume | Expressive details |
| Rich relief | Monumental stucco | Rich play of shadows | Ceremonial luxury |
How to paint a polyurethane ceiling rosette
The question of "what to paint with" is technical but fundamentally important. The wrong paint can ruin even a perfectly installed rosette.
Water-emulsion paint
The most common and correct choice. Water-based paint is compatible with polyurethane, lays evenly, does not deform the surface, and is easy to apply with a brush or roller. When applied to a primed rosette, it gives a matte finish that blends organically with a matte ceiling.
Suitable for: painting to match the ceiling color, subtle tones, light pastel shades.
Acrylic paint
More durable and dense than water-based paint. It gives a slightly richer color and a more resistant surface. A good choice for contrast painting, dark shades, and rooms with high humidity.
Suitable for: contrast painting, dark tones, kitchen, hallway.
Paint with a gold or bronze effect
For highlighting relief details — profile bands, acanthus leaves, ornamental elements. Applied with a thin brush pointwise, on a pre-painted white base. Creates the effect of gilded stucco.
Important: do not use aggressive solvents — nitro paint, solvent-based enamels. They can deform the polyurethane surface and destroy the relief.
Primer: a mandatory step
Before painting, the polyurethane ceiling rosette must be primed. Acrylic primer creates an adhesive layer, ensures even paint application, and prevents gaps.
The primer is applied with a brush in a thin layer. After drying (30–60 minutes) — the first coat of paint. After the first coat dries — the second.
When to paint: before or after installation
This is a practical question with a correct answer — and it depends on the specific situation.
Painting after installation — the standard approach
In most cases, the rosette is painted after installation and joint treatment. The sequence:
-
Install the rosette with glue.
-
Seal the perimeter joint with acrylic sealant.
-
Drying — 12–24 hours.
-
Primer — the rosette and the joint area.
-
Painting — in one or two coats.
Advantage: painting the rosette together with the ceiling gives a flawless visual result — the seam is invisible, the rosette is "integrated" into the plane.
Painting before installation — for special cases
If the rosette is to be painted in a color different from the ceiling — it can be painted in advance. The ceiling is painted separately, the rosette is painted separately, then the rosette is installed. The seam is then carefully sealed with painter's tape.
This is convenient when working with dark or saturated colors — when painting on an already installed rosette would require complex protection of the ceiling.
Gilding — after full painting
If gilding or bronzing of details is intended — this is the final operation, after the main paint has completely dried. Gold paint is applied pointwise, without affecting the main white layer.
Seam treatment: how the rosette "disappears" into the ceiling
One of the main secrets of a professional result is proper treatment of the seam between the rosette and the ceiling. It is this seam that determines whether the rosette will look like a "screwed-on overlay" or like "molding that has always been there."
Acrylic sealant — the right tool for sealing the joint. It is elastic, accepts paint, and does not crack with micro-movements of the rosette. It is applied around the perimeter of the rosette immediately after installation — while the glue has not yet fully set.
Application technique: an even strip of sealant along the entire perimeter. Then smooth the seam with one smooth motion using a moistened finger or spatula. The result is a thin, even seam without bumps.
After drying: the seam is primed together with the rosette and painted in a single layer. After painting, the seam disappears — only the rosette remains as part of the ceiling plane.
Detailed technique for processing joints and the complete installation algorithm — in the guide for installing polyurethane molding.
Rosette in the system: color, moldings, cornice
A rosette rarely exists alone on the ceiling. A complete result is a system where all elements are coordinated in color.
Rosette and moldings: a unified color scheme
If the ceiling is decorated polyurethane moldings — with frame contours around the rosette or straight decorative strips — their color must match the color of the rosette. A white rosette + white moldings matching the ceiling — a unified monolithic system. A gold rosette + gilding of the molding bands — a coordinated decorative program.
Mismatched color — a white rosette and beige moldings, or a gold rosette and a white cornice — creates a feeling of randomness and incompleteness.
Rosette and cornice: a common language
Perimeter cornice — Ceiling molding along the walls — together with the central rosette creates a "frame" for the ceiling. Two elements framing the ceiling plane from two sides: on the outside — the cornice, in the center — the rosette. The color of both should be coordinated.
Rosette and chandelier: metal and paint
The chandelier's hardware often determines the color accent of the rosette. Gold hardware of a crystal chandelier — and gilding of the rosette's relief details. Matte nickel of a modern pendant — and a white smooth rosette without metallic accents. Bronze chandelier in art deco style — and bronze highlighting of the rosette's geometric bands.
This is not a mandatory rule — but it is a professional technique for coordinating details that makes the interior cohesive.
Painting and interior style: how color works in different contexts
Classicism and neoclassicism
In a classic interior, the rosette is traditionally white — matching the plastered or painted ceiling. This is a historically accurate tradition: white stucco was the norm for centuries. To enhance decorativeness — delicate gilding of ornamental details.
Polyurethane stucco for painting in classic style, it works precisely in white: matte, clean, with a rich play of light and shadow on the relief. This is a timeless solution that never goes out of style.
Modern classic (transitional)
In interiors that combine modernity and historicism, the rosette is often white — but it is chosen with moderate relief, without baroque richness. Such ceiling rosette for painting adds historical depth without a feeling of heaviness.
Acceptable contrast — slightly warm white with a cold ceiling, or cold white with a warm ceiling. A nuanced solution that indicates good taste.
Provence and romantic style
For Provence — a rosette in cream, ivory, or distressed white. The color is aged, not freshly painted. Sometimes — intentionally uneven painting with visible transitions, imitating old lime stucco.
Art Deco
In Art Deco, contrasting painting is often used: a white base with geometric bands in black, graphite, or gold. This is the language of the style — clear color zones, geometric pattern, no soft monochrome.
Colored ceiling
If the ceiling is not white — the rosette is painted the same color. Gray ceiling — gray rosette. Blue — blue. The rosette cannot be white on a colored ceiling: it will look like an unpainted blank.
Exception: gold or metallic on a colored ceiling — this is a separate design technique requiring a confident hand and a clear concept.
How to choose a rosette model for painting: a step-by-step guide
Now that the color scheme is determined, you can proceed to choosing the model. Here is a sequence of questions that leads to the correct result.
Step one: ceiling height.
Up to 2.7 m — moderate diameter, low or medium relief. 2.8–3.0 m — medium diameter, medium relief. Above 3.0 m — large diameter and rich relief are possible.
Step two: room area.
Up to 15 m² — diameter 220–320 mm. 15–25 m² — diameter 300–420 mm. 25–40 m² — diameter 400–550 mm.
Step three: chandelier type.
Decoratively active — choose a calm relief. Laconic — you can take a richer relief so that the rosette takes on part of the decorative load.
Step four: color scheme.
Already determined — based on three strategies from the previous section.
Step five: relief for the color scheme.
Monochrome in the color of the ceiling — a rich relief will give a beautiful chiaroscuro. Nuanced contrast — moderate relief. Gilding of details — clear, well-developed elements are needed.
Step six: shape.
Round — universal. Square — strict interior, straight lines. Oval — elongated area, table, hall.
What to check before buying: final checklist
Before ordering, go through this list.
-
Material. Polyurethane — yes. Plaster — no (not intended for future repainting). Polystyrene foam — not recommended (holds paint poorly).
-
Diameter. Matches the chandelier, room, and ceiling height.
-
Relief height. Matches the ceiling height and color scheme.
-
Central hole. Matches the chandelier's mounting assembly.
-
Compatibility with the base. Concrete, drywall, plaster — standard adhesive. Stretch ceiling — check the installation diagram.
-
Adhesive. Specialized for polyurethane molding.
-
Sealant. Acrylic, white.
-
Paint. Water-based or acrylic — in the chosen color.
-
Primer. Acrylic.
-
Sequence. Installation → sealant → drying → primer → paint.
What to buy together with a paintable socket
The socket is the central element. But a complete result is always a set.
Minimum set
-
Ceiling rosette made of polyurethane.
-
Glue for polyurethane molding.
-
Acrylic sealant.
-
Acrylic primer.
-
Water-based or acrylic paint.
Extended kit for ceiling system
-
Moldings made of polyurethane — for decorative frame contours around the rosette. Painted in the same color as the rosette.
-
Perimeter cornice from the section Ceiling molding — for decor along the ceiling perimeter. Creates a "frame" for the entire ceiling plane.
-
Decorative Inserts — corner elements for molding frames. Painted together with the entire system.
| Task | What to buy |
|---|---|
| Make the rosette part of the ceiling | Rosette + paint in ceiling color + primer |
| Highlight the chandelier decoratively | Relief rosette + gold paint for details |
| Do not overload the low ceiling | Smooth rosette of small diameter + white paint |
| Create a ceiling system | Rosette + moldings + cornice + unified painting |
| Prepare the installation | Adhesive, sealant, primer, paint |
| Buy without mistakes | Socket by diameter + color scheme + correct paint |
Five real scenarios: painting a socket in specific interiors
Scenario one: living room 26 m², ceiling 2.9 m, white, crystal chandelier with gold fittings.
Round socket with a diameter of 460 mm, rich acanthus relief. Painted white to match the ceiling. Relief bands highlighted with gold paint using a thin brush. Moldings made of polyurethane in the frame contour — white with gold bands. Result: a classic living room with a coordinated ceiling system of 'white and gold'.
Scenario two: bedroom 16 m², ceiling 2.7 m, warm cream, minimalist chandelier.
Round socket with a diameter of 300 mm, delicate laurel wreath. Painted warm white — half a tone lighter than the ceiling. Subtle contrast. No metallic accents. Result: a soft, cozy, barely noticeable ceiling accent.
Scenario three: study 14 m², ceiling 2.8 m, cool white, matte.
Round smooth rosette with a diameter of 280 mm with a geometric belt. Painted in the ceiling color — solid white. No accents. Result: a strict, restrained ceiling element that does not distract from work.
Scenario four: hall 3 × 4 m, ceiling 3.0 m, suspended metal light fixture with bronze fittings.
Round rosette with a diameter of 480 mm, moderate geometric relief. Painted white. Bronze highlighting of the relief belt — matching the light fixture fittings. Perimeter cornice made of ceiling moldings — white with a bronze belt. Result: a coordinated ceiling system where the metal accent unites the rosette, cornice, and light fixture.
Scenario five: kitchen-living room, ceiling 2.7 m, gray accent, chandelier over the island.
Oval rosette with a long axis of 440 mm. Painted gray — matching the accent zone of the ceiling. No metal accents. Result: the rosette as part of the accent ceiling zone — geometrically expressive, stylistically precise.
Typical mistakes when painting a rosette
Mistake one: painting without primer.
Paint applies unevenly, with gaps. Primer is a mandatory step, even if the surface seems ready.
Mistake two: painting in one thick coat.
A thick layer of paint flows, seeps into the recesses of the relief, creating a "muddy" ornament. Two thin layers with intermediate drying is the correct technique.
Mistake three: not treating joints before painting.
An unsealed seam between the rosette and the ceiling after painting looks like a rough break. Always use sealant, let it dry, and only then paint.
Mistake four: choosing the color of the rosette without considering lighting.
In the store, the paint looks one way, on the finished ceiling another. Always test a sample on a piece of polyurethane under lighting similar to the actual room.
Mistake five: gilding without a white base.
Gold or bronze paint on unpainted polyurethane looks dull. First, a white base, then a metallic accent on top.
Mistake six: choosing the color of the rosette without connecting it to the chandelier and moldings.
A gold rosette with a nickel chandelier and white moldings is a random accent without a system. The color of the rosette should be connected to at least one other interior element.
Frequently asked questions
Can you paint a polyurethane ceiling rosette yourself?
Yes. The polyurethane surface accepts paint easily. Primer, two thin coats of water-based paint — and the result will be professional.
What color is best for painting a ceiling rosette?
The safest is the color of the ceiling. This is a universal solution that works in any interior and with any chandelier. For a classic style with a crystal chandelier — a white base with gilded details. For a modern interior — only white.
What to paint a polyurethane rosette with: which paint is better?
Water-based or acrylic. Oil and nitro paints are not recommended. For metallic accents — specialized metallic paint.
Is primer needed before painting?
Yes, definitely. Acrylic primer ensures even paint application and improves adhesion.
How to paint a relief rosette without blurring the pattern?
Thin layers, a soft brush, movements along the relief elements, not across. Avoid paint buildup in the recesses of the pattern.
Can an already installed rosette be repainted?
Yes. Light sanding of the old layer, primer, new paint. This is one of the main advantages. polyurethane sockets — the ability to update the color without dismantling.
What to buy together with a paintable socket?
Glue, acrylic sealant, primer, paint in the chosen color. If you want to create a ceiling system — Moldings, a cornice from the section Ceiling molding, Decorative Inserts. The full range is in the catalog polyurethane products.
About the company STAVROS
STAVROS — professional supplier polyurethane products for residential and commercial interiors: paintable ceiling rosettes of all shapes and diameters, Moldings and cornices, Decorative stucco, Ceiling decoration for creating complete ceiling systems. All STAVROS products are made of high-quality polyurethane, ready for painting, have precise relief and stable geometry. Contact us to confirm shipping to your destination. STAVROS is the choice of those who think about the result before purchasing.