Article Contents:
- What exactly is KPU-119
- What do the numbers 40 × 7 × 2000 mm mean specifically for this task
- 1. Total height of the front face
- 2. Height of the free front zone
- 3. Position of the LED profile
- 4. Size of the light gap
- 5. Light direction
- How to apply the template
- Why the template must be viewed with the light on and off
- Basic scheme
- Where it is better not to place the joint
- Where the joint is usually easier to hide
- 1. Placement closer to the upper part of the free zone
- 2. Landing centered in the free zone
- 3. Landing lower, closer to the bottom edge of the face
- 1. There is a continuous free zone on the face
- 2. The backlighting is not visually compromised
- 3. The beam surface is already well prepared
- 4. There is a calm place for the joint
- 5. The interior style supports the openwork
- Free zone less than 40 mm
- The profile fits only flush against the light gap
- The light line is the main effect of the beam
- The front face already has a complex relief
- The beam is viewed from a close distance
- In the color of the beam
- In contrast
- Step 1. Measure the front face
- Step 2. Measure the light module separately
- Step 3. Find a clean free zone
- Step 4. Make a 40 mm template
- Step 5. Evaluate the template in the evening
- Step 6. Think through the joint
- Step 7. Evaluate style and scale
- Step 8. Only after this place your order
- 1. Look for a narrower trim
- 2. Switch to a calmer molding
- 3. Leave the beam without additional decor
- Can KPU-119 be installed if the free zone is exactly 40 mm?
- Is it mandatory to run KPU-119 along the entire length of the 3.4 m beam?
- If the beam is longer than 3.4 m, how to calculate the quantity?
- Can KPU-119 be glued flush against the light gap?
- What is more important for this task — 40 mm or 7 mm?
- Do I need to take a third strip as a spare?
- Can KPU-119 be used on a beam with two light lines?
- What to do if KPU-119 doesn't fit?
- Can KPU-119 be painted in a contrasting color?
- Is a separate volumetric template needed if there is already a 40 mm paper strip?
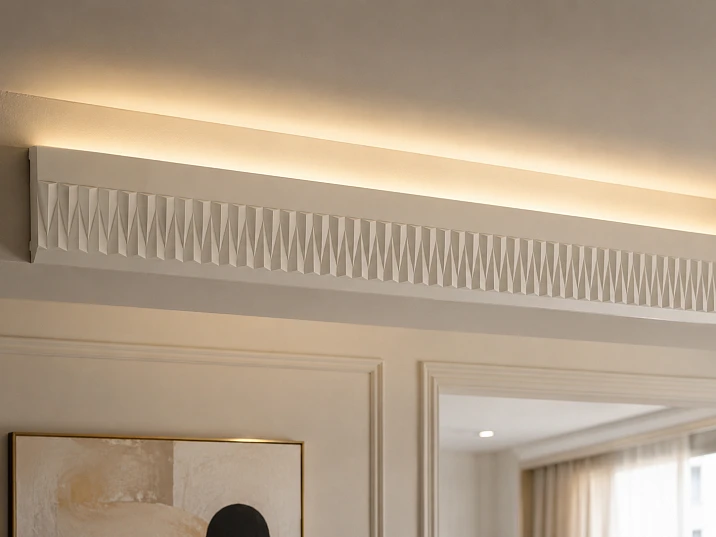
A finished ceiling beam with hidden lighting is not an empty blank that can be decorated with any profile after the renovation is complete. Such a beam already has its own architecture: the front face, the light gap, the placement of the LED profile, the direction of light, the painted surface, and the visual effect that the owners have already gotten used to. That is why the question of molding in this situation cannot be reduced to a general "will the trim fit the beams." The buyer's task here is much narrower and more specific: will the openwork trim KPU-119 fit on the front face without encroaching on the light gap and ruining the lighting.
The direct answer is this: KPU-119 can be considered for an already finished beam only after measuring the free front zone specifically, not the entire height of the beam. If there is a continuous section on the frontal plane where the profile fits completely, and this section does not fall into the light gap and does not worsen the light pattern, installation is possible. If the free zone is smaller than needed, if the openwork line starts to conflict with the light or visually splits the top edge of the beam, buying KPU-119 blindly is not worth it.
For example, let's fix a clear situation: a ceiling beam 3.4 m long is already installed, painted, and lit with an LED strip. One strip of KPU-119 has a length of 2000 mm, therefore, for one continuous decorative line, 2 strips are required. At a price of 6,880 ₽ per piece, the cost will be 13,760 ₽. But the main benefit of the article is not to repeat simple arithmetic. The point of the material is to prevent a person from spending 13,760 ₽ before making sure that the 40 mm trim actually fits on the free front plane and does not interfere with the operation of the light.
What exactly is KPU-119
For this topic, it is especially important to name the product accurately.
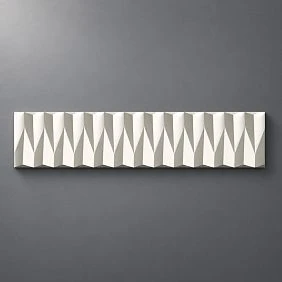
KPU-119 is an openwork decorative trim made of polyurethane.
This is not an overlay, not a molding, not a cornice, and not a rosette. In the product card and in the catalog, it is specifically about trim. This is a long decorative profile that is bought not by the piece "for a point," but by the length of the line.
Confirmed parameters that the article relies on:
| Parameter | KPU-119 |
|---|---|
| Type | openwork decorative molding |
| Material | Polyurethane |
| Size | 40 × 7 × 2000 mm |
| Length of one plank | 2000 мм |
| Price per 1 pc. | 6 880 ₽ |
The product card indicates that KPU-119 is suitable, among other things, for ceiling beams. This means that the very idea of using this profile on a beam is acceptable. However, approval for the intended use does not automatically guarantee compatibility with every specific beam, especially if hidden lighting is already installed in it.
Buy openwork molding KPU-119 made of polyurethane only reasonable after checking the geometry on site.




What the numbers 40 × 7 × 2000 mm mean specifically for this task
In the task with the light beam, each number has practical significance.
-
2000 mm is the length of one strip and the basis for calculating the quantity.
-
40 mm is the working size of the profile along the front plane, that is, the value that determines whether the decorative strip will fit in the free area of the front face.
-
7 mm is the thickness or protrusion of the profile from the surface. It is this that affects the shadow, the depth of the relief, and interaction with LED lighting.
On a finished beam with light, it is dangerous to look only at the total height of the front surface and say: "there is plenty of space, forty millimeters will fit." The light unit takes up part of the plane. In addition, an openwork relief next to the light reads differently than on a regular solid surface.
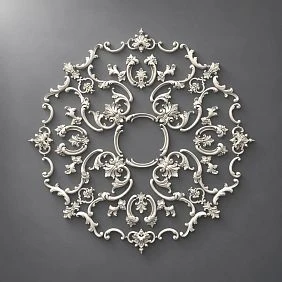
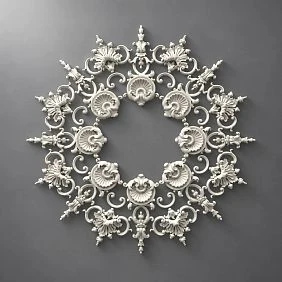
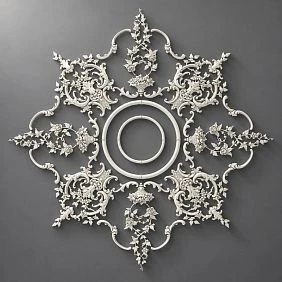
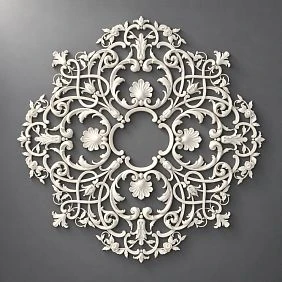
Our factory also produces:

Why you need to measure not the entire height of the beam, but the free face zone
This is the key technical point of the entire article.
The beam has a face edge, but part of its height may be visually or structurally connected to the lighting. The light gap may be in the upper zone, light may exit through a narrow slot, the LED profile may be recessed deeper, and sometimes a lip remains in front of the slot that cannot be covered by a decorative element. As a result, not the entire front plane is a mounting zone.
For example, the face edge of a beam may have a total height of 70 mm. But if the top 12 mm are actually occupied by the light unit or the zone to which openwork cannot be brought, the real available plane for decor is already 58 mm. KPU-119 should be compared specifically with these 58 mm, not with the full height of 70 mm.
If the beam additionally has a chamfer, rounding, shadow shelf, decorative ledge, or transition to another plane, the continuous flat zone becomes even smaller. Hence the main question you need to ask yourself before ordering:
What continuous section of the face edge is truly free after subtracting the light gap, the light exit zone, and all structural constraints?
Only this section can be considered a potential installation location for KPU-119.
Get Consultation
What measurements need to be taken before purchasing
To avoid buying a profile blindly, it is enough to take a few very specific measurements.
| What to measure | Why is this needed |
| The total height of the front face of the beam | understand the overall scale of the frontal plane |
| The height of the free front zone | compare it with the 40 mm profile |
| Position of the LED profile | determine where the sensitive light zone passes |
| Size of the light gap | understand how much space is already occupied by the light unit |
| Direction of light output | assess how the openwork will affect the light pattern |
1. Overall height of the front face
This is a starting point, but not the final answer. It shows how large the beam itself is and roughly how much space can be expected on the front side.
2. Height of the free front zone
This is the main dimension for KPU-119. It is this that is compared with 40 mm. If the free zone is smaller, the profile is not suitable for this face. If the free zone is 40–42 mm, the situation is borderline and requires particularly careful checking. If 50–60 mm or more is available, the chance of successful installation is noticeably higher, but checking is still mandatory.
3. Position of the LED profile
It is not enough to simply see the light. You need to understand where exactly the profile itself is located, in which plane it is installed, and how close the light comes to the front face. Sometimes the light is reflected upward and barely touches the frontal part of the beam. Sometimes, on the contrary, the light gap is so close to the front plane that any relief near it begins to actively read.
4. Size of the light gap
In the article, it is deliberately impossible to promise: "if the gap is narrow, then KPU-119 will definitely fit." Not only the width of the gap matters, but also the distance to the decorative strip. Even if the profile formally does not overlap the gap, too close proximity can produce a parasitic shadow.
5. Direction of light
If the light goes up to the ceiling and does not work forward, the influence of the relief on the light pattern can be minimal. If part of the light goes forward, the openwork KPU-119 begins to interact with it much more strongly. For some interiors, this is a beautiful effect, for others, it is visual noise.
How to make a full-size 40 mm template
The most useful practical tool for this article is a 40 mm wide template.
It can be made from:
-
thick cardboard;
-
thin plastic;
-
painter's tape, if the surface is already delicate and you are afraid of scratching something;
-
paper on a rigid backing.
The length of the template does not have to be 2 m. For a preliminary assessment, a segment of about 400–600 mm is sufficient. Its task is not to replace a real profile, but to quickly show whether the decorative strip fits in the free zone and whether it conflicts with the light.
How to apply the template
The template should be tried in at least three positions:
-
higher, closer to the light gap;
-
centered in the free zone;
-
lower, closer to the bottom edge of the front face.
These three positions produce different visual results.
-
The upper placement ties the decor more strongly to the backlighting, but increases the risk of shadow near the light gap.
-
The central placement gives the calmest and most predictable effect.
-
The lower placement reduces the impact on light, but may visually weigh down the lower part of the beam.
Why the template must be viewed with the light both on and off
With the LED strip off, you assess proportion, geometry, and scale. With it on, you assess the impact on the light pattern. These are two different tests, and both are mandatory.
With the backlight on, you need to check:
-
whether the light line remains clean;
-
whether the relief starts to cast too strong a shadow;
-
whether the top of the beam seems overloaded;
-
whether the openwork conflicts with the backlight effect itself.
That is why the article cannot honestly say in advance: "KPU-119 will definitely not block the light." Without these two tests, an answer is impossible.
How many slats are needed for a 3.4 m beam
Now we can move on to the quantity.
Beam length: 3.4 m.
One KPU-119 slat: 2 m.
Calculation:
3400 / 2000 = 1.7 → need 2 strips.
Cost:
2 × 6 880 = 13 760 ₽.
Total purchased length:
2 × 2000 = 4000 mm.
Nominal remainder after cutting:
4000 − 3400 = 600 mm.
This is the correct mathematical specification for one continuous line. But by itself, it does not guarantee convenient installation and a beautiful result.
Where to make the joint at a length of 3.4 m
On one beam 3.4 m long with two strips, there will be one joint. And this is not a small detail. If the light beam is on the visual axis of the room, a seam in an unfortunate place can ruin the entire impression.
Basic scheme
The simplest cutting:
2000 + 1400 = 3400 mm.
One plank goes entirely, the second is trimmed to 1400 mm. Theoretically, 600 mm remains.
Where it's better not to place the joint
It's undesirable to make the connection:
-
strictly in the center of the beam, if the center is clearly visible;
-
opposite a bright spot light or chandelier, which will emphasize the unevenness;
-
directly in the most contrasting zone of LED backlighting;
-
at the very edge of the beam, if there is a junction with other finishing or an end.
Where the joint is usually easier to hide
Most often, the joint is perceived more calmly:
-
closer to one of the edges, but not right up against it;
-
in the zone where side viewing is weaker;
-
where the openwork pattern joins more convincingly.
Since the open product description does not include a detailed pattern repeat diagram, it cannot be guaranteed in advance that any cut will join equally well. Therefore, before gluing, it is better to lay out two strips and choose the cut option where the pattern at the seam looks neater.
Three working installation scenarios for KPU-119 on the front face
1. Placement closer to the upper part of the free zone
This option is chosen when you want to maximally connect the openwork with the lighting. The molding ends up close to the light line but does not overlap it.
Advantages:
-
the upper edge of the beam reads more expressively;
-
the decor and lighting look like a single composition;
-
the beam appears more architectural.
Disadvantages:
-
the risk of shadow at the gap increases;
-
the openwork interacts more strongly with light;
-
any height error is immediately noticeable.
This option is only good when there is a clear visual gap between the KPU-119 and the light slit, rather than random 2–3 mm.
2. Centered placement in the free zone
Most often this is the safest and calmest option.
Advantages:
-
less risk of conflict with light;
-
easier to maintain even gaps;
-
the openwork reads as a decorative strip, not as part of the light assembly.
Disadvantages:
-
if the free zone is small, centering leaves too narrow margins;
-
the decor may be perceived as slightly more "independent" rather than in conjunction with the backlight.
For most ready-made beams, the central position is often the most reasonable starting option for fitting.
3. Placement lower, closer to the bottom edge of the front face
This is done when the upper part of the beam is already visually saturated with light and you don't want to additionally load it with relief.
Advantages:
-
minimal impact on the light line;
-
less risk of darkening the upper zone;
-
the lighting remains the main effect.
Disadvantages:
-
the openwork may detach from the logic of light;
-
the lower part of the beam becomes more active than the upper;
-
on some beams this creates a feeling of heaviness.
That is why one cannot declare a single "correct" option in advance. Only the template on a specific beam shows it.
What matters more: the total height of the beam or the clear zone under the decor
This is the question where people most often make mistakes.
The logic "the beam is tall, so 40 mm will definitely fit" is incorrect. What matters is not the total height, but the clear free plane onto which the molding can actually be glued.
Let's consider three typical situations.
| Scenario | Total height of the face | Free plane for decor | Conclusion |
| Comfortable | 70 мм | 52 мм | KPU-119 can be considered, a template is needed |
| Borderline | 60 мм | 42 мм | It fits formally, but the indents and light are critical |
| Unsuitable | 55 мм | 35 мм | KPU-119 does not fit this edge |
This table does not introduce a strict standard. It shows the principle: the solution is determined not by the overall beam height, but by the available flat section of the face plane.
If the free zone is exactly 40 mm, that is not an unconditional "yes". At least a small margin is needed for precise marking, paint characteristics, and visual separation of the profile from the light unit.
Why even an uncovered gap can look bad
It is very important not to reduce everything to just the issue of physically covering the light.
KPU-119 is an openwork relief molding. Even if it does not extend into the light gap, it can:
-
add extra shadow to the upper part of the face edge;
-
visually darken the edge near the light;
-
to intensify much more strongly than expected when the backlight is on;
-
to make the beam heavier and more complex in perception.
That is why the correct wording for the article is as follows:
The profile can be considered suitable only when it does not overlap the light gap and at the same time does not create an unwanted shadow effect next to it.
This is more honest and useful than promising "if it doesn't overlap, it fits."
When KPU-119 is truly suitable
Below are the signs under which the purchase seems reasonable.
1. There is a continuous free zone on the front face
The 40 mm profile fits on it without entering the light gap, chamfer, rounding, or another sensitive area.
2. The backlight does not visually deteriorate
With the LED strip turned on, the template does not produce a dirty shadow, and the light line remains readable and neat.
3. The beam surface is already well prepared
Openwork trim emphasizes the plane. If the face is wavy, damaged, or has a weak coating, the decor will not solve the problem and may make it more noticeable.
4. There is a calm place for the joint
At 3.4 m, a seam is inevitable. If it can be moved to a less visible area, the chance of a successful installation is higher.
5. The interior style supports openwork
KPU-119 is not neutral. If the room is designed in a very minimalist modern style, a smooth profile is sometimes more appropriate than an openwork strip next to the light.
When it is better not to buy KPU-119
The article should honestly describe failure scenarios as well.
Free space less than 40 mm
This is a direct limitation. The profile physically does not fit on the required face.
The profile only fits tightly against the light gap.
Formally this may be possible, but the risk of unwanted shadow is too high. In such a situation, it is better to look for a narrower profile.
The light line is the main effect of the beam.
If the entire design concept is based on a clean modern light strip, active openwork can overload the composition.
The front face already has a complex relief.
Additional openwork trim can make the beam too fragmented.
The beam is viewed from a close distance.
The closer the viewpoint, the more visible shadows, relief, and joint inaccuracies are. This is not always a prohibition, but such an effect should be recognized in advance.
If one of these problems is confirmed, it is logical choose another polyurethane molding or, if a calmer pattern is needed, buy polyurethane moldings.
The base is already painted: what this changes
A finished beam is not a rough surface. This means that not only the profile itself matters, but also the condition of the coating.
Before installation, you need to check:
-
how firmly the paint or finish layer adheres;
-
whether the chosen mounting compound is suitable for such a surface;
-
whether the trim can be precisely fixed in the desired position before it sets;
-
whether the gluing work will damage the already adjusted light unit.
Particular care should be taken with temporary fixation. Linear lighting shows misalignments very clearly. If the trim shifts even by a few millimeters, it will be more visible near the light than on a regular flat surface.
Why 7 mm also matter, even though everyone first looks at 40 mm
Usually, the first thing discussed is the 40 mm, and that's logical: they answer the question "will the profile fit on the edge." But 7 mm are no less important in the final result.
This thickness affects:
-
the shadow that the profile casts on the beam;
-
the depth of the relief near the light;
-
the sense of volume and decorativeness.
If 40 mm answers the question "will it fit," then 7 mm answers the question "how will it look near the light."
Therefore, after the 40 mm paper template, it is useful to make at least a rough three-dimensional imitation — for example, attach a strip or a thin plate — to see how the projection affects the shadow.
How to check the beam in the evening
Daytime and evening assessments have different goals.
During the day, you look at the geometry, proportion, and position of the strip on the beam.
In the evening, with the LED strip turned on, you check:
-
doesn't the purity of the light line disappear;
-
doesn't the openwork create too active a shadow;
-
doesn't the decor draw attention to itself;
-
doesn't the beam become visually heavier.
If in the evening the decor looks more interesting and the light remains clean, KPU-119 works in its favor. If the backlight loses its graphic quality and the top of the beam starts to seem overloaded, it's better to refuse the purchase.
It is the evening check that is often more important than any theoretical reasoning about style.
In the color of the beam or in contrast
On a finished beam, two paths are most often considered.
In the color of the beam
This is the safest scenario. The trim becomes part of the beam itself and works through chiaroscuro. For a backlit structure, this is especially appropriate because it doesn't create extra contrast next to the light strip.
In contrast
Contrasting openwork makes the beam significantly more decorative. But next to LED backlighting, such a technique quickly becomes very active. It makes sense to choose it only when the interior already has supporting decorative accents, and the beam itself is conceived as an expressive object.
If in doubt, for a beam with light it is calmer and more reliable to start with the solution "in the color of the base".
Practical algorithm before purchasing
This algorithm is needed so that a person can make a decision without guessing.
Step 1. Measure the front face
Measure not the total height of the entire structure, but specifically the dimensions of the plane where KPU-119 could theoretically be glued.
Step 2. Measure the light unit separately
Determine the position of the LED profile, the light gap, and their relation to the front face.
Step 3. Find the clear free zone
Exclude all areas where the trim cannot be routed.
Step 4. Make a 40 mm template
Try it in at least three positions: above, centered, below.
Step 5. Evaluate the template in the evening
Check the beam with the backlight on and off.
Step 6. Think through the joint
For a length of 3.4 m, 2 planks will be needed, meaning one seam. Its location should be determined in advance.
Step 7. Evaluate the style and scale
Check whether the beam becomes too active for the rest of the interior.
Step 8. Only after this place the order
If all checks are passed, you can order KPU-119 40 × 7 × 2000 mm in the quantity of 2 pieces per line 3.4 m long.
Ready-made decision matrix
| Condition | Conclusion |
| Free zone is confidently more than 40 mm, gap is not affected, light is not spoiled | KPU-119 can be considered |
| Free zone is about 40–42 mm, profile fits only tightly | Situation is borderline, need a template and evening test |
| Free zone is less than 40 mm | KPU-119 is not suitable |
| Profile does not cover the gap, but gives an unpleasant shadow | Better to look for another profile |
| Lighting is the main effect of the beam | Most likely to abandon the openwork |
| Need calm decor without an active pattern | Look at other trim or molding |
| On a length of 3.4 m, a spot for one joint has been found | 2 planks are enough |
| Need a reserve due to the risk of defects or a repeated beam | A third plank is possible, but not automatically |
This matrix is useful because it helps make a decision before paying for the product, rather than after delivery.
If KPU-119 is not suitable, what to do next
If measurements and the template showed a conflict, it does not mean that the beam decor has to be abandoned entirely. It only means one thing: KPU-119 is not a successful solution for this geometry.
Three directions are possible.
1. Look for a narrower molding
If the problem is purely geometric and 40 mm does not fit, it is reasonable choose another polyurethane molding, already based on the actual dimensions of the free zone.
2. Switch to a calmer molding
If the conflict is not so much in the width, but in the very ornate nature of the profile next to the light, it is logical buy polyurethane moldings and choose a more neutral option.
3. Leave the beam without additional decor
This is a full-fledged and normal solution. If the beam already looks solid, and adding a profile worsens the light, it is better to keep the clean structure than to buy decor for the sake of decor itself.
Conclusion
The ornate decorative molding KPU-119 40 × 7 × 2000 mm can indeed be considered for a ceiling beam: this matches the product's purpose. For a beam 3.4 m long, 2 strips will be needed for one continuous line, and the cost will be 13,760 ₽.
But in this task, it is not the catalog itself that decides, but the actual geometry of the finished beam. You need to check not just the height of the front face, but specifically the free front zone, separately measure the light fixture, make a 40 mm template, look at it with the backlight on and off, and think through the joint location in advance.
If a 40-mm openwork strip confidently fits into the free zone and does not break the light pattern, KPU-119 can be used without reworking the entire beam. If the profile turns out to be too close to the gap, creates an extra shadow, or makes the light effect worse, it is better to abandon this model and switch to another profile.
In this topic, there is only one sequence:
first measurement → then template → then light check → and only after that purchase.
FAQ
Can KPU-119 be installed if the free zone is exactly 40 mm?
Formally, this is a borderline situation. By the numbers, the profile matches the available height, but in practice, there remain markings, glue, unevenness of the painted surface, and the influence of light. At exactly 40 mm, the decision is made only after the template and a check with the backlight turned on.
Is it mandatory to run KPU-119 along the entire length of the 3.4 m beam?
No. A local decorative section can also be considered. But that is a different scenario, a different composition, and a different quantity calculation. This article specifically discusses a continuous line along the entire length of the beam.
If the beam is longer than 3.4 m, how should the quantity be calculated?
The total length of the decorative line is divided by 2000 mm and rounded up. Then, the locations of joints and cutting are planned separately.
Can KPU-119 be glued flush against the light gap?
Even if it is physically possible, doing so without a light test is not advisable. The profile may not overlap the gap, but it can still worsen the light pattern due to shadow and proximity of the relief.
What is more important for this task—40 mm or 7 mm?
First 40 mm, because they answer the question of whether the profile fits on the face. Then 7 mm, because they determine the shadow and volumetric effect near the light.
Should I take a third plank as a spare?
Not automatically. For one line 3.4 m long, 2 planks are mathematically sufficient. A third is needed only for a specific reason: risk of defects, complex joint, spare for another beam, or desire to have a reserve element.
Can KPU-119 be used on a beam with two light lines?
It can be considered, but then each light zone must be measured separately. A decision made for a beam with one light gap cannot be automatically transferred to a beam with two.
What to do if KPU-119 is not suitable?
Either look for a narrower trim, or switch to a calmer molding, or leave the beam without additional decor. Which path to choose depends on whether the problem is in the profile width or in the openwork nature of the decor itself.
Can KPU-119 be painted in a contrasting color?
It's possible, but next to the backlight, the contrasting openwork becomes much more active. If the light effect is already the main accent of the beam, it's safer to start with painting it in the color of the base.
Is a separate 3D template needed if there's already a 40 mm paper strip?
It's advisable to at least roughly model the thickness as well, because a flat paper strip doesn't show the shadow effect. Even a small overhang near the light can change the impression more than it seems by the numbers.