Article Contents:
- Polystyrene and polyurethane for ceiling molding: what the real difference is
- Expanded and dense polystyrene are not the same thing
- What molded polyurethane offers
- Why the finished product matters more than the general name of the material
- A floral ornament with real depth
- A large medallion as a system, not a single part
- Overlays and moldings expand the project
- Option one: one calm element around the chandelier
- Option two: a relief rosette as the main accent
- Option three: CRPU-070 made of individual polyurethane elements
- If the room is small
- For a living room with pronounced classical styling
- For a spacious living room and hall
- Texture and surface preparation
- How to avoid flooding thin leaves and scrolls
- Solid color surface, soft patina, and local accent
- Two profiles for different tasks
- How to add overlays without losing the logic of the composition
- Concrete, plaster, and painted ceiling
- Suspended drywall ceiling
- The chandelier is mounted independently of the ceiling rose
- Why precise marking affects both appearance and maintainability
- Which is better for a ceiling rose — polystyrene or polyurethane?
- How polystyrene ceiling molding differs from polyurethane
- Which is stronger: dense polystyrene or polyurethane?
- How to choose a ceiling rose for a chandelier
- Can a polyurethane ceiling rose be complemented with decorative moldings?
- How a one-piece ceiling rose differs from a modular one
- How to paint intricate relief without hiding the pattern?
- Can a large polyurethane ceiling medallion be installed on drywall?
- How to choose STAVROS polyurethane stucco for the ceiling?
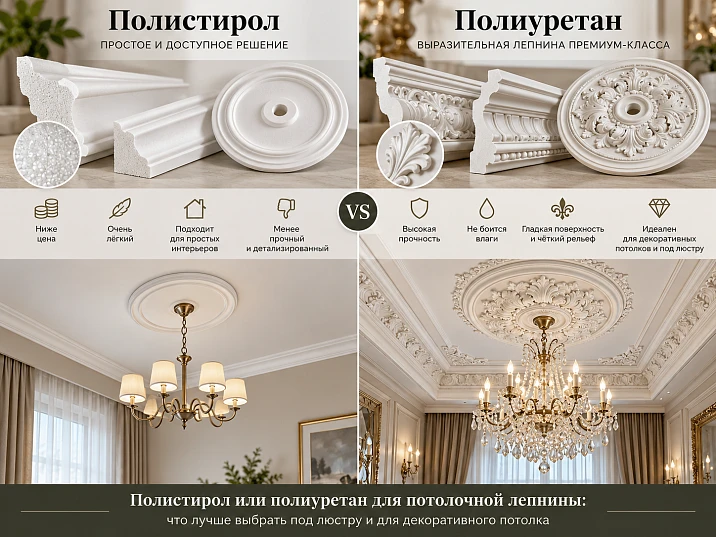
Two white ceiling medallions can look almost identical in a photograph. One is made of polystyrene, the other of polyurethane. Yet the prices differ, and both descriptions promise easy installation and the possibility of painting. A natural question arises: is it worth paying more for ceiling decor that no one touches after the renovation?
If you need a simple medallion with smooth rings around the chandelier, quality polystyrene often solves the task without extra costs. But if an ornamental medallion is planned, the joining of dozens of relief details, or a whole ceiling composition with moldings, the choice changes. Here what matters is not only the properties of the polymer, but also the availability of coordinated elements, the precision of the pattern, and the specifics of marking, finishing, and fastening.
The short answer: for a simple, unloaded ceiling decoration, compare specific polystyrene and polyurethane products by quality and price. For complex stucco with a large medallion, floral ornament, and separate overlays, it is worth considering STAVROS polyurethane systems first. At the same time, no material by itself guarantees reliable installation — especially on a suspended ceiling.




Polystyrene and polyurethane for ceiling stucco: what the real difference is




Expanded and dense polystyrene are not the same thing
Under the word "polystyrene," various products are sold. Lightweight expanded polystyrene medallions are usually made for relatively simple decorative finishing. Some of them show noticeable graininess, and the thin edge can be damaged during careless trimming. Such characteristics should be checked on a specific sample rather than considered mandatory for the entire material.
There is also another group — dense extruded polystyrene profiles, including impact-resistant varieties. Their surface can be smooth enough for painting, and the edge can withstand normal installation impacts. That is why the comparison of "cheap crumbly foam plastic versus quality polyurethane" misleads the buyer: in reality, polystyrene options differ substantially.
For the ceiling this is especially important. There are fewer accidental impacts here than on a hallway wall or a furniture facade. Impact resistance is not always the main criterion; sometimes the expressiveness of the relief, ease of installation and the cost of the finished composition are more significant.
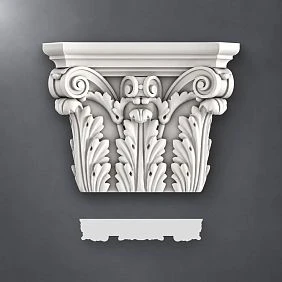
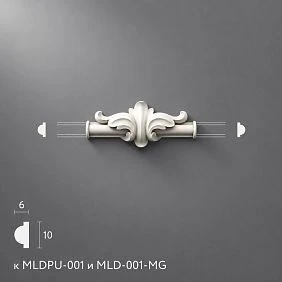
Our factory also produces:



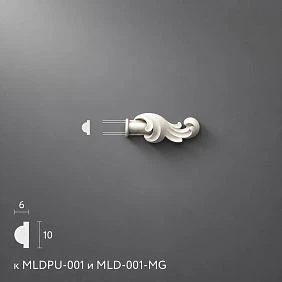
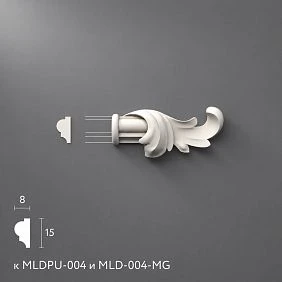
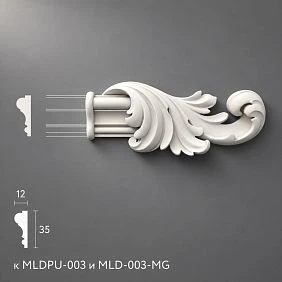
What molded polyurethane offers
Rigid molded polyurethane makes it possible to produce decorative items with protrusions, recesses, leaves, scrolls and repeating small details. After painting, such relief is noticeable thanks to its own geometry: light catches on the protruding edges and leaves shadows in the recesses.
However, the possibility of a complex pattern does not mean that any polyurethane profile is automatically more precise than any polystyrene one. The quality of the mold, production, coating and the part itself must be examined separately. For the buyer, a specific rosette with a drawing, a known dimension and a set of coordinated decorative elements is more convincing than an abstract characteristic of the material.
This approach is especially useful when decorating the ceiling around a chandelier. If all the parts of the future ornament are selected in advance, it is easier to see its scale, determine the position of the axes and avoid a situation where a liked overlay does not fit the intended frame.
Get Consultation
Why the finished product matters more than the general name of the material
Suppose you have two rosettes of the same outer size. The first is solid and almost flat; the second consists of separate overlays with a deep floral pattern. Their installation labor intensity, number of joints and requirements for the ceiling will differ regardless of the fact that both are called ceiling rosettes.
Before purchasing, find out the composition of the product, the dimension at the extreme points of the ornament, the largest relief protrusion, the type of base, the possibility of painting and the recommended fastening. If the rosette is sold as a composition of separate parts, you also need a layout diagram and the exact number of elements.
Polystyrene or polyurethane ceiling rosette: comparison by the main criteria
| Criterion | Polystyrene decor | Polyurethane decor |
|---|---|---|
| Initial cost | Simple foam products are often cheaper; dense options can be more expensive | Cost depends on size and complexity; large modular compositions can be significantly more expensive |
| Mass | Determined by density, dimensions, and construction | Also depends on the specific product; a large set of parts cannot be considered weightless |
| Ornament | Both smooth and more detailed profiles are possible, depending on the technology | Molded products allow for expressive, complex relief |
| Damage resistance | From delicate foam products to dense impact-resistant profiles | Depends on the composition and cross-section; a protruding thin scroll can still be damaged |
| Preparation for painting | The texture, primer, paint compatibility and solvent sensitivity must be taken into account | The condition of the factory primer, coating compatibility and cleanliness of the relief must be taken into account |
| Installation | To a compatible adhesive or other specified fastening method | Same; a large composition requires a separate assessment of the base and weight |
| Complex composite compositions | The options are determined by the range of the specific manufacturer | STAVROS offers CRPU modular rosettes, MLDPU mouldings and NPU individual overlays |
The most common misconception concerns strength. A polyurethane ornament does not have to be stronger than every product made of high-density polystyrene. On the contrary, some impact-resistant polystyrene profiles withstand operational impacts well. For a ceiling medallion, it is more important to check whether the fastening system can support the decor's own weight, whether the base is coming away, and how precisely the pattern elements align.
The second misconception is that any ceiling moulding must be perfectly smooth and white straight out of the packaging. For painting, manufacturers supply products with varying degrees of preparation. Before installation, the front surface, seams and possible manufacturing marks should be assessed; then a compatible primer and paint should be selected.
Why polyurethane often turns out to be the more interesting choice for complex ceiling molding
A floral ornament that has real depth
On a smooth rosette, the pattern is created by several concentric rings. They are enough to mark the suspension point of the chandelier, but from a distance they hardly compete with the fixture itself. Complex molding solves a different problem: it forms an independent center of the ceiling even when the chandelier is switched off.
In a three-dimensional composition, leaves can overlap each other, scrolls can form directional lines, and repeating motifs can set a circular rhythm. Under side lighting, shadows appear not only along the outer edge but also within the pattern. It is precisely for this kind of plasticity that it makes sense to choose a detailed polyurethane rosette.
At the same time, complexity does not always embellish a room. In a low room with several bright ceiling lights, a rich rosette sometimes looks too dense. If the interior already contains expressive cornices and a lot of ornament on the walls, the central medallion is best assessed together with them.
A large medallion as a system, not a single part
A modular rosette has a logic of its own: several types of parts repeat in specified places and combine into a single pattern. The manufacturer can provide common axes, radial distances, and a drawing for them. The installer does not have to invent an ornament on the ceiling from individual random overlays.
In photographs of the finished composition, this structural side is usually not visible. But it is precisely this that distinguishes an assembly of several dozen elements from the installation of a single solid rosette. A marking error on the first sector carries over to the rest: at the end of the circle, a mismatch arises that cannot be painlessly covered with paint.
Overlays and moldings expand the project
Around the central medallion, you can build a rectangular frame, and reinforce the corners or individual sections with ornament. Selection polyurethane decorative overlays allows you to match the character of the leaves, the direction of the curls, and the size of the accent details. Compatibility is still checked against specific product codes: belonging to the same material does not mean that any two overlays will fit together without adjustment.
This is where the practical advantage of the polyurethane range comes in: the buyer chooses not only between two materials, but also between a single ornament and a complete decorative system.
Three options for decorating the center of the ceiling: from a simple rosette to a modular composition
Option one: a single understated element around the chandelier
For a small room or a modern interior, a rosette without complex floral details is sufficient. It frames the ceiling cup of the light fixture and creates a few shadow lines. If a smooth polystyrene model of a suitable size is available that is compatible with paint and the mounting base, there is no need to pay extra just for the name of another material.
Pay especially close attention to the central part. The outer diameter may match in style, while the area around the suspension may conflict with the light fixture's cup. Clarify the geometry of the central hole, if one is provided, and the distance to the nearest relief. You cannot assume that a decorative rosette by itself resolves the issue of mounting and connecting the chandelier.
Option two: a relief rosette as the main accent
This choice is appropriate if the ceiling is sufficiently uncluttered and classical or neoclassical details are already used in the interior. Leaves, small flowers, and curls form a noticeable ring around the light fixture. Unlike a simple smooth shape, the ornament requires careful finishing paint: a thick layer can partially fill the recesses.
A relief rosette can be either one-piece or composite. Before ordering, you need to determine this from the product page, because the second version increases the number of marking and fixing operations. If the project is time-limited or the ceiling is difficult to prepare, a complex multi-part composition may not be the best solution.
Option three: CRPU-070 made of individual polyurethane elements
A telling example is Ceiling rosette CRPU-070 STAVROS measuring 765 × 765 × 18 mm. According to the product card description, this is a star-shaped composition of 24 elements in three types: eight fan-shaped NPU-244 overlays, eight elongated NPU-130 overlays, and eight compact NPU-309 overlays.
This design provides a useful example for comparing materials. The main value here is not that each individual polyurethane element is necessarily more durable than its polystyrene counterpart. The value lies in the pre-planned pattern, which can be reproduced on the ceiling using precise marking and coordinated parts.
To control the placement of the main nodes of the eight-ray composition, you can use eight directions with an angular step of 45°. But this is not enough for installation: the radii, mutual gaps, and orientation of each type of overlay must be taken from the standard drawing or installation template. Distributing the parts "by eye" across eight sectors on your own is risky.
The small NPU-309 element has dimensions of 66 × 45 × 8 mm. It is easy to underestimate, but it is precisely small inserts that can reveal errors in large parts. When two adjacent branches of the ornament converge, even a slight shift is noticeable against the background of rhythmic repetition. Therefore, during assembly, first check the entire scheme on dry marking, rather than gluing sector by sector without overall control.
Installation sequence at the project level: mark the center of the light fixture and the geometry of the composition; transfer the positions of the parts from the drawing; check all sectors; prepare the base; secure the parts using the method specified for their weight and surface; treat the seams and apply paint after the compounds have cured. For a specific ceiling rose, follow the manufacturer's instructions rather than using this general sequence as a universal working drawing.
Which STAVROS ceiling rose to choose by scale and character of the pattern
The catalog contains several models that are convenient to compare with each other not only by size but also by the complexity of the decorative system.
| Product | Dimensions, mm | What to consider before choosing |
|---|---|---|
| CRPU-070 | 765 × 765 × 18 | Composition of 24 elements in three types; precise radial marking required |
| CRPU-069 | 910 × 910 × 15 | A richer pattern of 64 pieces in 15 types; the volume of installation work increases |
| CRPU-068 | 1325 × 1325 × 18 | A large composition of 72 elements in 12 types; sufficient free area and a verified base are required |
| CRPU-071 | 1365 × 1365 × 19 | A large-scale ornamental system; an assessment of the room proportions and the chandelier is required |
All the dimensions given refer to the polyurethane options from the STAVROS product pages. These are the overall dimensions of the composition, not a guaranteed diameter of a solid disc: a composite ornament may leave gaps and an open center. The bonding area should not be determined by simply multiplying the two overall dimensions.
If the room is small
Start not with the size of the ceiling medallion in the catalog, but with the actual appearance of the ceiling. Look at the position of the chandelier, the ceiling cornice, the doorway, the windows, and additional light fixtures. A medallion of around 765 mm already forms a noticeable architectural accent; in a compact room it may be perceived differently depending on the ceiling height and the scale of the chandelier.
To evaluate the result, cut out the outer contour of the intended overall size from paper or cardboard and temporarily attach it to the ceiling in a safe way. Even such a rough mock-up is better than a product photo, because it immediately shows how much free surface will remain around the decor. If the pattern looks cramped, there is no need to necessarily choose a large modular composition.
For a living room with a pronounced classic design
CRPU-069 medallion measuring 910 × 910 × 15 mm allows a more complex central ornament to be considered. The product page lists 64 elements in 15 types; a separately purchased paper template is provided for installation. This is especially important when several small patterns must align in a circle without accumulating errors.
The more types of overlays there are, the more important the completeness of the delivery. When you receive an order, check the quantities against the specification, the presence of left and right parts, their condition, and their compliance with the drawing. You must not start assembly hoping to discover missing elements after half the ornament has already been glued.
For a spacious living room and hallway
Modular composition CRPU-068 measures 1325 × 1325 × 18 mm. In its product card it is described as a system of 72 parts of 12 types, forming an oval ornament within a specified overall dimension. Such a piece requires not only space, but also a correctly chosen degree of decorative richness in the adjacent cornices.
Another large option is the CRPU-071 rosette measuring 1365 × 1365 × 19 mm. When choosing it, you cannot rely on the room's floor area alone. The decisive factors will be the chandelier axis, the visible portion of the ceiling, the furniture layout, and the distance to the nearest light fixtures and architectural elements.
A useful criterion: if the rosette affects the area of ceiling lights, ventilation grilles, or access panels, resolve these engineering intersections first. You must not move a functional unit to preserve the symmetry of the decorative ornament without a technical check.
Polystyrene and polyurethane after painting: what happens to the decorative relief
Texture and surface preparation
On the ceiling, unevenness is clearly visible under grazing light from a window or wall lighting. Inexpensive foamed decor sometimes shows the texture of the base; dense polystyrene and quality molded polyurethane can have a noticeably smoother surface. But a final conclusion can only be made about a specific product after a test painting.
Pay special attention to the joints of the modular composition. The overlays themselves may have a clean pattern, but a convex bead of glue between them turns into a noticeable extra line after painting. Remove excess compound in accordance with the instructions without damaging the texture, and do not expect thick enamel to hide the defect.
How not to flood thin leaves and curls
A decorative rosette needs a layer that covers the material rather than filling its recesses. Determine the technique, number of layers, primer and intervals between applications based on the chosen paint system. There is no universal promise that any polystyrene or polyurethane is compatible with any paint, especially if the composition contains aggressive solvents.
Before the finishing work, make a test coat on a sample of the same material. Make sure the surface does not soften, the primer holds, and the paint does not collect in droplets on the protrusions. For recesses, use a suitable small brush; for open flat areas, use a tool that leaves an even layer without drips. When working overhead, it is better to use small portions of material.
A solid-color surface, soft patina and a local accent
White molding on a white ceiling is perceived primarily through shadows. This solution shows the form well and does not compete with the light fixture. A darker patina in the recesses enhances the depth of the pattern, but also emphasizes any joint defects. Gilding individual protrusions creates a strong decorative accent; on too fine an ornament it can turn into a motley set of highlights.
If the composition contains dozens of parts, first make a test on several identical elements and look at it from the floor, not just from arm's length. At a normal eye height, small differences in relief blend together; excessively contrasting paint, on the contrary, makes each part a separate spot.
How to combine a ceiling rosette and polyurethane moldings
The central medallion does not have to remain the only ceiling decor. In a classical composition, a rectangular or square molding outline is placed around it. The rosette sets the center, the frame marks the boundary of the decorative field. There needs to be air between them: a narrow gap forces the ornament and the molding to compete for the same line.
Two profiles for different tasks
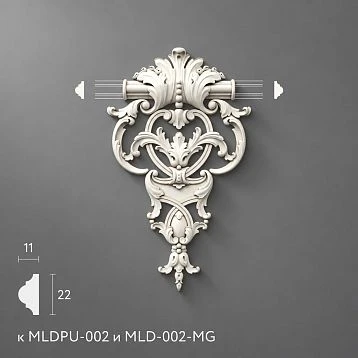
For a relatively light contour, you can consider polyurethane molding MLDPU-002 measuring 22 × 11 × 2600 mm. Its multi-level cross-section creates a visible boundary without turning the frame into a massive cornice.
If a more pronounced profile is required, molding MLDPU-003 it has a cross-section of 35 × 12 mm and a length of 2600 mm. It is wider and, with the same layout, will be more noticeable. The choice between them depends not only on taste: measure the distance from the outer ends of the rosette to the inner boundary of the frame and check whether the decorative field becomes visually cramped.
Moldings do not have to repeat every curve of the central rosette's leaf. It is enough to harmonize the overall character of the profile and the density of the relief. For example, a complex floral center may read better inside a calmer architectural contour than next to yet another rich ornament.
How to add overlays without losing the logic of the composition
First, the large elements are placed: the rosette and the frame. Only after that are the locations of additional accents determined. If overlays are placed at the corners of a rectangle, check their symmetry relative to the axes rather than simply repeating approximate distances from the walls.
In systems with CRPU-070, for example, the following is used: polyurethane overlay NPU-309However, its presence in the composition of a specific ceiling rose does not mean that it automatically fits every corner of any moulding. Compatibility of shapes and scale must be confirmed by a drawing or a dry fit.
Calculating the moulding frame around a ceiling rose: an example without unnecessary joints
Suppose the designer has specified a square outline of 2200 × 2200 mm, with a single central ceiling rose inside it. It is assumed that the 2200 mm dimension of each side is measured along the profile line that will be used to calculate the installation lengths. This is important: with mitre cuts, the lengths along the inner and outer edges differ.
The perimeter of the outline is:
4 × 2200 = 8800 mm, or 8.8 linear metres.
For moulding MLDPU-002, the length of one strip is 2600 mm. Based on the net linear metres, the division gives 8800 / 2600 ≈ 3.39 strips. Rounding up to four is mathematically correct, but this is not yet a full cutting check.
Here, four strips do indeed represent a reasonable initial scheme: each can be used to make one side 2200 mm long, leaving approximately 400 mm before accounting for saw kerfs and the geometry of the mitre cuts. But this conclusion is valid only after verifying that the required long points of the mitre cut fit within 2600 mm and that the profile of the selected section is correctly oriented in the cutting plan.
Schematic ceiling plan, view from below

     frame side 2200 mm
    ┌───────────────────────┐
    │                       │
    │       CEILING ROSE    │  2200 mm
    │     chandelier centre │
    │                       │
    └───────────────────────┘

  Each side is a separate strip.
  The position of the ceiling rose and the gap to the frame
  are refined according to the actual dimensions.
Suppose CRPU-070, with a dimension of 765 mm, is positioned inside the frame, strictly in the centre. If both values are measured along comparable geometric lines, the difference is 2200 − 765 = 1435 mm. On each side, approximately 717.5 mm remains to the corresponding boundary of the decorative field. On the finished ceiling, the actual visual gap will change due to the width of the moulding, the shape of the ornament and the measurement line adopted. This is a preliminary scale check, not an installation drawing.
For a 2200 × 2200 mm frame made of four solid sides, four strips will be required if the cutting check is successful. Four corner joints must be made and matched by pattern. If, however, the square is increased to a size exceeding the usable length of a strip taking mitre cuts into account, straight joints and a different material quantity calculation may be needed. In such a project, the total linear metres alone are no longer sufficient for an answer.
For large ornamental systems, calculate separately: moldings — by strips of the required length; ready-made rosettes — by sets; additional overlays — by pieces according to the scheme. Do not include the rosette's own elements again in the order until you have verified that they are not included in the set price.
Reliability of ceiling decor: the base matters more than a beautiful photo
Concrete, plaster and painted ceiling
Before installation, check not only the evenness but also the strength of the finishing layer. If the filler is peeling away from the concrete, a strong adhesive will hold only a piece of filler, not the decor on the load-bearing base. Peeling finish must be removed, the surface restored and prepared according to the instructions for the chosen installation system.
A painted ceiling requires a separate check of the paint's strength. Firmly adhering paint sometimes allows installation with a compatible adhesive, but if the coating is weak or incompatible, the bond will be unreliable. It is especially dangerous to assume that old whitewash is suitable as a base for a heavy composite composition.
Suspended plasterboard ceiling
A plasterboard ceiling should be considered a separate structure with a frame, hangers and load limits. Even if each small overlay seems light, the combined mass of dozens of parts, adhesive layers and additional profiles can be significant. Moreover, the load is distributed unevenly: the adhesive contacts only the rear pads of the parts, not the entire area of the rosette's nominal rectangle.
For large or heavy decor, the load-bearing capacity of the ceiling system and the manufacturer's specified fixing methods must be checked. When a single adhesive system is insufficient, decisions about additional backing or mechanical fastening are made before the final finishing and taking into account the frame structure. Arbitrary self-tapping screws into a plasterboard sheet do not replace a properly designed reliable assembly.
The chandelier is mounted independently of the rosette
A ceiling rosette is not a light fixture suspension. The weight of the chandelier must be borne by independent load-bearing fasteners designed for its mass and the ceiling structure. The decorative element only frames the space around the suspension point. It must not be used in place of a mounting plate, hook or other specified fastener.
Before work near the wiring, the power to the relevant line is switched off and the absence of voltage is verified with a suitable instrument. Electrical installation and mounting of a heavy chandelier should be entrusted to a qualified specialist. When installing stucco molding, do not block the ventilation zones, fastening elements, and access to the necessary connections provided for by the luminaire manufacturer.
Why precise marking affects both appearance and maintainability
If a small part is installed in the wrong place, correcting its position after the adhesive has cured is not easy: when removing it, both the ceiling covering and the ornament itself can be damaged. Therefore, the layout of the modular ceiling rose must be checked before gluing. On a large ceiling, it is better to verify the marking with several independent measurements: the axes of the room, the diagonals of the frame, and the symmetry of repeating elements.
How much does a simple ceiling rose and a ready-made polyurethane composition cost?
Comparing the price of a single simple polystyrene ceiling rose with a large polyurethane set is incorrect: these are projects of different scale. A fair comparison should take into account the finished result — the central decor, additional profiles, ceiling preparation, fastening, painting, and installation work.
To understand the order of costs, you can use the confirmed prices from the STAVROS catalog as of the verification date, October 21, 2026. The CRPU-070 composition is listed at 35,680 RUB, and one MLDPU-002 strip 2600 mm long — at 5,460 RUB. Four strips for the described square frame cost 21,840 RUB; together with the ceiling rose, that comes to 57,520 RUB, excluding adhesive, substrate preparation, consumables, painting, delivery, and labor. This is an illustrative estimate for the selected items, not the price of any ceiling project.
| Part of the example | Quantity | Estimated amount |
|---|---|---|
| Polyurethane composition CRPU-070 | 1 set | 35,680 RUB |
| Molding MLDPU-002, length 2600 mm | 4 strips | 21,840 RUB |
| Subtotal for items | — | 57,520 RUB |
| Preparation, adhesive, painting, installation and delivery | According to project conditions | Separately |
Before ordering, confirm current prices, package contents, packaging rules and whether the required cutting pattern can be produced. If a single simple rosette is enough, there is no need to buy several meters of moldings and dozens of overlays. But when a project requires a specific multi-part ornament, the price should be assessed by the achievable result, not only by the cost per unit length.
When to choose polystyrene and when polyurethane: a practical table
| Your task | What to focus on |
|---|---|
| A small smooth rosette without a complex pattern | Compare suitable products in both materials; high-quality polystyrene may be more cost-effective |
| Simple ceiling trim | Just check the profile's evenness, finish, installation conditions, and price |
| Ornamental rosette with expressive leaves | View the actual relief and drawing of the molded polyurethane product |
| Rosette made of several dozen elements | Choose a kit with a confirmed specification and assembly diagram |
| Rosette and rectangular frame | First determine the scale and layout, then select polyurethane moldings |
| Decor above the chandelier on drywall | First of all, check the ceiling structure and the permissible mounting system |
| Limited budget and a simple ceiling | Don't complicate the design just for the sake of a more expensive material |
| A statement composition for a large hall | Compare large modular systems by dimensions, number of parts and installation labor |
For an independent choice, it helps to answer four questions in sequence. First: is one socket enough, or is a full architectural composition required? Second: what actual size will not conflict with the chandelier, curtain rail and other fixtures? Third: what is the ceiling made of, and how will the decor be attached? Fourth: how many elements, joints and painting operations does the chosen option involve?
Once these answers are in hand, comparing materials becomes concrete. Polystyrene no longer looks inherently bad, and polyurethane no longer automatically necessary. The buyer chooses a specific shape and system that suit their space.
Frequently asked questions
Which is better for a ceiling medallion — polystyrene or polyurethane?
For a simple decorative shape with shallow relief, a quality polystyrene product may be sufficient. When a complex ornament or a multi-part medallion is required, it is more convenient to compare actual polyurethane systems with known dimensions and component sets. The final choice depends on the quality of the specific product, its weight, the ceiling substrate, the painting method and the budget.
How does polystyrene ceiling molding differ from polyurethane?
The difference lies in the material and the manufacturing methods of specific products, but it does not boil down to the formula "soft versus hard." The market offers lightweight expanded polystyrene and dense impact-resistant polystyrene; polyurethane elements also vary in formulation and geometry. For a ceiling medallion, you need to compare the quality of the edges, the depth of the pattern, finish compatibility and the availability of a ready-made set of decorative parts.
Which is stronger: dense polystyrene or polyurethane?
It is impossible to pick a winner without the specifications of two specific products. Impact-resistant polystyrene can resist mechanical damage well; a polyurethane piece with a thin protruding sheet can also break if handled carelessly. On the ceiling, accidental impacts are usually rare. What matters far more is sufficient strength of the base, compatibility of the mounting compound, and compliance with the requirements for attaching large decor.
How to choose a ceiling medallion for a chandelier?
Check the dimensions of the light fixture's ceiling cup, the mounting location, the free plane around it, and the ceiling height. The outer size of the medallion should match the room's composition, but it does not have to be larger or smaller than the chandelier according to some arbitrary universal rule. For a composite medallion, separately check the central opening and the placement of the relief: it must not interfere with installation and maintenance of the light fixture.
Can a polyurethane medallion be supplemented with decorative moldings?
Yes, if the dimensions and the character of the profiles are agreed upon in advance. The medallion has an overall dimension, the molding frame has an inner boundary, and a sufficient free field must be maintained between them. Not all overlays are compatible with every molding. To avoid conflicts, first draw the ceiling to scale, clarify the profile cross-section, and prepare a layout plan for the corner joints.
What is the difference between a one-piece ceiling medallion and a modular one?
A one-piece product is installed as a single part, so its total weight, contact surface area, and mounting conditions are critical. A modular system consists of individual overlays that must be positioned in precise mutual positions. It offers additional pattern possibilities but increases the number of installation operations. For complex systems, drawings, templates, and a preliminary completeness check are especially useful.
How to paint complex relief without hiding the pattern?
Choose a coating compatible with the material and the factory primer, then perform a test on a sample. Apply the paint thinly, without filling the recesses and without leaving runs at the joints. Take the number of coats and the intervals between them from the instructions of the chosen system. First evaluate decorative gilding or patina on a few pieces from the distance at which the ceiling is usually viewed.
Can a large polyurethane ceiling medallion be installed on drywall?
The drywall material itself does not mean an automatic prohibition, but the mounting method requires checking the ceiling structure and the weight of the entire set of parts. Reliability depends on the frame, hangers, condition of the sheets, contact area, and the instructions for the mounting system. One should not promise that adhesive will hold any large medallion. Heavy compositions may require additional fastening provided for by the project.
How to choose STAVROS polyurethane stucco for the ceiling?
Start with the central medallion, not with individual small appliqués. Match the dimensions, relief, number of elements, and drawing of the model with the ceiling and the light fixture. Then decide whether a frame of moldings is needed and which details truly complement the composition. Evaluate the cutting layout, strength of the base, and future painting. After these checks, you can form an order without unnecessary items and unplanned joints.
What to choose for your ceiling
Polystyrene is quite appropriate when a light and relatively simple decorative accent is needed. A good dense profile can produce a neat result after properly selected painting. There is no reason to declare such an option low-quality merely because it is made of a different polymer.
For a complex ceiling pattern, the criteria change. Here you need coordinated dimensions, repeating ornaments, a clear assembly scheme, and the ability to complement the central medallion with moldings and appliqués. It is precisely in such projects that STAVROS polyurethane products offer specific options: from CRPU-070 to large multi-element compositions CRPU-068 and CRPU-071.
You should choose after checking the ceiling and the light fixture, not before. Marking, reliable fastening, and careful painting will determine whether the intended pattern remains after installation. You can compare models, their dimensions, composition, and drawings in the section ceiling rosettes made of polyurethane STAVROS.