Article Contents:
- Why a flat facade almost always loses
- What is a decorative overlay and how does it work
- Where wooden overlays are used: scenario map
- Sliding Wardrobes and Swing Wardrobes
- Dresser: the most rewarding object
- Kitchen fronts
- Bedside tables and TV stand
- Sideboard, display cabinet, console
- Interior doors and decorative wall panels
- Overlays for a wardrobe: from box to joinery product
- How many overlays are needed for one door
- Kitchen overlays: decor where it belongs
- Coating for kitchen overlays: how to treat them
- Overlays for a dresser: how to update furniture without buying new
- Choosing an overlay for a dresser: by drawer size
- Imitation paneling: the most striking technique with overlays
- Combination of overlay and molding: double effect
- Carved overlays: when furniture becomes the center of the room
- How to choose the size and shape of a decorative overlay
- Facade size and overlay proportions
- Corner overlays: about symmetry
- Overlay thickness and combination with handle
- What to combine decorative overlays with: furniture decor system
- Wall and furniture decor in a unified style
- Mistakes when choosing furniture overlays
- Installation: how to properly secure a decorative overlay
- Tools and Materials
- Installation Sequence
- Where to buy wooden overlays and furniture decor
- FAQ: answers to questions about decorative furniture overlays

There is a question that almost everyone who lives in a well-furnished but somehow elusively "bland" apartment asks themselves: why does the furniture look cheap, even though it cost a lot? The answer is almost always the same — flat, smooth, featureless facades. A wardrobe is a rectangle. A dresser is a rectangle. A kitchen is a row of rectangles. Everything is clean, neat, functional — and completely faceless.
This is where the conversation about begins decorative inlays for furnitureNot as an obvious "decor" that is glued out of ignorance, but as a professional tool for transforming a surface — the kind used by furniture makers and interior designers when they need to turn a factory-made facade into an object with a story.

Why a flat facade almost always loses
Designers have long known: the human eye seeks shadow. Not a dark color, not a bright pattern — precisely shadow, relief, depth. A surface without relief is perceived as empty, even if it is beautifully painted. That is why a milled facade looks more expensive than a smooth one at the same price.
But what to do if the facade already exists, it is smooth, and there is nowhere to mill it — the furniture is factory-made, MDF or laminated chipboard? Or there is an old chest of drawers that is a pity to throw away but embarrassing to show to guests? Or the kitchen is quite functional, but looking at the same flat doors for three years is no longer bearable?
The answer is — decorative overlays for furniture. They create relief where there is none. They add shadow, depth, symmetry, and that very "hook" for the gaze that distinguishes furniture with character from furniture without it.


What is a decorative overlay and how does it work
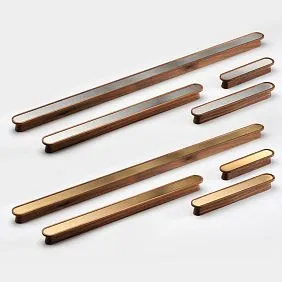
A decorative overlay for furniture is a three-dimensional wooden element that is attached to the surface of a facade and creates relief on it. It can be a central medallion, a corner piece, a strip overlay, a frame element, an ornamental insert, or a carved accent.
The principle of operation is simple: the overlay casts a shadow. The shadow creates a sense of volume. Volume makes the facade "deep" — like expensive joinery with profiled doors, real panels, and carved details. And all this — without replacing furniture, without complex joinery work, without significant costs.
Our factory also produces:
Where to use wooden overlays: a scenario map
Before choosing, it's important to understand where exactly and why they are needed. Because each piece of furniture has its own logic of decoration.
Get Consultation
Sliding wardrobe and hinged cabinets
A large wardrobe with smooth doors takes up a lot of visual space in the room. When it's empty in form, it feels oppressive. Overlays on the wardrobe facade do several things at once: break up the plane, add vertical rhythm, create a sense of 'sections,' and turn a monolith into something resembling a custom-made wardrobe from a furniture workshop.
Dresser: the most rewarding object
A dresser is an ideal candidate for working with overlays. It has several small drawers, each of which is a separate 'field' for decor. A central overlay on each drawer facade plus new handles — and the old dresser literally changes eras.
Kitchen fronts
In the kitchen, overlays are used carefully — not on all facades, but on accent ones: upper cabinets, buffet area, tall cabinet, island. Overlays on lower work facades are less practical due to cleaning, grease, and steam. But display cabinets, upper doors, and decorative panels are exactly where it decor for furniture facades works flawlessly.
Bedside tables and TV stand
Small items near a bed or sofa are always in sight — they are "read" in the calm space of a bedroom or living room. One neat overlay in the center of each door, and the nightstand ceases to be a faceless "box."
Sideboard, display cabinet, console
These are items designed as decorative — and therefore require appropriate styling. On them, overlays work to their full potential: medallions, corner rosettes, ornamental inserts.
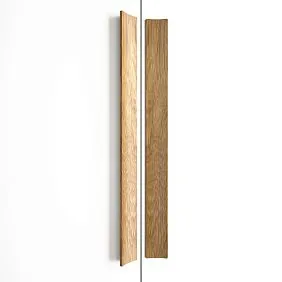
Interior doors and decorative wall panels
Wooden overlays are used not only on furniture. On interior doors with a flat panel, they can create the effect of a classic paneled door. On wall panels, they can form boiserie, a decorative frame, or a vertical rhythm without plasterwork.
Overlays for a wardrobe: from a box to a joinery product
A large built-in wardrobe is the most common furniture in modern interiors. And the most problematic in terms of appearance. The panels of sliding or hinged doors are often flat sheets with a single handle. No architecture.
Decorative appliqués for furniture can radically change this perception — without remodeling the wardrobe itself. Here is what happens when, for example, four corner elements and one central medallion are attached to a smooth door:
-
A visual frame is formed — an imitation of a paneled structure;
-
The center of the facade becomes an accent, not an empty space;
-
The cabinet begins to "read" as custom-made;
-
Corner overlays create a frame effect that we recognize from classic furniture.
This effect takes literally one evening of work with glue and painter's tape.
How many overlays are needed for one door
Simple rule: an odd number looks better. One central element works. Four corner + one central works. Two symmetrical work with strict symmetry. Three in a row only if the door is very tall.
For a sliding wardrobe with wide panels (from 600 mm), a vertical insert in the middle plus two corner elements at the top works well. This creates a sense of sectional division without physically dividing the panel.
Overlays for the kitchen: decor where it is appropriate
The kitchen is an area where any decor undergoes a serious test of practicality. Grease, steam, moisture, constant touching and cleaning all stress the surfaces. Therefore, the choice of overlays for the kitchen must be approached thoughtfully.
The most successful areas for wooden decor on furniture In the kitchen:
Buffet area and glass display cases. Upper cabinets with glass doors or framed fronts are an ideal place. There is no direct contact with steam and grease, and the wooden overlay works for a long time without maintenance.
Decorative tall cabinet. A tall cabinet is a large "field" for decor. Vertical overlays with a central accent on each door transform it from a utilitarian object into a beautiful kitchen element.
Island. The side walls of a kitchen island are often smooth panels. Overlays work great here: they are visible from all sides and create a "facade" feel from every angle.
Facades above the hood. A decorative canopy above the hood with overlay details is the central accent of the entire kitchen.
Coating of overlays in the kitchen: how to treat
Wooden furniture appliqués for the kitchen, it needs to be coated together with the facade — before installation or immediately after. The best options: alkyd or acrylic enamel in 2-3 layers, a finishing varnish with water-resistant properties, oil-wax for areas without direct contact with steam. The coating on the overlay and on the facade must be the same — then the boundary between them disappears, and the detail reads as part of the facade, not as something glued on.
Overlays for a dresser: how to update furniture without buying new
An old Soviet-era dresser or a five-year-old IKEA piece is almost the same: smooth drawers, no character. And almost always — a functional structure that is a shame to throw away.
The scheme for updating with furniture decor is simple and gives a striking result:
-
Sand the surface of the drawer fronts;
-
Attach Decorative wooden overlays — centered on each drawer;
-
Paint everything together — the front + overlays — in the chosen color (white, vibrant blue, matte black, dusty green);
-
Replace the handles — with wooden, metal, or porcelain ones to match the new look.
The result is a piece of furniture that visually looks like a "designer" item, even though its base hasn't changed. This is exactly the kind of transformation that furniture restorers, who are so prevalent now in DIY communities, undertake.
Choosing an overlay for a dresser: based on drawer size
For standard dresser drawers 400–500 mm wide and 120–150 mm high, overlays measuring 80–120 mm at the widest part are suitable. It's important to maintain proportion: the overlay should not occupy more than 60% of the drawer's area — otherwise, the front looks overloaded. The best visual result is when there is equal "breathing space" between the edges of the overlay and the edges of the drawer on all sides.
Panel imitation: the most effective technique with overlays
A panel is a recessed or protruding panel inside a door frame. It is what distinguishes expensive furniture from cheap. It is found on "classic-style" kitchens, English-style cabinets, and doors of Victorian houses.
Creating a real panel on a finished front without professional routing is impossible. But an imitation — is possible. And it works almost as convincingly.
The method is as follows: narrow wooden overlay strips are glued onto the smooth facade along the perimeter of the inner part of the door — with an indentation from the edges. They form a "frame", inside which a smooth surface remains — visually perceived as a recessed panel. If the same paint is applied, the effect is enhanced: the shadow from the strips creates real depth.
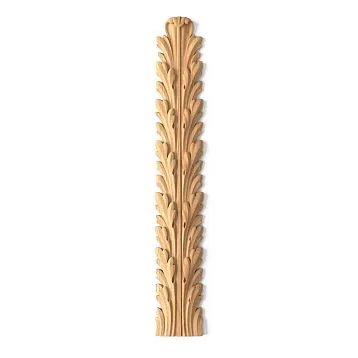
For this task, not only carved elements are used, but also wooden moldings. Wooden moldings for furniture and walls — this is a linear profile from which frame elements are cut at a 45° angle and assembled directly on the facade. The result is a classic furniture frame with the precision of a joinery product.
Combination of overlay and molding: double effect
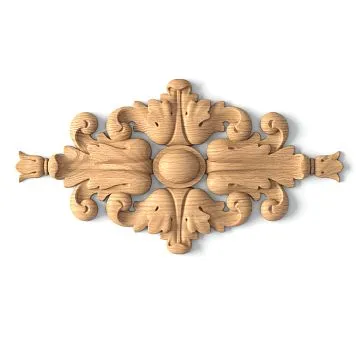
An even stronger option: a frame made of molding is attached along the perimeter of the facade (creating a "border"), and in the center of the resulting frame — a carved overlay or furniture rosette. This is a complete imitation of a classic paneled facade: frame + central medallion.
This is exactly the technique used in the restoration of furniture in classic interiors — and it works on cabinets, sideboards, doors, display cases, and decorative panels.
Carved overlays: when furniture becomes the center of the room
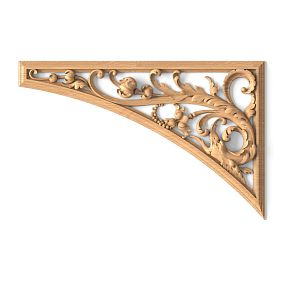
Carved decor is a different level. Here we are not talking about creating a frame or imitating a panel, but about a real ornamental decoration that makes the piece of furniture an object of attention.
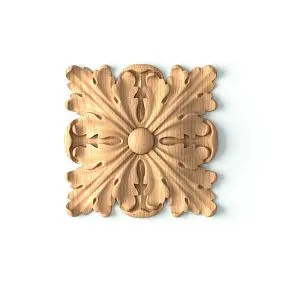
Wood Carving Decoration for Furniture — these are overlays with floral ornaments, acanthus leaves, geometric weaves, baroque curls, classic medallions. They are suitable for specific stylistic contexts:
Classic and neoclassic. A chest of drawers with carved corner overlays in the form of an acanthus leaf, a central rosette, and molding around the perimeter is pure classic. Turned furniture legs and shaped handles complete the look.
Provence. Overlays with soft floral motifs are appropriate here — vines, flowers, curls. Combined with "aged" paint (slightly sanded enamel) and matte handles, this is interior Provence without cuts.
Country and rustic style. Simpler, "wooden" overlays with geometric or floral patterns, under tinting or oil — they don't aspire to salon sophistication but create that very coziness sought in a country house.
Study and library. A bookcase or display cabinet for a collection in a study is a place where strict classical decor is appropriate: corner overlays with laurel wreaths, central medallions with ornament.
Bedroom with a carved headboard. A bed with a wooden headboard decorated with overlays — and nightstands with the same overlay details. This is no longer "store-bought furniture," but a set with a unified character.
How to choose the size and shape of a decorative overlay
This is the most practical question — and it has clear answers.
Facade size and overlay proportions
The main rule: the overlay should be neither too small (lost on a large facade) nor too large (overwhelming a small door). A good proportion for a central overlay is from 1/5 to 1/4 of the smaller side of the facade.
| Facade size (height) | Recommended overlay size |
|---|---|
| up to 300 mm | 60–80 mm |
| 300–500 mm | 80–120 mm |
| 500–800 mm | 100–160 mm |
| from 800 mm | 140–220 mm and more |
Corner overlays: about symmetry
Corner overlays are attached in pairs at the corners of the facade — all four corners or only the top ones. Key requirement: strict symmetry. Use a template or marking tool so that all four overlays are at the same distance from the edges of the facade.
Overlay thickness and combination with handle
Overlay thickness matters if there is a handle on the facade: there must be a visual "gap" between the edge of the overlay and the handle — at least 10–15 mm. Otherwise, the overlay will interfere with opening or look accidental.
for furniture handles in wooden interiors: a handle made of the same wood as the overlay is an ideal choice. Or a metal handle in tone with the overlay finish.
What to combine decorative overlays with: a decor system for furniture
Wooden overlays work at full strength only when they are part of a well-thought-out system. One overlay on one drawer among the rest of the smooth ones looks random. A system of several coordinated elements creates an image.
Here's what goes well with wooden overlays on furniture:
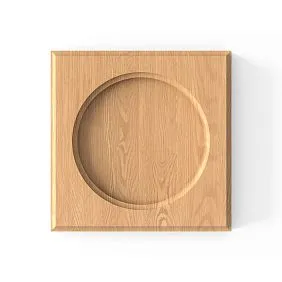
furniture rosettes — round or oval carved elements. They work well paired with corner overlays: four corners + a central rosette = a classic furniture composition.
Wooden Furniture Handles — from the same wood species as the overlays, in the same tone. Unity of material is the main principle.
wooden furniture legs — turned or carved. Overlays on the facade + legs at the bottom = furniture with a "body" from top to bottom. This rule works for chests of drawers, cabinets, consoles, sideboards.
Wooden moldings — for a frame effect. Molding around the perimeter of the facade + an overlay in the center = a paneled system.
Carved wooden decoration — for more complex, "architectural" tasks. Capitals, brackets, pilasters, cornices on cabinets — all of this is taken from the carved decor catalog.
Solid Wood Items — for a systematic approach: all furniture fittings and decor from a single catalog, in a single wood species and tone.
Decor for walls and furniture in a unified style
If the room has wooden panels on the walls, their style should echo the furniture decor. Overlays on wall panels and overlays on the chest of drawers next to the wall are a mirror: one ornament, one scale, one wood species. This unity creates the impression of a professionally designed interior.
Mistakes when choosing furniture overlays
Even a good idea can yield a bad result if implemented carelessly. Here are specific mistakes — and how to avoid them.
Too small decor on a large facade. A 50×50 mm overlay on a 900 mm high door is a "lost" detail. It creates no effect, just stuck on and forgotten. Always match the overlay size to the facade size.
Overloaded small cabinet. Five carved elements on one door of a 300×400 mm cabinet is chaos, not decor. Small facades require one clear accent — no more.
Broken symmetry. Corner overlays glued "by eye" create a feeling of carelessness. Work with a ruler and square. Asymmetric decor looks worse than none.
Overlays without considering the handle. A handle that presses into the overlay or overlaps it is a functional and visual failure. Always mark the placement of the overlay and handle together.
Different styles in one piece of furniture. A baroque overlay on a drawer, a Scandinavian handle, an art-deco leg — this is not "eclecticism," it's thoughtlessness. The style of all elements should belong to one world.
Overlay without coating. A raw wooden part on a painted facade is a temporary solution. It will darken, absorb grease or moisture. Always coat the overlay together with the facade.
Glue without surface preparation. A smooth lacquered or laminated facade requires degreasing and light sanding before gluing. An overlay glued to a greasy or glossy surface will fall off.
Attempting to hide a defect with an overlay. The overlay does not mask a scratch, chip, or film bubble. It accentuates the problem area. First, eliminate the defect, then decorate.
Buying overlays individually from different places. Overlays from different batches and manufacturers may differ in thickness, wood tone, and carving quality. Buy everything at once from one catalog.
Ignoring the scale of the room. Decor that is appropriate for a spacious hall with high ceilings looks heavy in a small bedroom. The scale of the decor should match the scale of the space.
Installation: how to properly secure a decorative overlay
This is a practical section for those who are ready to do everything themselves.
Tools and materials
-
Pencil and ruler for marking;
-
Square for checking symmetry;
-
Painter's tape to hold the overlay during gluing;
-
Liquid nails or furniture PVA-M glue (for wood on wood);
-
Acrylic glue — for attaching to MDF or laminated chipboard;
-
Acetone or alcohol for degreasing the surface.
Installation order
-
Mark the position of the overlay with a pencil;
-
Degrease the facade surface in the gluing area;
-
Apply glue evenly to the back side of the overlay, without gaps;
-
Press the overlay and secure with masking tape for 30–60 minutes;
-
After the glue has dried, check the strength of the attachment;
-
Apply the finishing coat — enamel, varnish, oil — to both the facade and the overlay simultaneously.
For additional mechanical fixation in difficult areas (large overlays, non-standard surfaces), you can add one or two finishing nails — their heads are countersunk and covered with wood putty.
Where to buy wooden overlays and decor for furniture
If you are looking for where buy decorative overlays for furniture Made from solid wood — STAVROS offers a full range of wooden decorative elements for transforming furniture fronts.
In the catalog you will find:
-
Decorative solid wood overlays — corner, center, ornamental, in various styles and sizes;
-
Wood Carving Decoration for Furniture — medallions, rosettes, capitals, brackets, overlays with classic ornamentation;
-
furniture rosettes — round and oval decorative elements for the center of the facade;
-
Wooden Furniture Handles — for a unified decorative system with overlays;
-
wooden furniture legs — turned and carved, for chests of drawers, cabinets, consoles, tables;
-
Wooden moldings for furniture and walls — for a frame effect and panel imitation;
-
Solid Wood Items — complete catalog of wooden products for furniture and interiors.
Buy wooden furniture decor can be purchased individually or as a set. Delivery across Saint Petersburg and all of Russia.
STAVROS is a Russian manufacturer of solid wood products and carved decor. Decorative overlays, rosettes, legs, handles, moldings, carved decor — everything is produced at our own facility from solid hardwood and softwood. Precise geometry, readiness for any final finish, a unified style language in the catalog. Over 4,000 items. STAVROS knows: furniture transformation begins with a small detail. And that detail must be made of real wood.
FAQ: answers to questions about decorative overlays for furniture
What are decorative overlays for furniture used for?
Decorative Inserts they help create relief on a flat facade, imitate a panel, add a carved accent, make furniture look visually more expensive — without replacing it.
Can wooden overlays be used on kitchen facades?
Yes, but it's important to choose the right area: display cabinets, upper cabinets, buffet facades, tall cabinet, island. In work areas with steam and grease — with a mandatory moisture-resistant coating.
Are overlays suitable for an old chest of drawers?
This is one of the best scenarios: an old chest of drawers is updated with paint, new handles, and wooden decor for furniture. The result looks like designer restoration.
How is a decorative overlay different from a molding?
Molding creates a linear frame or profile along the perimeter. decorative overlay — is a volumetric accent element: medallion, rosette, corner detail, central ornament. Together they provide maximum effect.
Can wooden overlays be painted to match the furniture color?
Yes. Wooden overlays can be painted, tinted, varnished, or highlighted in contrast. Painting in a single tone with the facade creates a 'native' decor effect — as if the facade was originally milled.
How to choose the right overlay size?
Focus on the facade height: the overlay should be 1/5 to 1/4 of the smaller side of the door. For chest drawers 130 mm high — overlay 70–90 mm. For cabinet doors 700 mm high — from 130 to 170 mm.
How many overlays to place on one facade?
Minimum for effect — one central. Classic system: four corner + one central element. For tall facades — two to three central vertically. Main thing is symmetry and air between elements.