Article Contents:
- Flat brush 50 mm for oil and wooden decor finishing: how to choose the tool for Rubio, stain, and paint
- Flat brush 50 mm — a small tool that affects the quality of finishing
- What tasks is the flat brush 50 mm suitable for
- Applying oil
- Applying stain and tint
- Priming before varnish or enamel
- Applying varnish
- Applying enamel
- Final touch-up and retouching
- Why 50 mm width is convenient for wooden decor
- Natural bristle and wooden handle: what matters when choosing
- Natural bristle: why it is better than synthetic for oil and stain
- Wooden handle: comfort and safety
- Brush for wood oil: how to apply the compound without streaks
- What is Rubio Monocoat oil and why it is applied with a brush
- Oil application technique with a brush: step by step
- Brush for stain and tinting: how to avoid streaks
- Rules for applying stain with a brush
- Features of staining oak and beech
- Brush for varnish and enamel: when a neat flat brush is needed
- Varnish: long stroke, minimal touches
- Enamel: control along the profile
- Where to use a brush in the STAVROS assortment
- Moldings and baseboards
- Wooden frame
- Decorative appliqués
- Carved decor: rosettes, pilasters, applied elements
- Wooden furniture handles
- What to buy with the brush: a kit for finishing wooden decor
- Typical mistakes when choosing a brush for wood finishing
- Brush care: how to extend the tool's service life
- Where to buy a flat brush 50 mm STAVROS
- FAQ: Answers to Popular Questions

Flat brush 50 mm for oil and finishing wooden decor: how to choose a tool for Rubio, stain, and painting
There are things that seem trivial — until you start working. A brush is one of them. Buy oak moldings, Rubio Monocoat oil, pick a tint shade, check every joint — and ruin it all with an unsuitable tool that left streaks, shed lint on the wet coating, or didn't fit well into the relief grooves of the carving. Frustrating. And predictable if the brush was chosen as an afterthought.
Flat brush buy — sounds simple. But it is this tool that determines how the oil will lay on the end grain of an oak overlay, how evenly the stain will penetrate beech, whether the varnish will raise the grain on an already sanded surface. The right flat brush 50 mm with natural bristles and a wooden handle — this is not just a consumable. It is part of the finishing technology.
Let's break it all down in order: what it's for, how to choose, how to work with oil, stain, and varnish, where to use it in the STAVROS range — and why exactly 50 mm.




Flat brush 50 mm — a small tool that affects the quality of finishing
Allow me to start with a provocative question: does it really matter which brush you use to apply oil or stain? Isn't it 'all the same'?
It's not all the same. And here's why.
Wooden decor — moldings, baseboards, carved overlays, baguettes, rosettes — are products with a developed profile. They have flat areas, bevels, grooves, relief protrusions, and thin indentations. Applying the compound evenly to such a surface is a task that not every tool can handle. A roller won't fit into the groove. A wide brush will accumulate the compound in the corner and cause drips. Too stiff bristles will scratch the soft wood of a beech overlay.
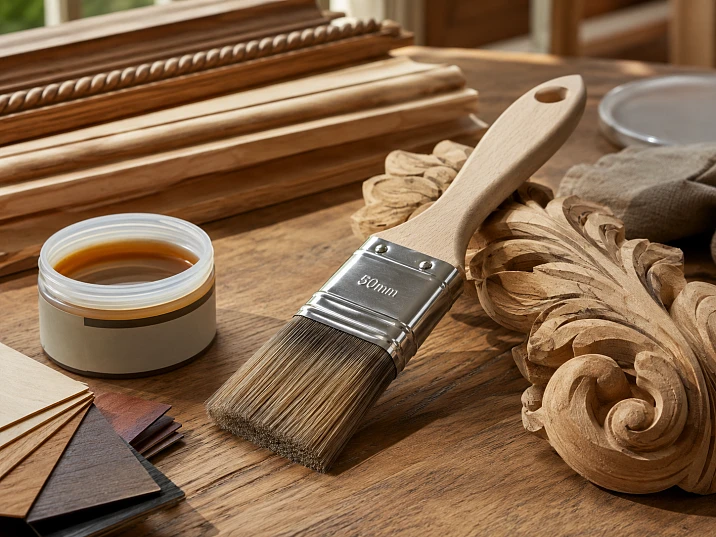
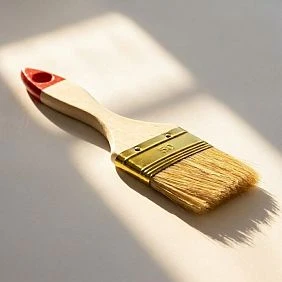
Buy flat brush with the right parameters means choosing a tool that works specifically with profiled wooden parts. A width of 50 mm provides sufficient coverage for flat areas while allowing entry into the relief without losing control. Natural bristles hold the compound — oil, stain, varnish — evenly, without excess. The wooden handle does not slip in the hand and does not react to solvents.
This is a set of parameters that makes the tool correct — not by name, but by result.
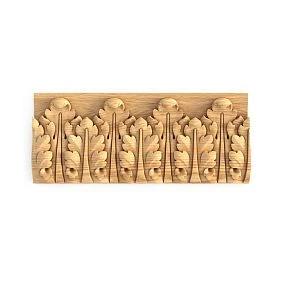
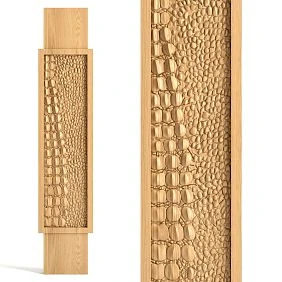
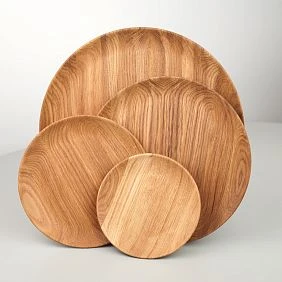
Our factory also produces:

What jobs is a 50 mm flat brush suitable for?
Application range of a flat paint brush when working with wooden decor is wide. Let's break down each task — with practical specifics.
Get Consultation
Applying oil
Oil is one of the main compounds in finishing solid wood products. It penetrates the pores, nourishes the fibers, protects the surface, and enhances the natural texture. Working with oil requires a tool that applies a thin and even layer without excess. A flat brush is the optimal choice here: it evenly 'lays' the compound on the surface and allows immediate blending along the grain.
Applying stain and tint
Stain is a compound with high penetrating ability. It quickly soaks into the wood, and the brush's task is to apply it evenly, without "joins" or bald spots. Too stiff bristles leave streaks. Too soft bristles do not hold the required amount of compound. Natural bristles of medium stiffness in a 50 mm brush is a balance that works.
Priming before varnish or enamel
Primer is applied before the final finish — it strengthens the surface, closes pores, and creates an even base. A flat buy flat paint brush for priming is the right choice, because at this stage it is important to achieve an even coating without bubbles or gaps.
Applying varnish
Varnish is the final protective layer. It "notices" any application mistakes: drips, streaks, bristle marks. A flat brush with neat bristles allows you to work with varnish using controlled movements — long strokes along the grain, with minimal touches to the same spot.
Applying enamel
Enamel is an opaque coating. For wooden decor to be painted (MDF moldings, extensions, architraves, box profiles), enamel is the main final finish. A 50 mm brush allows you to paint the profile, ends, and inner corners without compound buildup.
Final touch-up painting and retouching
When installing moldings, trims, and carved overlays, there are always areas that need touch-up painting: ends, joints, small chips from trimming. This is where buy a flat paint brush for spot work — an indispensable tool.
Why a width of 50 mm is convenient for wooden decor
This question is discussed less often than it should be. Yet it is the width of the brush that determines how convenient and fast the work is.
Brushes for decorative wood finishing are available in sizes from 20–25 mm to 100–120 mm and wider. Why is 50 mm the "sweet spot" for working specifically with wooden decor?
Too narrow (20–30 mm): work is slow, the compound is applied in narrow strips, joints are clearly visible especially when tinting, more effort — worse result. Such a brush is suitable for small carved details and spot work, but not for painting moldings or baseboards.
Too wide (75–100 mm): fast but messy. A wide brush accumulates a lot of compound and struggles to navigate internal profiles and relief grooves. For complex decor, this is a source of drips.
50 mm — balance: wide enough to cover flat areas in 1–2 strokes. Narrow enough to work along the profile section of a molding, trim, or baseboard. It will fit into a wide carving recess, won't accumulate excess in the corner, and won't leave joints on a long element.
Buy a flat brush 50 mm — means getting a universal tool suitable for 90% of tasks in finishing wooden decor: from applying oil to final enamel.
Natural bristle and wooden handle: what matters when choosing
The STAVROS brush card directly states: “natural bristle, wooden handle.” These are not random characteristics — each has a specific practical argument behind it.
Natural bristle: why it is better than synthetic for oil and stain
Natural bristle has a unique hair structure: it splits at the tip (so-called “flags”), creating a branched structure. It is thanks to this that natural bristle:
-
Holds a larger volume of compound in the bristles, which is especially important when applying oil — you need to distribute the compound across the fibers without frequent “refills” from the can
-
Evenly “releases” the compound onto the surface, creating a thin layer without excess
-
Provides a soft touch on the surface without scratches — this is critical for sanded oak or fine carving relief
-
Works well with oil and alcohol-based compounds — oils, alcohol-based stains, oil waxes
Synthetics (nylon, polyester) work better with water-based compounds: acrylic paints, water-based varnishes, water-based primers. For oil and oil stains — natural bristle.
Conclusion: for working with Rubio Monocoat oil and similar oils — buy flat bristle brush with natural bristles. This is not a recommendation "out of habit" — it is a technological requirement.
Wooden handle: comfort and safety
A wooden handle is a choice in favor of a non-slip, ecologically neutral material. It does not absorb the compound, does not deform upon contact with solvents, and sits comfortably in the hand during prolonged work. A plastic handle is worse in tactile sensation and can become slippery when oil gets on it. A metal handle is neutral but feels cold and "faceless."
A wooden handle is both practical and aesthetic. It is especially pleasant to work with such a tool when the brush material and the material of the workpiece are the same wood.
Brush for wood oil: how to apply the compound without streaks
Wood oil is not paint. It has its own technology, its own pitfalls, and its own logic of application. Let's break it down in detail.
What is Rubio Monocoat oil and why it is applied with a brush
Rubio Monocoat Oil Plus 2C — это профессиональный состав на основе льняного масла с ускоренной молекулярной сшивкой. Он проникает в поры дерева на один слой и химически связывается с волокнами. В результате — защита от воды, грязи, пятен и истирания без образования плёнки поверх дерева.
Именно потому, что Rubio не образует плёнку — он не лакирует, а пропитывает. И это определяет требования к инструменту: кисть должна наносить тонкий, равномерный слой. Никакого «налива», никаких луж. Иначе излишек масла так и останется на поверхности, не впитается, и поверхность станет липкой.
Технология нанесения масла кистью: пошагово
Шаг 1: Подготовка поверхности. Дерево должно быть сухим, чистым, отшлифованным (зернистость P180–P240). Пыль удаляется слегка влажной ветошью или антистатической тканью.
Шаг 2: Смешивание компонентов. Rubio Oil Plus 2C состоит из компонента A (масло) и компонента B (ускоритель). Их смешивают непосредственно перед нанесением.
Шаг 3: Нанесение кистью. Плоскую кисть 50 мм слегка — не насыщая ворс — погружают в состав. Наносят длинными движениями по волокну, равномерно распределяя по поверхности. Главный принцип: тонко. Масло должно войти в дерево, а не лежать поверх него.
Шаг 4: Растушёвка и контроль. После нанесения визуально проверяют: не должно быть мест, где масло собралось лужей. Если есть — сухой кистью или ветошью растушёвывают.
Шаг 5: Удаление излишков. Через 10–15 минут (в зависимости от температуры и породы дерева) остаток масла, не впитавшийся в дерево, снимается ветошью поперёк волокна.
Шаг 6: Сушка. Рабочая поверхность не трогается минимум 12–18 часов. Полное отверждение — 5–7 суток.
Кисть для нанесения масла по дереву должна работать на равномерную тонкую подачу — и именно так работает натуральная щетина 50 мм.
Brush for stain and tinting: how to avoid streaks
Stain is a different story. It doesn't just coat the surface — it colors it. Moreover, it colors wood unevenly: where the end grain is, absorption is twice as high. Where early wood (soft rings) is, it's brighter. Where late wood is, it's lighter.
Working with stain using a brush requires understanding these features.
Rules for applying stain with a brush
Rule 1: First — a test coat. On a scrap of the same material — mandatory. To understand how the wood takes the compound and whether pre-wetting with water is needed to even out absorption.
Rule 2: Work along the grain. Brush for tinting oak are guided strictly along the grain — this minimizes streaks at the junctions of strokes.
Rule 3: Wet edge. Each subsequent stroke should overlap the still-wet edge of the previous one. If the stain has dried, there will be a line at the junction. Therefore, work quickly, without pauses.
Rule 4: End grains — separately. End grains absorb stain much more intensively than face surfaces. They either need to be primed before tinting (to reduce absorption) or the stain should be applied with a thinner compound.
Rule 5: Control of the amount of composition. Brush for stain should carry exactly as much composition as needed for one stroke — no more. A "wet" brush with excess will leave drips that will have to be removed by sanding.
Features of tinting oak and beech
Oak is a porous species with pronounced vessels. Stain and tinting penetrate deeply into it and give a rich, sometimes unexpectedly dark result. For a softer tone, the surface is pre-treated with water and allowed to dry: the pores close slightly.
Beech is a dense, non-porous species. It takes stain more evenly, without pronounced vessels. The tone lays predictably. It is well suited for painting with enamel, less so for tinting with pronounced texture.
Brush for varnish and enamel: when a neat flat brush is needed
Varnish and enamel are finishing protective and decorative coatings. They determine the final appearance of the product. And it is with them that mistakes in application technique are most often made.
Varnish: long stroke, minimal touches
Varnish is a transparent coating. Any brush mark on it will be visible under side lighting. The correct technique: long strokes along the entire length of the element, without stopping in the middle. Wood varnish brush must work quickly — before the varnish starts to "drag". One stroke — one movement. No return passes over already applied varnish.
Between coats — mandatory intermediate sanding with P320–P400 grit and dust removal.
Enamel: profile control
Enamel is an opaque coating. It is more forgiving than varnish, but accumulates in corners and reliefs. For wooden decor with a pronounced profile — wood enamel brush should be kept slightly drier than when working with paints on flat surfaces. First, paint the corners and relief recesses — with the tip of the brush. Then, flat areas with longitudinal strokes.
Where to use the STAVROS assortment brush
The 50 mm brush is used for almost the entire STAVROS wooden assortment. Let's break it down by category.
Moldings and baseboards
Wooden moldings and baseboards are profiled long elements. They are painted either for tinting (if made of solid oak or beech) or for enamel (if made of MDF). In both cases, the 50 mm brush is the right choice: it evenly passes over the profile, without composition buildup in internal corners.
Section solid wood baseboards, moldings, and cornices STAVROS includes a wide range — from simple straight profiles to complex multi-tiered cornices. For all, the 50 mm brush works correctly.
Wooden molding
STAVROS wooden baguette — these are frame profiles for mirrors, panels, and paintings. They often require final tinting or varnishing. The 50 mm brush allows even coverage of both flat and beveled parts of the profile.
Decorative appliqués
STAVROS decorative overlays — these are carved elements with developed relief: leaves, flowers, geometric ornaments. Finishing such details is a delicate task. You need to reach every recess, evenly cover every protrusion, without accumulating compound in narrow relief areas. The 50 mm brush with natural bristles handles this better than a wider tool.
Carved decor: rosettes, pilasters, overlay elements
STAVROS carved decor — this is the entire range of three-dimensional architectural details: rosettes, pilasters, overlays, corner elements. When finishing with oil or tinting relief decor, it is important that the tool enters recesses without excessive pressure. Natural bristles provide the necessary softness of touch.
Wooden furniture handles
Wooden handles made of oak and beech are one of STAVROS's specializations. When applying finishing oil to handles, the 50 mm brush is convenient for working with the handle body, ends, and bevels. Even coverage of the ends is especially important — they always absorb oil more intensively and require extra attention.
What to buy with the brush: a kit for finishing wooden decor
A brush is a tool. The finishing result is determined by the kit: tool plus material plus the correct sequence of actions.
Here is what it makes sense to buy with the brush in the section STAVROS installation and finishing materials.
Rubio Monocoat Oil Plus 2C component A Pure oil — professional single-layer wood oil. It is included in the "bought with this product" block next to a brush — and this is no coincidence. Rubio is applied in a thin layer with a natural bristle brush. These two products work as a pair.
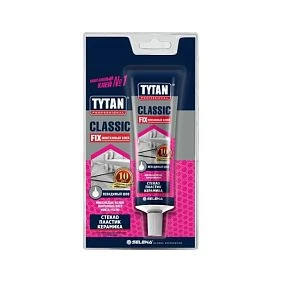
TYTAN Prof Classic Fix mounting adhesive — for mounting wooden elements. When installing solid wood decor, a reliable mounting compound is often needed. Tytan Prof Classic Fix is a transparent polyurethane-based adhesive with high adhesion to wood and MDF.
KUDO HIGH TACK adhesive — white mounting adhesive based on hybrid polymers. Used for installing moldings, architraves, baseboards on drywall, plaster, and other surfaces.
The "brush + Rubio oil + adhesive" kit is a complete working set for purchasing STAVROS wooden decor and its self-installation with finishing. It is with this kit that the final stage of any interior project with wood begins.
Typical mistakes when choosing a brush for wood finishing
This section is the practical experience of people who have already made mistakes. So that you do not repeat them.
Mistake 1: Buying a brush "any, as long as it's flat."
The market is full of brushes labeled as flat paint brushes, but upon closer inspection they turn out to be tools for wallpaper work with thick, stiff bristles. For fine wooden decor, this is an unsuitable tool. Medium-hard natural bristle is a must.
Mistake 2: Confusing it with a cosmetic or artist's brush.
Flat brushes are also made for cosmetics and acrylic painting. They cannot be used for painting work: they are not designed for contact with oils, stains, and solvent-based varnishes. Look for a tool labeled "paint brush" or "for finishing work."
Mistake 3: Applying too much oil.
Rubio oil and other impregnating oils work on the principle of "just enough for one coat." Excess will remain on the surface as a greasy, slow-drying film. The rule: the brush applies, the rag removes the excess.
Mistake 4: Not doing a test application.
Any new compound — oil, stain, varnish — should be tested on a scrap of the same material before applying to the product. This rule seems obvious but is regularly broken. Especially when working with tinting: the color in the can and the color on oak are different things.
Mistake 5: Using one brush for incompatible compounds.
A brush used with an oil-based compound cannot be immediately used for water-based varnish without thorough cleaning. Oil and water mix on the surface and cause stains. For each type of compound — either a clean brush or a thoroughly washed one.
Mistake 6: Not caring for the brush after work.
A brush left with oil after work dries out and becomes unusable. After working with oil-based compounds, the brush is washed with white spirit or a special oil paint cleaner. After water-based compounds, it is washed with warm water and a small amount of soap.
Mistake 7: Not checking the bristles before first use.
A new brush may contain loose bristles that will clump and settle on the surface during work. Before use, the brush needs to be "broken in": rub the bristles with your fingers, lightly comb them, and rub again. This takes 30 seconds and prevents bristles on the wet surface.
Mistake 8: Working with a dirty brush.
A brush with residues of the previous compound mixes the old material with the new one. When working with transparent compounds (varnish, oil), this means cloudiness. When working with tinting, it means an undesirable color shift.
Brush care: how to extend the tool's service life
A good tool is a long-term investment. Buy a flat brush once and use it for a long time is realistic if you follow a few rules.
After oil and fatty compounds: wash in white spirit, then in warm water with laundry soap. Thoroughly squeeze the bristles lengthwise, form a flat shape, store horizontally or hang with bristles down.
After alcohol-based stain: rinse in regular denatured alcohol or isopropyl alcohol. Then wash with soapy water.
After water-based compounds (primer, acrylic enamel): immediately rinse with warm water before the compound starts to set. Acrylic sets quickly and permanently.
After varnish: nitro and alkyd varnishes — white spirit or a special solvent. Water-based varnishes — warm water immediately after work.
Storage: store the brush in a dry place. The bristles should not be pinched or bent. For long-term storage, wrap in paper, shaping the bristles.
Where to buy a 50 mm flat brush STAVROS
A discussion about tools logically ends with the question: where to get one?
Buy a 50 mm flat brush can be found in the materials for installation and finishing section on the stavros.ru website. Price — 139 ₽. The item is in stock in Saint Petersburg. Orders are placed from 1 piece, shipment within 3 business days.
The brush is located in the same section as Rubio Monocoat Oil Plus 2C, mounting adhesives and other consumables for working with wood. This is convenient: you order wooden decor, immediately add oil, glue, and a brush to your cart — and get everything you need for installation and finishing in one delivery.
Buy a flat brush 50 mm here means taking a tool that is selected specifically for finishing STAVROS wooden decor. Not "any brush from the nearest hardware store", but the right tool in the right place.
FAQ: Answers to popular questions
What is a flat brush 50 mm with natural bristles for?
For applying oil, stain, tint, varnish, primer, and enamel to wooden products: moldings, baseboards, carved overlays, baguettes, furniture handles, wooden decor. Natural bristles work especially well with oil and alcohol-based compounds.
Why exactly 50 mm, and not 40 or 75?
50 mm is a balance between speed and control. The brush is wide enough to cover flat areas without numerous strokes. Narrow enough to work along the profile of a molding or carving relief without composition buildup in corners.
Is the brush suitable for applying Rubio Monocoat oil?
Yes. It is with a natural bristle brush that Rubio is applied correctly: in a thin layer, along the grain, with even distribution. The main thing is not to overdo it with the amount of composition and to remove excess with a cloth in time.
Can one brush be used to apply both oil and stain?
Technically, yes, if the brush is thoroughly washed each time. But professionals recommend keeping separate brushes for different types of compositions: oil, alcohol, water-based. This eliminates the risk of composition contamination.
How to avoid streaks when applying stain?
Brush strictly along the grain, maintain a "wet edge" (each new stroke overlaps the still-wet previous one), do not pause in the middle of the workpiece. First, do a test application on a scrap of the same material.
How to care for a brush after working with oil?
Rinse in white spirit until all oil residue is removed. Then wash with warm water and laundry soap. Squeeze out, shape the bristles, store horizontally or hanging bristles down.
Where to buy a 50 mm flat brush STAVROS?
On the website stavros.ru in the "Materials for installation and finishing" section. Price — 139 ₽. Available in Saint Petersburg. Contact us to confirm shipping to your destination. via CDEK and DPD.
What else to buy with the brush for a complete finishing kit?
Rubio Monocoat Oil Plus 2C for impregnating wooden products, TYTAN Prof Classic Fix or KUDO HIGH TACK mounting adhesive for installing decor. All these items are available in the materials for installation and finishing section of STAVROS.
Is the 50 mm brush suitable for working with carved decor with complex relief?
Yes. The natural bristles of medium stiffness gently enter the carving recesses and evenly cover the protrusions. For the smallest details and deep recesses, you can additionally use a narrower brush.
Can I use a brush to apply enamel?
Yes, a flat 50 mm brush with natural bristles is suitable for applying alkyd enamels. For water-based enamels (acrylic), synthetic bristles are preferred — they work better with water dispersions. For alkyd and oil enamels, natural bristles are optimal.
The tool does not define the master — but a master without the right tool works twice as hard and gets half the result. Choose a flat 50 mm brush STAVROS — and add oil, glue, and wooden decor to it in one order.