Article Contents:
- Installation is finished, but the wood has not stopped reacting to the room
- Construction microclimate and operational mode are not the same thing
- The commissioning date of permanent systems is the project's control point
- The initial condition is best recorded before permanent system commissioning
- Initial recording is needed not to find someone to blame, but for comparison
- Buying finishing materials wholesale is not enough — monitoring rules must be handed over for operation
- Wholesale materials: we monitor not only the product but also the event
- The “monitor” status is specifically needed for the transition period
- Why you should not replace every part at once
- Comparing floors helps quickly localize the problem
- Delivery of finishing materials: source batch data remains useful even after installation
- One-off figures without history provide little information
- Who should own indoor climate data
- The warranty process begins later than climate control
- The service reserve should not be spent at the first joint change
- A reorder appears only after calculating the actual requirement
- Control zones are best selected before problems arise
- A standard number can be used as a reference only under identical conditions
- The lobby at the entrance group is a separate risk zone
- The restaurant and public areas may undergo a different transition regime
- Rooms near exterior walls are useful to compare with interior ones
- For a single issue, we first check the assembly itself
- For a recurring pattern, we create a comparative sample
- Not every seasonal movement should be considered a product defect
- Not every joint change requires the same response
- The re-inspection should take place at the same point and with the same description
- The microclimate should be assessed near the problem area, not only based on the building's overall system
- Surface temperature monitoring is needed only where it helps with diagnostics
- Checking the fastening separates the climate hypothesis from the installation one
- The condition of the finish also affects diagnostics
- A change in the coating does not always mean a change in the wood itself
- How to handle a remark that has stopped progressing
- How to handle a remark that continues to grow
- How to deal with a crack in the profile
- How to deal with warping or noticeable separation from the wall
- How to account for adjacent materials
- How to deal with underfloor heating after its seasonal boost
- How to work with systems that are commissioned in stages
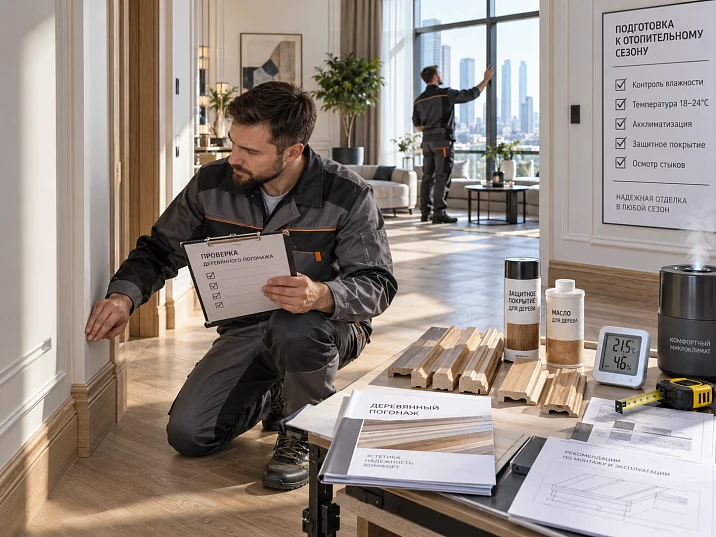
In a new hotel, business center, or office, wooden skirting boards, moldings, and cornices are already installed. The walls are painted, the furniture is almost in place, and the property is being prepared for handover to operations. But it is precisely at this moment that a stage begins that is easy to underestimate: continuous heating, ventilation, and air conditioning shift from construction or temporary mode into continuous operation.
For wooden finishes, this is not a formality. Wood remains a hygroscopic material even after installation: it exchanges moisture with the surrounding air and gradually moves toward a state corresponding to the actual microclimate of the room. If heat guns, temporary heaters, periodic ventilation, and incomplete ventilation were previously used in the building, conditions can change noticeably after the permanent engineering systems are started up.
Therefore finishing materials wholesale moscow, already installed in the interior, require not new installation, but a controlled transition from construction mode to operational mode.
Work sequence:
INSTALLATION COMPLETED → INITIAL CONDITION RECORDED → START-UP OF HEATING, VENTILATION, AND AIR CONDITIONING → MICROCLIMATE MONITORING BY ZONE → FOLLOW-UP INSPECTIONS → ACCEPT / MONITOR / CHECK TECHNICALLY → DETERMINE THE CAUSE → REPAIR OR REPLACE IF NECESSARY → HAND OVER TO OPERATIONS → MONITORING DURING THE FIRST HEATING SEASON.
Main principle:
INSTALLATION COMPLETED ≠ MICROCLIMATE STABILIZED.
Installation is complete, but the wood has not stopped reacting to the room
After installation, the trim becomes part of the interior, but the material does not become physically inert. It continues to react to the relative humidity and temperature of the surrounding air. When conditions change, the wood may gradually release or absorb moisture, which is accompanied by slight dimensional changes.
On a new site, the transition period is especially important. While finishing work was underway, temporary conditions may have been in effect in the building that were unlike future operation. Then the permanent engineering systems are switched to design modes, doors begin to operate differently, air exchange increases, and constant heat flows appear.
Therefore, it is useful to consider the first weeks after the engineering systems are started up as a separate stage of commissioning the wooden finish.




Construction microclimate and operational mode are not the same thing
During construction, conditions can differ greatly from future operation.
On site, you may encounter:
- temporary heating;
- local heat guns;
- frequently opening entrance doors and gates;
- partially functioning ventilation;
- residual moisture after painting and other wet processes;
- different modes by floor;
- periodic air conditioning;
- rooms that are not yet isolated from construction zones.
Once the building enters operational mode, it is not only the temperature that changes. Air exchange, relative humidity, airflow distribution, and the stability of conditions over time also change.
Therefore, it is useful not to compare a single figure “before” and “after,” but to record the moment of transition and observe the dynamics.
Our factory also produces:




The commissioning date of permanent systems is a project control point
For wooden finishes, it is useful to record the date when the permanent heating, ventilation, and air conditioning systems began operating in a stable mode.
| Event | Date | Zone | Comment |
|---|---|---|---|
| Permanent heating is on | ___ | Floors 2–5 | ___ |
| Ventilation switched to operating mode | ___ | Lobby | ___ |
| Underfloor heating started | ___ | Restaurant | ___ |
| Air conditioning started | ___ | Office block | ___ |
If a new issue appears a week later, the team sees the context: when the environment changed, exactly where, and which system was put into operation.
This information by itself does not prove the cause of the defect. It only creates a temporal link that can later be technically verified.
Get Consultation
The initial state is best recorded before the systems are put into continuous operation
Before switching to continuous operating mode, it is useful to carry out a short initial inspection. There is no need to photograph every linear meter. It is enough to select representative and high-risk points.
Suitable for initial recording:
- long straight skirting boards;
- feature joints;
- external corners;
- standard moulding frames;
- moulding joints at corners;
- cornices near ventilation grilles and diffusers;
- skirting boards in underfloor heating areas;
- areas near entrances;
- areas where construction remarks were previously made.
For each checkpoint, it is sufficient to specify the area, SKU and a photo.
The initial record is needed not to find someone to blame, but for comparison
Two weeks after the heating is started, a small change in a joint is detected in one room. Without an original photo, a dispute begins: "it was always like that" or "it appeared after startup".
With an original record, two reference points can be compared:
BEFORE STARTING CONTINUOUS OPERATION
и
AFTER THE TRANSITION PERIOD.
This way, the team first establishes the fact of the change, and only then discusses its cause and the necessary action.
A large facility cannot be assessed by a single sensor
A hotel or business center is not homogeneous. The lobby near the entrance group, the guest rooms, the restaurant, a closed corridor, and a room with underfloor heating may have different conditions even on the same day.
If one sensor in a technical room shows stable relative humidity, this does not yet mean that the conditions at the entrance doors, under the restaurant ceiling, or on the top floor are the same.
Therefore, monitoring is best organized by zones:
- lobby and entrance groups;
- corridors;
- standard rooms or offices;
- restaurants and kitchens;
- rooms with underfloor heating;
- areas near large ventilation elements;
- rooms that are commissioned later than the rest.
The climate zone map links room conditions and the condition of the moulding
| Zone | SKU | Engineering systems | Microclimate condition | Inspection | Solution |
|---|---|---|---|---|---|
| Lobby | PLT-A | Commissioned | Stabilizing | No remarks | OBSERVE |
| Numbers 201–220 | MLD-A | Commissioned | Stable | No remarks | ACCEPT |
| Restaurant | KZ-A | Partially launched | Unstable | — | REPEAT INSPECTION |
| Corridor 3 | PLT-A | Commissioned | Stable | Has a remark | Technical check |
This is not a lab log. The table is needed so that finishing is not considered separately from the actual condition of the room.
Trend matters more than a single beautiful number
A one-time measurement shows only the state of the air at a specific moment. For a transition period, it is more useful to see the trend: whether conditions are stabilizing or continue to change noticeably.
For example, checkpoints can be taken:
- on the launch day;
- after a few days;
- after a week;
- after two weeks;
- later — according to the conditions of the specific site.
If the readings have stabilized and the wooden trim shows no new changes, that is one situation. If conditions continue to fluctuate noticeably, early intervention at every joint may be premature.
Wooden skirting and underfloor heating should be included in the overall climate control
If the property has underfloor heating, its startup is a separate event that primarily affects the lower zone of the room. The skirting board is located exactly where the floor surface temperature and the air temperature near the wall may differ from the average room temperature.
Wooden baseboard in such a zone does not require a separate "special life," but the moment the underfloor heating is switched on is useful to record in the general log of engineering systems startup.
Checkpoints:
- skirting board along external walls;
- long straight sections;
- joints near doors;
- corners;
- zones next to furniture;
- areas where the underfloor heating operates most intensively.
One should not automatically assume that any change in the lower joint is a consequence of underfloor heating. First, check the condition of the base, the fastening, adjacent materials, the actual room conditions, and the history of the area.
Wooden moulding is easier to monitor using recurring control points
wooden molding it clearly shows small changes in corner joints, frames, and long horizontal lines. But random photos of different walls give a weak picture.
It is better to choose repeatable points:
- the upper right corner of a standard frame;
- the lower left corner;
- the central joint of the long horizontal line;
- the joint of the molding with the casing;
- one standard detail on each floor.
If you photograph the same places before and after the systems are launched, the comparison becomes more objective. This is especially useful at facilities with dozens of identical rooms.
A wooden cornice should be checked taking into account the upper zone of the room
wooden cornice it is located above the main observation level and may be exposed to different air flows than the baseboard.
Particular attention is paid to the following areas:
- near ventilation grilles;
- under or near diffusers;
- near air conditioning units;
- near technical niches;
- in high-ceilinged rooms;
- in restaurants and lobbies with intensive air exchange.
If the observations are concentrated only near specific air distribution elements, this is a useful diagnostic sign. But it is not yet a ready diagnosis.
buy finishing materials wholesale not enough — the monitoring rules need to be handed over to operations
After construction is completed, the operations team receives not only the interior, but also responsibility for maintaining the room conditions. For wooden finishes, it is useful to hand over clear information to them:
- which SKUs are installed;
- where the control zones are located;
- which areas require monitoring in the first weeks;
- where the service reserve is stored;
- what remarks were already noted before handover;
- whom to contact with a new question;
- what room conditions are specified by the design.
This is especially important if the operations team did not participate in installation and sees the wooden trim as an already finished part of the building.
materials in bulk: we monitor not only the product but also the event
It is useful to link each remark to its context.
For example:
ZAM-004 / Number 312 / PLT-A / detected 5 days after the start of continuous heating.
Such a record does not prove that heating was the cause. It only shows the sequence of events.
For a technical check, it is useful to know:
- date of detection;
- zone;
- SKU;
- previous condition;
- history of engineering systems startup;
- room conditions during this period;
- presence of similar cases nearby.
Correlation after systems startup is not yet a diagnosis
If the joint changed a week after heating was turned on, you cannot automatically write: “the cause is heating.” Alternative explanations need to be checked.
Possible factors:
- installation specifics;
- base mobility;
- local damage;
- condition of adhesive or mechanical fastening;
- change in adjacent finish;
- construction impact after initial fixation;
- specifics of a particular profile;
- change in microclimate.
Technical diagnostics must first separate temporal coincidence from actual causation.
Not every minor change requires immediate repair
For the transition period, it is useful to have several simple statuses.
| Status | What does it mean | Action |
|---|---|---|
| ACCEPTED | Condition without significant remarks | Regular inspection |
| OBSERVE | There is a minor change, cause not identified | Re-inspection |
| Technical check | Change requires diagnostics | Check the unit and conditions |
| Repair | Repair method determined | Execute and verify |
| REPLACEMENT ASSESSMENT | Repair may be insufficient | Determine the scope of replacement |
This way, the object avoids two extremes: "don't touch anything, the wood is fine as it is" and "any small crack requires urgent replacement."
The "monitor" status is specifically needed for the transition period
Monitoring does not mean ignoring. It is a managed decision to re-inspect the same area after conditions stabilize.
For the "MONITOR" status, it is useful to specify:
- what exactly has changed;
- date;
- photo;
- zone;
- the date of the next inspection;
- the criterion for transitioning to a technical inspection.
If the change does not progress, the decision may remain without repair. If it grows or similar cases appear, the status is escalated.
Why you shouldn't replace every part at once
If the building is still only reaching a steady state, immediately replacing a single element may not solve the root cause. The new profile will find itself under the same conditions and may repeat the behavior of the old one.
Before replacement, it is useful to go through the following sequence:
CONDITIONS → DYNAMICS → CAUSE → REPAIRABILITY → RESERVE → DECISION.
Replacement is justified when it is clear that local repair is not suitable or the element itself truly requires replacement.
If changes have appeared simultaneously in many rooms, we look for a common sign
Twenty similar remarks should not be handled as twenty independent minor repairs. First, we need to check whether they share a common factor.
Useful groupings:
- one floor;
- one ventilation zone;
- one room type;
- one SKU;
- one installation crew;
- one delivery batch;
- the same position relative to the diffuser or inlet;
- the same underfloor heating mode.
If fourteen issues appeared only on the fourth floor, while the same linear run behaves consistently on neighboring floors, this is a reason to first study the difference in conditions on the fourth floor.
Comparing floors helps quickly localize the problem
| Floor | SKU | Number of installed products | Climate zone | Remarks |
|---|---|---|---|---|
| 2 | PLT-A | 180 | Zone A | 0 |
| 3 | PLT-A | 184 | Zone A | 1 |
| 4 | PLT-A | 182 | Zone B | 14 |
Such a table immediately shows that the same SKU behaves differently under different conditions. This does not give a definitive answer, but it significantly narrows the search.
delivery of finishing materials: the data of the original batch remains useful even after installation
If a different delivery or a different material was used on one floor, this is a useful variable for diagnostics.
For example:
- floors 2–3 — batch A;
- floor 4 — batch B;
- issues appeared only on floor 4.
This is a reason to check the origin of the material, but not grounds to automatically declare the batch the cause. Other factors must also be compared: installation, room conditions, finishing, substrate, construction history.
A batch is only one of the variables in technical analysis.
There is no need to assign a single universal humidity level for all rooms
A hotel room, restaurant hall, lobby at the entrance group, and technical corridor may have different design conditions. In addition, specific requirements depend on the product, finish, and operating conditions.
Therefore, in a design article it is safer not to declare a single figure as mandatory for all wooden skirting boards, moldings, and cornices.
Working principle:
the target temperature and humidity regime is determined by the design, technical requirements for the specific product, and the operational task of the room.
Monitoring is then based on the design regime of a specific zone, rather than an abstract universal standard.
One-off figures without history provide little information
Imagine that on one day the relative humidity in the zone looks normal. But over the previous five days, the room underwent a sharp transition from a more humid construction regime to a dry heating regime.
A single measurement does not show this history.
Therefore, for diagnostic context it is useful to keep a simple trend:
| Date | Zone | Temperature | Relative humidity | System modes |
|---|---|---|---|---|
| Day 0 | Floor 3 | ___ | ___ | Startup |
| Day 3 | Floor 3 | ___ | ___ | Operating mode |
| Day 7 | Floor 3 | ___ | ___ | Operating mode |
| Day 14 | Floor 3 | ___ | ___ | Operating mode |
The table should not turn into a complex automation system. Its purpose is to show the trend.
Who should own the microclimate data
It is not necessary for a procurement specialist to lead them. After installation is complete, responsibility may pass to another team.
Depending on the facility, these may be:
- building commissioning service;
- general contractor;
- technical client;
- operations service;
- property management company;
- MEP systems specialist.
The article does not assign a universal owner. But there must be one clear person responsible for the transition period.
The handover of responsibility between construction and operations must be documented
A particularly weak point is the moment when the builders consider the work finished, but operations has not yet fully accepted the building.
It is precisely at this time:
- permanent systems are already operational;
- some areas are still being handed over by the general contractor;
- operations begins its walkthroughs;
- the first issues may begin to appear;
- it is not always clear who should conduct the follow-up inspection.
For wooden finishes, it is useful to separately assign an owner for the period "after systems commissioning — until final handover to operations."
The warranty process begins later than climate control
Warranty work usually begins after an issue has already been formulated and logged. Climate control starts earlier — at the moment the building's mode changes.
Work sequence:
CLIMATE CONTROL → MONITORING → TECHNICAL INSPECTION → WARRANTY ISSUE IF NECESSARY.
Thus, preventive monitoring does not replace the warranty procedure, but creates a factual history before it.
The first heating season is broader than the first two weeks
The first days after system start-up are important, but the process does not end there. A building can only go through a full seasonal cycle later, when outdoor conditions and heating modes change more significantly.
Therefore, for a new facility it is useful to keep several checkpoints:
- before permanent start-up;
- after initial stabilization;
- before the active heating season;
- in the middle of the first heating season;
- during the transition to spring mode — if the project considers this necessary.
This is especially useful for feature areas and repeating rooms, where any changes are easy to compare.
What to hand over to the operations team along with the wooden finishes
The minimum package may include:
- a list of installed SKUs;
- an up-to-date as-built drawing;
- service reserve;
- initial photos of the control zones;
- history of engineering systems startup;
- observation checkpoints;
- open cases with the status “MONITOR”;
- a contact for technical questions;
- the design operating mode of the rooms.
This way, operations receives not just a beautiful interior, but a clear system for monitoring it during the first season.
The service reserve should not be used up at the very first joint change
The reserve is needed for actual repair and replacement, not for a "just in case" reaction.
Before using a spare plank, it is useful to check:
- whether replacement is really necessary;
- whether a local repair can be performed;
- whether the conditions have stabilized;
- whether the same problem will recur on the new part;
- whether there are similar cases in the area.
Otherwise, the service fund may run out before normal operation even begins.
A reorder appears only after calculating the actual requirement
You cannot build a new order based on the pattern:
saw a change → order another 20 meters.
Correct sequence:
ISSUE → CAUSE → REPAIRABILITY → EXISTING RESERVE → QUANTITY TO REPLACE → ADDITIONAL ORDER IF NEEDED.
If repair is possible or the service reserve is sufficient, a new order is not needed.
A climate commissioning plan for finishes helps avoid chaotic reactions
For a large project, it is useful to define a short transition period plan in advance. It does not have to be a separate multi-volume document. A few clear steps that connect engineering commissioning and the state of the finished finishes are enough.
| Stage | What we do | Result |
|---|---|---|
| Before commissioning | We select control zones and record the initial state | There is a baseline for comparison |
| System launch | Set the date and active zones | There is a starting point |
| First days | Review microclimate and finishing dynamics | Understand whether the site is stabilizing |
| Re-inspection | Compare the same checkpoints | See real changes |
| Review of comments | Assign status and verify the cause | No chaotic repairs |
| Handover of operation | We hand over open cases and history | Observation is not interrupted |
This is how the first heating season stops being a period when every new joint is evaluated anew without context.
It is better to choose control zones before problems appear
If zones are chosen only after a complaint, there is a risk of looking where a defect has already been found and having no comparison with normal areas.
It is useful to choose several types of zones in advance:
- a typical unit or room;
- lobby;
- corridor;
- a room with underfloor heating;
- room next to the external entrance;
- zone near the diffuser;
- upper floor;
- lower floor;
- zone with a different SKU or a different delivery.
So when issues appear, there is something to compare the problem area against.
A typical room number can be used as a reference only under identical conditions
Two room numbers may be identical in architecture but differ in actual mode. One faces the sunny side, the second is located next to a shaft, the third has a different underfloor heating mode, the fourth is ventilated more often.
Therefore, a "typical room" for climate control is not just an identical layout. Comparable conditions are needed.
If two identical rooms behave differently, this is a useful sign for diagnostics: the difference should be sought in the local mode, installation, or the history of the specific zone.
Lobby at the entrance group — a separate risk zone
Entrance doors open regularly, outdoor air enters, an air curtain may be operating nearby, and the constant flow of people changes local conditions.
For wooden trim in the lobby, it is useful to monitor separately:
- baseboard near the entrance doors;
- long sections along the facade;
- corners near the vestibule;
- cornice near air flows;
- moldings on walls next to the outdoor area.
If observations are concentrated only in the lobby, the conclusion cannot automatically be applied to the entire property.
The restaurant and public areas may undergo a different transitional regime
Before opening, a restaurant may stand almost empty, but once operations begin, there are permanent staff, equipment, cleaning, door opening, and a different ventilation mode.
Therefore, monitoring performed only before actual operation begins may not show the real load on the space.
For such a zone, it is useful to have an additional control point after the normal operating mode has started.
It is useful to compare rooms near exterior walls with interior rooms
If changes appear only on the building's exterior perimeter, that is a separate diagnostic sign. If they are distributed equally across interior and exterior rooms, the cause may be different.
The comparison should be simple:
| Zone type | Number of control points | New remarks | Comment |
|---|---|---|---|
| Exterior walls | 12 | 4 | Check conditions |
| Internal walls | 12 | 0 | Stable |
This helps move from random complaints to comparative analysis.
The diagnostic tree begins with the scale of the observation
The first question in a new case is not "what to do?" but "what is the scale?"
Three levels are possible:
- ISOLATED CASE — one joint or one component;
- LOCAL PATTERN — several similar cases in one area;
- SYSTEMIC PATTERN — identical changes on several floors or types of rooms.
An isolated case more often requires checking a specific assembly. A recurring pattern forces us to look for a common factor. A systemic one requires checking a broader cause before mass repair.
For an isolated observation, we first check the assembly itself
If the skirting board joint has changed in one room while the neighboring ten rooms are stable, it is reasonable to start with a local check.
They check:
- mounting;
- base;
- condition of the adjacent wall;
- presence of mechanical impact;
- installation history;
- local microclimate;
- condition of similar joints nearby.
A mass conclusion across the entire site would be premature here.
For a repeating pattern, we create a comparative sample
If the same change has appeared in 14 rooms on one floor, it is useful to compare:
- these rooms with each other;
- similar units on another floor;
- the same SKU in a different zone;
- a different SKU in the same climate zone;
- installation date;
- the commissioning date of the building systems.
This helps determine whether the issue is related to the zone, the product, the installation, or a combination of factors.
Not every seasonal movement should be treated as a product defect
Wood can change slightly in size in response to its environment. A small change alone does not yet indicate a defect.
But the opposite extreme is also wrong: you cannot attribute any serious gap, warping, or recurring damage to the “natural behavior of wood” without diagnosis.
The right approach:
record → compare → assess the scale → check the conditions and the joint → determine the action.
Not every change in a joint requires the same response
Different states must be separated.
For example:
- minimal visual change without progression;
- a noticeable seam that is stable;
- growing change;
- separation of the profile from the base;
- crack;
- deformation;
- finish damage;
- repetition of the same case by zone.
Each scenario has its own level of verification. A single automatic response of "replacement" cannot be used.
The re-inspection must occur at the same point and with the same description
If the first time you photographed a corner of the frame up close, and a week later — the entire wall from a distance, the comparison is weak.
For the "OBSERVE" status, it is better to record:
- the same angle;
- the same area;
- the same zone code;
- date;
- a brief description of the change.
This is especially important if the decision will be made by someone other than the person who originally saw the area.
The microclimate should be assessed near the problem zone, not only based on the building's overall system
The automation system may show normal parameters for the floor, but the local area near the entrance, diffuser, or underfloor heating may differ.
During a technical inspection, it is useful to obtain data directly in the area of concern or at a comparable point, and then compare it with the overall picture of the floor.
This does not mean that a permanent sensor must be installed at every baseboard. Local measurement is needed only where it helps diagnostics.
Surface temperature monitoring is needed only where it helps diagnostics
For most areas, it is enough to understand the general conditions of the room and the history of changes. But if the problem is concentrated near a heated floor, radiator, thermal curtain, or another local heat source, it may be useful to compare the surface temperature in the problem area and the control area.
Such a measurement should not turn into a universal mandatory regulation for every meter of baseboard. Its purpose is to test a specific hypothesis.
For example:
- is there a noticeable difference at the base of the wall near the heated floor;
- is there a local heating zone near the equipment;
- does the problem room differ from the neighboring control room.
Checking the fastening separates the climate hypothesis from the installation one
If the baseboard has pulled away from the wall, the cause may not only be a change in the dimensions of the wood. It is necessary to check how the fastening works, what condition the base is in, and whether there is local detachment of the wall or covering.
For the molding, the following are checked in the same way:
- whether the frame geometry has been preserved;
- whether the profile is separating from the base;
- whether one specific joint has been compromised;
- whether there are similar changes on adjacent frames.
Such a check is especially important before concluding that "the problem is due to heating."
The condition of the finish also affects diagnostics
A painted, lacquered, tinted, or oiled profile may show changes differently. In some places, a joint is noticed first; in others, a coating crack; in others, a change in the plane.
Therefore, in the remark card, it is useful to specify not only the SKU but also the finish variant.
For example:
PLT-A / oak / tint F02 / Number 312.
If all cases relate to one finish variant, this becomes an additional parameter for technical inspection.
A change in finish does not always mean a change in the wood itself
A line may appear at the joint due to the behavior of the finish layer, not because of a significant change in the profile geometry. Conversely, a visually intact surface does not guarantee the absence of deformation.
Therefore, during diagnostics, a distinction is made between:
- the geometry of the product;
- the condition of the joint;
- condition of the coating;
- mounting;
- base.
The repair decision depends on which layer of the assembly has actually changed.
How to handle an issue that has stopped progressing
Suppose that in the first days after the system was launched, the joint changed slightly, and then two subsequent inspections show the same condition. This case differs from ongoing divergence.
Possible actions:
- leave it under observation until the next checkpoint;
- if the appearance does not significantly hinder acceptance — do not intervene immediately;
- if cosmetic repair is needed — perform it after stabilization;
- keep the history for the first heating season.
The decision is determined by the requirements of the specific site and the appearance of the assembly.
How to handle a remark that continues to grow
If two or three repeat inspections show progression, the status "MONITOR" becomes insufficient.
Then the case is transferred to a technical review. It is necessary to determine:
- the scale of the change;
- the conditions of the area;
- the condition of similar parts;
- mounting;
- base;
- possibility of repair;
- the need to limit further intervention until the cause is determined.
How to deal with a crack in the profile
A crack requires a separate assessment. It cannot automatically be considered normal seasonal movement just because it appeared during the heating season.
Checked:
- depth and extent;
- location relative to the grain;
- whether there are similar cracks in neighboring products;
- whether it was present in the original photo;
- whether it is related to mechanical impact;
- what condition the finish is in;
- is local repair possible.
If necessary, the case moves to a replacement assessment.
How to handle warping or noticeable separation from the wall
Here, observation without a technical inspection may be insufficient, especially if the geometry of the assembly has changed or there is a risk of further damage.
Check:
- the profile itself;
- mounting;
- wall surface;
- conditions nearby;
- condition of adjacent products;
- installation history.
Only after that do they choose repair, re-fastening, or replacement.
How to account for neighboring materials
The skirting board interacts with the flooring and the wall. The molding — with the wall finish. The cornice — with the wall, ceiling, and sometimes furniture or engineering elements.
If the adjacent material changes, the visual joint may look like a change in the wooden profile.
For example, movement of the flooring near the wall can change the appearance of the lower junction of the skirting board. Therefore, diagnostics should not isolate the wood from the entire assembly.
How to work with underfloor heating after its seasonal intensification
Underfloor heating may be started even before handover, but in a gentler mode. With the onset of the cold period, the system moves to a different load.
For areas with underfloor heating, it is useful to have an additional seasonal inspection after the system has actually been operating in winter mode.
This way the site checks not only the first start-up, but also the first period of intensive operation.
How to work with systems that are commissioned in stages
On large sites, heating, ventilation, and air conditioning may not be commissioned simultaneously. One floor is already operating in continuous mode, while another is still on temporary heating.
This needs to be reflected by zones.
| Zone | Heating | Ventilation | Air conditioning | Control status |
|---|---|---|---|---|
| Floor 2 | Constant | Constant | Started | Stabilizing |
| Floor 3 | Constant | Commissioning | Not started | TRANSITION MODE |
| Lobby | Constant | Constant | Started | Observation |