Article Contents:
- Why the correct SKU can become incorrect after a wall change
- What exactly counts as a change in finish thickness
- Base thickness and finish thickness are not the same thing
- You cannot rely solely on the thickness from the finishing material catalog
- What to check at the door
- Example: after adding a panel, the skirting board no longer aligns with the door casing
- Buying finishing materials in bulk is only possible after checking repeating door units
- Changing the wall thickness may require a different door extension
- Changing the profile and changing its position are different decisions
- When new finishing changes the amount of moulding
- Excess material after a change cannot be automatically sent to another room
- The decision for each line must be documented briefly and in Russian
- Practical scenario: a new panel changed only the door joint
- Practical scenario: the same skirting board now requires a different quantity
- Practical scenario: the moulding stayed the same, but the frame moved onto the panel
- Practical scenario: the panel covered one decorative frame
- Practical scenario: the cornice is formally the same, but the new cabinet changed the segment length
- Practical scenario: the new finish made the previous profile unsuitable
- Buying building materials wholesale after a wall change is only possible for confirmed affected lines
- We keep outdated drawings in the archive, but remove them from current work
- The purchaser should see the reason for the change, not just the new figure
- It is important for the designer to see the impact of the finish on already ordered adjacent products
- The installer needs one current version of the assembly
- The supplier is not responsible for a late design change if they manufactured the approved order
- If the supplier changed the parameters without authorization, that is a different process
- How to measure a new wall plane on site
- Local wall leveling may be more important than the nominal panel thickness
- External corners after wall thickening require separate verification
- The transition between two types of finish also affects the linear trim
- Acoustic cladding requires checking not only the thickness but also the fastening method
- Tile and stone change not only the plane but also the character of the joint
- Changing the wall can affect the reserve, even if the main quantity remains the same
- Changing the wall after partial installation requires separating what has already been done from the future scope
- If an already completed assembly is kept, it becomes a separate actual variant
- Before adjusting the order, you need to check the existing free fund
- If a surplus arises, we first decide its fate within the project
- The main impact statement must be updated after each closed decision
- How to verify a decision if the new wall has not yet been built
- How to process a commercial adjustment after a technical decision
- How to close changes before resuming mass installation
- When an order can be left completely unchanged
- How to check one standard door unit for dozens of rooms
- What to do if the new finish is introduced only after delivery to the site
- What to do if part of the new wall material is not yet fully determined
- How to work with an area where the new finish does not start from the floor
- How to work with an area where the new finish ends before the ceiling
- How to check whether the wall change affected the finish of the trim itself
- What to do if the wall change affects only one short section
- How to complete the check so that it does not have to be discussed again in a month
- How to verify solution repeatability before mass continuation of work
- Why the final statement should show both the technical and the procurement solution
- 1. Calculating wall thickness only from the old design
- 2. Looking only at the nominal panel thickness
- 3. Treating the new finish as a purely design change
- 4. Not checking the baseboard at the door
- 5. Not checking the door casing
- 6. Not recalculating the filler
- 7. Comparing only the total square footage
- 8. Do not return to the cutting plan
- 9. Automatically change the item code
- 10. Automatically keep the old item code
- 11. Review the entire object because of one zone
- 12. Do not single out exceptions from standard rooms
- 13. Do not check the furniture
- 14. Do not check the sockets
- 15. Do not check the curtain rod
- 16. Use the old reference room as proof of the new unit
- 17. Send the change to the supplier before technical review
- 18. Issue the disputed material to the installers
- 19. Delete the old version of the project
- 20. Treat any discrepancy in the finished assembly as a supplier error
- Should the baseboard be changed automatically if the wall becomes thicker?
- If the SKU does not change, should the supplier be notified?
- How can the actual wall offset be determined?
- Is there a universal allowable offset?
- When should the door extension be recalculated?
- Can the total linear footage stay the same while the number of planks increases?
- Does the entire floor need to be revisited?
- What should be done with the disputed material that has already been delivered?
- Does a new reference room need to be built?
- When does a wall change become an order change?

A wooden trim order has already been placed. The skirting board, moulding and cornice have been selected, the article numbers agreed, the quantity calculated, and some items have already been produced or delivered to the site. Then the architect or client changes the wall finish: instead of painting, a decorative panel appears, plywood is added, the plaster layer increases, acoustic cladding is introduced, the door reveal changes, or a slatted structure appears.
At the same time, the order line itself may formally remain unchanged. Before: PLT-A / oak / 2400 mm / 120 pcs. After: PLT-A / oak / 2400 mm / 120 pcs. The purchaser sees the same article number and draws a dangerous conclusion: the product has not changed, so the order can be left without checking.
But the product's environment has changed. The finished wall plane has shifted, and along with it the junction of the skirting board with the door casing, the depth of the door reveal, the position of the moulding relative to the panel, the adjacency to furniture, the position of sockets, the length of individual segments, and the very suitability of the selected profile may have changed.
Therefore wholesale purchase of building materials after such a design change begins not with a letter to the supplier, but with a technical check of the junction.
Work sequence:
WALL COMPOSITION CHANGE → RECORD OLD AND NEW PLANE → DETERMINE OFFSET → FIND AFFECTED ZONES → CHECK SKIRTING BOARDS, DOOR CASINGS, EXTENSIONS, MOULDINGS, CORNICES, FURNITURE AND SOCKETS → CLASSIFY IMPACT → UPDATE WORKING JUNCTIONS → RECALCULATE ONLY WHERE NEEDED → ADJUST THE ORDER ONLY FOR AFFECTED LINES.
Main principle:
A WALL CHANGE IS FIRST CHECKED AGAINST THE ACTUAL ASSEMBLY, AND ONLY THEN IS A DECISION MADE WHETHER THE ORDER NEEDS TO BE CHANGED.
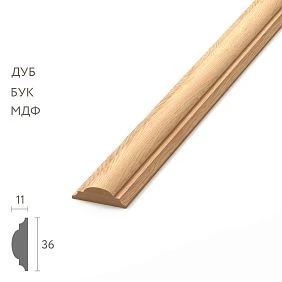
Why a correct SKU can become incorrect after a wall change
A profile by itself may fully match the order. The error arises not in the product, but in the new position of adjacent structures.
For example, the baseboard and the door casing used to be in the same visual plane. After adding a panel, the wall surface moved forward. The baseboard, which previously fit neatly against the door casing, may now protrude in front of it or, conversely, end up deeper.
The situation with the molding is similar. The frame may remain from the same MLD-A, but the new panel changes the base surface from which its dimensions are set. If the old coordinates are kept, the frame may shift relative to the furniture, the door, or the center of the wall.
The cornice may have the same SKU and the same total linear footage, but the new cladding creates a different top assembly, changes the length of a specific segment, or the position of a corner.
Therefore, the suitability of trim is determined not only by its own characteristics. It is determined by compatibility with the specific actual assembly.




What exactly counts as a change in the thickness of the finish
A change means any decision that alters the actual position of the front surface of the wall relative to the original design.
This could be:
- an additional layer of plaster;
- drywall on a frame;
- plywood or MDF base;
- decorative wooden panel;
- slatted finish;
- acoustic cladding;
- tile;
- stone or its base;
- additional adhesive layer;
- modification of the door reveal;
- column cladding;
- local leveling that significantly shifts the plane.
Not every change is critical. But every change that affects adjacent trim must be checked.
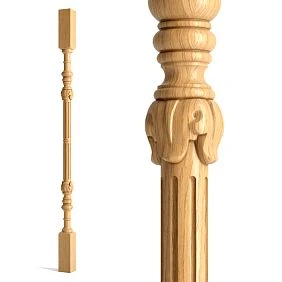
Our factory also produces:




Base thickness and finished thickness are not the same thing
What matters for the assembly is not the nominal panel thickness in the catalog, but the final plane after installing the full package.
For example, a decorative panel is 11 mm thick. But the actual projection may include:
- plywood or another base;
- Glue;
- local leveling;
- shim;
- gap or frame.
To check the baseboard and casing, you need to measure not the individual material, but the final position of the face surface.
Working note:
OLD PLANE: 5 mm from the baseline.
NEW PLANE: 18 mm.
OFFSET: +13 mm.
It is precisely these +13 mm that are used when checking joints.
Get Consultation
You cannot rely solely on the thickness stated in the finish material catalog
The catalog thickness describes the product itself. The installation assembly may be thicker.
For example, a 12 mm panel is installed on 9 mm plywood with installation compound. As a result, the finished plane is offset not by 12 mm, but by considerably more.
The opposite situation is also possible: part of the existing plaster is removed, and the new cladding barely changes the resulting plane.
Therefore, before deciding on trim, it is useful to obtain one of two facts:
- an exact cross-section of the new assembly;
- an actual full-scale measurement of a control area.
The original and new wall planes must be fixed separately
| Zone | Original finish | New finish | Plane offset | Product | Solution |
|---|---|---|---|---|---|
| Room 201 | Paint 3 mm | Panel 16 mm | +13 mm | PLT-A | Check door unit |
| Lobby | Plaster 8 mm | Package 18 mm | +10 mm | MLD-A | Check position |
| Corridor | Painting | No changes | 0 | PLT-A | Leave |
| Restaurant | Painting | Panel 20 mm | +20 mm | KZ-A | Check the upper joint |
This report allows you to immediately separate the affected rows from those where nothing has changed.
There is no universal acceptable offset for any trim
You cannot establish a rule like “up to 5 mm can be left unchecked.” For one joint, a small offset really does not change the visual result. In another joint, 3–4 mm is enough for the skirting board and architrave to lose their neat alignment.
The tolerance depends on:
- the thickness of the profile itself;
- the projection of the architrave;
- the method of finishing the skirting board;
- the presence of a decorative step;
- molding profiles;
- visibility of the junction;
- adjacent furniture;
- design requirements.
That is why the specific junction decides, not a universal number.
Wooden baseboard: first we check the joint with the door casing
At a door, the baseboard rarely works on its own. It meets the casing, the frame, the extension, and the reveal. When new cladding shifts the wall plane, this junction changes first.
Wooden baseboard It may turn out:
- in front of the casing;
- deeper than the casing;
- on a new decorative step;
- in the area where the casing already requires a different extension;
- in conflict with the end of the panel.
Therefore, when modifying the wall near the door, the entire assembly is checked as a whole, not just the baseboard itself.
What to check at the door
- position of the door frame;
- actual depth of the reveal;
- whether a new or wider extension is needed;
- the thickness of the casing;
- the protrusion of the casing relative to the new wall;
- skirting board thickness;
- method of finishing the baseboard;
- presence of a decorative end;
- actual position of the finished surface.
Example: after adding the panel, the skirting board no longer aligned with the door casing
Initially, the wall was prepared for painting. The door casing protruded 16 mm from the wall. The skirting board also protruded about 16 mm. The joint looked even.
After the design change, a panel with a full 12 mm installation kit was added. The wall surface moved forward. The door casing remained in its original position relative to the frame.
Now there are several options:
- keep the skirting board but change the door extension and the position of the door casing;
- keep the door assembly but change the way the skirting board terminates;
- change the local panel near the door;
- choose a different profile if the old one does not work visually.
No option can be chosen based only on the overall thickness of the skirting board. A real cross-section is needed.
buy finishing materials wholesale only after checking repeated door units
If one room type is repeated 40 times, an error in a single door unit is automatically replicated across the entire property.
Therefore, it is enough to check a typical unit once at full scale:
WALL → NEW FINISH → FRAME → EXTENSION → CASING → BASEBOARD.
After confirmation, the typical unit can be repeated. If the unit does not align, adjustments are made before mass installation and before additional ordering.
A change in wall thickness may require a different door extension
The extension compensates for the difference between the frame depth and the actual wall thickness. If the finished plane protrudes forward, the previous extension may become insufficient.
This matters even when the baseboard itself remains the same. If the extension becomes wider, the casing shifts, which means the meeting point with the baseboard changes.
Therefore, a change in the wall at doors must be checked as a single unit, not as an independent decision on the decorative profile.
Wooden molding: the profile may remain correct, but the composition may not
for wooden molding often it is not the article number itself that changes, but its position on the wall.
The frame was designed for a painted surface. Then a panel appears. Different solutions are possible:
- the molding is transferred to the new panel;
- the molding remains on the base wall;
- the molding becomes the boundary between two materials;
- the frame is reduced;
- the frame is enlarged;
- one frame disappears;
- a new frame appears around the panel.
As a result, MLD-A may remain MLD-A, but the old installation coordinates no longer apply.
Changing the profile and changing its position are different solutions
This needs to be recorded separately.
| Scenario | Article | Quantity | Installation position | What to change |
|---|---|---|---|---|
| Panel added, frame is being moved | MLD-A | No changes | Changes | Working drawing |
| One frame removed | MLD-A | Decreases | Changes | Quantity and drawing |
| Old profile is not suitable | reconsider | recalculate | New | Order and drawing |
This way the purchaser does not receive an order change where only a new installation drawing is needed.
When new finishing changes the amount of molding
The panel may cover part of the decorative composition. There were eight frames, now there are seven. Or vice versa: an additional frame appears around the new panel.
In such cases, not only the position changes, but also the consumption.
For each affected zone, you need to update:
- number of frames;
- side dimensions;
- list of segments;
- cutting map;
- number of whole planks.
materials in bulk: first we classify the impact, and then we adjust the purchase
For each affected line, it is convenient to use four solutions.
| Solution | What does it mean |
|---|---|
| NO IMPACT | The item and assembly remain unchanged |
| CHANGE ASSEMBLY | Same item, position changes |
| RECALCULATE QUANTITY | Same SKU, consumption changed |
| REVIEW SKU | The old profile is no longer suitable |
If out of 30 items a wall change actually affected four, there is no point in sending the entire order for re-approval.
Wooden cornice: a change to the wall can alter the upper junction
wooden cornice also depends on the actual wall plane.
New cladding can:
- shift the cornice relative to the ceiling;
- change the junction with the built-in wardrobe;
- create a new step;
- change the length of the section;
- affect the corner joint;
- conflict with a ventilation or lighting junction.
Therefore, the cornice cannot be checked only against the overall perimeter of the room.
The total linear meters may barely change, while the number of whole products changes
This is one of the most important practical scenarios.
There were two sections:
- 2300 mm;
- 2300 mm.
After changing the panel:
- 2450 mm;
- 2150 mm.
The total linear meters are almost the same. But with a commercial length of 2400 mm, the first segment can no longer be made from a single plank.
This means a simple check of the total meters will not reveal the problem. We need to go back to the segments and the cutting map.
construction materials wholesale: after changing the geometry, we return to the cutting map
We cannot limit ourselves to the formula “it was 42 m, it became 42.3 m — almost no changes.”
Checked:
- the lengths of individual sections;
- long view segments;
- corners;
- joints;
- ability to use leftovers;
- new quantity of whole items.
Only after this can it be confirmed that the old purchase quantity is indeed suitable.
We do not automatically mark already produced material as erroneous
If the wall change occurred after production started, you first need to determine which part of the old order is still usable.
For each item, check:
- whether the previous SKU is suitable;
- whether the entire produced volume can be used;
- whether only part can be used;
- whether a surplus has appeared;
- whether an additional quantity is needed;
- whether only the installation assembly needs to be changed.
For example, out of 120 PLT-A, one hundred rooms remained unchanged, while twenty received a new panel. There is no reason to consider all 120 planks disputed. Only the volume relating to the affected areas is subject to inspection.
We separate the already delivered trim by condition
On site, it is useful to temporarily separate the disputed material from the verified material.
| Condition | What does it mean | Action |
|---|---|---|
| can be used | Assembly confirmed | Release for installation |
| AWAITING DECISION | The impact of the new wall has not yet been checked | Do not issue |
| EXCESS AFTER CHANGE | Need decreased | Transfer to separate fund |
| REORDER REQUIRED | Real deficit confirmed | Adjust purchase |
This way, disputed material does not go into installation until the project team decides.
Excess material left after a change cannot be automatically sent to another room
If after a new panel there are 12 extra planks left in one zone, this does not yet mean they can be immediately given to another crew.
In another zone, the following may differ:
- article number;
- the material;
- product length;
- finishing;
- queue;
- reserve;
- cutting map.
Redistribution is performed only through the current schedule to avoid creating a new hidden deficit.
The affected zones registry separates a local change from the entire property
| Zone | Product | Wall change | Influence | Action |
|---|---|---|---|---|
| 201 | PLT-A | +12 mm | Junction with door | check the joint |
| 202 | PLT-A | 0 | No | Leave |
| Lobby | MLD-A | +18 mm | Composition changed | recalculate |
| Restaurant | KZ-A | +15 mm | New upper assembly | Check |
If the new finish appeared only in the lobby, there is no point in sending the entire room inventory back for re-approval.
This is especially important on large properties: a local design change should remain local until proven otherwise.
After the change, typical rooms should be divided into base rooms and exceptions
Let's imagine 50 identical rooms. In 40, the paint finish remains; in 10, a decorative panel is added.
Old formula:
TYPE A × 50.
New:
TYPE A × 40 + TYPE A1 × 10.
Type A1 receives a separate check:
- door assembly;
- plinth;
- Moldings;
- Outlets;
- Furniture;
- cornice;
- Cutting.
The reverse mistake is changing all 50 rooms because of a single executive exception. If a panel is added in only one room, it is designed as a separate variant, while the other 49 retain the approved solution.
The position of the sockets must be checked together with the tall skirting board and moldings
Thick cladding changes the relative position of the socket frame to the wall surface. This is especially noticeable if a tall skirting board or wall molding is used next to the electrical group.
Checked:
- lower mark of the socket frame;
- actual protrusion of the frame after new finishing;
- baseboard height;
- baseboard thickness;
- distance to the trim;
- distance to the corner;
- position of the molding;
- access to the mechanism.
If the new panel has pushed the wall forward, the electrical frame may end up deeper, while the adjacent decorative profile may protrude more visually. This needs to be seen before mass installation.
Built-in furniture also depends on the new wall plane
Furniture is often calculated relative to a specific wall. After adding cladding:
- the cabinet protrudes forward;
- the baseboard changes its endpoint;
- the molding frame becomes narrower;
- furniture overlaps part of the profile;
- a new end gap appears;
- the portal changes.
Therefore, the wall impact statement must be checked not only by the architect, but also against the current furniture layout in the affected areas.
Changes after approval of the reference room are especially dangerous
The reference room confirms a specific physical assembly. If it was approved with a painted wall, and the mass rollout received a panel, the old reference no longer proves the suitability of the new solution.
But this does not mean that a new full-scale room needs to be built.
For a local change, a full-scale control mockup is sufficient:
- a piece of the new wall;
- door frame;
- extension;
- platband;
- plinth;
- if necessary, an outlet or furniture junction.
Such a mockup shows the actual joint before serial installation begins.
When a control fragment is sufficient, and when a full recalculation is needed
A control fragment is usually sufficient if:
- the item code does not change;
- the quantity hardly changes;
- one standard joint is affected;
- the change is local;
- the rest of the room geometry remains the same.
A full recalculation is needed if the change affects:
- most rooms;
- perimeter;
- many doorways;
- several moulding frames;
- Furniture;
- cornice;
- overall geometry;
- list of segments.
The decision for each line should be brief and in Russian
Practical change card:
| Field | What we record |
|---|---|
| Change No. | ___ |
| Before | ___ |
| After | ___ |
| Reason | ___ |
| Affected rooms | ___ |
| Article number | ___ |
| Quantity | ___ |
| Mounting unit | ___ |
| Solution | Keep / modify node / recalculate / replace |
This is how the buyer, designer, and installer see the same solution.
When the supplier does not need to be involved at all
If, after the technical review, it is confirmed that:
- the item code remains the same;
- the material remains the same;
- the product length does not change;
- the quantity does not change;
- the product finish does not change;
and only the installation position changes, the task is resolved within the design and installation documentation.
Not every design change is an order change.
When the supplier must be connected without fail
A purchase adjustment is needed if at least one product parameter changes:
- article number;
- the material;
- product length;
- quantity;
- finish of the item itself;
- composition of the batch;
- deadline or queue due to the new volume.
Then the supplier receives an already verified change, not a vague message like “our walls have changed.”
A wall change must be linked to a specific project version
For example:
Version 07 — painting.
Version 08 — 16 mm panel.
Then it is clear which configuration was in effect at the time of ordering and why the current assembly differs.
This is also important for the allocation of responsibility. If the supplier manufactured the product according to the officially confirmed version 07, and the project changed later, this is a project change of the initial data, not automatically an error in the execution of the delivery.
If, however, the supplier arbitrarily supplied a profile with different parameters, this is a different process — verifying that the delivery matches the order.
Practical scenario: a new panel changed only the door joint
In 30 units, one type of PLT-A is installed. After ordering, in 10 units, instead of painting, a panel is introduced that shifts the wall forward by 12 mm.
The check shows:
- the overall perimeter has not changed;
- the number of segments has not changed;
- PLT-A fits in height and thickness;
- the quantity remains the same;
- the conflict arises only with the architrave.
Solution:
KEEP SKU / KEEP QUANTITY / CHANGE DOOR UNIT.
The supplier does not need to be connected if the product line truly does not change.
Practical scenario: the same skirting board now requires a different quantity
In the hallway, PLT-A remains the correct profile. But after the new cladding, the door has shifted, and part of the wall now has a built-in wardrobe. One long segment disappeared, two short ones appeared.
The total linear meterage changed insignificantly, but the cutting map became different.
Old quantity — 28 planks.
New calculation — 30.
Solution:
KEEP SKU / RECALCULATE QUANTITY / ORDER 2 MORE PLANKS.
This way, the project does not change the product just to change the geometry.
Practical scenario: the molding stayed the same, but the frame moved onto the panel
MLD-A was approved for a rectangular frame on a painted wall. After the project, an 18 mm thick wooden panel appears.
The designer confirms that the molding should be installed on the panel surface. The frame size and the number of sides remain the same.
Solution:
- MLD-A remains;
- the quantity remains;
- the installation plane changes;
- the working layout is updated;
- the fastening method for the new surface is checked.
This is a classic example of changing the assembly without changing the procurement.
Practical scenario: the panel covered one decorative frame
The lobby had eight MLD-B frames. After adding a large accent panel, one frame is no longer needed.
If the same set of segments is used for each frame, the total order is reduced.
But excess MLD-B cannot be automatically written off or sent to another project. First, it is checked:
- whether it can be used in another zone of this facility;
- whether it is needed as a reserve;
- whether it is possible to modify the open order;
- whether the material has already been produced;
- whether redistribution changes the finishing uniformity.
Practical scenario: the cornice is formally the same, but the new cabinet changed the segment length
KZ-A runs along the upper contour of the wall. After the furniture change, the cabinet now reaches the ceiling and occupies part of the wall.
The overall perimeter of the room has not changed, but the cornice no longer runs behind the cabinet.
As a result:
- part of the old linear footage becomes unnecessary;
- the endpoint changes;
- the end face needs to be checked;
- the cutting layout of corner sections may change.
The decision is made based on the new segment map, not the old total linear footage.
Practical scenario: new finishing made the previous profile unsuitable
A rare but important case. The PLT-A skirting was selected for a thin paint finish and a neat joint with the casing. After the wall change, a massive panel appears, forming a pronounced step. Even after adjusting the casing, PLT-A visually looks too thin and does not cover the new junction.
Then the status:
REVIEW THE SKU.
Next, the new profile is checked on a control fragment. The old order is not changed "by eye" until the replacement is confirmed.
buy construction materials wholesale after the wall change, only for confirmed affected lines
The purchaser should receive not a general phrase like “the walls have changed,” but a specific register.
| Code | Article | Old wall | New wall | Quantity | Solution |
|---|---|---|---|---|---|
| P-01 | PLT-A | Painting | Panel 16 mm | 120 | Check door unit |
| M-01 | MLD-A | Painting | Plaster +10 mm | 80 | Leave |
| M-02 | MLD-B | Painting | Panel 20 mm | 42 | recalculate |
| K-01 | KZ-A | Painting | Panel 20 mm | 24 | Check top junction |
Only lines with the status “RECALCULATE” or “REVIEW SKU” form a potential procurement adjustment.
We keep outdated drawings in the archive, but remove them from current work
After a wall change, the project issues a new working version. The old one is not destroyed, because an order may have been placed and part of the work completed based on it.
But there must be only one active version in current work.
On the old one:
REPLACED BY A NEW VERSION.
This is especially important when different crews work in parallel. Otherwise, one crew installs by the finish, while the other installs by the panel.
The purchaser should see the reason for the change, not just the new figure
If the MLD-B quantity changed from 42 to 36, it is useful to understand why.
The reason could be:
- one frame was removed;
- the panel covered part of the composition;
- the frame size changed;
- the cutting layout was adjusted;
- an error in the original calculation was identified.
Without a reason, the new figure looks like just another version of the table. With a reason, it becomes a controlled project change.
It is important for the designer to see the impact of the finish on already ordered adjacent products
A wall change is often perceived as a change in the square meters of finishing. But it may also affect:
- door extension jambs;
- Baseboards;
- skirting boards;
- Moldings;
- cornices;
- Outlets;
- built-in furniture;
- lighting and ventilation units.
Therefore, the decision on new cladding should preferably be accompanied by a brief check of related purchased items.
The installer needs one current version of the assembly
The installer should not decide on site:
"install the skirting over the panel, trim the panel, or somehow finish the end".
Before issuing the disputed trim to the floor, the following must be determined:
- new plane;
- profile installation point;
- the joint with the architrave;
- joint with furniture;
- ending;
- current item code.
The working unit must be single and clear.
The supplier is not responsible for a late design change if it has manufactured the agreed order
If the order was placed according to the approved configuration, and the wall thickness changed later, this is not automatically a supplier error.
One must distinguish:
- ORDER FULFILLMENT ERROR — something other than what was confirmed was delivered;
- CHANGE OF INITIAL DATA — the design changed after the order.
Confusing these scenarios makes it difficult to reach a correct solution and commercial agreement.
If the supplier changed the parameters without authorization, this is already a different process
For example, a profile of one thickness was ordered, but a different one was actually delivered. This does not relate to a wall change.
This checks whether the delivery matches the specification:
- article number;
- the material;
- size;
- length;
- finishing;
- quantity.
There is no need to combine such a claim with a design wall adjustment.
How to measure a new wall plane on site
If the new finish is already installed on the control area, an actual measurement is more reliable than a calculation based on individual layers. A stable baseline is selected: a door frame, a laser plane, an existing structural edge, or another agreed reference.
Next, measure the distance to:
- the old design surface;
- the new actual surface;
- the front plane of the casing;
- the front plane of the furniture;
- the socket frame, if necessary.
For repetitive rooms, a control set of points is sufficient if the junction is truly standard. If the cladding has noticeable variations, measure several locations rather than one convenient point.
Local wall leveling may be more important than the nominal panel thickness
The same panel can produce a different actual offset in two rooms if the substrate was uneven. In one case, the surface was leveled with a thin layer; in the other, a backing or additional leveling was required.
Therefore, a standard design section must be confirmed by the actual installation solution. This is especially important at doors, where a difference of a few millimeters becomes visually noticeable at the joint between the casing and the baseboard.
External corners after wall thickening require separate verification
If cladding is added on only one side of a corner, not only the wall plane changes, but the corner itself as well.
This may affect:
- the length of the baseboard up to the corner;
- the end termination;
- the joint of two moldings;
- the symmetry of the decorative frame;
- cornice;
- the position of adjacent furniture.
Such zones cannot be considered a simple linear wall offset. They require a new corner node.
The transition between two types of finishes also affects the linear footage
For example, half of the wall remains painted, while the other half receives an 18 mm panel. A step appears at the boundary.
The baseboard can:
- run continuously with a local transition;
- break;
- receive a decorative end;
- change position relative to the wall.
The molding can frame the boundary between materials itself. In that case, its quantity may even increase, even though the room area has not changed.
Acoustic cladding requires checking not only the thickness but also the mounting method
If the new wall consists of an acoustic panel or a soft decorative layer, the issue may not be only about the offset. It is necessary to understand what the wooden profile will be physically attached to.
Checked:
- is there a solid base;
- can the profile be mounted through the cladding;
- is a mounting block needed;
- will the soft layer deform;
- how the edge of the panel will look.
Even if the trim article looks suitable visually, the installation scheme may require reworking.
Tile and stone change not only the plane, but also the character of the joint
Hard cladding usually forms a more rigid and noticeable boundary. If a wooden skirting board meets tile, you need to check:
- tile protrusion;
- end face;
- seam;
- the height of the baseboard;
- end point;
- the ability to join neatly without an accidental step.
Such a check is especially important if the tile was added after ordering the wooden profile.
A change to the wall can affect the reserve, even if the main quantity remains the same
Let's say the main volume of PLT-A remains 120 planks. But after the new cladding, ten rooms get a different end assembly and more short segments.
The main order can remain the same thanks to the existing cutting stock, but the repair reserve is better revised: a future local replacement in these ten rooms will require the same new assemblies.
The reserve should not automatically repeat the old scheme if the design configuration has changed.
Changing the wall after partial installation requires separating what has already been done from the future volume
There are 20 rooms on the floor. In eight, the trim has already been installed according to the old finish; in twelve, the new cladding has not yet been installed.
You need to decide:
- whether the completed old assembly remains acceptable;
- whether already completed rooms need to be redone;
- or the change applies only to the future twelve.
This decision must be documented. Otherwise, the object gets two variants of the same standard room without explanation.
If an already completed assembly is kept, it becomes a separate actual variant
For example:
Type A — painting / PLT-A / already completed rooms 201–208.
Type A1 — panel / PLT-A / rooms 209–220.
This way, operations and future repairs understand why identical numbers have different junctions.
Before adjusting the order, check the existing free stock
The new calculation showed that six more MLD-A planks are needed. But on site there are:
- 2 whole planks from returns;
- 3 strips from the area where the frame was removed;
- 1 free strip after cutting optimization.
The actual deficit is zero.
Therefore, geometry adjustments must be combined with the current material balance of the project. A new calculation does not always mean a new order.
If a surplus arises, we first decide its fate within the project
After the finish change, 14 PLT-A were freed up. Possible solutions:
- use in another confirmed area;
- increase the operational reserve;
- leave as a free fund for the future queue;
- approve a change to the open order if the material has not yet been produced;
- consider a return if permitted by the delivery terms.
The choice depends on the order stage and project conditions. The surplus should not simply disappear from the schedule.
The main impact schedule must be updated after each closed decision
At the beginning, many lines have the status "to check". After technical decisions, they move to final states.
| Zone | Article | Offset | Node decision | Purchase decision | Summary |
|---|---|---|---|---|---|
| 201 | PLT-A | +12 mm | New filler | No changes | done |
| Lobby | MLD-B | +20 mm | Frame removed | −6 planks | done |
| Restaurant | KZ-A | +15 mm | Control sample | AWAITING DECISION | Check |
The transition is complete when there is no undefined impact on the affected lines.
How to verify a solution if the new wall has not yet been built
Sometimes a change has already been approved on the drawing, but there is no physical wall sample yet. Waiting for the full installation of the entire area is risky, especially if moulding production continues.
In this case, a calculation or physical control assembly can be put together. It should show not conventional "16 mm panels", but the full build-up: base wall, leveling, substrate, adhesive, cladding, door frame, extension, casing, and skirting. For the moulding, the actual panel plane and the design reference of the frame are added.
How to process a commercial adjustment after a technical decision
It is better to pass already finalized technical information to the supplier.
For example:
MLD-B / ordered 42 / after the wall change, 36 required / reduction 6 / reason — one decorative frame in the lobby was removed / new revision 08.
Or:
PLT-A / item unchanged / quantity unchanged / no order adjustment required.
This way, the supplier does not participate in a design discussion that is not yet complete and receives only the changes that actually affect its obligations.
How to close the change before resuming mass installation
The affected area can be considered ready for work to continue when all necessary actions have been completed:
- new plane confirmed;
- joints checked;
- SKU confirmed;
- quantity is confirmed;
- cutting updated if necessary;
- old working drawings withdrawn;
- disputed material received a clear status;
- purchasing adjustment issued if needed;
- installers received one current version.
Only after this is the temporary status "PENDING DECISION" removed, and the material can again be issued for installation.
When the order can be left completely unchanged
Such an outcome is perfectly normal and does not mean the check was unnecessary. If the wall change did not affect the geometry of the segments, the joint with the casing is confirmed, the moldings preserve the composition, the cornice does not conflict, and the furniture and outlets remain compatible, the old order can be left completely as is.
It is still useful to record in the project history:
wall change checked / no impact on linear trim / order unchanged.
This short note prevents the question from coming up again a few weeks later, when another team sees the new finish again and starts the check from scratch.
How to check one standard door assembly for dozens of rooms
If the new cladding is repeated in series, control can be organized on the principle of a reference assembly. One room is selected where the new wall has already been completed, the actual frame, extension, casing, and skirting are installed, and then the assembly is evaluated at full scale.
The check involves more than just dimensions. They look at how the step reads, whether the panel edge is exposed, whether the skirting protrudes beyond the casing, whether too deep a shadow appears, whether there is enough space for the outlet, and whether the furniture conflicts. If the assembly is confirmed, it becomes a working sample for all rooms of the same type.
If there are many standard rooms, such a single control assembly is significantly cheaper than fixing every door after mass installation.
What to do if the new finish is introduced only after delivery to the site
The material has already been received and distributed to the rooms, but installation has not yet begun. In this case, it is important to temporarily stop issuing only for the affected zones, not the entire warehouse.
Work sequence:
- mark the affected rooms;
- move the corresponding packs to "AWAITING DECISION";
- do not change their product identity;
- check the new nodes;
- after the decision, return suitable packs to the regular stock;
- separately document the surplus and shortage.
This way the project does not create an artificial stoppage of the entire site.
How to proceed if part of the new wall material has not yet been definitively determined
Sometimes it is known that the paint finish will be replaced with a panel, but the specific panel system is still being selected. In such a case, a final decision on the trim cannot be issued based on an approximate thickness.
Before confirming the panel, you can pre-select dependent elements: doors, baseboards, moldings, cornice, outlets, and furniture. However, the procurement adjustment remains open until the exact installation package is available.
This is better than changing the order multiple times based on intermediate finishing options.
How to handle an area where the new finish does not start from the floor
The panel may start above the baseboard. In that case, the baseboard itself remains on the original wall, while the upper part gains additional thickness.
At first glance, the baseboard is unaffected. But you need to check:
- how the panel ends above the baseboard;
- whether a shadow step is created;
- whether the molding frame changes;
- whether the vertical edge of the panel conflicts with the door casing;
- whether a new decorative transition is required.
That is, the absence of direct contact with the skirting board does not yet prove the absence of influence on the entire decorative wall assembly.
How to work with the area where the new finish ends before the ceiling
The reverse scenario: the panel occupies the lower or middle part of the wall, while the cornice remains on the original plane of the upper zone. In this case, the cornice may not change at all, but the molding or vertical decorative element must shape the transition between the two planes.
Therefore, the influence is considered not only by individual products, but also by the composition of the entire wall. If the cornice is not affected, its line receives "NO INFLUENCE" and does not go for recalculation.
How to check whether a wall change has affected the finish of the molding itself
Sometimes the article and geometry are suitable, but the new wall requires a different visual execution. For example, the profile previously adjoined paintwork, but now it is located on a wooden panel. The same color may look different due to the new adjacent surface, and the previous tinting scheme no longer works compositionally.
This is not always a reason to change the product. But it is necessary to separately confirm that the actual finish of the molding remains consistent with the new wall. If only the finish of the product changes, such an adjustment already relates to the order and must be processed separately from the change to the installation assembly.
How to proceed if a wall change affects only one short section
A local thickening near a column, niche, or furniture portal does not require revising the entire room. It is enough to identify the specific segment, check its junctions, and determine whether a different end, a short filler, or an additional piece is needed.
This approach is especially useful for skirting boards: the main perimeter remains unchanged, while one short part changes. The specification should show exactly the local section so that the change does not expand to the entire volume without reason.
How to complete the check so you don't have to revisit it a month later
For each affected room, it's useful to keep a short summary: the new plane is confirmed, the junction has been checked, the item code is such-and-such, the quantity is such-and-such, the order is changing or not changing, the working version of the drawing is such-and-such.
This note is especially important if the decision is "leave unchanged." Without it, a few weeks later another team member will see the new panel again and start re-checking, not knowing the issue has already been closed.
How to verify the repeatability of a solution before continuing work at scale
After confirming the reference junction, it's useful to check not just one sample but also its reproducibility. For example, in two adjacent standard rooms, measure the actual new plane, the position of the casing, and the dimensions of the skirting segments. If the result matches the reference fragment, the solution can be rolled out to the series.
If the actual panel offset differs due to the substrate, the standard junction must either be made more tolerant to the range of dimensions, or the rooms must be split into additional variants. This is especially important on sites where finishing work is carried out by different crews.
Why the final schedule should show both the technical and the procurement decision
A single "decision" column is often too ambiguous. It's better to separate two questions: what we do with the junction and what we do with the order.
For example: junction — modify the filler; skirting procurement — no changes. Or: junction — remove one frame; moulding procurement — reduce by 6 strips. This separation eliminates confusion between the architect and procurement.
As a result, the project sees that not every technical change requires a commercial adjustment, and every commercial adjustment has a clear technical reason.
Before releasing the final adjustment, it is useful to hold a short joint review: the designer confirms the new detail, the procurement specialist confirms the impact on quantity and ordering, and the installation representative confirms the feasibility of the solution on site. Such three-way control is especially useful for repeating areas: once a question is closed, it does not come back on every floor. If at least one party sees ambiguity, the line remains in the "CHECK" status, and material for it is not issued until confirmation. This is cheaper than fixing already installed trim after the new finish has been mass-repeated across the site.
After this review, each affected item must have one unambiguous action: keep, change the detail, recalculate the quantity, or replace the SKU. Vague wording should not be left before mass installation.
20 mistakes after changing wall finish thickness
1. Calculating wall thickness only from the old design
Why it happens: the order has already been placed, and the old documentation is familiar. Consequence: installation is carried out to a plane that no longer exists. How to prevent it: record the actual new plane.
2. Looking only at the nominal panel thickness
Reason: the catalog value seems sufficient. Consequence: the substrate, adhesive, and leveling are not taken into account. Prevention: check the full installation package.
3. Treating the new finish as a purely design change
Reason: the trim SKU does not formally change. Consequence: adjacent details remain unchecked. Prevention: assess the impact on doors, furniture, outlets, moldings, and cornices.
4. Not checking the baseboard at the door
Cause: the main perimeter of the room has not changed. Consequence: a step appears between the baseboard and the door casing. Prevention: check the standard door unit at full scale.
5. Not checking the door casing
Cause: attention is focused on the baseboard. Consequence: the baseboard ends up in front of or deeper than the door casing. Prevention: compare their actual protrusions after the new finish.
6. Not recalculating the extension
Cause: the door frame remains the same. Consequence: the new wall thickness is not covered by the old extension. Prevention: check the depth of the entire door opening.
7. Comparing only the total footage
Cause: the final meters change little. Consequence: a long segment is missed that no longer fits into a single commercial plank. Prevention: return to the list of segments.
8. Not returning to the cutting map
Cause: the article number is the same. Consequence: the number of whole products remains old with the new geometry. Prevention: recalculate only the affected areas.
9. Automatically changing the article number
Cause: the new wall looks different. Consequence: the product changes where a new installation unit would suffice. Prevention: first classify the impact.
10. Automatically keeping the old SKU
Cause: the product has already been purchased. Consequence: the profile does not work with the new plane. Prevention: check the unit before releasing it for installation.
11. Reviewing the entire project because of one zone
Cause: the change seems systemic. Consequence: dozens of unaffected lines go back for re-approval. Prevention: a register of affected rooms.
12. Not separating exceptions from standard rooms
Cause: type A continues to be treated as a single type. Consequence: ten numbers with the panel receive the old unit. Prevention: create a separate type A1.
13. Not checking the furniture
Cause: the furniture is handled by another team. Consequence: the wardrobe blocks the skirting board or the moulding frame. Prevention: verify the affected walls against the furniture documentation.
14. Not checking the sockets
Cause: the electrical point remains at the same elevation. Consequence: the new wall projection changes the relationship of the frame to the baseboard and molding. Prevention: verify the actual assembly.
15. Not checking the cornice
Cause: the change occurred below. Consequence: the upper assembly and segment length remain based on the old wall. Prevention: check the contour from floor to ceiling.
16. Using the old reference room as proof of the new assembly
Cause: the profile had already been approved. Consequence: an unverified configuration with the new panel is repeated on a mass scale. Prevention: create a control sample of the modified assembly.
17. Sending the change to the supplier before technical review
Cause: there is a desire to freeze the order faster. Consequence: the supplier receives several contradictory corrections. Prevention: first confirm the affected lines and the decision.
18. Issuing disputed material to the installers
Cause: the goods are already on site and no one wants them sitting idle. Consequence: the old assembly is effectively locked in by installation. Prevention: status “AWAITING DECISION.”
19. Deleting the old version of the project
Reason: the new version is considered the only valid one. Consequence: the understanding of which source data the order was placed with is lost. Prevention: keep the old version in the archive with a note about the replacement.
20. Treat any discrepancy in the finished assembly as a supplier error
Reason: the profile no longer fits after a change. Consequence: a design adjustment is mistakenly turned into a claim. Prevention: separate conformity of the delivery to the order from a later change to the source data.
Final algorithm for checking already ordered linear trim
WALL FINISH CHANGE RECEIVED → RECORD THE OLD AND NEW COMPOSITION → DETERMINE THE SHIFT OF THE FINISHED PLANE → FIND THE AFFECTED ZONES → CHECK THE SKIRTING → CASINGS AND EXTENSIONS → MOULDINGS → CORNICES → FURNITURE → SOCKETS → OTHER ADJACENT ASSEMBLIES → FOR EACH ITEM CHOOSE: NO IMPACT / CHANGE THE ASSEMBLY / RECALCULATE THE QUANTITY / REVISE THE SKU → UPDATE THE WORKING DOCUMENTATION → IF NECESSARY, ADJUST ONLY THE AFFECTED ORDER LINES → CHECK THE PRODUCED AND DELIVERED MATERIAL → HAND OVER ONE CURRENT VERSION TO THE INSTALLERS.
- Obtain the official new revision of the finish.
- Keep the previous version.
- Record the old wall composition.
- Record the new wall composition.
- Determine the resulting new plane.
- Calculate or measure the offset.
- Make a list of affected rooms.
- Do not include unaffected areas without reason.
- Check the baseboard.
- Check the joint between the baseboard and the door casing.
- Check the door extension.
- Check the molding frames.
- Check the cornice.
- Check built-in furniture.
- Check the sockets and switches.
- Check the lighting and ventilation units if necessary.
- Generate an impact report.
- Assign a decision to each row.
- For the modified geometry, update the segment list.
- Return to the cutting map.
- Recalculate whole products.
- Check the existing produced volume.
- Check the material already delivered.
- Separate the disputed material from the one approved for installation.
- Determine the surplus or shortage.
- If necessary, check the control fragment.
- Update working drawings.
- If the purchase does not change — leave the order unchanged.
- If it changes — adjust only the affected items.
- Remove outdated working copies.
Bottom line: after changing the wall, check the compatibility of the assembly, not just the order line
The main trap of this scenario is that the purchasing line may look completely unchanged. The same PLT-A, the same material, the same length, the same quantity. But the adjacent structure is already different.
Therefore, the right question is not “has the product changed?”, but:
DOES THE PREVIOUS PRODUCT WORK IN THE NEW ACTUAL ASSEMBLY?
If it works — the order can be kept. If only the position changes — the installation documentation is updated. If the consumption has changed — the quantity is recalculated. If the profile is no longer suitable — only then is the SKU revised.
This way the project avoids two opposite mistakes: it does not change the entire order because of a local decision, and it does not install the old profile into an assembly for which it is no longer suitable.
Frequently asked questions
Do I need to automatically change the skirting board if the wall has become thicker?
No. First, you need to check the actual joint with the door casing, door assembly, furniture, and the new wall plane. It is not uncommon for the existing profile to be left in place.
If the product code does not change, do I need to inform the supplier?
Not always. If the product parameters and quantity remain the same, and only the installation position changes, the issue can be resolved within the project.
How do I determine the actual wall offset?
Compare the original and new finished planes, taking into account the full installation package: substrate, adhesive, panel, leveling, and other layers.
Is there a universal allowable offset?
No. Acceptability is determined by the specific assembly, the protrusion of the profile, the door casing, furniture, and visual requirements.
When does the door extension need to be recalculated?
When the new finished wall thickness changes the depth of the opening relative to the door frame. The extension is checked together with the door casing and skirting board.
Can the total square footage stay the same while the number of planks increases?
Yes. If one segment has become longer than the commercial plank, the cutting layout changes even when the total number of meters remains almost unchanged.
Does the entire floor need to be reviewed?
Only if the change truly applies to the entire floor. For local new finishing, the affected areas and standard options are checked.
What should be done with disputed material that has already been delivered?
Separate it from the confirmed stock and do not release it for installation until a decision is made. After review, some of it may be approved, reallocated, or deemed surplus.
Is it necessary to build a new reference room?
Not always. For a local change, a full-size control mockup of the new assembly is often sufficient.
When does a wall change become an order change?
When, after technical review, the SKU, material, commercial length, quantity, product finish, or composition of the purchased batch changes.