Article Contents:
- First, the answer: can you assemble a panel from MLD-049
- What is known about MLD-049, and what needs to be checked separately
- Why one fluted strip says almost nothing about a whole wall
- Paired sample: the cheapest stage that saves an expensive batch
- Lay the pieces on a flat surface
- Bring the side edges together without glue
- Assess the seam from the front
- Look under side lighting
- Check the gap option
- Do a test coat
- Photograph at scale
- Layout from the left edge
- Layout from the center
- Layout from the architectural axis
- Wooden corner
- Frame molding
- Shadow gap
- Recessed fit
- Junction with furniture
- Finished open edge
- Socket in the center of MLD-049
- Socket at the joint
- Socket group
- Electrical fittings in a frame
- Moving a point
- Horizontal Orientation
- Panel 800 mm wide
- Panel 1240 mm wide
- Facade insert 560 mm wide
- What to add to the net quantity
- Multiply the wall width by 100 mm and order immediately
- Check only one plank
- Promise seamless installation without a drawing
- Start the layout from a random corner
- Fail to measure the outer profile margins
- Paint the entire batch before a test assembly
- Fail to check the panel under side lighting
- Mix lengths of 2400 and 2600 mm
- Use leftovers of another material
- Do not include sockets in the layout
- Trim only one edge
- Do not account for repair allowance
- Treat MLD-049 as a ready-made slat panel
- Assign adhesive before selecting the substrate
- Do not approve natural oak variation
- Make horizontal joint from random offcuts
- Hand over the edge to the installer without a drawing
- What is MLD-049?
- Can a solid wall panel be assembled from MLD-049?
- Why is a width of 100 mm insufficient for calculation?
- How many MLD-049 panels are needed for one meter of wall?
- Can the strips be placed flush against each other?
- Will the seam become a continuation of the ribbing?
- Is it mandatory to completely hide the joint?
- Is a gap needed between MLD-049 panels?
- Is one sample enough?
- Can I use the OMLD-005 set?
- What are the dimensions of MLD-049 made of MDF?
- What are the dimensions of the beech and oak profile?
- What to choose: MDF, beech or oak?
- Can I mix MDF and beech under the same enamel?
- How do I check the joint after painting?
- Where do I start the layout?
- Do I need to trim the edge strips?
- How do I finish the left and right edges?
- Can I run MLD-049 all the way to the outer corner of the wall?
- What do I do if the wall height is greater than the strip length?
- Can MLD-049 be installed horizontally?
- Is the profile suitable for a cabinet facade?
- Can MLD-049 be used in the kitchen?
- How to arrange sockets on a ribbed wall?
- Is a repair allowance needed?
- What allowance should be added to the calculation?
- Can short offcuts be used?
- How does MLD-049 differ from a ready-made slat panel?
- When is it better to choose a ready-made panel?
- Where can I see the current price of MLD-049?
- Where to buy MLD-049?
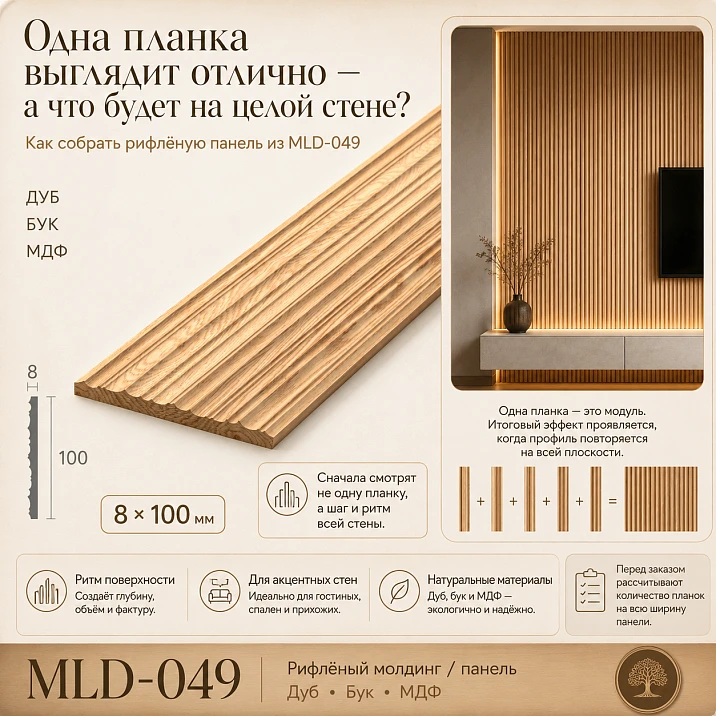
A single sample easily convinces you in your choice. It clearly shows the ribbing, neat geometry, profile width, and the character of the shadow. You can hold the piece against a wall, place it next to a cabinet facade, compare it with the floor color or the future enamel. Everything looks clear—until, instead of one strip, a whole ribbed panel appears in the project.
Suppose a designer proposes covering a section 800 mm wide. The MLD-049 profile has a nominal width of 100 mm, so eight planks appear in the estimate. The arithmetic seems flawless: 8 × 100 = 800 mm. But it only answers the question of the total dimensions. It says nothing about how two adjacent edges will meet, whether the rhythm of the ribbing will align, whether a separate flat strip will appear at the joint, whether a technical gap will be needed, and how the left and right ends of the finished field will look.
That is precisely why the decision to buy the ribbed molding MLD-049 for a large wall or furniture insert cannot be made based on a photo of a single piece. MLD-049 is indeed suitable for furniture, architectural framing, and panel structures. However, the stated characteristics do not confirm that the profile is a ready-made seamless module that can be repeated across the width any number of times without verification.
This does not mean that a beautiful assembled surface cannot be achieved. On the contrary, a wide ribbed molding can produce an expressive result. But between "I liked one plank" and "we order the entire batch," there must be a mandatory step: a paired sample, that is, two identical pieces brought together with their side edges on a flat base. Only such a test shows the real joint.
The main question of the article sounds human: will several MLD-049 pieces become a single ribbed surface, or will each 100-millimeter strip remain visually separate? The answer depends not on the single figure of 100 mm, but on the geometry of the edges, lighting, material, finish, layout, and the way the panel is completed.
First, the answer: can a panel be assembled from MLD-049
MLD-049 can be considered an element of a modular fluted panel, because the card allows the profile to be used in panel structures. But the joint cannot be assumed seamless in advance. Before ordering the full quantity, you need to attach two identical strips or two identical full fragments and check how the pattern continues.
The result may have several variants.
-
The joint almost dissolves into the rhythm. The distance between the outermost flutes of adjacent parts is perceived the same as the intervals within a single profile. In this case, a dense modular layout looks seamless.
-
The joint becomes an additional groove. It is visible but supports the overall pattern. Such a line can be acceptable and even expressive if it repeats consistently.
-
A wide flat field appears between the strips. Then each piece reads as a separate band rather than part of a continuous panel.
-
A gap is required for a neat connection. The panel turns into a rhythmic modular composition with intentional seams.
-
The side edges need to be trimmed. After processing, the useful width of one piece becomes less than 100 mm, so the calculation changes.
-
The joint depends on the finish. Before primer it looks one way, after enamel another; on oak under tinting, the wood grain also plays a role.
None of these options can be chosen by guesswork. You need to see the actual pair.
For a preliminary introduction, it is useful view MLD-049 dimensions, but for designing a large panel, dimensions alone are not enough. The check should answer three practical questions:
-
what the middle of the field looks like;
-
how the outer edges are finished;
-
what width one plank actually covers in the approved joint.
After this, MLD-049 can be considered not an abstract strip 100 mm wide, but a clear module of a specific project.




What is known about MLD-049, and what needs to be checked separately
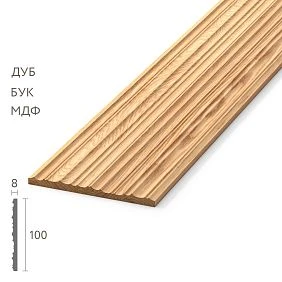
MLD-049 is a wide ribbed profile measuring 100 × 8 mm. The card presents three versions: MDF, beech, and oak. Different lengths and preparation for finishing are specified for them.
| Execution | Size | Length | Preparation | What does this change in the project |
|---|---|---|---|---|
| MDF | 100 × 8 mm | 2600 мм | For enamel | Suitable for solid opaque finishing; the joint needs to be checked after primer and test painting |
| Beech | 100 × 8 mm | 2400 мм | For enamel | Requires checking of the batch, ends, and behavior of the natural base under the selected coating |
| Oak | 100 × 8 mm | 2400 мм | For tinting | In addition to the relief, the grain pattern and shade of the wood on adjacent planks must be coordinated |
For the options, the "Prestige" sanding is specified. The profile is designed for furniture and interior tasks, decorative framing, and panel structures. This data allows selecting the material, calculating the vertical length, and understanding the overall scale of the relief.
But for a solid assembled panel, additional information is needed that is not among the basic dimensions:
-
exact pitch of the flutes;
-
width of the ridges and grooves;
-
distance from the outermost flute to the right edge;
-
distance from the outermost flute to the left edge;
-
shape of the side edges;
-
presence or absence of a chamfer;
-
recommended method for joining two parts;
-
useful width after possible trimming;
-
permissibility of intentional gap;
-
finished scheme of left and right endings.
The absence of these parameters does not indicate a product deficiency. The card describes a single molding, and the buyer is trying to turn it into a repeatable system. This scenario requires additional design verification.
There is an important boundary between a confirmed fact and an assumption. It is confirmed that the width of MLD-049 is 100 mm. It is not confirmed that the distance between the last rib of the first part and the first rib of the second will automatically match the internal pattern pitch. Therefore, the phrase "ten planks give a seamless field one meter wide" still contains an extra promise.
It is more correct to say otherwise: ten planks have a total nominal width of 1000 mm before accounting for the joint, frame, edge trims, and technological gaps.
Our factory also produces:
Why one ribbed strip says almost nothing about an entire wall
A single sample shows the profile itself. It helps to assess the texture depth, size 100 × 8 mm, material, and future color. But a panel assembly is built not only from face surfaces—it is built from repeating joints.
On a wall 1800 mm wide, with nominal calculation, eighteen planks and seventeen internal joints will appear. Even if each seam deviates from the internal rhythm only slightly, repetition amplifies the difference. What is unnoticeable between two fragments in hand becomes a regular vertical grid under side light.
The effect is even stricter on a furniture insert. The facade is examined up close, handles and door gaps provide precise comparison lines, and side light from a window highlights differences. If the outer seam is wider than the inner recesses, the eye quickly reads individual hundred-millimeter boards.
One sample does not show:
-
pattern repeatability;
-
accumulation of seams over a large width;
-
symmetry of the outer fields;
-
surface behavior under side light;
-
difference in shades of adjacent wooden parts;
-
result after opaque painting;
-
interaction with sockets and switches;
-
view of the panel from a distance.
That is why What can and cannot be checked with a short sample — not a formal question. A short piece is useful, but its capabilities are limited. To check repetition, at least two identical elements are required.
If the sample set contains only one fragment of MLD-049, it helps to choose a profile, but does not confirm the joint. For a large wall, it is better to get paired segments or two full strips for a test assembly.
Get Consultation
Paired sample: the cheapest stage that saves an expensive batch
A paired sample is two identical MLD-049 parts joined exactly as they will be installed on a wall or furniture. It should not be a decorative miniature. It is a working mock-up of a critical joint.
The check is carried out in sequence.
Place the parts on a flat surface
If the base is curved, the seam will show the problem of the table, not the profile. The strips should lie without forced bending.
Bring the side edges together without glue
First, look at the natural fit. Do not try to immediately pull the parts together as they do not want to connect. It is important to understand the original geometry.
Evaluate the seam frontally
Stand directly in front of the sample. Compare the distance between the outermost ridges of adjacent planks with the distances within each piece.
Look under side light
Place the light source to the side or position the mockup near a window. The ridges work with shadow, so frontal uniform light often hides the actual joint.
Check the option with a gap
Sometimes a tight connection looks worse than a uniform intentional gap. Try several distances, but do not set the final gap without coordinating installation and finishing.
Make a test application
For MDF and beech under enamel, the seam needs to be seen after primer and final coat on a test piece. The coating thickness can soften a fine line, but it can also emphasize a drip or unevenness.
Photograph at scale
In the photo, there should be a ruler or another clear reference nearby. Separately, take a general shot from the distance at which the panel will be seen in the room.
The OMLD-005 set helps to get familiar with the real geometry of the profiles. You can order molding samples before purchasing a batch, but the presence of two identical fragments of MLD-049 in a specific set needs to be confirmed. To test the joint, one specimen is not enough.
The joint does not have to disappear, but it must look intentional
The buyer often formulates the task strictly: "The seam should not be visible." For a ribbed surface, this is not always the only good result. Sometimes the connection becomes part of the rhythm and is perceived as another groove. What matters is not the absolute absence of a line, but its predictability.
A bad seam gives itself away by three signs.
The first is that it differs in width. Inside MLD-049, the ribs repeat at a certain pace, and between the planks a noticeably wider or narrower field appears.
The second is that it differs in depth. The connection creates a gap that is darker than the inner grooves, or, on the contrary, protrudes as a flat strip.
The third is that it differs in light behavior. A side beam gives a sharp shadow only at the boundaries of the planks, and the surface breaks into modules 100 mm wide.
An intentional joint can be visible if:
-
it repeats evenly across the entire panel;
-
matches the overall logic of the fluting;
-
has a stable width;
-
does not look like a gap from poor fitting;
-
is consistent with the edge elements;
-
is supported by the finish;
-
does not vary from piece to piece.
Sometimes the designer deliberately emphasizes each module with a thin shadow gap. Then MLD-049 works not as a seamless plane, but as a set of wide fluted strips. This is a different artistic solution, but it can be convincing.
The mistake is to promise the client a solid field, and after installation explain the visible lines as a "material feature." If the seam is to be part of the design, it must be shown on a paired sample before ordering. If visually continuous fluting is required, the test must confirm exactly that effect.
Four possible connection schemes for MLD-049
After testing two slats, one chooses not just "suitable" or "not suitable," but a specific scheme.
| Scheme | What it looks like | When appropriate | What to Check |
|---|---|---|---|
| Tight abutment | Planks joined by side edges | When the rhythm at the joint visually continues | Plane, seam width, behavior after finishing |
| Controlled gap | An identical shadow line remains between parts | When the seam cannot be dissolved, but can be made part of the rhythm | Width of the distance and uniformity along the entire height |
| Trimming of side margins | Edges are adjusted to achieve the desired rhythm | When the original edges create too wide a pause | New useful width and edge protection |
| Frame separation | Groups of planks are limited by molding or corner trim | When a large surface is better assembled from independent fields | Frame size, symmetry, and material joints |
Tight abutment seems the simplest but requires the most precise geometry of the base. If the wall is wavy, two thin parts 8 mm thick may diverge in height or form gaps.
A controlled gap is more tolerant of minor differences but requires spacer templates. The gap must be maintained from the floor to the top edge. An accidental expansion of a few millimeters breaks the rhythm.
Trimming the side fields changes the calculation. The nominal width of 100 mm ceases to be the useful width. If after processing one part overlaps less, the quantity needs to be recalculated.
The frame helps manage edges and divide a large wall into panels. It is especially useful if the width of the section is not a multiple of the approved module. But the frame profile also takes up space, so it is added to the calculation before purchasing MLD-049.
Useful width and the rated 100 mm are not the same thing
Size A = 100 mm describes the full width of the product. For a preliminary calculation, this is the initial value. But the finished panel may have a different module.
The useful width depends on the joint.
With a tight fit without trimming, it may coincide with the nominal width. Then ten strips will take up about 1000 mm before accounting for actual installation tolerances and the outer frame.
With a controlled gap, the width of the gaps is added to the sum of the strips. For ten pieces, there are nine internal seams. Even a small uniform gap increases the final field.
With trimming, the useful width decreases. It is important to consider both sides if the right and left edges are adjusted.
With an overlap, if the designer considers such a joint at all, the useful width will also be less than the full width. However, the possibility of an overlap must be confirmed by the cross-section and a test; it cannot be invented just for the sake of calculation.
A convenient formula after approving the joint:
Width of the finished field = sum of useful widths of all strips + sum of approved gaps + width of edge elements.
Before approving the joint, you can only use a guideline:
Preliminary quantity = width of decorative zone ÷ 100 mm.
The resulting number cannot be immediately turned into an order. It shows the order of quantity and helps estimate the budget. The final list appears after paired layout.
For example, for a section of 1240 mm, the calculation gives 12.4 slats. This does not automatically equal an order of thirteen pieces. Different compositions are possible:
-
twelve slats and side frames;
-
thirteen slats with symmetrical trimming of the outer ones;
-
twelve slats with extended side margins;
-
a narrower decorative zone centered on the wall;
-
division of the section into two fields.
The correct option is chosen by appearance, not just by the ability to cover millimeters.
Layout from the edge, from the center, or from the architectural axis
Even if the joint of two MLD-049 panels looks neat, the panel can be ruined by an incorrect starting layout. The first plank sets the position of all the others and determines the width of the edge elements.
Layout from the left edge
The first piece is installed whole at the chosen boundary, and the rest follow sequentially. This method is simple to mark out, but the right edge gets the remainder. If the wall width is not a multiple of the module, a narrow cut may appear on the right.
This option works when the left edge matters more than the right: for example, the panel starts from an inner corner and ends behind furniture.
Layout from the center
First, build the central axis, then distribute the planks symmetrically. The left and right edges get equal cuts or margins. For an accent wall, this often looks calmer.
The center can be a seam between two planks or the middle of a single piece. Both options should be compared on the layout.
Layout from the architectural axis
The center of the panel is tied not to the wall geometry, but to the main object:
-
the TV;
-
beds;
-
to the sofa;
-
to the window;
-
to the door portal;
-
to the fireplace;
-
to the wardrobe;
-
to the table;
-
to the mirror.
The wall can be asymmetrical, but the fluted field must support the furniture composition.
For the wardrobe facade, the axis is the center of the body or the group of doors. For a kitchen insert, it is the center of the hood, sink, or work module, if provided by the design.
The axis selection is fixed before calculating the quantity. You cannot order slats and then "slightly shift" the panel: the trims and outer edges will change.
Why the edges of the panel matter more than its middle
The middle consists of repetition. If the joint is approved, the inner field is usually predictable. The left and right edges have to be designed separately each time.
It is at the edges that the most noticeable problems arise:
-
the fluting breaks off halfway through a protrusion;
-
too narrow a flat strip remains;
-
the left and right sides differ;
-
the open end of MDF is visible;
-
an untreated cross-cut appears on the oak;
-
the panel does not reach the trim;
-
the edge conflicts with the baseboard;
-
the last plank turns out to be narrower than the socket;
-
the frame overlaps part of the pattern.
A good edge explains where the fluted zone begins and ends. It can be strict, shadowed, framed, or integrated into an adjacent element.
Wooden corner
The corner piece covers the side end and forms a vertical boundary. Its thickness should be compared with 8 mm, and it should be checked that it does not protrude too far.
Framed molding
The panel gets a frame. This approach ties MLD-049 to classic wall compositions and helps compensate for non-multiple widths.
Shadow gap
A deliberate dark line is left between the fluted field and the adjacent surface. It requires a level base and precise geometry.
Recessed cutout
The edge goes beyond the side plane of the niche or adjoins it. The end becomes less noticeable, but the joint needs to be shown in section.
Adjoining to furniture
The panel ends at the side of a cabinet, kitchen, or console. Furniture can cover the edge if its position is final and dismantling is accounted for.
Processed open end
Acceptable in a low-visibility area if the material is protected and the shape looks intentional. For MDF, a single coat of paint may not be enough if the edge is clearly visible from the side.
The edge cannot be left 'to the installer's discretion.' By the time of installation, the entire batch is already ordered, and the possibility of symmetrical trimming may be lost.
Ribbed wall made of MLD-049: not only the width needs to be calculated
For a wall panel, horizontal calculation is only half the task. You need to check the height, the base, and all elements that intersect the ribbed field.
MLD-049 made of MDF has a length of 2600 mm, while variants made of beech and oak are 2400 mm. If the panel goes from the baseboard to the ceiling, the length may not be enough. Then a horizontal joint appears, or a decorative finish before the top plane.
On the layout, mark:
-
finished height from the floor;
-
baseboard;
-
ceiling cornice;
-
upper edge of the panel;
-
sockets;
-
switches;
-
door trims;
-
window slopes;
-
wall-mounted lights;
-
TV mount;
-
furniture;
-
ventilation grilles;
-
inspection hatches.
Each element can change the number of slats. A socket that falls on a joint requires different treatment than a socket in the center of a wide piece. A switch may end up on a ribbing protrusion and sit unevenly. A TV bracket requires a prepared base that cannot be calculated only based on the decorative layer 8 mm thick.
If the wall height is greater than the slat length, there are several options:
-
limit the ribbed zone by height;
-
install a horizontal dividing profile;
-
make a joint on the agreed line;
-
change the orientation of the moldings;
-
choose a different panel system.
A horizontal seam on a ribbed surface is very noticeable because it crosses all vertical lines. It cannot be hidden accidentally behind a picture or hoped to disappear after painting. The location is chosen on the layout.
For large heights, it is worth comparing MLD-049 with other solutions. In the category, you can View all wooden moldings and select a profile that better matches the scale and length of a specific wall.
Wall base: a thin profile repeats plane errors
The thickness of MLD-049 is 8 mm. The profile creates relief but should not be perceived as a means of leveling the wall. If the base has a wave, adjacent planks may diverge at the edges, and light will emphasize the differences.
Before installation, check:
-
verticality;
-
local bumps;
-
deep recesses;
-
condition of the plaster;
-
strength of the painted layer;
-
dust and peeling coatings;
-
moisture content of the base within the chosen technology;
-
position of cables and embedded elements.
Irregularity is especially dangerous with tight abutment. One plank is pressed against the wall, the adjacent one remains higher, and a step appears between them. If you try to compensate for it with an adhesive layer without a design, the joint thickness varies along the height, and the outer surface becomes wavy.
Controlled gaps require no less precision. Even a slight deviation makes the vertical dark line wider or narrower.
Before full installation, it is useful to secure a test section of three or four planks. Two pieces show the joint, but a small fragment 300–400 mm wide better reveals the accumulation of base errors.
The fastening method depends on the profile material, wall condition, and future finishing. One adhesive cannot be assigned for every case. Suitable Materials for finishing ribbed profile are chosen after checking MDF, beech or oak and the specific base.
The decorative surface starts to look expensive not after buying the profile, but after precise preparation of the plane. On the ribs there is no calm area that would hide unevenness: light passes along the entire height and shows every step.
Sockets and switches: the ribbing should not accidentally hit the frame
Electrical fittings easily ruin the pattern if their position is not included in the layout. The planks cannot be considered as a continuous wall, and then cut holes "on site" without checking the rhythm.
There are several scenarios.
Socket in the center of MLD-049
A part width of 100 mm may allow placing part of the electrical installation product within one plank, but the exact result depends on the frame size and relief. The base must remain flat.
Socket on the joint
The connection line passes through the frame. Visually, this may look untidy, and processing two parts becomes more complicated. The layout should be shifted if the project allows.
Group of sockets
A long common frame crosses several flutes. Under it, a flat area or a separate insert may be required.
Electrical fittings in a frame
A smooth field is created around the sockets, and the fluted surface approaches it from four sides. Such a unit is easier to perceive but takes up additional space.
Moving the point
If the renovation is not yet complete, it is sometimes wiser to adjust the position of the socket relative to the panel axis. This decision is made by the designer, taking into account the electrical work, not by the molding installer.
The development drawing shows not only the center of the socket box but also the outer dimension of the decorative frame. Otherwise, the latter will end up closer to the fluting than expected.
For kitchen furniture, sockets for household appliances, lighting outputs, and access for maintenance are additionally considered. MLD-049 should not cover removable elements or hinder disassembly.
Light determines whether the panel will appear seamless
The fluted profile exists thanks to shadow. Under even frontal lighting, the surface appears calm. Under side lighting, each protrusion gets a light edge, each recess gets a dark one. The joint also falls into this pattern.
Therefore, the sample is checked under conditions close to real ones.
If the window is on the side, the layout is rotated relative to the light in the same way as the future wall. If an LED line is planned along the panel, the test is performed with a similar beam direction. If the surface will be illuminated only by diffuse ceiling light, an overly contrasty laboratory test can be misleading, but it still shows the limits of the geometry.
Especially carefully check:
-
the wall opposite the window;
-
the panel next to the stained-glass window;
-
the TV area with side lighting;
-
the headboard with wall sconces;
-
kitchen facades under upper lights;
-
cabinets near the window;
-
a long corridor with sequential light sources.
On oak, light shows not only the relief, but also the grain. Adjacent planks may differ in pattern and coating reflection. On enamel, plane differences and sags at seams are more visible.
A photo of a card cannot convey all the options. That is why the decision about an entire wall is made on a physical mock-up, not from an enlarged image of a single strip.
MDF under enamel: a solid-color panel requires a test paint-out of the joint
MLD-049 made of MDF has a size of 100 × 8 mm and a length of 2600 mm. Preparation for enamel makes this option convenient for solid-color wall and furniture compositions.
A covering finish offers several advantages:
-
the color can be tied to the wall or furniture;
-
the pattern of natural wood does not affect adjacent slats;
-
the joint is evaluated primarily by geometry;
-
the fluted field can become a calm background;
-
the length of 2600 mm reduces the risk of horizontal joining on standard sections.
But enamel does not turn an imprecise seam into a seamless one. A thick layer can round off small edges, but it also creates a sag if the compound collects in a recess. After painting, a too-narrow gap may close unevenly, and a too-wide one may become even darker.
A trial paint-out includes at least two connected parts. Painting a single sample is pointless for evaluating the joint.
Check:
-
preservation of knurling after primer;
-
uniformity of coverage in grooves;
-
the connection line;
-
absence of adhesive buildup;
-
color under side light;
-
possibility of local touch-up;
-
behavior of the outer end face.
For ordering, you can choose MLD-049 from MDF, beech, or oakbut the material is fixed until final calculation. The length and finishing method affect the entire panel map.
Beech under enamel: the natural base changes the technology, but does not cancel the test
Beech MLD-049 has the same size 100 × 8 mm, but the length is 2400 mm. The card indicates preparation for enamel.
The buyer may ask: why choose beech if the surface will be painted anyway? The answer depends on the project design, base requirements, and combination with other wooden parts. Beech cannot be declared mandatory or best without a specific node.
For a panel made of strips, you need to check:
-
conformity of strips by geometry;
-
straightness;
-
condition of edges;
-
behavior of the wood base;
-
end faces;
-
number of joints by height;
-
compatibility with the selected enamel;
-
changes after storage and preparation.
A length of 2400 mm is critical for a wall larger than this size. If the decorative field needs to be 2500 mm high, a solid vertical slat cannot be achieved without changing the composition. With MDF of 2600 mm length, such a task can be solved with a single piece.
Beech cannot be mixed with MDF in one continuous field just because both options are planned to be covered with the same paint. Different substrates may behave differently during processing and show differences at the joint.
For a furniture insert, beech may be logical if the entire structure is made of compatible wood materials. But the exact decision is made after a sample and approval of the finish.
Oak for tinting: the panel repeats not only the relief but also the wood.
Oak MLD-049 has a length of 2400 mm and is prepared for tinting. In this version, the fluted surface is combined with the pattern of the natural material.
The joint of two parts is evaluated on several levels at once:
-
continuation of the fluting;
-
width of the inter-module line;
-
direction of fibers;
-
shade;
-
density of the pattern;
-
reaction to staining;
-
gloss of the finish;
-
view of the ends.
Even a geometrically precise seam can remain visible if adjacent planks differ greatly in color. This is not necessarily bad: natural wood does not have to be monotonous. But the degree of variability should be agreed with the client.
For a calm field, the planks are pre-laid on the floor and sorted by pattern. Then they are numbered in the order in which they will be installed. Rearranging after tinting can disrupt the smooth transition of shades.
On a furniture facade, the direction of the grain is linked to the cabinet body. On a wall, one decides whether the wood should look uniform or naturally varied.
An oak panel is especially sensitive to side light. Tinting can emphasize recesses and make the rhythm richer. Therefore, the test fragment should include not one, but several adjacent pieces.
Wall and furniture: one MLD-049, but two different projects
A wall panel and a facade insert may look similar in renderings: a vertical fluted field, a frame, solid or wood finish. Technically, these are different tasks.
| Parameter | Wall panel | Furniture insert |
|---|---|---|
| Base | Prepared wall or substrate | Facade, side panel, separate panel |
| Main size | Zone width and height | Size of a specific door or cabinet body |
| Critical intersections | Sockets, switches, baseboard, ceiling | Facade gaps, handles, hinges, opening |
| End view | Often visible from the side | May be covered by the facade frame |
| Length | Depends on wall height | Depends on the height or width of the door |
| Finishing | On-site or in advance | Often in production |
| Dismantling | Usually not expected | The facade must remain serviceable |
| Calculation | According to the architectural layout | For each furniture piece |
When installed on furniture, the 8 mm thickness is added to the facade surface. Need to check if the relief interferes:
-
with opening the adjacent door;
-
with handle operation;
-
fit to the side panel;
-
drawer extension;
-
lifting mechanism;
-
installation of the decorative frame;
-
sink, stove, or appliances in the kitchen.
Molding on furniture fronts cannot be calculated based only on the total area of the cabinet. Each door has its own gaps and edges.
General principles are covered in the material on how to choose molding for a cabinet or kitchen front. For MLD-049, a paired test of the fluted joint is additionally required.
MLD-049 on a cabinet front: when it is better to assemble the fluted field on a separate insert
There are two ways to use a profile on furniture.
The first is to attach the strips directly to the front. The second is to assemble them on a separate panel, which is then installed as an insert.
Direct mounting reduces the number of layers, but requires precise marking of each door. You need to maintain gaps and not extend the profile beyond the outline.
A separate insert gives more control. On a flat base, you can:
-
assemble several MLD-049;
-
check the seams;
-
perform finishing;
-
finish the edges;
-
install the finished field into the frame.
But the insert increases the overall thickness of the structure. Its dimensions and fastening must be included in the furniture project.
For a two-door cabinet, another question arises: should the rhythm continue through the central gap of the doors? If yes, the layout is built along the common axis of the cabinet, not along each door independently. If no, each door gets its own symmetrical composition.
Do not cut slats for facades until checking the actual dimensions of the finished doors. Even a slight change in gaps affects the outer strips.
In the order, the furniture contour is recorded separately:
-
cabinet model;
-
the facade number;
-
insert size;
-
groove orientation;
-
material;
-
finish;
-
joint scheme;
-
frame;
-
quantity;
-
reserve.
Thus, MLD-049 ceases to be a general footage and becomes part of a specific furniture piece.
Kitchen facades: there are always functional limitations near the grooves
Horizontal orientation
MLD-049 can be considered in a different layout if it matches the design and is confirmed by a mockup. Then the length restriction works across the wall width, not the height.
For oak, the horizontal joint is additionally compared by wood grain. For enamel, the plane and line are checked after painting.
A joint along the length is considered a separate node. It requires material, a sample, and an exact location in the drawing. You cannot assume that the connection will automatically disappear among the vertical grooves: it crosses them transversely and therefore attracts attention.
MLD-049 or a ready-made slat panel: it's not just about price
A modular structure made of moldings and a ready-made slat panel solve a similar visual task, but are arranged differently.
MLD-049 is a separate linear profile. The buyer independently forms the field width, chooses the layout, designs joints and endings. This provides freedom but requires more preparation.
A ready-made panel usually has a predetermined module, substrate, or connection scheme. It can cover a large area faster, but limits the pattern, size, and edge options.
| Criterion | Modular surface made of MLD-049 | Ready-made slat system |
| Rhythm | Determined by the profile and joint | Set by the panel design |
| Field width | Configured by the number of parts | Depends on system modules |
| Materials | MDF, beech, or oak in confirmed finishes | Depends on the specific model |
| Edges | Designed separately | May have a standard solution |
| Joint | Requires paired testing | Usually provided by the system, but also checked |
| Repair | A separate strip can be replaced if there is a spare | Depends on the module design |
| Installation | Many individual parts | Large ready-made elements |
| Artistic freedom | High | Limited by the system |
MLD-049 is worth choosing when you need its specific corrugated pattern, material, size, and the ability to assemble a field of non-standard width. A ready-made panel is more reasonable when installation speed and a pre-designed module matter.
It cannot be said that one option is always better. The buyer should compare:
- appearance;
- approved joint;
- cost of the complete set;
- base preparation;
- number of edge elements;
- finish;
- production timelines;
- repair stock.
Sometimes one wall is more advantageous and expressive when assembled from MLD-049, while for a large commercial space a ready-made system is more practical.
How different reliefs behave and why experience with another molding cannot be directly transferred
Ribbed profiles differ not only in width. They may have a fluted, wavy, fine, or coarse pattern. A joint that works well for one article does not guarantee anything for another.
It is useful to see how fluted and wavy reliefs behave. Such a comparison shows the general principle: adjacent parts should support the direction and rhythm of the pattern.
But MLD-049 with a width of 100 mm remains a separate task. It has its own edge fields and its own geometry. Even if another ribbed molding joined tightly, this does not confirm the seamlessness of MLD-049.
When choosing between profiles, compare:
- width;
- thickness;
- density of ridges;
- shadow scale;
- type of side edge;
- the material;
- length;
- finishing method;
- possibility of repetition;
- availability of samples.
For a small furniture insert, a large rhythm may be too strong. For an accent wall, a thin profile, on the contrary, will get lost. Therefore, choosing molding for walls and furniture is better after comparing physical samples, not just photographs.
Calculation of quantity: three examples without false precision
Panel width 800 mm
Preliminary: 800 ÷ 100 = 8 slats.
If a tight joint is approved and edges do not require trimming, eight pieces can form a nominal field of 800 mm. If a frame is added, its width is calculated separately. If edge slats are trimmed for symmetry, the useful field changes.
Panel width 1240 mm
Preliminary: 1240 ÷ 100 = 12.4.
Possible options:
- 13 slats with trimming of edge pieces;
- 12 slats and two frame pieces;
- 12 slats in a field 1200 mm wide with side offsets;
- Changing the width of the decorative zone.
Without a sketch, it is impossible to choose a single answer.
Facade insert 560 mm wide
Preliminary: 560 ÷ 100 = 5.6.
Six whole strips give a nominal 600 mm, so trimming or reducing the number of parts with a frame will be required. But trimming only the outermost strip is risky: the pattern will differ on the left and right. Symmetrical treatment of both edges is more often considered.
What is added to the net quantity
After the layout is approved, include:
- two parts or fragments for testing;
- allowance for edge trims;
- reserve for damage during finishing;
- reserve for complex openings;
- repair strip;
- frame or corner material.
Reserve cannot be set as a single percentage for all projects. A panel without sockets and a facade with several cutouts require different insurance.
The order is calculated in whole strips of the selected length. Vertical parts for a wall 2500 mm high cannot be obtained from beech or oak 2400 mm long without an additional joint.
What to buy together with MLD-049
A complete set depends on the project. For one panel, only strips and finishing materials are needed; for another, samples, a frame, corners, and a separate backing are required.
| Position | Why it's needed | What to check | Inner page |
| MLD-049 | Forms the main ribbed field | Material, length, size, availability | Order MLD-049 for panel construction |
| Second test part | Shows a repeatable joint | Full execution match | Specified when ordering a sample |
| Sample set | Helps compare profiles and materials | Availability of the required article | order molding samples before purchasing a batch |
| Frame molding | Frames the left, right, top, or bottom edge | Width, thickness, relief | STAVROS furniture molding catalog |
| Mounting compound | Attaches the profile to the base | Compatibility with material and wall | Select adhesive for MLD-049 |
| Primer and enamel | Needed for MDF and beech under opaque finish | Test paint-out of the joint | Primer and enamel for MDF |
| Materials for tinting | Used for oak finish | Color sample on the batch | Materials for finishing ribbed profile |
| Repair stock | Allows replacing a damaged strip | Material, batch, and finish | Included as a separate line item |
Do not buy related materials blindly. First choose the MLD-049 version and installation method, then check compatibility of the composition with the substrate and finish.
How to record the MLD-049 panel set in an order
Bad line:
MLD-049 — 13 pcs.
It does not explain why thirteen parts were chosen, how they connect, or where they are installed.
The working specification looks like this:
| Field | Example entry |
| Product | MLD-049 |
| Purpose | Set-type ribbed wall panel |
| Room | Living room |
| Material | MDF |
| Size of one slat | 100 × 8 × 2600 mm |
| Orientation | Vertical |
| Size of finished area | 1240 × 2500 mm |
| Start of layout | From the central axis of the TV |
| Joint | Approved by paired sample |
| Edge | Frame profile on both sides |
| Finishing | Enamel per project |
| Quantity | By layout map |
| Test pieces | Separately |
| Reserve | Separate line |
| Installation | On prepared base |
| Drawing | Wall layout and edge node |
For furniture, add the facade number, gaps, handles, and the method of attaching the insert.
Such a record is useful not only for the supplier. It synchronizes the designer, cabinetmaker, finisher, and client. Everyone understands that what is being purchased is not thirteen random strips, but a set for a specific field.
Who is the MLD-049 slat panel suitable for
The solution is worth considering if you specifically like the fluted pattern of MLD-049, need a surface of non-standard width, the material must match the furniture or other wood decor, and the project allows for a paired test and precise layout.
MLD-049 is especially interesting for accent zones where the fluted field does not have to cover the entire wall. For example:
- behind the TV;
- behind the headboard;
- on the front of the built-in wardrobe;
- on the side of the kitchen island;
- inside the wall frame;
- in a niche;
- on part of the study;
- in the mirror frame;
- on the decorative insert of the sideboard.
In these cases, the width can be controlled, and the edges can be included in the composition.
The MLD-049 panel suits the project if the base is level enough, the height fits the chosen length or a horizontal joint is provided, sockets and switches are marked on the elevation, the finish is tested on a sample, and the client has seen the approved seam in advance.
When it's better to choose another solution
The modular panel should be abandoned or redesigned if a guaranteed seamless system without testing is required, there is no way to obtain two identical parts, the wall is very uneven, and a horizontal seam is unacceptable.
Another format is more reasonable when the panel edge remains fully exposed but its finishing is not thought through; the grooves conflict with a large number of sockets; the facades have no allowance for opening; the timeline does not allow for a trial assembly; the installer must improvise on site; a standard module with ready-made extensions is needed.
Rejection in one project does not mean that MLD-049 is bad. It means that the specific task requires a different product format.
Mistakes that turn one beautiful strip into a failed wall
Multiply the wall width by 100 mm and order immediately
The calculation does not account for seams, the frame, and trimming.
Check only one plank
A single sample does not show repeatability.
Promise seamlessness without a drawing
Open characteristics do not confirm modular connection.
Start layout from a random corner
A narrow asymmetric strip appears on the opposite side.
Do not measure the extreme profile fields
They determine the rhythm at the joint.
Paint the entire batch before test assembly
After finishing, fixing geometry is more expensive and difficult.
Do not check the panel under side light
Frontal light hides inter-module lines.
Mix lengths 2400 and 2600 mm
The cutting map becomes incorrect.
Use remnants of another material
MDF, beech, and oak differ not only in name but also in preparation.
Do not include sockets in the layout
Electrical fittings fall on a seam or protrusion.
Trim only one edge
The panel becomes asymmetrical.
Do not provide a repair allowance
After damage to an individual strip, a suitable part may not be available.
Consider MLD-049 as a finished slat panel
This is a separate profile from which the system is created by the project.
Assign adhesive before selecting the base
The mounting compound must match the material and surface.
Do not approve natural variation of oak
After staining, adjacent parts look different.
Make a horizontal joint from random offcuts
The transverse line starts to "jump" in height.
Pass the edge to the installer without a drawing
The completion form is determined only after cutting, when material may run out.
Procedure before purchasing the full batch
- Determine the exact width and height of the decorative zone.
- Choose vertical or horizontal orientation.
- Mark the architectural axis.
- Place furniture, doors, outlets, and lights.
- Open the MLD-049 card and select the material.
- Consider the length of 2600 or 2400 mm.
- Get two identical samples.
- Bring them to a level base.
- Check the joint from the front.
- Look under side lighting.
- Perform a test coat or tint.
- Choose a tight joint, gap, trim, or frame.
- Determine the usable width.
- Build the layout from the selected axis.
- Make the left and right edges symmetrical.
- Check the height and horizontal joints.
- Create a map for each plank.
- Add test pieces.
- Add allowance for trimming and finishing.
- Allocate repair stock.
- Select mounting materials.
- Approve the layout with the client.
- Record the node in the specification.
- Check the current price and availability.
- Only after this, place the full order.
This sequence may seem excessive for a simple molding. But in a large panel, every detail repeats. An error in one joint turns into a dozen identical errors.
How to order MLD-049 on the STAVROS website
First, you need to check the price and availability of MLD-049 and select the confirmed execution:
- MDF 100 × 8 × 2600 mm for enamel;
- beech 100 × 8 × 2400 mm for enamel;
- oak 100 × 8 × 2400 mm for tinting.
Then pass to the manager not only the quantity, but also the purpose. Specify that MLD-049 is purchased for a set fluted panel or furniture insert.
It is useful to include in the request:
- size of the finished area;
- the material;
- orientation;
- estimated quantity;
- need for two test pieces;
- edge option;
- finish;
- reserve;
- photos or a layout.
If the profile has not been finally selected yet, you can first View all wooden moldings and compare several options by scale and relief. The decision on MLD-049 is made at the level of a specific card and paired test.
It is better for the manager to ask a precise question: whether two identical fragments are available, what the side edge looks like, whether the connection can be checked, and what material options are in the current card. Such a request is more useful than a general request to confirm that "the whole wall will look beautiful."
FAQ: answers to questions about the fluted panel from MLD-049
What is MLD-049?
MLD-049 is a wide fluted molding measuring 100 × 8 mm. It is used in furniture, interior, and panel structures. The profile is available in MDF, beech, and oak versions.
Can a solid wall panel be assembled from MLD-049?
This option can be considered, but a seamless result should not be promised in advance. First, you need to join two identical parts and check the continuation of the flutes, the external seam, and the edge fields.
Why is the width of 100 mm not enough for calculation?
100 mm is the full nominal width of the product. The finished module depends on the connection method, possible gap, trimming, and finishing of the outer edges.
How much MLD-049 is needed per meter of wall?
Preliminarily, one meter corresponds to ten strips with a width of 100 mm. The final quantity is determined after approval of the joint, useful width, edge trims, and frame.
Can the strips be placed flush against each other?
Tight fitting can be checked, but its suitability is confirmed only by a paired sample. There is no separate seamless connection scheme in the public specifications.
Will the seam become a continuation of the ribbing?
This depends on the distance between the outer ribs and the shape of the side edges. An answer cannot be obtained from a single strip.
Is it mandatory to completely hide the joint?
No. The joint can become part of the rhythm if it is uniform, neat, and pre-approved. What looks bad is not the fact of the line itself, but random width or depth.
Is a gap needed between MLD-049?
A gap can be a design solution if tight fitting does not provide the desired pattern. Its size is checked on a mockup and kept consistent along the entire height.
Is one sample enough?
For evaluating material and relief — yes. For checking a repeatable joint — no. Two identical fragments are needed.
Can I use the OMLD-005 set?
The set is useful for getting familiar with moldings. However, it needs to be confirmed that it contains two identical samples of MLD-049. One fragment will not show the joint.
What are the dimensions of MLD-049 made of MDF?
The confirmed size is 100 × 8 mm, length — 2600 mm. The version is prepared for enamel.
What are the dimensions of the beech and oak profiles?
The cross-section is also 100 × 8 mm, length — 2400 mm. Beech is specified for enamel, oak — for tinting.
What to choose: MDF, beech, or oak?
MDF is convenient for solid opaque finishing and has a length of 2600 mm. Beech is chosen considering the wood base and enamel. Oak is suitable for tinting when a natural grain is important. The decision depends on the project and panel height.
Can MDF and beech be mixed under the same enamel?
In one continuous field, it is better not to mix different bases without a technological check. They differ in length, processing properties, and behavior during finishing.
How to check the joint after painting?
Assemble two parts on a test base, apply the specified primer and enamel, then evaluate the seam from the front and under side light.
Where to start the layout?
For a noticeable accent wall, the layout is more often built from the center or architectural axis. Starting from the edge is suitable if the opposite side is hidden or less important.
Is it necessary to trim the edge planks?
Trimming is not always required. It is used when the field width is not a multiple of the module or symmetry is needed. After trimming, the useful width is recalculated.
How to finish the left and right edges?
Possible options include a frame molding, wooden corner, shadow gap, abutment to a niche or furniture, as well as a processed open end. The joint is chosen before ordering.
Can MLD-049 be brought directly to the outer corner of the wall?
Only after designing the end and transitioning to the adjacent plane. The open side edge must be protected and look intentional.
What to do if the wall height is greater than the length of the plank?
It is necessary to change the height of the decorative zone, create a horizontal divider, design a single transverse joint, or choose another solution. Random connections at different heights are undesirable.
Can MLD-049 be installed horizontally?
Such a layout can be considered if it meets the project and is tested on a mock-up. Then the length limitation applies to the width of the zone.
Is the profile suitable for a cabinet facade?
Yes, the profile is designed for furniture tasks, but you need to check the 8 mm thickness, gaps, handles, hinges, opening, and edge finishing.
Can MLD-049 be used in the kitchen?
The possibility depends on the specific location, base, and finishing system. Universal suitability near water or heat cannot be promised without checking the coating and operating conditions.
How to arrange sockets on a ribbed wall?
Sockets should be placed on the layout before arranging the panels. It is better to avoid having a joint fall on the edge of the frame. Sometimes a separate smooth field is created around electrical fittings.
Is a repair stock needed?
Yes, for a large panel it is useful to keep at least one suitable plank or a justified reserve of the same material and finish. Later it is harder to find a matching piece.
What stock should be added to the calculation?
There is no universal percentage. The stock depends on the number of cuts, holes, horizontal joints, trial finishing, and edge complexity.
Can short remnants be used?
Yes, if they match in material, length, geometry, and finish. On a solid vertical panel, random short fragments will not replace full-size pieces.
How is MLD-049 different from a ready-made slat panel?
MLD-049 is a separate linear profile. The connection scheme, field width, and edges are designed by the buyer. A ready-made panel usually has a pre-designed module.
When is it better to choose a ready-made panel?
When a standard connection is required, quick coverage of a large area, ready-made edges, or when there is no possibility to conduct a pair test and detailed layout.
Where can I see the current price for MLD-049?
Price and availability are checked in the product card after selecting the material and finish. They should not be fixed in a long-term article.
Where can I buy MLD-049?
The profile can be ordered on the STAVROS website. For a large panel, first agree on two test fragments, the connection scheme, material, length, edge, and final quantity.
One slat shows the texture, two show the truth about the future panel
MLD-049 can become the basis of an expressive fluted wall, furniture insert, or decorative facade. The size of 100 × 8 mm provides a clear scale, and the MDF, beech, and oak finishes allow the profile to be paired with different decoration options.
But the nominal width does not turn the product into an automatically repeatable module. The true quality of a large surface is determined at the boundary of two parts. It is there that it becomes visible whether the pattern continues, whether a separate line appears, whether a gap is needed, and what useful width should be used in the calculation.
Before purchasing the full batch, do a paired test, inspect the joint under side light, perform a trial finish, build the layout from the axis, and separately finish the edges. Only after this should you count whole slats, reserve, and accompanying materials.
STAVROS offers MLD-049 in confirmed finishes and helps select other wooden moldings, samples, and materials for installation and finishing. The buyer only needs to take the main professional step: not to transfer the impression of one beautiful strip to an entire wall without verification. Two adjacent parts will provide more useful information than a dozen visualizations and will allow ordering exactly the set that will truly assemble into a convincing panel.