
























































Article Contents:
- RPU.VRS-001 differs from a regular large rosette in its very design
- What the buyer gets: specifications without guesswork
- 911 × 911 mm is no longer a small decor around the wire
- A large ceiling rosette should have air around it
- What to measure before purchasing RPU.VRS-001
- A composite rosette does not mean eight identical parts
- Why then are NPU-507 and NPU-508 sold separately
- Kit or individual elements: what's the practical difference
- Composite or solid ceiling rosette: comparing not beauty, but the way they work
- It should not be claimed that a composite rosette is 'simpler' at all
- In RPU.VRS-001, the most important thing is not the first element, but the center of the entire system
- The chandelier sets the axis, but not always the geometric center of the room
- Ceiling cup of the chandelier: a small detail with a big impact
- Do not make the rosette a 'load-bearing' part of the chandelier
- A 911 × 911 mm template is more useful than a dozen photos
- Why you cannot draw just a circle
- What to do if the square seems too big
- What to do if 911 mm, on the contrary, is too little
- From socket to full ceiling center
- The molding contour should not come close
- When molding around RPU.VRS-001 is not needed
- When one ceiling socket is not enough
- No need to repeat NPU-507 and NPU-508 across the entire ceiling automatically
- If you want to design independently, start with the category of overlays
- RPU.VRS-001 is a good example of the difference between a kit and a set
- Can you start with one NPU-507 to see the ornament
- Can you buy only four NPU-507
- And four NPU-508
- Why it is useful for the buyer to know the article numbers of internal parts
- Relief height 18 mm: the ceiling ceases to be flat
- 18 mm cannot be assessed as "thick or thin" without context
- Monochrome makes the relief the main focus
- Contrast makes 911 mm visually even more noticeable
- Do not choose the color of RPU.VRS-001 separately from the chandelier
- Room with a low ceiling: size is not prohibited, but requires verification
- High ceiling requires looking not only at the size, but also at the chandelier
- Living room: the most natural scenario for a large RPU.VRS-001
- Dining room: the center needs to be connected to the table
- Kitchen-living room: do not confuse the center of the zone with the center of the entire room
- Bedroom: large decor should remain calm
- Study: chandelier and ceiling rosette form the axis of the space
- Hall and stairwell space: large scale works differently
- Restaurant, salon, showroom: first the project, then the quantity
- A large rosette does not have to be only classic
- In strict minimalism, RPU.VRS-001 may be unnecessary
- Composite rosette and stretch ceiling: first the technical scheme
- Plasterboard ceiling also does not cancel the base check
- Painted ceiling: first the condition of the coating
- Why it is especially dangerous to assemble a composite socket on an uneven surface
- Lay out the eight elements before lifting to the ceiling
- Why the "four plus four" should be recounted immediately after receipt
- Do not start installation if the orientation of at least one element is unclear
- First two axes, then eight parts
- Why you cannot rely only on the walls
- The chandelier is already hanging: can RPU.VRS-001 be added later
- The chandelier is not yet installed: this is a convenient moment for design
- Can it be made larger
- What to buy together with RPU.VRS-001
- RPU.VRS-001 or other ceiling rosettes
- How not to confuse RPU.VRS-001 with a regular decorative trim
- How not to confuse a rosette and a molding
- How not to confuse a ceiling rosette and a full set of ceiling decor
- How not to confuse a decorative rosette and a chandelier mounting plate
- Typical mistake #1: buying a rosette because of a close-up photo
- Mistake #2: not noticing that the rosette is composite
- Mistake #3: considering the eight elements interchangeable
- Mistake #4: buying one NPU-507 and expecting a ready-made ceiling rosette
- Mistake #5: starting the layout from a random trim
- Mistake #6: focusing on the center of the room, ignoring the chandelier
- Mistake #7: not measuring the ceiling canopy
- Mistake #8: measuring only the chandelier as a whole
- Mistake #9: considering 911 mm as "approximately a meter" and not making a template
- Mistake #10: immediately adding the outer molding contour
- Mistake #11: placing the molding almost flush against the rosette
- Mistake #12: spreading parts apart to make the rosette larger
- Mistake #13: compressing the layout for a small room
- Mistake #14: installing decor before the final decision on the chandelier
- Mistake #15: considering the rosette as part of the mounting
- Mistake #16: not checking the ceiling surface
- Mistake #17: assuming a composite structure is automatically simple
- Mistake #18: ordering multiple sets for a commercial space without a test zone
- Mistake #19: using NPU-507 and NPU-508 on dozens of areas just for the sake of matching
- Mistake #20: comparing the cost of one NPU-507 with a whole RPU.VRS-001
- Mistake #21: not checking the set of eight elements at once
- Mistake #22: choosing the socket color separately from the chandelier
- Mistake #23: using strong contrast without full-size visualization
- Mistake #24: taking the overall dimension of 911 × 911 mm as the size of each overlay
- Mistake #25: thinking that any large socket will solve the problem of a large chandelier
- When RPU.VRS-001 is especially worth considering
- When it's better to choose a different ceiling rosette
- When it's better to skip a separate rosette altogether
- When a full ceiling kit is needed instead of a single rosette
- When NPU-507 or NPU-508 alone is sufficient
- Polyurethane ceiling molding: better to buy as a system, not random items
- RPU.VRS-001 as the core of a large ceiling composition
- And the opposite scenario: one rosette and nothing else
- What not to do from scratch if you already have RPU.VRS-001
- Practical sequence before ordering
- First — the chandelier
- Then — a point on the ceiling
- Then — a square 911 × 911 mm
- After — the surrounding decor
- Then — the decision on the set
- And only then — the order
- What is RPU.VRS-001?
- Is RPU.VRS-001 a single piece?
- How many parts are included in the RPU.VRS-001?
- Are all eight elements the same?
- How many NPU-507 are needed for a full RPU.VRS-001?
- How many NPU-508?
- What is the overall size of the finished socket?
- Is 911 × 911 mm the size of one NPU-507?
- Can the NPU-507 be purchased separately?
- Can the NPU-508 be ordered separately?
- Is one NPU-507 a small RPU.VRS-001?
- If you buy four NPU-507, will you get a ceiling socket?
- If you buy four NPU-507 and four NPU-508 separately, will you get RPU.VRS-001?
- Can the distance between elements be changed?
- Can RPU.VRS-001 be made smaller than 911 mm?
- Can it be made larger?
- Is RPU.VRS-001 suitable for a chandelier?
- Do I need to know the chandelier size before purchasing?
- What chandelier size is needed for RPU.VRS-001?
- Why measure the ceiling canopy?
- Can I install the socket first and buy the chandelier later?
- Can the ceiling socket hold a chandelier?
- How is a modular socket better than a solid one?
- Which is easier to install — a solid or modular socket?
- How can I tell if the RPU.VRS-001 is too large?
- Can I estimate its size on the floor?
- Why does the socket seem huge on the floor?
- Will the RPU.VRS-001 fit a small room?
- Will it fit a large living room?
- Can I use the RPU.VRS-001 in a bedroom?
- Will it fit a dining room?
- Where should the socket be placed in a kitchen-living room?
- Can RPU.VRS-001 be used without a chandelier?
- Is a molding needed around the socket?
- When is molding useful?
- Where to find moldings?
- Can a molding frame be placed flush against RPU.VRS-001?
- What to do if one RPU.VRS-001 is not enough for a large ceiling?
- Can additional NPU-507 be used around a finished socket?
- Can NPU-508 be used separately on the ceiling?
- Where to look for other decorative overlays?
- How is RPU.VRS-001 different from a ceiling molding?
- How is it different from a full ceiling kit?
- Do I need to buy all the stucco of one article?
- Can RPU.VRS-001 be combined with wall moldings?
- Can the ceiling rosette be painted to match the ceiling color?
- Which shows relief better — color or light?
- Do NPU-507 and NPU-508 need to be painted the same way?
- What should be checked before installation?
- Why can't elements simply be glued "by the picture"?
- Should elements be laid out on the floor first?
- What to do if one element in the set is missing?
- What to do if one of the overlays is damaged?
- Where to buy RPU.VRS-001?
- Where can I see other ceiling rosettes?
- Where can I choose the rest of the ceiling molding?
- What is most important to check right before ordering?
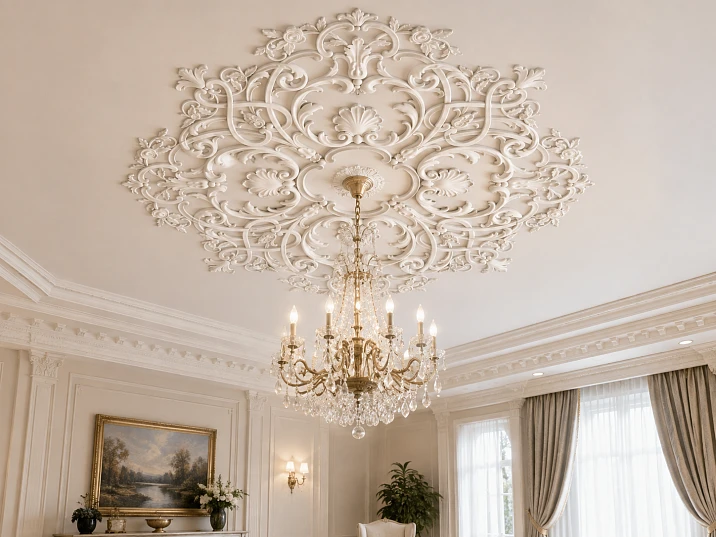
A large chandelier in the center of a room quickly reveals the weak spot of even a well-finished ceiling: around the ceiling cup, an empty plane remains, and the light fixture seems to hang by itself. A small decorative rosette does not always save the situation — next to a large chandelier, it can get lost. But a solid massive piece does not suit everyone either. When an expressive stucco center is needed, and working with one large rosette is not desirable, it is worth considering a different principle — a composite ceiling rosette for a chandelier, which is formed from several separate decorative elements.
This is exactly how RPU.VRS-001 is designed. It is a polyurethane ceiling rosette with a final dimension of 911 × 911 × 18 mm, but the order does not involve a single solid panel almost a meter by meter. The composition consists of eight elements: four decorative overlays NPU-507 and four NPU-508. After proper arrangement, they are perceived as a single large ceiling ornament around the chandelier.
Such a design changes the very approach to purchasing. The buyer needs to evaluate not only the overall size of 911 × 911 mm. It is necessary to understand whether this scale suits the room, how the composition will be positioned relative to the chandelier, where the mounting point of the light fixture is, what size its ceiling cup has, whether there is enough free ceiling space, and whether the full set of eight parts is really needed. A separate NPU-507 or NPU-508 can be bought independently, but one overlay is not yet RPU.VRS-001.
Therefore to buy the ceiling rosette RPU.VRS-001 it is reasonable not by the principle of "a large rosette is needed," but after a thorough check of the ceiling and the light fixture. Then a clear decorative system with a known composition and size is purchased, rather than just a striking ornament for which a place will have to be found later.
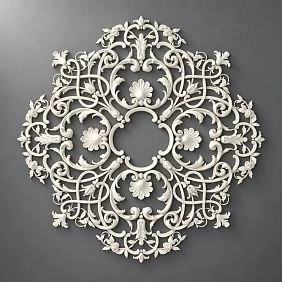
RPU.VRS-001 differs from an ordinary large rosette by its very construction
In the catalog of ceiling elements, the word "rosette" may create the expectation of a solid round or shaped piece that is lifted to the ceiling and installed in the center of the room. For RPU.VRS-001, such a picture is incorrect.
Its final decorative pattern is large — 911 × 911 mm — but it is formed from eight separate parts.
This is fundamental.
Composition of RPU.VRS-001:
-
4 decorative overlays NPU-507;
-
4 decorative overlays NPU-508.
Total — 8 elements.
Neither NPU-507 nor NPU-508 individually constitutes the entire ceiling rosette RPU.VRS-001. They are components of the finished scheme.
This can be imagined as an ornamental mosaic. Each element has its own shape, but the final effect appears only after all parts take their designated places relative to a single center.
For the buyer, this raises a completely different question: not "how to lift a 911 × 911 mm piece to the ceiling," but "how to pre-mark the 911 × 911 mm composition and accurately assemble it from eight parts."




What the buyer receives: specifications without guesswork
| Parameter | RPU.VRS-001 |
|---|---|
| Product type | Composite ceiling rosette |
| Article number | RPU.VRS-001 |
| Material | Polyurethane |
| Total size of the finished composition | 911 × 911 × 18 mm |
| Number of constituent elements | 8 |
| NPU-507 | 4 pcs. |
| NPU-508 | 4 pcs. |
| Main task | Decorative design of the ceiling center, including the chandelier area |
| Construction | Composite, made of individual decorative overlays |
| What to check especially | Scale on the ceiling, center of the light fixture, size of the chandelier ceiling cup, placement of all eight elements |
| Primary method of preliminary verification | Full-size marking of the 911 × 911 mm area |
The most important line here is not the material and not even the size.
These are eight elements.
It is the composition that determines the scenario of purchase, preliminary fitting, and installation.
Our factory also produces:
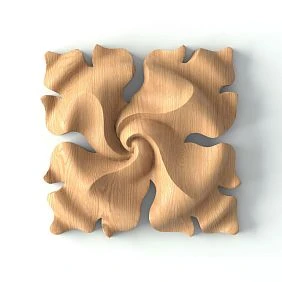
911 × 911 mm is no longer a small decor around the wire
A ceiling composition almost a meter in external dimension is perceived differently than a small rosette directly under the lamp shade.
It cannot be judged only by the product photo.
On the screen, even a large ornament fits within a few tens of centimeters. In a real room, the side of the composition is 911 mm, that is, just under a meter.
The simplest way to feel the scale is to mark out a 911 × 911 mm square on the ceiling or first on the floor.
Do not draw the ornament itself yet. Just outline the external dimension.
Look at the resulting area.
And only then imagine a chandelier inside it.
If the square seems unexpectedly large, it does not mean that RPU.VRS-001 is not suitable. Ceiling decor is evaluated from a distance of several meters, so a large size on top is perceived more calmly than the same dimension on a wall next to a person.
But if almost no free ceiling plane remains around the square, you need to stop and reconsider the scale.
Get Consultation
A large ceiling rosette must have air around it
Let's imagine a square or nearly square ceiling.
In the center — RPU.VRS-001 with a width of 911 mm.
Further to the walls, there remain large free fields.
Such a scheme is perceived as a central decorative island.
Now let's imagine a very small room where only a small gap remains from the edge of the composition to the ceiling cornice.
The center ceases to be a separate center. It almost merges with the perimeter.
This is already a completely different architecture.
Therefore, the question 'will a ceiling rosette of 911 mm fit into a room of such and such area' cannot be solved with a single universal table.
Real ceiling proportions are needed.
What to measure before purchasing RPU.VRS-001
Not the room area, but specifically the ceiling.
Required:
-
length of the room;
-
width of the room;
-
position of the electrical outlet and the center of the chandelier;
-
distance from the center of the light fixture to the nearest wall;
-
location of ceiling cornices, if they are already installed;
-
position of other light fixtures;
-
dimensions of the ceiling cup of the main chandelier;
-
possible hatches, sensors, ventilation elements, or other objects near the center.
After that, a 911 × 911 mm square is drawn on the plan relative to the actual chandelier point.
This immediately makes it clear whether a large ceiling rosette actually fits into the existing ceiling architecture.
A composite rosette does not mean eight identical parts.
This is an important point.
RPU.VRS-001 contains four NPU-507 and four NPU-508.
That is, two different article numbers are used.
You cannot buy eight NPU-507 and assume that you will get the same set.
You cannot take eight NPU-508.
You cannot replace one variety with another simply because both are decorative polyurethane overlays.
In the finished RPU.VRS-001, these parts have different roles in the overall ornament.
That is why a buyer who wants to guaranteed receive the intended composition finds it easier to consider RPU.VRS-001 as one product set, despite the physical separation into eight parts.
Why then are NPU-507 and NPU-508 sold separately?
Because a separate decorative trim is an independent product.
The buyer may not need the entire socket.
For example, it may be required:
-
to use one ornamental element in your own ceiling composition;
-
to decorate another location;
-
to create a custom design;
-
to replace or purchase a specific component after checking the actual task.
For such cases, you can buy the decorative trim NPU-507 separately or Buy decorative overlay NPU-508 separately.
But buying one part separately does not automatically turn it into a ceiling rosette measuring 911 × 911 mm.
This is especially important to understand before ordering.
Kit or individual elements: what is the practical difference
| Purchase option | What the buyer receives | When it makes sense | What to check |
|---|---|---|---|
| RPU.VRS-001 | A ready-made intended composition of 8 elements | Need exactly a rosette 911 × 911 × 18 mm | Does the overall size and ceiling layout fit |
| 1 × NPU-507 | One standalone decorative element | Need a separate overlay | Where and how it will be used |
| 1 × NPU-508 | One standalone decorative element | Need a separate overlay | Does it match its own composition |
| 4 × NPU-507 | Group of identical parts | The buyer designs an independent scheme | This is no longer automatically RPU.VRS-001 |
| 4 × NPU-508 | Group of identical parts | For an independent ceiling ornament | A separate layout project is needed |
| 4 × NPU-507 + 4 × NPU-508 | Set by the number of RPU.VRS-001 elements | Only if the buyer exactly reproduces the intended scheme | Quantity by itself does not replace the correct layout |
The last line is fundamental.
Even the presence of four pieces of each item does not eliminate the need to maintain the composition's geometry.
Therefore, if the goal is specifically RPU.VRS-001, it is more rational to start from the card of the entire rosette.
Composite or solid ceiling rosette: comparing not beauty, but the method of work
A buyer often comes to RPU.VRS-001 not because they fundamentally prefer composite decor.
The reason is more practical: a large ceiling center is needed, but a solid piece of such scale seems inconvenient for a specific project.
The comparison looks like this.
| Criterion | Composite RPU.VRS-001 | Solid ceiling rosette |
|---|---|---|
| Number of parts | 8 | 1 |
| Final size of RPU.VRS-001 | 911 × 911 × 18 mm | Depends on the specific model |
| Working with composition | Each part is installed in its own position | The finished form is assembled |
| Preliminary layout | Especially important | Usually the position of the entire part is assessed |
| Ability to use components independently | NPU-507 and NPU-508 are available as separate overlays | The solid model remains an independent product |
| Risk of error | Offset of individual parts relative to the common axis | Error in the position of the entire rosette |
| Who it suits | For those who need a large composite ornament | For those who prefer a solid form |
| Main question before ordering | Is the ceiling ready for a 911 × 911 mm composition and an eight-element layout | Does the size of one finished piece fit |
There is no winner here.
Solid and composite construction are two different approaches.
It is not worth claiming that a composite rosette is 'simpler' in general
It solves one problem but creates another.
Working with eight separate parts can be psychologically and physically more convenient than with one single piece almost a meter in size.
But in return, more precise marking is required.
In a one-piece socket, the relative position of the parts is already set by the shape itself.
For RPU.VRS-001, it needs to be maintained on the ceiling during assembly.
Therefore, the phrase "composite is always easier to install" would be too crude.
More precisely:
a composite structure allows working with individual elements but requires careful overall geometry.
This is exactly what the buyer should understand.
In RPU.VRS-001, the most important thing is not the first element, but the center of the entire system.
Imagine that you started installation with one cover and placed it visually "approximately in place".
Then the second one had to be moved a bit.
The third one — adjusted to fit the previous two.
On the fourth, it turned out that the pattern as a whole had shifted relative to the chandelier.
Therefore, a composite ceiling rosette cannot be assembled on the principle of "let's start here and figure it out as we go."
First, the center is determined.
For RPU.VRS-001, the semantic center is usually the area of the light fixture.
The overall geometry is built from it.
The chandelier sets the axis, but not always the geometric center of the room.
This is especially interesting in real interiors.
The electrical outlet may be slightly offset.
The table in the dining room may not be positioned at the geometric center of the room.
The kitchen-living room may have several functional zones.
The chandelier is sometimes deliberately placed above the table, rather than in the center of the entire ceiling.
What to do with RPU.VRS-001?
There is no need to automatically center the ceiling rosette relative to the room if the chandelier is located elsewhere and it is the chandelier that should become the center of the composition.
The ceiling rosette for the chandelier must work with the light fixture.
If the position of the chandelier itself raises doubts, the issue must be resolved before installing the molding.
Chandelier ceiling cup: a small detail with a big impact
Buyers often measure the entire diameter of the chandelier but forget the top cup — the part that attaches to the ceiling and hides the mounting.
For a composite rosette, this size is especially important.
The bowl is located directly in the center of the decorative system.
Need to ensure:
-
it does not cover an important part of the ornament;
-
it does not randomly fall on the edges of several elements;
-
there is a clear compositional connection between the shape of the luminaire and the stucco center;
-
access to the mounting unit of the luminaire remains technically correct.
RPU.VRS-001 is decorative trim around the luminaire, not part of its load-bearing mounting.
The luminaire itself must be installed in accordance with the ceiling structure and the requirements of its mounting system.
Do not make the rosette a "load-bearing" part of the chandelier
Polyurethane decor and luminaire mounting serve different purposes.
The socket decorates the ceiling.
The mounting unit holds the chandelier.
You cannot rely on decorative covers to bear the load of the light fixture.
Before decorative work, the suspension point must be clear and prepared for the specific chandelier.
This is especially important for heavy light fixtures and complex ceiling structures.
A 911 × 911 mm template is more useful than a dozen photos.
Want to know if RPU.VRS-001 fits your room?
Take some painter's tape.
Mark a 911 × 911 mm square on the floor or ceiling.
Mark the center.
If possible, move the size of the ceiling bowl of the chandelier inside.
Now step back.
On the floor, this will give a first idea of the size.
On the ceiling, it is much more accurate.
Even a simple border without a pattern immediately answers several questions:
-
is the center too large;
-
is there enough free space;
-
is the composition approaching the cornice;
-
does it conflict with other ceiling elements;
-
does it match the scale of the room.
Why you can't draw only a circle
RPU.VRS-001 has dimensions of 911 × 911 mm.
If you draw a circle with a diameter of 911 mm on the ceiling, you will get a different field geometry.
The outer points of the square footprint and the circle are distributed differently.
Therefore, for a preliminary check, it is better to mark the full outer rectangular footprint of 911 × 911 mm, and then imagine the actual ornament inside it.
What to do if the square seems too large
Don't rush to reject it.
First, look from a normal distance.
The ceiling is perceived from below.
The decor is farther from the eye than a dresser handle or wall molding.
Therefore, a nearly meter-long composition on the floor may seem huge, but after moving it to the ceiling, it becomes quite appropriate.
If it also takes up too much free space on top, then it makes sense to open the section and buy polyurethane ceiling rosettes, comparing RPU.VRS-001 with other options.
What to do if 911 mm, on the contrary, is too little
That is also possible.
Large living room.
High ceiling.
Large multi-arm chandelier.
Spacious hall.
In such conditions, even RPU.VRS-001 can be perceived only as a central core.
Then it is not necessary to look for an even larger single socket.
You can develop the ceiling around it.
For example, with a molding contour.
Or with a broader ceiling decor system.
Thus, a separate rosette becomes part of a multi-level composition.
From a rosette to a full-fledged ceiling center
If the size 911 × 911 mm appeals to you, but too much empty space remains around it, there is no need to artificially enlarge the RPU.VRS-001 itself.
It has a defined geometry.
It is better to create a second level.
For this, you can buy polyurethane moldings and form an additional contour around the central rosette.
The result is a sequence:
chandelier → RPU.VRS-001 → free field → molding frame → rest of ceiling.
This is already an architectural system, not a single decor.
The molding contour should not come close.
RPU.VRS-001 has a strong own ornament.
If the outer contour is drawn almost along the edge of its dimensions, the two systems will visually merge.
There needs to be a free ceiling field between them.
Its exact size is determined by the project, but the principle is simple: the viewer should first see the central rosette, then a pause, then the next line.
It is the emptiness that makes individual decorative levels clear.
When molding around RPU.VRS-001 is not needed
If the room is small.
If the ceiling is of standard height.
If the socket itself already occupies a noticeable part of the center.
If there is an expressive cornice along the perimeter.
If the chandelier is complex and rich.
In these cases, another frame can turn the ceiling into a set of competing contours.
RPU.VRS-001 can operate independently.
When one ceiling rosette is not enough
The opposite situation is a large hall.
The center is good, but the edges of the ceiling remain too empty.
Then it makes sense not just to add random overlays, but to Order polyurethane ceiling decor as a broader system.
This is already a different scale of the project.
RPU.VRS-001 is responsible for the center.
Ready-made ceiling compositions and additional elements can be responsible for the rest of the surface.
There is no need to repeat NPU-507 and NPU-508 across the entire ceiling automatically.
Since the buyer learns what the rosette consists of, there is a temptation to use the same overlays elsewhere.
For example, repeat NPU-507 at the corners of the ceiling.
Then NPU-508 along the sides.
Theoretically, individual overlays allow building custom patterns.
But repetition must have an architectural reason.
Otherwise, the main rosette loses its uniqueness and the ceiling turns into a uniformly filled decorative field.
It is useful for the center to remain the center.
If you want to design on your own, start with the category of overlays.
A buyer who likes the very principle of composite decor but finds RPU.VRS-001 unsuitable in size does not have to switch to a solid socket.
You can Buy decorative polyurethane overlays and develop your own composition.
But here, responsibility for proportions fully shifts to the designer.
The finished RPU.VRS-001 already has a final size and a known composition.
With a custom system, these decisions will have to be made independently.
RPU.VRS-001 is a good example of the difference between a kit and a set.
A set is eight parts randomly lying together.
A kit is eight parts pre-designed for a specific common result.
For RPU.VRS-001, the second model is fundamental.
Four NPU-507 and four NPU-508 are valuable not only as individual ornaments, but as parts of a system measuring 911 × 911 × 18 mm.
Therefore, comparing the price of the full product with the price of one NPU-507 without considering the quantity is incorrect.
These are different purchases.
Can you start with one NPU-507 to see the ornament?
If the buyer needs a physical sample of a specific element for their project, the separate NPU-507 card allows such a detail to be examined independently.
But one overlay will not show the final size of the entire RPU.VRS-001 on the ceiling.
To assess the scale, a dimensional template of 911 × 911 mm is still needed.
One element answers the question 'do I like this fragment'.
The full template answers 'does the entire rosette suit me'.
These are different checks.
Can you buy only four NPU-507?
NPU-507 can be considered as a separate decorative item, and you can choose the required quantity for your own project.
But four NPU-507 are not RPU.VRS-001.
The original ceiling socket also contains four NPU-508.
Therefore, such a set will be a different composition.
And four NPU-508
Same logic.
Four identical NPU-508 can only be used as a standalone set of elements for your own idea.
It does not reproduce the full composition of RPU.VRS-001.
If you specifically need the RPU.VRS-001 socket, focus on its full set.
Why it is useful for a buyer to know the article numbers of internal parts
Because the set ceases to be a "black box."
A person understands what exactly forms the pattern.
Can open the cards of the components.
Examine each element separately.
Compare them.
Understand whether a full set or a custom composition is needed.
If necessary, you can buy the decorative trim NPU-507 separately and separately Buy decorative overlay NPU-508 separately.
Such transparency is especially useful for designers and buyers who want not just a "ready-made beautiful thing" but understand the structure of the decorative system.
Relief height 18 mm: the ceiling ceases to be flat
The third dimension of RPU.VRS-001 is 18 mm.
It is not visible on the paper diagram.
On the ceiling, it works with light and shadow.
The relief receives side shadows.
In daylight, they change depending on the direction of the window.
In the evening, the pattern reacts differently to the chandelier and additional lighting fixtures.
Therefore, ceiling molding is not the same as a flat print or painted ornament.
It physically changes the surface.
18 mm cannot be assessed as "thick or thin" without context.
On a table, 18 mm is easy to measure with a ruler.
On the ceiling, the effect depends on viewing distance and light.
In a spacious living room, the relief may be perceived as moderate.
In a small room with a low-mounted light fixture, it is more noticeable.
Therefore, it is useful to evaluate not the number itself, but the combination of three parameters:
911 mm — overall scale;
18 mm — depth;
ceiling height — distance to the viewer.
Monochrome makes the relief the main focus
One of the calmest ways to incorporate RPU.VRS-001 into an interior is to finish it in the ceiling color, if the chosen finishing system allows it.
Then the pattern is not emphasized by a separate color.
It manifests through light and shadow.
This approach works well if the chandelier itself is already complex, shiny, multi-tiered, or colorful.
The ceiling rosette becomes an architectural backdrop rather than a second independent object.
The contrast makes 911 mm visually even more noticeable.
If the ornament stands out from the ceiling in color or tone, its boundaries are read more strongly.
The composition appears larger.
Therefore, a contrasting solution should be checked with a mockup especially carefully.
What was perceived calmly in white may become the dominant element of the entire room in dark or gold.
The specific painting method, surface preparation, and material compatibility should be chosen considering polyurethane and the actual ceiling finish.
Do not choose the color RPU.VRS-001 separately from the chandelier.
The ceiling rosette and the light fixture are in the same center.
The viewer sees them simultaneously.
If the chandelier is dark, it does not mean that the socket must also necessarily be dark.
If the chandelier is gilded, it is not necessary to repeat the entire ornament in gold.
Sometimes a calm socket in the color of the ceiling makes the light fixture more expressive.
Sometimes a light tonal accent is needed.
The solution is better checked on a visualization or sample, rather than by the color of the product in a separate photo.
Room with a low ceiling: size is not prohibited, but requires verification
It is impossible to formulate a rule: “RPU.VRS-001 is suitable only for ceilings above a certain height” if such a restriction is not in the confirmed characteristics.
But visual perception does indeed change.
The lower the ceiling, the closer the large socket is to the eye.
Therefore, with a standard room height, the 911 × 911 mm template is especially important.
If the pattern seems heavy, it is worth comparing others Polyurethane ceiling rosettes.
A high ceiling requires looking not only at the size, but also at the chandelier
In a spacious hall, a large RPU.VRS-001 may look proportional.
But if the chandelier is small, the connection between them will become weak.
The result will be a large stucco field and a small light fixture in the center.
This means that when choosing, you need to compare three scales:
-
the ceiling;
-
the rosette;
-
the chandelier.
None of them exists on its own.
Living room: the most natural scenario for a large RPU.VRS-001
In the living room, the central light fixture often plays a prominent role.
The room is visible from multiple points.
The ceiling has a large free area.
In such a space, a composite ceiling rosette for a chandelier made of polyurethane can become the main architectural center without the need to fill the entire ceiling with molding.
If the room is very spacious, an additional molding contour can be checked around RPU.VRS-001.
If the living room is more compact, it is better to first evaluate the rosette without additional frames.
Dining room: the center should be linked to the table
In a separate dining room, the chandelier is often positioned above the center of the dining table.
If the table is not placed at the geometric center of the room, the light fixture can also be offset.
Then the ceiling outlet should work specifically with the light point and the furniture group.
There is no need to forcibly return RPU.VRS-001 to the geometric center of the room if it breaks the connection between the chandelier and the table.
Kitchen-living room: do not confuse the center of the zone with the center of the entire space
A large combined space can have multiple lighting scenarios.
Above the island — pendants.
In the living room — a central chandelier.
Above the table — another light fixture.
In such a room, RPU.VRS-001 should not automatically arrange the "middle of the ceiling."
First, the main zone is selected.
If the ceiling rose is intended for a living room chandelier, its geometry should follow that zone, not the overall length of the room.
Bedroom: large decor should remain calm
In the bedroom, the ceiling rose is often visible from a lying position.
That is, a person views it longer and more frontally than in a hallway.
RPU.VRS-001 here can provide an expressive classical center, but decorative density requires special caution.
If there are already cornices, molding frames on the walls, a complex headboard, and textiles around, adding several more levels of ceiling stucco may be excessive.
One composite rosette and a calm perimeter often look more cohesive.
Study: chandelier and ceiling rosette form the axis of the space
A classical study often has clear geometry.
a table.
Cabinets.
Carpet.
Central ceiling light.
RPU.VRS-001 can support this axis.
But if the ceiling is already divided by coffers or complex frames, you first need to understand whether the composite rosette retains its own field.
Hall and stairwell space: large scale works differently
In a tall hall, the viewer often sees the ceiling from a greater distance.
A 911 × 911 mm rosette can be perceived much more calmly than in a room of standard height.
However, the attachment to the hanging chandelier is especially important.
If the light fixture descends to a great height, the ceiling cup and rosette remain above as an independent architectural element.
Restaurant, salon, showroom: first the project, then the quantity
In a commercial space, several identical ceiling centers may be needed.
For example, several halls or repeating light fixtures.
Here, it is dangerous to immediately multiply RPU.VRS-001 by the number of chandeliers.
First, check one zone.
Scale.
Perception from the entrance.
Light.
Furniture placement.
Only after this, repeat the system.
A large socket does not have to be only classic.
Carved ornamentation, of course, is more strongly associated with classicism and neoclassicism.
But modern eclecticism is often built precisely on contrast.
Simple ceiling.
Laconic walls.
Modern furniture.
And one complex stucco centerpiece.
In this case, RPU.VRS-001 becomes a deliberately historical accent.
The main thing is not to try to add carved decor to every surface at once.
In strict minimalism, RPU.VRS-001 may be unnecessary.
This is also an honest answer.
If the interior is built exclusively on planes, hidden lighting, and a complete absence of ornament, a large carved rosette will change its character.
If that's exactly what you want — good.
If not — it's better to consider a different ceiling decor.
The product should not be sold to the customer against the interior task.
Composite rosette and stretch ceiling: first the technical scheme
There is no universal statement "just glue RPU.VRS-001 onto any stretch ceiling."
Stretch systems have their own requirements for embedded elements, lights, and decorative parts.
Therefore, the technical base and mounting method are determined first.
The decorative scheme of RPU.VRS-001 is designed already taking into account the prepared ceiling structure.
It is especially important to decide the chandelier node in advance.
A plasterboard ceiling also does not eliminate the need to check the base.
Externally, the surface may be perfectly flat.
But decorative installation still depends on the specific base, finish, and chosen mounting system.
Therefore, you cannot choose adhesive solely based on advice for 'polyurethane in general,' ignoring the ceiling itself.
It is better to verify precise recommendations before starting work.
Painted ceiling: first, the condition of the coating
If the paint is peeling, poorly adhered, or the base has defects, installing over it will not fix the problem.
A large composition measuring 911 × 911 mm requires a prepared field.
The surface must allow for accurate marking and the intended fixation of decorative elements.
Why it is especially dangerous to assemble a composite rosette on an uneven surface
In a solid piece, the geometry of the parts is already linked.
With eight separate elements, each section contacts the ceiling independently.
If the surface has local unevenness, the relative position of the parts may visually suffer.
Therefore, before decorative installation, evaluate the plane of the entire square field, not just the point under the chandelier.
Lay out the eight elements before lifting to the ceiling.
A useful preliminary step is to understand the order composition and the relative arrangement of parts before final installation.
You should have:
-
four NPU-507;
-
four NPU-508.
First, check the quantity.
Then refer to the provided RPU.VRS-001 scheme.
Don't find out for the first time which part goes where while already standing on a stepladder.
Why "four plus four" should be recounted immediately after receipt
It's easier to make a mistake with the quantity than it seems.
Boxes may be opened at different times.
Some elements are moved to another room.
One item number is visually mistaken for another.
For a regular single overlay, this is unpleasant.
For a symmetrical ceiling composition, the absence of one part immediately stops the entire scheme.
Therefore, completeness is checked in advance.
Do not start installation if the orientation of at least one element is unclear.
In a decorative pattern, rotating a part can change the design.
Even if it physically fits in the right place.
Therefore, first you need to understand the entire composition as a whole.
Do not install four elements and then "adjust the remaining ones."
First two axes, then eight parts
Almost any symmetrical central composition benefits from marking the main axes.
This is especially important for RPU.VRS-001 due to its size.
First, the center is determined.
Through it, two perpendicular lines.
After that, the positions of individual elements can be controlled relative to the common center, rather than relative to each other.
This reduces error accumulation.
Why you shouldn't rely only on walls
In old and even new rooms, walls may not be perfectly parallel.
If you measure the same distance from four walls, the centers may not coincide with the actual chandelier point.
Therefore, first you need to determine what is the main reference point of the project:
room geometry;
chandelier;
furniture zone;
existing ceiling contour.
For the article about RPU.VRS-001, the key reference point is more often the light fixture itself.
The chandelier is already hanging: can RPU.VRS-001 be added later
The idea is only possible after checking the specific mounting assembly.
You need to understand:
is it safe to work around the existing light fixture;
is the ceiling area accessible;
does the canopy interfere with the layout;
is temporary removal of part of the fixture required for proper work.
Do not try to slide decorative trim around the chandelier blindly.
The sequence of actions depends on the specific design.
The chandelier is not yet installed: this is a convenient time for planning
If the fixture is only selected for now, you can compare in advance:
size of its ceiling bowl;
the center;
diameter or width of the chandelier itself;
Can it be made larger
Same logic.
Physically spreading the elements is possible within a custom decorative project, but the result can no longer be considered the standard RPU.VRS-001 measuring 911 × 911 mm.
If a larger ceiling center is required, it is better to develop the composition with an external molding contour or additional decor, while keeping the rosette itself in its intended geometry.
What to buy together with RPU.VRS-001
There is no mandatory set of related products for every ceiling. But there are several directions that are logical to consider depending on the project.
| What to look at | When this is needed | Why | Commercial transition |
| RPU.VRS-001 | Need a ready-made composite rosette 911 × 911 × 18 mm | Get the intended system of 8 elements | to buy the ceiling rosette RPU.VRS-001 |
| Ceiling rosettes section | RPU.VRS-001 turned out to be too large or does not match the pattern | Compare other options | buy polyurethane ceiling rosettes |
| NPU-507 | A separate component is needed | Use the overlay independently | buy the decorative trim NPU-507 separately |
| NPU-508 | A second type of component is needed | Custom decorative task | Buy decorative overlay NPU-508 separately |
| Decorative overlays | Requires a custom ceiling scheme | Choose other shapes | Buy decorative polyurethane overlays |
| Moldings | The 911 mm center needs to be connected to a large ceiling surface | Make an outer contour | buy polyurethane moldings |
| Ceiling decor | You need not just one socket, but a whole system | Design a large ceiling area | Order polyurethane ceiling decor |
| General catalog of stucco decor | The project includes ceiling, walls, and other surfaces | Select elements in a unified system | You can buy ready-made stucco matching the Baroque style. Calculate the quantity: linear meters of cornices and moldings, number of rosettes, pilasters, consoles, corner elements. Add a ten to fifteen percent allowance for trimming. |
The table is useful precisely as a route.
It does not mean that RPU.VRS-001 necessarily requires moldings, additional overlays, and a full ceiling set at the same time.
For many interiors, a ready-made composite socket is sufficient.
RPU.VRS-001 or other ceiling sockets
If the main request is "buy a ceiling socket for a chandelier," you should not start with the article number.
Start with the size.
Then — the construction.
Then — the ornament.
RPU.VRS-001 is especially interesting to a buyer who fits the size 911 × 911 mm and likes the principle of an eight-element composition.
If you need a single solid shape or a different scale, it makes sense buy polyurethane ceiling rosettes after comparing the entire section.
How not to confuse RPU.VRS-001 with a regular decorative overlay
NPU-507 is an overlay.
NPU-508 is an overlay.
RPU.VRS-001 is a ceiling rosette assembled from several overlays.
If a buyer sees a photo of a separate NPU-507 and thinks it is a "small version of RPU.VRS-001," that is incorrect logic.
This is a component.
Just as one tile is not a whole panel.
How not to confuse a rosette and a molding
The rosette forms the central decorative node.
The molding forms a line.
From molding, you can make a square, rectangular, or other frame around the center, but it will not replace the ornament RPU.VRS-001.
Conversely, eight overlays do not perform the function of a long continuous frame.
Therefore, these categories complement each other.
How not to confuse a ceiling rosette and a full set of ceiling decor
RPU.VRS-001 is responsible for a specific central composition.
Full ceiling decor can include many more elements and cover a larger area.
If the buyer only needs to frame a chandelier, a ready-made kit for the entire ceiling may be excessive.
If, however, architecture from the center to the walls is required, a single RPU.VRS-001 may not be enough.
Then you need Order polyurethane ceiling decor as a separate category of solutions.
How not to confuse a decorative rosette with a chandelier mounting plate
These are fundamentally different things.
RPU.VRS-001 solves an aesthetic task.
The mounting plate or other load-bearing component relates to the structure of the luminaire and the ceiling.
Stucco decor does not replace fasteners.
This needs to be determined before any decorative work.
Typical mistake #1: buying a socket because of a close-up photo
In the photo, the ornament always looks expressive.
But you don't see the real relation to the room.
First check — a 911 × 911 mm square on your ceiling.
Mistake #2: not noticing that the socket is composite
The buyer expects one large piece.
They get eight elements.
It feels like something is missing.
In fact, the composition of 4 × NPU-507 + 4 × NPU-508 is the principle of RPU.VRS-001.
Mistake #3: considering the eight elements interchangeable
They are divided into two articles.
Four of one type and four of another.
The proportion of the composition cannot be changed if the original composition is required.
Mistake #4: buying one NPU-507 and expecting a finished ceiling outlet
One element is just one fragment.
The dimensions of RPU.VRS-001 refer to the full composition.
Mistake #5: starting the layout from a random overlay
The overall center and geometry must be determined first.
Otherwise, the error will accumulate.
Mistake #6: focusing on the center of the room, ignoring the chandelier
If the chandelier is deliberately offset above the table, an outlet placed in the geometric center of the room will end up separate from it.
Mistake #7: not measuring the ceiling canopy
It can overlap part of the central zone or visually conflict with the molding.
Mistake #8: measuring only the chandelier as a whole
The diameter of the lower part of the fixture does not answer the question about the central mounting point.
Both measurements are needed.
Mistake #9: treating 911 mm as "about a meter" and not making a template
The difference between mental and real scale is often surprising.
A template takes a few minutes and can save the entire project.
Mistake #10: immediately adding an external molding contour
First, look at RPU.VRS-001 one.
Perhaps the ceiling needs nothing more.
Mistake #11: placing the molding almost flush against the outlet
The center needs a free field.
Otherwise, the two levels of decor merge together.
Mistake #12: spreading parts apart to make the outlet larger
Then the intended geometry of RPU.VRS-001 changes.
This is already an author's composition.
Mistake #13: compressing the layout for a small room
If the size doesn't fit, it's better to choose a different model rather than deform the ready-made scheme.
Mistake #14: installing decor before the final decision on the chandelier
Later it may turn out that the bowl of the new light fixture has a different size or the suspension point changes.
Mistake #15: considering the socket part of the mounting
It is decorative.
The weight of the light fixture should be supported by the intended structural element.
Mistake #16: not checking the ceiling surface
Unevenness and weak coating cannot be fixed with a decorative cover.
First the base.
Mistake #17: assuming a composite structure is automatically simple
Eight small details are convenient for one, but require precise marking.
Error #18: ordering multiple sets for a commercial space without a test zone
Repeating the erroneous scale is expensive and pointless.
First, one full-size mockup.
Mistake #19: using NPU-507 and NPU-508 on dozens more areas just for the sake of matching
A unified style does not require literally repeating one pattern everywhere.
Mistake #20: comparing the cost of one NPU-507 with a whole RPU.VRS-001
These are purchases with different compositions.
You need to compare complete solutions.
Error #21: not checking the set of eight elements at once
Before starting work, all four NPU-507 and all four NPU-508 must be recalculated.
Mistake #22: choosing the socket color separately from the chandelier
In the center of the ceiling, they are read simultaneously.
Mistake #23: using strong contrast without full-size visualization
Contrast increases the visual presence of the ornament.
Mistake #24: taking the overall dimension of 911 × 911 mm as the size of each overlay
This is the size of the finished entire composition.
Not of a separate NPU-507 or NPU-508.
Mistake #25: thinking that any large socket will solve the problem of a large chandelier
Size is only one criterion.
Need suitable proportions, style, center, and free field.
When RPU.VRS-001 is especially worth considering
When a large ceiling rosette is needed.
When you don't want to work with a solid decorative element of almost a meter in size.
When you like a composite ornament.
When the chandelier should get a noticeable stucco center.
When the ceiling provides enough free field.
When the size 911 × 911 mm passes a full-size check.
When the buyer is ready to carefully mark out eight elements.
When the interior allows expressive polyurethane ceiling molding.
When it's better to choose a different ceiling rosette
If 911 mm is too much.
If you need a compact center directly under the lamp shade.
If the principle of composite assembly is not suitable.
If you want one ready-made solid shape.
If the RPU.VRS-001 pattern does not stylistically match the interior.
Then the correct next step is — buy polyurethane ceiling rosettes after comparing other models.
When it's better to abandon a separate rosette altogether
Sometimes the ceiling already has a complex decorative center.
For example, several molding frames converge to the chandelier.
Or a large caisson is used.
Or the lamp is built into a separate architectural niche.
An additional RPU.VRS-001 may be redundant.
There is no need to add a product just for the sake of having molding.
When instead of a single socket, a full ceiling kit is needed
If the task is not to "decorate a chandelier" but to "make the entire ceiling classical."
If required:
perimeter architecture;
several molding contours;
ornamental inserts in the corners;
connection of the central node with the edges of the ceiling.
Then it is more reasonable to look Order polyurethane ceiling decor, and RPU.VRS-001 should be considered only as one of the possible central elements.
When NPU-507 or NPU-508 alone is sufficient
If a full socket isn't needed.
If the task is local.
If the designer builds their own ornament.
If a specific overlay is used in another zone.
In this case, there is no point in buying the entire set just for one type of element.
Polyurethane molding on the ceiling: it is better to buy as a system rather than random items.
The ceiling especially doesn't tolerate randomness.
On the wall, a small error can be hidden behind furniture.
On the ceiling, all axes are exposed.
The chandelier shows the center.
The cornice shows the perimeter.
Moldings show the geometry.
Therefore You can buy ready-made stucco matching the Baroque style. Calculate the quantity: linear meters of cornices and moldings, number of rosettes, pilasters, consoles, corner elements. Add a ten to fifteen percent allowance for trimming. for a ceiling project, it is more useful after the overall scheme has been formed.
First, the center.
Then, the outer lines.
Then, additional overlays.
Not the other way around.
RPU.VRS-001 as the core of a large ceiling composition
Imagine a spacious living room.
In the center — a chandelier.
Around it — RPU.VRS-001.
Even further — a large open field.
Then a thin molding frame.
Along the perimeter is a cornice.
Here, each element has its own level.
The chandelier is the functional and lighting center.
RPU.VRS-001 is ornamental.
Molding is geometric.
Cornice — the boundary of the room.
This is how the ceiling becomes architecture.
And the opposite scenario: one socket and nothing else.
Bedroom.
White ceiling.
Calm walls.
In the center, a neat chandelier.
Around it, only RPU.VRS-001.
no additional frames.
Such a scenario is also complete.
A large composite rosette itself can provide enough relief.
Not every decorative solution needs to be continued.
What should not be done from scratch if RPU.VRS-001 already exists
You don't need to come up with eight unrelated overlays on your own.
You don't need to pick four similar parts of one size and four more of another.
You don't need to design each ornament element separately.
You don't need to cut out a complex carved pattern yourself.
You don't need to search for random fragments on different catalog pages if the goal is exactly the finished RPU.VRS-001.
Already known:
final dimensions;
material;
number of elements;
part numbers of the components.
The buyer is left to decide more important tasks: whether the system suits the ceiling, chandelier, and interior.
Practical sequence before ordering
This is not an installation instruction, but a buyer's check.
First — the chandelier
Choose or at least determine its main dimensions.
Especially the ceiling cup.
Then — the point on the ceiling
Where is it actually located?
Does it coincide with the intended center of the composition?
Then — a square of 911 × 911 mm
Mark it.
Look from the floor.
Then — surrounding decor
Is there a cornice?
Moldings?
Other light fixtures?
Then — decision on the set
Is it specifically RPU.VRS-001 or a separate NPU-507/NPU-508?
And only then — order
This reduces the risk of buying a flashy product that doesn't solve the specific task.
How to buy RPU.VRS-001 on STAVROS
If the full-size dimension fits, the light fixture is checked, and the modular system suits you, you can to buy the ceiling rosette RPU.VRS-001.
Before placing the order, double-check:
- item number RPU.VRS-001;
- overall size 911 × 911 × 18 mm;
- composition of four NPU-507 and four NPU-508;
- the actual layout of your own ceiling;
- the position of the chandelier;
- ceiling rosette;
- the need for additional moldings or other decor.
If there is still doubt specifically about the scale, it is wiser to first return to the section of polyurethane ceiling rosettes and compare solutions, rather than trying to make RPU.VRS-001 fit at any cost.
FAQ: composite ceiling rosette RPU.VRS-001
What is RPU.VRS-001?
RPU.VRS-001 is a composite ceiling rosette made of polyurethane. The finished composition has dimensions of 911 × 911 × 18 mm.
Is RPU.VRS-001 a single piece?
No. It consists of eight separate decorative elements.
How many parts are included in RPU.VRS-001?
Eight: four NPU-507 and four NPU-508.
Are all eight elements identical?
No. Two different part numbers are used in equal quantities.
How many NPU-507 are needed for a full RPU.VRS-001?
Four.
How many NPU-508?
Also four.
What is the total size of the finished socket?
911 × 911 × 18 mm.
Is 911 × 911 mm the size of one NPU-507?
No. This is the overall dimension of the entire assembled RPU.VRS-001.
Can NPU-507 be purchased separately?
Yes, it can. buy the decorative trim NPU-507 separately.
Can I order NPU-508 separately?
Yes. For a standalone task, you can. Buy decorative overlay NPU-508 separately.
Is one NPU-507 a small RPU.VRS-001?
No. It is only one component decorative element.
If you buy four NPU-507s, will you get a ceiling rosette?
Not RPU.VRS-001. The full composition also requires four NPU-508s.
If you buy four NPU-507s and four NPU-508s separately, will you get RPU.VRS-001?
The quantity matches the composition, but to achieve the original composition, you must follow the specified layout. Therefore, if your goal is to buy exactly RPU.VRS-001, it is easier to start from the full product page.
Can I change the distance between elements?
If you change the specified layout, the final composition changes as well. Such a variant should already be considered as a standalone project.
Can RPU.VRS-001 be made smaller than 911 mm?
The finished design should not be considered automatically scalable. If the dimensions do not fit, it is better to choose a different ceiling rosette.
Can it be made larger?
Separating the components will change the original composition. To increase the overall ceiling pattern, it is better to consider an external molding contour.
Is RPU.VRS-001 suitable for a chandelier?
Yes, one of the main purposes of such a ceiling rosette is to frame the area around a chandelier.
Do I need to know the chandelier size before purchasing?
It is advisable. This allows comparing the scale of the light fixture and the rosette.
What chandelier size is needed for RPU.VRS-001?
It is incorrect to specify a universal range without confirmed limitations. You need to compare the actual chandelier with the rosette template of 911 × 911 mm.
Why measure the ceiling rosette?
It is located in the central part of the ceiling assembly and directly interacts with the decorative composition.
Can you install the rosette first and buy the chandelier later?
Such an order increases the risk of mismatch. It is better to at least know the dimensions and type of the future light fixture in advance.
Can a ceiling rosette hold a chandelier?
No, the decorative system cannot be considered as load-bearing mounting for the light fixture. The installation of the chandelier is determined by the ceiling structure and the fixture itself.
How is a composite rosette better than a solid one?
This is not a question of absolute superiority. The composite RPU.VRS-001 allows forming a large ornament from individual elements, but requires precise marking.
Which is easier to install — a solid or a composite rosette?
It depends on the project. A solid model has a ready-made internal geometry, while a composite one requires precise placement of each component.
How to understand if the RPU.VRS-001 is too large?
Mark the external dimensions of 911 × 911 mm on the ceiling and look at it from the usual points in the room.
Can the size be assessed on the floor?
Yes, that is a good first test, but the final perception is better checked on the ceiling itself.
Why does the socket seem huge on the floor?
Because on the ceiling it will be farther from the eyes and perceived at a different scale.
Will the RPU.VRS-001 fit a small room?
This is determined not only by the area, but also by the actual ceiling dimensions, height, chandelier, and the amount of free space around the composition.
Will it fit a large living room?
It may fit if the 911 × 911 mm dimension matches the scale of the light fixture and the room.
Can RPU.VRS-001 be used in a bedroom?
Yes, if the size and decorative richness suit the ceiling and the room's style.
Will it work for a dining room?
Yes, especially if the rosette is tied to the chandelier above the dining table and accounts for the actual center of that zone.
Where should the rosette be placed in a kitchen-living room?
Relative to that light fixture and the functional zone it should frame. The geometric center of the entire room is not always the correct point.
Can RPU.VRS-001 be used without a chandelier?
As a standalone decorative ceiling element, it requires a separate compositional check. The main purpose of RPU.VRS-001 in the task at hand is to frame the center around the light fixture.
Is a molding needed around the rosette?
Not necessarily. First, RPU.VRS-001 should be evaluated on its own.
When is a molding useful?
When the room is large and the central rosette needs to be connected to a broader ceiling architecture.
Where can I find moldings?
You can buy polyurethane moldings and select a profile for a separate ceiling frame.
Can a molding frame be placed flush against RPU.VRS-001?
It's better to first assess the free space between the two decorative levels. A frame that is too tight may visually merge with the rosette.
What to do if one RPU.VRS-001 is not enough for a large ceiling?
You can consider a wider system and Order polyurethane ceiling decor.
Can additional NPU-507 be used around a finished rosette?
You can design your own composition, but that is a separate design solution, not the original composition of RPU.VRS-001.
Can NPU-508 be used separately on the ceiling?
Yes, as an independent decorative element in its own scheme.
Where to look for other decorative overlays?
You can Buy decorative polyurethane overlays and choose a shape for an individual ceiling pattern.
How is RPU.VRS-001 different from a ceiling molding?
RPU.VRS-001 forms a central ornament, while a molding forms an extended line or frame.
How is it different from a full ceiling kit?
RPU.VRS-001 decorates a specific central area. A full ceiling kit can cover a significantly larger area and include different types of decor.
Do I need to buy all the stucco of one article number?
No. Different types of products can be used in one system if their combination is provided for by the project.
Can RPU.VRS-001 be combined with wall moldings?
Yes, if the sizes and style are linked by a common interior design. It is not necessary to repeat the same ornament literally.
Can the ceiling rosette be painted to match the ceiling color?
Such a solution is possible as a design approach. The specific preparation and painting system should be selected considering the polyurethane and the actual coating.
Which shows the relief more strongly — color or light?
Both factors. With monochrome finishing, the main role begins to be played by the chiaroscuro from the relief up to 18 mm high.
Do NPU-507 and NPU-508 need to be painted the same way?
If they should be perceived as a single RPU.VRS-001, a unified finishing logic usually looks more cohesive. Any intentional difference in colors should be visualized in advance.
What should be checked before installation?
Completeness, center, external dimension 911 × 911 mm, chandelier position, ceiling cup, ceiling surface, and the chosen layout scheme for all eight parts.
Why can't you just glue the elements "by the picture"?
On the ceiling, a slight shift of one part relative to the common axis can disrupt the symmetry of the entire composition.
Do you need to first lay out the elements on the floor?
A preliminary layout helps to check the quantity and understand the structure of the ornament before working on the ceiling.
What to do if one element in the set is missing?
Do not start assembling an incomplete composition. First, you need to clarify the completeness of the order.
What to do if one of the overlays is damaged?
Since NPU-507 and NPU-508 exist as separate products, you can clarify the possibility of ordering the desired article separately.
Where to buy RPU.VRS-001?
You can to buy the ceiling rosette RPU.VRS-001 after checking the size and ceiling scheme.
Where to see other ceiling rosettes?
In a separate category, you can buy polyurethane ceiling rosettes and compare models.
Where to pick the rest of the ceiling molding?
If the project extends beyond a single rosette, you can You can buy ready-made stucco matching the Baroque style. Calculate the quantity: linear meters of cornices and moldings, number of rosettes, pilasters, consoles, corner elements. Add a ten to fifteen percent allowance for trimming. and connect the central decor with other elements of the room.
What is most important to check right before ordering?
Three things: the 911 × 911 mm dimension on the actual ceiling, the position of the chandelier, and understanding that RPU.VRS-001 consists of eight separate elements. If these three conditions are clear, making the remaining decisions is significantly easier.
A composite rosette is good not because there are more parts, but because they form the desired center.
RPU.VRS-001 is interesting to consider precisely as an alternative to the usual logic of a large ceiling rosette.
The buyer needs a large stucco center.
But instead of a single piece of almost a meter in size, he gets a composition of eight components.
Four NPU-507.
four NPU-508.
After proper layout — 911 × 911 × 18 mm.
This is the main feature of the product.
However, the composite structure requires discipline. First the center. Then marking. Then checking all parts. And only after that final installation. Trying to assemble the pattern "in place" without an overall plan negates the main advantage of the kit — the intended geometry.
Before purchasing, do one thing that is more useful than any theoretical reasoning: mark a 911 × 911 mm square on your ceiling around the intended chandelier point.
If the size looks organic, check the ceiling cup of the light fixture.
Then decide whether one RPU.VRS-001 is enough or the ceiling needs an external molding contour.
If the entire system fits, you can to buy the ceiling rosette RPU.VRS-001.
If the almost meter-long composition is too large, it is wiser to move to the category and buy polyurethane ceiling rosettes of a different scale.
If, on the contrary, one rosette is not enough for a large hall, the next level is Order polyurethane ceiling decor and build ceiling architecture around the central point.
And for independent ornamental solutions, you can use Polyurethane decorative appliques and molding profiles as separate constructor elements.
In this case, STAVROS offers the buyer two paths at once. You can choose the ready-made composite system RPU.VRS-001 and accurately reproduce the intended center. Or you can take individual NPU-507, NPU-508, moldings, and other polyurethane stucco elements for your own project.
For a buyer who needs exactly a large ceiling rosette for a chandelier but does not want to deal with a single solid piece, the first path is especially clear: eight separate elements, one calculated decorative center, and a known overall size of 911 × 911 × 18 mm.