Article Contents:
- First screen: what to buy for a beautiful under-table
- Why legs alone are not enough: the architecture of the under-table
- What the under-table consists of
- Which legs to choose for the task: breakdown by table types
- Legs for dining table
- Legs for kitchen table
- Legs for coffee table
- Legs for a console table
- Legs for a desk
- Legs for a vanity table
- Where to use polyurethane molded decor on a table
- Front panel of the sideboard
- Side parts of the underframe
- Lower molding belt
- Corner Decorative Elements
- Drawer front
- Decorative line under the tabletop
- How to combine wooden legs and polyurethane decor: material logic
- Option one: all in one color
- Option two: natural legs + painted decor
- Option three: tinted legs + painted decor matching the wall color
- Ready-made kits for different table types
- Classic style dining table
- Neoclassical coffee table
- Neoclassical console
- Makeup table
- Kitchen table
- Installation of legs and decor: work sequence
- Step one: frame assembly
- Step two: surface preparation for decor
- Step three: installation of polyurethane decor
- Step four: final painting
- Step five: final assembly
- Choosing leg fasteners: what's important to know
- Threaded bushings and bolts
- Furniture corners and screws
- Special plates with bolt
- Calculating table base decor: how to avoid buying too much and making mistakes
- Calculating molding for the frame on the apron
- Calculating overlays
- Calculating the lower molding belt
- Eight mistakes when buying table legs and decor
- Comparison table: table base decor by table type
- Additional elements: what to consider beyond the main set
- Wooden overlays for corner transitions
- Polyurethane trim
- Decor for moldings
- Finish coating: varnish, paint, or oil
- Frequently Asked Questions
- About the Company STAVROS
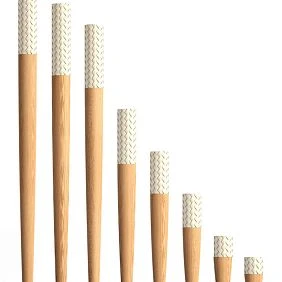
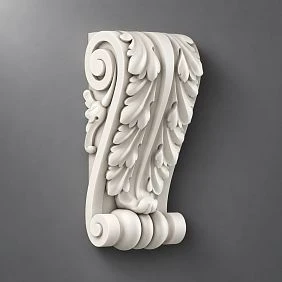
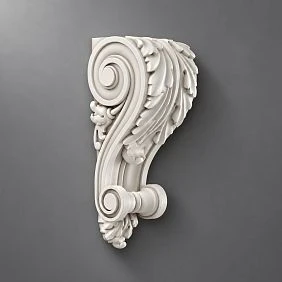
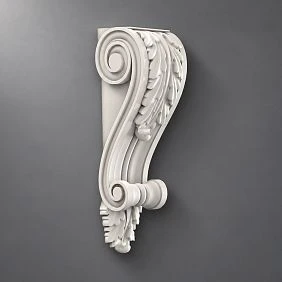
Beautiful Legs for tables — a necessary condition. But not sufficient. Four excellent legs on a flat, unadorned apron — that is an unfinished image. Add to them Polyurethane moldings for furniture, decorative overlays on the front panel, a thin horizontal line under the tabletop — and the same table acquires a completely different interpretation: architectural, complete, expensive.
This article is about how to assemble such a set. About what to buy besides legs. And about how wood and polyurethane work together, creating an underframe that you want to examine.
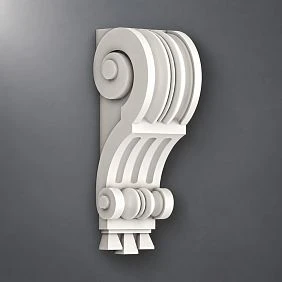
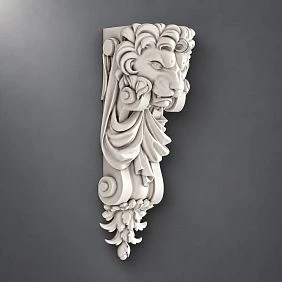
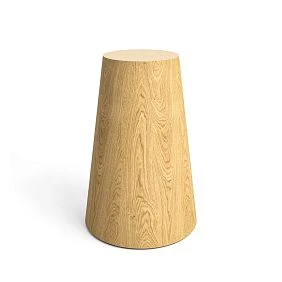
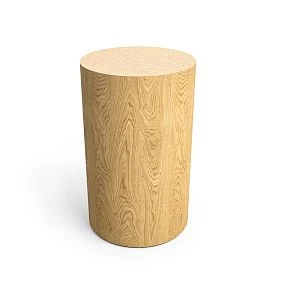
First screen: what to buy for a beautiful underframe
Here is a concrete answer — without preamble:
Complete set for designing an underframe in a classic style:
-
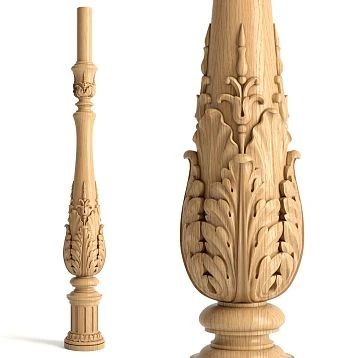
Wooden legs for table — according to the number of supports + selection based on load and style.
-
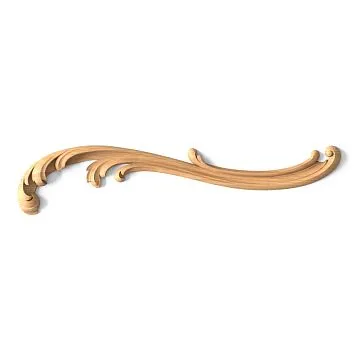
decorative elements for furniture — wooden overlays for corners and accents.
-
Polyurethane moldings for furniture — frames on the apron and decorative horizontals.
-
molded decoration made of polyurethane — overlays for the front panel.
-
Glue — specialized for polyurethane. More about selection — what to glue polyurethane molding with.
-
Acrylic sealant.
-
Acrylic primer.
-
Paint or varnish.
-
Fasteners for legs (bolts, nuts, studs, or threaded inserts).
-
Spare decor 12–15%.
This is not 'wishes for the future' — this is the real minimum for the table to have a finished look, rather than looking like 'legs + tabletop'.




Why legs alone are not enough: the architecture of the underframe
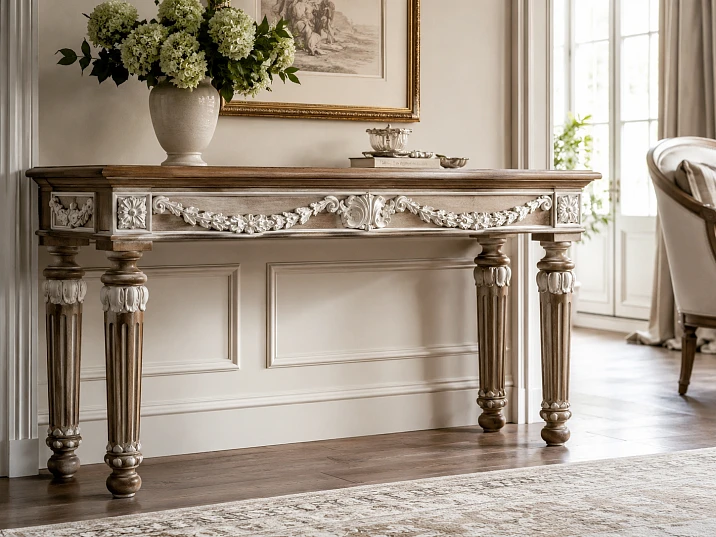
Imagine a classic table in an expensive restaurant or country house. Legs — turned, carved, with an elegant profile. Apron — with a molding frame and a small overlay in the center. Under the tabletop — a thin decorative horizontal line. Everything works as a single whole.
Now remove everything except the legs. A flat apron, no relief — and the same turned legs no longer 'read' as classic. They just stick out from under the tabletop.
That is why the underframe is a system. And Wooden legs for table — the first and most important element of this system, but not the only one.
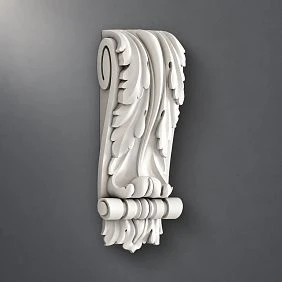
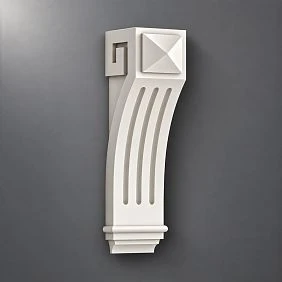
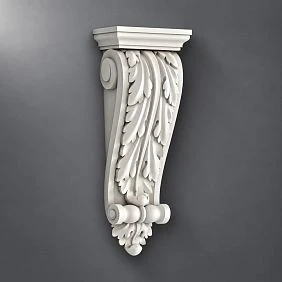
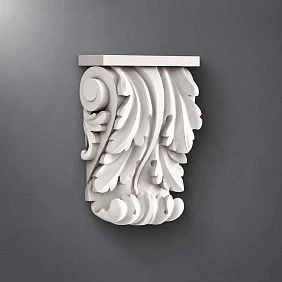
Our factory also produces:

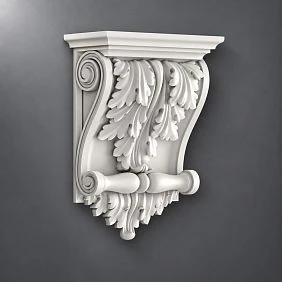
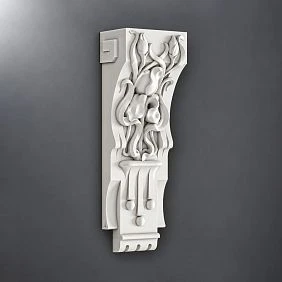
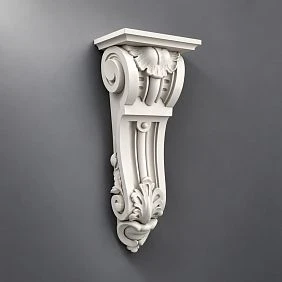
What the underframe consists of
Legs (supports) — vertical load-bearing elements. They determine the table height, style, and load capacity.
Apron — a horizontal frame connecting the legs under the tabletop. The tabletop rests on it. It is the main surface for decoration.
Front decorative panel — the visible side of the apron facing those seated. A place for moldings and overlays.
Side parts — the end sides of the underframe, visible from the side. They can also be decorated.
Bottom line of the apron — the lower edge of the front panel. A small molding or trim here creates a pronounced horizontal line.
Corner elements — the transition points from the leg to the apron. This is where decorative elements for furniture they play the role of a "node" connecting the vertical support and the horizontal crossbar.
Get Consultation
Which legs to choose for the task: a breakdown by table types
Legs for a dining table
A dining table bears constant load: the weight of the tabletop, dishes, people leaning on the table. buy legs for a table for dining — means choosing strong, stable supports made of hard wood.
Parameters:
-
Height: standard for a dining table is 710–730 mm. Legs are usually 680–700 mm considering the tabletop thickness.
-
Cross-section at the base: at least 60×60 mm for a small table, 70×70 mm or more for a table for 6–8 people.
-
Shape: classic — a turned leg tapering downward. Modern style — a straight square support.
-
Wood species: beech, birch, oak — standard options for furniture legs.
For a classic-style dining table — turned legs with twisted relief or shaped cross-section. Decor of the underframe with molded decoration made of polyurethane on the apron will enhance the classic interpretation.
Legs for a kitchen table
Kitchen table — in a zone of constant use. Requirements: durability, resistance to mechanical impacts, ease of cleaning. Decor — minimal. Deep relief on kitchen table legs is inconvenient for cleaning.
The optimal choice is straight or low-relief legs for a kitchen table with moderate decor. It can be complemented with a thin molding along the lower edge of the apron — and that is enough.
Legs for a coffee table
Legs for coffee table — lower and more elegant than dining tables. The standard height of a coffee table is 450–500 mm. Legs — 400–450 mm.
A coffee table is decorative furniture. Here, legs play a greater visual role than in a dining table. An elegant turned leg, a small polyurethane overlay on the apron, and a neat molding around the perimeter — and the coffee table becomes a decorative item, not just a functional surface.
Legs for a console table
A console table is a showcase for legs. Its underframe is fully visible because the tabletop is narrow and placed against the wall. Furniture legs for a console table are chosen to be as expressive as possible: tall (up to 850–900 mm), with a developed turned or carved profile.
The decor of the console apron — polyurethane furniture overlays and moldings — are especially appropriate here: the front panel of the console is always visible and functions as a decorative facade.
Legs for a desk
A writing desk is a functional work surface. Legs: practical, without excessive relief, not interfering with work. Buy legs for furniture For a writing desk means choosing stable straight or slightly relief supports with a height of 680–700 mm.
The decor of the writing desk underframe is a thin molding along the lower edge of the apron and, if desired, a small overlay on the drawer.
Legs for a dressing table
A dressing table is an elegant piece of furniture. Height: from 680 to 750 mm, legs: slender, with a delicate profile. Here decoration for polyurethane furniture is especially organic: thin molding frames on the front panel, small overlays in the center, an elegant stucco belt under the tabletop.
Where to use polyurethane stucco decor on a table
decoration for polyurethane furniture — not only for walls and ceilings. On furniture, it works pointwise, creating relief and visual value where it was not before.
Front panel of the apron
This is the main place for underframe decor. It is the front apron that a person sitting at the table sees. A molding frame on the front panel is the most common and organic technique. An overlay inside the frame is the next level.
Scheme: molding along the perimeter of the front panel → decorative element in the center. Result: the apron acquires a "furniture" face.
Side parts of the underframe
Side aprons are visible from the ends of the table. A small overlay or a modest molding contour here works as a continuation of the front decor. Important: the side decor should not be richer than the front one — it supports, not competes.
Lower molding belt
Thin Polyurethane molding — 20–30 mm — along the lower edge of the apron creates a pronounced horizontal line. It visually "completes" the underframe from below, separates the leg space from the apron, and gives the structure architectural clarity.
This technique is minimalist, delicate, and very effective. It works on both classic and modern tables.
Corner decorative elements
At the connection points of the leg and the apron — corner overlays. decorative polyurethane elements in these zones, they simultaneously solve an aesthetic and masking task: hide the joint, add volume, and emphasize the transition from vertical to horizontal.
Front of the drawer
If the table is equipped with a drawer — its front requires decoration. A molding frame on the drawer + a small overlay in the center + a wooden handle — a ready-made furniture accent.
Decorative line under the tabletop
Narrow Polyurethane trim or thin molding along the top edge of the apron, under the tabletop. This line is only visible when viewed from below and from the side — but it is precisely this that creates the feeling of "completeness."
How to combine wooden legs and polyurethane decor: the logic of materials
The question arises for everyone: wood and polyurethane are not the same. They are painted differently, feel differently, and react differently to the external environment. How to tie them into a single image?
Option one: everything in one color
Painting the table, including the legs and polyurethane decor, in one color is the most trouble-free way to combine different materials. White, cream, dark gray — monochrome neutralizes the difference in textures and creates a single architectural body.
At the same time, the preparation of materials is different:
-
Wooden legs: sanding → wood primer → paint.
-
Polyurethane decor: acrylic primer → paint.
Result: uniform tone, relief is read only by light and shadow.
Option two: natural legs + painted decor
Wooden legs — in natural wood with varnish or oil. Apron with polyurethane decor — in white or wall color. This is a contrasting combination that requires a clear concept. Works in Scandinavian style, in "warm white" interiors.
Risk: if the legs and apron are very different in tone, the table may "fall apart". It is important that the color of the legs echoes at least one of the tones in the interior.
Option three: tinted legs + painted decor in wall tone
Legs tinted with stain to look like walnut or wenge. Apron with polyurethane decor — in a dark tone close to the color of the legs. An expressive, "expensive" option for a classic or neoclassical interior.
Ready-made sets for different types of tables
Dining table in classic style
Task: Table for 6–8 persons in a classic interior. White or natural tone.
What to buy:
-
Wooden legs for table — turned, height 680–700 mm, 4 pieces.
-
Polyurethane moldings for furniture — frame along the perimeter of the front apron + sides.
-
molded decoration made of polyurethane — overlay in the center of the front apron.
-
Corner decorative elements at the junction points of the leg and apron.
-
Thin molding 20–25 mm along the bottom edge of the apron.
-
Glue for polyurethane.
-
Acrylic sealant.
-
Primer + white paint.
-
Hardware for legs.
Result: A table with an expressive underframe that reads organically in a classic interior.
Neoclassical coffee table
Task: An elegant coffee table for the living room. Height 450 mm. Light tone.
What to buy:
-
Legs for coffee table — height 400–420 mm, 4 pieces, elegant cross-section.
-
decorative elements for furniture — wooden corner accents.
-
Thin Polyurethane molding along the bottom edge of the apron.
-
Small polyurethane molding on the front panel.
-
Glue + sealant + primer + paint.
Result: A light, elegant table with a complete underframe without overload.
Console in neoclassical style
Task: A narrow tall table for a hall or living room. Height 850 mm.
What to buy:
-
Furniture legs tall ones — 780–800 mm, 4 pieces.
-
molded decoration made of polyurethane — overlay in the center of the front apron.
-
Moldings made of polyurethane — frame on the front apron + horizontal belt.
-
Decor for Molding — corner inserts in the frame.
-
Glue + sealant + primer + paint.
Result: A console with an expressive front facade — a full-fledged decorative interior element.
Vanity table
Task: Elegant furniture with high decorative value. Height 700–720 mm.
What to buy:
-
furniture legs — slender, with an elegant turned profile.
-
Thin Polyurethane molding for frames on the front and side aprons.
-
Small Decorative Inserts — in the center of the frames.
-
A thin horizontal band along the bottom edge.
-
Glue + primer + white paint or pastel tone.
Result: A dressing table with an expressive molded underframe in the spirit of a Parisian boudoir.
Kitchen table
Task: A practical table for the kitchen. Height 740 mm.
What to buy:
-
legs for a kitchen table — straight or with minimal relief, height 690–700 mm.
-
A thin molding 20–25 mm along the bottom edge of the apron is the only decorative element.
-
Lacquer or paint resistant to moisture and washing.
Result: A neat, practical kitchen table with minimal but complete decor.
Installation of legs and decor: sequence of work
The correct sequence is the key to everything looking as intended.
Step one: frame assembly
First, the load-bearing structure: the apron is assembled from side, front, and back panels. The legs are attached to the apron using fasteners: threaded inserts, bolts, or special furniture brackets.
Check: the structure must stand level, without wobbling. A level is mandatory.
Step two: surface preparation for decor
If the apron is made of MDF, sand the surface with 180-grit sandpaper. Degrease. Apply primer.
If the tsarga is painted — matte with 220 grit sandpaper, degrease.
Step three: installation of polyurethane decor
Moldings — first. Mark the frames with a pencil and level. Cut at 45° on a miter box. Apply glue in a zigzag pattern, press, secure with painter's tape until set.
Overlays — after moldings. Mark the center, check symmetry relative to legs and frame. Apply glue in dots on the back of the overlay, press.
Molding joints — acrylic sealant, smooth with finger, remove excess with a damp sponge.
Step four: final painting
After the decor and sealant have dried — final painting. Acrylic primer — 1 coat. After drying — paint in 2 coats with intermediate drying.
Wooden legs are painted or varnished separately, before installation.
Step five: final assembly
After the paint has fully dried — the tabletop is installed on the frame. Final geometry check.
Choosing fasteners for legs: what you need to know
furniture legs are attached to the apron in different ways. The right choice depends on the table design.
Threaded inserts and bolts
The most common method for removable legs. A threaded insert (e.g., M8) is driven into the leg base. The apron gets a corresponding threaded hole or furniture insert. The leg screws in — disassembles and assembles without tools.
Advantage: the table disassembles for transport.
Disadvantage: requires precise alignment of threaded elements.
Furniture brackets and self-tapping screws
For a non-removable connection: the bracket is attached from inside the apron to the leg end with self-tapping screws. Reliable, but the table does not disassemble.
Special plates with bolt
For classic turned legs with a flat base — a plate with a bolt screws into the leg base, the plate attaches to the bottom plane of the apron. Convenient, allows slight adjustment.
Calculation of under-table decor: how not to buy too much and avoid mistakes
Calculation of molding for a frame on the apron
For a rectangular frame on the front apron measuring, for example, 900×120 mm:
-
Frame perimeter (outer): (900 + 120) × 2 = 2040 mm + allowance for cutting corners at 45°.
-
Add 20% for cutting and fitting.
-
Total: approximately 2450 mm of molding.
If the front and side aprons are decorated — calculate each separately.
Calculation of overlays
Overlays are individual elements. Count the number of positions: 1 for the front apron + optionally 1 for each side. Allowance — 1 piece.
Calculation of the lower molding belt
Molding along the bottom edge of the entire apron (front + two sides + back, if visible) + 15%.
Eight mistakes when buying legs and decor for a table
Mistake one: buying legs without considering the weight of the tabletop.
A marble tabletop weighs 60–80 kg. Light beech legs with a 40×40 mm base are insufficient. For heavy tabletops, use legs with a base of at least 60×60 mm, made of hard wood.
Mistake two: legs that are too thin for a large table.
A table 200×90 cm on legs with a 35×35 mm cross-section at the base is structurally and visually unreliable. The scale of the legs should match the scale of the tabletop.
Mistake three: overloading the underframe with carved decor.
Large overlays, wide moldings, rich corner decor — all together on a small apron creates visual chaos. One central element + a thin belt line is enough.
Mistake four: not considering the working height of the table.
The table height is 740–760 mm — standard for seating. If the legs are too high, the tabletop will be uncomfortable. Check: leg height + tabletop thickness = final table height.
Mistake five: placing relief decor in the kick zone.
The lower part of the legs and the lower apron belt are the area where the feet of those sitting hit. Deep relief here is uncomfortable and gets damaged quickly.
Mistake six: not checking paint compatibility with wood and polyurethane.
Alkyd paint does not dry properly on polyurethane. Only acrylic paint works for both materials.
Mistake seven: forgetting the fasteners.
Legs without fasteners are just wooden blocks. The type of fastener must be determined before purchase: removable (threaded bolts) or non-removable (brackets).
Mistake eight: not matching the leg style with the apron decor.
Straight square legs + rich baroque overlay on the apron = style conflict. The decor should be consistent in style: classic turned legs with ornamental decor; straight geometric supports with minimalist molding.
Comparison table: under-table decor by table type
| Table type | Legs | Apron molding | Overlay | Lower belt | Finish |
|---|---|---|---|---|---|
| Classic dining | Turned 680 mm | Frame 30 mm | Yes, central | Yes | White / lacquer |
| Coffee table | Elegant 400 mm | Thin 20 mm | Small | Yes | White / pastel |
| Console | High 780–800 mm | Frame + horizontal | Yes | Yes | White / contrast |
| Kitchen | Straight 690 mm | Lower belt | No | Yes | Durable paint |
| Toilet | Slim 680 mm | Thin frames | Small | Yes | White / pastel |
| Writing | Straight 680 mm | Lower belt | On the box | optional | Neutral tone |
Additional elements: what to consider beyond the main set
Wooden overlays for corner transitions
Furniture Decoration from Wood — wooden corner overlays at the junction of the leg and the apron — this is a small but significant element. It masks the technical joint and visually "connects" the vertical of the leg with the horizontal of the crossbar. In natural wood, it organically complements the wooden legs.
Polyurethane moldings
Polyurethane trim — thin profile 15–30 mm — for horizontal decorative lines on the underframe. Works as an additional belt: one under the tabletop, one along the lower edge of the apron. Creates a multi-level horizontal system.
Decor for moldings
Decor for polyurethane moldings — corner inserts at the intersection points of the frame moldings. Without them, the frame corner is just a junction point of two profiles. With them, it becomes a decorative accent that "enlivens" the frame and adds expressiveness.
Finish coating: varnish, paint, or oil
The finish coating is chosen according to the task and style.
White acrylic paint is a classic for neoclassical style. Lightweight, easy to refresh, and pairs well with any interior style.
Colored acrylic paint — for the interior concept: gray, blue, dark green, terracotta.
Tinting varnish or oil — for wooden legs that remain in a natural tone. Protects wood from moisture and mechanical damage. A semi-matte finish is preferable to gloss on furniture.
Combination: wooden legs in a natural tone with varnish + apron with polyurethane decor in white or light paint — one of the most expressive and sought-after options.
Frequently asked questions
Is it possible to combine wooden legs and polyurethane decor?
Yes. Wooden legs for table provide structural strength and natural texture. molded decoration made of polyurethane decorates the apron, front panel, and decorative lines. Both materials are painted with acrylic paint or kept in different tones.
Which legs to choose for a dining table?
Sturdy wooden legs made of hardwoods (beech, birch, oak) with a base of at least 60×60 mm and a height of 680–700 mm. Style — according to the interior concept.
Where to use stucco decor on a table?
On the front apron (frame + overlay), on the side aprons, along the bottom edge of the apron (horizontal belt), at the corner joints of the leg and apron, on the front of the drawer.
Can you paint wood and polyurethane the same color?
Yes, but the preparation is different: wood — sanding + wood primer + paint. Polyurethane — acrylic primer + paint. The result in one color is a uniform monochrome surface with a relief that is only readable by light.
What to buy to update an old table?
new furniture legs, Moldings for furniture, polyurethane panels, glue, primer, and paint. A table that seemed hopelessly outdated can become a room decoration after such an update.
How to calculate the amount of molding for a frame on an apron?
Measure the perimeter of the frame (sum of two lengths and two heights), add 20% for 45° cuts and possible errors.
About the company STAVROS
STAVROS is a manufacturer and supplier of decorative elements for furniture and interiors. The company's assortment includes Wooden furniture legs various shapes and heights, decorative elements for furniture made of solid wood, Polyurethane Items — moldings, overlays, trim, and stucco decor.
STAVROS helps customers assemble not individual elements, but complete sets: legs + decor + consumables. Everything — in one place, with a guarantee of style compatibility and professional advice on selection, calculation, and installation.
If you want to make a table that you want to look at, STAVROS provides everything you need for that.