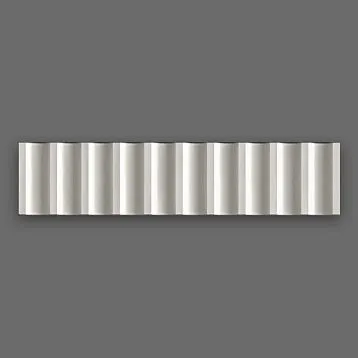
Article Contents:
- Wooden cornice KZ-012 79×105 mm: what dimensions are confirmed by the product card
- 79 and 105 mm are not one "cornice height"
- Why a full-size template is more important than a photo
- Wooden ceiling plinth and wooden cornice: why the search query is one, but the product is called KZ-012
- Why the rule "we'll glue it to the wall" also requires verification
- Why you can't drill "just below the baguette" by eye
- As-built drawing is the best source
- If there are no documents
- Why you can't write "105 mm will exactly cover the baguette"
- The template must be rigid
- Adjoining the fabric: contact, maintenance, and limitations of the finished system
- Why you can't simply press the wooden cornice KZ-012 against a stretch ceiling
- Why acrylic or sealant should not glue the fabric to the cornice
- Stretch ceiling is already installed: what dimensions to take before ordering KZ-012
- Why corners need to be measured separately
- Why long walls should be measured not with a single tape measure along the floor
- KZ-012 from MDF 2600 mm: when length really saves one plank
- Wall 5000 mm
- Wall 5100 mm
- Wall 5200 mm
- Wooden cornice KZ-012 from oak or beech 2400 mm: when natural wood matters more than an extra joint
- Why a joint opposite a window is especially noticeable
- When a short joint is acceptable
- KZ-012 from MDF under enamel: when a painted cornice is more logical than oak
- "Under enamel" does not mean "already painted"
- Why MDF is convenient when the room is already finished
- Built-in wardrobe up to the ceiling: will KZ-012 not hit the side panel
- If the wardrobe reaches the wall closely
- If the wardrobe has its own top cornice
- Curtain rod next to KZ-012: which element should be closer to the ceiling
- If the curtain niche is already ready
- If the rail is wall-mounted
- Ventilation grille or diffuser next to KZ-012
- How to join KZ-012 in internal corners without repeating the general textbook on ceiling cornices
- Why the corner near a stretch ceiling is more difficult than a regular one
- How the corner affects the remainder
- MDF 2600 mm
- Can MDF be laid in five planks at the cost of an extra joint
- Beech/oak 2400 mm
- Why room perimeter / 2.6 is an incorrect calculation for ordering KZ-012
- Why an external corner increases the risk of overconsumption
- Why the visible wall gets priority
- Why base preparation should precede the purchase
- When can KZ-012 be returned to the project
- A stretch ceiling can be removed: is it worth dismantling it for KZ-012
- If the embedded part already exists, but its position is unknown
- If the wall was finished with drywall after installing the stretch ceiling
- Who has priority
- When it is better to finish the cornice earlier
- How to finish KZ-012 near a cabinet, niche, or ventilation
- Straight end
- Decorative return
- End hidden by furniture
- Full-size mockup: what to check before buying eight long planks
- Why one place is not enough
- When the mockup shows that KZ-012 is visually too large
- Why you can't cut KZ-012 for the elevator without a map
- Rigid packaging frame
- Example 1: two walls of 5100 mm and two of 3650 mm
- MDF 2600 mm
- Beech/oak 2400 mm
- Example 2: long wall 5000 mm, cabinet occupies the last 1200 mm
- Example 3: ventilation divides a 5000 mm wall into 1800 and 2200 mm
- Example 4: curtain niche leaves a short section of 700 mm
- If the ceiling has a shadow profile or floating effect
- If the fabric has hidden LED lighting
- If the ceiling is fabric or PVC: the article does not assign universal installation
- When KZ-012 can be confidently left in the project
- Dry fitting KZ-012 next to a finished stretch ceiling
- Ready wallpaper or painted wall: why the base for KZ-012 needs separate checking
- If the wallpaper is already ready
- If the wall is painted
- Future maintenance of the stretch ceiling: can the fabric be removed after KZ-012 installation
- Why permanent installation is not always the best
- If the stretch ceiling already has a warranty from another company
- Control scenario: KZ-012 runs along three walls, but a wardrobe interferes on the fourth
- Control scenario: KZ-012 is compatible with the ceiling, but conflicts with only one diffuser
- Control scenario: technically everything fits, but KZ-012 visually "eats up" the top of the wall
- Error 1. Considering the stretch fabric as the base for the cornice
- Error 2. Drilling below the ceiling without understanding the position of the baguette
- Error 3. Deciding that 105 mm will "definitely cover the baguette"
- Error 4. Pressing KZ-012 against the fabric
- Error 5. Buying material before checking the cabinet
- Error 6. Blocking the curtain niche
- Error 7. Covering the ventilation grille
- Error 8. Count only the perimeter / 2600
- Error 9. Count 2400 and 2600 as one card
- Error 10. Use any short remainder
- Error 11. Not checking delivery of 2400/2600 mm
- Error 12. Start painting before distributing across walls
- Error 13. Consider MDF as "ready white" due to the "Under enamel" mark
- Error 14. Buy oak only for the material's status
- Error 15. Ignore the possibility that KZ-012 is not suitable at all
- Checklist before payment for KZ-012
- What is the size of KZ-012?
- What materials is KZ-012 made from?
- Can KZ-012 be used with a stretch ceiling?
- Can KZ-012 be attached to the stretch ceiling fabric itself?
- What should be checked in the stretch ceiling structure?
- What does 79×105 mm mean?
- Do I need a full-size template?
- Can KZ-012 touch the fabric?
- What is the length of MDF KZ-012?
- What is the length of oak and beech KZ-012?
- What is more advantageous on a 5100 mm wall?
- Can KZ-012 be installed next to a wardrobe?
- How to combine KZ-012 with a curtain track?
- What to do near a ventilation diffuser?
- How to count the number of planks?
- Can the cornice be pre-cut for the elevator?
- When is it better not to buy KZ-012?
- Can a smaller cornice be installed instead of KZ-012?
- Where to order KZ-012?
- Final order KZ-012 after checking the ceiling unit

The stretch ceiling is already finished, the fabric is tucked into the baguette, the walls are finished, and a large wooden cornice KZ-012 has appeared in the project. It is more noticeable than a regular thin molding: the profile measures 79×105 mm and therefore occupies a significant area in the upper part of the wall. At this stage, you cannot decide based only on a photo, color, or price. First, you need to understand where exactly the stretch ceiling baguette is hidden, how much rigid wall remains below it, where the fasteners may go, and whether the profile will touch the fabric.
The KZ-012 cannot be attached to the stretch fabric. The fabric is not a load-bearing base for a wooden or MDF cornice and should not bear its weight, punctures, compression, or installation force. If the stretch ceiling is already installed, safe logic begins with inspecting the finished ceiling unit: a stretch ceiling specialist or finisher must determine the position of the baguette, the fastening zone, wiring, and available rigid surface. Only after this does it become clear whether KZ-012 can be purchased for this room at all.
The cornice itself should not be automatically 'pressed' against the fabric. Between the rigid profile and the membrane, there must be a structurally correct unit where the fabric does not rub against the wood/MDF, is not pinched, and can be serviced if necessary. There is no universal gap in millimeters for all ceiling systems: different baguettes, tensioning methods, and junctions have different geometries.
If in everyday search a user formulates the task as 'buy a wooden ceiling plinth,' it often refers to the same upper architectural line. But the product in this article is called precisely: KZ-012 — a wooden cornice. Its card and drawing, not the everyday term, define the actual dimensions and orientation.

Wooden cornice KZ-012 79×105 mm: which dimensions are confirmed by the card
The current KZ-012 card shows three versions. MDF has a length of 2600 mm, beech and oak — 2400 mm. The cross-section dimensions are the same: A=79 mm and C=105 mm.
| KZ‑012 execution | Size | Price at the time of check | Availability at the time of check |
|---|---|---|---|
| MDF | 79×105×2600 mm | 3 800 ₽ | SPb — 62 pcs. |
| Beech | 79×105×2400 mm | 8 230 ₽ | SPb — 32 pcs. |
| Oak | 79×105×2400 mm | 12 350 ₽ | SPb — 43 pcs. |
These prices and stock levels are dynamic. They need to be re-checked before payment. The card also indicates a rigid packaging frame costing 390 ₽ for safe transportation. For ordering long lengths, this is a separate logistics line.
Exact product — Wooden cornice KZ-012. In the selected MDF configuration, the card shows the “Prestige” quality and “Under enamel” preparation.




79 and 105 mm are not a single “cornice height”
The card uses two cross-section parameters. 105 mm should not be perceived as a universal vertical height or as a guaranteed size by which the cornice will “cover” the stretch ceiling baguette. Before ordering, a drawing of the actual profile is needed: which projection goes along the wall, which protrudes into the room, and where the rear mounting planes are located.
Our factory also produces:



Why a full-size template is more important than a photo
A cardboard or thin rigid template, cut according to the real KZ‑012 cross-section, allows you to apply the profile to the wall without risk to the fabric. It immediately shows how far the cornice protrudes, where its bottom line runs, whether it visually covers the baguette, and whether a rigid wall zone remains for installation.
Get Consultation
Wooden ceiling plinth and wooden cornice: why the search query is the same, but the product is called KZ‑012
Users often call any profile at the junction of wall and ceiling a "ceiling plinth." In the manufacturer's catalog, KZ‑012 belongs to cornices. For the article, this is not a game of terms: the exact name helps avoid confusing KZ‑012 with a floor plinth, curtain rod, or lightweight polymer molding.
The search phrase "wooden ceiling plinth" is useful as a description of buyer intent, but the technical solution should be based on the card of a specific wooden cornice.
If you need to view others Wooden cornices, the working category allows comparing KZ‑012 with more compact models. This is especially useful if the finished tension assembly leaves no room specifically for the 79×105 mm profile.
The tension fabric cannot be used as a base for KZ‑012
The tension membrane works as a finishing surface. It is held by its own baguette system, but is not a structural wall or ceiling slab into which heavy molding can be secured. Puncturing the fabric, pressing it with a rigid profile, and attempting to use it as support create a risk of damage.
Therefore, for an already installed ceiling, there are three basic restrictions:
- do not drill through the fabric;
- do not hang KZ‑012 from the membrane;
- do not design the cornice weight so that it is transferred to the fabric.
The working structure must rest on a wall, prepared embedded elements, or another rigid base confirmed for the specific object. If no such base exists after installing a stretch ceiling, the structural solution is decided first, not the curtain rod purchased.
Why the rule "we'll glue it to the wall" also requires verification
Even if the curtain rod is planned to be fixed primarily to the wall, you need to know the wall material, the quality of its finish, the actual contact area of the rear surface, and the requirements of the mounting system manufacturer. Wallpaper, loose putty, or weak paint should not automatically be considered a load-bearing base.
Why you cannot drill "slightly below the baguette" by eye
Behind the fabric and near the baguette, there may be the ceiling's own fasteners, wiring, embedded elements, niche profiles, or other components. The exact position must be obtained from the ceiling installer, from the as-built diagram, or after a safe inspection. Random drilling into an unknown area is unacceptable.
Where the stretch ceiling baguette is located and why its position must be known before purchasing KZ‑012
Externally, the user only sees the line where the fabric meets the wall. The mounting profile itself is hidden. Its height and width depend on the system. Therefore, the question "is 79 mm of wall enough" cannot be resolved without information about the baguette.
You need to find out:
- baguette type;
- at what height it is mounted;
- what part of the wall it occupies;
- where its mounting points are located;
- is there a free rigid zone below it;
- does electrical wiring pass through this zone;
- are there embedded elements for future decor;
- how the panel is removed or serviced.
As-built diagram is the best source
If the installation company saved photos before the fabric was stretched or a diagram of the baguette mounting, this is the most useful material. It allows you to see where rigid elements are located without opening the finished finish.
If there are no documents
You need to call a stretch ceiling specialist and determine the structure in a safe way. Do not ask a regular finisher to "roughly recall" where the profile runs.
KZ‑012 has a large cross-section of 79×105 mm: what to check on a full-size template
Once the position of the baguette is known, a template of the actual profile is made. Not a 79×105 mm rectangle, but exactly the contour according to drawing KZ‑012. This is important: the real cross-section has a decorative shape and mounting planes.
The template must answer six questions:
- where the lower decorative line runs;
- how far the cornice protrudes into the room;
- whether there is a rigid wall behind it for mounting;
- whether the profile touches the fabric;
- whether the cornice can be routed through internal corners;
- whether it conflicts with a wardrobe, curtain niche, or ventilation.
Why you cannot write "105 mm will definitely cover the baguette"
Even if the outer dimension of the cornice is larger than the visible height of the ceiling profile, this does not prove the correctness of the joint. The mounting zone may be located exactly where the rear part of KZ‑012 requires contact with the wall, or conversely—below the baguette there may remain a sufficient rigid strip. Only a wall section and the template provide the answer.
The template must be rigid
A soft sheet of paper will bend near the canvas and won't show the actual offset. For checking, foam board, thin plywood, or another lightweight material that holds its shape and has no sharp edges is more convenient.
Adjoining the canvas: contact, maintenance, and limitations of the finished system
Why you can't simply press the wooden cornice KZ-012 against a stretch ceiling
A rigid profile and a flexible canvas behave differently. A stretch ceiling can move slightly due to air, temperature changes, or maintenance. If KZ-012 constantly touches the membrane, chafing, a visible wave, or difficulty in dismantling the ceiling may occur.
The correct joint structurally separates the cornice and the canvas. How exactly depends on the ceiling and wall system. A universal gap in millimeters cannot be given without a drawing.
Why acrylic or sealant should not glue the canvas to the cornice
Filling a regular rigid joint between a wall and a wooden profile is one thing, but gluing the membrane to KZ-012 is another. The stretch canvas must remain part of its own system. If the project involves a special adjoining profile, its solution is confirmed by the ceiling company.
The stretch ceiling is already installed: what dimensions to take before ordering KZ-012
After checking the baguette, you need to take the room's geometry. For a large cornice, a single perimeter is not enough. Each wall becomes a separate segment, and all obstacles become independent joints.
| What to measure | Why |
|---|---|
| Length of each wall | Cutting map 2400/2600 mm |
| Actual room height | Profile scale estimation |
| Bagette position | Working wall area check |
| Distance to cabinets | So the profile doesn't hit furniture |
| Curtain niche and cornice | To not block access to textiles |
| Ventilation | Save shooting and maintenance |
| Air conditioner | Check top gap and service |
| Internal corners | Cuts and reserve |
| External corners | Additional consumption and visible joints |
| Service hatches | Do not block access |
Measurements should be taken after finishing wall cladding, if it has already been done. Plaster, panels, or decorative paint can change actual lengths by a few millimeters compared to the project. For long runs, this affects joints.
Why angles need to be measured separately
An internal corner is rarely an ideal 90°. If two walls meet at 88° or 92°, a miter cut at standard 45° will leave a gap. For KZ‑012, this is especially noticeable due to the large cross-section.
Why long walls should be measured not with a single tape measure along the floor
The cornice is in the upper zone. The wall may have a deviation, niche, protrusion, or column only near the ceiling. The size for KZ-012 is better taken along the future installation line, rather than transferring the lower perimeter of the room.
Material and standard length: MDF 2600 mm vs. oak/beech 2400 mm
KZ-012 from MDF 2600 mm: when length really saves one plank
The difference between 2600 and 2400 mm is 200 mm. On one wall, it can be critical.
Wall 5000 mm
For MDF:
2600 + 2400 = 5000 mm, meaning two planks are theoretically enough if the second is trimmed to 2400 mm.
For beech or oak:
2400 + 2400 = 4800 mm.
200 mm is missing, so a third fragment is needed. It can be obtained from the remainder of another wall, but a separate map becomes mandatory.
Wall 5100 mm
MDF:
2600 + 2500 = 5100 mm.
Two planks cover the wall, leaving about 100 mm from the second one before accounting for the final cut.
Beech/oak:
2400 + 2400 + 300 = 5100 mm.
That's already three segments if a 300-millimeter filler piece cannot be obtained from another leftover.
Wall 5200 mm
Two MDF planks give exactly 5200 mm nominally. In practice, final trims and corners may require additional allowance, so the plan of "two planks exactly to size" needs to be checked especially carefully.
Two wood planks of 2400 mm give only 4800 mm, so an additional segment is inevitable.
After confirming the ceiling assembly, you can buy KZ-012 79×105 mm already in the length and material that match the actual cutting layout.
Wooden cornice KZ‑012 made of oak or beech 2400 mm: when natural wood matters more than an extra joint
MDF should not automatically win just because it is longer and cheaper. If the design is based on natural wood, oak or beech can be the main material of the upper architectural line.
In this case, you need to decide in advance:
- whether the finish will be transparent or tinting;
- whether adjacent planks need to be matched by shade and pattern;
- where joints are acceptable;
- which wall is the main one in view;
- which planks to assign to the corners;
- whether a reserve from the same batch is needed.
Why a joint opposite a window is especially noticeable
Side light highlights the slightest difference in planes and tone. If a long wall is visible from the entrance or is lit along the profile, the most even planks with the closest pattern should be assigned exactly there.
When a short joint is acceptable
Behind a tall cabinet, deep in a niche, on a secondary wall, or next to another architectural break, an additional joint can be practically invisible. Then 2400 mm is not a problem.
KZ-012 from MDF under enamel: when a painted cornice is more logical than oak
The KZ-012 card for MDF shows the preparation "Under enamel". This option is especially logical if the cornice must match the wall, doors, or other painted trim.
Working scenarios:
- white cornice matching the ceiling area;
- one RAL with the walls;
- one color with door casings;
- contrasting dark cornice without wood texture;
- a project where joints should be visually minimal after quality preparation.
"Under enamel" does not mean "already painted"
Before installation, you still need to coordinate the primer, enamel, gloss, painting order, and treatment of fresh ends after cuts. The card does not turn the profile into a finished white product.
Why MDF is convenient when the room is already finished
If the walls and ceiling are already finished, a significant part of the painting can be done before installation, and after installation only local touch-up of joints and fasteners remains. The specific technological sequence depends on the chosen painting system.
Built-in wardrobe up to the ceiling: will KZ-012 hit the side panel
The 79×105 mm profile takes up noticeable space. If the built-in wardrobe almost reaches the ceiling, the cornice may intersect with the side panel, top decorative belt, or door.
Before ordering, you need to check:
- distance from the wall to the wardrobe;
- height of the top panel;
- door overhang;
- own furniture cornice;
- ability to open the leaf;
- where to finish KZ-012 with a clean end.
If the cabinet goes flush to the wall
KZ-012 can be finished at the side of the furniture if it looks like a deliberate architectural boundary. There is no need to extend the profile behind the cabinet just for formal continuity.
If the cabinet has its own top cornice
Two profiles side by side can compete. It is better to make a front sketch in advance and check which line should be the main one — the ceiling or the furniture one.
Curtain rod next to KZ-012: which element should be closer to the ceiling
There is no universal answer. The curtain system can be wall-mounted, ceiling-mounted, hidden in a niche, or built into the panel. KZ-012 should not interfere with hooks, runners, curtain removal, or fabric movement.
Check:
- position of the rail;
- curtain overhang;
- fold depth;
- access to hooks;
- ability to remove the rail;
- intersection with the cornice 79×105 mm.
If the curtain niche is already ready
Edge KZ‑012 must be tied to the actual boundary of the niche. If the cornice protrudes into its working area, the fabric may catch or access to the rail will be lost.
If the rail is wall-mounted
Need to check the vertical distance between the rail and KZ‑012, as well as the ability to unscrew the brackets without dismantling the cornice.
Ventilation grille or diffuser near KZ‑012
If a linear diffuser is already installed in the upper zone of the wall, KZ‑012 must not cover its removable part, fasteners, or service area. Decorative continuity yields to the maintainability of the engineering system.
Before cutting, check:
- where the grille starts and ends;
- how it is removed;
- whether there is fastening under the front part;
- whether access to adjustment is needed;
- whether KZ‑012 can end with a clean end before the diffuser.
If the cornice needs to be interrupted, this break is immediately included in the cutting map: one long wall turns into two independent segments.
Corners, ends, and short add-ons for KZ‑012
How to join KZ‑012 in internal corners without repeating the general textbook on ceiling cornices
For this article, it is important not to teach carpentry from scratch, but to show how the corner affects the purchase and compatibility with a stretch ceiling. The wall corner is rarely exactly 90°, so a strip calculated “from corner to corner” may require additional length after cutting.
Before the final cut:
- measure the actual angle;
- make a template;
- perform a test cut on a technological offcut;
- apply two parts without pressure on the blade;
- check the line of contact with the wall and ceiling area;
- only after that cut the visible plank.
Why the corner near a stretch ceiling is more difficult than usual
The craftsman must simultaneously control the wooden profile and not damage the membrane. A large KZ-012 cannot be actively "pulled" toward the corner if the upper part is pressing against the fabric.
How the angle affects the remainder
After the mustache cut, the remainder loses its straight end. If it was planned to be used as a short extension near a cabinet or ventilation, the useful length may be less than the nominal one. In the remainder map, the condition of the edges must be noted.
KZ‑012 2400 or 2600 mm: the cutting map must take into account not only the perimeter
Let's take a room with four working areas after subtracting the built-in cabinet and the ventilation zone:
- wall A — 5100 mm;
- wall B — 3650 mm;
- wall C — 2400 mm;
- wall D — 1850 mm.
Sum:
5100 + 3650 + 2400 + 1850 = 13,000 mm.
Simple division by the standard length creates only a mathematical minimum.
MDF 2600 mm
13 000 ÷ 2600 = 5.
It seems that five planks are perfectly enough. But we need to lay out the real segments:
- A 5100 = 2600 + 2500;
- B 3650 = 2600 + 1050;
- C 2400 = one piece;
- D 1850 = one piece.
If you give A two planks, B two planks, C one, D one — that's already six. But some of the trims can be combined into one blank.
For example:
| Plank 2600 | Parts | Remainder |
|---|---|---|
| 1 | A1 = 2600 | 0 |
| 2 | A2 = 2500 | 100 |
| 3 | B1 = 2600 | 0 |
| 4 | B2 = 1050 | 1550 |
| 5 | C = 2400 | 200 |
| 6 | D = 1850 | 750 |
In this straight layout, six planks are needed. Mathematically, five cannot simultaneously yield solid pieces of 2500, 2400, and 1850 mm along with two 2600-mm segments. This is a good example of why the sum of lengths is insufficient.
Can MDF be laid out in five planks at the cost of an extra joint
Yes, if you allow splitting one of the face pieces. For example, 1850 mm can be assembled from two remnants. But then an extra joint appears. The buyer must compare the savings of 3,800 ₽ for one plank with the visibility of this connection.
Beech/oak 2400 mm
For a 5100 mm wall, you need 2400 + 2400 + 300. For a 3650 mm wall — 2400 + 1250. Wall C 2400 mm takes a whole plank. D 1850 mm — a separate one or a remnant.
A practical map might look like this:
| Plank 2400 | Parts | Remainder |
|---|---|---|
| 1 | A1 = 2400 | 0 |
| 2 | A2 = 2400 | 0 |
| 3 | A3 = 300 + B2 = 1250 | 850 |
| 4 | B1 = 2400 | 0 |
| 5 | C = 2400 | 0 |
| 6 | D = 1850 | 550 |
Here, too, there are six planks, but wall A already receives two connections instead of one. This does not make the wood "worse": it's just that the interior price of choosing a natural material is a different rhythm of joints.
Why room perimeter / 2.6 is an incorrect calculation for order KZ-012
The perimeter does not know where corners, furniture, ventilation, and open ends are. For KZ-012, the algorithm is as follows:
real segments → priority of whole view pieces → corner cuts → short extensions → scrap map → number of whole planks.
Need to account separately for:
- internal corners;
- external corners;
- long cut points;
- gaps at cabinets;
- curtain niches;
- ventilation;
- service hatches;
- open ends;
- reserve for a trial angle.
Why an external corner increases the risk of overconsumption
On an external corner, a cutting error is especially noticeable, and the long point of the part may require additional allowance. The remainder after such a cut is less suitable for another section.
Why the view wall gets priority
If one long wall is visible from the entrance, it is better to keep a minimum number of joints on it, even if a less visible section has to be assembled from two remnants.
What to do if a stretch ceiling covers the entire area suitable for mounting
This is the main honest scenario of the article. After inspection, it may turn out that the stretch ceiling baguette occupies exactly the part of the wall on which a large KZ-012 should rest, and below there is no sufficient structural zone.
In this case, you cannot proceed to "reinforced glue" or random drilling. You need to stop the purchase and revise the project.
Options:
- choose a more compact curtain rod;
- invite a stretch ceiling specialist and design a base modification;
- use a different decorative profile;
- reassemble the top line of the interior without KZ-012;
- if the ceiling is going to be replaced anyway, provide a mounting plate during its next installation.
Why base modification should precede the purchase
If you buy eight long curtain rods first and then find out there's nowhere to securely attach them, the order turns into expensive warehouse stock. Structural compatibility is the first checkpoint.
When KZ-012 can be brought back into the project
After the specialist confirms a new rigid support, an accurate installation line, and independence from the canvas. Then the full-size template is checked again: base modification may change the position of the curtain rod relative to the wall.
When it's better not to buy the wooden KZ-012 at all for an already installed stretch ceiling
KZ-012 should not be recommended at any cost. You should refuse to buy it if:
- the profile physically touches the fabric;
- there is no rigid load-bearing/installation zone;
- fastening would require drilling into an unknown area of the baguette or wiring;
- the cornice interferes with ceiling maintenance;
- the 105-millimeter dimension conflicts with the cabinet;
- the curtain niche is blocked;
- the ventilation grille is covered;
- too many short breaks make the large profile visually heavy;
- the room does not allow safe delivery and unfolding of slats of the required length.
The alternative is chosen not on the principle of "what is cheaper," but based on the geometry of the finished ceiling unit.
Embedded elements and modification of an already installed stretch ceiling
A stretch ceiling can be removed: is it worth dismantling it for KZ-012
Sometimes the structurally best option is to partially dismantle the fabric, add an embedded element, and restore the ceiling. But this is not a universal recommendation. The decision depends on the stretch ceiling system, the condition of the fabric, the possibility of reinstallation, and the cost of the work.
First, you need to obtain a conclusion from the ceiling installation company:
- whether the fabric can be removed and reinstalled;
- which section will need to be opened;
- whether a rigid embedded element can be added;
- whether the warranty will be affected;
- how the baguette line will change.
Only after this do they compare the cost of such modification with the cost of choosing a different curtain rod.
If the embedded element already exists, but its position is unknown
Sometimes during ceiling installation, a wooden beam or metal base was provided, but the as-built diagram is lost. It cannot be assumed that the embedded element runs "approximately along the entire perimeter."
Its exact position must be determined safely through the installation organization. KZ‑012 is large, and the fasteners must hit the actual rigid base, not the void next to it.
If the wall was finished with drywall after the stretch ceiling was installed
Then you need to know what is behind the sheet in the area of the future curtain rod. The drywall itself and decorative putty should not automatically be considered a sufficient load-bearing system for large curtain tracks. Studs, embedded elements, or another solution confirmed by the designer/installer are required.
If reinforcement is absent, the base is designed first. The article deliberately does not specify a universal anchor type and fastening spacing: they depend on the specific wall and the weight of the selected configuration.
Curtain rod, ventilation, and cabinet: how to assemble the upper zone in one drawing
Often KZ‑012 conflicts not directly with the stretch ceiling, but with other elements already located in the upper zone. Therefore, it is useful to create one common wall elevation and mark on it:
- the line of the ceiling fabric;
- hidden baguette;
- KZ-012 section;
- curtain rail;
- top of the cabinet;
- diffuser;
- air conditioner;
- service hatch.
This shows that the "free wall" in the photos may actually be occupied by three systems simultaneously.
Who has priority
Engineering and service elements cannot be blocked by decorative trim. If the continuous KZ-012 line requires covering a removable ventilation grille or access to the curtain rail, the project must be changed.
When it is better to finish the cornice earlier
A clean end before a cabinet, diffuser, or niche often looks better than trying to go around each object with short pieces. This is especially true for the large profile 79×105 mm.
How to finish KZ‑012 at a cabinet, niche, or ventilation
An open end becomes part of the interior. For MDF under enamel, the end can be prepared and painted in the overall color. For oak and beech, you need to decide whether the cut will be visible or whether a decorative return is better.
Straight end
The most compact option. It is convenient to use at a cabinet or technical boundary if the material and finish allow making a neat cut.
Decorative return
A short piece returns the profile to the wall and hides the cross cut. It requires an additional cut and material consumption, so it must be included in the cutting plan.
End hidden by furniture
If the cabinet completely covers the end of KZ‑012 and is permanently installed, decorative finishing can be simpler. But the mounting base and access to the ceiling must still remain correct.
Full-size mockup: what to check before buying eight long planks
For a complex finished ceiling, one mockup can save an entire erroneous order. You need to cut 300–500 mm of conditional length with the real KZ‑012 profile and apply it to several key points in the room.
Need to check:
- the main straight wall;
- inner corner;
- the area near the wardrobe;
- the curtain niche;
- ventilation;
- the section with the smallest working wall area.
Why one location is not enough
The stretch ceiling baguette may run uniformly around the entire perimeter, but the wall, furniture, and engineering elements differ. A profile that fits perfectly on one wall may conflict with another.
When the mockup shows that KZ‑012 is visually too large
Even a technically compatible profile may turn out to be disproportionate. If the cornice takes up too much wall or almost touches door trims and wardrobes, it is better to compare more compact options. buy a wooden cornice in the category and select the model after the new layout.
The long KZ-012 still needs to be brought into the room: logistics 2400 and 2600 mm
Ceiling compatibility doesn't end at the wall. Planks 2400/2600 mm long must fit into the elevator, up the stairs, through the door, and around interior corners of the apartment.
The card indicates a rigid packaging frame. Before ordering, it's useful to know the actual shipping dimensions of the packaging, not just the profile length.
Check:
- entrance door;
- elevator cab and door;
- stair landings;
- apartment door;
- corridor;
- storage location.
Why you can't cut KZ-012 for the elevator without a plan
If a 5100 mm wall is to be assembled from 2600 + 2500 mm, cutting one plank into 1800 + 800 mm for transport will ruin the rational layout. Any pre-cutting is only allowed if it matches the future installation pieces.
Cost of KZ-012: you need to calculate not the price per meter, but whole planks
For the current card:
- MDF 2600 mm — 3,800 ₽;
- beech 2400 mm — 8,230 ₽;
- oak 2400 mm — 12,350 ₽.
For example with six slats:
| Material | Quantity | Profile cost |
|---|---|---|
| MDF | 6 | 22 800 ₽ |
| Beech | 6 | 49 380 ₽ |
| Oak | 6 | 74 100 ₽ |
But comparing by the same quantity is only fair if the card truly requires six slats in all materials. On other geometry, 2600 mm may eliminate one rod or one joint, while 2400 mm may, on the contrary, be more convenient for short segments.
Rigid packaging frame
The card indicates 390 ₽ for the frame and packaging standards: up to two solid wood items and up to five MDF items. The final number of packages and the packaging amount need to be confirmed for a specific order.
Control cutting examples for KZ-012 in real configurations
Example 1: two walls of 5100 mm each and two of 3650 mm
This is a useful scenario from an existing KZ-012 article, but here its purpose is different: to show how length affects the order after compatibility with a stretch ceiling has already been confirmed.
MDF 2600 mm
For each 5100 mm wall:
2600 + 2500.
Two such walls require four planks.
For the 3650 mm wall:
2600 + 1050.
Two long parts of 2600 require two planks. Two extensions of 1050 mm can be obtained from one additional 2600 mm plank:
1050 + 1050 = 2100 mm.
500 mm remains.
Total: seven MDF planks.
Cost:
7 × 3 800 = 26 600 ₽.
Beech/oak 2400 mm
A 5100 mm wall requires 2400 + 2400 + 300. A 3650 mm wall requires 2400 + 1250. The map of short extensions needs to be rebuilt because general arithmetic no longer shows the number of connections.
Even if the final total of the planks turns out to be close, there will be two joints on each of the two main walls instead of one.
Example 2: a long wall of 5000 mm, the wardrobe occupies the last 1200 mm
If the built-in wardrobe constantly covers the upper section of the wall, the actual decorative segment KZ‑012 may be only 3800 mm.
Then:
MDF: 2600 + 1200.
Oak/beech: 2400 + 1400.
In both cases, two planks. The 200-millimeter advantage of MDF no longer changes the quantity, only the size of the remainder. Here, the choice of material is better made based on the finish, not the length.
Example 3: ventilation divides a wall of 5000 mm into 1800 and 2200 mm
The total wooden section is only 4000 mm, but these are two independent segments.
For MDF, one plank of 2600 can give 1800 mm and a remainder of 800 mm; the second — 2200 mm and a remainder of 400 mm. Two planks.
For 2400 mm, one plank gives 1800 and a remainder of 600, the second — 2200 and a remainder of 200. Also two.
In this scenario, the standard length does not affect the quantity at all. What matters much more is carefully finishing the two ends of the diffuser.
Example 4: a curtain niche leaves a short section of 700 mm
It is convenient to assign the short segment from the remainder after the long wall. But not every remainder can be considered suitable: after an angled cut, its usable length is shorter, and for natural wood, the pattern may not match.
In the map, the remainder must have a code and actual length, for example:
R3 = 760 mm, one end is straight, the second is after a miter cut.
Only after this can it be assigned to the 700-millimeter section.
Special ceiling systems: shadow gap, backlighting, fabric and PVC
If the ceiling has a shadow profile or a floating effect
Modern stretch ceiling systems can form a special shadow gap or a lit perimeter. The large KZ-012 can completely cover this effect or conflict with its working area.
Before purchasing, you need to understand whether the shadow gap is part of the design. If so, covering it with a wooden cornice is pointless. Then either KZ-012 is abandoned on that wall, or the ceiling concept itself is reconsidered.
If the canvas has hidden LED backlighting
The cornice should not block the light flow, access to the tape, power supply, or diffuser. A large profile can change the light-and-shadow pattern even without physical contact.
It is useful to turn on the backlight and apply a full-size KZ‑012 mockup in the evening. This shows whether it creates an unwanted shadow or, on the contrary, forms the desired architectural line.
If the ceiling is fabric or PVC: the article does not prescribe a universal installation
The material of the stretch ceiling and its mounting system may vary. This does not imply a universal KZ‑012 scheme. In both cases, the rigid cornice should not be attached to the canvas itself, and the specific junction is coordinated by a specialist in the ceiling system used.
Do not transfer a solution from one apartment to another just because both ceilings are called stretch ceilings.
When it is better to replace KZ‑012 with a more compact profile
Rejecting a specific KZ‑012 does not mean rejecting the wooden top line altogether. Sometimes the finished ceiling allows a cornice, but the 79×105 mm profile is too large for the remaining wall area.
It is worth comparing a smaller profile if:
- the KZ‑012 template almost touches the canvas;
- the bottom line drops too close to the door or cabinet;
- the curtain niche loses working access;
- ventilation requires too large a gap;
- the cornice visually overloads the room;
- the rigid base exists only on a narrower strip of the wall.
In this case, the general catalog Wooden trim is useful as a starting point for a new comparison. But the new profile is checked again with a full-size template — it cannot be assumed that the smaller one is automatically compatible.
When KZ-012 can be confidently left in the project
The profile is ready for ordering if several conditions are met simultaneously:
- the position of the baguette is precisely known;
- there is a confirmed rigid zone for installation;
- the fabric does not bear load;
- the cornice does not touch the membrane;
- the curtain system remains serviceable;
- ventilation and cabinets do not conflict with the cross-section;
- corners are checked with a template;
- the 2400/2600 mm map is assembled;
- route dos
Dry fitting KZ-012 next to the finished stretch ceiling fabric
Before final installation, it is useful to assemble several key sections without permanent fixation. There is no need to lift the entire perimeter at once. It is enough to check:
- one internal corner;
- the main wall;
- end of the cabinet;
- gap at the ventilation;
- area near the curtain niche.
During fitting, the profile should not press on the fabric. If the membrane has to be "squeezed" for a tight fit against the wall, the structure is not ready.
Finished wallpaper or painted wall: why the base for KZ‑012 needs to be checked separately
A stretch ceiling is often installed after the walls have already been finished. By the time the idea of KZ‑012 appears, there may be wallpaper, decorative paint, putty, or wall panels under the profile. The presence of a rigid wall behind the finish does not mean that the decorative layer itself can be used as a reliable mounting surface.
Before installation, it is necessary to determine:
- what the load-bearing wall is made of;
- what layer is directly under the cornice;
- can the fastener reach the rigid base without damaging the fabric;
- is it necessary to locally remove the weak finishing layer;
- how to restore the visible wall boundary after installation.
Particular care should be taken with thick wallpaper and loose putty. The cornice should not "hold on to the wallpaper" just because the mounting adhesive has bonded well to its surface. The load-bearing logic must be confirmed for the wall.
If the wallpaper is already ready
The working area KZ‑012 must be marked out before any cuts. If the technology requires opening the base, it is better to remove the material only inside the future hidden contour of the cornice, rather than damaging the visible wall below.
If the wall is painted
It is necessary to check the strength of the coating and its compatibility with the chosen mounting system. Weak paint that peels off from the putty does not become stronger with expensive adhesive.
Warranty and maintainability of the ceiling after installing the cornice
Future maintenance of the stretch ceiling: will it be possible to remove the fabric after installing KZ‑012
Today the ceiling looks finished, but in a few years access to wiring, repair of a leak from above, replacement of a light fixture or the fabric itself may be required. If KZ‑012 completely covers the baguette line, it is necessary to understand in advance how the ceiling company will perform maintenance.
Check with the installer:
- is direct access to the baguette needed;
- from which side is the fabric removed;
- does the cornice interfere with the tool;
- will it be necessary to dismantle KZ‑012;
- is it possible to locally remove one plank without destroying the entire perimeter.
If any work with the ceiling requires breaking the painted cornice throughout the room, the assembly is poorly maintainable. Sometimes it is wiser to leave a serviceable gap or choose a smaller profile.
Why permanent installation is not always the best
For decorative finishing, maximum rigidity seems like an advantage, but service architecture is also important. Where the ceiling may potentially need to be opened, the KZ‑012 structure must be coordinated with the ceiling system before installation.
If the stretch ceiling already has a warranty from another company
Any drilling or installation near the baguette may affect the warranty terms of the ceiling system. Before starting work, it is useful to contact the installer and clarify in writing which interventions are permissible.
This is especially important if the installation of KZ-012 requires:
- partial removal of the fabric;
- adding an embedded insert;
- relocating the baguette;
- work near built-in lighting;
- changing the junction of the fabric to the wall.
The cost of such coordination and possible rework should be included in the budget before purchasing the cornice. Otherwise, a cheap product line may require expensive ceiling alterations.
Compatibility check scenarios: a local conflict does not always cancel the entire KZ-012
Check scenario: KZ-012 runs along three walls, but on the fourth, a cabinet interferes
It is not necessary to abandon the cornice throughout the entire room. If the profile is technically compatible with the ceiling on three walls, and the fourth is occupied by a built-in wardrobe up to the ceiling, you can end KZ-012 at the sides of the wardrobe and not run it behind the furniture.
Then the map turns from a closed perimeter into three independent lines. This may even reduce the number of slats and joints. But the two new open ends at the wardrobe must be finished in advance.
Control scenario: KZ-012 is compatible with the ceiling but conflicts with only one diffuser
If ventilation takes up 1200 mm on one wall, the cornice can be interrupted before its service zone and continued after. In the calculation, this is two segments, for example, 1700 and 2100 mm.
For MDF, two slats will be needed, but large leftovers can be given to another wall. For wood of 2400 mm, the quantity may also remain two. That is, a local engineering break does not necessarily increase the purchase — sometimes it only changes the distribution of leftovers.
Control scenario: technically everything fits, but KZ-012 visually "eats up" the top of the wall
The cornice may be compatible with the baguette and the embedded element, but the room has low doors, a large wardrobe, and a small ceiling height. A full-size template shows that the bottom line of KZ-012 drops too close to the furniture and makes the top of the room heavy.
In this case, you cannot justify the purchase only by technical feasibility. The commercially correct choice is to compare a smaller cornice. Technical compatibility is a necessary but not sufficient condition.
Mistakes when ordering KZ-012 for an already installed stretch ceiling
Mistake 1. Considering the stretch fabric as the base for the cornice
The fabric is not a rigid load-bearing surface. KZ‑012 must rest on a confirmed structural zone.
Mistake 2. Drilling below the ceiling without understanding the position of the baguette
You can hit the system's fasteners, wiring, or other hidden structures. First, obtain as-built information.
Mistake 3. Assuming that 105 mm will "definitely cover the baguette"
The external dimension does not show the position of the mounting planes. You need the actual drawing and a template.
Mistake 4. Pressing KZ‑012 against the fabric
The rigid profile can rub against the membrane and hinder maintenance. The joint must be structurally separated.
Mistake 5. Buying material before checking the cabinet
The 79×105 mm profile may hit the side panel or door. First, make a mock-up.
Mistake 6. Blocking the curtain niche
The cornice interferes with runners, hooks, or fabric. The curtain system must be serviced.
Error 7. Close the ventilation grille
The service part stops being removable. KZ‑012 finish earlier and include a break in the cutting.
Error 8. Count only the perimeter / 2600
The mathematical minimum does not account for solid view parts, corners, and breaks.
Error 9. Count 2400 and 2600 as one card
A wall of 5100 mm for MDF and solid wood gives a different number of segments.
Error 10. Use any short remainder
After a miter cut, the useful length is less, and the natural pattern may not match.
Error 11. Do not check delivery of 2400/2600 mm
The plank fits the room, but doesn't fit through the elevator or hallway. Transport cutting ruins the layout.
Error 12. Start painting before distributing across the walls
After a test fit, it turns out that one plank needs to be swapped or trimmed differently.
Error 13. Treating MDF as "ready white" due to the "Under enamel" label
Preparation for enamel is not the final paint coat.
Error 14. Buying oak just for the material's status
If the cornice is fully painted and natural texture isn't needed, the material choice should be recalculated based on finish and cutting.
Error 15. Ignoring the possibility that KZ‑012 doesn't fit at all
If there's no base or the profile conflicts with the ceiling, the right decision is not to buy it until the joint is reworked.
Decision tree: is the ceiling joint ready for KZ‑012
Question If yes If no Is the position of the baguette known? Check the rigid wall zone Call a ceiling specialist Is there a confirmed basis? Make a full-size template Do not order KZ-012 Does the template not touch the fabric? Check furniture and engineering Change the node or profile Do cabinets/curtains/ventilation not conflict? Measure wall lengths Design gaps/ends Is map 2400/2600 assembled? Calculate cost Do not determine quantity by perimeter Is delivery of long planks possible? Form the order Resolve logistics before payment What to send to the installer and STAVROS manager before order KZ-012
Useful specification should contain:
- article KZ-012;
- material — MDF, beech or oak;
- photos of all walls around the perimeter;
- photo of the stretch ceiling line;
- type of ceiling system, if known;
- data on the baguette;
- diagram or photo of embedded elements;
- length of each working wall;
- internal and external corners;
- position of built-in wardrobes;
- curtain system;
- ventilation;
- air conditioner and service hatches;
- selected finish;
- cutting map 2400/2600 mm;
- estimated quantity;
- actual size of transport packaging.
Final specification KZ-012 before payment
Parameter What to fix Product KZ‑012 Cross-section 79×105 mm Material MDF / beech / oak Length 2600 / 2400 mm Stretch ceiling Type and position of the baguette Base Confirmed rigid mounting zone Contact with the canvas Excluded Cabinets Checked with template Curtain system Access saved Ventilation Removal and maintenance saved Angles Actually measured Layout By individual segments Quantity By practical map Finish Approved Delivery Long profile route verified Checklist before payment KZ-012
- Card and size 79×105 mm verified;
- Material selected after finish and cutting;
- Stretch ceiling baguette identified;
- working hard zone confirmed;
- no attachment to the web;
- no constant contact with the membrane;
- full-size template checked in all complex areas;
- cabinets, curtains, and ventilation accounted for;
- 2400 and 2600 mm calculated separately;
- whole view areas assigned first;
- corner cuts have allowance;
- remainders marked;
- delivery route checked;
- Price and availability have been rechecked.
FAQ about KZ-012 and an already installed stretch ceiling
What is the size of KZ-012?
Cross-section is 79×105 mm. MDF has a length of 2600 mm, beech and oak — 2400 mm.
What materials is KZ-012 made from?
From MDF, beech, and oak.
Can KZ-012 be used with a stretch ceiling?
Such a project can be considered if there is a rigid base for installation and the cornice does not load or damage the fabric.
Can KZ-012 be attached to the stretch fabric itself?
No. The fabric is not a load-bearing base.
What should be checked in the stretch ceiling structure?
Position of the baguette, fasteners, embedded parts, wiring, working wall area, and method of servicing the fabric.
What does 79×105 mm mean?
These are two cross-sectional dimensions of the profile. They should be read together with the drawing, not as one universal "height."
Is a full-size template needed?
For an already finished ceiling, it is very useful: it allows checking the offset, seating, and conflicts before purchase.
Can KZ‑012 touch the fabric?
Designing permanent contact of a rigid cornice with the membrane is not recommended. The specific joint should be coordinated with the ceiling installer.
What is the length of MDF KZ‑012?
2600 mm.
What is the length of oak and beech KZ‑012?
2400 mm.
What is more advantageous on a 5100 mm wall?
MDF 2600 mm allows assembling a wall from 2600+2500 mm with one joint. For 2400 mm, an additional segment or alternative use of offcuts is required.
Can KZ-012 be installed next to a cabinet?
Yes, if the profile does not interfere with the doors and there is a neat ending point. This is checked with a template.
How to combine KZ-012 with a curtain track?
You need to preserve the fabric movement, access to hooks, and the ability to service the track. There is no universal mutual position.
What to do near a ventilation diffuser?
Do not block the removable part and fasteners. If necessary, interrupt KZ-012 and finish the ends.
How to count the number of planks?
Based on individual wall segments and the cutting map, not just the total perimeter.
Can the cornice be pre-cut for the elevator?
Only if the transport cut coincides with future mounting parts and does not create an extra visible joint.
When is it better not to buy KZ-012?
When there is no rigid base, the profile touches the canvas, conflicts with the cabinet/curtain/ventilation, or requires drilling into an unknown ceiling structure.
Can a smaller cornice be installed instead of KZ‑012?
Yes, if the finished ceiling unit does not fit the 79×105 mm profile. The new profile still needs to be checked with the template.
Where to order KZ‑012?
After checking the ceiling unit — in the product card with the selected material and calculated quantity.
Final order of KZ‑012 after checking the ceiling unit
When the baguette is found, the base is confirmed, the full-size template does not touch the canvas, and the cutting map is assembled, you can order the wooden cornice KZ-012. Before payment, you need to re-check the price, availability, packaging, and the selected finish.
Bottom line: for a finished stretch ceiling, the first thing you buy is not the cornice, but confidence in the unit
KZ‑012 is a large architectural profile 79×105 mm that can expressively finish a wall under a stretch ceiling. However, an already installed membrane sharply increases the requirements for pre-order verification. You cannot attach the cornice to the membrane or drill near the baguette without understanding the hidden structure.
A proper project starts with the ceiling: determine the baguette, embedded elements, wiring, and the available rigid zone. Then a full-size KZ‑012 template checks the projection, position relative to the membrane, cabinets, curtains, and ventilation. If the structure is confirmed, proceed to material and cutting.
MDF 2600 mm can reduce the number of joints on walls around five meters. Beech and oak 2400 mm are chosen for natural wood and joints are planned deliberately. The quantity is determined by a segment map, not by the formula "perimeter divided by length."
If there is no rigid mounting zone, KZ‑012 should not be purchased until the ceiling assembly is reworked. This is the main commercial conclusion: a beautiful profile only makes sense when it can be safely and maintainably integrated into an existing structure.
Working sequence: KZ‑012 card and drawing → stretch ceiling data → baguette position → rigid mounting zone → full-size template → cabinets/curtains/ventilation → corners → 2400/2600 mm map → delivery → finish → order.