





















Article Contents:
- Slat panel PAN‑005 1010×9 mm: what the current product card confirms
- Price and material of PAN‑005: calculate only after the engineering wall diagram
- Price of PAN‑005 at the time of verification: calculate after determining the actual area
- When PAN‑005 can be run continuously behind the screen
- When is it better to leave a smooth service zone
- Should the service zone be visible
- How to finish the vertical pattern PAN-005 next to the screen
- Why the edge of the panel matters more than the total area
- How to check the edge without buying the entire batch
- Screen raised: how the wall should look in normal mode
- Screen lowered: does expensive oak make sense behind the screen
- PAN-005 made of MDF for a cinema: why color may matter more than material
- Glare from PAN-005: why you need to test not only color
- Why the OPAN-005 sample is especially useful near a projection screen
- What to check with the sample
- Can PAN-005 be considered an acoustic panel
- Where to place front speakers relative to PAN-005
- Whether to buy PAN-005 for the area always hidden by the screen
- Buy
- Do not buy
- Buy partially
- Why excluding a section behind the screen may not reduce the order at all
- Example: the service area actually reduces the number of modules
- Example: the service area does not provide savings, but creates a repair remainder
- Short PAN-005 740/950 mm or long 2670/2400 mm around the screen
- How to calculate PAN-005 by width of 1010 mm, not just by area
- How to calculate the lower zone under the screen
- How to calculate the upper zone above the screen
- Screen in a niche: why the service zone may coincide with ceiling architecture
- How to determine the service boundary if the screen is already mounted
- Bottom ballast bar: why it often resolves the 9 mm issue
- Why a single distance figure from the screen to the wall is not enough
- How to make a PAN-005 template 9 mm deep for screen checking
- If there are only a few millimeters of clearance between the screen and the wall
- If the screen is installed 30–50 mm further from the wall
- Screen wiring: why it cannot simply be hidden under a slat panel
- Socket and power supply behind the screen
- If the screen control is wireless
- If the cassette is built into the ceiling
- If the cassette is open and mounted on the wall
- How to make the service area part of the design, not a hole in the finish
- Horizontal service strip or central rectangle
- If the screen is wider than the decorative zone PAN‑005
- If PAN‑005 is wider than the screen
- How to check light reflection specifically on the sides of the fabric
- Screen lowers in front of dark PAN‑005: possible advantage
- The screen lowers in front of the light PAN‑005: when this is acceptable
- Should you use oak for the central hidden zone
- MDF under enamel as a more manageable option for a complex service wall
- Short modules 740 and 950 mm in the lower zone
- Long MDF 2670 mm and ceiling 2700 mm: why "almost enough" needs checking
- Beech/oak 2400 mm and a tall wall
- When a horizontal joint can be hidden behind a screen
- How to calculate the cost of oak for visible and hidden zones separately
- How to calculate the price of slatted panels around the screen
- When the service zone should be wider than the cassette
- When the service area may already be the cassette
- If the screen is already under warranty
- If the screen is planned to be replaced in a few years
- How to assess the future screen change on the layout
- If the projector is calibrated to the current geometry
- Scenario 1. The screen fully retracts into the ceiling recess
- Scenario 2. The cassette is open, and the cover is removed from the wall side
- Scenario 3. The bottom bar passes very close to the wall
- Scenario 4. The screen is almost always raised
- Scenario 5. Screen is almost always lowered
- Scenario 6. Screen occupies 80% of the wall width
- Scenario 7. Screen occupies only the central 60% of the wall
- Scenario 8. Column on the left, cabinet on the right
- When you don't need to buy PAN-005 for the entire wall
- When PAN-005 for the entire wall is really worth buying
- Mistake 1. Buy panels first, then read the screen instructions
- Mistake 2. Check only the screen fabric
- Mistake 3. Consider 9 mm the only critical dimension
- Error 4. Close the service cover
- Error 5. Read PAN‑005 with an acoustic panel
- Error 6. Buy oak for the hidden part of the wall without analyzing usage patterns
- Error 7. Count quantity only by m²
- Error 8. Not checking the wall with the screen raised
- Error 9. Not checking the projector light on a textured sample
- Error 10. Making the service zone exactly the width of the screen
- Error 11. Tying the interior to a single screen model
- Error 12. Using short panels only because they are cheaper
- Materials for installation and finishing
- Payment and delivery terms for long panels
- Control example: wall 4040 mm and one service strip 1010 mm wide
- Control example: screen covers central 2500 mm of a 3600 mm wide wall
- Why you cannot change the relief after calculating the service zone without re-checking
- What to do with the remainder after installation
- When an order can be considered ready for payment
- What to save in working documentation after installation
- What is the depth of the PAN-005 relief?
- What is the width of PAN-005?
- Can PAN-005 be installed behind a motorized screen?
- Can 9 mm interfere with the movement of the fabric?
- Is it necessary to leave a service zone?
- Can the screen housing be closed with panels?
- What to do with the wires?
- Is it worth buying oak behind the screen?
- Is MDF suitable for a dark theater wall?
- Is PAN‑005 an acoustic panel?
- How to count the quantity around the screen?
- Can a service cutout not reduce the order?
- When is an OPAN‑005 sample needed?
- Which is better — 950 or 2670 mm?
- What to do when replacing the screen in the future?
- Where to order PAN‑005?

The home theater is already assembled: the motorized screen is secured, the drive is adjusted, the fabric lowers into the working position, and the projector is calibrated. After that, a new design idea appears — to decorate the wall behind the screen with a slatted panel PAN-005. From the outside, the task seems simple: the screen is raised — the decorative slatted wall is visible; the screen is lowered — most of it is hidden by the fabric. So, you can buy panels for the entire wall and get a beautiful background in daytime mode.
But a motorized screen has not only the fabric itself. There is a cassette, a bottom weighted bar, a drive, a power cable, possible side cables, covers, and service areas. PAN-005 adds a relief of 9 mm depth to the wall. These 9 mm cannot automatically be considered safe or dangerous. First, you need to check the specific screen design, the trajectory of all moving parts, and access to service. Only after that is the actual cladding area determined.
If PAN-005 does not fall into the trajectory of the fabric and the bottom bar, does not cover the service covers, and does not interfere with access to the drive and wiring, the panel can be run continuously behind the screen. If maintenance or screen movement requires a free plane, it is better to leave a smooth service area and clad only those sections that truly do not conflict with the equipment.
The main commercial mistake is buying PAN-005 for the entire wall area before this check. The technical zone can reduce the order, change the layout across the 1010 mm width, and make part of the expensive material meaningless. But the opposite situation also happens: a service gap saves nothing because the number of whole modules remains the same. Therefore, after the engineering check, what is needed is not a calculation of square meters, but a map of whole panels.
If the material is still being compared, you can first Buy slatted panels for wall finishing after checking the geometry of the home theater. This article does not repeat the general comparisons of PAN-005 with PAN-007 or PAN-001 and does not turn into a guide for choosing a projector. Here there is one intent: an already installed screen + future PAN-005 + the service architecture of the wall.

Slatted panel PAN-005 1010×9 mm: what the current product card confirms
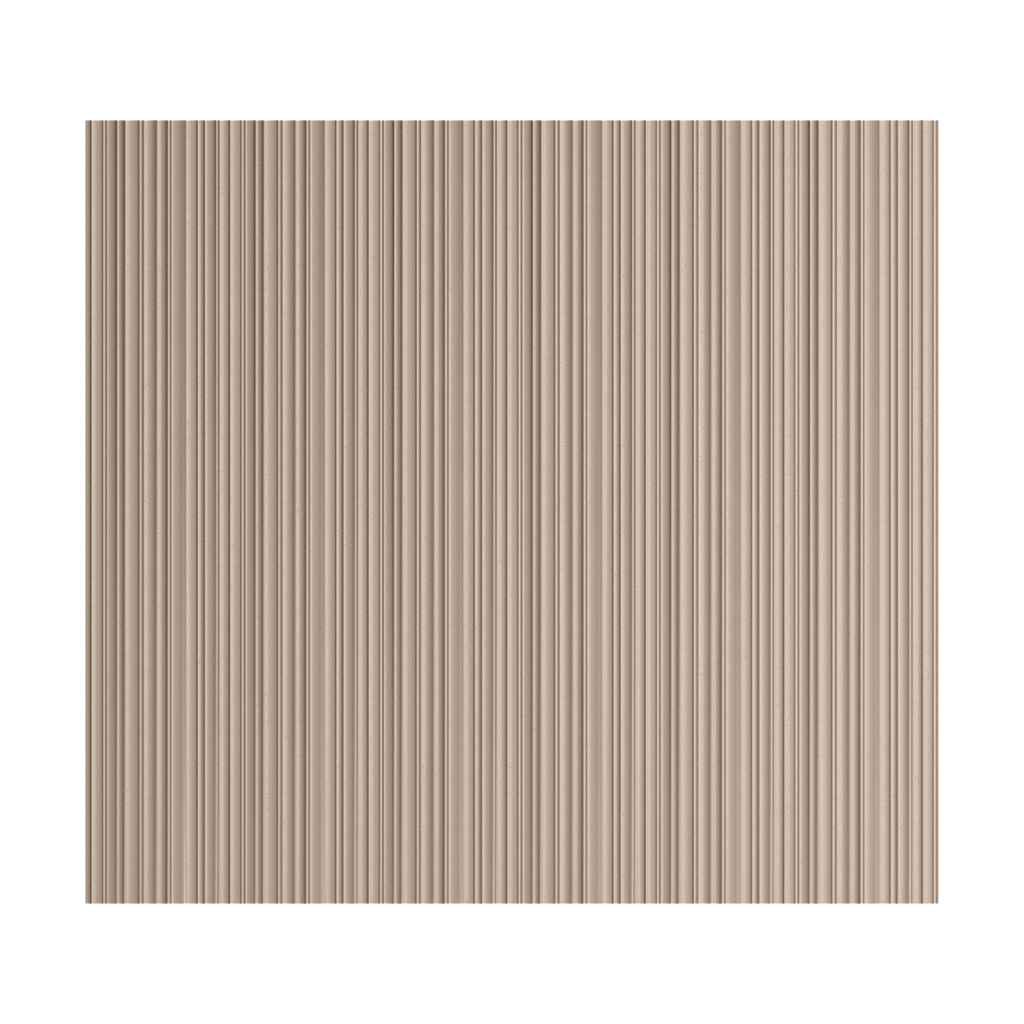
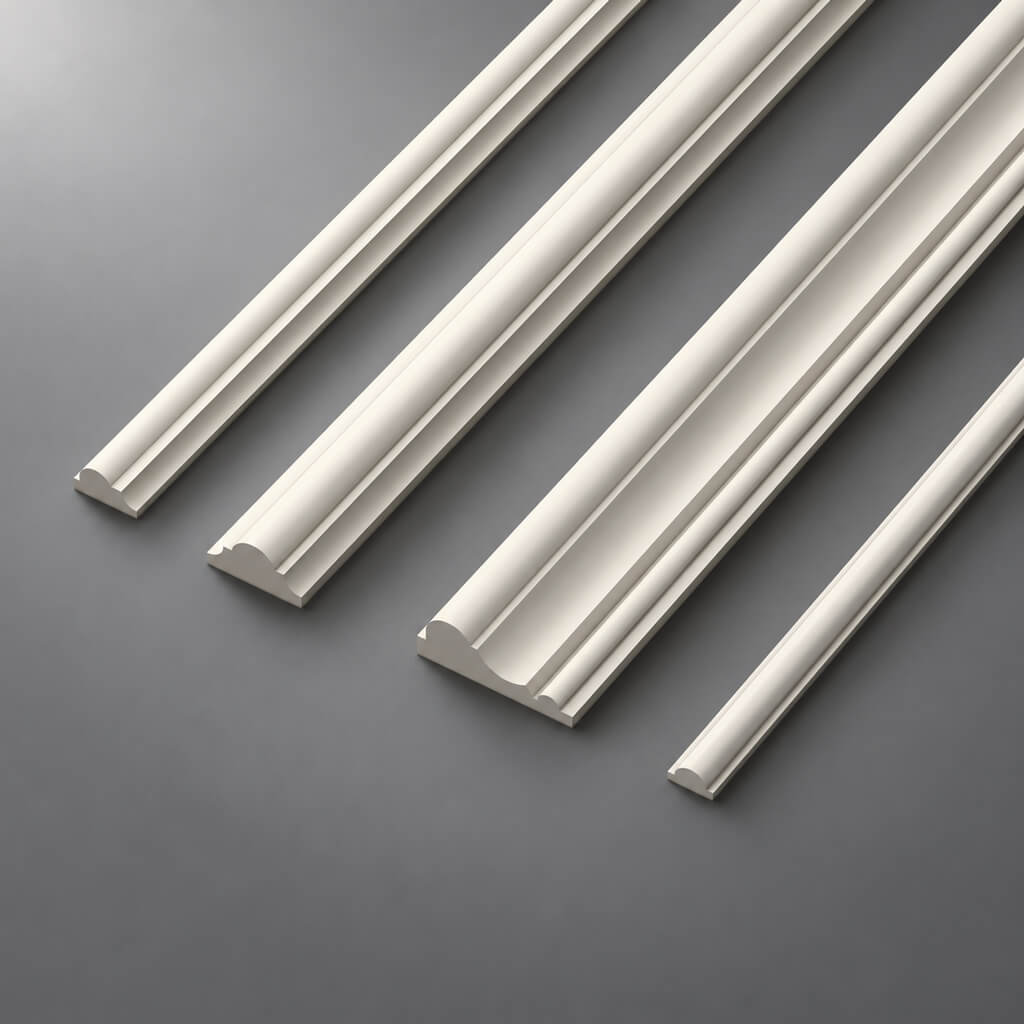
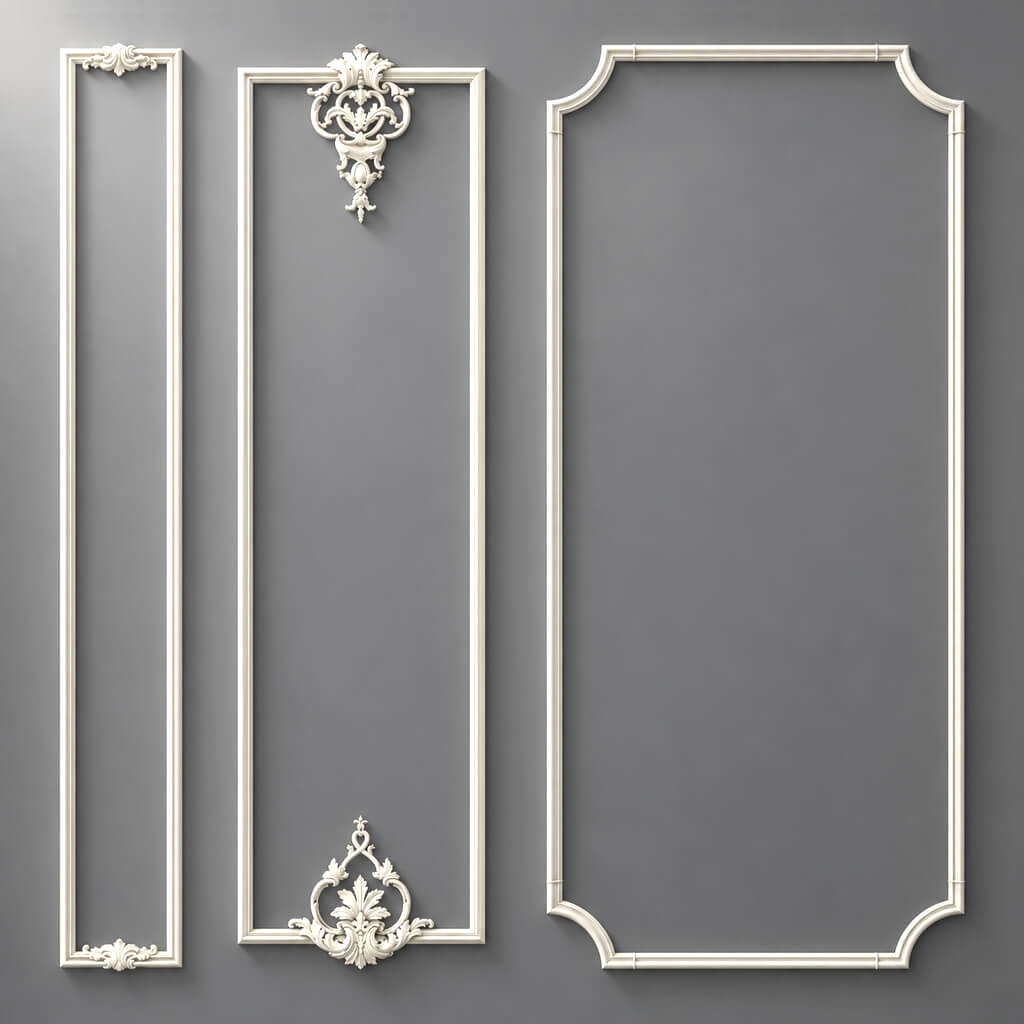
PAN-005 is a flexible slatted panel on a fabric base with a triangular relief of 9 mm depth. The current product card at the time of the check shows several lengths and materials. For this article, the width A=1010 mm and depth C=9 mm are especially important, because they determine the layout around the screen and the change in the wall plane.
| PAN-005 version | Size | How to use in a screen scenario |
|---|---|---|
| MDF | 1010 × 9 × 740 mm | Short current modification for local areas |
| MDF / primed MDF | 1010 × 9 × 950 mm | Short service and furniture zones |
| Beech / Oak | 1010 × 9 × 950 mm | Short format with natural texture |
| MDF / primed MDF | 1010 × 9 × 2670 mm | High vertical wall cladding |
| Beech / Oak | 1010 × 9 × 2400 mm | Long format of natural material |
The current card additionally shows MDF 740 mm, which was not in the original editorial plan. In the article, it is used only as an additional short format: the central task remains the same — to understand where PAN‑005 is needed around an already installed screen.
After checking the trajectory and service area, you can buy slatted panel PAN-005 in the required execution. Before that, choosing the material and length is premature.




Price and material PAN‑005: calculate only after the engineering wall scheme
Our factory also produces:


Price PAN‑005 at the time of check: calculate after determining the actual area
The current card shows that the cost strongly depends on the format and material. At the time of check:
| PAN‑005 | Price at the time of check |
|---|---|
| MDF 1010×9×740 mm | 9 780 ₽ |
| MDF 1010×9×950 mm | 12 550 ₽ |
| Beech 1010×9×950 mm | 18 120 ₽ |
| Oak 1010×9×950 mm | 29 510 ₽ |
| MDF 1010×9×2670 mm | 30 010 ₽ |
| Beech 1010×9×2400 mm | 40 780 ₽ |
| Oak 1010×9×2400 mm | 67 480 ₽ |
These prices change, so they need to be rechecked before payment. For the topic, something else matters: if there is a hidden technical zone of 2–3 m² behind the screen, the decision to 'clad it or not' can change the budget by tens of thousands of rubles, especially with oak finish. But savings cannot be calculated by area before laying out whole modules.
Get Consultation
Motorized screen and slat wall: which elements can actually conflict
The screen itself is often at some distance from the wall, but checking only it is not enough. A real motorized screen involves several elements: the bottom weighted bar, possible side cables, cassette, drive, wiring, and controls. The PAN‑005 relief must be outside the path of all moving parts and not block access to serviceable components.
The bottom bar can protrude relative to the screen and move closer to the wall. The cassette may have covers and fasteners that need access. The cable, socket, power supply, or receiver must also remain serviceable. Therefore, the main engineering principle of the article is simple: first the spec sheet and actual screen construction, then the PAN‑005 layout.
What to measure before buying PAN‑005
Take a separate wall measurement after the screen is installed. Design dimensions are useful, but actual installation geometry is more important.
| Size | What to measure | What for |
|---|---|---|
| Wall width | Finished width | Number of 1010 mm modules |
| Wall height | From floor to ceiling/cornice | Selection 2670, 2400, 950, 740 mm |
| Cassette width | By maximum dimension | Service zone |
| Panel width | Working part | Visible area in cinema mode |
| Distance of the fabric to the wall | In working position | Relief check 9 mm |
| Clearance of the bottom bar | Minimum distance to the wall | Moving element check |
| Height of lowered screen | From cassette to bottom edge | What really hides behind |
| Service cover | Position and removal path | Leave access |
| Power supply | Socket, lead-out, cable | Do not cover with panel |
Why you can't simply finish the entire wall from floor to ceiling with PAN-005
Full cladding is visually convenient: when the screen is raised, the surface looks seamless. But if the screen is serviced from the wall side, such finishing can turn a simple replacement of the drive or cable into dismantling several meters of finished panel.
Before continuous installation, you need to understand how the cassette is removed, where the service cover opens, how to access the motor, wiring, and mounts, and whether the screen can be removed without destroying the panel. If at least one answer is unknown, the full cladding project is not yet approved.
Solid slat wall or smooth service zone
When PAN-005 can be run continuously behind the screen
A continuous slat surface is justified if the 9 mm relief does not interfere with the path of the fabric and bottom bar, the cassette is serviced without removing panels, the mounts are independent of the decorative surface, the cables are accessible, and the screen can be removed if necessary. Then PAN-005 works in two modes: a technically neutral background during viewing and a full decorative wall when the screen is raised.
When it is better to leave a smooth service zone
A smooth section is more rational if access to the equipment is from the wall side or the textured cladding complicates maintenance. A service zone is needed when the cassette must be removed with access to the wall, the power supply is in the area, the drive cover must open toward the wall, the bottom bar runs very close to the surface, or a future screen replacement with a different model is planned.
The smooth zone should not look like an accidentally unfinished rectangle. It is better to tie it to the cassette, niche, screen axis, or another architectural boundary.
Should the service zone be visible?
Not necessarily. The technical section can be made so that it is hardly perceived as a separate insert. For example, leave a smooth surface only inside the ceiling niche, paint it the same color as the adjacent PAN-005, or finish the slat pattern along a natural vertical boundary.
The problem starts when the service cover is "hidden" behind a decorative panel so that it can no longer be opened. In a home theater, visual masking should not turn screen maintenance into a construction operation.
How to finish the vertical pattern PAN‑005 next to the screen
If the panel is interrupted around the service area, the question of ending the slat rhythm arises. PAN‑005 has an active triangular profile, so a random narrow edge at the boundary is especially noticeable.
Before cutting, you need to find the screen axis, lay out the modules on the left and right, check the outermost slat, and eliminate any random narrow fragment. If the screen is positioned symmetrically relative to the wall, it makes sense to first check the symmetrical pattern. If the equipment is offset due to furniture or acoustics, symmetry may be inappropriate—then focus on the actual composition.
Why the panel edge matters more than the total area
Two layouts can have the same area of PAN‑005 but look completely different. In the first, the edge ends with a full triangular slat; in the second, with a narrow offcut. The number of square meters is the same, but the quality of the result is not.
How to check the edge without buying the entire batch
Use an OPAN‑005 sample or a paper template of the repeating rhythm. Mark the proposed panel boundary on the wall and look at it with the screen raised. If the edge looks random, shift the layout before ordering.
Two interior modes: screen raised and screen lowered
Screen raised: how the wall should look in normal mode
The home theater is not used constantly. During the day, the screen is often stored in its cassette, and the wall becomes part of a regular living room. Therefore, the solution "nothing is visible behind the screen anyway" is only suitable for rooms that almost always function as a cinema hall.
| Condition | What is evaluated |
|---|---|
| Screen raised | Rhythm of battens, service area, color, light, equipment, symmetry |
| Screen lowered | Glare, visible side bands, lower zone, cables, speakers |
If a smooth technical area looks strange only in the raised state, it can be integrated with color, a niche, or an architectural frame instead of purchasing PAN‑005 for a knowingly problematic section.
Screen lowered: does expensive oak behind the screen make sense
This is one of the most useful commercial questions. If the screen covers a large central part of the wall during viewing, natural oak there may only be visible during the day when the screen is raised. If the living room lives as a regular room most of the time, such an investment may be justified. If the screen is almost always lowered, expensive finishing on the hidden area requires a separate explanation.
One cannot conclude "oak is not needed behind the screen." One must understand the room's usage mode. Sometimes it is the raised screen that reveals the main accent wall, and natural material works for many hours a day. In another project, the central area is almost always closed, and it is more logical to use MDF under enamel or even leave a service surface.
PAN-005 made of MDF for a cinema: why color may be more important than material
MDF allows you to achieve a precise solid color — for example, dark graphite, almost black, the color of the wall, or a contrasting decorative surface. For a home theater, this is convenient because the area around the screen often needs to be visually calm and not distract from the image.
But a specific RAL or NCS cannot be assigned without a project. The color depends on the screen, ceiling finish, furniture, lighting, and the room's usage mode.
Light, relief, and a sample of OPAN-005 next to the projector
Glare from PAN-005: why you need to test not only the color
The triangular relief of PAN-005 creates pronounced chiaroscuro. At one angle of light, the surface looks matte and deep; at another, individual facets may catch reflections. Therefore, before ordering, you need to check not only the chosen shade but also the actual gloss of the coating.
Test:
- daytime side light;
- projector light;
- decorative lighting;
- main ceiling lighting;
- reflection from the screen itself.
A very glossy finish on the triangular relief can behave noticeably differently than a matte one. This is especially important in the area visible on the sides of the lowered screen.
Why the OPAN‑005 sample is especially useful near the projection screen
OPAN‑005 measures 197 × 9 × 310 mm and allows you to see the actual triangular relief under light. It is not a replacement for a full-size panel or proof of the entire layout, but for color and light testing, the sample is more convenient than a flat swatch.
Before the main order, you can buying a sample OPAN-005 and place it exactly where the visible side area around the screen will be.
What to check with the sample
- relief with the projector turned on;
- light and shadow in the normal living room mode;
- matte/gloss;
- color next to the screen;
- combination with speakers and furniture.
Acoustics, speakers, and the boundaries of the decorative function of PAN‑005
Can PAN‑005 be considered an acoustic panel
There is no reason to sell PAN‑005 as a professional sound absorber just because it is used in a home theater. The confirmed card describes a decorative slatted panel on a fabric base, but does not claim special acoustic characteristics, absorption coefficients, or a certified acoustic scheme for PAN‑005.
The textured surface may visually and physically differ from a smooth wall, but this does not justify promising professional acoustic correction. If a home theater requires calculation of reflections, bass modes, absorption, or diffusion, that is a separate engineering task.
Where to place front speakers relative to PAN‑005
The article does not calculate acoustics, but decorative finishing should not block speakers, ports, mounts, or service access. First, fix the position of speakers and cables, then lay out PAN‑005.
If a speaker is built into the wall, it cannot be covered with a slatted panel without an agreed acoustic design. If floor-standing speakers are placed in front of the wall, it is important that cables and connectors remain accessible.
Should you buy material for the hidden central part of the wall
Do you need to buy PAN‑005 for the area that is always hidden by the screen
Three different solutions are possible here.
Buy
If the screen is often raised, the central wall is clearly visible, and service is not affected, continuous PAN‑005 creates a finished interior in normal mode.
Do not buy
If the area is technical, almost always covered by the housing/panel, serviced from the wall side, and does not affect the room's appearance, decorative cladding there may be unnecessary.
Buy partially
Often the best option is PAN‑005 on the left, right, and below the screen, while leaving a smooth technical surface behind the cassette/service block. This keeps the slat wall expressive, but the equipment remains accessible.
How to recalculate the amount of PAN‑005 after excluding the service area
Counting only square meters is not enough. The panel has a width of 1010 mm, so a modular wall map is important.
After excluding the technical zone, the wall is divided into real rectangles:
- left vertical strip;
- right vertical strip;
- bottom zone;
- top zone, if it is clad at all;
- separate areas around equipment.
Then they check which of these can be obtained from a single panel without inconvenient joints and incorrect orientation.
Modular arithmetic of 1010 mm: when a service zone saves a panel, and when it does not
Why excluding an area behind the screen may not reduce the order at all
Let's imagine a wall 3030 mm wide. In width, this is almost exactly three PAN‑005 modules of 1010 mm each:
1010 × 3 = 3030 mm.
If the service zone is only in the center of one module, but the side sections of that same module are still needed, a whole third panel may remain in the order. You save part of the material within the panel, but you don't remove it from the cart.
Therefore, the commercial conclusion is formulated not as "removed 1 m² — so we'll buy 1 m² less," but as "after subtracting the zone, we reassembled the map of whole modules."
Example: the service zone actually reduces the number of modules
Suppose the wall width is 4040 mm — that's four modules of 1010 mm. The central technical zone takes up exactly one full module in width, and its cladding is not needed at all in height. Then the project can switch from four long panels to three, if the remaining sections are indeed covered by whole modules.
With MDF 2670 mm, the difference at the current price is the cost of one long panel — 30,010 ₽. But this is only an illustration: the actual savings depend on the wall height and cutting layout.
Example: the service zone doesn't provide savings but creates a repair leftover
If the center of the panel is cut out for a cassette, and the remaining parts are used to the left and right or below the screen, a whole panel stays in the specification. However, a large leftover is formed, which can be kept as repair material or used on a short wall section.
Short and long formats around the service zone
Short PAN‑005 740/950 mm or long 2670/2400 mm around the screen
Short formats are useful if the service architecture breaks the wall into low zones: for example, a lower decorative band or areas above furniture. But you cannot choose them just because "the screen covers the middle." The layout is built first.
Long MDF 2670 mm is convenient for solid verticals. Beech/oak 2400 mm are suitable where the finishing height fits within this size. MDF 740 and 950 mm become additional options for local rectangles.
How to calculate PAN-005 by width of 1010 mm, not just by area
For example, the visible left strip has a width of 880 mm, the right one — 920 mm. Each requires a separate part of the panel. Theoretically, two fragments can be obtained from one panel 1010 mm wide only if their orientation and height allow cutting — they do not fit simultaneously by width:
880 + 920 = 1800 mm > 1010 mm.
That is, the area may be less than the area of one large panel, but geometrically at least a second blank is needed. This is an example where square meters are misleading.
How to calculate the lower zone under the screen
If the screen in the working position ends, for example, at a height of 700 mm from the floor, and a slatted panel should remain below, the short format 740 mm may be close to the task. But first you need to know the exact height to the bottom rail, baseboard, and furniture.
You cannot write "740 mm is ideal for under the screen" without specific dimensions. This version is useful only as one of the formats after measurement.
How to calculate the upper zone above the screen
If the cassette is hidden in a ceiling niche, above the PAN-005 fabric there may be no visible gap at all. If the housing is mounted below the ceiling, a strip remains between it and the ceiling. It can be finished with a short module or left as a smooth service zone depending on access to the cassette.
Screen in a niche: why the service zone may align with the ceiling architecture
This is one of the best scenarios. The technical niche itself forms the boundary, and PAN-005 does not have to be randomly interrupted in the middle of the wall. The panel aligns with the niche line, and screen maintenance occurs inside it.
But even here, you need to check whether the cassette can be lowered and whether the slatted surface interferes with its removal.
How to check the screen trajectory and actual service access
How to determine the service boundary if the screen is already installed
You don't need to guess it based on the fabric width. The service zone is built around the actual equipment. First, determine the maximum contour of the cassette and components that may be removed. Then check the service direction. If the cover opens downward, free space below is needed. If the end block is removed from the side, the service zone shifts toward one edge. If access is fully frontal, the panel on the wall behind the screen may not interfere at all.
Practical algorithm:
- move the screen to the service position, if provided;
- open or show all accessible covers;
- mark their contours with painter's tape on the wall;
- add the trajectory line of the bottom bar;
- apply the intended plane PAN‑005 +9 mm;
- check dismantling without removing the decorative trim.
Only after this is the area considered "technical" or "free for PAN‑005".
Bottom weighted bar: why it often resolves the 9 mm issue
The panel itself is thin and can be at a comfortable distance from the wall. The bottom bar is usually stiffer, thicker, and has end elements. If it moves at a smaller distance, it is its minimum clearance that needs to be compared with the new wall plane.
Suppose before panel installation the minimum actual clearance between the bottom bar and the wall is 16 mm. PAN‑005 adds up to 9 mm along the relief. The simple difference leaves about 7 mm:
16 − 9 = 7 mm.
But even such a calculation cannot be declared guaranteed safe: the wall may be uneven, the panel has a mounting layer, the bottom bar may slightly oscillate. Therefore, after a dry template, the screen must be fully lowered and raised several times.
Why a single distance figure of the panel to the wall is not enough
If the user measured 30 mm to the fabric in the center, that still says nothing about the edges. The bottom bar, side cables, cassette, and mounting protrusions may be closer. You need to find the minimum distance of the entire moving system, not a comfortable number at one point.
How to make a PAN-005 template 9 mm deep for checking the screen
Before purchasing the panel, you can use a rigid batten or foam board about 9 mm thick. It is better to make several fragments of 300-500 mm each and temporarily place them in the most critical spots: under the bottom bar, at the left and right edges, near the service cover.
Then the screen is run several times along the full trajectory. The template must not:
- touch the bottom bar;
- catch the cables;
- interfere with the operation of the covers;
- block access to the fasteners;
- deform from contact with the screen.
If even a rigid 9-millimeter mockup conflicts with the screen, it is too early to buy a PAN-005 for this area.
If there are only a few millimeters of clearance between the screen and the wall
Borderline compatibility is a bad time for optimism. If after accounting for PAN-005 there are 2-5 mm left, you need to add real wall unevenness, mounting adhesive, and possible movement of the bottom rail. Such a joint is better either measured instrumentally and approved, or left smooth.
If the screen is installed 30-50 mm further from the wall
A large gap increases the chances of continuous cladding, but does not eliminate service needs. You can have 50 mm to the panel and still cover with a panel the single screw through which the cassette is removed. Movement geometry and maintainability are checked separately.
Screen wiring: why it cannot simply be hidden under a slat panel
PAN-005 is a decorative panel, not a declared cable channel. If screen power or control wiring runs along the wall, the electrical route is designed first. You cannot clamp the cable between the panel and the wall without calculation, make a random cutout in MDF/wood, or cover a connection that must remain accessible.
Socket and power supply behind the screen
If the socket is directly in the service zone, a smooth surface is often more convenient. If it is on the side and accessible independently of PAN-005, the panel can run continuously. What matters is not the mere presence of the socket, but access to the plug after installation.
If screen control is wireless
A wireless remote does not eliminate power and motor. Even if the user never touches the screen housing, service access must still remain. Do not consider the wall completely "non-technical" just because the screen is controlled remotely.
If the cassette is built into the ceiling
A built-in niche often simplifies the task: the main service area goes into the ceiling structure, and the wall behind the fabric can be free. But you need to check whether the cassette can be removed downward and whether a free vertical strip is required for dismantling.
If the housing is extracted downward in front of the wall, the active 9-millimeter relief may end up in the path not during normal operation, but during repairs. This is also a reason to leave a local smooth zone.
If the cassette is open and mounted on the wall
Here, PAN‑005 more often encounters fasteners and the housing. You need to determine whether the panel should fit under the cassette, go behind it, or stop below it. There is no universal solution.
The neatest option often results when the PAN‑005 boundary coincides with the bottom line of the housing or another clear architectural horizontal line, rather than ending randomly a few centimeters away from it.
How to make the service area part of the design, not a hole in the finish
There are several working techniques:
- paint the smooth section exactly in the color of PAN‑005;
- align it with the width of the cassette;
- make the vertical edges symmetrical relative to the screen;
- integrate the zone into the common niche;
- cover the technical part with the screen in the raised position, if the design allows;
- leave only a narrow horizontal service strip instead of a large rectangle.
The choice depends on which part exactly needs to open. There is no need to leave a smooth half of the wall if the service requires only a 150-millimeter strip near the cassette.
Horizontal service strip or central rectangle
If maintenance runs along the entire cassette, a horizontal strip makes sense. If the equipment is in one side compartment, it is more correct to leave a local rectangle. The service geometry is shaped by the equipment, not by the convenience of cutting the panel.
If the screen is wider than the decorative zone PAN‑005
Sometimes the slat panel is intended only as a central insert, and the screen is wider than it. Then the side edges of the fabric pass in front of the smooth walls when lowered. This can even simplify the task: the relief is only in the central zone and is easily checked along the trajectory.
If PAN‑005 is wider than the screen
When raised, the slat wall reads as a major accent. In cinema mode, visible bands remain on the sides. Their color and gloss are especially important: the viewer sees them simultaneously with the image.
How to check light reflection specifically on the sides of the screen
Place the OPAN‑005 or a painted relief sample in the side area, turn on the projector, and display a bright scene. If the surface noticeably glares and distracts, change the finish or color before purchasing the batch. Checking with the projector off is insufficient for such a solution.
Screen lowers in front of dark PAN‑005: a possible advantage
A dark matte side area can visually reduce distracting reflections around the image. But this does not turn PAN‑005 into an acoustic or special cinema material. This is only about the visual behavior of the chosen finish.
Screen lowers in front of light PAN‑005: when this is acceptable
If the room is primarily a living room and the screen is used rarely, a light wall may be more important than an ideal "black surround" in cinema mode. Here, the choice is made based on the room's priority. There is no need to blindly paint PAN‑005 black just because there is a projector.
Should you choose oak for the central hidden area
Natural oak is justified if the wall is often seen when the screen is raised, the texture relates to the furniture and interior, and the budget allows for a cohesive composition. If the central section is hidden almost constantly and the side areas can be made from another solution, it is worth comparing cost and benefit.
However, mixing oak and MDF on the same visible wall without a design is not allowed: the texture, tone depth, and light behavior will differ.
MDF under enamel as a more manageable option for a complex service wall
MDF allows you to precisely match the color of a smooth technical zone. This is convenient if part of the wall is PAN‑005, and part should remain flat. With a successful color match, the difference reads as "relief / smooth surface," not as "two different materials."
Short modules 740 and 950 mm in the lower zone
If a decorative section 600–900 mm high remains under the lowered screen, a short PAN‑005 can be convenient. For example, with a clear zone of 700 mm, MDF 740 mm provides about 40 mm of nominal allowance for trimming. At 900 mm, 950 mm is more logical.
But this is only arithmetic. You need to account for the baseboard, furniture, the bottom rail of the screen, and the finished edge. The short format should not become a reason for an accidental horizontal joint.
Long MDF 2670 mm and ceiling 2700 mm: why "almost enough" needs to be checked
The PAN‑005 card describes 2670 mm as a long format, but if the finished wall height is 2700 mm, a simple calculation shows a deficit of 30 mm. You cannot promise that the panel will cover the full height without an additional solution.
In a screen scenario, this may not be a problem: the top 30–100 mm can go into a ceiling niche or service strip. But it is the actual assembly that should explain the difference, not a conditional phrase like "almost to the ceiling."
Beech/oak 2400 mm and a tall wall
At a height of 2700–3000 mm, a long solid format does not cover the wall completely with a single piece. A horizontal joint will appear, or a separate top/bottom zone. Behind a motorized screen, such a joint can be tied to the service architecture, but it must be designed, not happen by accident.
When a horizontal joint can be hidden behind a screen
If the screen in the raised position leaves the entire wall visible, the joint cannot be hidden. If a cassette, niche, or furniture permanently covers a certain horizontal line, the joint can be aligned with it. The key is to check both operating modes.
How to calculate the cost of oak for visible and hidden areas separately
Suppose the wall needs four long oak PAN-005 panels at 67,480 ₽ each. The full set costs 269,920 ₽ before finishing and installation. If the central hidden area allows removing one whole module from the layout, the savings at the current price equal the cost of one panel — 67,480 ₽.
But if the service cutout does not reduce the number of whole modules, the savings will be zero, even if the cladding area has noticeably decreased. This is a good example of why a commercial decision is checked by the cart, not by square meters.
How to calculate the price of slat panels around the screen
If a customer wants to compare MDF, beech, and oak options, first build the same geometric layout, then substitute current prices. For a category comparison, you can open prices of slat panels for interior wall finishing. Final figures should be taken from the product cards on the day of ordering.
When the service area should be wider than the cassette
If side mounts, power supply, or drive extend beyond the enclosure dimensions, the smooth zone must account for them. The service rectangle is designed around the serviced system, not the attractive screen width.
When the service zone can be narrower than the cassette
If the enclosure is serviced only through a local cover and everything else requires no access, there is no reason to keep the entire width smooth. But this is only possible after confirming the design of the specific screen.
If the screen is already under warranty
Wall finishing must not hinder warranty service. Before installation of PAN‑005, it is useful to save photos of the mounts, serial information, and the manual. If a service technician must remove the enclosure, the decorative wall must not obstruct the standard procedure.
If the screen is planned to be replaced in a few years
A new model may have a different cassette width, different drive, and different trajectory. A too-precise cutout for the current screen creates a dependency of the interior on one piece of equipment. More sustainable solutions are a universal service strip, a ceiling niche, or a solid PAN‑005 if it does not interfere with service at all.
How to assess future screen changes on the mockup
Draw an additional conditional contour +100–150 mm around the current cassette. This is not a regulatory allowance, but a design test. If even a slight increase in a future model breaks the entire layout, the current service zone is too tied to a single device.
If the projector is calibrated to the current geometry
Changing the wall surface should not change the position of the screen itself. Do not shift the cassette or the fabric just to accommodate a convenient 1010 mm module if it requires reconfiguring the cinema room. The decorative layout adapts to the already working equipment.
Practical scenarios for PAN‑005 with a motorized screen
Scenario 1. The screen fully retracts into the ceiling recess
The cassette is hidden, service is performed from the ceiling area, the fabric lowers at a distance from the wall, and the bottom bar does not touch the 9-millimeter template. In this case, PAN‑005 can be considered as a full wall finish from floor to the recess line. This scenario is especially good if the screen is often raised and the wall is visible.
Scenario 2. The cassette is open, and the cover is removed from the wall side
Continuous PAN‑005 blocks access. It is better to leave a smooth horizontal service strip tied to the screen housing. The panel starts below or ends at a clear architectural line.
Scenario 3. The bottom bar passes very close to the wall
The 9 mm template shows a borderline gap. Even if the cassette is easy to service, the relief may fall into the trajectory. Here, technical compatibility matters more than the beauty of a seamless wall. A smooth section is left across the entire movement zone, or the geometry is changed only after confirmation from the screen manufacturer.
Scenario 4. The screen is almost always raised
The living room is used daily, and movies are watched a couple of times a week. The decorative wall is visible most of the time. If service is not compromised, purchasing PAN‑005 for the central zone is much more justified than in a dedicated cinema room.
Scenario 5. Screen almost always lowered
A separate room is used as a cinema. The central zone is constantly hidden. Natural oak in the area behind the screen may not provide noticeable interior value. Consider MDF, a smooth service surface, or reduced cladding on the sides.
Scenario 6. Screen occupies 80% of wall width
Narrow slat strips remain on the sides. Their color and rhythm have the strongest impact on the picture in cinema mode. The central hidden zone may not reduce the order if the 1010 mm module is still needed for the side strips.
Scenario 7. Screen occupies only the central 60% of the wall
The side fields are wide, and PAN-005 is perceived as a full architectural frame. Then a solid wall is more often justified if there is no service conflict.
Scenario 8. Column on the left, cabinet on the right
Symmetric layout relative to the screen is no longer
When you don't need to buy PAN-005 for the entire wall
It is better to refuse full cladding if:
- the screen requires constant access from the wall side;
- 9 mm of relief falls within the trajectory of the bottom rail;
- the central zone is almost always closed and carries no interior value;
- the layout creates many inconvenient narrow offcuts;
- expensive natural material is hidden most of the time;
- the glossy finish interferes with image perception;
- the panel covers the service electrical wiring;
- future screen replacement will require complete wall demolition.
In these cases, partial PAN‑005 or a smooth technical zone is more honest than decorative cladding "because the wall must be whole."
When PAN‑005 across the entire wall is truly worth buying
Full cladding is strong if the screen rises, the wall remains visible, service is organized independently of the finish, the relief does not conflict with movement, and the material supports the entire interior. Then PAN‑005 works not only as a cinema background, but also as a full-fledged accent wall.
Mistakes when buying PAN‑005 for a wall with a projector
Mistake 1. Buy panels first, then read the screen instructions
The consequence is a blocked service cover or a conflict with the trajectory. First the equipment, then the decor.
Mistake 2. Check only the screen fabric
The bottom bar and cables may be closer to the wall. You need to look for the minimum clearance of the entire system.
Mistake 3. Consider 9 mm the only critical dimension
There is a mounting layer, wall unevenness, and service. The relief is only one parameter.
Mistake 4. Cover the service cover
Future repairs turn into dismantling PAN‑005.
Error 5. Treating PAN-005 as an acoustic panel
Special acoustic characteristics for the specific SKU are not confirmed.
Error 6. Buying oak for a hidden part of the wall without analyzing the usage mode
The material may be barely visible and not provide the expected value.
Error 7. Counting quantity only by square meters
The width of 1010 mm and the shape of the service area determine the actual number of modules.
Error 8. Not checking the wall with the screen raised
The technical area may look like a random spot in daytime mode.
Error 9. Not checking the projector light on a textured sample
Glossy edges may produce unwanted glare.
Error 10. Make the service area exactly the width of the panel.
The serviced enclosure may be wider or narrower. The boundary is built according to the equipment.
Error 11. Tie the interior to a single screen model.
After replacing the cassette, the service cutout no longer fits.
Error 12. Use short panels only because they are cheaper.
Additional horizontal joints can ruin the solid vertical composition.
Decision tree: PAN‑005 for the entire wall or service area.
| Question | If yes | If no |
|---|---|---|
| Relief 9 mm outside the screen path? | Check service | Leave smooth area/rework node |
| Is the cassette serviced without removing panels? | Check electrical | Service area required |
| Are power and mounts accessible? | Check visual mode | Change the layout |
| Is the wall often visible when the screen is raised? | Full cladding is more valuable | Compare partial scheme |
| Does the sample not glare under the projector? | Check quantity | Change finish/color |
| Does excluding the service area reduce whole modules? | Recalculate budget | Decide based on service and design, not cost savings |
What to send to the manager before ordering PAN‑005
For a useful consultation, prepare:
- article number PAN‑005;
- the material;
- photo of the entire wall;
- photo of the screen raised;
- photo of the screen lowered;
- width of the cassette;
- the width of the panel;
- distance of the fabric and bottom bar to the wall;
- size of the service area;
- power supply position;
- wall dimensions;
- location of speakers and furniture;
- preliminary layout of 1010 mm;
- desired finish.
After confirmation, you can order PAN-005 from MDF, beech, or oak in the quantity required specifically for this wall.
Installation materials, delivery, and final acceptance
Materials for installation and finishing
Adhesive, primer, and finish are selected after the material PAN‑005, the wall substrate, and the lighting mode are understood. For accompanying items, you can open Mounting and finishing materials.
Do not run the entire batch for painting until testing near the projector. One successful color on a regular wall does not guarantee a successful result in cinema mode.
Payment and delivery terms for long panels
MDF 2670 mm and beech/oak 2400 mm are long-length elements. Before payment, it is useful to check payment and delivery terms, the current price and availability. If the layout requires one spare long panel, it is better to include it in the initial specification rather than rely on a late additional order.
Final specification PAN‑005 for the wall with a motorized screen
| Parameter | What to fix |
|---|---|
| Product | PAN‑005 |
| Width / depth | 1010 × 9 mm |
| Material | MDF / beech / oak |
| Length | 740 / 950 / 2670 / 2400 mm depending on the version |
| Screen model | Exact name |
| Trajectory | Checked with 9 mm template |
| Service | Covers, drive, mounts available |
| Power supply | Not blocked |
| Service zone | Size and position |
| Wall mode | Screen raised / lowered checked |
| Finish | Checked with a working projector |
| Quantity | Based on the 1010 mm module map |
| Reserve | Based on cutting layout and future equipment changes |
Control calculations of finished schemes
Control example: a wall of 4040 mm and one service strip 1010 mm wide
The wall width divides perfectly into four modules:
4040 ÷ 1010 = 4.
If one central strip 1010 mm wide is completely excluded across the entire working height, the project theoretically transitions from four long modules to three. For MDF 2670 mm, the current price difference is 30,010 ₽. For oak 2400 mm, it is 67,480 ₽.
But if the service area occupies only part of the height of this central module, the panel may still be needed for the lower or upper fragment. Then the quantity in the cart will not decrease. This is the fundamental difference between area and modular cutting.
Control example: a screen covers the central 2500 mm of a wall 3600 mm wide
1100 mm of total visible width remains on the sides — approximately 550 mm each. For a symmetrical scheme, each side requires a separate vertical fragment. One panel 1010 mm wide is not enough to simultaneously obtain two strips of 550 mm:
550 + 550 = 1100 mm > 1010 mm.
Although the total visible area seems small, at least two blanks will be required in width. This is another example of why PAN‑005 should not be calculated only in square meters.
Final purchase route after checking the home theater
When the engineering wall scheme is approved, the buyer can already choose not an abstract "slat finish" but a specific volume. If you want to review the entire product group once more before placing an order, you can buy slat panels for interior wall finishing after comparing the material, length, and current price. However, switching to a different profile after the service zone is approved requires re-checking the relief depth and layout.
For PAN‑005 itself, the working order sequence is as follows:
- Fix the model and mounting scheme of the screen.
- Measure the minimum actual clearances.
- Check the 9-millimeter template during the full movement cycle.
- Open the service covers and check the dismantling.
- Draw the precise service zone.
- Check the wall with the screen raised and lowered.
- Perform a light test OPAN‑005.
- Build a module map 1010 mm wide.
- Select length 740/950/2670/2400 mm for specific rectangles.
- Compare the cost of MDF, beech, and oak already on whole panels.
- Reserve only where it is actually needed.
If after this a general category transition is needed to order several modules and compare availability, the request buy slatted panels for interior wall decoration logically leads to the catalog, and the exact PAN‑005 is ordered from the SKU card.
Why the relief cannot be changed after calculating the service zone without re-checking
If PAN‑005 is replaced with another slat panel, the depth, profile, and sometimes length change. The service zone safe for 9 mm does not automatically become safe for another relief. Therefore, an alternative product means a new template, not just a new price.
What to do with the remainder after installation
It is better to keep a large fragment of PAN-005 together with the finish code. It will come in handy if the screen is replaced in the future and the technical zone becomes smaller, or if local edge repair is needed. For oak and beech, such a remainder is especially valuable due to the natural pattern of a specific batch.
Final check before payment and service documentation
When an order can be considered ready for payment
The specification is ready if all serviced screen boundaries are known, the 9-millimeter relief is physically verified, both visual wall situations are approved, the material is selected, and whole panels are calculated. If the question "what if the drive is removed from the wall side" remains, it is too early to process the entire batch.
Before payment, you also need to re-check current prices and availability in the product card. The panel may be in stock in one material and made to order in another, and the primed MDF version has its own cost. These data are dynamic and should not be perceived as a permanent characteristic of the item.
What to keep in working documentation after installation
Save a photo of the wall before cladding, a photo of the service covers in the open state, the exact size of the smooth zone, the wiring diagram, and several screen shots in the upper and lower positions. On the plan, mark the boundaries of PAN-005 and the panel numbers.
This documentation is especially useful in a few years when the motor, cassette, or the screen itself needs to be replaced. Without it, the service technician will have to re-determine where the decorative panel ends and which area can be safely disassembled.
If the service zone is visually hidden, it still needs to be documented. Good technical integration is not only invisible access today, but also clear access for a person who did not participate in the original renovation.
FAQ about PAN-005 behind a motorized screen
What is the relief depth of PAN-005?
9 mm.
What is the width of PAN-005?
1010 mm.
Can PAN-005 be installed behind a motorized screen?
Yes, if the panel does not interfere with the path of moving parts and does not obstruct the service of the specific screen.
Can 9 mm interfere with the movement of the fabric?
The fabric itself may have sufficient clearance, but the bottom bar, cables, and other elements need to be checked separately.
Is it necessary to leave a service zone?
Only if required by the screen's design and maintenance. The size is determined by the actual component.
Can the screen housing be closed with panels?
Covers, fasteners, and areas needed for routine maintenance must not be blocked.
What to do with the wires?
Power and control cables are designed separately and must remain accessible according to the equipment layout.
Is it worth buying oak behind the screen?
It depends on how often the wall is visible when the screen is raised and how important the natural texture is to the interior.
Is MDF suitable for a dark cinema wall?
MDF is convenient for covering paint, but the specific color and gloss need to be checked with the projector running.
Is PAN-005 an acoustic panel?
There are no confirmed special acoustic characteristics for PAN-005, so it cannot be positioned as such.
How to count the quantity around the screen?
First, divide the wall into real cladding zones, then assemble them from modules 1010 mm wide and of the selected length.
Can a service cutout not reduce the order?
Yes. If the remaining fragments still require the same whole panel, the quantity does not change.
When is an OPAN-005 sample needed?
When you need to check the actual relief, color, and glare next to a working screen.
Which is better — 950 or 2670 mm?
It depends on the height of the specific zone. The short format should not create an extra horizontal joint.
What to do when replacing the screen in the future?
Do not tie the service geometry too rigidly to the current model, or keep a repair stock of PAN-005.
Where to order PAN-005?
In the product card after checking the equipment, finish, and module map.
Summary: first the screen and service, then PAN-005 and the number of modules
PAN-005 has a width of 1010 mm and a relief depth of 9 mm. These parameters are important for a home theater, but by themselves they do not determine whether the entire wall needs to be clad. First, the specific motorized screen is checked: the bottom bar, cassette, cables, drive, power supply, and service direction.
If PAN-005 does not interfere with movement and service, a solid slat wall provides a beautiful daytime mode when the screen is raised. If the equipment requires a flat surface, a smooth service zone is the correct engineering solution, not a flaw.
After that, they recalculate not square meters, but whole modules. The service cutout may remove one long panel from the order, or it may not change the cart at all. For expensive oak, this difference is especially significant.
The correct sequence: screen passport → actual dimensions → 9 mm template → movement and service check → "solid wall / service zone" scheme → OPAN-005 test with the projector running → 1010 mm module map → material and length → order.