Article Contents:
- Hallway as an architectural challenge
- Why the entryway cannot be decorated like a living room
- Typology of hallways: each has its own logic
- Type 1: Narrow long hallway (width up to 120 cm)
- Type 2: Medium-width hallway (120–160 cm)
- Type 3: Spacious entryway (from 6–8 sq m)
- Type 4: Hall (from 10–12 sq m)
- Long wall in the hallway: how to break monotony
- Scheme 1: Series of identical rectangular frames
- Scheme 2: Horizontal belt line
- Scheme 3: Lower decorative belt with verticals
- Scheme 4: One large frame as a focal point
- Piers between doors: the most common task
- Pier width: everything depends on it
- Offset from the casing: critically important
- Switches and sockets: bypass, not play around
- Molding height on the pier
- Decorative area near the mirror: hallway as an interior
- Frame around the mirror
- Decorative panel behind the console
- Decorative elements in the frame
- Lower decorative belt in the hallway: function and aesthetics
- Belt with verticals: panel system
- Profile selection: detailed analysis for the hallway
- Smooth profile vs. textured profile
- Profile selection table
- Plank length and footage calculation
- Color solutions for the hallway: three working approaches
- Approach 1: Monochrome — molding and wall in one color
- Approach 2: Molding lighter than the wall — delicate contrast
- Approach 3: White molding — classic
- Hallway design schemes: specific examples
- Scheme A: Narrow hallway, ceiling 2.5 m, many doors
- Scheme B: Entryway 8 sq. m, ceiling 2.7 m, mirror at the entrance
- Scheme C: Hall 14 sq. m, ceiling 3 m, main entrance
- Installation in the hallway: technical nuances
- Perforated walls in old houses
- Installation in the corner of the hallway
- Glue in the hallway: installation conditions
- Complete set for hallway and entryway
- Mistakes most often made in the hallway
- Mistake 1: Profile too wide
- Mistake 2: Frames flush with doors
- Mistake 3: Disproportionate frame around the mirror
- Mistake 4: Different profiles in the same space
- Mistake 5: Cutting at joints not accounted for
- Mistake 6: No allowance left
- Interior styles and moldings for the hallway
- Modern minimalism
- Scandinavian Style
- Neoclassicism
- Classic
- Frequently Asked Questions
- About the Company STAVROS
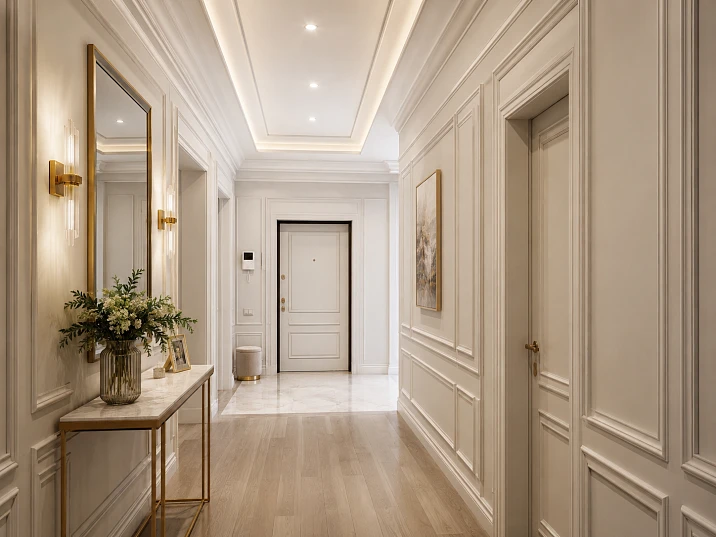
Polyurethane moldings help turn a hallway and entryway from a mere passage zone into part of the interior: thin profiles gather wall sections, frames break up long walls, a lower belt protects the finish, and painting in the wall color does not overload the narrow space. The goal is not to decorate every centimeter, but to build logic.






The hallway as an architectural challenge
There are rooms you walk into and immediately understand: people with taste live here. Usually, it's not a living room with an expensive sofa or a kitchen with a German set. It's the entryway. It is the first to greet everyone who crosses the threshold. It creates the first impression, which cannot be made twice.
And here's the paradox: the entryway and hallway are the most challenging spaces for decor. Many doors, many corners, narrow wall sections, an ever-cramped corridor, switches in awkward places, a mirror on one wall, a closet on another. It would seem — what moldings? There's no room there.
In fact, there is room. You just need a different approach. Not the one that works in a living room or bedroom. The hallway requires special logic: minimum decor, maximum visual impact, strict control over proportions.
Polyurethane moldings for walls — is precisely the tool that allows you to make the entryway and hallway neat, finished, and architecturally sound. But only if you understand how to work with this space.




Why the entryway cannot be decorated like a living room
This is the key principle that determines everything else. The entryway and hallway are passage zones. There is no point from which a person looks at the wall for a long time. There is movement: entered — took off coat — moved on. The gaze moves quickly, with peripheral vision. The brain registers the overall impression, not the details.
This means the following: in the entryway, the overall rhythm of decor is important, not its richness. If you hang wide relief frames with a large profile in a narrow corridor, they will create a feeling of tightness and visual noise. Not because they are bad, but because they do not match the scale and logic of this space.
The rules for the entryway and hallway are fundamentally different:
-
Less is more: one neat decorative element is better than five competing ones;
-
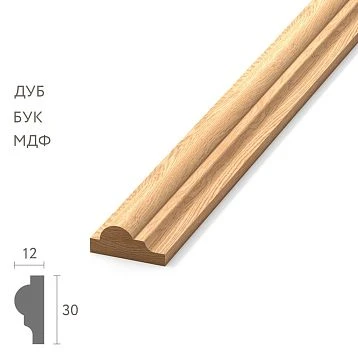
Thin profile: for narrow corridors — no wider than 25 mm, for standard ones — up to 35 mm;
-
Monochrome or close tones: molding in the color of the wall or a shade lighter — this is a strategy, not a lazy choice;
-
Rhythm is more important than ornament: evenly spaced simple profiles work better than randomly scattered decorative elements;
-
Consideration of doors and openings: each molding must be "tied" to the existing geometry.
Our factory also produces:
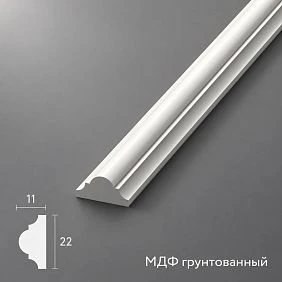


Typology of corridors: each has its own logic
Before choosing moldings for the hallway, you need to understand what kind of corridor you are dealing with. This is not a rhetorical question — different types of corridors require fundamentally different solutions.
Get Consultation
Type 1: Narrow long corridor (width up to 120 cm)
The most common type in city apartments. The width is constrained, the ceiling seems lower than it is. The main task: to create a feeling of height and lightness, not to overload the side walls.
Solution: vertical moldings on the piers between doors. Thin profile (10–18 mm). Monochrome scheme. No horizontal frames — they would narrow the corridor even more.
Type 2: Medium-width corridor (120–160 cm)
Here you can already work with different schemes. Vertical profiles on the piers, small rectangular frames on sections without doors, a lower decorative band. The width allows using a medium profile (20–30 mm).
Type 3: Spacious hallway (from 6–8 sq. m)
A hallway with sufficient space is already a separate room. Here, decorative frames near the mirror, verticals on the accent wall, and a lower band around the perimeter are possible. Profile — medium or moderately wide (25–40 mm).
Type 4: Foyer (from 10–12 sq. m)
A spacious foyer is an architectural space. Here, more complex decorative systems work: vertical moldings on long walls, frames around the perimeter, a decorative area near the mirror and console. buy polyurethane moldings for a foyer — means choosing a profile proportionate to the ceiling height and wall area.
Long wall in the corridor: how to break up monotony
A long blank wall without doors or windows is a typical corridor problem. It looks either like a canvas for paintings (which often overloads the space) or like an empty canvas that oppresses with monotony.
polyurethane wall moldings solve this problem in several ways.
Scheme 1: A series of identical rectangular frames
Three or four identical rectangular frames with equal gaps between them is the most classic scheme. A long wall is divided into visual sections. Each frame is a small 'frame' that organizes the plane.
Requirements for frames in a hallway:
-
frame height no more than 60–70% of the wall height;
-
frame width proportional to the distance between them;
-
identical indents from the floor, ceiling, and adjacent frames;
-
profile in the color of the wall.
Scheme 2: Horizontal belt line
One horizontal molding along the long wall — at a height of 80–100 centimeters or at 2/3 of the wall height. It divides the wall into lower and upper zones. The lower part can be in a different color or texture — the molding serves as its upper boundary.
This is the fastest and most economical solution for a long corridor wall. A horizontal line at "eye" level instantly organizes the space.
Scheme 3: Lower decorative belt with verticals
A lower belt around the perimeter at a height of 80–100 cm plus vertical moldings from the baseboard to the belt — a simplified version of "panelling." The lower part of the wall acquires a relief panel structure.
This solution is not only decorative but also functional: the lower part of the wall in the corridor is the most vulnerable to mechanical impacts (bags, shoes, accidental touches). Moldings make it more durable and decorative at the same time.
Scheme 4: One large frame as a focal point
If the wall is long enough (from 2.5 meters), one large vertical frame in the middle — with a mirror, console, or simply as a decorative element — creates a clear focal point. The gaze fixes on the frame, and the wall stops "disappearing" into monotony.
Spaces between doors: the most common task
The space between two door openings is the most common area for applying moldings in the corridor. And at the same time, it is the most technically demanding.
Width of the space: everything depends on it
| Width of the pier | Solution |
|---|---|
| Up to 30 cm | Molding is not installed — too little space |
| 30–50 cm | One vertical molding in the center |
| 50–80 cm | One vertical molding or a small frame |
| 80–120 cm | Two vertical moldings or one frame |
| 120+ cm | A frame or several verticals |
Indentation from the trim: critically important
The molding cannot be placed flush against the door trim. The minimum indentation is 10–15 centimeters. With a smaller distance, the molding and trim will visually 'stick together,' and both will lose their shape.
If the wall section is narrow (30–50 cm) and the trim occupies a significant part of its width — one vertical molding in the center, strictly between the trims.
Switches and outlets: bypass, do not incorporate
Switches are often located in the wall sections between doors. The molding cannot run through a switch. Solution: the vertical passes by the switch at a distance of at least 8–10 centimeters.
If the switch is located exactly in the center of the wall section — two symmetrical moldings on either side of it, with equal indentations.
Molding height on the wall pier
The vertical molding on the wall pier should run from the baseboard to the level of the top door casing or to the ceiling — depending on the design task.
-
From baseboard to top of casing: the molding is "fitted" to the door height, creating a sense of a unified system with the doorway.
-
From baseboard to ceiling: the molding is independent of the door, functioning as a full vertical line across the entire wall height.
The second option visually raises the ceiling — preferred for hallways with low ceilings.
Decorative zone at the mirror: hallway as an interior
A hallway with a mirror is a stopping point. Here, there are a few seconds of contact with the space. And it is here that decorative molding works with maximum efficiency.
Frame around the mirror
Molding around the mirror's perimeter is a classic technique. A rectangular or square frame made of profile creates a "setting" for the mirror, transforming it from a functional object into an architectural element.
Condition: the frame must be proportionate to the mirror. The molding extends 5–8 centimeters beyond the mirror's edge on each side. If the frame is flush with the mirror's edge, it merges with it and loses its purpose.
Mirror frame profile: medium (25–35 mm), with moderate relief or smooth. Color — matching the wall or contrasting.
Decorative panel behind the console
If there is a console table or shelf at the entrance, the wall above it becomes an accent decor zone. A molding frame on this section of the wall creates a "pedestal": the console and the wall behind it form a single composition.
Frame height — from the console level (or baseboard) to the mirror line or up to 2/3 of the wall height.
Decorative elements within the frame
Decor for Molding — applied decorative elements — in the corners of the frame or in the center of the horizontal sides add a touch of sophistication to the hallway. This is one of the most effective ways to add a "stroke" to the interior without overloading it.
Lower decorative belt in the hallway: function and aesthetics
The lower part of the wall in the hallway is subject to the greatest wear. Touches, bags, shoes, accidental impacts — all leave marks below the belt level. A decorative horizontal molding at a height of 80–100 centimeters solves two problems at once.
Functional task: the upper boundary of the "working" zone. Below the belt — paint (or wallpaper) more resistant to mechanical impact. The molding serves as a clear boundary between the lower "working" zone and the upper decorative one.
Aesthetic task: the horizontal line organizes the wall. It gives the eye a point of reference and divides the wall into two independent fields.
Belt with verticals: panel system
A horizontal molding belt plus vertical moldings in the lower zone is an imitation of classic panel wall design. Each "panel" between the verticals is a separate field. It looks expensive, thoughtful, yet requires a modest budget and one to two hours of work.
For this scheme Buy polyurethane wall moldings means choosing one profile SKU for both the horizontal belt and vertical sections. A single profile creates a system, not a set of disparate elements.
Profile selection: detailed breakdown for a hallway
Smooth profile vs. textured profile
For a hallway and entryway, a smooth or minimally textured profile is the preferred choice. Why?
A textured profile with ornamentation "speaks" loudly. In a large living room, this is appropriate. In a narrow hallway, it creates visual noise. The eye passing by doesn't have time to "read" the ornament and gets a feeling of overload.
A smooth profile works through shape: torus, fillet, chamfer, ogee. Relief is created by light and shadow, not ornamentation. This is delicate, modern, and scales to any space.
Profile selection table
| Corridor type | Profile width | Relief | Color |
|---|---|---|---|
| Narrow (up to 120 cm) | 10–18 mm | Minimal, smooth | Wall color |
| Medium (120–160 cm) | 18–28 mm | Soft, cove molding | Same color or one shade lighter |
| Spacious hallway (6–8 sq m) | 25–35 mm | Moderate | Same color or contrasting |
| Hall (from 10 sq m) | 30–45 mm | Moderate or classic | By design |
Plank length and footage calculation
The standard length of a polyurethane molding plank is 2 or 2.5 meters. For a corridor with a ceiling height of 2.5–2.7 meters, vertical molding will require one full plank plus a small piece of a second.
Calculation for the horizontal belt: wall length ÷ plank length = number of planks + 15% reserve.
Calculation for frames: total perimeter of all frames × 1.15.
Color solutions for the corridor: three working approaches
Approach 1: Monochrome — molding and wall in the same color
The most versatile option for any corridor. The molding is visible only in relief — like a play of shadows. The space is not overloaded with additional color contrast.
Ideal for narrow corridors, dark hallways, and rooms with many doors. This approach turns the molding into 'invisible architecture' — you feel it but don't notice it.
Approach 2: Molding lighter than the wall — delicate contrast
If the wall is in a rich or medium tone, molding two shades lighter creates a soft contrast. The frames and verticals are readable but not overwhelming. This is a working option for hallways with medium and good lighting.
Approach 3: White molding — a classic
White molding on a wall of any color is a classic choice. It always looks clean and elegant. The main condition is that the profile must be neatly applied, joints perfectly sealed and puttied. White molding shows the quality of installation without compromise.
Hallway design schemes: specific examples
Scheme A: Narrow hallway, ceiling 2.5 m, many doors
Parameters: hallway 1.1 m × 6 m, four doors, ceiling 2.5 m.
Solution:
-
Vertical moldings on each wall section between doors (profile 14 mm, from baseboard to ceiling);
-
Horizontal band along the long blank wall (if any) at a height of 90 cm;
-
Monochrome painting.
Result: the hallway gains rhythm and order. Verticals visually raise the ceiling. The horizontal band organizes the long wall.
Scheme B: Hallway 8 sq m, ceiling 2.7 m, mirror at entrance
Parameters: hallway with mirror, console, three doors and one long wall.
Solution:
-
Molding frame around the mirror (28 mm profile);
-
Decor for Molding in the corners of the frame;
-
Lower decorative belt at a height of 90 cm along the long wall;
-
Vertical profiles (20 mm) in the lower zone between the belt and the baseboard;
-
Molding in the color of the wall.
Result: the hallway becomes a full-fledged "entryway" with architectural logic. The mirror is a decorative center. The lower belt is a functional and aesthetic line.
Scheme C: Hall 14 sq m, ceiling 3 m, main entrance
Parameters: spacious hall in a country house or large apartment.
Solution:
-
Vertical moldings (35 mm) on long walls with a spacing of 80–90 cm;
-
A horizontal molding belt at 2/3 of the wall height connects the verticals;
-
Polyurethane wall decor at the intersection points;
-
Molding frame around the mirror;
-
White molding on a light gray or warm wall.
Result: the hall acquires a representative architectural character — without heavy classical stucco, without expensive finishing.
Installation in the hallway: technical nuances
Perforated walls in old houses
In Soviet-era houses, walls in the hallway often have switches and sockets in non-standard places, pipes under plaster, and unevenness. Before installing the molding:
-
Check the wall with a metal detector (for hidden wiring);
-
Make sure the surface is dry and not flaking;
-
Prime before applying glue.
Installation in a corridor corner
In a narrow corridor, the molding inevitably goes into an internal corner. 90° corner joints are a mandatory element. Cutting at 45° is precise, with minimal gap. The gap is filled with white acrylic sealant and sanded.
Full technique for working with corners and joints — in the article about installing polyurethane moldings.
Glue in the corridor: installation conditions
A corridor is a space with drafts when doors are open. The glue during installation should not dry too quickly from a draft or too slowly in high humidity (for example, if there is a bathroom nearby). Polyurethane mounting adhesive is the optimal choice: stable polymerization time, good adhesion to any wall covering.
Complete set for corridor and hallway
| Position | Purpose |
|---|---|
| Moldings made of polyurethane | main profile |
| Mounting adhesive for polyurethane | Mounting |
| Painter's tape | fixation while drying |
| White acrylic sealant | sealing joints |
| Fine sandpaper | Sanding |
| Acrylic primer | preparation for painting |
| Paint in the desired color | Finish coating |
| Decor for Molding | Corner and accent elements |
| Polyurethane wall decor | Additional overlays |
| Decorative stucco | Accent elements for the mirror area |
| Molding allowance 15–20% | Trimming, errors |
Mistakes most often made in the hallway
Mistake 1: Profile too wide
A 50 mm molding in a 110 cm wide hallway is a disaster. A wide profile in a narrow space feels oppressive, narrows the area, and creates discomfort. For a narrow hallway, only a thin or at most a medium profile.
Mistake 2: Frames too close to doors
The gap from the trim is not maintained — the molding "sticks" to the door. Minimum 10–15 centimeters. Preferably 15–20.
Error 3: Disproportionate mirror frame
A frame around a mirror the same size as the mirror makes the frame "disappear." The frame should be larger than the mirror: at least 5–8 centimeters on each side.
Error 4: Different profiles in one space
One molding article was used in the hallway, another in the corridor. After painting, the difference in relief will be noticeable. The entire hallway and corridor space should use one article.
Error 5: Cuts at joints not accounted for
The molding ends at a corner, but the corner is not cut. An open profile end is a glaring mistake that is immediately visible. All corner joints should be cut at 45° and sealed with sealant.
Error 6: No allowance forgotten
We calculated the exact footage, didn't take an allowance, and a few planks were missing. The standard allowance for a corridor with many corners and joints is 20%, not 15%.
Interior styles and moldings for the corridor
Modern minimalism
A thin flat profile with a chamfer (10–15 mm) in the wall color. Only verticals on the piers. No ornaments. Maximally "quiet" decor that works through shape and proportions.
Scandinavian style
White or cream walls. Thin white profile (15–20 mm) with minimal relief. Simple rectangular frames. No gold, no classic style.
Neoclassicism
Medium profile with ogee or cove (25–35 mm). Frames on the long wall. Horizontal band. Molding frame near the mirror with decor for moldings in the corners. White or cream molding on a wall in a warm neutral color.
Classic
Wider profile (35–40 mm) with relief. Panel design on the lower part of the wall. Decorative stucco in accent points. White moldings on colored walls.
Frequently asked questions
Which moldings to choose for a hallway?
For a narrow hallway — thin or medium profile (10–25 mm) without heavy ornamental relief, in the color of the wall. For a spacious entryway — medium (25–35 mm) with moderate relief. Smooth profiles with minimal shape (tor, chamfer) work better in a hallway than complex ornamental ones.
Can moldings be used in a small entryway?
Not only can — they should. Thin molding (10–15 mm) in the color of the wall adds rhythm and completeness without overloading a small space. The key is a monochrome scheme and a delicate profile.
How to design the wall section between doors?
One vertical molding in the center of the wall section (if it is at least 60 cm wide) or two symmetrical ones (if wider than 80 cm). The distance from the casing is at least 15 centimeters. Molding from the baseboard to the ceiling.
Do I need a reserve of molding for the hallway?
Absolutely. The hallway has many corners, cuts, and joints. Reserve — 20%, at least.
What to buy for a hallway with moldings?
Moldings made of polyurethane, mounting adhesive, painter's tape, white acrylic sealant, primer, paint. Additionally — Decor for Molding и Polyurethane wall decor if necessary.
Can moldings be combined with wallpaper in the hallway?
Yes. The molding is installed over wallpaper intended for painting or over smooth plain wallpaper. Textured wallpaper is not the best base: the molding will not adhere evenly.
How to connect moldings in the hallway with moldings in the living room?
A single profile SKU across all adjacent spaces is the rule for a cohesive interior. If molding A is used in the living room, the hallway should have the same A (or a proportionate thinner one from the same line).
About the company STAVROS
The first thing a guest sees when entering your apartment is the entryway. And the last thing they see when leaving is also it. This space deserves attention and a thoughtful approach. Moldings in the hallway are not a luxury or excess. It is the right architectural solution that makes even a small entryway neat, complete, and memorable.
STAVROS is a Russian company with a full range of decorative polyurethane moldings for walls, corridors, hallways, and any other spaces. Profiles of any width and relief, stable SKUs, possibility of reordering. The entire range is in the section Buy moldings.
In the STAVROS catalog: moldings for walls and corridors, Decor for Molding, Decorative stucco, Polyurethane wall decor — everything you need for a neat and professional result in your hallway.