




Article Contents:
- What a furniture wall in a studio is and why one line is harder than three separate pieces
- How a furniture wall differs from floor-to-ceiling built-in furniture
- When not to combine zones
- Measurement map for the project
- Single zero datum and front plane
- Option 1. Straight kitchen, transition insert and wardrobe
- Option 2. Kitchen and wardrobes with a shared top-cabinet line
- Option 3. A wardrobe separating the sleeping alcove from the kitchen area
- Option 4. A wardrobe with sliding fronts and a concealed utility section
- Option 5. A furniture line with a TV section and a low console
- Junction 1. The joint between the kitchen and a wardrobe of different depths
- Junction 2. The plinth line and the bottom track of the sliding wardrobe
- Junction 3. Oven opening and access to the wardrobe
- Junction 4. The top of the tall unit, the top cabinet and the ceiling cornice
- Junction 5. The joint between the slatted panel and the smooth front
- Node 6. Sockets, lighting and technical access
- Node 7. Serviceability and replacement of an individual part
- Ready-made panel PAN-001: modular cladding
- Individual slats RK-001: more freedom in spacing
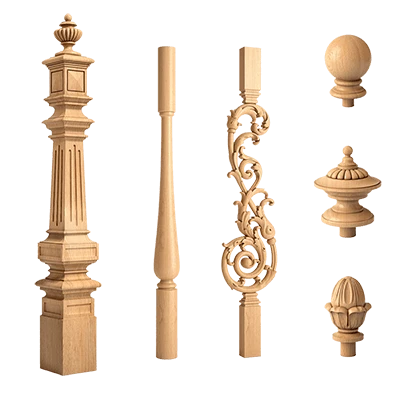
- Moulding MLD-004: small frame elements
- Skirting and finishing lines
- Where the finish must give way to technical requirements
- Kitchen section: 2600 mm along the facade line
- Sliding wardrobe: 1600 mm by design width
- Transition zone: 600 mm instead of a random gap
- What the layout drawing shows beyond dimensions
- Option A. One ready-made panel PAN-001
- Option B. Fifteen individual slats RK-001
- How to choose between the options without making a mistake
- Two frames MLD-004 on a fixed smooth section
- Skirting board PLT-006 on exposed wall sections
- Comparative materials statement
- Before final finishing: engineering coordination
- During installation of the carcasses
- Installation of moldings and battens
- Can a kitchen and a sliding wardrobe be made from the same material?
- Is it necessary to align all fronts in a single plane?
- Can PAN-001 be glued directly onto a sliding wardrobe?
- What should be used to cover the joint where the skirting board meets the wardrobe guide?
- How accurate is the estimate provided?
- What should be done if a 30 mm unaccounted gap remains after furniture installation?
- What documents are needed so that contractors do not argue with each other?
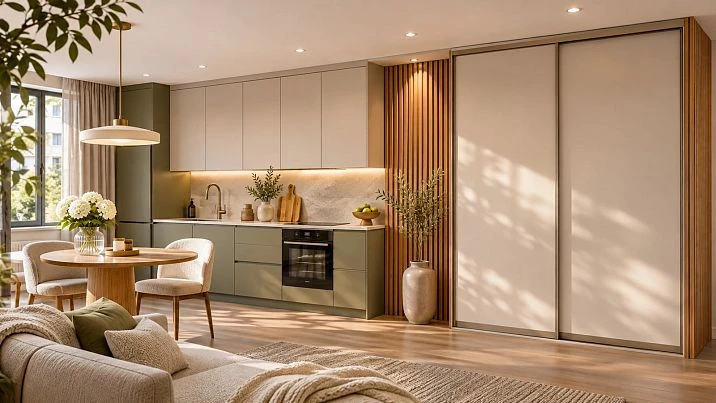
The owner of a studio apartment has a wall 4800 mm long. It must accommodate a kitchen with a sink and stove, a coat closet, utility storage, and a finish that ties together items with different purposes into a single composition. On a drawing, it is easy to draw a straight line of facades. It is harder to make sure that the oven door opens, the sliding wardrobe does not block the passage, the decorative material does not swell next to the wet zone, and the skirting board does not run into the lower guide. It is precisely these small details that usually test the quality of a design.
A furniture wall is not the name of a special furniture set, but a way to organize different zones along a single line. Behind a single plane there may be kitchen cabinets about 600 mm deep, a deeper wardrobe, a narrow utility module, and a decorative insert. At the same time, the actual dimensions depend on the appliances, the opening system, the geometry of the room, and the contents of the items. A finished attractive image cannot replace working measurements and equipment verification.
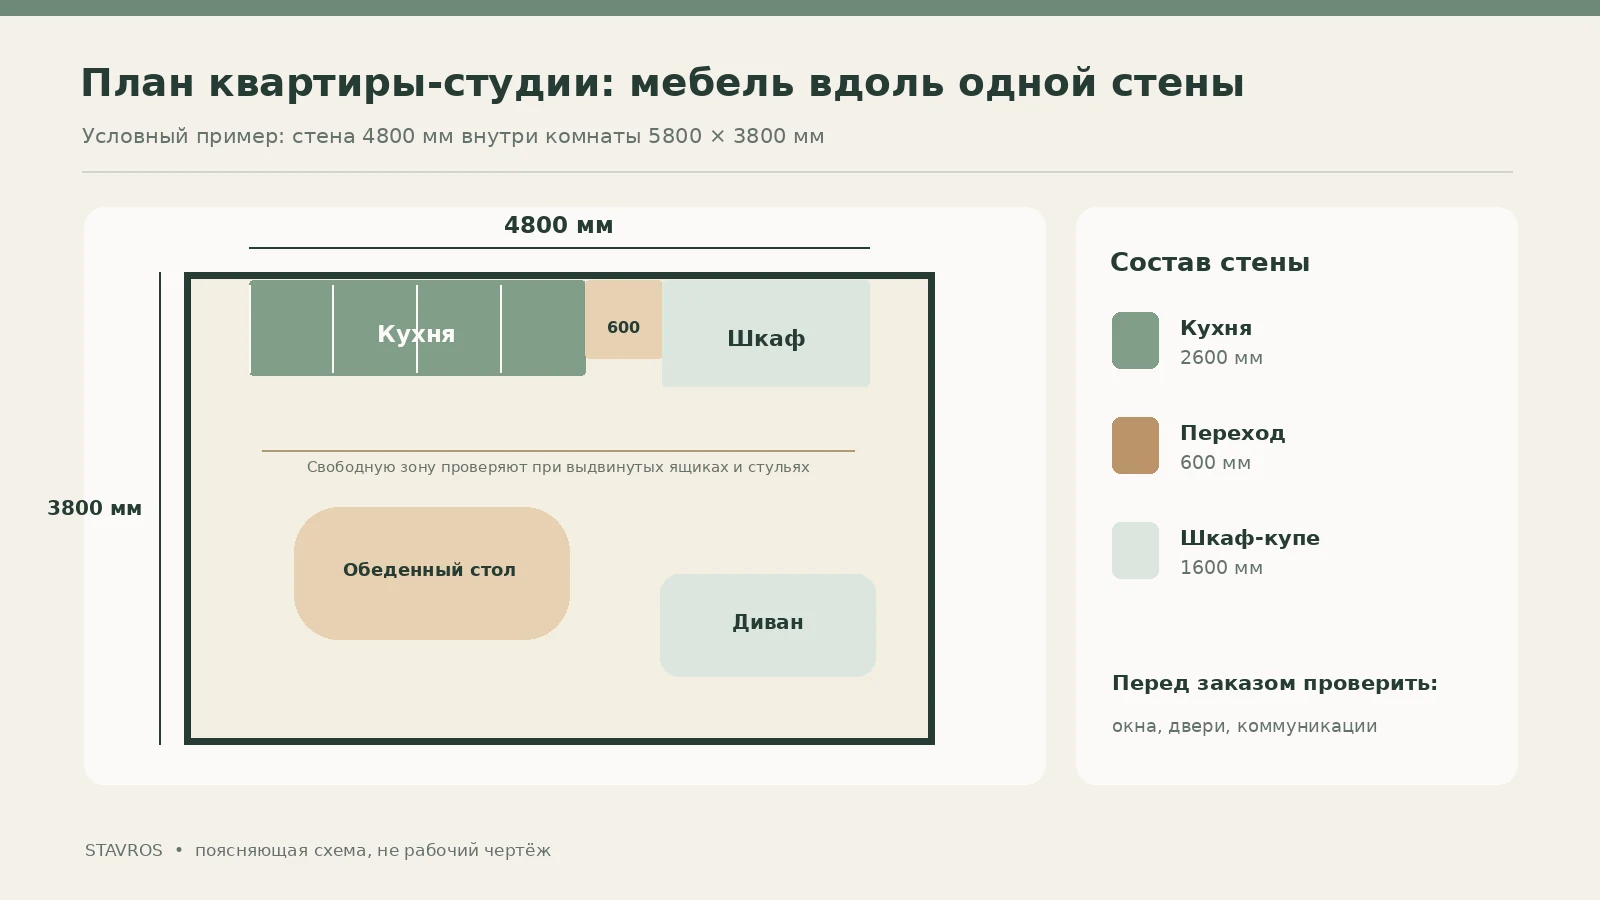
Next, we will examine five layout options, seven key junction points, and the calculation of a conditional wall 2600 + 600 + 1600 = 4800 mm. For the decorative part, we will consider STAVROS wall panels, wooden slats, mouldings and skirting boards, and for furniture making — a separate project for a kitchen and wardrobe made to measure. All diagrams and dimensions refer to a training project: they cannot be transferred to a specific apartment without re-checking.
What a furniture wall in a studio is and why one line is more difficult than three separate items
When the kitchen, wardrobe and finishes are designed independently, each contractor ends up with their own frame of reference. The furniture maker measures the kitchen from the left corner, the wardrobe specialist from the right, and the finisher marks out the vertical slats from the middle of the free wall section. As a result, a 20–30 mm difference can end up exactly at a visible joint: one side panel protrudes, the other recedes, and the last slat turns into a narrow strip. Similar problems arise with colour and texture: two parts are called "natural oak" but differ in tone, sheen and grain direction.
A shared furniture wall must have a single drawing. First, the finished wall dimension, floor level, ceiling height and the plane of the future front facades are set. Then the width of each functional part is assigned. Only after that are the decorative elements selected. If done the other way round, the finishes imperceptibly begin to dictate the dimensions of appliances and mechanisms, which is almost always irrational. Decoration should complete a well-functioning structure, not correct its mistakes.
A single line does not require all items to be the same colour. On the contrary, one part of the wall can be light, another wooden, and the transition neutral. Unity is achieved through matching horizontal levels, a measured rhythm of verticals, well-thought-out end panels and the absence of random gaps. For example, the tops of two tall cabinets can be brought to a single height while leaving the kitchen worktop lower. Visually the composition will be coherent, and functionally convenient.


How a furniture wall differs from floor-to-ceiling built-in furniture
The terms are often confused, yet they describe different things. "Built-in furniture" describes how the carcasses are positioned relative to the walls, floor and ceiling, while "furniture wall" describes a composition. A built-in wardrobe can stand alone in a niche. A furniture wall can be made up of standard modules with decorative panels between them. In a small space, what matters is not the name but the ability to dismantle the structure for servicing utilities and to replace an individual damaged element.
Floor-to-ceiling furniture helps to use the height but creates maintenance issues. Above built-in appliances, the air paths specified by the manufacturer are required; the hinges and lift mechanisms of top cabinets must operate freely; the ceiling is rarely strictly horizontal. That is why the top filler, decorative cornice and dimensions of the carcass part are calculated separately. You cannot simply "extend" furniture up to the plaster without an installation allowance and confidence in the substrate.
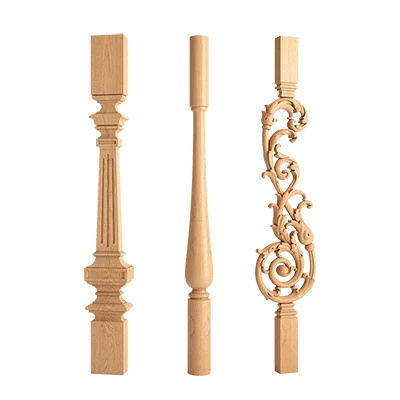
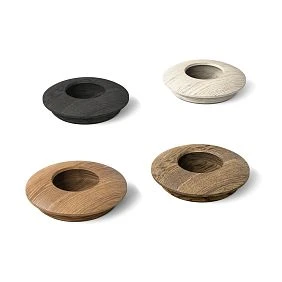
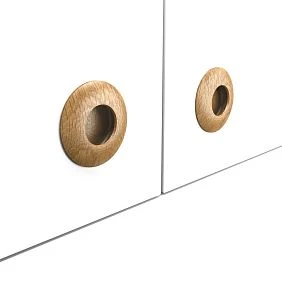
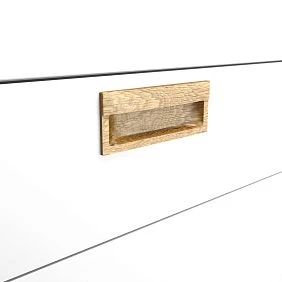
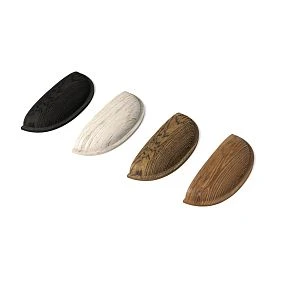
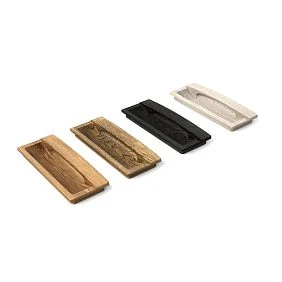
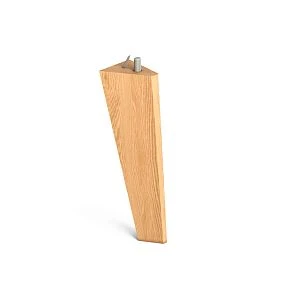
Our factory also produces:
When You Shouldn't Combine Zones
If the studio's only wall contains a large number of pipes, ventilation ducts, inspection hatches and electrical panels, a continuous composition can make maintenance significantly more difficult. Access to valves, distribution devices and the engineering units specified in the design should not be blocked by decor. Another bad scenario is when the doorway is right next to the end of the run, leaving no space for the facade to open safely. Sometimes two separate furniture blocks with an honest gap are better than one artificially continuous unit.
A useful decision-making criterion is the accessibility of each unit after installation. The owner should understand how to shut off the water, service the extractor hood, remove the plinth, pull out the refrigerator and dismantle part of the cabinet without damaging the wall. If these questions have no answers, the sketch is not yet ready for production.
Get Consultation
Measuring a studio apartment: what dimensions are needed before ordering a kitchen and wardrobe
You start not with choosing a facade, but with a measured plan. The dimension 4800 mm in our example means the length of the finished wall after finishing, not the figure from the developer's documentation. Measure the length at the bottom, at countertop height and at the ceiling. Additionally, record the room's diagonals, deviations from vertical and local protrusions. On the plan, mark windows, radiators, window sills, doors, switches, sockets, water supply, sewerage, ventilation and heating appliances. If the room is still at the rough finishing stage, be sure to allow for the expected thickness of the layers, but the final furniture dimension is set based on the actual readiness of the required surfaces.
Unlike a freestanding table, a furniture wall interacts with several planes at once. The floor may have a level difference, which means the end cabinets require different heights of adjustable supports. The ceiling may be lower near the window or ventilation duct. The wall may bow in the middle even though the corners look straight. That is why measuring only with a tape measure along the skirting board is not suitable. For installation, what matters is not the smallest dimension "somewhere between the walls", but the specific geometry of each section at the level of the cabinet, countertop and finishing element.
Measurement map for the project
| Node | What to fix | The risks of missing data |
|---|---|---|
| Wall 4800 mm | Lengths at three heights, diagonals, protrusions | Cabinet units won't fit within the overall dimension |
| Finished floor | Levels, flooring, thresholds | Baseboard and wardrobe door lines will be lost |
| Kitchen area | Water, drain, gas if available, electrical, ventilation | Appliances won't connect or can't be serviced |
| Sliding wardrobe | Opening height and depth, ceiling geometry | Door jamming, guide rail misalignment |
| 600 mm transition | Actual width after fillers and gaps | Rails or panel may be cut accidentally |
| Room before furniture | Space for table, sofa, chair and walkway | Impossible to use open doors |
You need to account not only for furniture dimensions, but also for the contours of its operation. An extended drawer may block the passage to the wardrobe. An open oven takes up space that was considered free on the clean plan. A sliding wardrobe door stays in its guide but, when opened, blocks part of the internal access to the shelves. You need to mark on the drawing the real trajectories of the doors, the maximum extension of the baskets and the position of a person at the work surface. The manufacturer must confirm this scenario before releasing the detailing.
Single zero datum and front plane
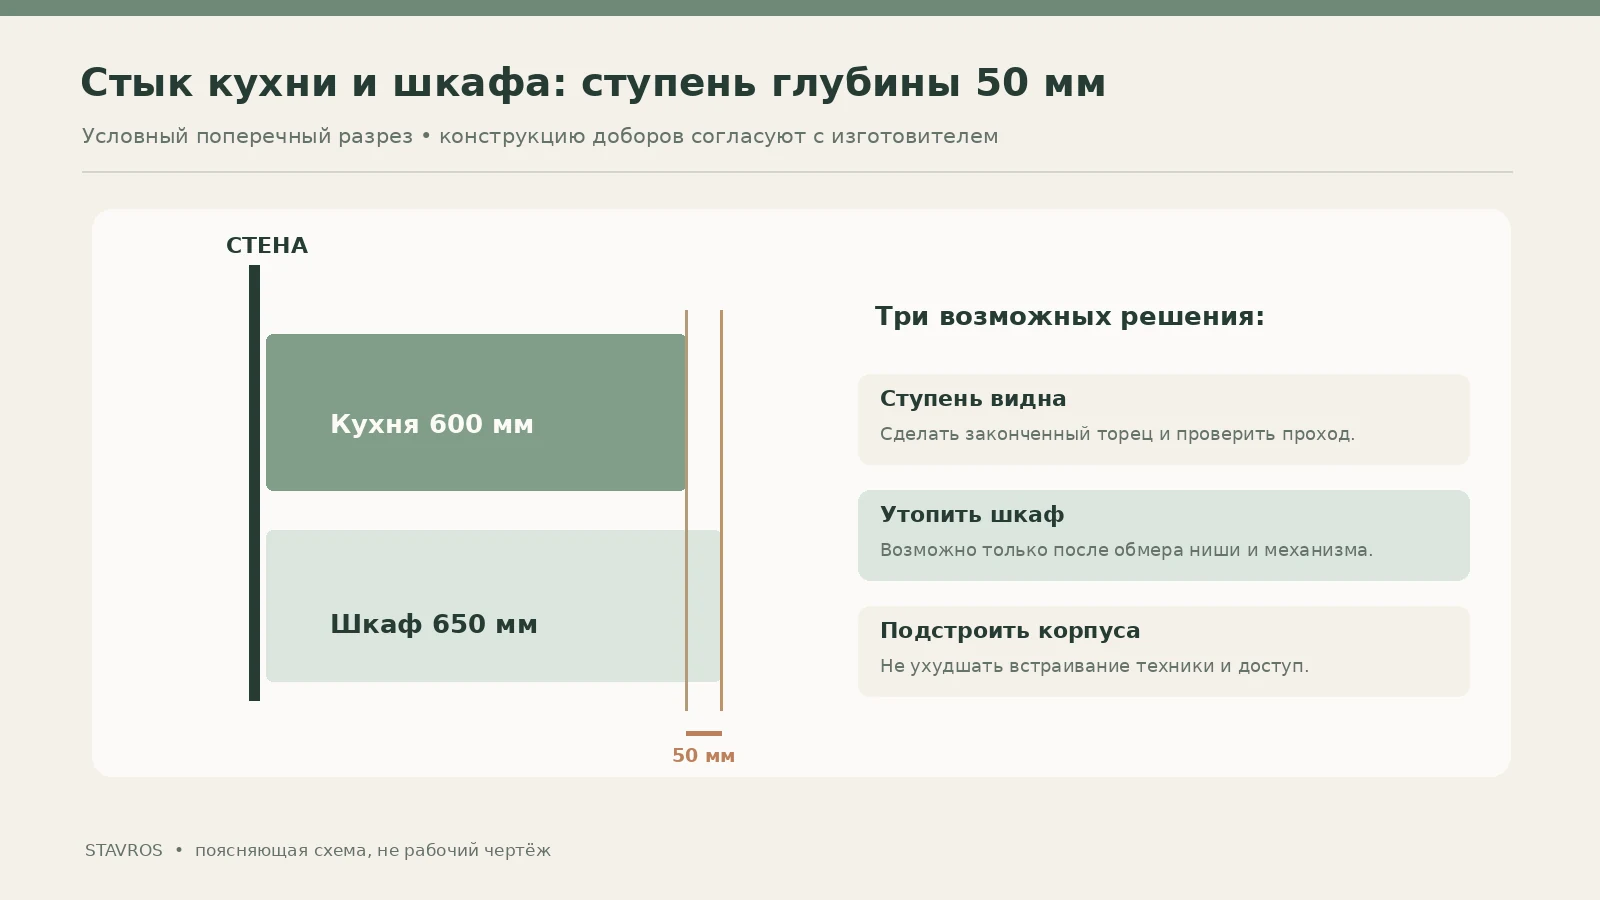
For different contractors, it is useful to assign a common "zero" datum — the top of the finished floor — and measure heights from it. The countertop is shown as a separate line with its actual thickness, cabinet fronts with their own line, and suspended elements with distances to the ceiling. The horizontal lines may not coincide, but the discrepancy must be intentional. If the kitchen is 600 mm deep and the cabinet is 650 mm, aligning the front surface will require recessing one of the carcasses, adding a side filler, or accepting a visible step. All three options can be acceptable if they are drawn in advance and agreed upon.
For corner junctions, the adjacent wall side is also measured. The thickness of the floor skirting, architrave, and future cladding changes the swing path of the furniture door. With a sliding wardrobe, it is important to know not only the outer size of its frames but also where the guide is located relative to the front plane. The decorative panel pattern must not obstruct access to the bottom rail or the mechanism cleaning area.
Five furniture wall options: from a restrained solution to an accent composition
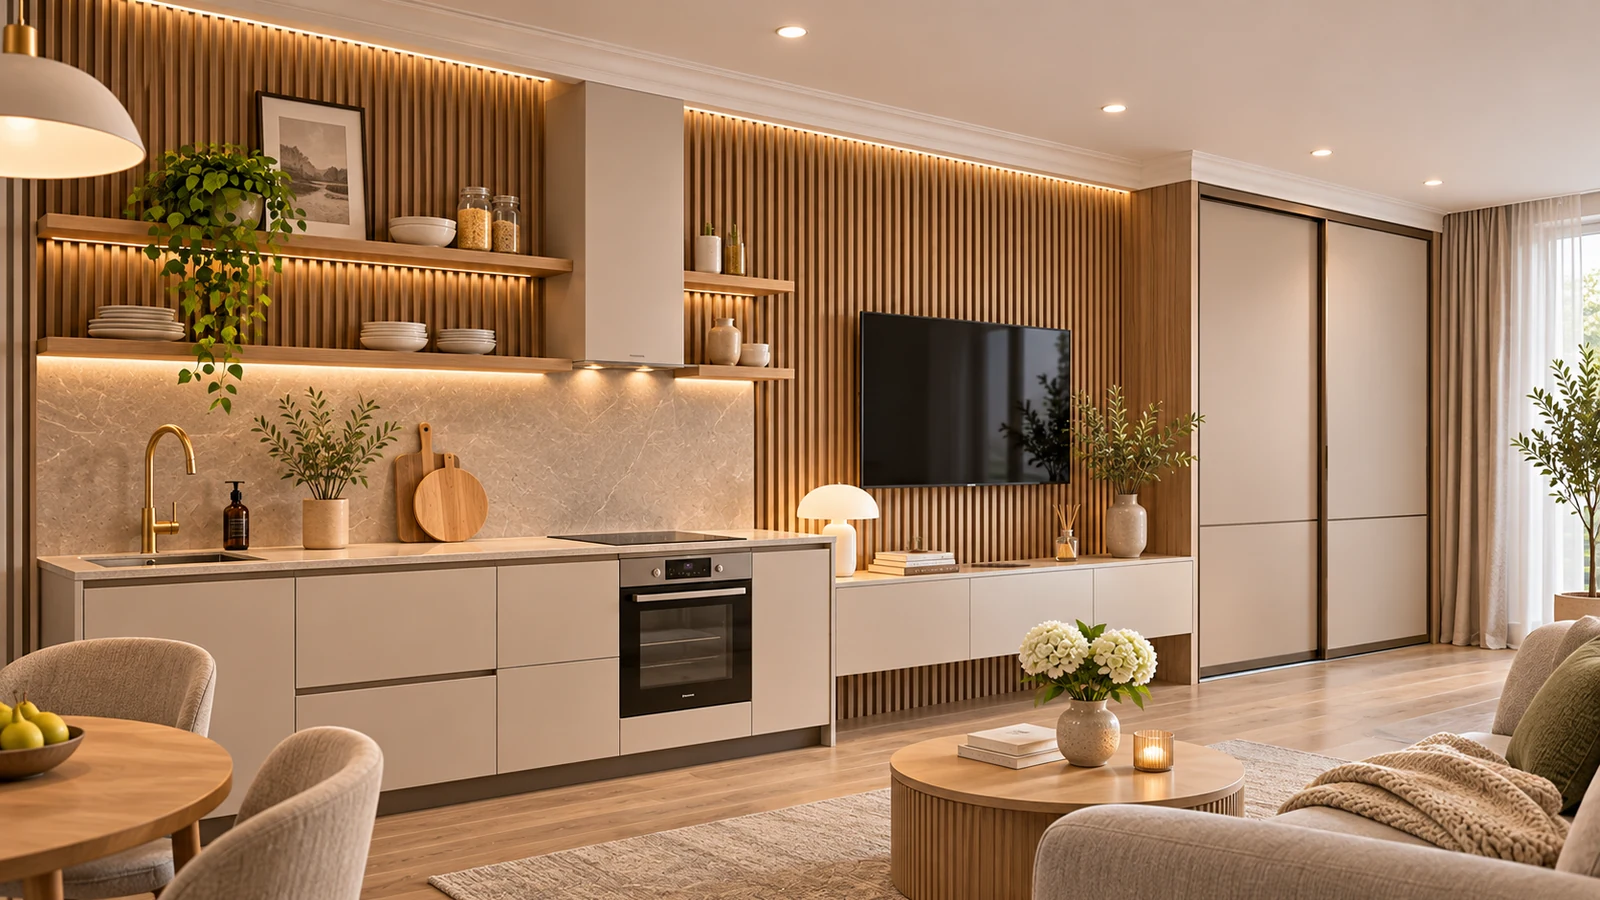
The first task is to choose which set of functions to place on a single line. In a studio apartment there is no single correct recipe: much depends on the location of the window, entrance, bathroom, and existing utilities. However, the five options below help you see the compromises before ordering. For each option, appliances, storage space, free movement, and maintainability must be checked separately.
Option 1. Straight kitchen, transition insert, and sliding wardrobe
This is the option selected for further calculation: 2600 mm is occupied by the kitchen, 600 mm by the transition section, and 1600 mm by the wardrobe. The composition reads as a single line, while each functional part remains independent. The transition can be smooth, slatted, or used as a shallow open shelving unit. The main advantage is the simple production logic: the kitchen and wardrobe have their own specifications, and the decorative section allows them to be visually coordinated.
The drawback appears when the room width is insufficient. A sliding wardrobe is deeper than the kitchen, so its front plane may protrude forward. This is acceptable if the passage is calculated based on the deepest section. If a perfectly straight line is required, the kitchen depth must be increased or a more complex wardrobe carcass must be made, which is not always justified. It is better to honestly compare both solutions on the elevation drawing.
Option 2. Kitchen and cabinets with a shared top-cabinet line
A single horizontal line of upper fronts can be run above the kitchen and the utility block. This technique suits apartments with relatively high ceilings, where seasonal storage is genuinely needed. However, the top cabinets above the kitchen area must not block the required appliance ventilation or range hood servicing. The different loads on the carcasses are taken into account in the design: a long decorative band must not be made load-bearing without calculation.
In this option, the precision of material selection is especially noticeable. The cornice profile should complete the visible top rather than hide errors in heights. Between the mezzanine and the ceiling, an extension piece with a mounting gap is often provided. It can be painted to match the facades, and the decorative cornice can be selected separately. This approach looks calmer than trying to press the entire cabinet directly against uneven plaster.
Option 3. A wardrobe separates the sleeping niche from the kitchen area
In a studio, it is sometimes advantageous to use a wardrobe as a visual boundary for the sleeping area. In that case, it may not stand strictly along the wall but form a short perpendicular section. The result is an L-shaped layout: the kitchen remains on the main wall, and the wardrobe partially screens the bed from the entrance. However, the side panel of the wardrobe must have its own finish, because it will be visible from the living part of the room. Smooth panels or neatly arranged slats are suitable for this, but not decorative elements that are easy to catch on when passing by.
In this option, it is necessary to carefully check the stability of the cabinet, its connection to the base, and the presence of a safe exit from the sleeping area. If the wardrobe functions as a partition, it cannot be considered a structural wall; the requirements for fastening and stability are determined by the actual construction. Vertical decor here helps to mark the boundary but does not replace a technical solution.
Option 4. A wardrobe with sliding facades and a hidden utility section
In a studio, the ability to hide cleaning supplies, an ironing board, a suitcase, and a vacuum cleaner is especially valuable. Instead of several small cabinets, it is rational to provide one tall utility section. For it, the longest item, the depth of the cabinet, and access through the open opening are measured in advance. Sliding doors save space in front of the wardrobe, but due to the overlapping panels they reduce the width of simultaneous access. Not every item can be conveniently placed behind the central divider.
When finishing the outer side of the wardrobe, decorative moldings and slatted inserts must take into account the weight of the doors and the requirements of the selected mechanism. A plate glued to a lightweight door changes its weight; a protruding profile may interfere with the overlapping of the panels. Therefore, any additional facade elements are included in the door calculation before purchasing the system, not after installing the wardrobe.
Option 5. A furniture line with a TV section and a low console
If the wall is not long enough for three tall blocks, the transition zone can be replaced with a low cabinet and the TV can be placed above it. The section combines the kitchen and storage in the living room but imposes restrictions on placing the screen near sources of heat and moisture. You should not place the TV directly above the sink or cooktop just for the sake of symmetry. Electrical outlets and access to them must also be provided in advance.
If the wall is long enough, more than 600 mm can be allocated for the TV, reducing the kitchen or wardrobe; for our calculated option, a narrow 600 mm insert is considered only as a decorative transition, without a TV. This is fundamental: the layout must show workable proportions, not try to fit any set of functions into an arbitrary space.
Seven junctions to agree on before making the furniture
The main value of a furniture wall project is not the impression of the overall facade, but the precision of the individual joints. It is convenient to treat them as seven separate junctions. For each one, the drawing must include a close-up, real dimensions, the materials of adjacent parts, installation tolerance and the designated installer. Without this, any beautiful solution remains merely an intention.
Junction 1. The joint between the kitchen and a cabinet of different depth
Suppose the kitchen carcasses have a design depth of 600 mm, and the cabinet is 650 mm including the chosen sliding system. The difference is 50 mm. You can bring the kitchen forward, recess the cabinet into a prepared niche, or make an open transition between the two front planes. But you must not automatically increase the width of the kitchen countertop to hide any step: the overhang and the load on the work surface will increase, and the positions of appliances and utility connections will change.
If the transition is finished with vertical slats, their depth is counted together with the adhesive and the coating. For example, a slat 5 mm thick in the finished state cannot compensate for a 50 mm step on its own. This requires a separate backing or a structural filler. On the section drawing, first draw the wall, the kitchen carcass, the cabinet plane, and only then the cladding. This avoids the mistake where the decorative panel unexpectedly has to be trimmed in width after both units are installed.
Junction 2. The plinth line and the bottom track of the sliding wardrobe
The kitchen plinth is usually recessed relative to the plane of the fronts. The bottom track of the wardrobe is closer to the front edge of the opening, and the floor skirting board meets the wall where there is no furniture. These three elements perform different functions. If the skirting board is run under the track without an agreed joint, the door mechanism may become inaccessible for cleaning. If a wide uncovered gap is left, the visual line will look interrupted.
A correct junction defines the position of the skirting board edge, the protective or decorative end face, the ability to remove the kitchen plinth and access to the rail. For the abutments, it is useful to consider wooden plinth PLT-006, but it is not turned into part of the door guide and is not used to close moving parts. The choice of a specific profile depends on the plinth height and the overall line of the room.
Unit 3. Oven opening and access to the cabinet
In a small studio, there is sometimes a temptation to place the oven flush against the side panel of the adjacent cabinet. On a plan with closed fronts, everything fits, but an open oven door requires free space in front of the furniture, and a nearby pull-out drawer needs its own path. You need to check not only collisions between objects but also the position of the person removing a hot baking tray. In a narrow passage, using both units at the same time may be unsafe.
The drawing set must include an opening diagram with dimensions from the instructions for the specific appliance model. If the parameters have not yet been selected, a preliminary condition is recorded, and the final detailing of the carcasses is postponed. You must not assign a universal clearance "by eye" or promise that any oven is compatible with any furniture.
Unit 4. Top of the tall cabinet, overhead cabinet and ceiling cornice
A tall kitchen cabinet and a sliding-door wardrobe may have different support schemes and different structural finishes. On the front elevation, the top looks unified, but the hidden ventilation channels and installation gaps do not have to coincide. Therefore, the upper horizontal is chosen after the appliances are determined and the ceiling is checked. If a decorative cornice is required, it is attached to a calculated base or a suitable surface — without loading a thin facing for which such a method is not intended.
Particular attention is paid to a ceiling with a height difference. A wide profile can visually conceal part of the unevenness, but it must not prevent removal of the front or operation of the hinge. When space is limited, a calm straight filler often looks neater than a complex shaped cornice. The material and width of the decorative element should be assessed not separately in a store, but on a fragment of the elevation at full scale.
Unit 5. Joint of the slatted panel with a smooth front
This is the most noticeable area of the composition. The relief cladding has protruding peaks and recesses, while the smooth front has a single plane. If they are joined without a transition piece, the outermost slat will look accidental. It is useful to calculate in advance the total number of slats, the pitch, the width of the end margins and the position of the vertical seams. The panel itself should end at a predictable point: under a filler, on the axis of the side surface or on a separate end profile.
For a small transition insert, the following is suitable Slat panel PAN-001, if the size, material, finish and safe application area are approved for the selected configuration. PAN-001 is not a ready-made load-bearing partition; it is intended for decorative cladding. In the kitchen, it is important to separate the dry interior area from the backsplash by the sink and stove, where the material must withstand different operating conditions.
Unit 6. Sockets, lighting and technical access
Backlit slats look impressive, but they need space for the light source, wiring, power supply and maintenance. Electrical connections must not be hidden under a glued non-removable panel without a design. All devices and their placement methods are selected by a specialist in accordance with electrical requirements; the furniture drawing records the approved access points, not just attractive light lines. If the power supply must be serviced through a cabinet, the accessible section and the openings permitted by the design are determined in advance.
Also check the everyday details: the vacuum cleaner needs a socket, the refrigerator needs a connection according to the instructions, and chargers need a place in a dry and accessible area. It is especially unpleasant when a hidden socket is forgotten before the cabinet is installed and an extension cord is then used behind fixed furniture. A simple schedule of electrical points saves more rework than additional decorative elements.
Unit 7. Serviceability and replacement of an individual part
The entire furniture wall should not turn into a single non-removable object. A hinge can be replaced, a facade removed, a runner cleaned and access gained to a shut-off valve without damaging adjacent sections. When choosing a coating, consider the possibility of spot repair and color matching. Wood has its own texture, and a new slat from a different batch may differ in shade even with the same article number. It is better to approve samples together, especially if several products will stand next to each other in a visible area.
For repairing decorative cladding, the fastening sequence is important. If the last slat cannot be removed because the cabinet side panel is in the way, more will have to be disassembled than planned. Therefore, the finishing profiles and access to hidden fasteners are considered before purchasing materials. From an aesthetic point of view, the unit is almost invisible, but operationally it is one of the most important.
STAVROS materials: when to choose a slatted panel, individual slats and moldings
For the transition between the kitchen and the cabinet, you need more than just "wood-look panels" — you need a material with known thickness, external rhythm and finishing method. The official STAVROS website presents products made of solid wood and MDF. They have different textures, weights, processing methods and behavior on the substrate. The properties of one material cannot be transferred to the entire category: the specific application conditions are determined by the product card, finish and installation requirements.
Ready-made PAN-001 panel: modular cladding
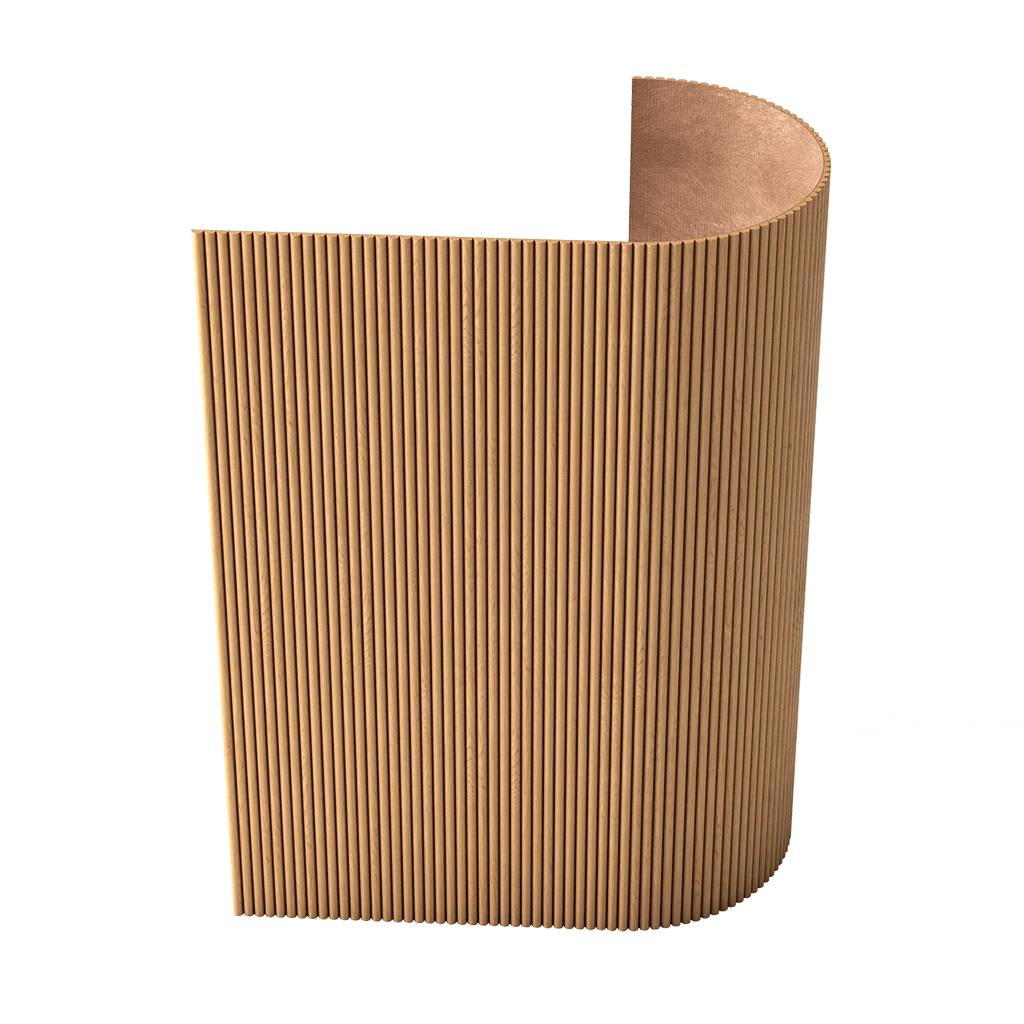
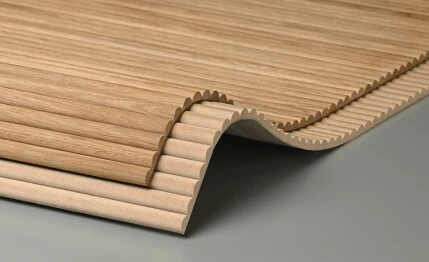
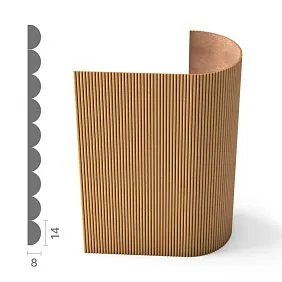
The PAN-001 panel consists of semicircular decorative elements on a flexible fabric backing. This is convenient for an accent surface and some curved surfaces, but it does not mean that it can be laid on any radius or used without a suitable adhesive. The catalog includes versions in MDF, beech and oak, and dimensions and prices differ by variant. For our calculation we need specifically an MDF panel 1010 mm wide, 8 mm thick and 2670 mm long: a 600 × 2300 mm section can be cut from it if the relief layout and installation scheme allow such cutting.
When choosing a ready-made panel, first determine the orientation of the pattern. The layout drawing should show where the semicircular slats begin and end, how the edge and joint are finished, and whether the remainder can be used outside the main area. The fabric backing allows the cladding to bend, but by itself it does not replace the preparation of a dry, strong and level substrate. For kitchen areas near sources of moisture and heat, the suitability of the material must be confirmed separately.
PAN-001 has an important advantage: the rhythm of the elements is already set by the manufacturer. It is easier for the furniture maker to align the pattern with the vertical of the door, and for the installer not to set out the spacing of each slat individually. The drawback shows up with a small insert width: a whole sheet is purchased, and after cutting a significant part of the material remains. The estimate must take into account not only the area of the finished cladding but also the purchased format of the product.
Individual RK-001 slats: more freedom in spacing
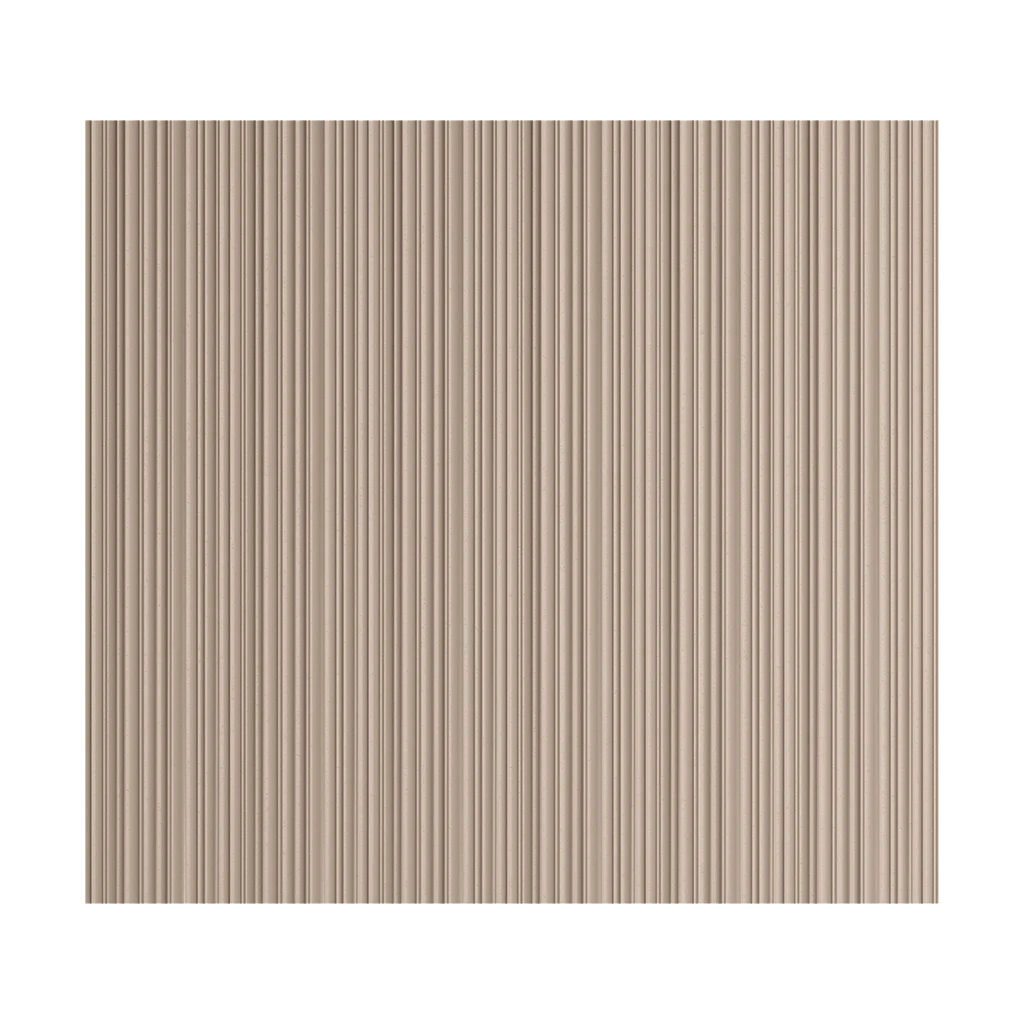
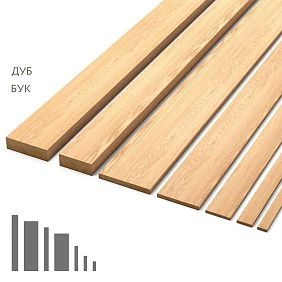
An alternative is to assemble the pattern from wooden RK-001 slats. The model comes in various cross-sections; in our example, we choose beech, 24 mm width, 5 mm thickness and 2400 mm length. This option lets you set a custom spacing, create equal gaps from both sides of the section and avoid an accidental narrow last slat. Installing the elements evenly is harder than a ready-made modular panel: you need marking, control of the adhesive, a gap template and careful finishing.
The slats are not a structural part of the cabinet side panel. If the difference between the kitchen and the cabinet needs to be leveled, a calculated backing or filler is made first, and the slats are placed on top. It is essential to check that the outermost slat does not interfere with the opening of the fronts. With sliding doors it is especially important to leave clearance to the entire path of the leaf and its handles, not just to the closed plane.
Other RK-001 sections can also be used for furniture, but the profile cannot be changed after the spacing has been calculated: the number of elements, the visual rhythm and the purchase will change. Therefore the specification must contain the full size and material, not just the designation “RK-001 slat”. If the wood texture continues the pattern of the floor or furniture, it is advisable to order samples and compare them under the same lighting.
MLD-004 moulding: small frame elements
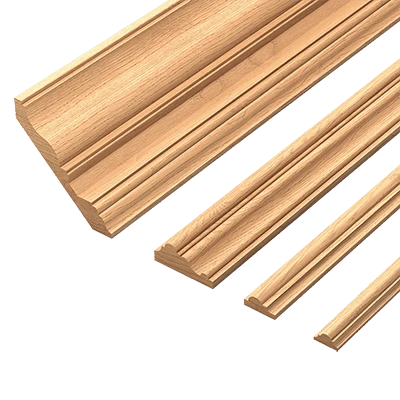
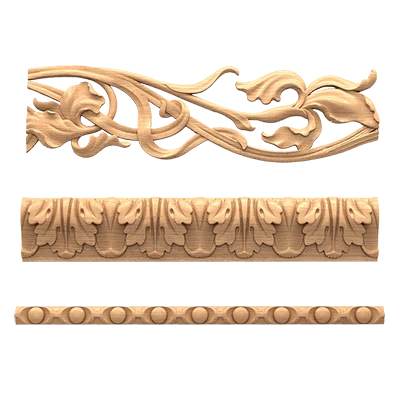
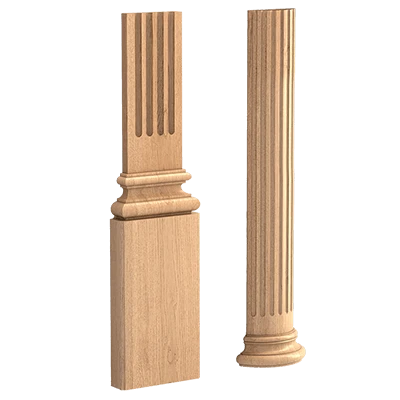
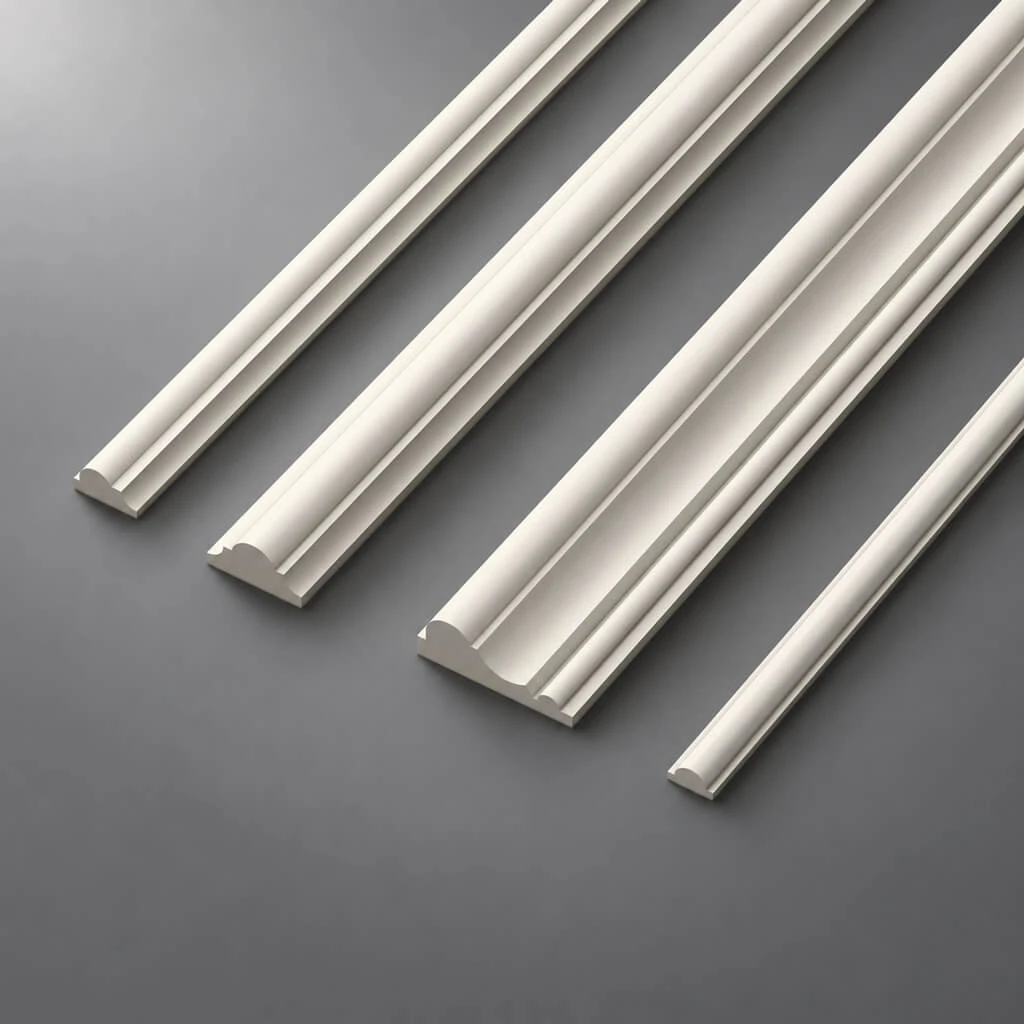
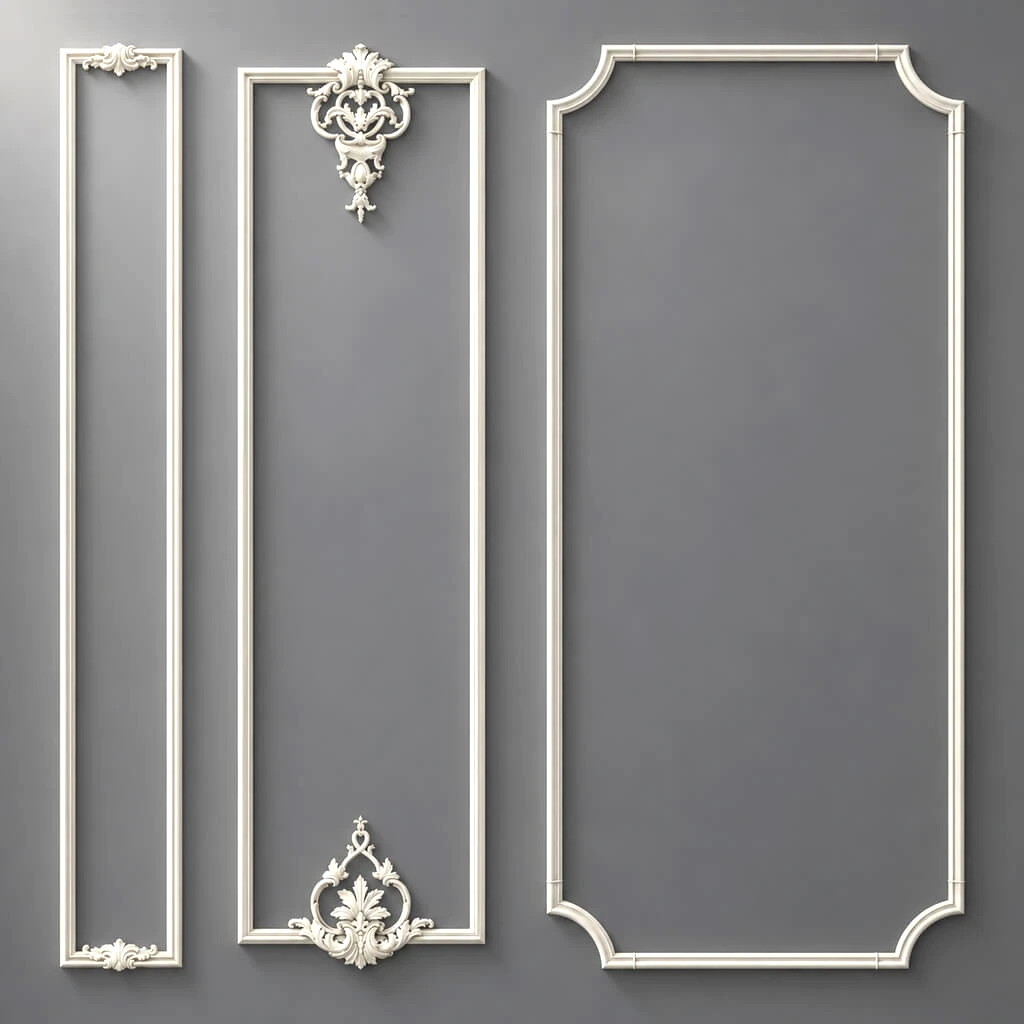
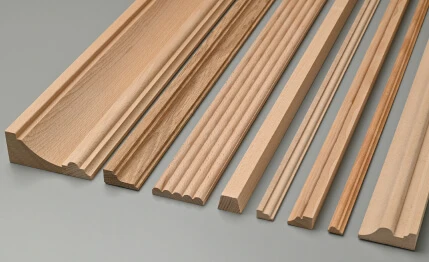
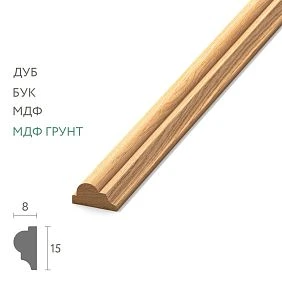
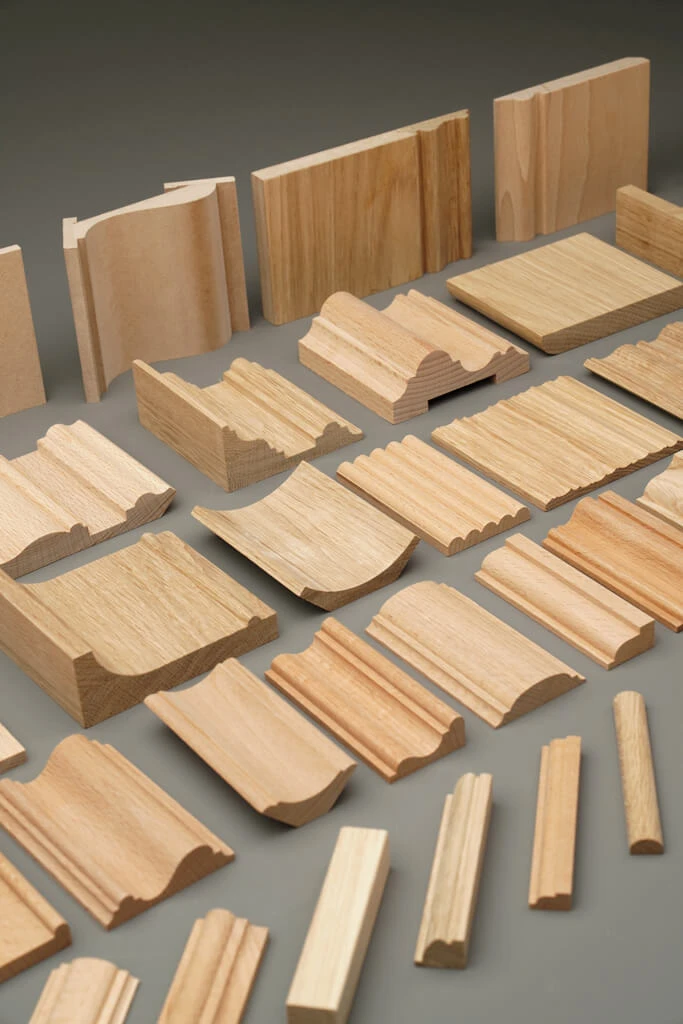
Suitable for a calm framing of the smooth section wooden mouldings MLD-004 with a cross-section of 15 × 8 mm. The catalogue offers short and long strips, as well as options in beech, oak and MDF. On the wardrobe surface, the moulding can create one or two rectangular frames, but only provided that the thickness and weight of the decor are compatible with the mechanism of the selected door. With some sliding systems, you cannot freely add a bulky surface-mounted profile: it will catch on the adjacent panel.
The decor can be placed not on the moving doors, but on a fixed side filler or a smooth wall section. This is technically simpler and often looks neater in a small studio. A rectangle is best designed in proportion to the actual module, rather than copying a standard frame from someone else's interior. The article below provides an illustrative cutting plan for two frames; it does not confirm compatibility with a specific sliding wardrobe.
Skirting and finishing lines
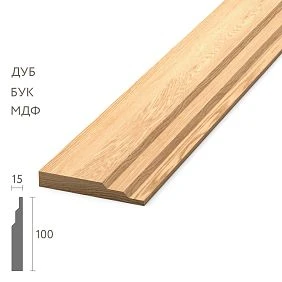
The floor skirting simultaneously protects the junction and sets the overall horizontal rhythm. In STAVROS mouldings catalogue you can choose different profiles for floors and walls. One option is PLT-006; it is available in different materials and lengths, so the parameters cannot be specified without clarifying the version. Under a kitchen and a wardrobe closed with a plinth, a continuous floor skirting is often not needed. It is calculated only for open wall sections and transitions.
To avoid an accidental combination, the skirting height is coordinated with the lower line of the furniture. Sometimes you may want to raise the overall plinth to the height of the skirting, but structurally these are not the same thing. The furniture plinth should remain removable where this is intended, and the skirting should not cover the wardrobe door mechanism. The most noticeable joints are usually at the ends: these require a finished piece rather than a cut profile with randomly exposed wood.
Where finishing must give way to technical requirements
Slatted panels, decorative profiles and wooden slats perform best in dry interior areas. The kitchen backsplash area, the immediate vicinity of the sink, hob and oven require a separate choice of cladding, coating and fastening. Any wood finish should not be considered sufficient protection against constant moisture or high temperature. When a material is chosen for its appearance rather than verified against operating conditions, the consequences show up not in the visualisation, but after months of use.
Before purchasing the finishes, check the manufacturer's instructions for each product and coordinate the junction with the designer. Sometimes it is wiser to make the backsplash from a material suitable for the relevant zone and move the wooden accent to the vertical filler between the kitchen and the wardrobe. This solution does not reduce the decorative expressiveness, yet it makes the project easier to maintain. For complex junctions, it is worth ordering samples and testing them on the actual substrate.
Practical example: a 4800 mm furniture wall for a studio apartment
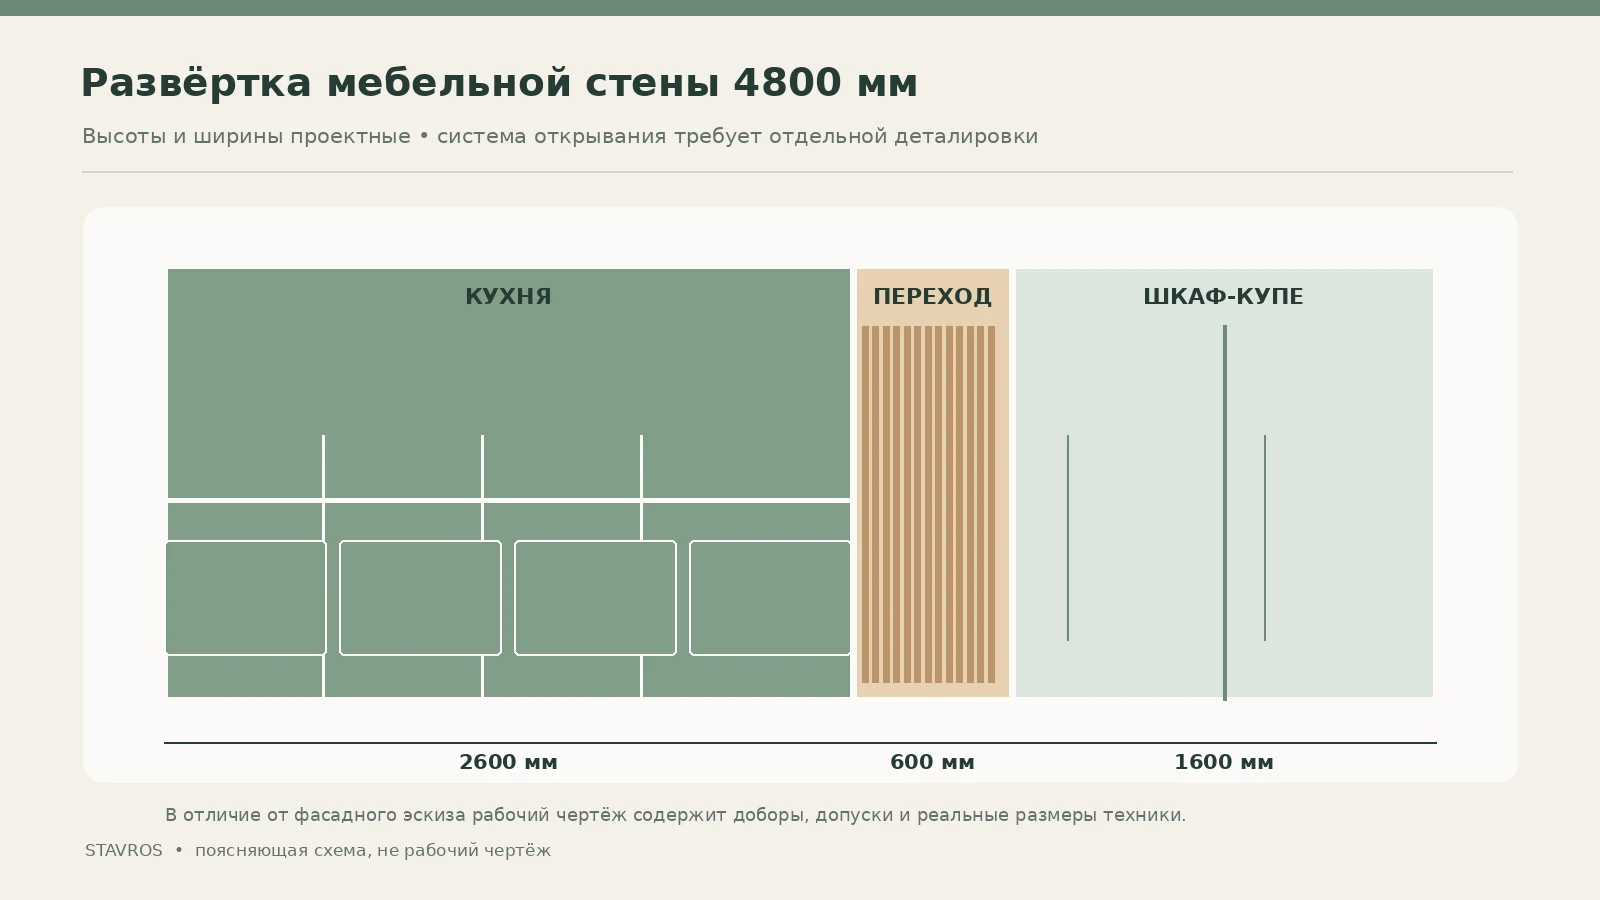
Let us imagine a rectangular studio with a usable main wall length of 4800 mm, a room height of 2700 mm and sufficient space in front of the furniture. The position of the window, door and utilities in the actual property is not yet known; therefore, the diagram provided is an exercise in layout and finish calculation. We do not present it as a project suitable for installation without on-site measurement. The goal is to show how to make decisions sequentially rather than simply stacking attractive modules.
Along its length, the wall is divided into three parts: kitchen 2600 mm, decorative transition 600 mm and sliding-door wardrobe 1600 mm. The sum is exactly 4800 mm. This is the nominal dimensions of the design zones, not finished parts for cutting: production will still require installation gaps, fillers, the actual thickness of the side panels and verification of the end junctions. For ease of calculation, let us take the height of the accent cladding as 2300 mm, leaving the upper part of the wall for an agreed finish.
Kitchen part: 2600 mm along the facade line
| Conventional module | Width, mm | What to check in the project |
|---|---|---|
| Tall refrigerator cabinet | 600 | Dimensions of the specific refrigerator and ventilation |
| Sink with base cabinet | 600 | Water drainage, siphon and access to connections |
| Cooking zone with oven | 600 | Built-in conditions, thermal clearances and electricals |
| Wide pull-out drawers | 800 | Load on runners and opening |
| Total | 2600 | Assembly dimensions are confirmed after measurement |
Such a set fundamentally shows that the refrigerator, sink, cooking and storage have a place on the short wall. But it does not mean that a full-size dishwasher will also fit here. If one is needed, the composition of the modules must change: for example, give up some drawers, choose a different size of appliance, or move one function to another wall. The project must not hide the problem behind the vague phrase “additional storage.”
The height of the countertop, its thickness and the position of the backsplash are set after choosing the cabinet and equipment. For visual unity, it is convenient to continue the color of the kitchen fronts into the transition filler, but it is not necessary to repeat the material. If the backsplash is made of stone or ceramic, its edge must be finished before the wooden cladding area. Joints between materials are chosen according to the actual manufacturers' recommendations, taking into account possible movement and sealing requirements.
Sliding wardrobe: 1600 mm by design width
Inside the wardrobe, you can designate a compartment for outerwear, shelves for linens, and a utility section, but first measure the actual items. A wide door does not guarantee convenient access to all contents: one leaf in the open position blocks part of the other opening. Suitcases need space in height and width, a vacuum cleaner needs the right depth and access to an electrical outlet, and an ironing board needs a separate vertical niche. It makes sense to move some items to other zones if the wardrobe does not provide convenient access.
Let us assume a conditional carcass depth of 650 mm for the external system and 600 mm for the kitchen. The 50 mm difference will become a matter to resolve at the junction detail. If the room is wide enough, the wardrobe can be left protruding and the end face finished with a transition section. If a flush front line is important, other structural solutions are needed, which the furniture maker will coordinate with the sliding door mechanism. Do not reduce the usable depth of the wardrobe just to match the kitchen: hangers, doors, and internal guides require their own space.
Transition zone: 600 mm instead of a random gap
A width of 600 mm allows for a legible vertical accent between two items of different character. Such a section does not necessarily have to be a functional cabinet. Possible solutions include a dry slatted partition, a thin wall panel on a suitable base, a small open shelf in a safe place, or a smooth painted surface with frame molding. The choice depends on the location of electrical points, the distance to the stove, and the accessibility of the furniture side panels.
For the conditional cladding, let us assume 600 × 2300 mm. Geometrically, this is 1.38 m² of visible surface. But you cannot buy “1.38 square meters of any panel”: products are sold in specific sizes. Therefore, the calculation must go through the full format, the number of blanks, and the offcuts. It is precisely the difference between the installed area and the purchased area that most often causes unexpected costs.
What the elevation drawing shows besides dimensions
The elevation drawing must have at least four layers of information. The first is the actual fronts with opening lines and gaps. The second is the finish: slats, moldings, end profiles, and their heights. The third is engineering points: outlets, plumbing, ventilation, electricals. The fourth is installation and service zones: removable plinth, access to the lower rail, technical hatches, fixing points. If only the first layer is presented, the project looks complete but is not yet suitable for production.
In a small studio, checking the opposite side of the room is especially important. Suppose the room width is 3800 mm, and the deepest furniture point protrudes 650 mm. There will be 3150 mm left to the opposite wall, but this is not a clear passage: there will be a table, a sofa, chairs, and a person opening a drawer. Therefore, subtract the actual furniture dimensions taking into account the usage scenario and check the narrowest section. There is no need to invent a single universal standard passage without the room's purpose and data about its users.
Cladding calculation: ready-made panel PAN-001 or individual slats RK-001
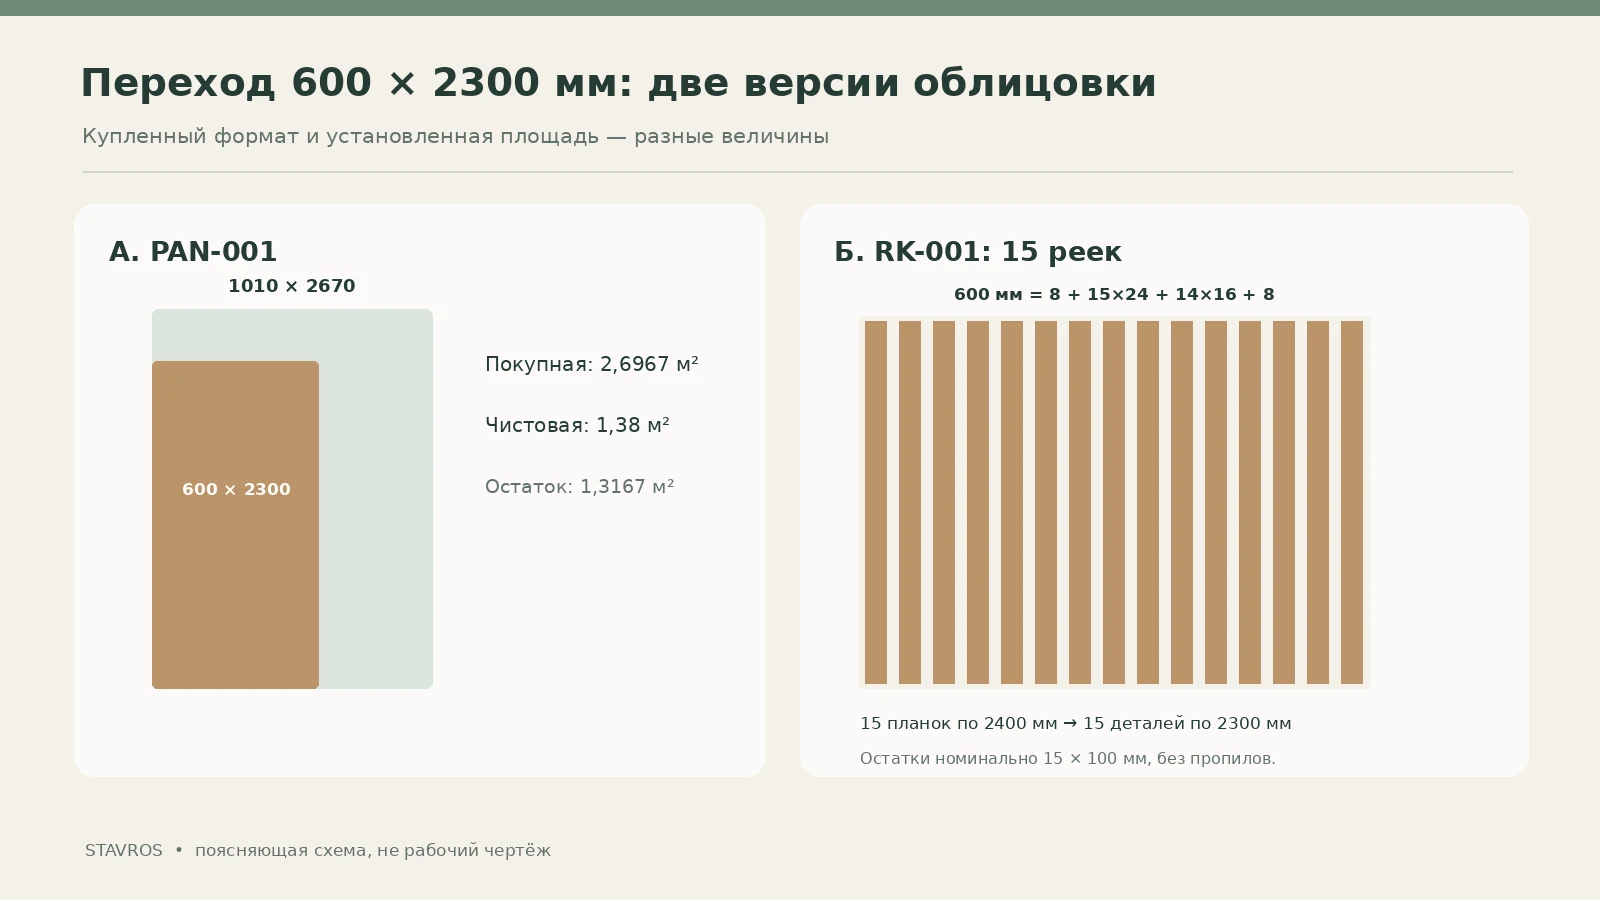
For comparison, let us consider two alternatives for the same section measuring 600 × 2300 mm. These are not two mandatory purchases: the client chooses either a ready-made panel or a set of slats. The comparison is useful because it shows not only the price, but also the specifics of cutting, the number of parts, coatings, and installation complexity.
Option A. One ready-made panel PAN-001
PAN-001 is available in an MDF version with a width of 1010 mm, a thickness of 8 mm, and a length of 2670 mm. Geometrically, one such panel can yield a section of 600 × 2300 mm. The purchased rectangular area will be 1.010 × 2.670 = 2.6967 m², the installed area — 0.600 × 2.300 = 1.38 m². The difference is 1.3167 m². This is only the arithmetic of rectangles: the actual reuse of the offcut depends on the orientation of the semicircular elements, the integrity of the base, the product configuration, and the cutting technology.
You cannot automatically assume that the remaining piece is suitable for a second facade. A narrow offcut may have an incomplete pattern or an inconvenient line direction. If a decorative insert is planned for the side surface of the cabinet, the cutting plan must show both sections and verify that the rhythm matches. For this reason, it is useful to order one sample and check the appearance of the edges before paying for the full panel.
In the public product card, the selected panel option is shown at the price 24 660 ₽. This is a reference guide at the time the material was prepared, not a guaranteed price on the order date. Finishing, installation, consumables and delivery are not included in this amount. An MDF slatted panel may require preparation for painting: the designer must confirm with the supplier the requirements for primer, coating and use in the specific area.
Option B. Fifteen individual RK-001 slats
We choose RK-001 in beech, 24 × 5 mm cross-section and 2400 mm length. For a 600 mm wide section, we will take 15 slats of 24 mm, 14 gaps of 16 mm и two edge margins of 8 mm. Check: 15 × 24 + 14 × 16 + 2 × 8 = 600 мм. This arrangement does not happen by itself: the margins and spacings must be maintained according to the markings. With custom installation, technological deviations are possible, which are selected taking into account the substrate and the technology.
The part height is 2300 mm, the original strip is 2400 mm. Each whole slat yields one part, and the nominal straight offcut will be 100 mm. For fifteen slats we buy 15 planks, the original total length is 36 m, the installed length is 34.5 m, nominal offcuts are 1.5 m. Saw kerf and possible cleanup losses are accounted for separately; none of the short offcuts should be assumed in advance to be suitable for cladding another visible area.
The product page for the selected RK-001 version in beech 24 × 5 × 2400 mm shows a guideline of 820 ₽ per slat. Then the preliminary cost of the slats themselves is 15 × 820 = 12 300 ₽. This is not the price of a finished wall: you will need a base, marking, adhesive or other suitable fasteners, coating, end pieces and labour. Comparing 12,300 ₽ with 24,660 ₽ as two prices for a fully completed solution would be wrong. Slats give a flexible rhythm but require more operations on site.
How to choose between the options without making a mistake
A ready-made panel is worth considering when an even relief, repeatability of modules and the ability to clad complex geometry using a proven technology are important. Individual slats are more convenient when you need to set the exact width of each vertical and its spacing. Whichever you choose, you must check that the base is dry, the temperature and humidity conditions, the coating requirements and the safe distance to household appliances. A transition section must not become a test bed for an unknown material.
Color also affects the choice. MDF under enamel allows for a relatively uniform painted surface, whereas beech under a clear finish reveals its own structure. These are different aesthetic solutions. If a wood-effect facade is placed nearby, the tone of the natural slat may differ from that of the film or veneer, and this must be coordinated using samples under the lighting of the apartment, not just from photos on a screen.
Moldings and skirting boards: we count planks and parts, not linear meters
Even on a small furniture wall, a decorative frame may consist of several pieces with complex miters. The total molding length is only the first step. The second is to lay out each piece on the stock so that the number of long parts actually fits into the purchased strips. The third is to add allowance for cuts, joints, and possible defects. If you simply divide the total footage by the strip length and round, you may end up with an insufficient set.
Two MLD-004 frames on a fixed smooth section
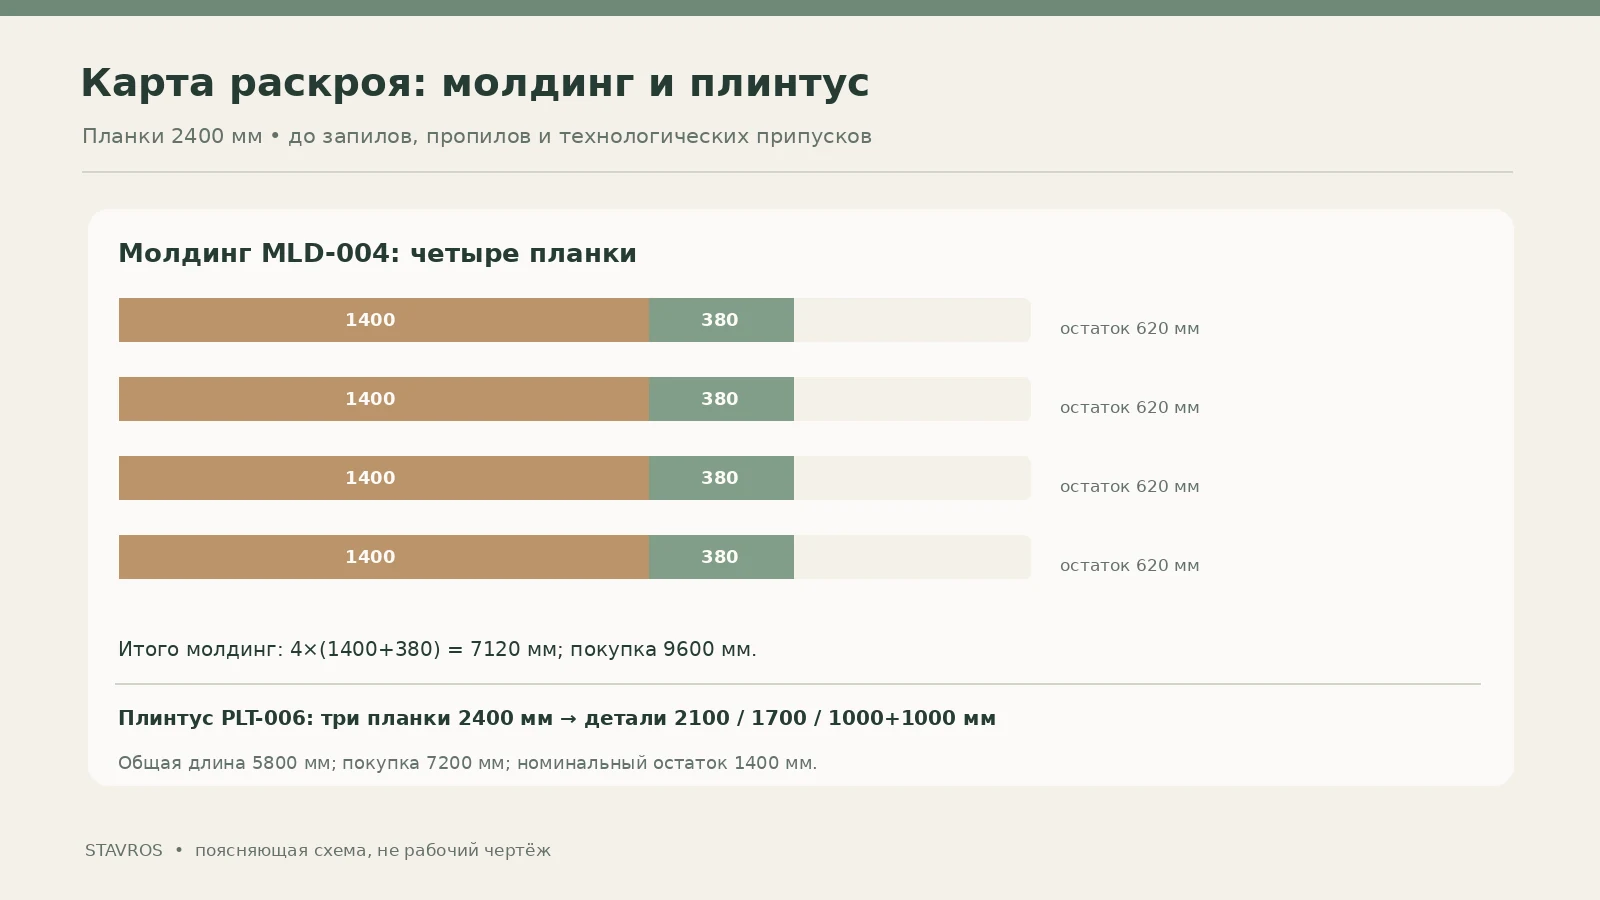
Suppose that on an adjacent wall or on separate fixed fillers there are two frame zones, each 380 mm wide and 1400 mm high. This is not a suggestion to glue moldings onto any sliding facade: here we are considering a fixed surface. The total nominal length of one frame is 2 × (1400 + 380) = 3560 мм, of two — 7120 мм. You will need four long sides of 1400 mm and four short sides of 380 mm. Using MLD-004 in beech, 2400 mm long, it is actually possible to lay out one long and one short piece on each of the four strips: 1400 + 380 = 1780 mm.
Four stock strips will yield 9600 mm. The nominal remainder is 9600 − 7120 = 2480 мм, distributed across the four strips. This space includes allowance for cuts, but the exact cutting map is made after specifying the direction of the corners and the finished dimensions of the parts. For a profile frame, the geometry on the face side and along the rear edge differs: the figures must unambiguously indicate which line the length is measured along. The MLD-004 card for beech 15 × 8 × 2400 mm shows a reference 700 ₽ per piece; four strips provide 2800 ₽ without coating and installation work.
Skirting board PLT-006 on open wall sections
Floor skirting is counted only in those places where it is actually specified by the plan. In the example, sections with lengths of 2100, 1700, 1000 and 1000 mm are conventionally open: total 5800 мм. For beech PLT-006 with a length of 2400 mm, three strips will be suitable. Cutting: the first — a 2100 mm piece, the second — 1700 mm, the third — two pieces of 1000 mm each. The total purchased length is 7200 mm, the nominal remainder is 1400 mm before accounting for saw cuts and trims. Such a set is possible if the selected joints and profile directions allow the listed pieces.
On the public page, the selected beech option PLT-006 100 × 15 × 2400 mm is listed at 3220 ₽. For three strips, the guideline is 9660 ₽. Replacing with MDF changes not only the price but also the length of the original profile, so if a different version is chosen, the entire cutting plan must be recalculated. Additional and end elements, actual installation and painting are accounted for separately.
Comparative materials schedule
| Position | Option with PAN-001 | Option with RK-001 | Explanation |
|---|---|---|---|
| Main transition cladding 600 × 2300 mm | 1 panel × ₽24,660 | 15 slats × ₽820 | Two mutually exclusive options |
| Molding MLD-004, beech, 2400 mm | 4 × 700 ₽ | 4 × 700 ₽ | Only if frames are provided for by the project |
| Baseboard PLT-006, beech, 2400 mm | 3 × 3220 ₽ | 3 × 3220 ₽ | For open wall sections |
| Estimated product total | 37 120 ₽ | 24 760 ₽ | Excluding installation, finishes, consumables and delivery |
These values illustrate the specific composition of the selected configurations, reviewed via public product cards, and not the cost of building a furniture wall. The cost of the kitchen itself, the wardrobe, mechanisms, appliances, design project, wiring, bases and all work is not included. If the material, finish or cutting layout changes, both amounts must be recalculated. A final purchase requires a valid commercial offer and confirmed prices for the selected options.
Sequence of work: how to avoid damaging the finishes when installing a wardrobe and kitchen
A complex furniture wall involves more than one contractor, so the order in which data is handed over matters. At the first stage, the owner determines the composition of appliances and items for storage. Then a specialist takes measurements, checks for structural obstacles and sets preliminary dimensions for the carcasses. After that, the front planes, opening directions, utility connections and finishing scheme are agreed. Only once the dimensions and jointing technology are confirmed can the order for furniture and decorative materials be finalized.
Before the final finishes: engineering coordination
The electrical, water supply and ventilation plan must account for the actual composition of the furniture. Electrical lines and connections are installed by specialists in accordance with the design and applicable requirements. If a refrigerator is to be built into a tall cabinet, the required ventilation openings must not be arbitrarily blocked. If a wardrobe has an illuminated decorative end panel, access to the serviceable parts of the lighting must be provided in advance. A socket behind a fixed solid panel is a bad solution even when it is not visible in the photo.
It is useful to create a single list of reference dimensions for all contractors: the wall dimensions, the position of the taps, the countertop height, the wardrobe depth, the width of the transition panel, the switch height and the thickness of the final finish. One file with consistent designations reduces the risk of mismatched dimension versions appearing in different documents. If any parameter changes, the drawing revision number is retained and communicated to all contractors; a verbal "we'll shift it a little to the left" without updating the drawing leaves too much room for error.
During carcass installation
A furniture line usually begins with checking the base and setting the supports, after which the main blocks are assembled and the actual dimensions of the transition sections are verified. The sequence depends on the design and should be determined by the installer. A decorative panel should not be glued into an opening in advance, since its width may still change while the cabinets are being aligned. Otherwise, instead of a precise symmetrical pattern, you will get a strip that hides a technical discrepancy.
Access to the lower guide of the sliding wardrobe is also checked: the door must move without touching the plinth, and the rail must remain accessible for cleaning and maintenance. In the kitchen, all drawers and doors are opened, and the oven and refrigerator are checked in accordance with the equipment requirements. At this stage, there should be no unresolved questions about sockets, ventilation, or the removable plinth. Installing the decor is the final operation, not a means of hiding unfinished work.
Installation of moldings and trim
For decorative products, the base is prepared in advance, lines are marked out, and a trial layout is performed. If necessary, a gap template is used that does not change size during the work. Wooden profiles take into account the characteristics of the material and the chosen finish, so the storage conditions before installation and the finishing requirements should be clarified according to the instructions. On the STAVROS page there is Recommendations for finishing and installation, but the specific fastening method is still agreed upon with regard to the base, the product material, and the furniture design.
When painting individual elements as one system, it is important to achieve the same shade on the ends and the front face, preserve the profile, and not cover the technical gaps with paint. If MDF and solid wood are placed next to each other, one cannot promise a perfect texture match. Striking combinations are more often achieved when the materials either deliberately contrast or are confirmed by samples under the same lighting. Checking the coating on a small fragment is significantly cheaper than repainting the entire composition.
Mistakes that turn a furniture wall into an inconvenient partition
The most common mistake is counting only linear meters. On a 4800 mm wall, all the necessary functions would seem to fit, but access to each of them is decisive. If a suitcase cannot be conveniently placed in the wardrobe and the oven opens into the walkway, the meters are distributed incorrectly. The second mistake is striving for a single depth at any cost. A step between the kitchen and the wardrobe is acceptable if it is planned in advance and does not impede movement. Increasing the thickness of the cabinet body merely for a flush facade can take away useful space without any functional gain.
The third mistake is choosing decorative panels before the technical layout of the kitchen. A painted trim looks good next to a dry wall section, but near the sink or stove the conditions will be different. The fourth is not taking into account the weight of the decor on sliding panels. Even a relatively thin molding changes the weight and thickness of the facade, and the mechanism has its own limitations. The fifth is covering serviceable utilities with non-removable finishes and postponing the issue of access to the future.
The sixth problem is inaccurate cutting calculations. Nominally, you can buy 7120 mm of molding by dividing the length by 2400, but four long pieces of 1400 mm are required, so four original strips will be needed. The seventh mistake is taking the price of one trim as the price of a finished wall. The coating, substrate, fastening, delivery, and labor can significantly affect the budget, and the composition of expenses depends on the project. That is why a commercial specification must be detailed rather than limited to a picture and one total sum.
How to place an order for furniture and decorative items
For furniture, first prepare one set of measurements and a functional specification: what is stored and where, which appliances will be built in, which fronts open, where the utility connections are located, and which decorative areas remain visible. custom kitchens should be considered together with the adjacent cabinet so that heights, transition pieces and installation tolerances do not conflict with each other. Separately agreed are sliding-door wardrobes with the actual door system, permissible loads and opening. If the project combines several furniture zones, a single detailed parts list and shared responsibility for coordinating joints are useful.
The next stage is approval of the decorative schedule: item code, material, cross-section, length, finish quality, quantity, coating and point of application. To choose suitable options, STAVROS offers Wood and MDF Products, and to agree on the texture it is useful to clarify in advance Materials and product quality. You should not order a slatted insert based on a photograph alone: a specific size is needed, along with a statement that it is decorative cladding and not a load-bearing component.
In the documents for Custom-made furniture it is important to state separately who is responsible for preparing the wall, installing the kitchen carcasses, fitting the runners, cladding the slatted area and final handover. An external link to the furniture manufacturer is useful as a route for developing the project, but it does not mean that STAVROS and CONCEPT are parties to a joint contract. The buyer should conclude contracts and agree responsibility with the actual contractors. Before paying, you can visit CONCEPT furniture showroom and to discuss the selection of fronts, samples and the project configuration.
For STAVROS products, it is recommended to verify the current terms payment and delivery. The official website offers options for placing orders and Contact us to confirm shipping to your destination., but the specific shipping cost, packaging, availability and lead times must be confirmed for the selected batch and address. Long wooden planks require careful packaging and handling during transport. After receipt, check the dimensions, visible damage and completeness before starting installation, keeping the order documents.
Frequently asked questions before designing a furniture wall
Can a kitchen and a sliding wardrobe be made from the same material?
Close colors, textures and finishes can be coordinated, but the specific front bases and requirements for the wet kitchen area may differ. For a cohesive result, it is not necessary to use the same board everywhere: it is more important to coordinate samples and junction lines. Particular attention is paid to areas near water, heat and opening mechanisms.
Is it necessary to align all fronts in a single plane?
No. Sometimes a 50 mm step between the kitchen and the wardrobe turns out to be a more convenient solution than increasing the depth of the furniture. The main thing is that the transition is drawn on the section, protected and does not reduce the permissible passage. Alignment at any cost must not disrupt the integration of appliances or the operation of doors.
Can PAN-001 be glued directly onto a sliding wardrobe?
Not onto any. Before cladding a movable panel, you need to check the weight, thickness, rigidity of the base and the limitations of the specific sliding system. It is easier to place slatted panels on a fixed end or wall insert. For PAN-001, a suitable version and installation technology are selected from the manufacturer's recommendations.
What should be used to cover the junction where the skirting board meets the cabinet guide?
The assembly is selected based on the actual door system and profile height. The skirting board must not overlap moving parts or block access to the rail. Sometimes a separate end piece is required, and sometimes a clean technical gap. There is no universal profile that fits all systems.
How accurate is the provided estimate?
This is a calculation of quantities and reference prices specific decorative items, excluding the kitchen carcass, cabinet, appliances, delivery and installation. Even with an accurately calculated cutting plan, the total cost varies depending on the material, finish, fasteners, quality of the base and actual prices on the order date. Use the schedule as an example of the method, not as a price promise for a finished interior.
What should be done if, after installing the furniture, an unaccounted gap of 30 mm remains?
You should not cover it with the first batten you find. First, determine the cause: a measurement error, an uneven wall, an incorrect filler piece, or a deviation of the furniture from the approved dimension. Then agree on a corrective piece that will not interfere with opening and will preserve access to the fastening. If you change the cladding without checking, the defect may appear at another junction.
What documents are needed so that contractors do not argue with each other?
A measurement plan, a 4800 mm elevation drawing, sections of key assemblies, an electrical and utility outlet diagram, a furniture schedule, a decor specification and a list of areas of responsibility. For a complex project, it is useful to appoint a person who coordinates changes between the furniture maker, electrician and finisher. Even a small renovation benefits from a single current version of the drawings.
Bottom line: design functional zones together, and decor according to proven geometry
A furniture wall succeeds when it requires no compromise between a beautiful plane and everyday convenience. On a nominal 4800 mm we placed a 2600 mm kitchen, a 600 mm transition zone and a 1600 mm wardrobe, then checked the depth step, door opening, technical access and two cladding options. The ready-made panel PAN-001 and individual slats RK-001 solve a similar visual task in different ways, so they cannot be chosen based on the price of a single pack alone.
Decorative mouldings and skirting boards STAVROS help complete the composition if the number of strips is calculated based on the actual cutting plan, and the junctions are coordinated with the carcasses and runners. For a deeper understanding of how furniture and decor connect, it is useful to study the STAVROS material on how to combine slatted panels and a built-in wardrobe. The correct sequence remains unchanged: measurement, appliances and storage, facade geometry, engineering junctions, product selection, cutting plan, and only then ordering and installation.