





Article Contents:
- What a kitchen without upper cabinets means and who it suits
- When the solution helps and when it's better to keep wall-mounted modules
- Three questions before any beautiful project
- Check the room in working condition
- What must be recorded in the measurement sheet
- Option one: a straight kitchen with an open wall
- Option two: an L-shaped kitchen with partial full-height storage
- Option three: a kitchen with two tall cabinets and one open wall
- Option four: a kitchen with an island
- Option five: a kitchen-living room with an accent wall
- Plates and cups: two possible scenarios
- Pots, pans and lids
- Food supplies, preserves and small appliances
- Comparing storage before and after giving up the upper row
- Mounting and placement of shelves
- Backsplash near the sink and stove
- Wooden slats: rhythm and scale
- Moldings on a free wall
- Comparison of finishing methods
- What happens to the walkway
- Where to place the accent finish
- How many slats are needed for a height of 1600 mm
- When the PAN-001 panel is more cost-effective than individual slats
- Slats and panels on a prepared base
- How to align furniture, skirting and wall decor
- Can you completely do without wall-mounted cabinets in a small apartment?
- Which is more practical: one long shelf or several short ones?
- Can wall panels be installed directly above the sink?
- Do open shelves replace a range hood?
- How to avoid mistakes when choosing wood for the kitchen?
- How many RK-001 slats are needed for a wall 1200 mm wide?
- Can a kitchen be styled with moldings without wall panels?
- How to choose between individual slats and a ready-made PAN-001?
- Do you need a tall pantry cabinet if the kitchen has no upper cabinets?
- What set of documents should be prepared before purchase?
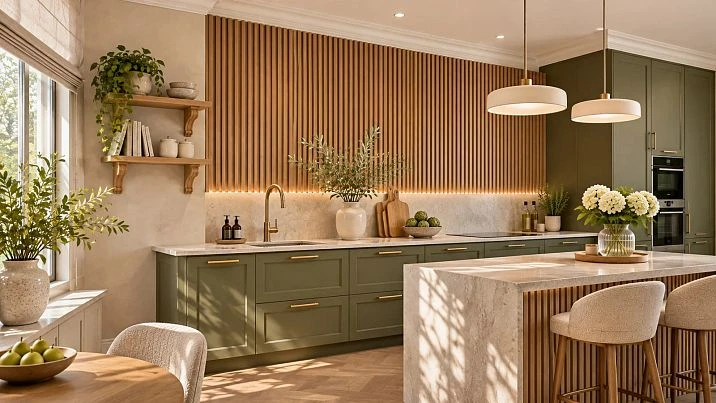
On a kitchen drawing 3200 mm long, everything looks convincing: base cabinets run along the wall, a clear surface remains above the countertop, and a tall pantry unit neatly completes the composition. But after the very first week of use, it turns out that a dish rack, cups, grains and rarely used appliances need somewhere to be stored. If the designer simply removed the wall cabinets for the sake of a photo of a beautiful interior, the solution will be inconvenient. The task is not to get an empty wall, but to redistribute storage, check everyday scenarios and choose a finish that will withstand kitchen conditions.
A clear wall opens up possibilities for wood, slatted panels, understated moldings and shelves on decorative brackets. However, some materials work well near the dining table and require caution near the sink or stove. That is why the furniture layout and wet zones are dealt with first, and only then are STAVROS wall panels, wooden trim and profile parts selected. This order helps avoid situations where expensive finishes have to be removed because of a poorly planned extractor hood or socket.
As a running example, let's take a rectangular room of 3200 × 4000 mm, that is, 12.8 m², and a working wall 3200 mm long. All dimensions, clearances, prices and diagrams below refer to a hypothetical project, and not to a ready-made standard kitchen. A real apartment will require a separate measurement, checking ventilation, the condition of the walls, the height of the windowsill and the position of utilities. First we will show five layout options, then we will carry out a detailed calculation of STAVROS decorative materials.
What a kitchen without upper cabinets means and who it suits
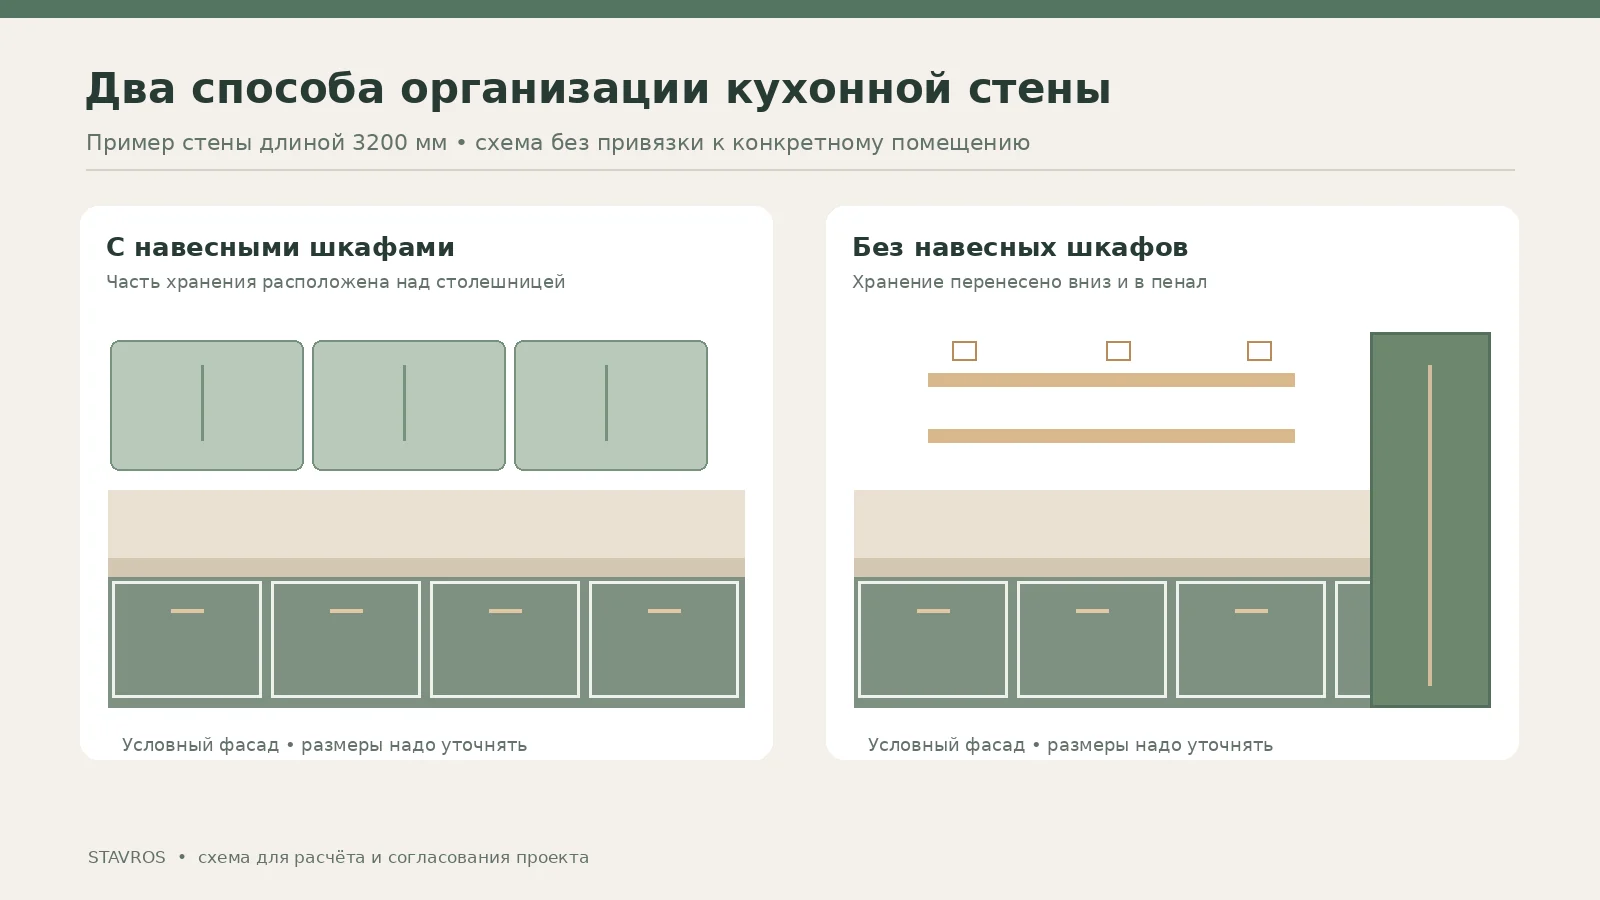
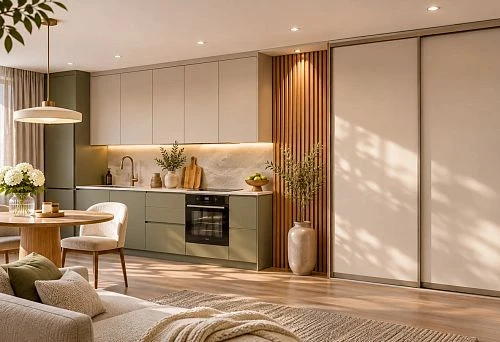
A kitchen without an upper row is a furniture composition in which there is no usual continuous line of wall-mounted cabinets above the main worktop. At the same time, a tall pantry unit, a separate sideboard, a narrow display cabinet, an open shelf or a built-in refrigerator may well remain. A strict rule of "nothing at all above waist height" is not required: it is more important to preserve the visual lightness of the wall and to use the kitchen without constant workarounds.
The main advantage of this solution is more air in the line of sight. Deep upper carcasses do not hang over the work surface, and the wall finish and natural light are visible. This looks especially convincing in a kitchen-living room, where the furniture is seen from the sofa or the dining table. But the visual effect alone does not guarantee convenience. If everyday items have to be put away in a tall pantry unit far from the sink, the person's path through the kitchen will increase. It is necessary to check not only the fronts, but also the movement during cooking.



When the solution helps, and when it is better to keep the wall-mounted modules
A kitchen without upper cabinets is easier to design where there is additional space for a pantry, a spacious tall unit or several deep pull-out systems. It suits owners of a moderate amount of dishes, those who are ready to regularly maintain order on open shelves, and families for whom the aesthetics of a free wall really matter. This is not a question of apartment size in isolation from habits: two people in a large kitchen may have more utensils than a family of four in a compact one.
If the home has a lot of seasonal dishes, preserves, appliances and sets for large feasts, giving up all upper modules at once is risky. A compromise is to leave one row above the sink or move storage into two columns at the end of the room. In a narrow kitchen, windows also matter: a tall unit next to the window reveal can worsen the lighting, and open shelves can end up in the zone where the sash swings. Before ordering, it is useful to draw not one attractive sketch, but at least two options indicating storage places for the same set of items.
Do not confuse the absence of upper cabinets with the absence of a range hood. The choice of ventilation and extraction solution depends on the stove, distances, building structure and equipment design. For some interiors, a separate decorative hood is suitable; for others, a ceiling-mounted or built-in system. The hood is not chosen last, when the slats are already attached: the air duct route, access to filters, power supply and permissible proximity of finishing materials are agreed in advance.
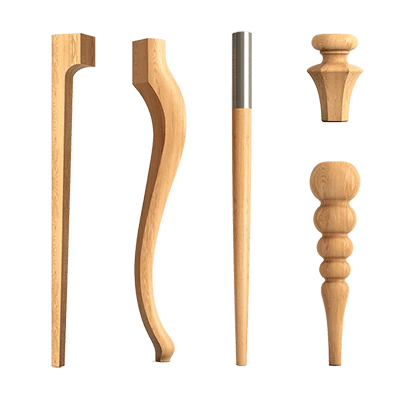
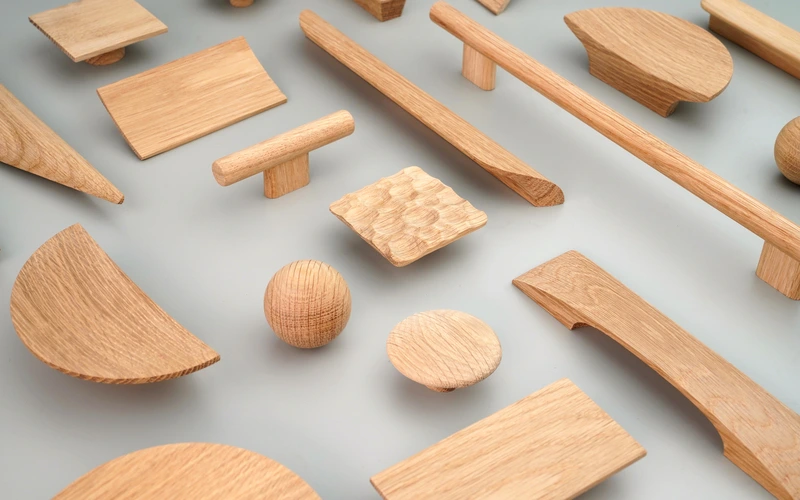
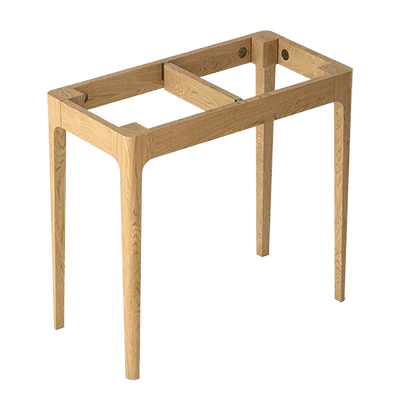
Our factory also produces:

Three questions before any beautiful project
The first question is how many items are actually stored in the kitchen. Over the course of a week, it is useful to record what the family takes daily, once a month and several times a year. The second is how many work surfaces are needed at the same time: one person cooks at the sink, another chops vegetables, a child puts down plates, someone uses the coffee machine. The third is who will clean and maintain the open elements. Textured walls and shelves look impressive in a photograph, but require access for cleaning and suitable coatings.
Planning discipline is more important than the words "minimalism" and "modern style". It is enough to show the capacity of the lower cabinets on the drawing, label the appliances and mark dry zones for decor. Then the free wall becomes the result of a well-thought-out layout, not a loss of functionality. At the same time, it is easier to compare projects from different manufacturers: the same facade pattern does not yet mean the same useful capacity.
Get Consultation
Measuring the room before making a made-to-measure kitchen
The check begins with a to-scale plan. For a rectangular room, measure the length of each wall at several heights, the position of doors and windows, the ceiling height, the diagonals and any significant deviations of the surfaces. You cannot rely on the technical inventory data alone: the thickness of the final finish, new window reveals, a ventilation duct box or a relocated partition change the dimension into which the furniture must fit. The floor level may differ at different ends of a long run, which affects the setting of the supports and the fit of the skirting board.
Measure the working wall especially carefully. Mark the location of the water supply, drainage, gas if present, ventilation openings and electrical outlets. For each appliance, write down the manufacturer's actual installation requirements. A dishwasher needs a connection route and door-opening clearance; an oven needs installation conditions; a refrigerator needs working clearances and ventilation. A decorative wall panel must not block access to shut-off valves, serviceable connections and electrical boxes.
Check the room in its working state
Unlike a schematic plan, a real kitchen constantly changes configuration: a drawer opens, a pull-out basket slides out, an oven door swings open, a person stands nearby. That is why the drawing marks additional opening outlines and the ability to walk past. For a table, you should consider not only the size of the tabletop but also the pulled-out chair; for a tall cabinet, the direction of the fronts; for a window, the swing of the casement, the curtains and access for cleaning the glass. A dimension "between furniture" without people moving says nothing about the quality of the layout.
As an example, let us take a working wall of 3200 mm with base cabinets 600 mm deep. If a table stands opposite, the remaining width cannot automatically be considered a free passage: you will need to account for the overhang of its tabletop and the chair in the seated position. You should check the narrowest point with the chair pulled out, not the pretty distance between closed fronts. Ergonomic recommendations are applied with adjustment for individual needs, limitations and the actual dimensions of the furniture; a universal number without checking the scenario does not replace a design.
What must be recorded in the measurement sheet
| Section | What we record | Why this is needed |
|---|---|---|
| Working wall | Length at three levels, deviations, ventilation | Ordering the carcasses and the backsplash |
| Floor | Level markings and coating material | Support adjustment, joints with skirting board |
| Window | Windowsill height, sash swing, curtains | Placement of tall cabinets and shelves |
| Water and electricity | Exact outlets, service zones | Installation and safe access |
| Dining area | Table and chair dimensions in use | Actual clearance |
| Decorative wall | Width, height, dry and wet areas | Choosing slats, panels and finishes |
Professional measurement is especially important for custom kitchens, in which the upper cabinets are replaced with non-standard tall sections and pull-out modules. When manufacturing to individual dimensions, you need to discuss more than just the colour of the fronts: the furniture maker must receive an exact layout of the decor, electrics and extractor hood. This prevents disputes between contractors when each does their part correctly, but the finished kitchen does not come together into a single composition.
Five kitchen layout options without an upper row
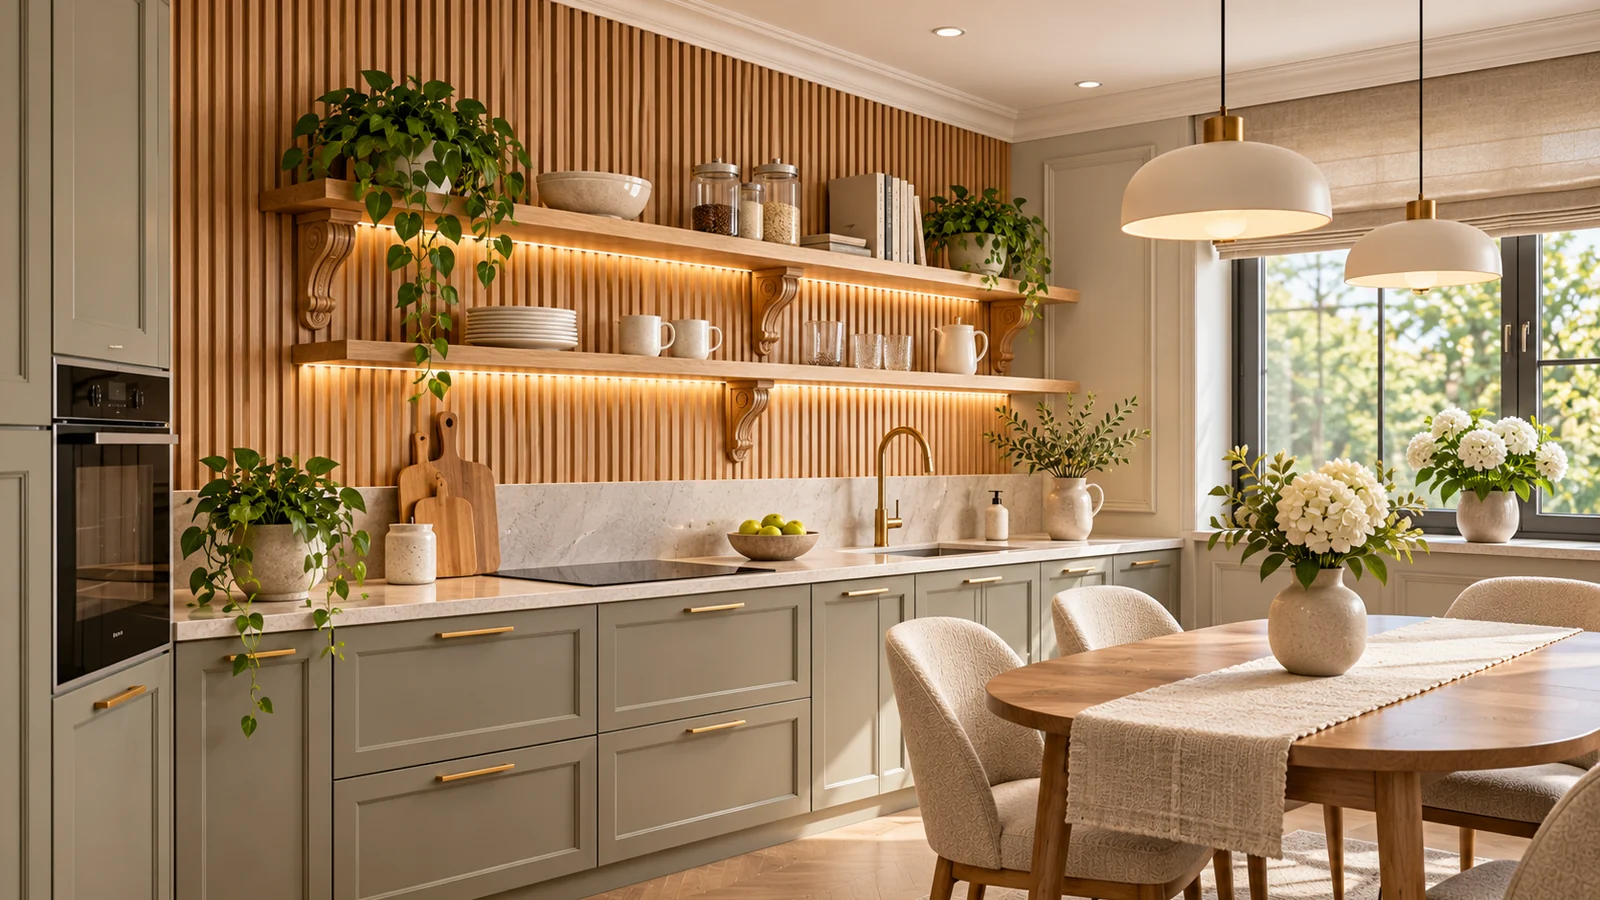
To choose, start with the everyday scenario: who cooks, how often guests are entertained, how much equipment is needed, and whether a table remains in the kitchen. Then make five simple plans and rule out those where real items do not fit. The options below show the principle, not ready-made furniture sets available for installation in any room. In one room the window will be on the right, in another on the left; the same set of cabinets may require a mirrored arrangement.
Option one: a straight kitchen with an open wall
This is the cleanest option compositionally. Along one wall stand lower modules with a sink, worktop and hob, above them a protected work area and a free section of wall. Tall cabinets are placed at the end or moved to the adjacent wall. For a straight kitchen, the length of the continuous worktop is especially important. If the sink, hob and coffee machine have taken it all up, visual lightness does not compensate for the lack of space for a chopping board.
Finishing is often handled in two levels. The lower band must meet the conditions of food preparation; above, you can leave a painted surface or a small wooden accent if humidity and temperature conditions allow. Vertical slats across the entire work wall are not always sensible: they collect dirt and complicate cleaning. If you want natural wood, it is better to highlight a dry area next to the dining table or at the end of the furniture line.
Option two: an L-shaped kitchen with partial full-height storage
An L-shaped layout is convenient when additional work surface is needed. One side can be left without wall cabinets, while on the short side you can place two tall larder units, a refrigerator or a closed pantry section. The result is an expressive balance: a visually open long wall and a functionally dense end. But the corner requires proper design of pull-out mechanisms so that each drawer extends without colliding with the handle of the adjacent cabinet.
A particular difficulty is the junction of the countertop, backsplash and decorative trim at the inner corner. Materials behave differently, and the gap must be provided for in the installation solution rather than filled with whatever compound happens to be at hand. In an L-shaped kitchen, the lines of the ceiling cornice and floor skirting are especially noticeable. They are coordinated in advance with the height of the larder unit: a small difference in levels creates an accidental step that is then difficult to conceal neatly.
Option three: a kitchen with two larder units and one open wall
Two tall cabinets allow storage to be concentrated at the edges or on the side wall. One houses built-in appliances, the other holds supplies, dishes and household essentials. This solution is effective if the family agrees to keep some items further from the immediate cooking area. To organize the interior space, the height of shelves and pull-out baskets should be shown: the same external size of a larder unit does not mean the same useful layout.
This is where expressive wall finishes are especially appropriate. A flat plane between two vertical volumes emphasizes the wood texture and profile lines. However, a tall cabinet by the window can block light, and the junction of the slat with the side panel of the furniture can leave a messy narrow gap. At the design stage, a finishing profile, a concealed mounting strip or a precise setback agreed with the furniture maker and the finisher is provided for.
Option four: a kitchen with an island
An island helps separate individual operations and provides more base drawers, but it is justified only with sufficient walkways. You should not put an island on the plan simply because it looks beautiful in photos. An open dishwasher, an oven, pulled-out baskets and a person at the countertop must all fit at the same time. In an apartment with a small floor area, it is wiser to replace the island with a mobile table or a bar counter than to narrow circulation for the sake of a fashionable composition.
If a cooktop or sink is moved to the island, the engineering part becomes noticeably more complex: coordinated utilities, ventilation, electrical lines and access for maintenance are required. Wooden slats on the island can serve as a finish for the vertical facade part, but they are not used in place of load-bearing components and are not placed where they will be constantly kicked without appropriate protection. The material is chosen after studying the specific usage scenario.
Option five: a kitchen-living room with an accent wall
When the work area is visible from the living room, the absence of upper cabinets makes the furniture look less like a technical unit. On one wall, you can continue the wooden slat motif from the dining area, tie the color of the tall cabinet to the door casings, and choose a matching floor skirting. But this does not mean the entire long wall has to be covered in a single material. Around the sink and hob, practical requirements remain more important than decorative rhythm.
It is precisely for such a composition that it is useful to compare custom-made furniture with ready-made standard-size boxes. With a custom-size project, you can agree on the height of the tall cabinets, door gaps, the width of decorative inserts, and the transitions between zones. An example of completed comprehensive projects shows Custom-made furniture, however, before placing an order you still need your own set of measurements and approved drawings. The appearance of a neighboring kitchen will not tell you where the pipes and ventilation run in your home.
Where to put dishes, food, and appliances: planning storage item by item

The main mistake when giving up upper cabinets is discussing storage with the generic word “capacity.” For a project, you need to list items by size, weight, and frequency of use. First, put everything that is in the upper row of your current kitchen into a separate group. Take out at least one approximate set of plates, cups, and glass goblets, and measure the height of the largest items. Then determine what should stay next to the sink, what can be moved to the refrigerator, and what is used so rarely that the top shelf of a tall cabinet suits it.
When storage moves from the wall row down below, items change their access height. This is not always worse: a deep drawer with dividers can be more convenient than an upper shelf you have to reach for. But heavy items cannot automatically be put into any pull-out mechanism. The load capacity of the runners, the quality of the cabinet body fastening, and the placement of the load must comply with the manufacturer's documentation. Specifying a drawer “from a photo” without choosing hardware for a specific load is a weak technical solution.
Plates and cups: two possible scenarios
The first scenario is to store tableware in wide lower drawers next to the dishwasher. Plates are held in place with dividers, and cups are arranged so they do not have to be moved three times. The advantage is a logical sequence of actions: take out clean dishes, put them away, set the table. The disadvantage is that some drawers become heavier and require suitable hardware. For a family with small children, safe access to glass and heavy ceramics should be considered additionally.
The second scenario is to allocate a dry tall cabinet for dishes used during breakfasts and dinners. Shelf heights are chosen based on the actual dishes rather than making a uniform grid for looks. At the same time, a tall cabinet must not be loaded with items only in the upper part. Heavier contents are better placed lower, and rarely used items above the level of convenient daily access. The system for securing the tall cabinet itself must match the wall construction and the furniture manufacturer's recommendations.
Only a limited number of items can go on open shelves: beautiful ceramics, cups for daily use, containers with tightly fitting lids. But a shelf above the hob is not a place for dried branches, books, or heat-sensitive items. Even in the dry part of the kitchen, open surfaces collect dust; for families who cook often, the number of such shelves is better limited in advance. A clean composition of two shelves is more practical than a multi-tier display of dishes up to the ceiling.
Pots, pans and lids
Large cookware works well in deep bottom drawers if the facade height and runner system are calculated correctly. In one wide drawer you can provide vertical lid holders, in another — pots nested one inside another. But the theoretical cabinet volume does not equal the available internal volume: side panels, runners, fasteners and the pull-out mechanism get in the way. Before making the furniture, check the usable height of each level on the hardware drawing.
Heavy cast-iron and solid cookware is often more convenient to store closer to the bottom of the furniture. At the same time, an extended loaded drawer creates stress on the cabinet and fixings; you should not assume that expensive hardware automatically solves all issues. The manufacturer must state the permissible loads for the chosen system and the method of securing the cabinet. If space is insufficient, reconsider the number of items and the functions of the cookware itself: sometimes one large pot for a rare feast takes up the space of a whole everyday set.
Food supplies, preserves and small appliances
It is more convenient to divide food into four groups: dry supplies, frequently used ingredients, refrigerated products and reserve packages. Dry supplies are best kept in a separate closed section away from heat and excess moisture. Household chemicals should be kept in a separate compartment, not mixed with food. A tall cabinet can accommodate pull-out baskets, but its position is chosen so that the open section does not block the passage and does not collide with neighbouring doors.
A coffee machine, toaster and food processor require more than just shelves. For each appliance, define the work location, ventilation and electrical connection. If the appliance will constantly slide out of a niche, the cord and socket must be positioned safely, and the mechanism must be rated for the corresponding load. Placing a powerful appliance inside a closed cabinet and operating it with the door shut is not allowed without the manufacturer's explicit approval. Separately check the dimensions of containers, bowls, removable parts and the space for removing them.
Comparison of storage before and after eliminating the upper row
Let us imagine three wall cabinets with a nominal external size of 600 × 350 × 720 mm. Their total geometric volume is 3 × 0.6 × 0.35 × 0.72 = 0.4536 m³. This is only the external volume, not the usable capacity: walls, shelves, hardware and awkward zones reduce the space. It cannot be compared directly with the volume of bottom drawers. For a meaningful comparison, record the internal dimensions and make an item-by-item storage plan.
A possible alternative is a single tall cabinet with external dimensions of 600 × 600 × 2000 mm. Its geometric volume is 0.72 m³, but even here the usable space will be smaller. If part of the height is taken up by a built-in oven, lighting, or technical clearances, the comparison becomes even more conditional. So the numbers help you understand the scale of the cabinet, but the final decision is made based on the internal configuration: how convenient it is to reach the plates, where the baking tray sits, and what happens when two drawers are opened at the same time.
| What used to be on top | A possible new location | What to check |
|---|---|---|
| Everyday plates | Lower wide drawer | Dividers, access, load capacity |
| Cups and glasses | Tall cabinet or dry shelf | Height, stability, cleaning |
| Grains and spices | Closed pull-out section | Humidity, heat, airtightness |
| Rarely used tableware | Upper shelf of the tall cabinet | Adult access, stability |
| Small household appliances | Worktop or niche | Electrical, ventilation, maintenance |
| Cleaning products | Separate lower compartment | Separation from food products |
Such a table should be part of the technical specification for the furniture maker. It lists the number of items and approximate dimensions. A good kitchen design without upper cabinets does not force the buyer to purchase a separate shelving unit after installation, because the initial visualization forgot about pots and a basket of grains.
Open shelves in the kitchen: where they are truly convenient
Open shelves are often proposed as a visually light replacement for wall-mounted cabinets. But a cabinet with a door protects its contents from direct contamination and hides dissimilar items, while a shelf leaves everything in view. For one or two shelves, it is reasonable to assign a limited function: a tea set, decorative ceramics, everyday small dishes in a dry zone. A solid wood shelf can be an expressive element if its profile and shade are coordinated with the furniture. At the same time, the material of the shelf and the decorative bracket do not automatically determine the permissible load of the entire structure.
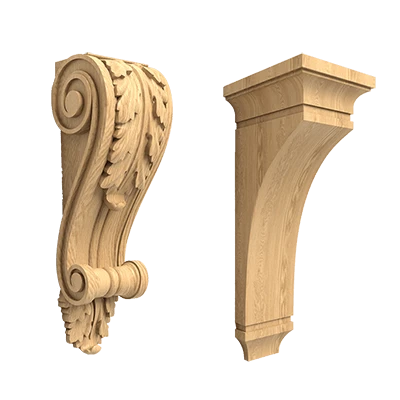
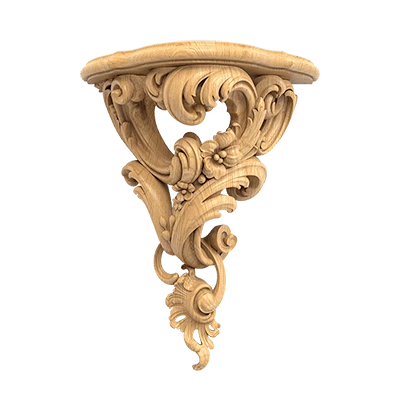
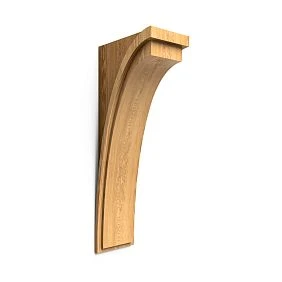
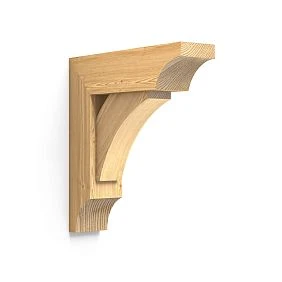
In the STAVROS catalog there is Wooden brackets for shelves, including models of various sizes and materials. For the project, you can consider KR-070 pine bracket measuring 200 × 44 × 200 mm, or a larger KR-065 bracket, available in oak and beech versions. These are decorative products; choosing a specific load-bearing scheme requires verification of their construction, number of supports, wall material, fasteners, shelf depth and weight of the items. You cannot claim, based on a single bracket size, how many kilograms a finished shelf will hold.
Mounting and placement of shelves
The most important parameter is the wall base. Brick, concrete, hollow block, drywall cladding and stud partitions require different fastening solutions. It is forbidden to treat a decorative panel as a load-bearing support if it is fixed only to the cladding substructure. The load must be transferred to the base provided for by the design. The installer clarifies the permissible spacing between supports, the anchoring method and the presence of concealed utilities; only after this can the length and depth of the shelf be agreed.
The shelf should not be hung in a way that obstructs the opening of the refrigerator, a tall larder unit or a window. Separately check the height of the dishes that will be taken down from the top level. Sometimes installing shelves makes the workspace less convenient: items end up at face level during cooking, and too little space remains between the overhanging shelf and the countertop. In this case it is preferable to leave the wall free and add one horizontal shelf in the dry dining area.
Household cleaning must not be ignored. Greasy aerosols from the hob and humid air settle on open surfaces; they may require more frequent care than a closed cabinet. For a room where food is often fried, this characteristic is especially important. Open shelves are appropriate when there are few of them, they are accessible for washing, and the wood finish is selected for the actual conditions and the supplier's recommendations.
How to finish the wall: paint, tile, panels or wooden slats
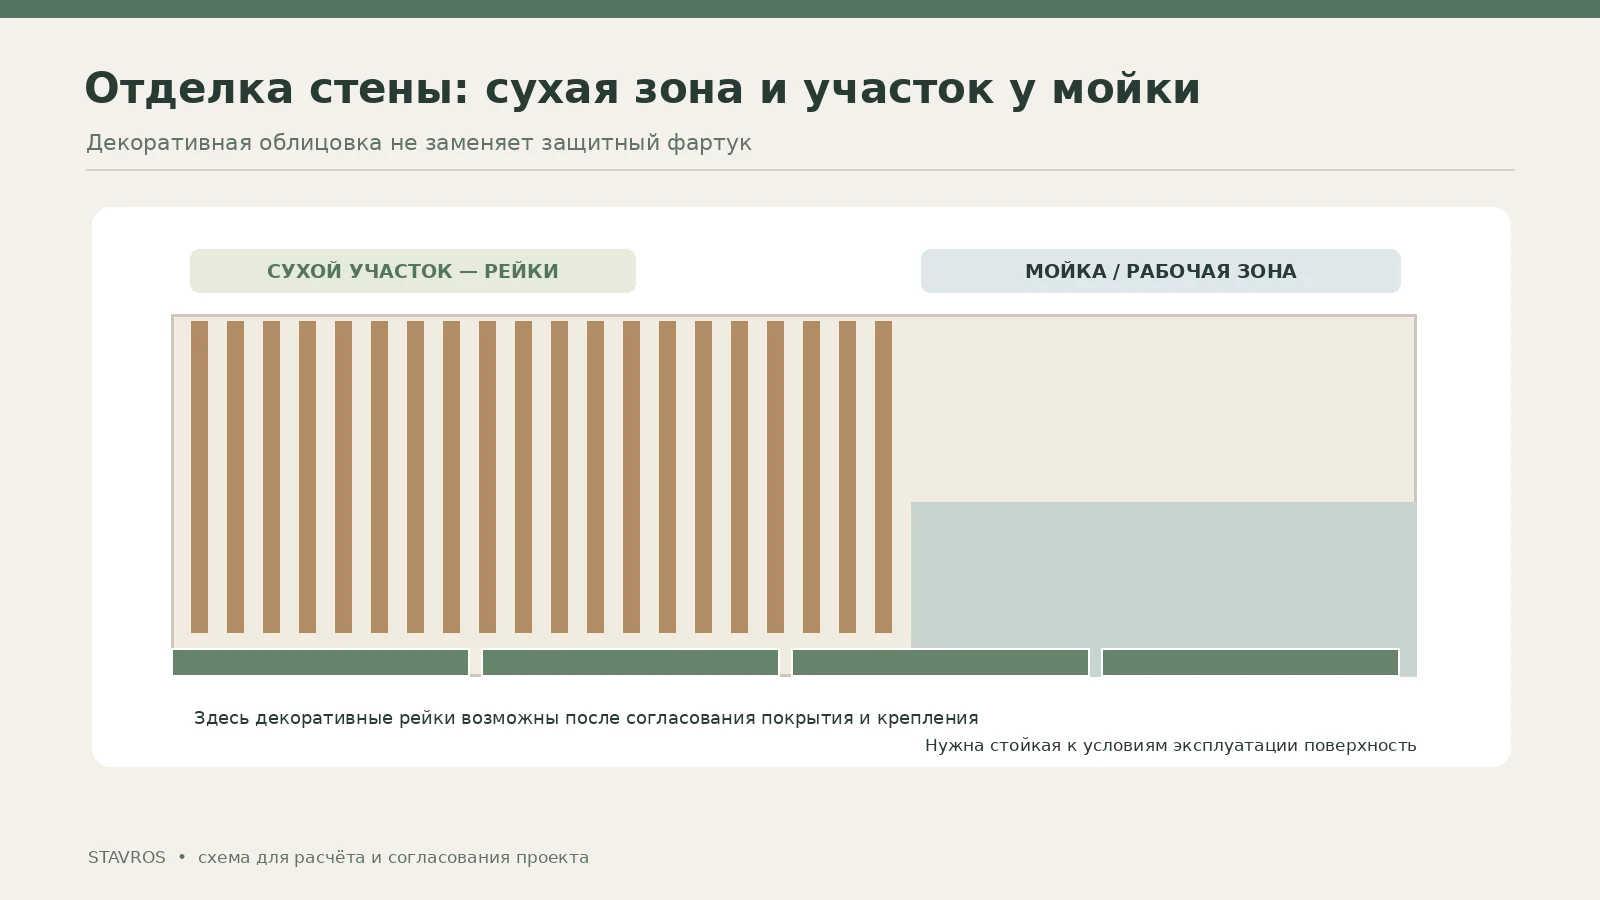
A free wall visually expands, but at the same time the quality of the finish becomes more noticeable. Irregularities, random sockets, different shades of the surface and joints between materials are visible on it. There is a temptation to cover everything with large slatted panels, but it is better to divide the wall into functional zones. Where water splashes and cooking products are possible, practicality and material suitability will be the main criterion. In the dry part of the kitchen, closer to the dining area, natural texture and a more complex decorative composition can be used.
Splashback near the sink and hob
The working splashback must meet the requirements of the specific zone: be suitable for cleaning, have correctly executed joints, withstand the specified operating conditions and not obstruct access to utilities. For a gas hob, restrictions on combustible materials, distances and structures are additionally taken into account. It is impossible to give a universal recommendation to glue wooden slats directly behind the burners. The suitability of the finish is determined by the design and the requirements of equipment and material manufacturers.
Near the sink, the moisture resistance of the coating and the protection of the junctions are important. Even a good decorative paint does not compensate for an exposed wood end that regularly gets wet from water. If sockets are provided nearby, safety rules and their placement take priority over a symmetrical pattern of mouldings. Therefore, the designer first shows the working strip in section, then marks the boundary of the decorative dry zone. In a small room, this boundary may not run strictly along the centre of the wall; it is worth linking it to the edge of a furniture module or larder unit.
Wooden slats: rhythm and scale
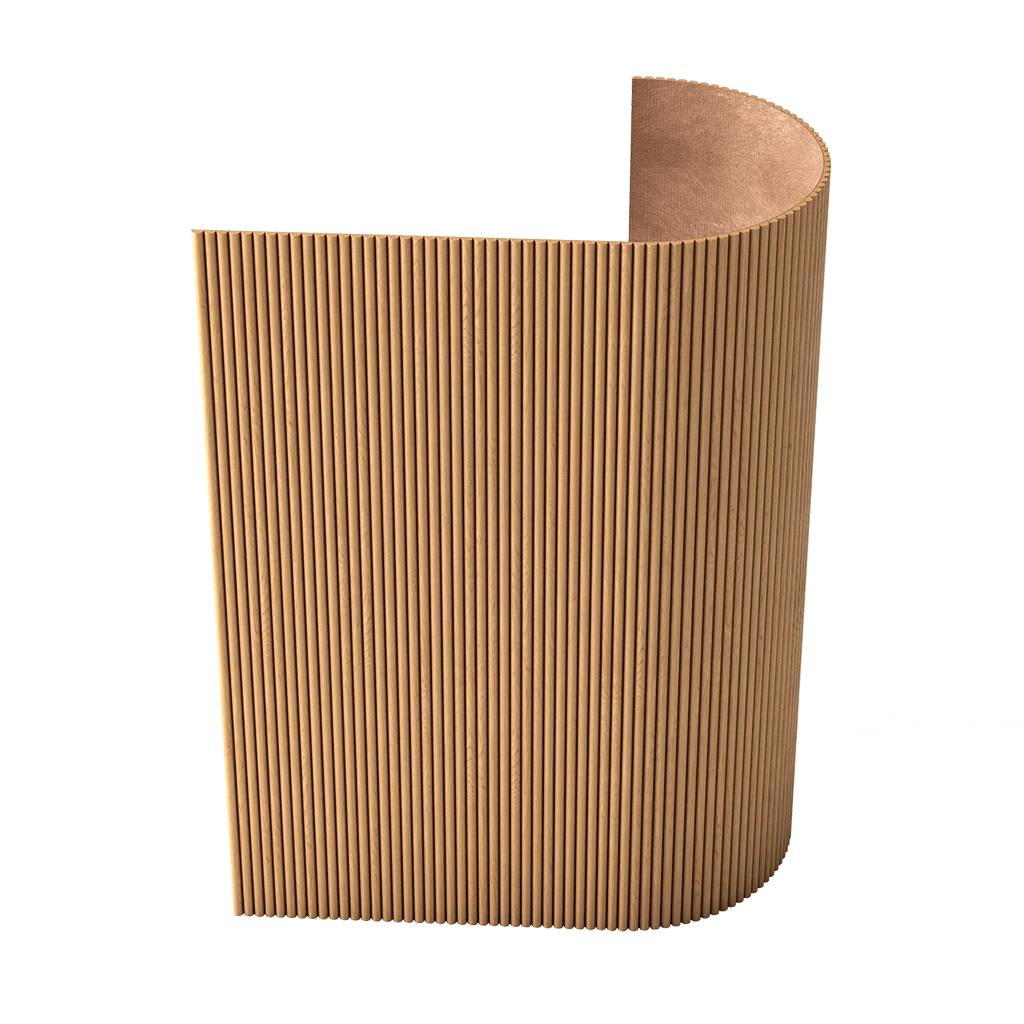
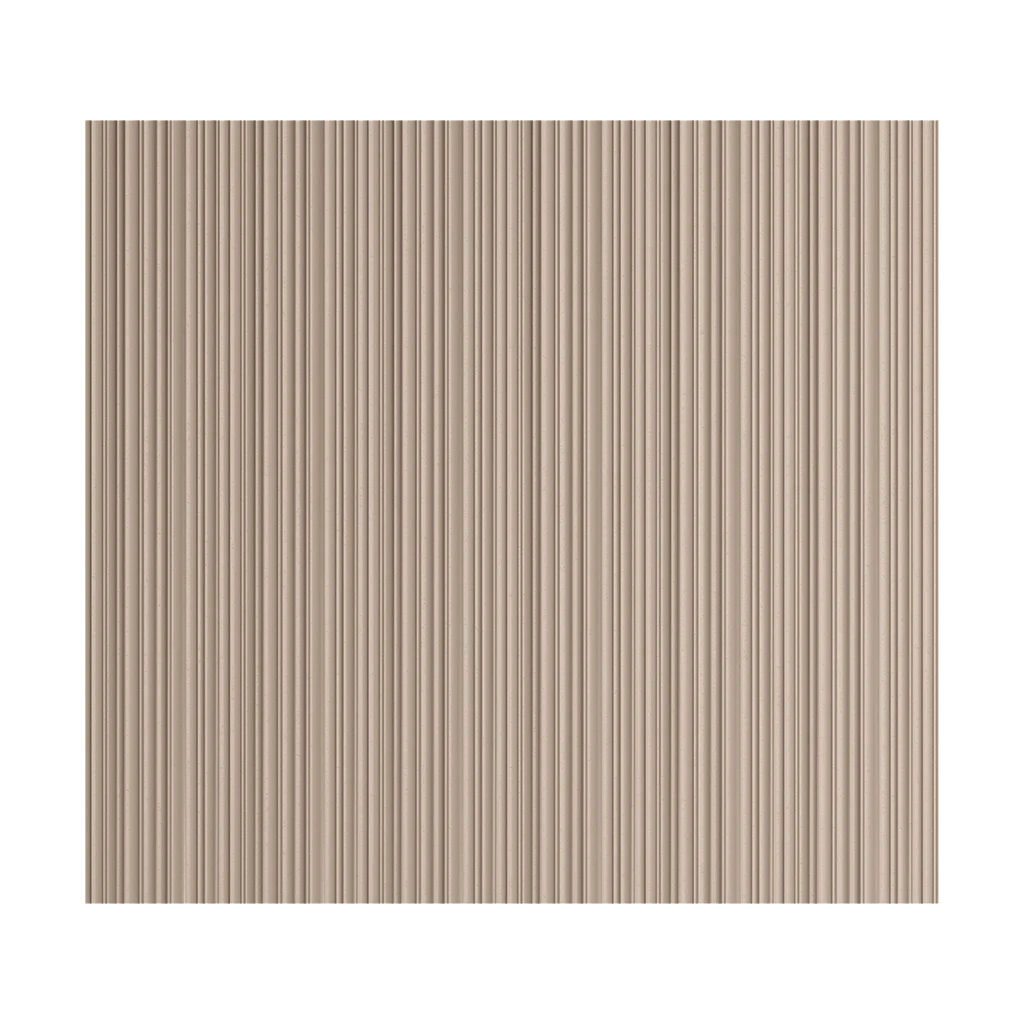
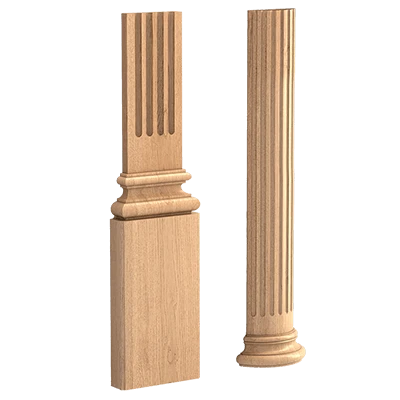
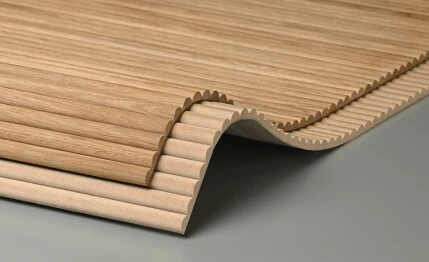
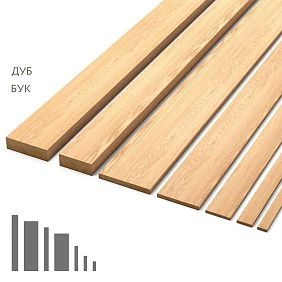
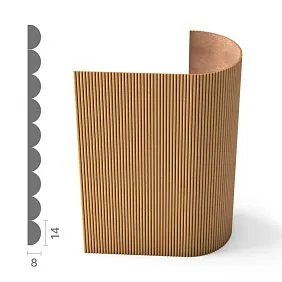
Decorative slats work well on a dry section of the wall, for example behind the dining table, at the transition from the kitchen to the living room, or on a side wall without constant contact with water. Model wooden slat RK-001 is available in several cross-sections in beech and oak with a length of 2400 mm. For the example below, we use the specific version 24 × 5 × 2400 mm in beech. Other thickness and width options create a completely different rhythm and require a separate calculation.
The slats can be positioned vertically, horizontally, or as a limited panel. A vertical layout emphasizes height and looks good next to a tall cabinet. A horizontal one makes the wall visually wider, but requires attention to the ends and lengthwise joints. You should not automatically choose narrow gaps: dust accumulates on the relief, and too frequent a pattern near small tiles or a complex countertop texture creates visual noise. Before ordering, it is useful to lay out several strips of masking tape on the wall at the chosen spacing and evaluate the composition from different points in the room.
Slatted panels and moldings: practical solutions for dry areas
When a large area of repeating pattern is required, instead of individual parts you can consider slatted panel PAN-001. This model is available in versions made from different materials, including solid wood and MDF, with length options. What matters is not only the visible ribs, but also the module width, the joint between adjacent panels, base preparation and permissible cutting methods. A panel cannot be considered interchangeable with a set of slats just because both solutions produce vertical lines.
For example, some versions of PAN-001 in the catalog specify a format of 1010 × 8 × 2400 mm. For an area 2020 mm wide, two such panels at nominal width give 2020 mm, and the cladding area is 2.02 × 2.4 = 4.848 m². However, this is a geometric calculation without taking into account installation gaps, the actual joint, cutting and the choice of a specific version. If the wall width differs from 2020 mm, the layout and the possibility of cutting must be confirmed against the product documentation. You should not purchase two panels based only on a formula without checking the joining method.
Moldings on a free wall
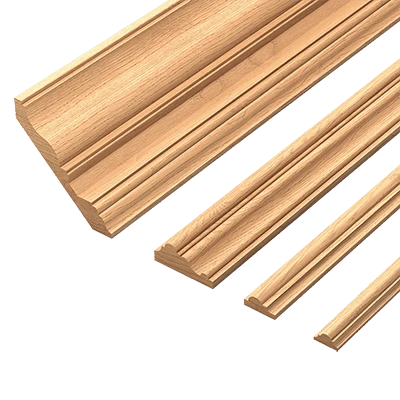
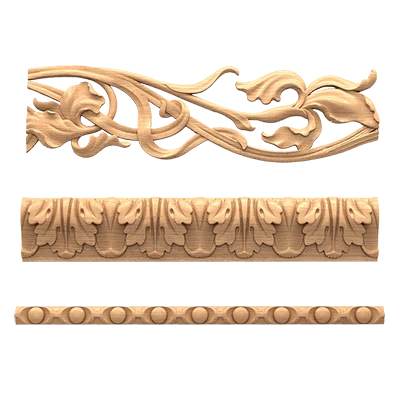
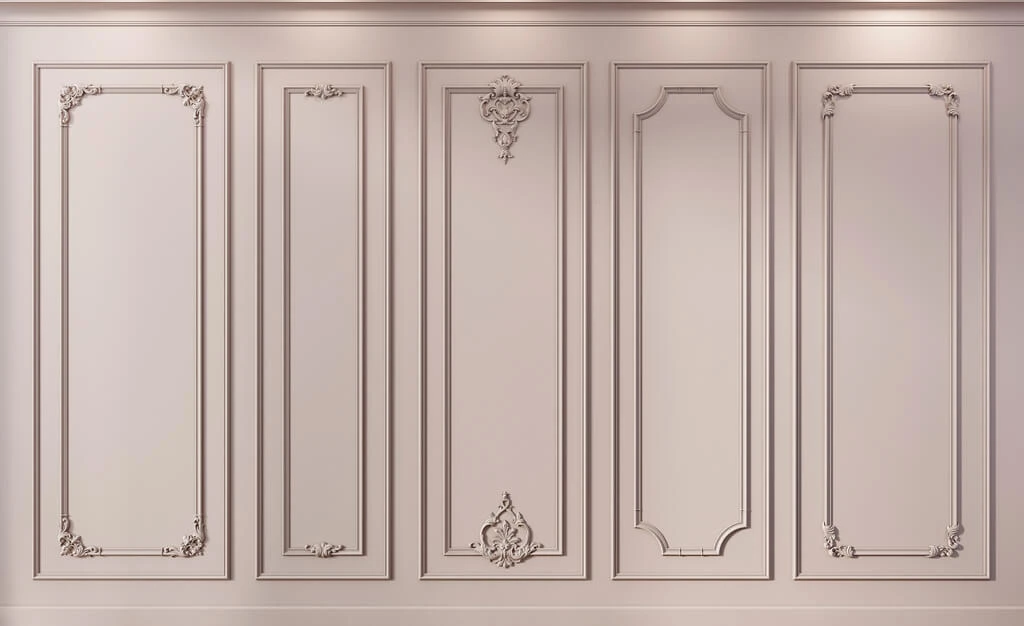
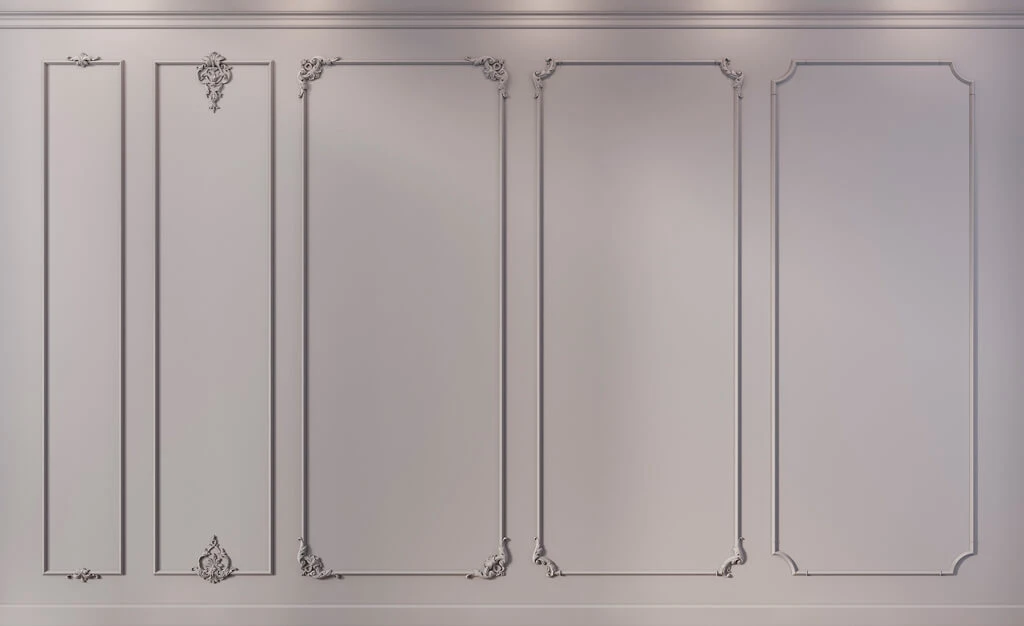
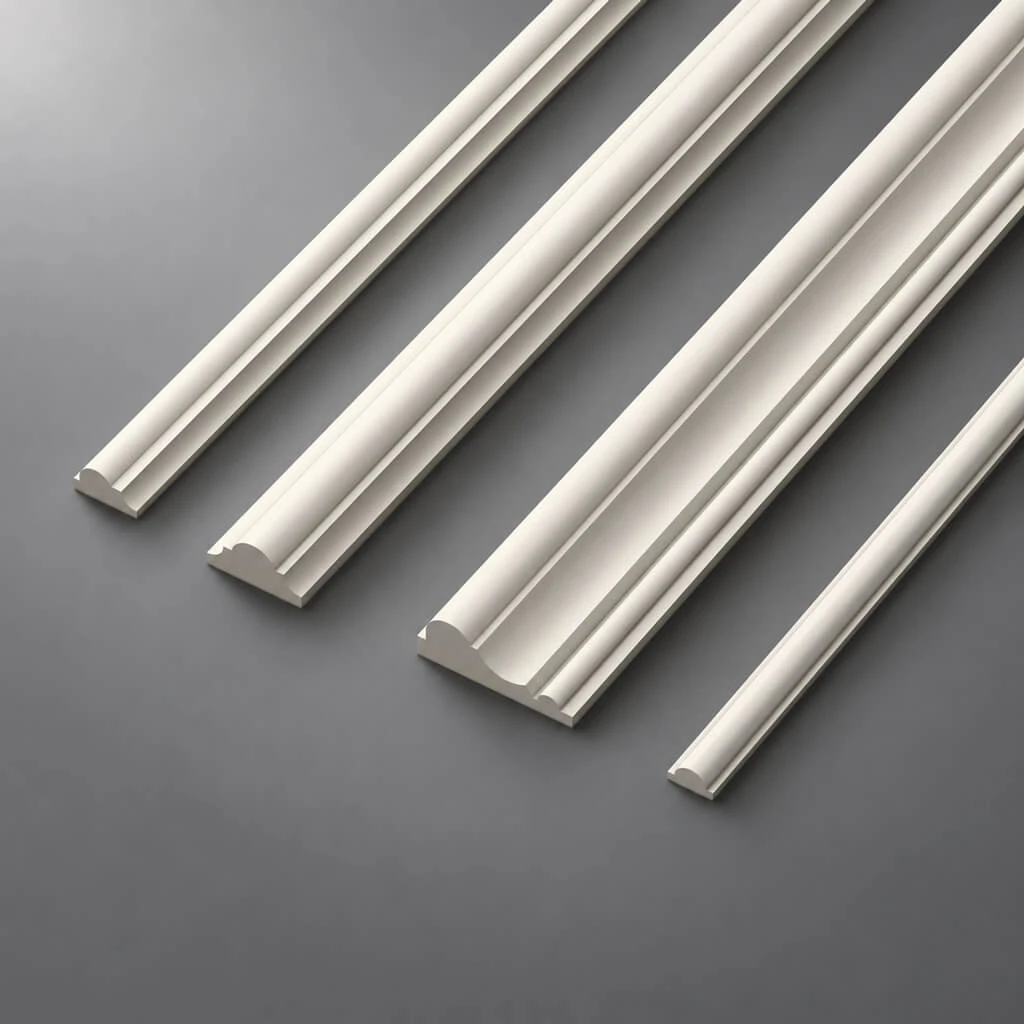
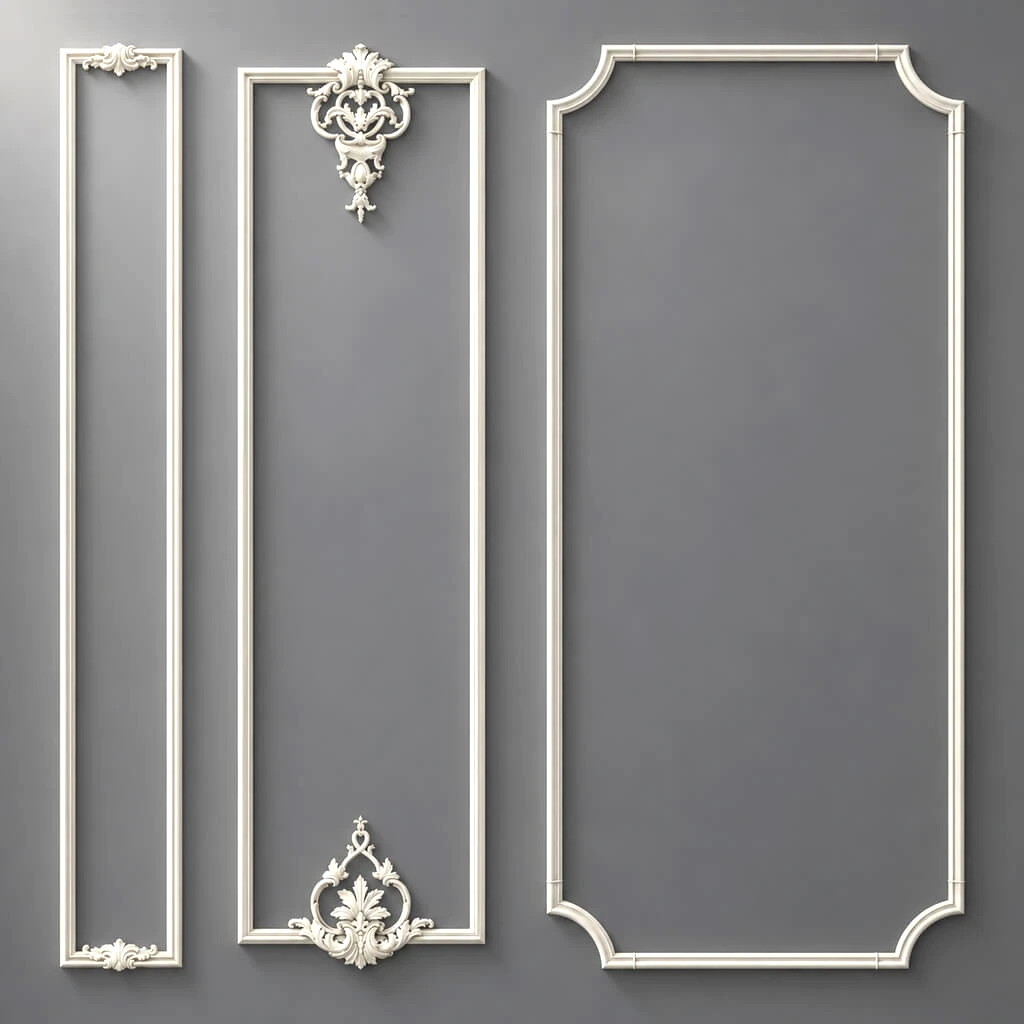
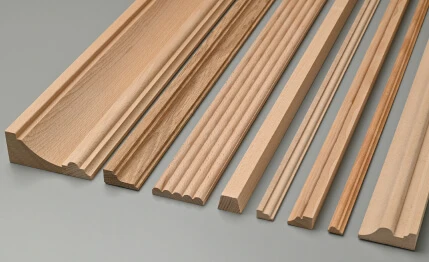
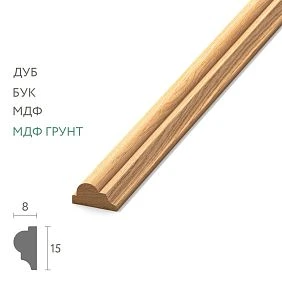
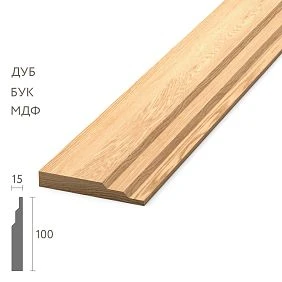
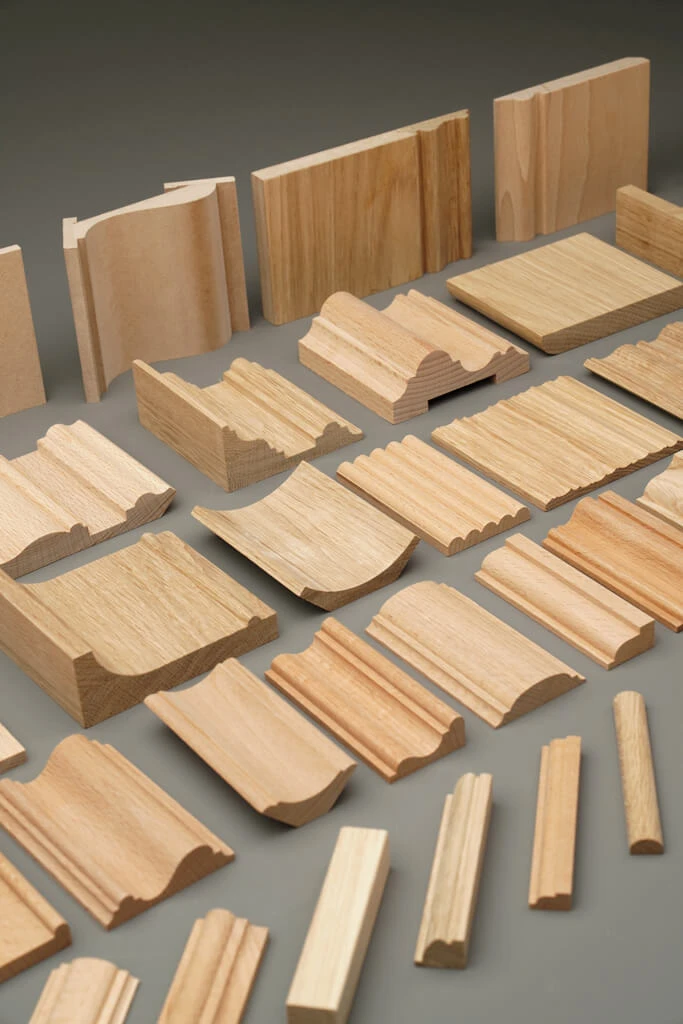
When the interior leans toward calm classicism, it is convenient to decorate a free wall not with continuous slats, but with two rectangular frames. A small one is suitable for this Wooden Moulding MLD-004 with a cross-section of 15 × 8 mm. The model is available in beech, oak, and MDF versions; the length depends on the material and finish. On such a wall, a couple of frames with small gaps are enough; adding a frequent batten to the adjacent surface as well is optional.
Before ordering the profile, mark on the plan the outer size of each frame, the direction of the cuts, the joint location, and the possibility of painting. The trim must not overlap a switch, an appliance socket, a ventilation grille, or the place of a future shelf. At an outer corner or a furniture cabinet, it is desirable to complete the composition with a meaningful offset; a strip of molding accidentally cut off at the facade looks like a measurement error. In a classic interior, the continuity of lines and the equal height of the upper horizontals are especially important.
Comparison of finishing methods
| Solution | Where it looks appropriate | What to check in advance |
|---|---|---|
| Paint on a prepared wall | Large calm area | Surface preparation, washable surface |
| Tile or another suitable backsplash | Sink and cooking area | Temperature, water, joints, cleaning |
| Individual wooden battens | Dry dining or side area | Step, covering, substructure, cleaning |
| Slatted panel PAN-001 | Large decorative dry area | Exact dimensions, joints, fastening, material |
| Molding MLD-004 | Frames and local compositions | Cutting, sawing, symmetry, painting |
Choosing a finish should not be reduced to finding the most photogenic image. A practical combination often looks like this: a protected work area, a calm wall above it, and a wood accent in a separate dry spot. This scheme keeps the kitchen convenient, showcases beautiful STAVROS materials, and does not create the false impression that decorative cladding replaces engineering and protective solutions.
Kitchen breakdown 3200 × 4000 mm: furniture, walkways, and decorative wall
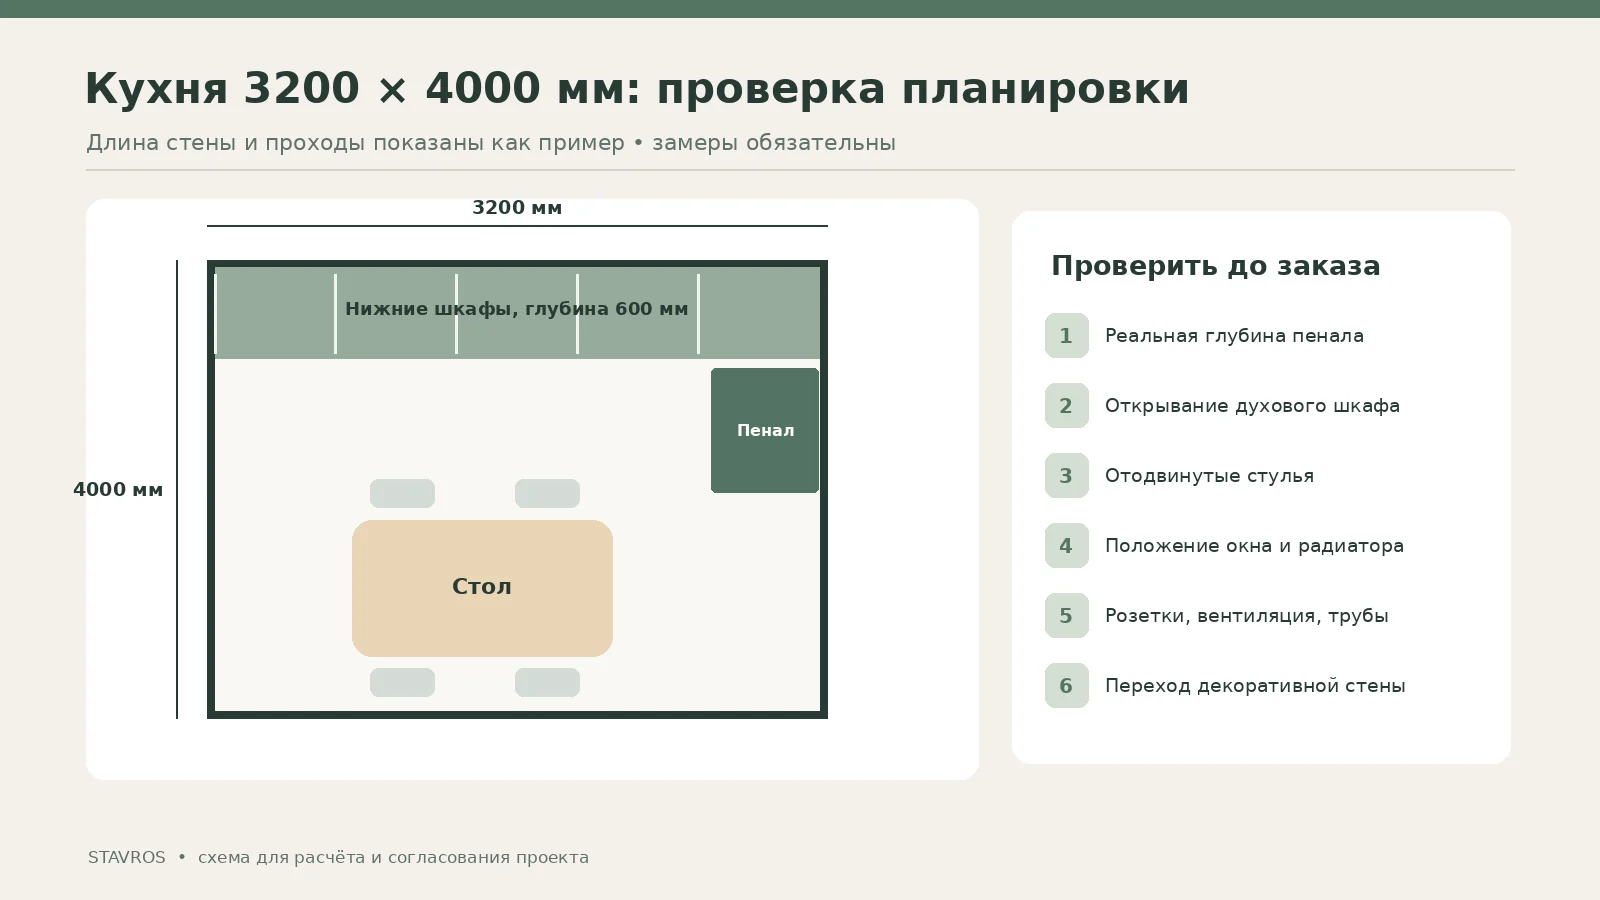
Let's return to the conventional room with an area of 12.8 m². For clarity, we assume that the work line occupies one short wall of 3200 mm, while along the other side there is space for a table and a dry decorative area. In a real project, the window, door, and utilities may require a different layout. Our goal is not to provide a universal drawing, but to show the sequence in which the kitchen can be checked before handing dimensions over to production.
One option for distributing the lower row along the length looks like this: 600 mm — tall cabinet, 600 mm — sink module, 800 mm — main work drawers, 600 mm — cooktop area, 600 mm — additional drawer or section. The sum equals 600 + 600 + 800 + 600 + 600 = 3200 mm. This is a nominal breakdown that does not account for side fillers, technological gaps, or the specifics of particular fronts. Therefore, the actual cabinets may turn out narrower, and the required inserts may change the pattern of the fronts.
If appliances are built into a tall cabinet, it cannot simultaneously be considered fully free space for dishes. Similarly, the sink module loses part of its usable volume due to the siphon and utility lines. 800 mm-long drawers can be allocated for cutlery, small dishes, and food products, but only after selecting the runners and filling in the internal inventory sheet. Tall bottles and large pots may not fit under the crossbars, so the list of items matters more than the mathematical sum of widths.
What happens to the passage
After installing the lower modules 600 mm deep along the short wall, the remaining nominal length of the room is 4000 − 600 = 3400 mm. If a dining table 750 mm deep is then placed, 2650 mm remains for the distances on both sides of the table and other elements. But you cannot divide 2650 in half and assume that convenient passages of 1325 mm each are guaranteed: the table must be tied to the actual layout, taking into account pulled-out chairs and the position of the door.
The check is done with paper silhouettes or in a simple scale diagram. A person stands longer near the sink than next to the end cabinet. This means the space opposite the sink must support the working scenario, not just passage with the drawers closed. If two family members are simultaneously cooking and setting the table, a different space allowance is required than for single use. A quality specification notes not only the closed furniture but also the worst reasonably expected position of movable elements.
A tall cabinet at the edge of the run can help eliminate the upper cabinets, but if placed by the window it will create additional shadow. Therefore, it is sometimes wiser to place the tall cabinet along another wall and leave the work line completely low. Such a solution changes the length of the countertop and the position of the dining table. During the project discussion, it is worth showing both options at the same scale and with the same set of storage, otherwise the comparison will be unfair.
Where to place the accent finish
For the calculation we choose a dry section of wall 1200 mm wide near the dining area. We assume there is no sink, hob, hot appliances or exposed ventilation elements here, and that the materials and fastening have been agreed in advance. We take the height of the decorative panel to be 1600 mm. Its lower edge placement, the offset from the furniture and the cleaning method must be determined separately: in several real interiors, the same slat pattern will be appropriate at different heights.
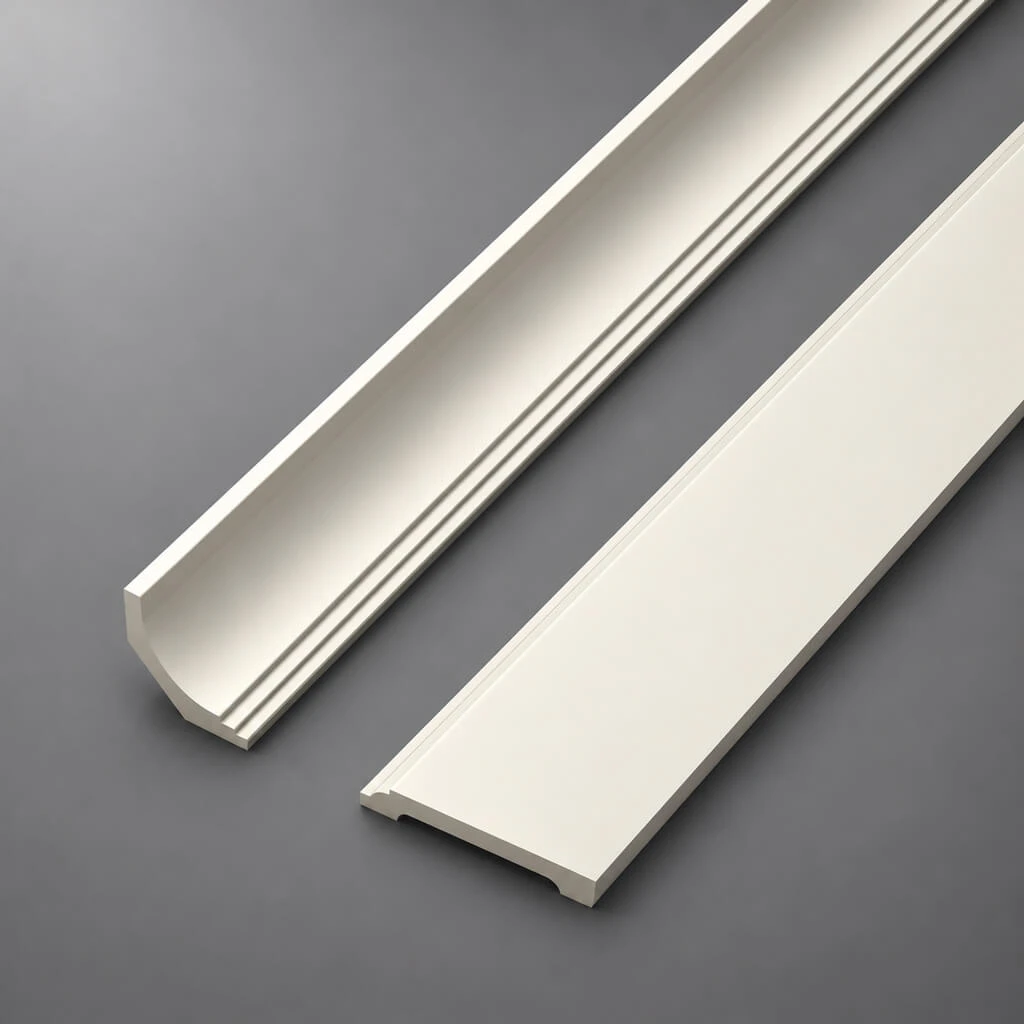
When designing a decorative wall, it is useful to align the overall line with door casings and the floor skirting. For a smooth transition, you can use matching STAVROS trim products. Universal profile PLT-006 is offered in solid wood and MDF versions; the length, material and thickness are chosen according to the specific product card, not a generalized description of the whole series. The skirting itself must not prevent the lower furniture fronts from opening fully.
Calculation of RK-001 wooden slats: quantity, spacing and cutting
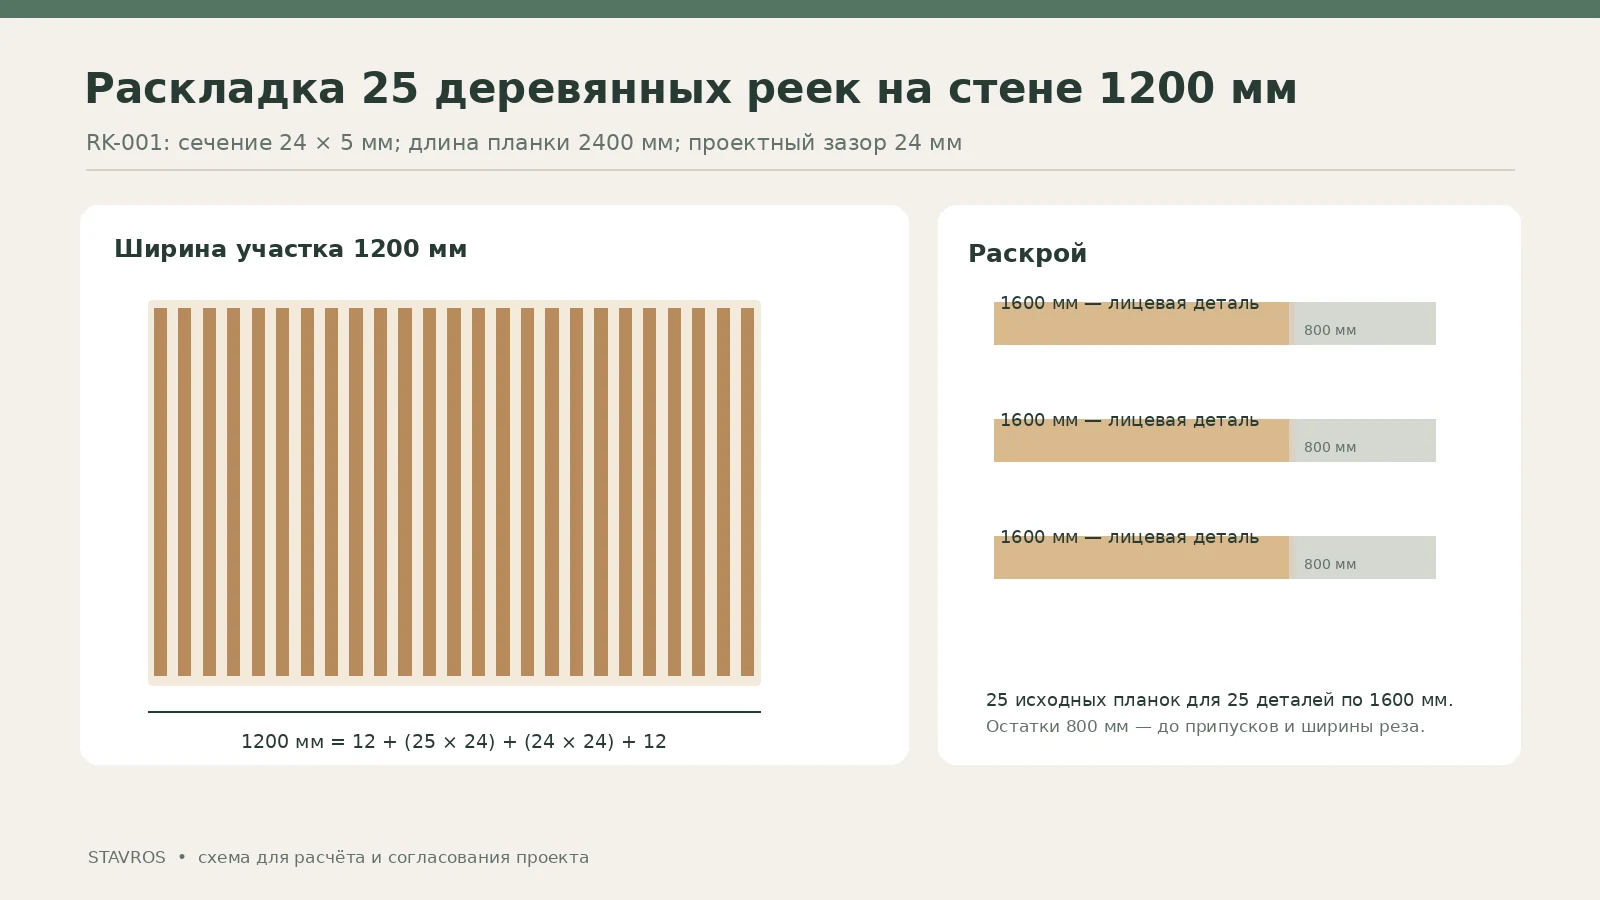
We choose the RK-001 version with a face width of 24 mm, a thickness of 5 mm and an initial length of 2400 mm. This is one of the actual variants of the model, not an arbitrary cross-section. For a dry panel 1200 mm wide, we set a clear gap between the slats of 24 mm. The formula accounts for the number of face strips, the number of gaps and two symmetrical edge offsets. If we apply 25 slats, we get 25 × 24 + 24 × 24 = 1176 mm. We divide the remaining 24 mm into 12 mm on each edge. The total width is exactly 1200 mm.
This rhythm gives a one-to-one ratio of visible wood to gaps. It is calmer than an almost solid cladding, but still remains quite noticeable. With a different wall color, lighting or slat thickness, the visual impression will change. Therefore, the chosen spacing must always be shown on a sample, especially if lighting is planned behind the panel: light will reveal unevenness of the base and misalignment of lines faster than ordinary daylight.
How many slats are needed for a height of 1600 mm
From a single source strip 2400 mm long, one solid face piece 1600 mm high can be obtained. The nominal remainder is 800 mm before accounting for kerf width and allowances. Since the panel requires 25 pieces, the following are needed 25 source strips. The net installed length is 25 × 1.6 = 40 linear meters, while the purchased length is 25 × 2.4 = 60 linear meters. The 20-meter difference is the total nominal remainder, which cannot automatically be declared a useful blank for another wall.
Waste can be reduced by changing the height of the decorative panel or by organizing another project from the leftover offcuts, but joining offcuts on the visible part without a well-designed seam is undesirable. The option of cladding along the full length of the source strip of 2400 mm, by contrast, does not require such height trimming, but it increases the wood area and may conflict with the baseboard, cornice, and upper cabinets. The decision is made before purchase, when the exact dimensions of the area and the permissible methods of end treatment are known.
For correct cutting, the width of the cutting tool, the additional allowance for the finished end, the grain direction, and the finishing requirements are taken into account. The bill of materials “25 pieces at 1600 mm” is not a command to automatically saw all boards in one day. First, a trial element is made, the actual room height is checked, the edge strips are test-fitted, and the final elevations are agreed upon. If the wall surface is noticeably uneven, substrate preparation or a substructure is required, rather than an attempt to correct the difference with adhesive thickness.
When the PAN-001 panel is more advantageous than individual strips
The comparison does not come down to the cost per square meter. A finished panel provides a stable factory geometry of rhythm and can reduce manual marking, but it is tied to its own size and installation rules. Individual strips allow the width to be adapted more precisely to the niche and the required spacing around an outlet or switch to be left, but they require more independent operations and careful preparation. In both cases, the furniture maker must know the final thickness of the decorative layer if a drawer or cabinet door is nearby.
For a small dry area 1200 mm wide, choosing individual strips may be rational precisely because of the flexibility of layout. For a wide rectangular wall with a suitable module and minimal trimming, a finished panel, on the contrary, helps reduce the number of joints. The final price is compared based on the specific material, coating, area, and installation, not on the cost of the first catalog item. If the coating has not yet been selected, a calculation accurate to the ruble will create a false impression of a completed estimate.
Calculation of two decorative frames from MLD-004 molding
An alternative option for a dry wall is two concise frames. Let us take the outer size of one conventional frame as 600 × 900 mm so that both look proportional next to the furniture cabinet. Two frames will require four long pieces of 900 mm and four short pieces of 600 mm. Their total calculated length is 4 × 900 + 4 × 600 = 6000 ммBut buying 2.5 planks is impossible, and even three planks of 2400 mm require checking against the actual cutting plan.
As an example, the MLD-004 version in beech, 2400 mm long, will work. For three source planks, the following scheme can be adopted: the first — 900 + 600 + 600 = 2100 mm, the second — the same combination, the third — 900 + 900 = 1800 mm. This yields all four parts of 900 mm and four of 600 mm. The nominal offcuts are 300, 300 and 600 mm, even before deducting the kerf width and allowances. This scheme leaves room for careful cutting, but angled cuts require the craftsman to separately verify the external dimension and the orientation of the profile.
Frames must not be glued over a finish that does not adhere firmly to the base. If painting to match the wall color is required, first select a primer and topcoat compatible with the specific product material. The profile itself must not cross switches or shelf mounting locations. Before installation, mark a common horizontal line on the wall, check the diagonals of each frame and the distances between them. These operations take little time compared with correcting a skewed composition after painting.
The buyer can compare options in the STAVROS catalog and decide what is better for the space: a slatted panel or geometric frames. In one room, both techniques are acceptable only with a sufficient visual pause between them. If there is already a countertop with a pronounced stone texture and active fronts nearby, calm moldings often look neater than a continuous dense slat pattern. This is a design judgment to be verified on samples and in a visualization, not a technical standard.
Sample estimate: what is and is not included in the price
The estimate should begin with the exact product modification, not with an abstract "slat" line item. For illustration, we take the prices of specific versions shown in the catalog as of the check date, November 19, 2026: beech RK-001 24 × 5 × 2400 mm — 820 ₽ per plank, beech MLD-004 15 × 8 × 2400 mm — 700 ₽ per plank, KR-070 pine bracket — from 3080 ₽ per piece. These are price reference points from specific product cards, not a promise of an unchanged price, availability or cost of the finished work. Before paying, you must check the current option and amount in the cart.
| Product and version | Quantity | Unit price for the example | Total |
|---|---|---|---|
| RK-001, beech, 24 × 5 × 2400 mm | 25 planks | 820 ₽ | 20 500 ₽ |
| MLD-004, beech, 15 × 8 × 2400 mm | 3 planks | 700 ₽ | 2 100 ₽ |
| KR-070, pine, for a separate shelf | 2 pcs. | from 3080 ₽ | from 6160 ₽ |
| Total for selected items only | from 28 760 ₽ |
Amount does not include the shelf board itself, furniture carcasses, runners and fronts, finishing compounds, fasteners, wall preparation, lighting, installation, delivery, packaging and any cutting. In addition, slats and frames are shown in this table as two different decorative techniques, so the total serves only as an example of a general purchase for a project that uses , and not as a mandatory estimate for a single wall. If you choose only slats or only frames, the order composition and amount change.Separately, note that the cost of a wooden bracket does not include verification of the shelf's load-bearing capacity. For a specific load and mounting base, the installer may choose a different load-bearing system, and decorative brackets should be used only when structural compatibility is confirmed. If ordering a ready-made PAN-001 panel, the price should be based on the selected wood species or MDF, length and finish option; the price of a short panel must not be substituted for a long one.
Separately, note that the cost of a wooden bracket does not include verification of the shelf's load-bearing capacity. For a specific load and mounting base, the installer may choose a different load-bearing system, and decorative brackets should be used only when structural compatibility is confirmed. If ordering a ready-made PAN-001 panel, the price should be based on the selected wood species or MDF, length and finish option; the price of a short panel must not be substituted for a long one.
Installation in stages: engineering first, then furniture and decor
The sequence of work affects the quality of the result no less than the choice of material. First, the dimensions of the furniture, the location of the sink, appliances, ventilation and sockets are approved. Next, the wall base, levelling, finished floor heights and the point where the backsplash transitions into the decorative part are checked. After that, the installation technology for the specific panels, slats and mouldings is agreed. Only when all project participants understand the order of work can you proceed to purchasing materials and manufacturing the cabinet bodies.
It is usually safer to complete the preparatory construction and engineering work before installing the finished decorative elements. However, the order of some operations depends on the kitchen design: the backsplash can be installed before the countertop or after it, with a designated junction detail. There is no universal sequence for every project. It is important to appoint in advance someone responsible for each junction: who accepts the wall, who installs the countertop, who performs the sealing, who mounts the shelves, and who is responsible for damage to the decorative coating during furniture installation.
Slats and panels on a prepared base
The base must meet the requirements of the chosen fastening method. If the system provides for mechanical fastening, you need to know the material and strength of the wall, the location of the fastening points and hidden utilities. If adhesive technology is used, you need compatibility of the adhesive with the base and the coating, permissible moisture and curing time. MDF and solid wood have different properties; recommendations for one material cannot be transferred to another without verification.
When installing slats, spacing errors are especially noticeable. The installer first marks out all 25 positions, checks the edge offsets and verticality, then fastens a test piece. After that, they check the pattern under daylight and artificial lighting. If a socket is provided in the wall, it must be included in the drawing: cutting a hole at random in the installed cladding is dangerous and can ruin the composition. The rules for installing electrical points are set by the electrical design, not by the decorative layout.
For further reading, STAVROS recommendations on installation and finishing and on storage and care of productsBefore treating the surface, it is worth checking the instructions for the selected wood species or board. The decorative coating must be designed for the expected conditions, and cleaning must follow the manufacturer's recommendations, without aggressive compounds or abrasive tools that could damage the texture.
How to align furniture, skirting board and wall decor
Junctions are easier to coordinate on a common section. It marks the front plane of the lower cabinets, the worktop overhang, the wall vertical, the cladding thickness and the floor profile. If the rail adjoins a tall cabinet, its end must have a provisioned gap or termination, and the cabinet door must open freely. A decorative element placed too close can catch the facade even when the furniture is installed correctly.
The backsplash and the lower edge of the wooden panel should be shown separately. A massive decorative rail must not run directly to a wet worktop just for the sake of a continuous vertical if this contradicts the operating conditions. A well-thought-out transition through a washable strip or another permitted detail may look better than an unprotected end. In the sink area, access for cleaning and the absence of hidden cavities where water can accumulate are especially important.
How to place an order for a kitchen and decorative products without re-approvals
You should start with a single document where the furniture, finishes and engineering are described together. The schedule specifies the finished dimensions, carcass material, facade, opening direction, mechanism of each drawer and the wall surface behind the furniture. Then a separate STAVROS table is drawn up: article number, selected wood species or MDF, length, cross-section, quantity, required coating, end treatment method and installer. Such documents save time not because of formality, but because they eliminate ambiguous wording like "make it beautiful, as in the image".
Before the final approval of the project, show the furniture manufacturer not only the design but also the wall section. Kitchen manufacturing can be coordinated via CONCEPT furniture showroom, by providing measurements, storage preferences and a list of future decorative profiles. At the same time, one should not create the impression that the furniture manufacturer is automatically responsible for purchasing materials from another brand: the scope of work, suppliers, contract and liability of the parties must be recorded separately.
For wooden elements, choose the material option in the actual STAVROS product cards, then confirm availability, the possibility of the required cutting, the finishing method and packaging. Information about payment and delivery of STAVROS helps to understand the ordering procedure, but the final cost and lead times are confirmed for a specific order. It is better to accept large decorative panels with a check of the packaging, geometry and integrity of the elements before installation work begins. Damage discovered after cutting is harder to link to the transportation stage.
Approving samples is especially valuable when the kitchen combines several shades of wood: fronts, table, slats and skirting. The name of the species does not guarantee the same tone after coating. Solid wood can differ in pattern and shade even within one type of wood, so it is not only "beech" or "oak" that is approved, but also the finish, sheen, character of the cut and lighting. A tiny sample is examined next to the front and countertop, not separately under a lamp in a store.
Common mistakes when ordering a kitchen without wall cabinets
The upper cabinets were removed, but no inventory of items was made. After installation, the plates end up in an inconvenient lower corner, and the coffee machine takes up the entire work surface. The fix is to distribute items among the drawers before signing the contract, specify the internal dimensions and check the mechanism of each module. If there is not enough space, the furniture configuration should be adjusted rather than hoping that order will appear on its own.
Too many open shelves were installed. In the visualization they are filled with six beautiful items; in real life they end up holding spices, bags, spare cups and jars. The fix is to define the specific function of each open shelf and limit their number. Everything that requires regular protection from dust and moisture is better placed behind a front, if this is consistent with the storage conditions.
Finishing materials were moved into a hazardous area. The slatted panel was placed right next to the stove or a constantly wet area, because that is how it was shown in an advertising photo. The fix is to divide the walls by operating conditions, choose a suitable protective finish and check the equipment requirements. Wood near the kitchen is not necessarily bad, but the place of use and the coating must be justified.
Decorative brackets were purchased without calculating the shelf. A beautiful piece looks massive, so people plan to place a heavy dinner service on it. The fix is to request the fastening data, determine the weight of the contents, the wall material and the shelf construction. If the required load cannot be confirmed, the support design must be changed. The decorative appearance of a piece is not a certificate of load-bearing capacity.
The panel thickness was not agreed with the furniture maker. After installation of the rail, the cabinet no longer opens to the required angle, and the edge of the cladding protrudes beyond the facade frame. The fix is to account for the thickness of the decorative layer on the section before manufacturing the carcasses, leave the necessary technological gaps and set the installation sequence. Checking on paper is cheaper than fixing a finished facade.
The total linear footage was calculated, but not the cutting plan. Three moldings were bought based only on six linear meters, forgetting about the long parts and the direction of the cut. Sometimes matching total lengths does not mean the whole set can be cut from the available strips. The fix is to draw up cutting maps for each source length, indicate the cuts and the required profile direction.
Frequently asked questions about a kitchen without upper cabinets
Can you do completely without wall cabinets in a small apartment?
Yes, if the storage calculation shows that the needed items fit in the lower drawers, tall cabinets and other available places. But the area of the apartment alone does not guarantee the result. Consider the number of residents, the stock of dishes, cooking habits and whether there is a pantry. In a small space, it is sometimes more rational to keep one compact upper module than to buy an additional cabinet that will reduce the passage.
What is more practical: one long shelf or several short ones?
It depends on the wall construction, the weight of the items, the number of reliable supports and how often you clean. A long shelf may look calmer, but it requires a properly calculated load-bearing scheme and fastening. Several short ones help visually divide zones, but increase the number of horizontal surfaces to clean. You cannot choose by appearance alone: the permissible loads and the base are agreed first.
Can wall panels be installed directly above the sink?
You should not automatically use a standard decorative panel in an area exposed to regular splashes. The specific material, coating, joints and manufacturer's recommendations need to be checked. In many projects it is more practical to create a protected work backsplash and move the wooden or slatted finish higher up or onto a separate dry wall. Conditions near the cooktop additionally require checking temperature and fire restrictions.
Do open shelves replace a range hood?
No. A shelf serves a storage and decorative function, while an extraction system serves a different purpose. The issue of ventilation, removal of odors and cooking products depends on the equipment and the kitchen's engineering design. Opting out of upper cabinets cannot be considered grounds for waiving ventilation requirements. When choosing a decorative finish, this issue must be resolved in advance.
How can you avoid mistakes when choosing wood for the kitchen?
First, determine the area of application and the actual exposure to moisture, heat and dirt. Then choose the material and a suitable coating, and check a sample next to the cabinet fronts, countertop and floor skirting. Items of the same article number in different wood species may differ in color, texture and price. For an order, the specific finish and dimensions matter, not just the model name from the product card title.
How many RK-001 slats are needed for a wall 1200 mm wide?
In our example, with a face width of 24 mm, a gap of 24 mm and end margins of 12 mm each, the result is 25 slats. For a height of 1600 mm, each piece is cut from a separate 2400 mm plank, so 25 source planks are required. If you choose a different cross-section, gap or panel height, the result changes; the formula must be recalculated before purchase.
Can a kitchen be decorated with moldings without wall panels?
Yes. A couple of neat frames made from MLD-004 in a dry area can support the classic character of the cabinet fronts and keep the wall visually light. It is important to ensure symmetry, a solid base, correct cutting and not to cover switches, sockets or ventilation elements. This solution is especially useful if the countertop stone and the furniture front pattern already create enough texture.
How to choose between individual slats and a ready-made PAN-001?
Compare not only the appearance, but also the dimensions of the area, the specific width of the panel, the material, whether cutting is allowed, the type of fastening, edge treatment, and the cost of work. For a complex niche, individual slats can simplify fitting; for a large flat surface, a panel can provide a convenient repeating pattern. A real estimate is made based on the chosen version, not on the first visible price in the catalog.
Should a tall pantry cabinet be installed if the kitchen has no upper cabinets?
Not necessarily. A pantry cabinet is one way to restore lost storage, but it can be replaced by additional lower drawers, a separate pantry, or another room layout. If a tall cabinet blocks a window or prevents a door from opening, the gain in volume does not compensate for the inconvenience. The decision is made after checking the list of items and movement scenarios.
What set of documents should be prepared before purchase?
At minimum, you need precise measurements, a furniture plan with dimensions and opening directions, a utility layout, an internal storage schedule, the location of finishes, and a product specification. For decorative products, specify the item code, material, cross-section, length, quantity, finish, and installation method. After approval, you can place the kitchen purchase and, separately, the order for suitable linear products, without mixing the responsibilities of different suppliers.
Bottom line: a free wall starts with proper storage
A kitchen without upper cabinets is convenient not because there are no doors above the countertop, but because everything necessary has found its place in advance. Lower drawers, pantry cabinets, work zones, the range hood, walkways, and utilities form the basis of the design. STAVROS wooden slats, panels, moldings, and brackets become its meaningful continuation: they help finish dry areas, align the furniture line with the interior, and give the room an individual character.
Before buying materials, compare two layout solutions with the same set of items, check the operating conditions of the finish, and create a cutting plan. Then the order for the kitchen and the decorative set will be based on dimensions and agreed-upon details, rather than on an approximate resemblance to someone else's interior photo. This is especially important where the kitchen is directly connected to the dining room and living room: a beautiful space must remain convenient every day.