Article Contents:
- Which carved element is needed for your furniture
- What you are buying: a separate piece with ready-made geometry
- Carved overlays: central, vertical, horizontal, and corner
- Central overlay
- Vertical overlay
- Horizontal overlay
- Corner overlay
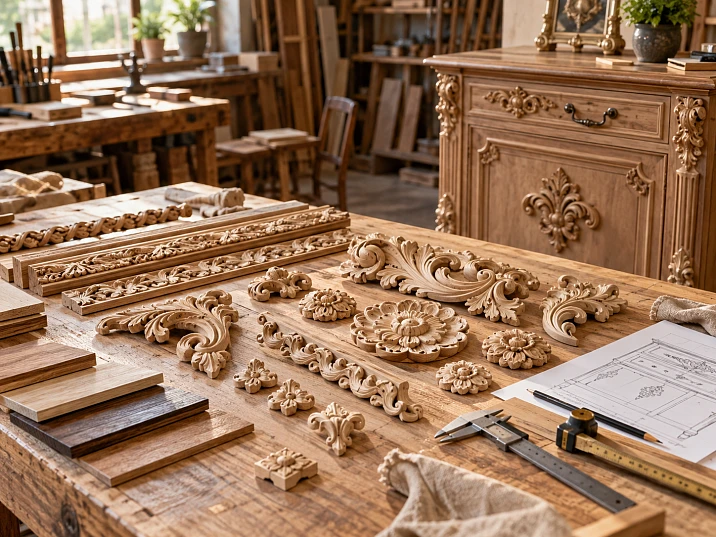
The center of a door requires one piece, while the narrow post next to it needs another. And under a protruding shelf, a flat applique will no longer solve the problem: there you need an element that connects the vertical and horizontal lines. A search for "cabinet carving" quickly turns into dozens of similar images until the installation location is determined.
Start with the piece of furniture you are going to decorate. Measure the available surface, mark the handles, frames, and moving parts. After that, it will become clearer what to buy: a carved applique, a wooden rosette, a bracket, a capital, or a long ornamental molding.
Ready-made furniture carving allows you to select a complex shape for a specific project. But for a beautiful design to work, its dimensions, thickness, direction, mounting surface, and future finish must also match the furniture. These are the parameters that turn a found ornament into a piece suitable for ordering.
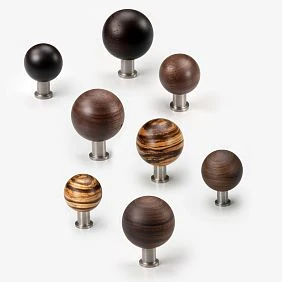
Which carved element is needed for your furniture
The name of the ornament helps you choose the character of the decor: acanthus, garland, cartouche, floral scroll. The product type answers a more practical question — how this carving is positioned on the furniture and what it connects to.
| Place and purpose | What to look for | What to check first |
|---|---|---|
| Center of a door or wide front | Central applique, rosette | Free field and handle position |
| Narrow vertical zone | Vertical overlay, pilaster | Width of the section and projection relative to the facade |
| Frame angle | Corner overlay, suitable corner element | Angle, junction to the profile, and direction |
| Frieze or long horizontal strip | Horizontal overlay, carved moulding | Length, pattern repeat, and joints |
| Area under a protruding shelf | bracket | Height, overhang, and mounting arrangement |
| Top of a pilaster or column | Capital | Cross-section of the vertical element and its connection to the cornice |
| Upper central part of the cabinet | Finial, central overlay | Silhouette, base, and available height |
This is a search map, not a ready-made set for every cabinet. One piece may need only two overlays, while another requires matching pilasters with capitals. In the section carved furniture decor first select the product group, then the shape and size. This makes it easier to compare parts that truly solve the same task.




What you are buying: a separate part with ready-made geometry
Applied furniture carving is manufactured separately from the facade. It is matched to the base and installed in the prescribed manner. Carving directly in the facade panel belongs to a different design approach: there the ornament is formed within the furniture part itself.
Here the choice has already been made in favor of ready-made elements. Therefore, when purchasing, you need to evaluate not only the front side but also the back. It may be flat, have a recess for a profile, or another geometry. A product designed to fit onto a molding cannot automatically be considered an ordinary flat overlay.
A finished shape also does not necessarily mean it is ready for installation without finishing. Check the surface condition and what is included in the delivery. Buying an unpainted carved part and buying an element with a ready-made finish involve different amounts of work in the workshop.
Our factory also produces:
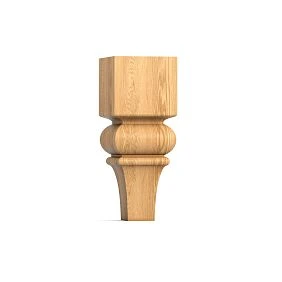
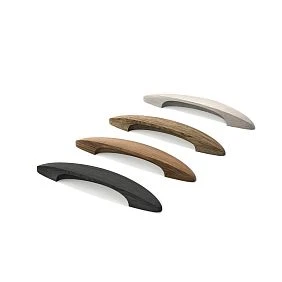
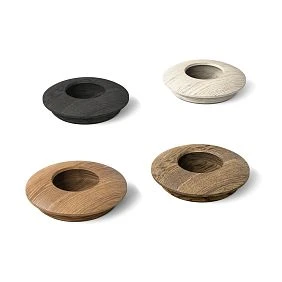
Carved overlays: central, vertical, horizontal, and corner
Carved decorative inserts for furniture they are suitable for decorating flat areas of facades, posts, and other furniture parts if their mounting side matches the base. Within this group, you choose not just a motif you like, but the direction and placement of the pattern.
Get Consultation
Central overlay
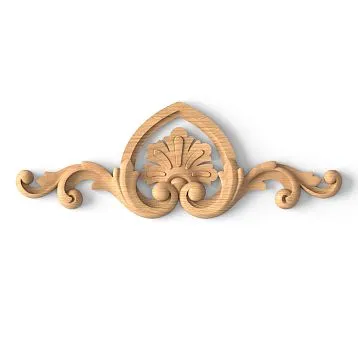
A cartouche, a symmetrical floral composition, or another central element can occupy the field of a wide door, a chest front panel, or a furniture portal. The starting point is the axis of the plane on which the part will be attached.
The center of the entire wardrobe does not always coincide with the center of the desired facade. If drawers or a glazed section are located nearby, first determine the boundaries of the area to be decorated. Then check whether there is still room for the handle and how the overlay relates to the frame.
A large element above two doors can be considered for a fixed top panel. It cannot be used to join two independently opening leaves: the installation location must match the furniture construction.
Vertical overlay
An elongated ornament is convenient for narrow posts and tall facades. Its width must match the actual mounting plane: leaves and scrolls hanging over the edge may end up next to a door gap or interfere with opening.
If the design has a distinct top and bottom, rotating it will not make it universal. Check the direction of the leaves, the base of the composition, and the finishing end. For two side areas, a mirrored pair may be needed rather than two identical parts.
Horizontal overlay
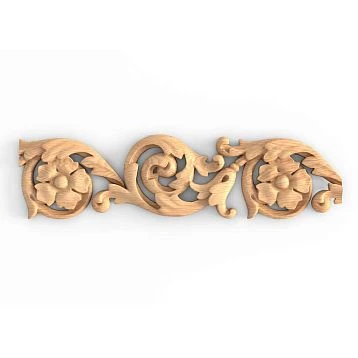
For a wide drawer, frieze, or top panel, choose a composition that develops along the horizontal. At the same time, a long overlay usually remains a complete ornament with its own center and ends. This differs from a profile with a repeating pattern intended for an extended line.
Before purchasing, look at where the outermost scrolls fall. If they run into the side posts or extend under neighboring decor, it is better to choose a different size version. Trimming a complete carved composition can ruin the design and affect delicate areas.
Corner overlay
Here, not only the overall size matters, but also the shape of the inner corner. Some elements are placed inside the frame, while others adjoin the profile or overlap it according to the intended fit. Externally similar parts may require different bases.
Check the position of both shoulders, the distance to the frame, and the protrusion relative to the molding. For four corners, you cannot automatically order four identical overlays: the required quantity of each version depends on whether the pattern allows rotation and whether mirrored variants are needed.
When to buy a wooden rosette instead of an overlay
A rosette is convenient when a compact center or a repeating accent is needed. It can be considered for a small field, the upper part of a post, or individual nodes of a frame composition. Unlike an elongated overlay, it often draws attention around its own center.
In the section wooden rosettes choose not only a round or square contour, but also a carved version that suits the task. The shape alone does not determine the character of the surface: a geometric element and a rosette with floral relief will be perceived differently.
If the rosette is to connect moldings, clarify the geometry of the junction. You need the dimensions of the profile ends, the thickness of the assembly, and an understanding of where each molding ends. A regular decorative rosette is not necessarily a ready-made connector for any profile.
Two small rosettes can support the central composition of a cabinet. But buying them just to fill empty space is not necessary. First, look at what role the repetition plays: emphasizing posts, linking sections, or creating unnecessary accents near the handles.
The bracket is chosen along two directions
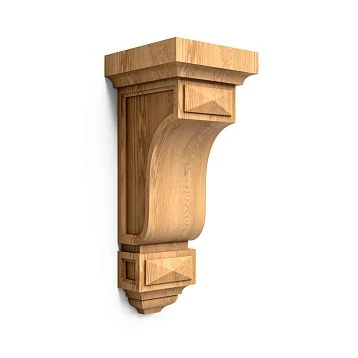
The bracket turns the decor from a vertical plane into a horizontal one. You need to evaluate its height along the post and its depth under the shelf or protrusion. A frontal photograph does not show this assembly fully: a side view is necessary.
Choosing Wooden Brackets, compare them with the shelf overhang, the thickness of adjacent parts, and the available mounting surfaces. An element that is too deep may protrude beyond the shelf, while a short one may leave an unintended gap between the carving and the edge.
Decorative resemblance to a support does not confirm load-bearing capacity. If a bracket is intended to bear load, this purpose, fastening, and permissible conditions of use must be confirmed for the specific product and the entire structure. A decorative element can be used in an assembly with an independent load-bearing fastening provided for by the project.
For a pair of brackets, also check the visible side faces. What matters is how the carving looks from outside the furniture, not only when viewed straight at the front. This information determines the choice of version even before ordering.
Pilaster, capital, and cornice: buy as a coordinated assembly
In a bookcase, display cabinet, or large wardrobe, carving can decorate an entire vertical. The pilaster defines its extent, the capital completes the upper part, and the cornice runs above it. Each detail is selected with consideration for its neighbors.
First determine the width and thickness of the vertical element. In the section pilasters and columns compare suitable structural options: a flat wall-mounted element and a three-dimensional column require different amounts of space. If carving is specifically needed, separately check the presence and placement of the ornament in the selected model.
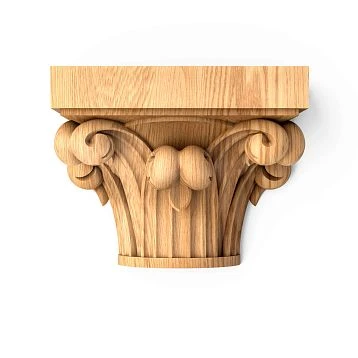
Then select wooden capital by the lower junction and upper overall dimensions. It may be wider than the body of the pilaster, but its projection must fit next to the front and under the cornice. A capital is not a universal decoration for any upper section of a wardrobe: its shape is tied to the completion of the vertical element.
The placement is clarified in two views — front and side. In the front drawing the width fits, while the side view may show too large a projection or the absence of a surface for fastening. These dimensions must be coordinated before purchasing all three elements.
For a long line, a profile with a suitable pattern is needed
If the thread must run along the cornice, frieze, or frame, compare linear products by cross-section and the nature of the ornament's repetition. A long central overlay does not always replace carved moulding: it may have ends that cannot be seamlessly continued with the next piece.
When selecting, wooden moldings for furniture specify which profile is needed in the project — smooth or ornamental. For corners, centers, and frame terminations, consider the corresponding Decor for Molding. Compatibility is determined by the specific cross-section and joint design, not just the overall collection or width.
Before ordering, mark the joints and pattern directions. Calculate the blanks taking into account the available length, cuts, and ornament alignment. The total sum of meters does not guarantee that the selected segments will produce the required layout without an extra joint in a visible place.
The size of the decor is chosen based on the free field
The full overall dimension of the door is rarely equal to the available space for the overlay. Part of the width is taken up by the frame stiles, part of the height by the crossbars. A handle, decorative profile, keyhole, or glass boundary are added.
Measure the surface on which the piece can actually be installed. Mark its axis, edges, and occupied areas. Separately check whether the base is flat across the entire contact area: the edge of a panel or the bevel of a frame cannot be considered a continuation of a flat central field.
A conditional example: after subtracting the frame, a field of 480 × 780 mm remains. An overlay 320 mm wide and 220 mm high is being considered. With geometric centering, the side margins will be (480 − 320) / 2 = 80 mm, and the top and bottom margins — (780 − 220) / 2 = 280 mm.
These numbers show that the overall size fits, but they do not confirm a successful composition. There may be a handle at the bottom, and the upper part of the ornament may look heavier than the lower part. The position is refined on a mockup while maintaining the necessary working clearances. There is no universal fill percentage for all overlays and fronts.
If the carving you like does not fit, first compare other sizes and models. Buying a large piece with the idea of "we'll trim it a bit later" makes sense only when such modification is intended and does not damage the pattern or the mounting part.
How to read dimensions in the catalog and on the drawing
Dimension designations must be verified for each product group. In the STAVROS catalog, for decorative overlays, size A denotes width, B denotes height, and C denotes thickness. For brackets, A is used for height, B for width, and C for depth. Therefore, three numbers without decoding are insufficient for ordering.
| Parameter | What to find out before purchasing |
|---|---|
| Width and height | How the element is positioned on the drawing and where the overall dimension boundaries run |
| Thickness or depth | From which plane the dimension is measured and what will protrude after installation |
| Mounting side | Whether it is flat, whether there are recesses, steps, and special fits |
| Direction | Where is the top, the front side, the left or right version |
| Junction | Which dimensions must match the profile, pilaster, or base |
For a complex part, use drawings and product models. Check that the document refers to the correct article and size version. If the required type or installation dimension is not available, request it before placing the order.
An enlarged version of a familiar ornament may differ in several dimensions at once. You cannot assume that only the width increased while the thickness, height, and all junctions remained the same. Transfer the full selected dimension into the specification with a clear measurement order.
Part thickness and carving depth are different values
The thickness of the overlay shows the overall size of the part in the corresponding direction. The carving depth describes the difference between areas of the relief. One number does not replace the other: a thick part may have a calm pattern, while a thin openwork overlay can cast a noticeable shadow.
For furniture, first check the protrusion after installation. For a flat overlay on a flat base, it is related to its thickness; with a recess or fitting onto a profile, the position will be different. Measure from the actual plane of the facade, not from the random edge of an adjacent molding.
Check the nearest obstacles: the handle and finger space, the adjacent door, a protruding post, the wall near the opening door. The absence of a collision when the facade is closed does not mean that it will not appear when it is opened.
The gap is determined by the design and movement of the specific furniture. It cannot be chosen based on the overlay thickness alone: the hinges, the position of the pivot axis, the protrusion of adjacent elements, and the required opening angle all matter.
A full-size template helps you choose before buying
Print the outline of the selected model at a 1:1 scale. If that is not possible, at least draw the overall dimensions and main protrusions. On the printout, check the reference dimension with a ruler: automatic scaling to fit the sheet format will distort the fitting.
Place the template on the desired area and look at the furniture as a whole from a normal distance. Then assess the clearances, handle, and adjacent parts up close. For a pair of elements, prepare two templates with the correct orientation.
Paper shows the outline but not the volume. To check the protrusion, you can make a simple three-dimensional mockup of the required thickness from a suitable lightweight material. It is temporarily placed in a way that is safe for the surface. Such a mockup allows you to notice a possible collision, but an accurate assessment of a complex profile will require the actual part.
On existing furniture, separately check whether the chosen temporary fastening method damages the finish. After fitting, record the agreed position with dimensions from stable reference points — the edge of the front, frame, or axis. A photo without markings will not replace these dimensions during installation.
Left and right thread: how to order the correct pair
For a directional ornament, the left and right parts may have separate item codes with L and R designations. Keep them fully in the order. Two copies of the same item code do not become a mirrored pair after rotation.
Determine the placement of the elements on the front view of the furniture. Show which way the scrolls should face: toward the center or outward. Then compare this layout with the images and drawings of both models. Do not guess the direction from the letter alone: verify the orientation accepted for the specific product.
If you need a pair for two doors, compare not only the pattern but also the size versions, wood, and surface preparation. The left and right elements must have matching specifications. In the order, they are written as separate lines, even if the supplier shows them next to each other.
For repeating symmetrical rosettes, the situation is different: identical pieces can perform the required task. So first determine whether the project truly requires mirroring, and then count the quantity of each version.
Beech or oak: the choice depends on the future finish
Carved solid wood decor is chosen together with the coating. For opaque enamel, surface preparation, preservation of fine detail after priming, and a coordinated painting process are important. For a transparent finish, these conditions also include the wood grain and how it combines with the furniture.
Carved beech elements can be considered for a painted project where the carcass and decor should be perceived as a single whole. But the species itself does not guarantee the desired result. On complex ornamentation, you need to check recesses, transitions, and areas that are difficult to reach during preparation.
Carved oak elements are suitable for tasks where the texture is meant to be shown. On a sample, evaluate the chosen stain, oil, or clear lacquer alongside the other wooden parts. The same composition does not necessarily produce the same shade on different blanks: the grain and the original tone of natural wood vary.
In the information about the quality of wooden products check the material and finish options. When purchasing a batch, record the selected version. The names “beech” or “oak” are not enough if a specific surface preparation has also been agreed for the project.
Do not choose oak only because you assume it is necessarily better for any carving, and beech exclusively for painting. Compare the result of the required finish on a suitable sample, its cost, and the amount of work in the workshop.
Finished carving without a coating: what remains to be done in the workshop
An unpainted part allows you to use your own finishing system and coordinate the decor with the carcass. The complex geometry is already manufactured, but preparation, a test coat, and installation still need to be accounted for in the project.
Apply the chosen material system according to the manufacturer's instructions. For verification, the entire sequence matters, not just one layer of stain. Patina and gilding also require a coordinated base and technique; they are not a universal way to hide preparation flaws.
Check whether the fine lines of the pattern remain visible after the finish is applied, whether material accumulates in the recesses, and how the transition from the overlay to the cabinet front looks. Decide whether to finish the part separately or after installation. This depends on the joint design, the desired appearance, and the compatibility of the fastening with the surfaces.
The installation method is determined by both parts being joined. Flat unfinished wood, a painted facade, and a special recess for molding require different assessments. For a paneled construction, the movement of the elements must also be taken into account: the overlay must not unintentionally bind the movable panel to the frame.
If the decorative part requires mechanical fastening, check in advance the access from the back side, the length of the fastener, and the permissible hole locations. A thin carved protrusion should not be treated as a mounting surface just because it is conveniently located.
When it is useful to buy a sample piece first
A trial purchase is justified for an unfamiliar model, a new finish, or a project where the volume of carving is critical. It allows you to check the actual back side, the fit, and the finishing result before ordering the full quantity.
To evaluate the material, you can look at Product samples, but a sample of a different profile will not confirm the fit of the chosen overlay. When you need to check the exact geometry, you will need the very part and size version that are planned for the furniture.
If beech and oak are being compared, both materials are needed for a direct comparison of the finish. If the composition consists of left and right elements, one side does not confirm the size and appearance of the whole pair. The volume of the trial order depends on the question you want to resolve.
After checking, record the selected characteristics and keep the result of the color test. For repeatable production, it is convenient to keep the physical sample separately. Then it is not deducted from the number of parts needed for the finished furniture.
How to assemble a set of carvings for one cabinet
Start with the furniture layout: mark the fixed and opening sections, the places for decor, and the orientation of each part. Then make an order list. It should contain specific items, not a general entry like “carving for cabinet”.
A conditional example for a cabinet with a central element on the fixed top panel, two side overlays, and a pair of rosettes:
| Position on the furniture | What to select and record | Quantity per cabinet |
|---|---|---|
| Upper central panel | SKU of the central overlay, size, wood species | 1 |
| Left side area | Full item code of the left version | 1 |
| Right side area | Full right-hand article number | 1 |
| Two coordinated composition points | Article number of identical rosettes | 2 |
For each line, add the finish, installation method, and a link to the product. If pilasters, capitals, and a cornice are provided, list them separately with their own dimensions and quantities. It is not necessary to add all types of decor to a single item.
For the three identical cabinets in the example, you will need three central overlays, three left, three right, and six rosettes — 15 elements in total. Reserve and samples are counted separately. This record prevents the situation where the total quantity is correct but one direction is missing.
Keep the list together with the drawing and the approval date. It is better to place a repeat order using this data rather than a photo of the finished cabinet: the photo does not show the exact size, material, or mounting side.
How not to buy extra decor
Large central carving already creates a strong accent. If equally noticeable rosettes, rich pilasters, shaped handles, and an active cornice appear nearby, the elements will start to compete. The number of free areas does not determine the required number of decorations.
First choose the main element. Then add only what supports its position or connects parts of the furniture: a pair of side overlays, repeating small rosettes, a calm profile. On the overall elevation, it should be clear where to look first.
Match the carving with wooden furniture handles. The handle takes up physical space and can itself have an expressive shape. Sometimes changing its model allows you to keep the chosen overlay; sometimes it is better to reduce the decor.
Before the final purchase, remove one of the secondary elements from the layout and compare the two options. If the furniture remains cohesive and the pattern reads more clearly, this detail may not be needed. Such a choice reduces not only the purchase but also the operations for marking, finishing, and installation.
Where to buy furniture carving and what to specify in the order
In the STAVROS catalog you can select ready-made carved wooden products for furniture: overlays, rosettes, brackets, and other elements. For architectural units, separately compare capitals, pilasters, and profiles. Start from the chosen installation location and verified dimensions.
Before buying carved wooden decor, check the order against a short list:
- The full article number of each model and the size version.
- Wood species and surface preparation.
- Left, right, or symmetrical shape.
- Quantity of each item per product and for the entire project.
- Kit contents and required mating parts.
- Availability of the selected version and the agreed delivery date.
Workshops find it useful to check conditions for manufacturers: this page shows shipping from one piece. The ability to start with a small purchase helps refine the decision before assembling the project; the current price and lead time are checked for a specific item.
If you need advice on selection, provide the dimensions of the mounting area, front and side views of the furniture, handle positions, and finish requirements. With this information, it is easier to discuss a specific applique or bracket than a general wish to buy "beautiful furniture carving."
An order can be considered ready when each carved part has its own place on the drawing, a clear version, and an exact quantity. Then the purchase completes the choice of design and decor, and the received elements can be put into work according to the agreed plan.