
























































Article Contents:
- The Main Idea: Combine a Gallery Wall With Architectural Molding
- Why Staircase Gallery Walls Need a Different Layout
- Four Staircase Gallery Wall Layouts That Work in American Homes
- 1. A Single Ascending Row of Photo Frames
- 2. Repeated Rectangular Molding Panels Along the Flight
- 3. A Stairway Wainscoting Effect
- 4. A Large Feature Panel on the Stair Landing
- Use a rising reference line, not guesswork
- Do not copy a universal 60-inch gallery height onto every step
- Decorative trim molding for accents
- Polyurethane onlays: a focal accent
- Decorative rosettes
- Panel molding corners
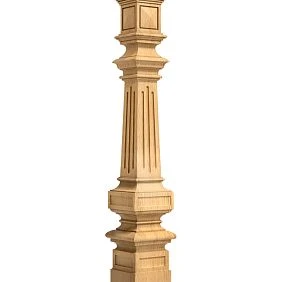
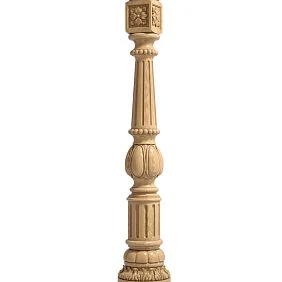
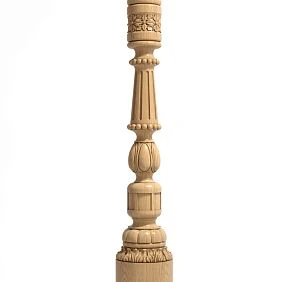
- Turned oak or beech balusters
- Square or slim metal balusters
- Ornate carved railing
- Coordinate color without pretending different materials are identical
- Wall sconces beside the gallery
- Directional accent lighting
- LED lighting and decorative moldings
- A practical cutting plan for 102.36-inch STAVROS profiles
- What changes with shorter decorative trim?
- Adding decorative corners or a central accent
- Concept 1: Traditional Two-Story Foyer With Turned Oak Balusters
- Concept 2: Contemporary Townhouse With Glass Railing and Oak Treads
- Concept 3: Family Staircase With Patterned Wallpaper
- Step 1: Establish the design and check clearances
- Step 2: Identify the substrate
- Step 3: Cut and dry-fit every frame
- Step 4: Mount trim using the product-specific system
- Step 5: Finish joints and paint
- Step 6: Hang photographs independently
- What is the best way to arrange a staircase gallery wall?
- Can I combine polyurethane molding with family photographs?
- What is the difference between picture-frame molding and picture frames?
- How many linear feet of molding do I need for four 24 × 36-inch wall frames?
- Can polyurethane molding follow the slope of the stairs?
- Is beaded molding suitable for a staircase wall?
- Are decorative polyurethane rosettes structural?
- Should the molding match my wooden balusters?
- Can I install wall molding over wallpaper?
- Does STAVROS sell ready-made polyurethane staircase wall molding kits?
- Does stairwell lighting need special planning?
- Does STAVROS ship polyurethane wall decor to the United States?
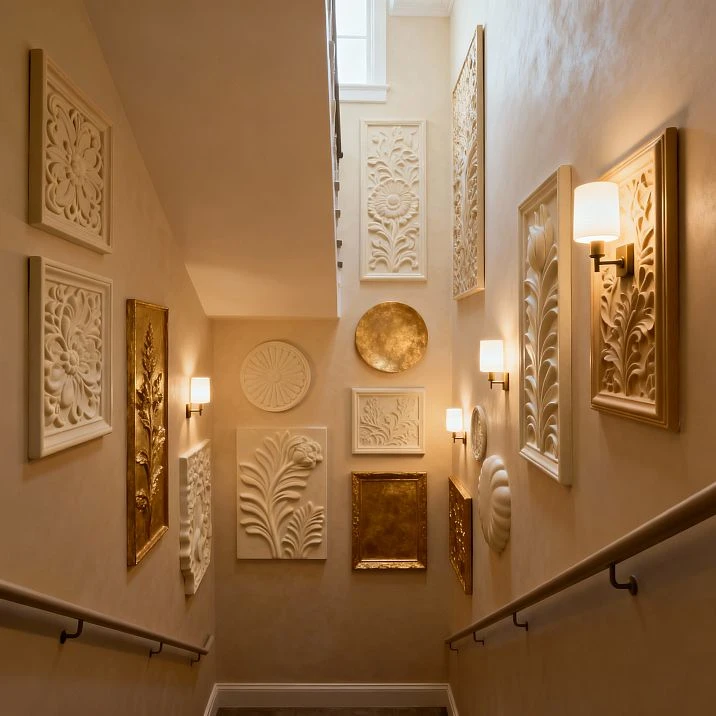
The staircase is one of the most frequently viewed spaces in a two-story home, yet its walls are often left blank. They are too tall for a conventional picture arrangement, too narrow for furniture, or interrupted by the slope of the stairs. But the same geometry that makes a stairwell challenging also makes it a natural setting for a gallery: the view unfolds as you climb, each photograph or architectural panel adding another chapter to the composition.
A thoughtfully designed staircase gallery wall can combine family photographs, framed artwork, and polyurethane molding into an architectural feature. Picture-frame wall molding brings order to the arrangement. Decorative onlays add a focal point. A restrained repeating profile can echo the rhythm of wooden balusters without copying them. Carefully aimed light reveals the relief and helps illuminate the stairs.
The most successful result is not necessarily the most elaborate. A narrow stairway may need only a row of consistent frames. A tall two-story foyer can accommodate larger picture-frame molding panels, a prominent decorative centerpiece, and an organized lighting plan. The critical decisions are layout, scale, material, safe clearances, and how the purchased trim is cut and installed.
This U.S.-focused guide explains staircase wall molding, gallery-wall arrangements, decorative trim, and practical product selection using real STAVROS polyurethane architectural decor. It includes dimensions in inches and feet, a worked stock-length calculation, three illustrative before-and-after design scenarios, and product links for shoppers comparing polyurethane trim. All before-and-after descriptions are design concepts, not photographed or independently verified renovation projects.
The Main Idea: Combine a Gallery Wall With Architectural Molding
There are two elements to distinguish. A photo gallery wall is an arrangement of independently mounted photographs, prints, or artwork. An applied molding wall uses decorative profiles attached to the wall to form architectural borders and panels. Combining the two can create an elegant layered effect, but the picture frames and moldings should have independent, appropriate attachments.
The molding provides the architectural framework; the art supplies the personal content. Neither should be required to support the other. An image should hang from hardware appropriate to its weight and the wall substrate, not from a decorative polyurethane applique or an untested molding joint.
Four useful approaches are:
-
Photo-only gallery with polyurethane accents: Hang photographs along the rising stair line, then use selected onlays or small decorative rosettes in adjacent empty wall areas.
-
Repeated picture-frame wall molding: Build an evenly spaced set of rectangular raised molding frames and leave their centers painted, papered, or selectively filled with art.
-
Molding panels plus individual framed photographs: Use a large architectural panel as a visual backdrop while independently hanging a smaller photograph inside it.
-
A landing-centered composition: Keep the stair-flight wall restrained and make the landing the focal point with a larger frame, rosette, or group of pictures.
For all four, begin with the stair geometry. A design that looks balanced on a flat elevation can feel awkward if its frames collide with the handrail or crowd the space where people carry furniture upstairs.




Why Staircase Gallery Walls Need a Different Layout
A living-room gallery is usually organized against one horizontal floor line. A staircase introduces a rising visual baseline, changing eye level from step to step. The viewer also sees the arrangement from below, from the upper landing, and in motion.
Three challenges follow. First, the artwork must form a coherent rhythm along a slope rather than appearing randomly staggered. Second, the panels must be large enough to read from below but not so prominent that they intrude into the passage. Third, lighting should reveal the composition while keeping the stairway practical and safe to use.
A high stairwell also invites a familiar mistake: filling every empty square foot. Negative space is part of the design. Leaving an uninterrupted painted area between the principal groups can make the gallery appear more deliberate and prevent the wall from competing with the railing.
Наша фабрика также производит:
Смотреть весь Каталог продукции
Four Staircase Gallery Wall Layouts That Work in American Homes
Получить консультацию
1. A Single Ascending Row of Photo Frames
A row of similarly sized pictures is one of the clearest ways to organize a narrow staircase. Establish a smooth diagonal line for the centers of the frames, following the general rise of the stairs. Keep spacing visually consistent as the frames climb.
For a calm, traditional effect, repeat one picture size and one frame finish. For a more personal gallery, alternate two sizes while keeping the centerline coherent. A narrow applied polyurethane bead molding can define a secondary architectural border elsewhere on the wall, without forcing every photograph into its own molded rectangle.
Avoid arranging photos as a literal jagged copy of the stair treads. The overall composition is generally easier to read when it follows a continuous rising guide, with individual frames kept level. A gallery wall is not a collection of diagonal picture frames; the diagonal belongs to their sequence.
2. Repeated Rectangular Molding Panels Along the Flight
This option places several architectural rectangles on the stair wall, each progressing upward with the flight. The sides of each rectangle remain vertical and the top and bottom remain horizontal. The centers of the rectangles rise together; the rectangles themselves are not tilted to match the stairs.
You might repeat three or four tall panels, each framed with MLDPU-002 stepped polyurethane molding. The panels can be painted to match the wall for subtle shadows, or painted in a contrasting color for stronger geometry.
One panel may contain artwork, another a small decorative onlay, and a third may remain empty. This is often more effective than putting a different ornate centerpiece into every panel. The repetition gives the eye order while the contents provide variety.
3. A Stairway Wainscoting Effect
Applied molding can also create a sequence of lower wall panels following the flight. This is different from a gallery of photographs: it is a continuous architectural wall treatment.
Depending on the stair geometry, panel tops may be aligned to a sloping cap or rail-like visual line, or a composition may use individual rectangular panels stepping upward. The detailed construction matters; a straight rigid polyurethane molding does not automatically become a curved or angled top rail. Wherever the design includes a sloped molding, confirm the cut geometry and the profile's suitability for the specific installation.
A painted wainscoting effect can coordinate with a white stair railing or contrast with oak treads. Never interfere with the actual handrail, required grasping clearance, guards, or code-required stair width. Decorative paneling is not a replacement for those safety components.
4. A Large Feature Panel on the Stair Landing
When the wall beside the flight is narrow or interrupted by doors, concentrate the main decorative feature at the landing. A large polyurethane molding frame with a family portrait, mirror, or central applique creates a focal point visible from both levels.
The stair flight might contain only smaller photographic frames or a simple line of decorative trim. This provides a visual destination rather than equal ornament from the first riser to the last.
The STAVROS decorative polyurethane onlay collection is useful for considering individual accents for a substantial landing wall. Check the actual dimensions and projection of each item; a product designed as a furniture applique is not necessarily suitable in every stairwell location.
Measure the Staircase Before Choosing a Molding Profile
A gallery-wall plan should start with measurements taken from the actual finished stairs. Photograph the wall from the bottom, the top landing, and halfway up. Then record the following:
-
The usable horizontal length of the wall along the stair flight.
-
The total vertical rise of the portion being decorated.
-
The visible wall height above the stair treads at several points.
-
The height, projection, and path of the existing handrail.
-
The location of switches, sconces, HVAC grilles, smoke detectors, doors, and artwork hardware.
-
The available depth, especially where furniture is moved along the stairs.
-
The substrate and condition of the painted wall, including any existing wallpaper.
It is generally better to measure the usable design area rather than assuming the full wall is available. A handrail, a switch plate, or a narrow landing return can change a four-panel concept into a better three-panel layout.
Use a rising reference line, not guesswork
For a controlled photo arrangement, mark two points that represent the intended centers of the lowest and highest frames. Connect them with a straight diagonal guideline, then locate intermediate frame centers along it.
In drawing coordinates, with x measured horizontally from a fixed wall datum and y measured vertically from one common level, a guideline can be described as:
y = y₀ + (rise ÷ horizontal run) × (x − x₀).
For example, an illustrative design line that rises 8 inches for every 12 inches of horizontal travel has a slope of 2/3. If picture centers are placed at horizontal positions 36 inches apart, their vertical center positions rise by 24 inches from one to the next. The chosen line is a visual design reference; it is not a required eye-level or code dimension.
Use painter's tape or paper templates to test the centers and outer edges while walking both directions. Keep the individual photographic frames level. The same process works for architectural molding rectangles, but those require their own allowance for molding face width and miter long points.
Do not copy a universal 60-inch gallery height onto every step
On a flat wall, an eye-level rule can be a convenient starting point. On stairs, the floor reference moves with the observer, so a fixed distance above the ground floor can give a strange result. Consider the viewer's position on the nearby tread, the handrail, and the view from both landings.
There is no single correct number for every staircase. Establish a comfortable visual centerline, make full-size templates, and check clearances along the entire flight before drilling or gluing anything.
Polyurethane Molding Profiles for Staircase Wall Frames
For a stairwell, two measurements matter visually: face width, which controls the strength of the border, and projection, which determines the amount the profile stands proud of the wall. Stock length controls how efficiently you can cut repeated frames.
The following STAVROS profiles are specific polyurethane products. Confirm their current dimensions and suitability for the selected wall before ordering.
| STAVROS profile | Face width × projection | Stock length | Good design use |
|---|---|---|---|
| MLDPU-001 | 0.39 × 0.24 in. | 102.36 in. | Fine secondary lines and restrained narrow frames |
| MLDPU-002 | 0.87 × 0.43 in. | 102.36 in. | Mid-scale picture-frame molding for a residential stair wall |
| MLDPU-003 | 1.38 × 0.47 in. | 102.36 in. | Stronger raised borders on tall or wider stairwell walls |
All measurements are approximate inch conversions from the product data. Wider does not mean better: a slim border may suit a tight hallway, while a prominent profile can be effective in a two-story foyer.
The broader STAVROS molding category includes MDF and polystyrene products as well as polyurethane. Select by the exact SKU and material field, not the category title alone.
Decorative trim molding for accents
Not every gallery frame should be ornate. If the composition calls for a special border around one focal artwork or a central landing panel, the STAVROS ornamental polyurethane trim collection includes repeating motifs such as beads, rope, leaves, and more expressive friezes.
A relatively narrow KPU-105 polyurethane beaded molding is approximately 0.43 × 0.24 × 39.37 inches. It is an example of beaded molding that can reinforce the cadence of turned wooden balusters, but its short stock length requires more attention to cut planning and motif alignment.
For a more decorative classical room, a single strip of ornate relief on the landing wall may be more convincing than placing ornamental molding around all the frames. Use decorative trim molding and ornate molding in relation to actual design need—not as keywords to repeat in every paragraph.
Decorative Onlays, Rosettes, and Molding Corners
A staircase gallery needs a hierarchy. Photographs and art often provide enough detail on their own; sculpted polyurethane ornaments can be reserved for transitions, a central architectural panel, or a prominent landing.
Polyurethane onlays: a focal accent
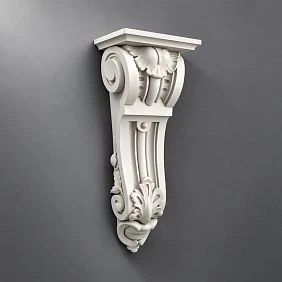
A wall applique is a separate raised decorative piece, generally chosen by width, height, and projection. A floral ornament can suit a traditional staircase with carved balusters, while a small geometric accent may work with square or metal railing members.
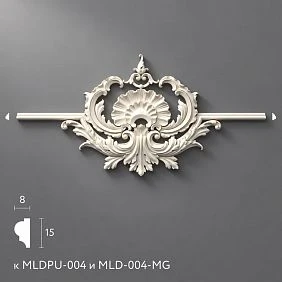
The STAVROS NPU-501 vertical polyurethane onlay is listed at approximately 2.28 × 11.81 × 0.43 inches. Its elongated ornamental shape is a relevant example of a vertical accent for a suitably sized decorative panel. An onlay is not a picture hook, and it should not be used to support framed photographs or other objects.
A smaller NPU-491 floral polyurethane applique measures approximately 4.13 × 3.70 × 0.67 inches. It may suit a carefully chosen focal point in a larger composition; check the shape, installation documentation, and whether its projection is appropriate near traffic.
Decorative rosettes
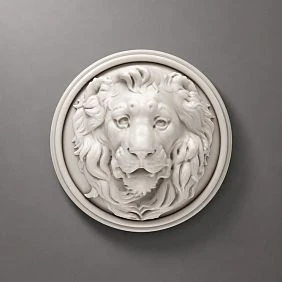
Round or radiating details can echo turned baluster profiles or add a finishing point to a wall-panel composition. Browse STAVROS decorative rosettes and confirm that the selected item is an appropriate wall ornament, rather than assuming every ceiling medallion is sensible for a stair wall.
Panel molding corners
Molding corner ornaments may be designed for specific straight profiles. The MLDPU-001U polyurethane corner detail has a roughly 3.39 × 3.39-inch footprint and is a product to evaluate with the corresponding molding family.
A decorative corner is not automatically a right-angle building protector or a replacement for a properly joined miter. Confirm its exact geometry and compatibility before modifying the straight-piece cut list. For additional options, see the STAVROS molding corner and centerpiece category.
Match the Wall Decor to Wooden Balusters and the Stair Railing
The railing is already one of the staircase's strongest decorative elements. Coordinating it with the gallery wall gives the whole stairwell a unified appearance. That does not require repeating an identical carving on every surface.
Turned oak or beech balusters
Traditional turned balusters contain rounded sections, collars, and curved transitions. A small bead profile, subtle rosette, or restrained classical leaf accent can echo that geometry. Warm natural wood often pairs effectively with a painted ivory, stone, or soft gray gallery wall, while white-painted balusters may be coordinated with white molding frames.
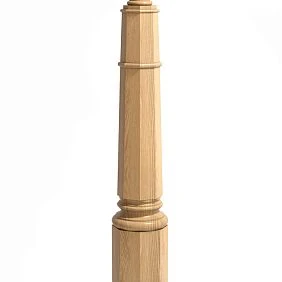
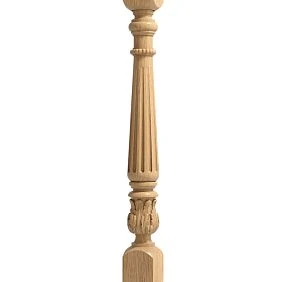
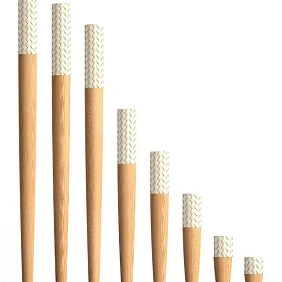
For visual reference, the STAVROS wooden stair baluster assortment includes beech and oak models. These are wooden staircase components, not polyurethane wall trim. Treat their design as the reference for your wall ornament while keeping railing structure and any decorative installation separate.
Square or slim metal balusters
Square metal railings and simple straight wood balusters often suit clean geometric wall frames. Narrow STAVROS polyurethane moldings can establish a quiet rhythm that follows the architectural clarity of the railing. Deep floral appliques might work as one focal accent on the landing, but there is rarely a need to place them between every picture frame.
Ornate carved railing
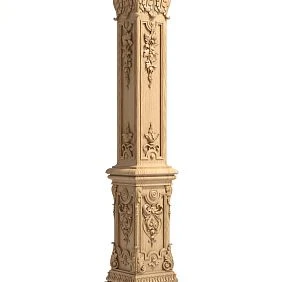
Where the staircase already has botanical carvings, a selected floral or acanthus-inspired detail on the wall can create visual continuity. Choose a common motif and finish, not several unrelated ornamental styles. If the railing contains a prominent leaf pattern, use a restrained polyurethane ornamental trim or one coordinated wall applique rather than a competing full-wall relief scheme.
Coordinate color without pretending different materials are identical
Oak, painted wood, metal, polyurethane, and MDF can be visually related through a controlled palette, but their coating systems and maintenance needs differ. In a traditional stairwell, a pale painted wall with white moldings and a dark-stained rail can produce a clear hierarchy. A contemporary composition might use charcoal picture frames against a warm white wall with light oak treads.
The best relationship is deliberate: the staircase supplies one visual rhythm and the wall responds to it.
Plan Lighting That Shows the Artwork and Keeps the Stairs Usable
Lighting is central to the appearance of relief. A gently angled beam from a sconce or properly positioned picture light can reveal the shallow shadows of decorative trim. But a stairway's safe illumination and visibility are more important than dramatic accent effects.
A gallery wall should not create glare in the eyes of someone climbing or descending. Neither should its lighting obscure step edges or produce alternating areas of excessive brightness and deep shadow. If the existing stair lighting is inadequate, address it as an illumination project first rather than relying on ornamental highlights.
Wall sconces beside the gallery
Wall sconces can frame a large artwork or illuminate sections of a long stair wall. Select fixtures based on their actual projection, installation height, electrical requirements, and the remaining stair width. Avoid placing bulky fittings where people carrying furniture may strike them or where they interfere with the handrail.
For traditional oak and cream interiors, 2700–3000 K is one useful warm-white starting point. Contemporary paint schemes may suit another color temperature. These are aesthetic preferences, not code-required lighting values.
Directional accent lighting
An adjustable ceiling or wall fixture can emphasize a floral applique or a selected landing portrait. Use a limited number of accents so that the composition has a clear focal point. Side lighting can reveal the stepped profile of an MLDPU-002 decorative wall frame more effectively than perfectly flat frontal light.
Check reflections on framed artwork and glazing before finalizing the fixture position. A large photograph with reflective glass can be difficult to view if a sconce creates a bright hotspot directly in front of it.
LED lighting and decorative moldings
A normal polyurethane wall molding is not automatically a rated LED channel. Any integrated lighting must use components approved for the application, with appropriate heat management, electrical connections, access, and mounting. Do not hide electrical splices or power supplies behind an improvised decorative frame, and do not drill into existing wiring.
A qualified electrician should handle new wiring, junction boxes, and changes that require permits or inspection. Decorative moldings must not interfere with switches, required stair lighting, or other safety-related fixtures.
How Much Molding Do You Need for Four Staircase Gallery Panels?
One of the most useful improvements over a generic design article is a real cut schedule. Decorative molding is often sold by the full strip, not by an arbitrary linear foot, so the number of required pieces matters as much as the total installed footage.
Suppose you plan four rectangular architectural frames, each measuring 24 inches wide by 36 inches tall, measured at the outside long points of 45-degree mitered corners. These rectangles will climb along the wall at different heights, but each one remains square to the room's horizontal and vertical axes.
Each frame needs two 24-inch pieces and two 36-inch pieces:
2 × 24 + 2 × 36 = 120 inches = 10 linear feet per frame.
Four frames require 480 inches, or 40 linear feet, of nominal installed molding. That means eight 24-inch pieces and eight 36-inch pieces.
A practical cutting plan for 102.36-inch STAVROS profiles
For a STAVROS MLDPU polyurethane profile supplied in 102.36-inch full strips, one possible layout is:
| Full strip | Cut pieces | Nominal used length |
|---|---|---|
| Strip 1 | 36 + 36 + 24 in. | 96 in. |
| Strip 2 | 36 + 36 + 24 in. | 96 in. |
| Strip 3 | 36 + 36 + 24 in. | 96 in. |
| Strip 4 | 36 + 36 + 24 in. | 96 in. |
| Strip 5 | 24 + 24 + 24 + 24 in. | 96 in. |
| Total | Eight 36-in. and eight 24-in. pieces | 480 in. |
Each stock length leaves approximately 6.36 inches before saw kerf and end trimming. Under the stated assumptions, five full strips provide all sixteen pieces. Always check your actual saw kerf, the condition of the stock ends, and the method used to measure miter long points.
This calculation works for these selected lengths; it is not permission to assume every profile will cut or join identically. Repeating patterns, manufacturer-required joint details, and corner ornament can change the quantities.
What changes with shorter decorative trim?
The KPU-105 beaded polyurethane molding comes in approximately 39.37-inch lengths. A single strip can provide one 36-inch member or one 24-inch member, but cannot supply two of either length. Consequently, the same four simple frames would require 16 complete KPU-105 strips under the straightforward one-cut-per-strip plan, before any additional allowance for pattern matching.
The nominal installed length is still 40 linear feet. The purchasing quantity changes drastically because of the individual cuts and stock length. This is why a buyer comparing decorative trim molding must work from the actual SKU and cut schedule rather than a per-foot figure alone.
Adding decorative corners or a central accent
If each frame receives four individual decorative corner accents, the project needs 16 matching corner pieces, subject to the actual design and orientation. That does not mean every gallery frame should have them. One richly detailed central frame with simpler neighboring panels may be a better composition and require fewer accessories.
Where corner components replace a portion of the straight trim instead of overlaying an existing joint, revise the cut lengths. Use product-specific compatibility information from the STAVROS molding corner selection.
Should You Buy a Wall Molding Kit or Individual Profiles?
A wall molding kit can simplify selection when its dimensions fit the project and the set contains the desired pieces. But a staircase seldom offers the same uninterrupted rectangular wall area as a bedroom or dining room. The presence of a handrail, slope, sconces, and doors may require individualized panel dimensions.
The STAVROS wall-decor collection offers coordinated sets in several decorative styles. For example, the CPU-2-2 Neoclassic Light wall-decor set combines polyurethane ornaments with primed MDF molding components. Its stated dimensions are for the specified kit; the set should not be described as an all-polyurethane picture-frame molding package.
Choose a complete set only after checking:
-
Its actual outer dimensions against the usable staircase wall area.
-
Whether the components are polyurethane, MDF, wood, or another material.
-
How its finished panel will relate to the sloping stair line.
-
Whether any corner pieces have left/right orientation.
-
Whether the arrangement can be installed without intruding into stair circulation or touching a handrail.
For highly customized stair-wall dimensions, individually selected polyurethane panel moldings may be easier to schedule and cut than adapting a fixed-size kit.
Three Before-and-After Staircase Design Scenarios
The following examples are illustrative design concepts, developed from the themes of the original article. They are not claims of completed STAVROS projects, verified renovation photographs, or customer testimonials.
Concept 1: Traditional Two-Story Foyer With Turned Oak Balusters
Before: A tall painted stair wall feels disconnected from a substantial dark-oak railing and turned balusters. Two sconces illuminate the stairs, but the empty wall remains visually dominant. The staircase itself is finely detailed while the adjacent wall has no related architecture.
Proposed after: Four large painted molding frames rise with the flight. Their centers follow a controlled diagonal, and each frame remains level. A single ornamental applique defines the landing area, while the three remaining panels display appropriately mounted family photographs or remain simply painted. The trim is finished in a warm off-white, and a selected decorative detail echoes the leaves or rounded elements of the balusters.
A medium MLDPU-002 polyurethane frame molding can serve as a design reference, while the STAVROS botanical onlay assortment provides options for a focal ornament. The proposed improvement is a connection between railing, wall frames, and art—not a claim that a particular installation has already been photographed.
What makes it work: one consistent frame profile, a repeatable layout, limited ornament, warm lighting, and careful avoidance of the handrail path.
Concept 2: Contemporary Townhouse With Glass Railing and Oak Treads
Before: The staircase has slim metal or glass railing details and pale oak treads. The adjacent white wall is technically finished but visually empty. Adding elaborate classical ornament would conflict with the existing architectural language.
Proposed after: A series of narrow rectangular polyurethane molding frames creates crisp geometry. Black-and-white photographic prints are hung independently within selected panels. The trim is painted to match the wall, so the shallow shadows provide detail without heavy contrast. One larger photograph anchors the upper landing.
A narrow MLDPU-001 polyurethane bead is a possible profile to compare. An alternate treatment uses MLDPU-003 sparingly for a single large landing panel rather than for every small photo.
What makes it work: consistent photo spacing, a restrained material palette, controlled projections, and no unnecessary layering over the existing glass or rail details.
Concept 3: Family Staircase With Patterned Wallpaper
Before: A patterned stair wall contains a few unrelated photographs at different heights. The paint and paper compete with the images, and the overall appearance lacks a clear visual order. Existing white balusters establish a classic element that the wall does not reflect.
Proposed after: Three or four symmetrical molding frames organize selected areas of patterned wallpaper, turning the paper into a deliberate inset backdrop. Neutral photographic frames introduce the family's images without competing with every decorative element. One modest rosette or corner detail can mark the landing.
A mixed-material STAVROS Neoclassic wall-decor concept can be a reference for color and arrangement. But do not assume that construction adhesive will bond adequately over existing wallpaper. The receiving surface must be evaluated and prepared according to the exact molding and adhesive system, which may require removing the wallpaper from attachment areas.
What makes it work: a clear border, reduced visual competition, existing railing colors repeated in the wall finish, and a proper substrate preparation plan.
Installing Polyurethane Wall Molding on a Staircase
Stair installations are not ordinary flat-wall projects. Working above sloping steps increases the difficulty of reaching the wall safely, leveling the layout, controlling tools, and supporting long decorative pieces while adhesive cures. If the work cannot be accessed safely, use qualified installers with appropriate stair-access equipment rather than balancing a conventional ladder on the treads.
Step 1: Establish the design and check clearances
Mark all photo centers and molding frames with paper templates or painter's tape. Verify the views from the bottom, middle, and top of the stairs. Confirm that the decoration will not obstruct any required handrail grip clearance, stair width, switches, light fixtures, doors, or egress path.
Step 2: Identify the substrate
Painted drywall, plaster, repaired surfaces, and wallpaper present different attachment conditions. The bond is only as reliable as the surface beneath it. Loose paint, damp areas, failing plaster, or wallpaper adhesive should not be concealed behind decorative strips. Check the manufacturer's mounting instructions for the actual PU product and wall finish.
Step 3: Cut and dry-fit every frame
Record the outer long-point dimensions for each mitered member. A 45-degree miter is appropriate for a square 90-degree corner, but an existing wall or unusual design may require field adjustments. Label each piece before cutting. Dry-fit the frames and confirm their outer dimensions and diagonals before using adhesive.
Rigid polyurethane is not automatically flexible. Do not bend standard MLDPU moldings around an irregular wall or along an arch without documented approval. Resolve geometry through the specified installation method or a different product.
Step 4: Mount trim using the product-specific system
Select an adhesive or fastening method appropriate to the exact polyurethane profile and the actual receiving surface. Follow instructions for preparation, bead pattern, working time, temporary support, and cure. Large applied ornaments may require a different attachment strategy from slim straight molding. Do not assume a strip held by painter's tape for a few minutes is fully secure.
The STAVROS installation and finishing materials catalog contains related products, but compatibility must be verified rather than inferred from the fact that products appear in the same catalog.
Step 5: Finish joints and paint
Use the appropriate joint treatment for the specified profiles. Paintable caulk can finish certain small gaps but does not substitute for a required adhesive joint or mechanical attachment. Protect the stair treads, railings, and finished flooring while working.
Verify the item's primer and coating instructions. A compatible paint finish can unify the gallery wall, especially where one composition combines different decorative components. Thick paint buildup can soften fine beads or floral relief; use controlled coats that preserve the detail.
Step 6: Hang photographs independently
Choose hanging hardware based on the weight of each frame and the wall's construction. The picture must remain securely attached even if a decorative polyurethane molding is removed. Never hang photographs from a decorative applique or assume ordinary construction adhesive is an appropriate picture-hanging method.
Do not put heavy picture frames in locations where a failure could drop them onto the stair treads. Use appropriate rated hardware and placement, particularly in homes with children.
Safety and Code Considerations for Staircase Wall Decor
Architectural decoration should never change the safety function of the stairway. The applicable building requirements vary by jurisdiction and adopted code, so a specific clearance must be checked for the actual project rather than borrowed from a general design article.
The key concerns are unobstructed passage, safe handrail access, secure attachment, fixture projection, and adequate stair lighting. Do not cover emergency or safety devices. Do not attach decorative pieces to a working handrail or guard, and do not add protruding ornaments in locations where they could snag clothing or be struck while carrying objects.
Wall sconces and picture lights need proper electrical installation and mounting. Decorative polyurethane brackets are not automatically load-bearing shelves or approved electrical equipment supports. A home renovation can be beautiful while keeping every existing safety component fully functional.
A Realistic Budget for a Staircase Gallery Wall
A useful budget separates molding material, decorative accents, photograph frames, finishing, access equipment, and installation labor. There is no reliable universal price for a complete American staircase gallery wall because the site conditions and scope vary widely.
| Budget line | How to estimate it |
|---|---|
| Straight polyurethane molding | Exact SKU price × full stock lengths from the cut schedule |
| Decorative corners or centerpieces | Price per actual product × required quantity and orientation |
| Framed photographs or artwork | Frame size, print production, matting, glazing, mounting hardware |
| Primer, paint, adhesive and joint treatment | Manufacturer-approved products and actual coverage |
| Wall preparation | Existing paint, plaster, wallpaper and repair work |
| Stair-access equipment | Required safe access method and installer setup |
| Installation labor | Number of individual cuts, height, layout, substrate and finish scope |
| Accent lighting | Fixtures, electrical design and permitted installation as required |
| Shipping and applicable charges | Confirmed delivered quotation for the destination |
The equivalent material price per linear foot is calculated as the current full-strip price divided by its length in feet. This is a useful comparison, not necessarily a unit the supplier sells. A four-frame project that requires five long MLDPU sticks may require many more short KPU sticks, even when both designs use the same nominal installed footage.
Before choosing ornate trim, ask whether a single featured panel could provide the same architectural impact as repeating ornament around every photograph. Concentrating relief in a few places can simplify cutting, finishing, and maintenance.
Cleaning, Repairs, and Future Updates
Staircase decor may collect dust in beaded or leaf-shaped recesses. Use a soft cloth or brush appropriate for the actual finish; avoid abrasive or solvent-based cleaning unless the product and paint specifications allow them. Dusting may be enough for many locations, while a high stairwell may require safe access equipment for maintenance.
A cosmetic chip may be repairable with a compatible filler and touch-up coating, but a loose or damaged wall ornament needs its attachment evaluated before repair. An unstable frame should not simply be re-glued onto failing paint. Protect projecting details when carrying furniture up or down the stairs.
A photo gallery can evolve without rebuilding the decorative molding framework. Replace the photographs and mats, update the display on the landing, or change the color of independently mounted picture frames. This adaptability is one advantage of keeping photograph supports separate from the wall trim.
Frequently Asked Questions About Staircase Gallery Wall Molding
What is the best way to arrange a staircase gallery wall?
Start with a smooth rising guideline through the centers of the photograph frames or architectural panels. Keep each frame level, use consistent spacing, and test the pattern with paper templates from both ends of the staircase. The exact sizes and positions depend on the available wall space and handrail clearances.
Can I combine polyurethane molding with family photographs?
Yes. Polyurethane moldings can create decorative wall panels that visually frame independently mounted artwork. The photographs should use suitable picture-hanging hardware; the polyurethane trim should not support their weight.
What is the difference between picture-frame molding and picture frames?
Picture-frame molding is architectural trim attached to the wall to form raised rectangular borders. A picture frame holds an image. They can be combined, but they are different products with separate installation requirements.
How many linear feet of molding do I need for four 24 × 36-inch wall frames?
Each rectangle uses 120 inches of nominal trim, so four require 480 inches or 40 linear feet. With 102.36-inch MLDPU sticks, the illustrated cutting plan uses five full lengths. Actual quantities depend on profile, saw kerf, end condition, and any pattern or corner elements.
Can polyurethane molding follow the slope of the stairs?
A sloping applied trim line may be possible if it is designed with appropriate cuts and mounting, but ordinary rigid polyurethane should not be forced to bend. Repeated rectangular frames generally stay level and step upward along the flight, while their centers follow a rising visual line.
Is beaded molding suitable for a staircase wall?
It can be an attractive accent, especially with turned traditional balusters. Check its face width, projection, stock length, and motif matching. For example, STAVROS KPU-105 decorative beaded trim is much shorter than an MLDPU straight molding and can require more full sticks for the same frame arrangement.
Are decorative polyurethane rosettes structural?
No. An applied rosette is ornament. It is not a picture hook, shelf support, handrail bracket, or replacement for a structurally rated component unless specific product documentation explicitly establishes such a use.
Should the molding match my wooden balusters?
It does not have to match exactly. Coordinate the visual character: rounded or floral motifs may echo turned and carved balusters; cleaner geometric lines often complement square or metal rails. Keep color, proportions, and ornament under control.
Can I install wall molding over wallpaper?
Do not assume so. The adhesive may bond to the wallpaper but the wallpaper may detach from the wall. Review the intended installation system and prepare an approved substrate; this may require removing the paper from bonding areas.
Does STAVROS sell ready-made polyurethane staircase wall molding kits?
The catalog contains polyurethane profiles, decorative onlays, and coordinated wall-decor sets. Some CPU sets contain both polyurethane and primed MDF, and they are not automatically sized for an angled staircase. Check the exact set composition, dimensions, and installation requirements before ordering.
Does stairwell lighting need special planning?
Yes. Decorative lighting should not create glare, obscure steps, narrow the usable passage, or interfere with handrails and switches. New electrical work and concealed LED systems should follow the relevant installation and local code requirements.
Does STAVROS ship polyurethane wall decor to the United States?
STAVROS publishes an English catalog with dimensions in inches and prices displayed in U.S. dollars, but its published delivery information primarily describes Russia and CIS destinations. Confirm shipping to your specific U.S. address, packaging, freight, import responsibilities, and availability before committing to a contractor schedule.
Create a Staircase Gallery With STAVROS Decorative Polyurethane Trim
A staircase gallery should feel like a natural continuation of the house rather than a set of ornaments placed on an empty wall. Start by choosing the relationship between the stair slope, the photo sequence, and the surrounding architecture. Then decide whether the design needs a slim raised frame, a more substantial stepped border, a single botanical accent, or a carefully selected decorative corner.
For the architectural framework, compare STAVROS polyurethane wall molding profiles. To introduce a classical repeating pattern, explore decorative beaded molding, rope molding, and ornate polyurethane trim. Use polyurethane onlays and appliques for a limited number of focal accents, and consider compatible molding corners where the design actually needs them.
For a more coordinated panel arrangement, review the STAVROS wall-decor collections while checking each set's polyurethane/MDF composition. Designers can also consult the available STAVROS product catalogs and drawings before building a cut list.
The best staircase gallery wall combines personal images, deliberate architectural rhythm, safe mounting, and a restrained decorative vocabulary. The moldings should improve the experience of moving through the house—not get in the way of it.
The golden mean - a thoughtfully composed design with moderately complex elements, quality materials, and professional installation - 60,000 to 80,000 rubles. This is a sensible investment in transforming the staircase space, yielding aesthetic pleasure and increased interior value.
Inspiration and Ideas
Thematic Galleries
A staircase gallery can be thematic. For example, a botanical gallery uses decor with plant motifs: leaves, flowers, fruits. Each panel features a different plant (rose, lily, grape, oak leaves). This creates a natural theme, especially suitable for country homes.
A historical gallery uses classical motifs from different eras: ancient rosettes, Renaissance cartouches, baroque volutes, neoclassical wreaths. Ascending the staircase, you embark on a journey through architectural history.
A geometric gallery is built on abstract forms: circles, squares, triangles, polygons. Panels and appliqués feature various geometric compositions. This is modern, intellectual, and suitable for lovers of minimalism and constructivism.
Integration with Photographs and Paintings
Polyurethane decor combines beautifully with photographs and paintings on the wall. Moldings create frame-panels, within which images are hung. This results in double framing: a polyurethane frame on the wall + a picture frame. This is a classic museum approach.
You can alternate between decorative panels and image panels. One panel is a relief panel, the next is a framed photograph, the next is again a relief panel, and so on. The rhythm of alternation creates an interesting dynamic, combining three-dimensional decor with flat images.
For modern interiors, an interesting approach is to hang photographs directly on polyurethane panels without frames — the image becomes part of the panel. This creates layering, play of planes and volumes.
Seasonal and Festive Accents
Polyurethane decor is a permanent element, but it can be enhanced with seasonal accents. For example, during New Year, lightweight Christmas ornaments and garlands can be hung on appliqués and rosettes. In summer — live or artificial flowers in small brackets integrated into the composition. In autumn — garlands made of leaves.
These temporary additions do not damage the main decor (they attach via thin hooks, string, or removable clips), but they refresh the space, making it lively and ever-changing.
Conclusion
The staircase ceases to be merely a path from the first to the second floor when the wall alongside it acquires content.polyurethane wall decorIt transforms utilitarian space into a gallery, where architectural forms become art. Each ascent and descent is a journey through a composition of reliefs, ornaments, light, and shadow.
The key to success is thoughtfulness. You cannot simply hang beautiful elements on the wall and wait for magic. A concept is needed: the connection between decor and formwooden balusters, scale matching the room’s height, rhythm and balance in element placement, proper lighting that highlights relief. When all these components are combined, a cohesive artwork is created.