



Article Contents:
- Where to buy a wooden ceiling cornice in Penza and what to specify in your order
- KZ-006 and KZ-004: which profiles exactly are we comparing
- A decorative ceiling cornice is not a curtain rod
- Oak or beech: what differences the buyer will notice after finishing
- A built-in floor-to-ceiling wardrobe: where exactly the conflict arises
- From which line to measure the ceiling cornice
- Option A: a full cornice along all four walls of the living room
- Option B: do not run the cornice behind the wardrobe
- Checking the cutting map: why seven and six are not just rounding
- Miter cuts and actual length: where the preliminary plan may fail
- Can a different profile change the number of strips
- How much six and seven wooden cornices cost
- How to neatly finish a cornice next to a tall wardrobe
- How to choose the height and depth of a cornice for a room with a wardrobe
- Installation: what to prepare before receiving long strips
- Wood finishing and care: what to agree with the workshop
- Delivery of wooden cornices to Penza: how to check the order before payment
- Common mistakes when ordering a cornice for a living room with a wardrobe
- Frequently asked questions about wooden ceiling cornices
- Can I buy KZ-006 and KZ-004 in the same length for comparison?
- Why seven strips if the perimeter is 15.2 m, and 15.2 / 2.4 is more than six?
- Can the area behind a built-in wardrobe be omitted entirely?
- What should I choose if the wardrobe doors almost touch the ceiling?
- What should I use to measure an angle in a room?
- What is the difference between buying a beech profile and an oak one?
- Can a wooden cornice be installed flush against a stretch ceiling?
- Do I necessarily need to buy one more strip as a spare?
- Does STAVROS deliver wooden cornices to Penza?
- Can the leftover 197 and 397 mm pieces be used to finish the ends?
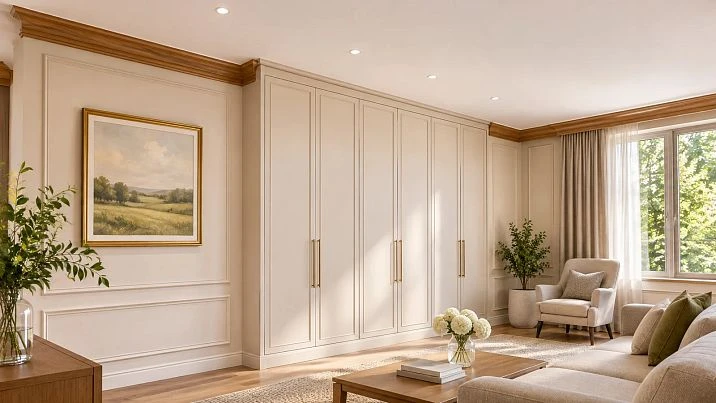
The wardrobe is already designed all the way to the ceiling, and you want to run a wooden cornice along the top of the walls. At first glance, all that's left is to choose a profile and order it around the perimeter of the living room. But near the wardrobe, a question arises that is easy to overlook before the furniture is made: should the cornice continue behind the cabinet, pass in front of it, or end on both sides? This decision affects more than just the two visible ends. In our room measuring 4300×3300 mm, the difference amounts to a whole factory-length strip.
If you keep a closed ceiling contour, you will first need seven wooden cornices, each 2400 mm long. If you remove the hidden section 2300 mm wide behind the wardrobe, six may be enough. We are looking at two real STAVROS profiles — KZ-006 with a wooden cross-section of 55×20 mm and KZ-004 measuring 60×60 mm. For each, we will compare beech and oak, calculate the cost, and explain under what conditions such savings stop working.
There is no promise here that any room of 4.3×3.3 m can be unconditionally finished with six or seven strips. All lengths below refer to a training layout of straight parts. Actual cuts, the position of the measuring line, wall curvature, the termination near furniture, and the chosen profile direction are verified on site. That is why the design is determined first, then the cutting is done, and only then is the order placed.
Where to buy a wooden ceiling cornice in Penza and what to specify in the order
A resident of Penza can buy a wooden ceiling cornice in Penza, choosing a suitable profile from the official STAVROS catalog and arranging shipment across Russia. The delivery city here does not mean that the manufacturer has a local warehouse or showroom in Penza. The availability of a specific version, lead times, and shipping costs must be confirmed separately.
The name “ceiling cornice” is used for two different products. In our case, it is a shaped wooden strip that finishes the transition from wall to ceiling. A different product is used for hanging curtains: tracks, rods, or special concealed systems with fabric attachment. For a buyer looking specifically for a curtain holder, the decorative wooden profile KZ-006 or KZ-004 will not replace a suspension mechanism. This is a fundamental distinction: the similarity of the word “cornice” does not mean the same function.
For a commercial request, it is not enough to write “wooden cornice, sixteen meters.” The manager needs a specification: KZ-006 or KZ-004, beech or oak, factory length 2400 mm, number of strips, selected surface preparation, and delivery address. If tinting is planned, provide a sample and agree on the finishing technology. For opaque painting, clarify the preparation for enamel. The availability of such options in the product listing should not be confused with a promise that the coating is already applied and included in the stated price.
Attach a room diagram marking the tall wardrobe, its width, the cabinet height, the exposed wall sections, the ceiling material, and the profile installation line. This will allow the conflict to be checked before long wooden items are shipped. It is more sensible to agree on a single furniture joint detail than to order a spare strip just in case without knowing where it will be used.
Before paying for the order, check the full name in the product listing. When the page opens, the price of the cheaper MDF version may be shown first. For our task, we specifically need solid beech or oak with a length of 2400 mm. The difference matters both for the budget and for the geometry: the MDF versions in the listings under consideration have a different factory length, which is not suitable for the wooden calculation.

KZ-006 and KZ-004: which profiles exactly are we comparing
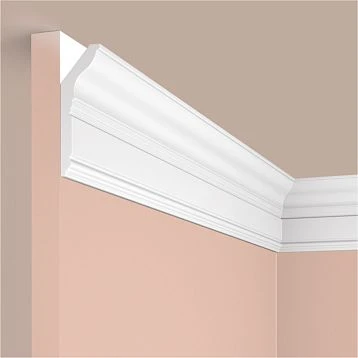
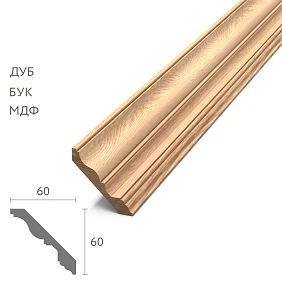
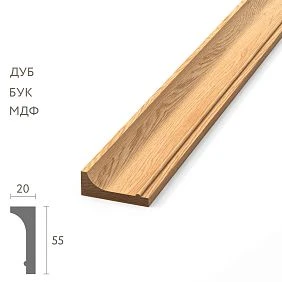
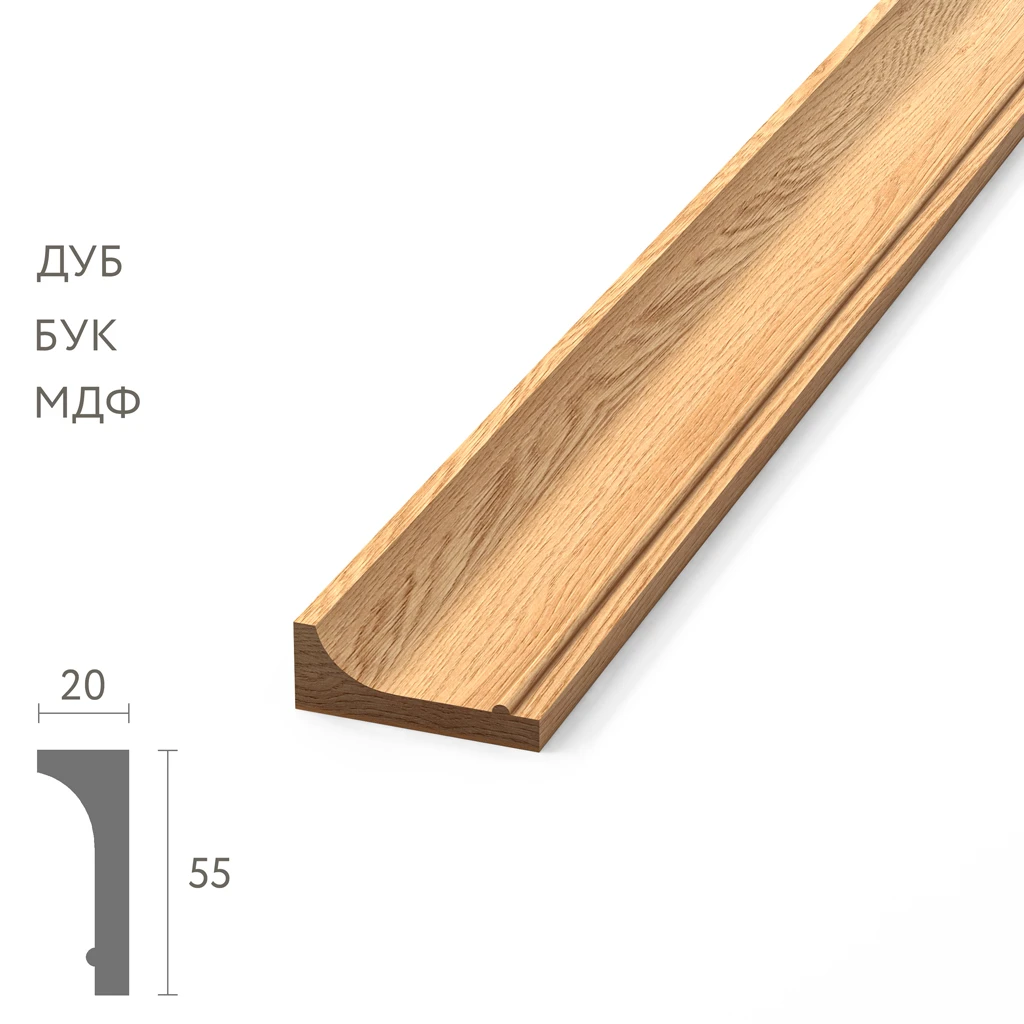
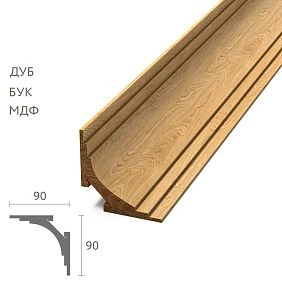
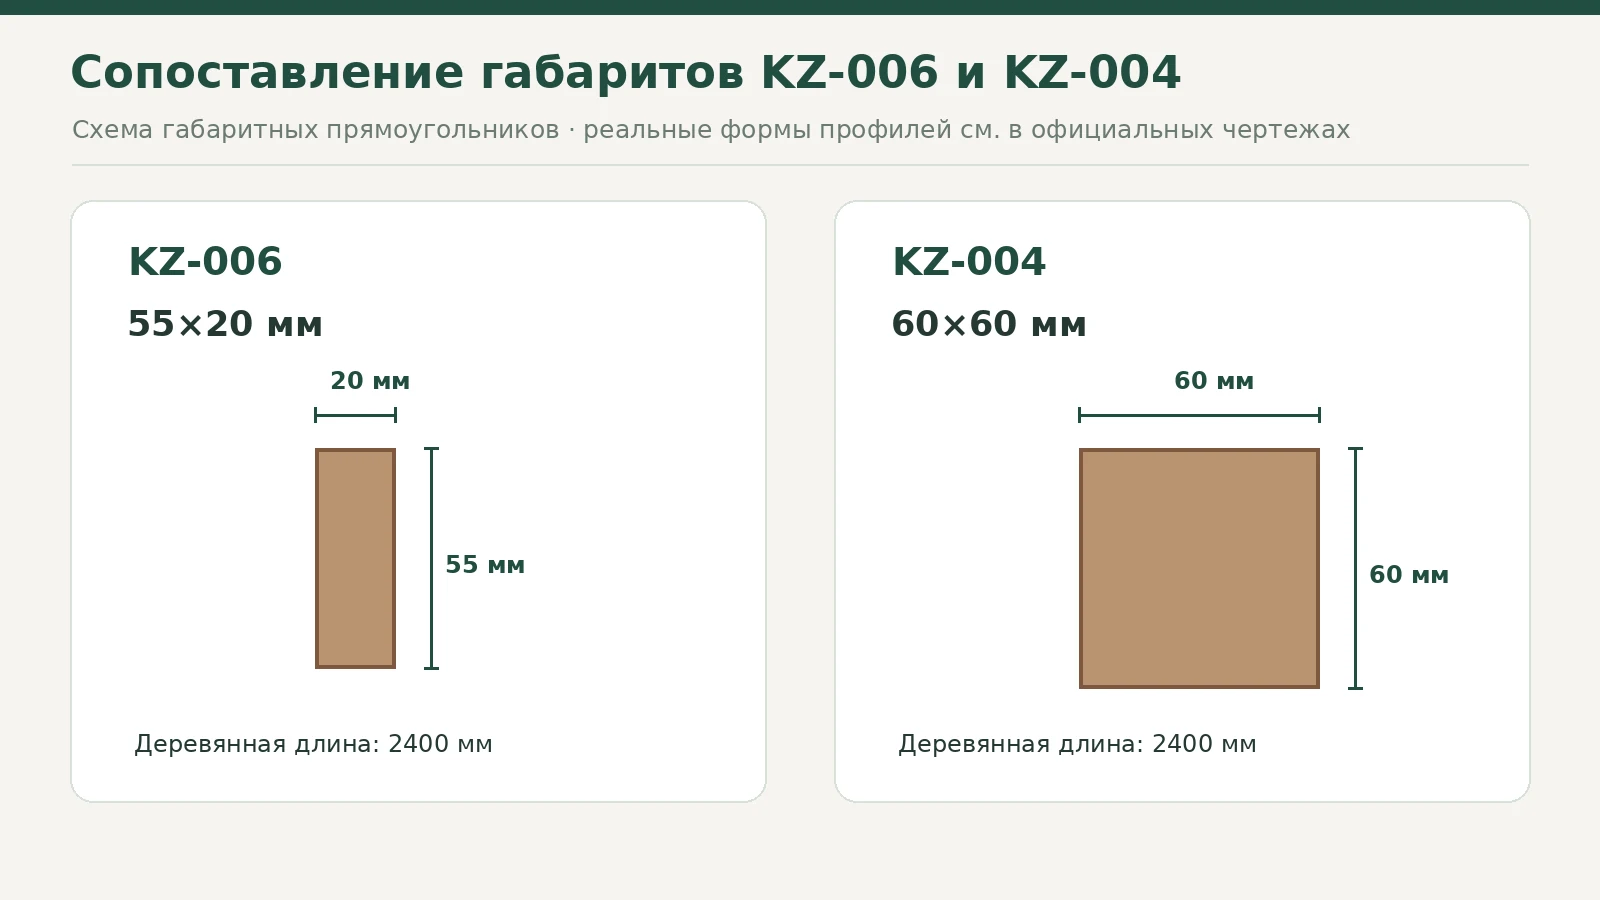
For KZ-006 in the wooden version, the cross-section dimensions are 55×20 mm. The factory length of the beech or oak strip is 2400 mm. The contour looks relatively compact: at the wall-to-ceiling joint, a wooden line appears without a significant protrusion into the room. For the purchase, both cross-section figures matter, not just the height. A smaller depth sometimes leaves more freedom near hinged fronts and ceiling finishes, although the final clearance is still checked against the actual drawing.
KZ-004 has a cross-section of 60×60 mm with the same wooden strip length of 2400 mm. Visually, this is a different solution: the profile plays a more noticeable role in the transition between the wall and the ceiling, and its line is offset from the corner differently. If the wardrobe doors reach almost to the ceiling, the geometry of such a cornice can be decisive. Five millimeters of difference in one direction does not reflect the whole picture: in the other direction, the difference between the stated dimensions reaches forty millimeters.
To buy a wooden cornice KZ-006, open the manufacturer's listing and select the beech or oak version. For the KZ-004 model, use a separate listing and do not treat it as a dimensional modification of KZ-006. These products have their own shapes and supply options. You cannot substitute one for the other once the marking has been done: you would have to change the junction line and the work with the corners.
| Characteristic | KZ-006, solid wood | KZ-004, solid wood |
|---|---|---|
| Cross-section | 55×20 mm | 60×60 mm |
| Factory strip length | 2400 мм | 2400 мм |
| Wood species for the main calculation | Beech, oak | Beech, oak |
| Beech price per strip | 3 530 ₽ | 4 580 ₽ |
| Price of oak per strip | 5 040 ₽ | 6 630 ₽ |
| What to check especially on a wardrobe | The junction line and the visible end face | Profile depth and opening of the fronts |
Prices apply only to wooden versions and were recorded from the official pages on 15 November 2026. The price does not include the decorative finish, fasteners, transport, packaging or the craftsman's labour. The MDF versions 2600 mm long presented in the catalogue are not included in the comparative estimate. This is not an assessment of MDF quality — simply a separate product and calculation task.
The shape of the front surface also matters. The KZ-006 contour will produce one rhythm of light and shadow, KZ-004 another. People rarely look at a ceiling cornice only up close. It is seen together with the doorway, the top of the wardrobe and the ceiling line. On a long wall even a small profile forms a distinct line. That is why the sample should be placed at the intended installation height, not chosen on a table by the size of a picture.

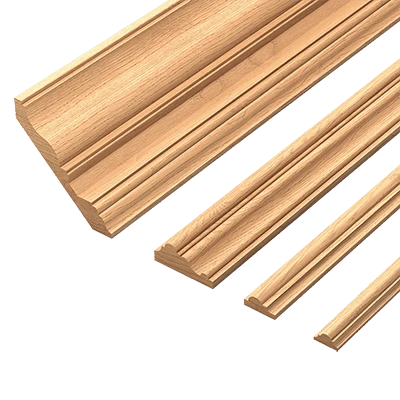
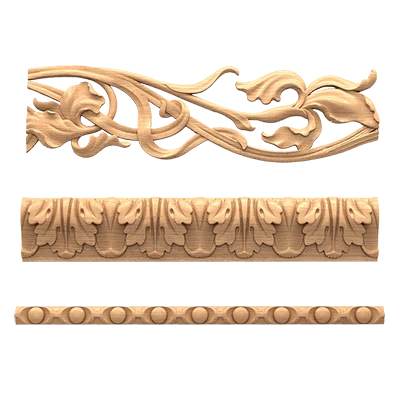
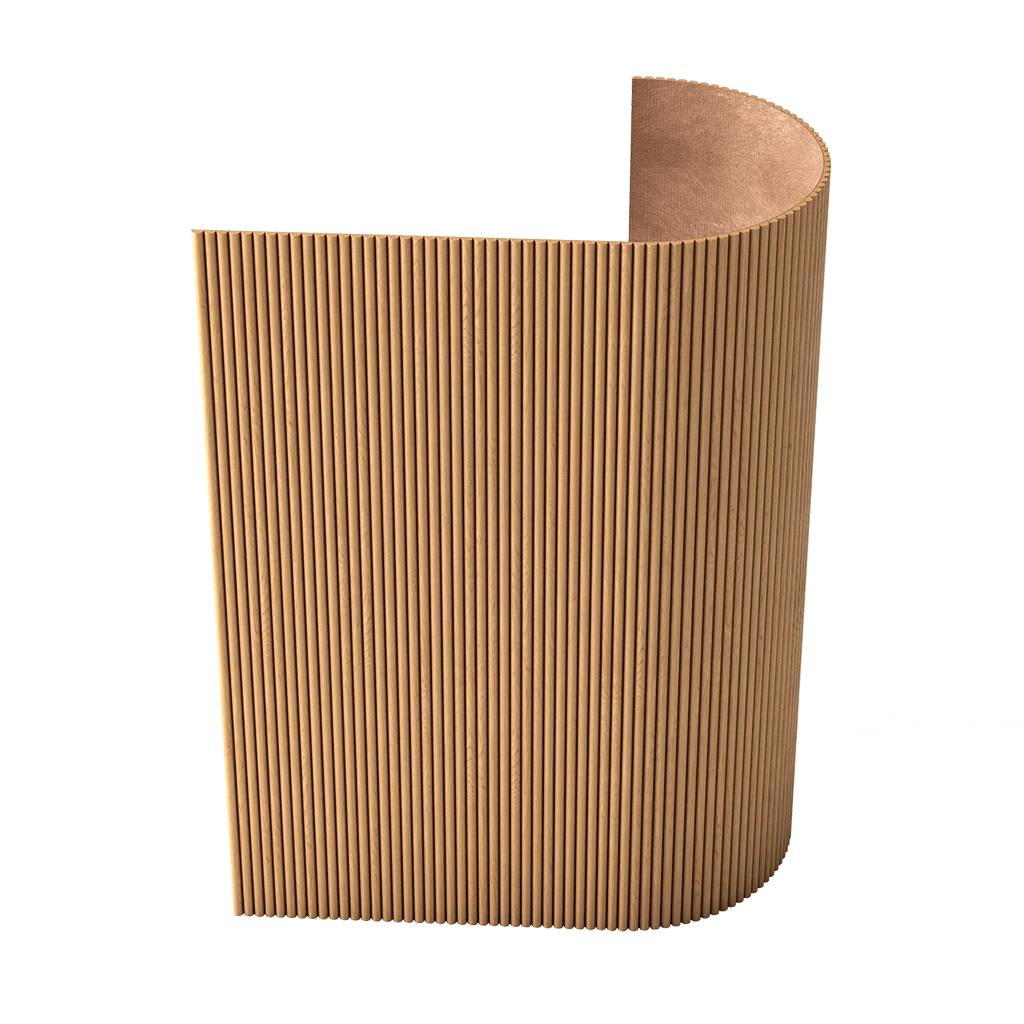
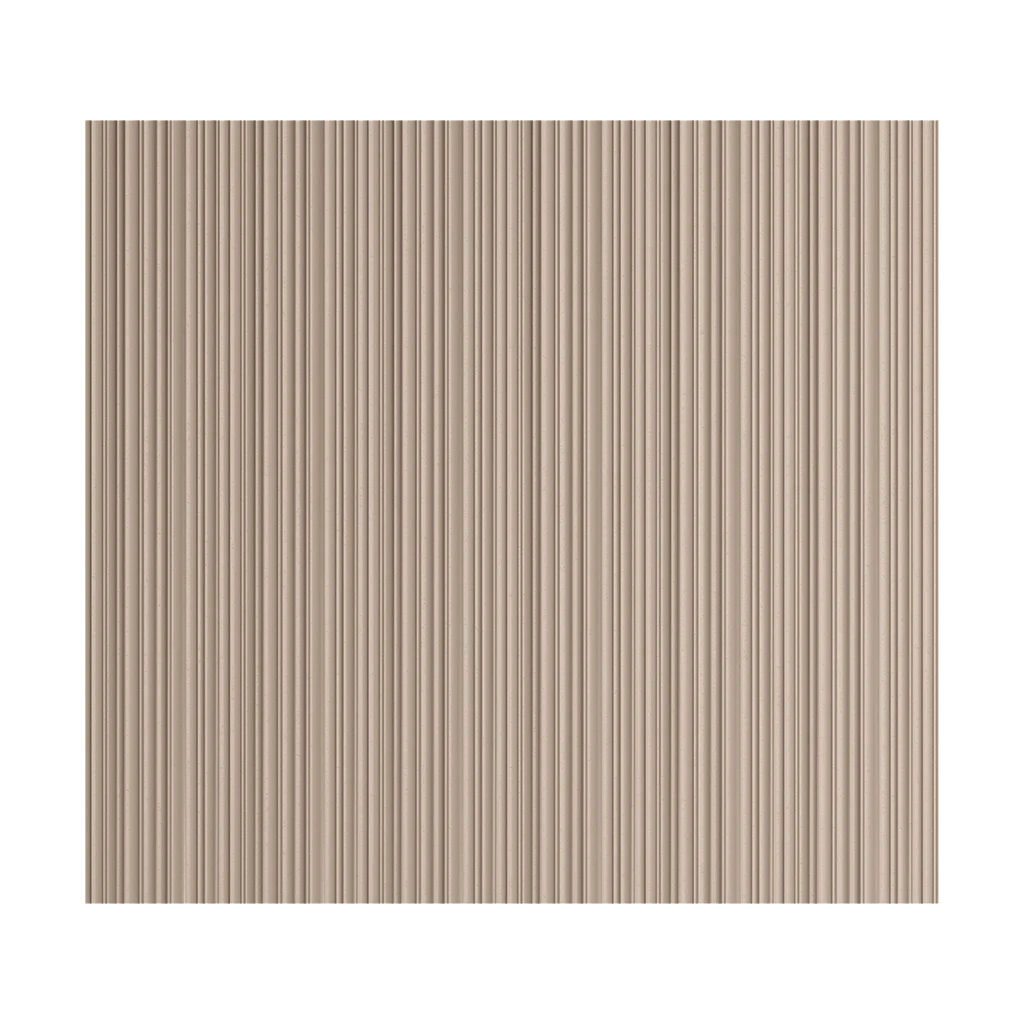
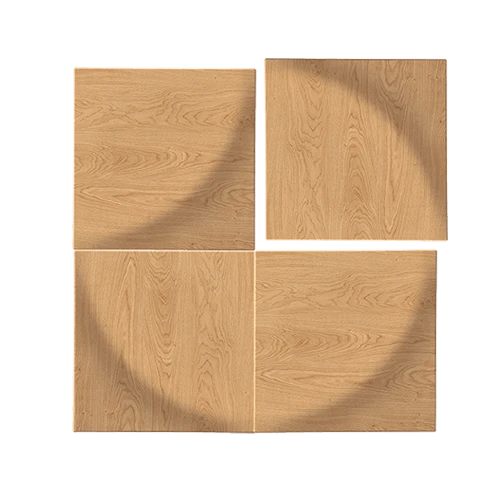
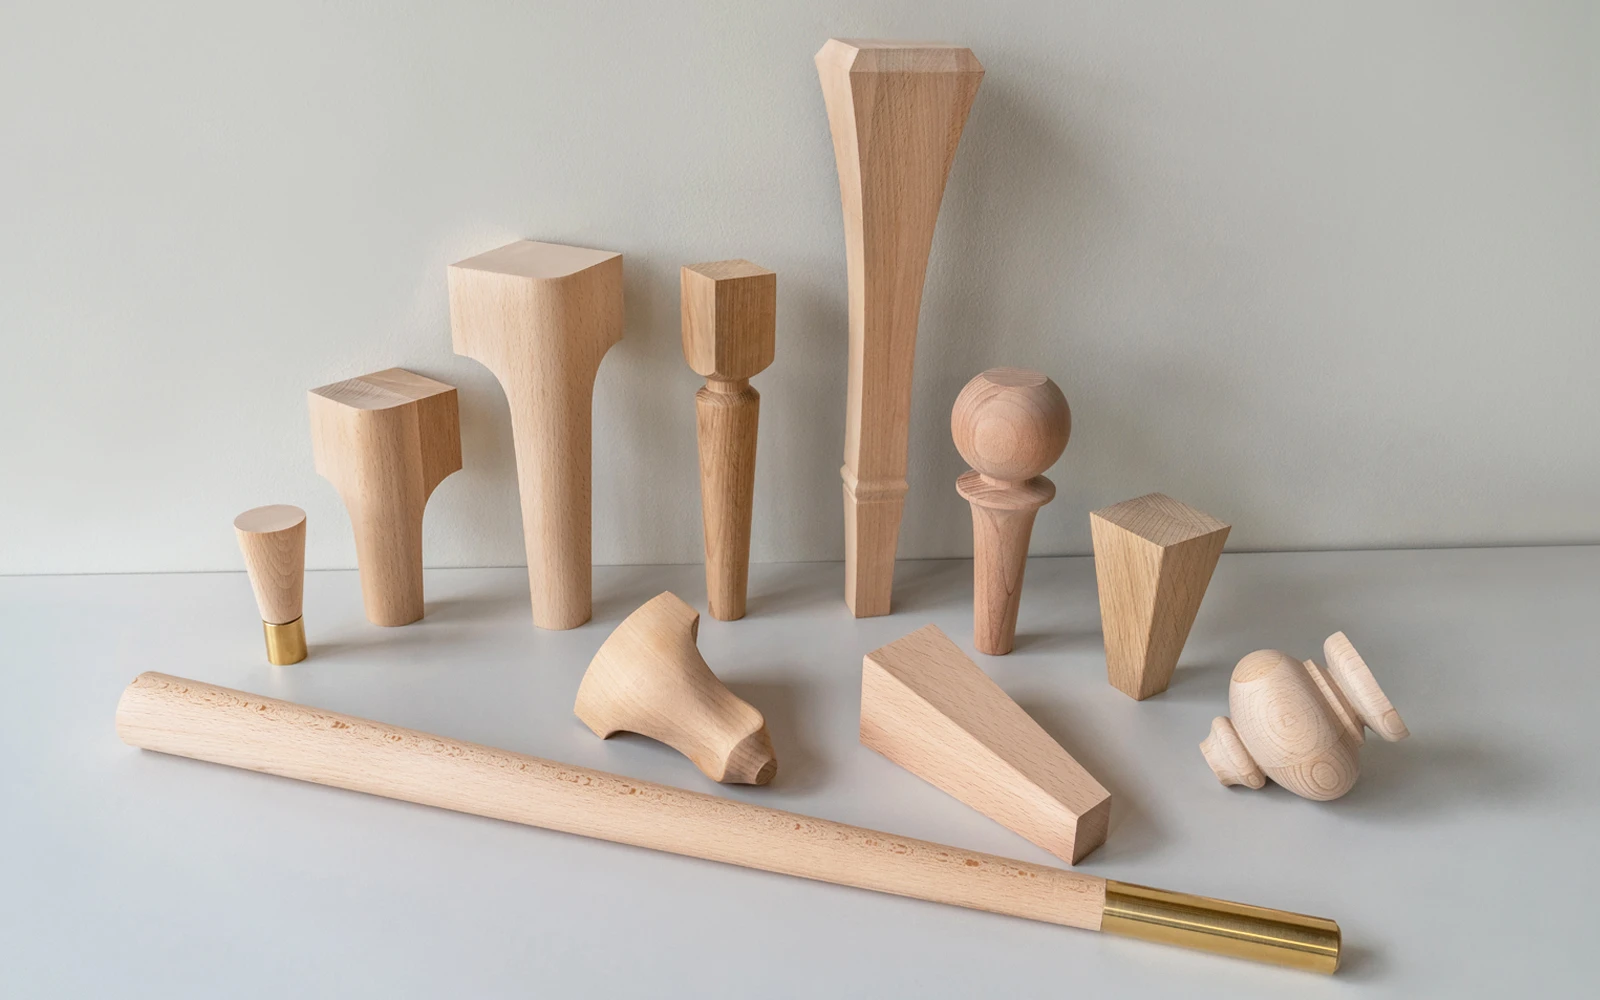
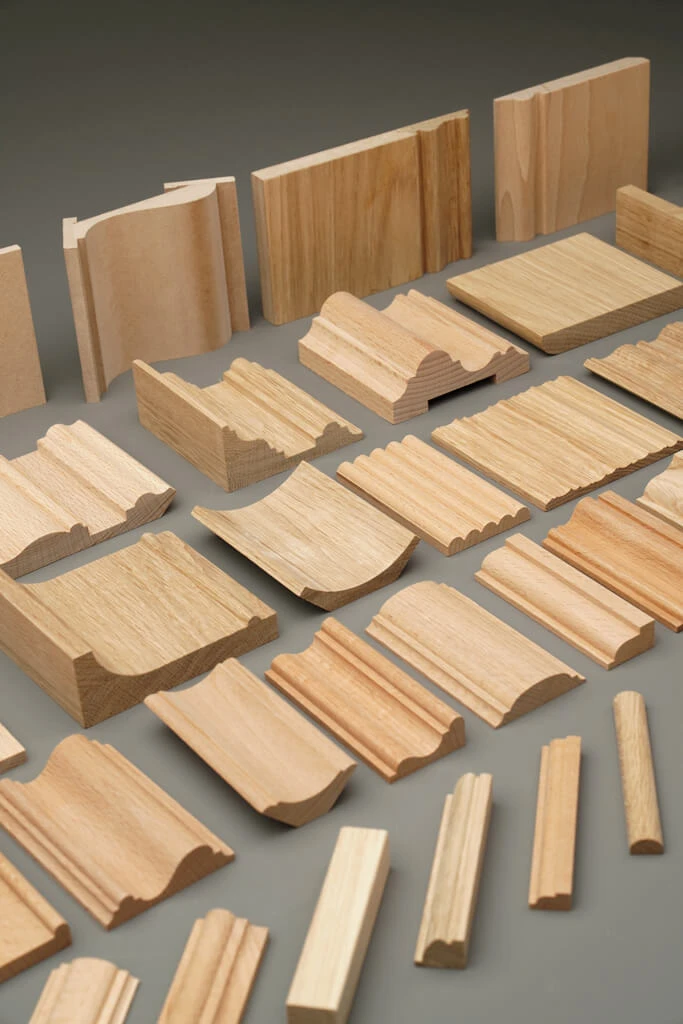
Our factory also produces:
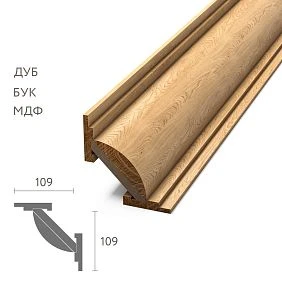
A decorative ceiling cornice is not a curtain rod
The confusion begins already at the search stage. The phrase "wooden cornice" may mean a round rod for curtains, a furniture top rail, a ceiling moulding or a profile for joining finishes. For a purchase, it is important to state the purpose before the material. If the task is to hang drapes on a window, load-bearing elements capable of taking the weight of the fabric and appropriate fittings will be required. The KZ figured wooden cornice should not be used as a replacement for such a system without a structural design.
In the living room from our example, the window can be finished with a separate curtain recess. The decorative cornice then completes the walls where the recess allows it to be installed, or ends before it. This is another possible break in the perimeter that is not in the tutorial schedule. If a recess is present, the list of segments must be drawn up again: the previous seven and six strips are no longer considered a verified quantity.
A furniture cornice installed directly on top of a wardrobe is also not necessarily a continuation of the ceiling KZ. It may have a different geometry, be fixed to the carcass, and take into account removable false panels and door opening. Sometimes such a solution is better precisely because the furniture can be serviced. But a furniture top and a wall ceiling profile cannot be mixed in one order line: they may have different dimensions, fixings and joint requirements.
Therefore Buy wooden ceiling cornice should only be done after choosing the purpose. For our scenario, we need not fabric guides but wooden architectural trim for the transition between the wall and the ceiling. It is the number of its planks that we are counting.
Get Consultation
Oak or beech: what differences will the buyer notice after finishing
Oak is often chosen for its pronounced wood grain. With a clear finish, individual fibers and cut areas can create shade differences even on planks from the same batch. This is no reason to consider the entire material inconsistent in quality: natural grain does not have to repeat like a printed pattern. On a continuous ceiling contour, the difference in texture is especially noticeable in side light, when the eye reads a long horizontal line along several walls.
Beech is usually perceived as calmer in pattern, but its natural color does not equal a guaranteed shade after the chosen lacquer or stain. Two samples of the same species may differ in tone. To avoid a noticeable transition when joining, agree on a test finish on the material from which the order is planned. If the contour is painted in the color of the walls or ceiling, compare first of all the profile shape and the requirements for preparation under enamel.
The difference between species does not automatically turn into a difference in installation tolerances. Both species under consideration are natural wood; it changes dimensions when air humidity changes. For long continuous trim, it is necessary to take into account the condition of the base, the room conditions, the properties of the adhesive, and the fixing methods. It will be especially inconvenient to eliminate a defect on a plank that has been rigidly clamped between the wall, a cabinet, and a stretch ceiling. The condition for free movement of the structure should be discussed in advance with the installer, rather than trying to fix it after gluing.
Choose oak cornice KZ-006 makes sense if the solid wood grain will actually be visible or if it must match wooden doors, slats, and furniture parts. When all the decor is painted with opaque enamel, check whether there is a practical reason to choose a more expensive species. Perhaps the project needs different surface preparation, but the decision is made after consulting on the properties of the specific order.
For painting and tinting, it is not enough to choose a word in the menu. Agree on who performs the finishing, whether the ends will be primed again after cutting, and when installation can be carried out. If the craftsman cuts finished lacquered planks, fresh open cuts appear at the corner joints. They must be treated according to the chosen technology. If the coating is applied after installation, it is important to protect the ceiling, furniture, and wall trim.
Built-in wardrobe up to the ceiling: where exactly the conflict arises
Let's imagine a living room measuring 4300×3300 mm. On one wall 4300 mm long, in the center, there is a built-in wardrobe 2300 mm wide; on the sides, sections of 1000 mm remain. The carcass is planned to be brought up to the ceiling. While it is not there, the wall cornice can be mentally continued along the entire length. Once the furniture is installed, the former line turns out to be covered by the carcass or its upper filler panel.
The first solution is to leave a closed loop behind the wardrobe. This is only possible if the finishing system and furniture installation are compatible in advance. In particular, you need to know whether the cornice will prevent the back of the wardrobe from sitting flush, whether it will cover the mounting fasteners, and whether the front panel can be removed and adjustments made. Concealed trim does not automatically become useful just because it closes the geometric line of the room on the plan.
The second solution is to end the cornice before the wardrobe on the left and right. You will need to agree on the appearance of the two open ends and their distance to the side panels. If the end of the profile is simply cut at a right angle in a visible place, the cross-section will be noticeable. For a complex shaped profile, it may look like a random break. Neat returns to the wall, furniture joints provided for by the design, or covering elements are possible. They cannot be chosen at random based only on a product photo.
The third solution is to create a continuous visible line along the wardrobe front by connecting the wooden ceiling cornice with the furniture top. This is a completely different junction: its support, finish, and ability to be disassembled must be designed together with the furniture maker. There is no such section in our training calculation, so it cannot be added to the estimate of six strips without a new schedule.
There is also the question of opening. Tall hinged doors often require free space in front of the top end, and lift-mechanism doors need their own trajectory. The large KZ-004 profile may interfere with such a trajectory where the more compact KZ-006 still leaves clearance. But a conclusion can only be drawn after checking the actual gaps and door construction. The stated 60×60 mm is the geometry of the product itself, not a ready permission for installation next to any furniture.
Discuss the finishing before the wardrobe is manufactured. When the furniture maker and the finisher work from different drawings, one allows for the ceiling clearance while the other allows for a continuous profile. Correcting such a mismatch after installation often requires redoing the front strip or making a new cut on finished wooden elements.
Which line to measure the ceiling cornice from
On a room plan, walls are shown as straight segments. However, the cornice has a three-dimensional cross-section, and the joint of two walls requires a cut. You can measure the length along the wall surface, along the inner corner, along the long edge of the front part, or along a special installation line. All these values do not have to match. For KZ-004 with dimensions of 60×60 mm, the difference between the sides is especially noticeable. Therefore, each measurement must have an explanation: along which line the figure was obtained.
If the installer first writes down 4300 and 3300 mm and then independently chooses the layout, they can use them as conditional calculation lengths for a preliminary order. But before the final cutting, the profile, joint, cut, and deviations of angles from 90 degrees must be checked. The training schedule below already assumes that the given values refer to finished straight parts for the selected line. It cannot be transferred to another profile without verification.
Near the wardrobe, you need to measure not only the width of 2300 mm but also the actual width of the visible section on the left and right after the side strips are installed. If, for example, a furniture filler strip takes up part of the wall, the stated 1000 mm will not remain the same. Even small changes matter: they change the position of the end and may require a different wall connection scheme.
Mark the ceiling height at each corner on the plan. In old finishes, the ceiling may have a slight level change; the shaped strip then begins to appear tilted relative to the furniture. You should not try to level out this impression by simply building up the adhesive layer. First choose the base line with a laser, then check what gap will result at the ceiling and how much of it can be compensated by the chosen technology.
Keep two schedules. The first contains the actual dimensions of all finished parts after corner alignment. The second shows how parts are distributed across factory stock lengths of 2400 mm. The first is for the installer, the second determines purchasing. It is precisely the mixing of these documents that leads to erroneous formulas, where the entire perimeter is simply divided by the length of one blank.
Option A: a full cornice along the four walls of the living room
With a closed loop, the length of the two long walls is 4300 mm each, and the two short walls are 3300 mm each. The preliminary perimeter is 2 × 4300 + 2 × 3300 = 15,200 mm. At this stage it is easy to divide 15.2 meters by 2.4 and get 6.34, that is, round up to seven stock lengths. The number matches our purchasing schedule, but such a division by itself proves nothing. The proof is the actual cutting plan: all the required straight parts must come out of seven blanks.
A 4300 mm long wall can be made from two 2150 mm segments with one straight transverse joint at an agreed location. There are two such walls, so four 2150 mm parts are needed. Each requires its own 2400 mm source stock length: two 2150 mm pieces do not fit into one. We will split the 3300 mm short wall into sections of 2200 and 1100 mm. There are also two short walls, so this gives two 2200 mm parts and two 1100 mm parts.
An important technique involves the pair of short segments. Two times 1100 mm is 2200 mm in total, and together with a nominal 3 mm saw kerf that is 2203 mm. Such a pair fits into one factory blank 2400 mm long. Two 2200 mm segments, by contrast, will each require a separate stock length. The purchasing scheme is 4 + 2 + 1 = 7 blanks.
| Parts of the full loop | Number of finished parts | How we distribute across 2400 mm blanks | Planks |
|---|---|---|---|
| 2150 мм | 4 | One part per strip | 4 |
| 2200 мм | 2 | One part per strip | 2 |
| 1100 мм | 2 | Both parts from one strip | 1 |
| Total | 8 | Finished length 15,200 mm | 7 |
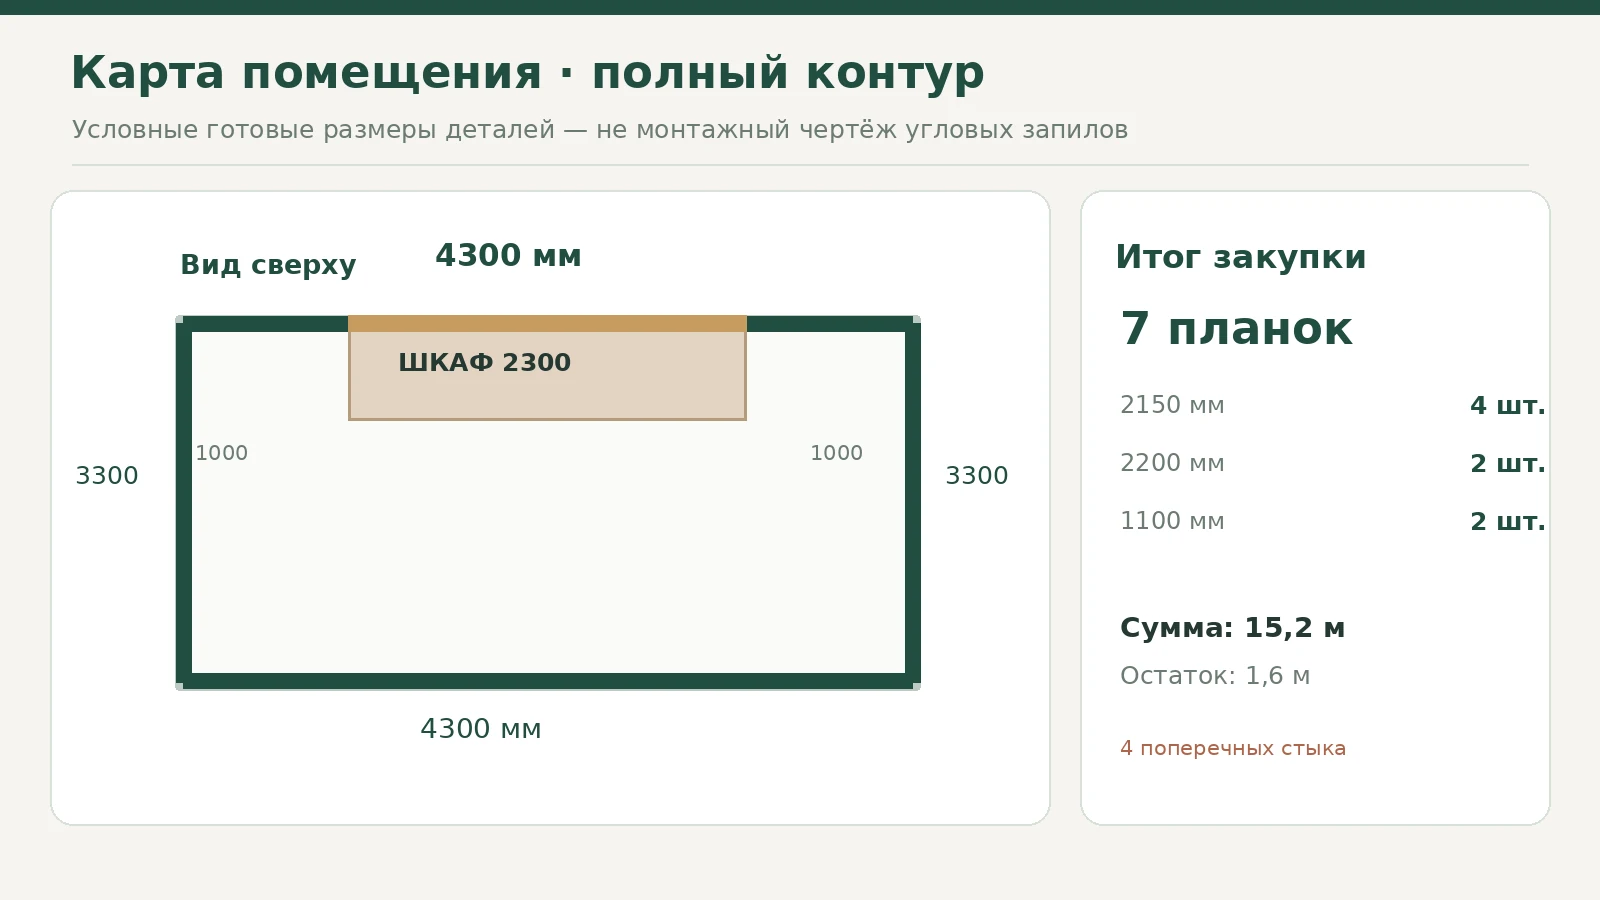
The nominal purchase will be 7 × 2400 = 16,800 mm. The difference from the finished length of 15,200 mm is 1600 mm. It is distributed among the remnants of individual blanks and does not represent one usable strip. Part of this reserve will go to end trimming and kerf width. If, for example, one segment at a corner turns out longer due to a cut along the outer edge, the amount of the remainder will change. Therefore, the stated 1600 mm is an accounting difference, not a promised volume of usable material after installation.
The full contour has a visual advantage: when installed correctly, the line does not end at the sides of the cabinet. However, part of the 2300 mm wide profile may be hidden behind the furniture. The customer pays for this section too, even if it will never be visible from the room. For the solution to make sense, it is necessary to confirm that the cabinet body does not conflict with the cornice and does not cover fastenings that require servicing.
Check the transverse joints on long walls separately. Two halves of 2150 mm do not provide a "strip without a joint." If a continuous front surface along the entire wall is mandatory, the original 2400 mm products do not solve this task on their own. A different design, a different factory length, or an agreed decorative method of joining is needed. Do not promise the customer that seven strips will produce four visually seamless walls.
Option B: do not run the cornice behind the cabinet
In the second option, the cornice runs along three walls and along two open sections of the fourth. A 2300 mm wide wardrobe occupies the middle of the 4300 mm long wall, leaving 1000 mm at each of its edges. Therefore, the total length of the wooden trim is 15,200 − 2300 = 12,900 mm. The difference from the first project is 2300 mm, but the purchase is reduced by only one strip, not by an arbitrary number of meters.
Two 2150 mm parts that made up the wall in front of the wardrobe disappear from the full project. Instead, two visible straight sections of 1000 mm each will appear. The remaining lengths stay the same: two 2150 mm parts for the opposite long wall, two 2200 mm and two 1100 mm parts for the short walls. In our preliminary bill of materials there are eight finished parts in total — the same number as with the full perimeter, but a different set of lengths.
Two 1000 mm parts are made from one blank. We will allow a nominal 3 mm saw kerf between them; in total this is 2003 mm, which fits within 2400 mm. The pair of 1100 mm parts also fits into one blank. The long elements require four separate strips. Total 2 + 2 + 1 + 1 = 6.
| Perimeter parts without the wardrobe | Number of parts | Layout | Factory strips |
|---|---|---|---|
| 2150 мм | 2 | Two separate | 2 |
| 2200 мм | 2 | Two separate | 2 |
| 1100 мм | 2 | One shared | 1 |
| 1000 мм | 2 | One shared | 1 |
| Total | 8 | Trim length 12,900 mm | 6 |
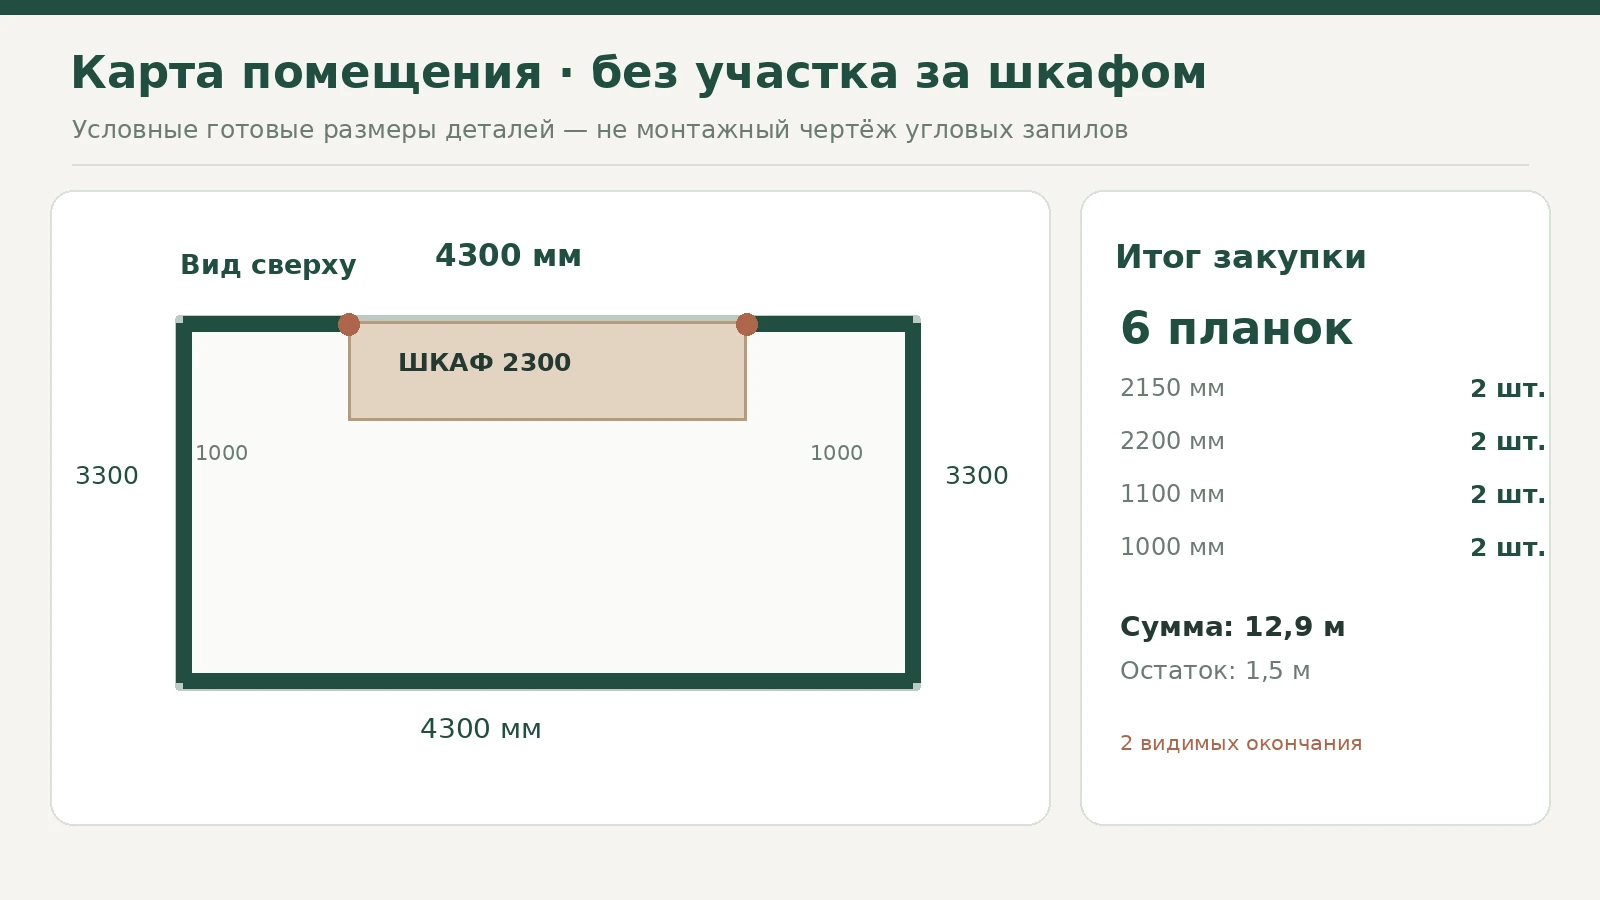
Nominally purchased 6 × 2400 = 14,400 mm wood. The accounting remainder is 1500 mm before deducting losses for saw cuts and final fitting. It is 100 mm less than in the first option, although the purchase has been reduced by 2400 mm. Here it becomes clear why looking only at the waste percentage would be a mistake. We excluded the hidden section and thereby removed an entire blank from the order.
| Indicator | Full contour | Without the section behind the cabinet |
|---|---|---|
| Finished cornice length | 15,200 mm | 12,900 mm |
| Strips 2400 mm long | 7 pcs. | 6 pcs. |
| Purchased length | 16,800 mm | 14,400 mm |
| Nominal difference before saw cuts | 1600 мм | 1500 мм |
| Ends near the cabinet | No exposed ends | Two visible ends |
| Main limitation | The hidden part must be compatible with the cabinet | Matching terminations are required |
The open layout comes with its own cost that is not in the purchasing table: two visible terminations next to the cabinet. Their finishing requires agreement on the profile, the termination method, and the labor intensity. If additional pieces are needed for a neat return of the cornice, they must be added to the new cutting map. The conditional six strips are calculated for the listed straight parts without separate returning elements.
This layout is only suitable when the furniture truly forms a meaningful boundary of the decorative line. If the cabinet is to be dismantled or its width changed, an unfinished part of the wall and ceiling will be exposed behind the remaining ends. For a temporary cabinet, it is better to assess whether it is worth breaking the permanent ceiling decor for the sake of one strip.
Checking the cutting map: why seven and six are not just rounding
For purchasing long linear stock, a small placement problem needs to be solved. We have factory strips of the same length, 2400 mm, and a list of required parts. The rule is simple: no group of segments that we want to obtain from one blank must exceed its length after accounting for saw kerfs and the necessary clean end trimming.
In the full contour, four parts of 2150 mm and two of 2200 mm require six separate blanks. The remaining 1100+1100 fit into the seventh. In the open contour, two parts of 2150 mm and two of 2200 mm occupy four blanks; one more is used for 1100+1100, and the last for 1000+1000. This explains the difference in quantity without resorting to the approximate "ten percent reserve."
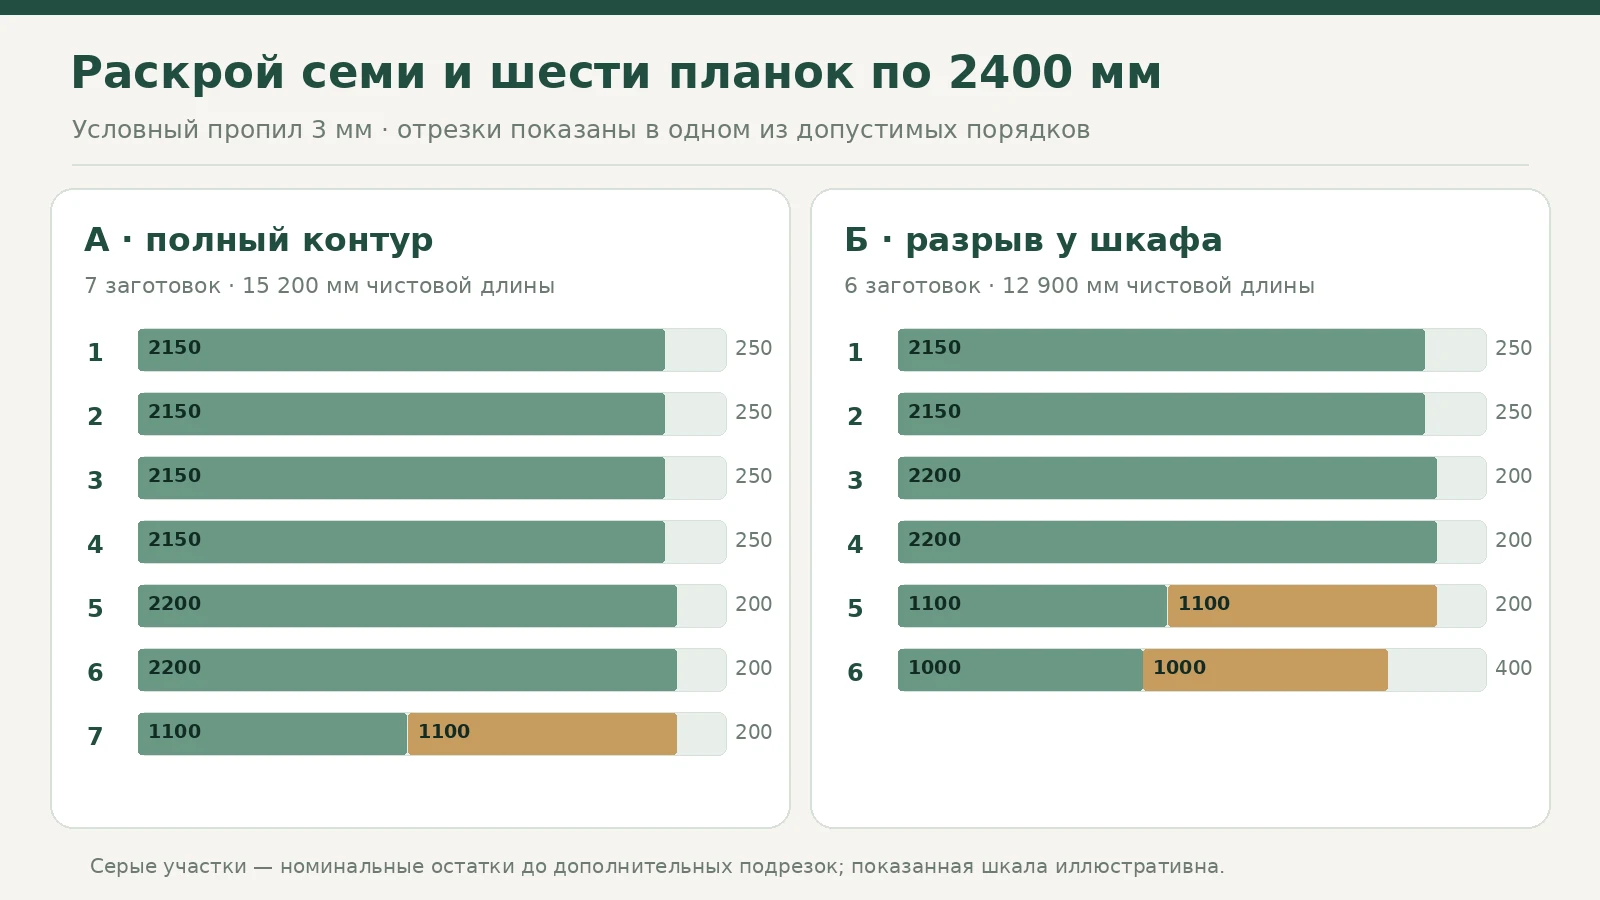
In the training example, the saw kerf width is taken as 3 mm. This is not a characteristic of the STAVROS tool and not a universal standard: the actual loss is determined by the blade used and the chosen cutting sequence. The sum 1100+1100+3 equals 2203 mm; a reserve of 197 mm remains for other trims. For two parts of 1000 mm with one separating kerf, the reserve is 397 mm. The technologist who makes additional clean end cuts must subtract those as well.
But there is a less obvious subtlety. If the 2150 and 2200 mm lengths are not measured along the same profile face that the craftsman cuts along, the actual length of the workpiece may turn out different. For a ceiling cornice, angled trimming is often needed at inside corners, and the shape of the front face determines which edge will be the long one. Profile KZ-004 with a depth of 60 mm and profile KZ-006 with a depth of 20 mm cannot be automatically marked out using the same template without checking the drawings.
Also check whether the remainder can be reused. A 200 mm offcut left after a 2200 mm part will not suit every end face. If the cabinet is to have a short return to the wall, first draw its actual shape and see whether it can be made from the remainder while preserving the grain direction and enough length for a safe cut. You cannot treat any offcut as a resource for future elements simply because it has a non-zero length.
There is also a production sequencing question. Sometimes the craftsman cuts the long elements first, leaving the shortest ones for last so as not to waste material if an unexpected defect occurs. For two short parts calculated from a single blank, it is sensible to mark out both pieces and the control allowance before the first cut. If one element is cut “roughly to place,” the second may no longer fit. That is why the parts list is better passed on together with the cutting plan, not just with the total number of metres.
Mitre cuts and actual length: where the preliminary layout may fail
On paper, a 3300 mm wall easily splits into 2200 and 1100 mm. On site, both ends of that line may adjoin neighbouring cornices via an angled mitre cut. Then measurements along the long, short or mounting edge will give different numbers. You cannot cut exactly 2200 and 1100 mm just because they are printed in the table. Before cutting, the craftsman must place the actual profile in its working position, mark its top, bottom and room-facing side, then check the dimensions on site.
There is a difference between an internal and an external corner. An internal corner usually forms the junction of two walls of the room; an external corner appears at a projection, column or niche. Even if both are shown as right angles on the plan, the direction of the long edge of the part will differ. For a room with a simple rectangular outline, internal corners are considered. If the actual project has protruding shafts or furniture corners, the preliminary layout must be recalculated.
Allow for wall curvature. A wooden profile can conceal minor visual irregularities, but it must not replace proper preparation of the substrate. If the ceiling has a noticeable slope, the gap along the long wall cannot be eliminated simply by adding a centimetre to the length of the part. A new baseline and an agreed method of junction are needed. After levelling, the position of the future joint may change, so a cutting map made before the finishing works remains preliminary.
For transverse joints on long walls, decide where the seam will run. An even geometric division in half is not always the least noticeable. In one interior it is better to move the joint away from bright side lighting, in another away from the place where a person most often looks at the wall. But the joint can only be shifted while cutting remains possible. For example, two 2150 mm sections for a 4300 mm wall will certainly fit into two blanks, whereas the 2500+1800 mm option is already impossible from a standard 2400 mm strip.
The practical check consists of three separate actions. First, the craftsman marks out the cornice lines in the room. Then he applies a sample of the profile and chooses the method of joining internal corners and visible end faces. After that, he refines the finished dimensions of each part and repeats the calculation of the number of factory strips. Only this order connects arithmetic with installation reality.
Can a different profile change the number of strips?
With the same factory length and the same finished dimensions of the parts, the purchasing scheme for KZ-006 and KZ-004 comes out the same: seven or six strips. However, the phrase “the same finished dimensions” conceals an important condition. Different sections may require different lengths along the outer edge of the mitre cut. If the project has almost no installation allowance left, especially on the 2200 mm part, this affects the cutting decision.
For KZ-006, the profile has a compact depth of 20 mm. On certain cabinet and ceiling components, this dimension helps avoid protruding into the facade area, although it also depends on the cross-section shape. For KZ-004, the 60 mm depth requires a separate check of where the front edge will end up. The interior wall corner may be the same, but the visible junction and the measurement point of the parts differ.
Before ordering, compare the technical drawings of both profiles. They should be checked not only for the stated dimensions but also for the orientation of the section. If the drawing shows a nominal position, the installer must confirm the actual installation method. The shaped profile must not be rotated to reduce the visible depth if such an orientation is not provided for by its design and fastening.
If the calculated section has a finished length of 2350 mm, the margin in a standard blank is only 50 mm before any trimming. For our example, the longest part at 2200 mm nominally leaves 200 mm. This is more convenient, but it does not replace checking the cuts. If the chosen decorative treatment of the cabinet adds a short return to a straight part, it will need to be assessed as a separate part. It may fit within the existing offcut, or it may increase the number of strips required.
Therefore, a more expensive profile does not necessarily require more wood. But it is also impossible to promise the same material requirements for any profile. We are comparing two specific models within one preliminary geometry; the final purchasing list must be approved after checking both installation options.
How much do six and seven wooden cornices cost?
The clearest result for the buyer is obtained when all four versions are consolidated into a single table. Let us take the confirmed prices per 2400 mm wooden strip and multiply them by the number of blanks in each project. Below is the cost of the cornices themselves as of the verification date of November 15, 2026, excluding delivery, packaging, fasteners, finishing, and installation.
| Product and species | Price of one plank | Full perimeter: 7 pcs. | Without the section behind the cabinet: 6 pcs. | Savings on products |
|---|---|---|---|---|
| KZ-006, beech | 3 530 ₽ | 24 710 ₽ | 21 180 ₽ | 3 530 ₽ |
| KZ-006, oak | 5 040 ₽ | 35 280 ₽ | 30 240 ₽ | 5 040 ₽ |
| KZ-004, beech | 4 580 ₽ | 32 060 ₽ | 27 480 ₽ | 4 580 ₽ |
| KZ-004, oak | 6 630 ₽ | 46 410 ₽ | 39 780 ₽ | 6 630 ₽ |
The difference in the number of blanks is the same across all four rows: one fewer strip is purchased. The difference in rubles varies only because of the cost of the selected product. It should not be stated that the savings equal the same amount in any project. For KZ-006 in beech, this is 3530 ₽, and for KZ-004 in oak, 6630 ₽ at the stated prices.
It is useful to compare not only the cost of the models but also the limits of the comparison. Seven beech KZ-006 come to 24,710 ₽. Six beech KZ-004 — 27,480 ₽. Even dropping the concealed section does not automatically make the larger profile cheaper than the compact one. The buyer must first decide which silhouette the room needs and whether it is compatible with the wardrobe, then look at the price difference.
A particularly common mistake is to see the starting price in the KZ-004 product card and multiply it by six. The starting value may refer to MDF, which in the card in question has a length of 2600 mm and a different finish. According to the conditions of our task, wooden strips of 2400 mm are being purchased, which means that for six beech KZ-004 the calculation is 6 × 4580 = 27 480 ₽, and not six starting prices.
The final order total will differ from the one given. The cost of surface preparation and finishing, protective packaging, transport to Penza, possible additional short parts and installation are clarified separately. The official product cards mention a rigid packing frame; the specific number of frames and the size of the final surcharge should be clarified when the order is placed. Do not add the same conditional packaging cost to every item without confirmation of the pricing logic.
If the craftsman suggests purchasing one more spare strip, ask them to specify which risk it is intended for: a complex mitre cut, possible defects during tinting, a long part with little remaining stock, or planned end finishing. A reserve is acceptable when it is justified, but it is already a separate line in the estimate. Seven and six are baseline scenarios, not a promise of execution without any risk and additional material.
How to neatly finish the cornice next to a tall wardrobe
An open layout has two places that are hard to hide from view: the left and right ends at the wardrobe. If you take a two-metre board and simply saw it across, a visible cross-section of the wood will appear. On a shaped ceiling profile it reveals all the transitions of the relief and may be perceived as unfinished work. Therefore, before ordering, you need to decide whether the end will go towards the wall, be covered by the side panel of the furniture, or adjoin a special part designed for this junction.
The simplest visual option is to finish behind the cabinet plane, when the end is not visible from the main viewing direction. However, this is only acceptable with a pre-defined wardrobe geometry. Do not count on two side panels hiding the cut edges equally: the wardrobe may have unequal filler panels, and the exposed part of the wall on the left and right differs after the furniture is finally installed.
Another option is a short return of the cornice to the wall. Such a part does not continue the line along the length of the wall; it returns the shaped profile, closing its cross-section. Technologically, the return may require several precise cuts on a very short piece. It cannot be cut and installed like ordinary long moulding: safe fixation during processing and enough material for support are needed. It is deliberately not included in our baseline table because its size is unknown. If the solution is agreed, add two returns as a separate line in the cutting map.
For built-in furniture, a transition through the wardrobe's front panel is sometimes made. It allows the wall finish to be visually linked to the furniture, but the fastening and load transfer from the wall to the furniture carcass. Before fixing a wooden ceiling cornice, find out whether the wardrobe can be dismantled for repairs, whether access to hidden wiring is required, and whether the furniture structure will change its dimensions independently of the wall. Rigidly gluing elements on different bases without a well-designed junction can create problems after installation.
If it is decided buy wooden cornice KZ-004 specifically for an open profile, start with a drawing of its 60×60 mm cross-section. It makes it easier to understand which side will be in contact with the furniture and which forms the visible edge. The same principle applies to KZ-006, but a different shape means different return dimensions. You should not buy two random corner elements in advance, assuming compatibility based on the shared series name.
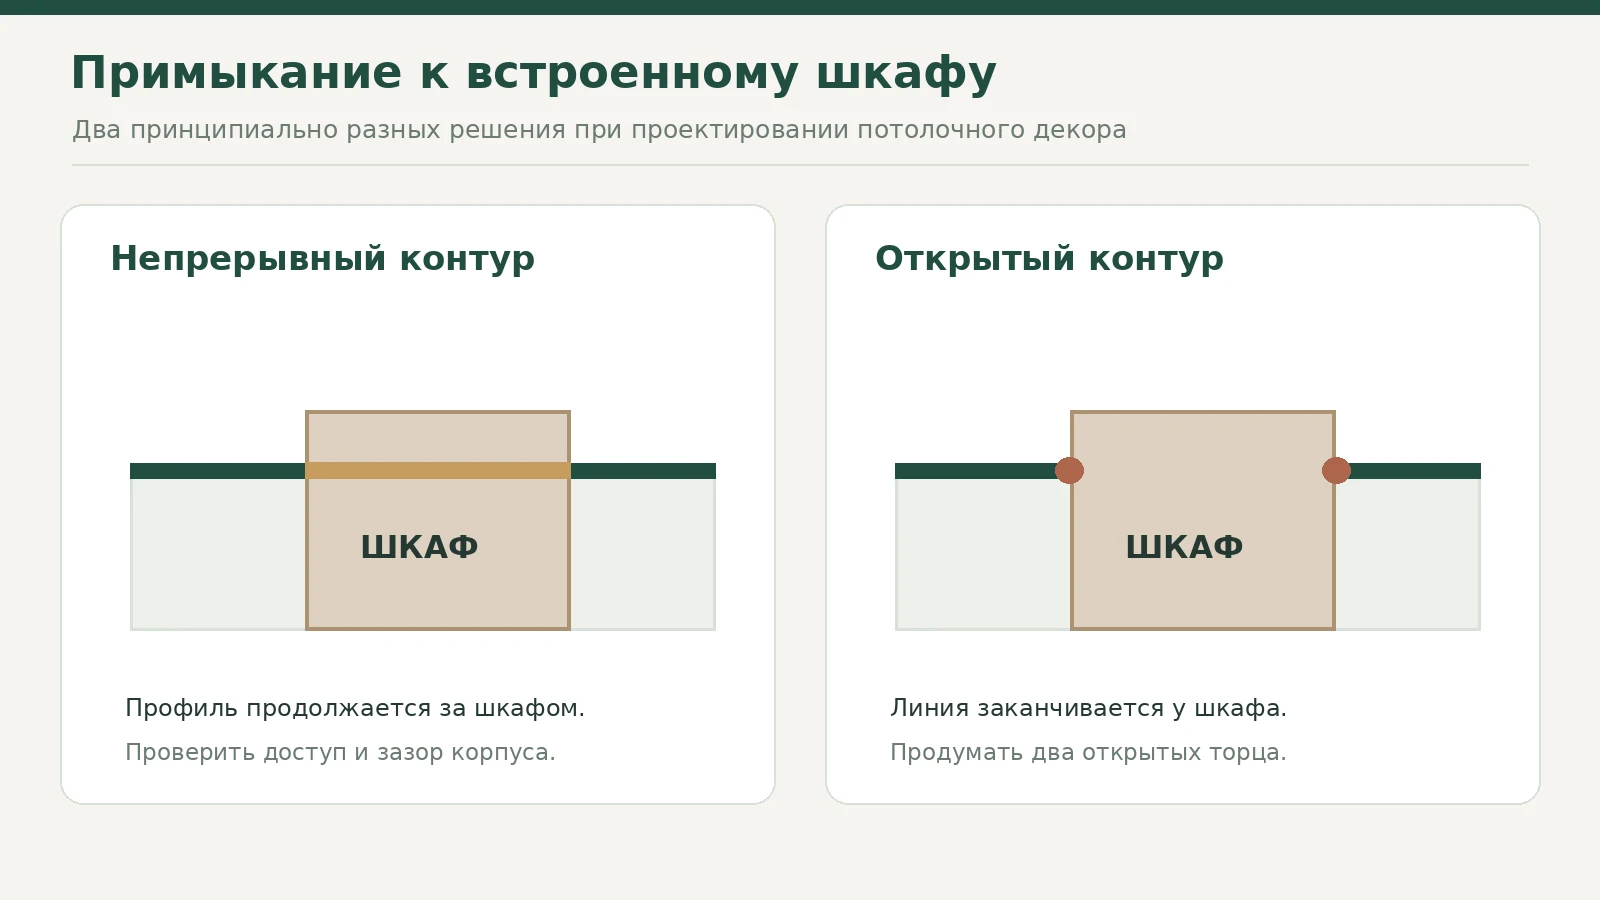
Do not forget about the top of the cabinet. If a removable decorative filler is installed there, it may cover not only the furniture gap but also access to the cornice fastening. Decide how the element will be removed without damaging the painted surface. This small detail does not affect the price of seven straight strips, but it directly affects how convenient the furniture is to use.
How to choose the height and depth of a cornice for a room with a wardrobe
The KZ-006 profile measures 55×20 mm in the wood version under consideration. KZ-004 measures 60×60 mm. Both models belong to decorative ceiling mouldings, but their visual effect is different. The compact profile is easier to perceive next to smooth fronts and thin casings. The deeper one makes the transition between ceiling and wall more noticeable, forming a standalone architectural band. This is an observation about geometry, not a universal rule of taste.
Look at the room height, but do not limit yourself to it. Even with a 2700 mm ceiling, a large decorative cornice can be appropriate if the room already has tall door surrounds and an expressive furniture top. In a room with nearly flat fronts, the same profile sometimes looks out of place. It is best to compare three adjacent lines: the top of the cabinet, the cornice along the wall, and the top of the door casing. If one of them protrudes significantly, the balance may change.
The top of a hinged door matters. Suppose the gap between the front and the ceiling on the plan is 40 mm. This does not mean that a 60 mm deep ceiling profile will necessarily fit: it may enter the door leaf's movement zone. First, the furniture maker should show the actual opening trajectory. Then the cornice cross-section template is applied and it is checked whether the front passes without contact. Sliding doors and lift-up fronts require their own checks.
If the finish is planned to match the furniture color, compare the shade under different lighting. The color of white enamel on a wooden part and on a factory laminated board is not always perceived the same way due to texture and gloss. Oak or beech under a clear finish, by contrast, can deliberately contrast with painted fronts. But such contrast needs to be continued in at least one other interior detail if the design intent requires it; you should not choose a wood species solely by price.
For a custom project KZ-004 solid oak cornice may turn out to be a good match next to oak wall panels, and beech ceiling cornice KZ-006 — with a calmer finish. But no single species should be called universally best: you need to check a sample, the shape, the operating conditions, and whether the entire batch can be coordinated.
Installation: what to prepare before receiving the long planks
Start by checking the base. A wooden ceiling cornice is not a way to hide serious irregularities in the wall geometry. A wavy surface can leave a gap, and a corner that noticeably deviates from a right angle will not allow two standard mitre cuts to meet without adjustment. First establish a baseline with a laser level and measure the deviations, then prepare the surface so that the mounting compound works within acceptable limits.
The type of fastening depends on the wall and ceiling material, the weight and cross-section of the profile, the condition of the plaster, the finish coating, and the instructions of the manufacturer of the compound used. It is impossible to recommend one universal adhesive or one screw size for any room. On a solid base, the mounting compounds specified by the fastening system and mechanical fixing may be used; on a weak base, the problem of the load-bearing layer must be resolved first. You cannot count on attaching a wooden plank to a stretch ceiling in the same way as to a rigid base: the support point must be provided for in advance.
If the walls have not yet been painted, marking out and test-fitting the profiles is usually easier than working after a fully completed renovation. But agree the order of the finishing coating of the wood itself separately. Pre-finishing individual long blanks reduces the amount of painting work in the room, but after cutting, fresh end faces remain. Painting after installation helps to tie the joints together, but requires protecting other surfaces and properly preparing the connections.
A long 2400 mm plank must not be held by one end when carrying and test-fitting. The wood and the thin shaped edge can be damaged by bending or by hitting a door opening. Before cutting, check the orientation of the pattern, place a protective support underneath, mark the face side, and label the future piece. Even with the same length, two profiles from different walls may have oppositely oriented mitre cuts.
A separate stage is a trial dry assembly. Bring two pieces together into a corner without glue, look at the line of the relief, and compare the fit along the top and bottom edges. Only after that proceed to final fixing. Where the cornice ends at a cabinet, check that the end face is parallel to the side panel and that the doors can open. After the furniture is installed, access to the joint area may become very limited.
For KZ-004, with its more pronounced profile depth, it is especially useful to make a short test fragment of the assembly near the cabinet. It will show what the projection will be, whether the end face will be covered, and whether an unwanted shadow from the facade will appear. Such a check is cheaper than redoing the entire finished line.
Wood finishing and care: what to agree with the workshop
The buyer often expects that wooden moulding is immediately ready for installation in the interior. But the product listing may indicate the quality of sanding and surface preparation options, rather than a fully finished colour and protective coating. Therefore, the specification should separate the cost of the wooden blank from the finishing service. If enamel is planned, clarify the primer, the final colour, the degree of gloss, and the treatment of the end faces. If clear lacquer, agree whether the natural shade needs to be preserved or a tinted result is required.
Joints on long walls fall within view when a person sits opposite them. With naturally coloured oak, a mismatch in grain between two sections can be more noticeable than the geometry of the seam itself. Before installation, lay the pieces out on the floor in the order of future fitting and select adjacent ones by colour and texture. This does not guarantee the joint will disappear, but it helps avoid accidentally joining the most dissimilar ends of the batch.
You should not apply a random product to wood just because it is labelled "universal". Different finishes impose requirements on sanding, priming, drying conditions and compatibility with adhesive. When finishing near the ceiling, drips and uneven sheen are especially noticeable under side light. A test coat on a small section helps you see not only the colour but also how the relief collects shadows.
In use, it is enough to follow the care appropriate to the specific finish. Generally it is best to avoid prolonged wetting, harsh abrasives and strong solvents that can change the colour. If local darkening appears near the cornice, first determine its cause: condensation, traces of a leak, contamination or a change in the coating. A simple repaint without eliminating the source of moisture may hide the problem only briefly.
Delivery of wooden cornices to Penza: how to check your order before payment
For an order to the Penza region, the exact nomenclature matters most. In your request, specify "KZ-006, beech, 55×20×2400 mm, seven pieces" or another selected estimate line. For KZ-004, similarly write "60×60×2400 mm". If you need one coating colour on all strips, state this as a separate condition. Confusion between the wooden and MDF versions most often begins where only the article number is left without material and length.
Official page delivery conditions for wooden cornices describes payment and shipping methods across Russia. When placing an order, you need to confirm the transport company, the cost of shipping specifically 2400 mm long strips, the packaging requirements and the method of receipt in Penza. Universal free delivery or a guaranteed timeframe for a specific batch cannot be promised without a calculation from the seller and the carrier.
In the cornice product pages, the manufacturer separately draws attention to the rigid packaging frame for safe transportation. For long profiles this is an essential detail: there may be not only chips on the ends but also damage to protruding parts of the relief during transshipment. Agree on how many packages will be in the order, whether all strips can be transported together and how the cost of the frame is calculated. Do not assume in advance that one frame costs the same for an order of six and seven strips.
On receipt, match the documents against the actual items. Check the article number, material, factory length, number of strips and integrity of the packaging. Inspect the ends and visible edges before handing the material over to the installer. If damage is found, record it in the manner established by the carrier. This is easier than proving the origin of a defect after some of the items have already been cut or painted.
Keep the cutting plan separately. When materials arrive in another city, the installation team may not have the original correspondence with the designer. The table with sections of 2150, 2200, 1100 and 1000 mm should remain next to the specification. Then the craftsman understands why exactly six or seven strips were purchased and which offcuts are intended to be used in pairs.
Remember that wooden moulding can be purchased as a separate decorative element, but the composition of our project is not determined by the overall product range. Only two specific cornice models are selected here. Battens, architraves and skirting boards may be useful for adjacent finishing, but they should not automatically end up in the product carousel of an article about ceiling cornices.
Typical mistakes when ordering a cornice for a living room with a wardrobe
Calculation based on the perimeter only. The number 15,200 mm describes the geometry of the room, but it does not say how to distribute the finished parts across the factory lengths. In our case, seven strips are sufficient only with the adopted layout scheme: four parts of 2150 mm, two of 2200 mm and two of 1100 mm. If the positions of the transverse joints are changed, the result must be recalculated, even if the perimeter remains the same.
The assumption that the wardrobe automatically covers the ends. Between the cabinet body and the wall there is often a filler strip, a technical gap or space for opening the doors. After installation, the two ends may be clearly visible. Therefore, the end of the decorative profile should be drawn in the junction detail rather than designated as invisible without verification.
Comparing the price of solid wood with the starting price of MDF. These are different product versions. For our estimate, the beech KZ-006 costs 3530 ₽, the oak one — 5040 ₽ per 2400 mm. For KZ-004, the beech and oak prices are 4580 and 6630 ₽. MDF values with a different length must not be used in these multiplications.
An unaccounted cut at the corner. Even a correct segment table is useless if the installer measures one side of the profile but cuts along the other. First determine the installation line and the orientation of the cross-section. Check on a scrap piece where the long point of the cut will end up. This is especially important for the deeper KZ-004 and for non-standard room angles.
Attempting to make any wall without a transverse joint. We have one long wall equal to 4300 mm, while the wooden plank is 2400 mm. This means that, without additional special solutions, a continuous line from a single piece is impossible. The specification honestly shows a joint of two parts. If a seamless requirement is essential, it must be resolved before paying for the material, not patched over as a surprise after installation.
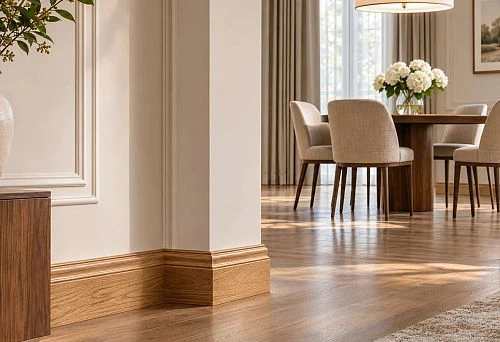
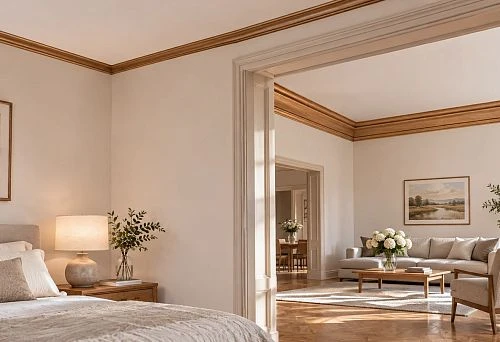
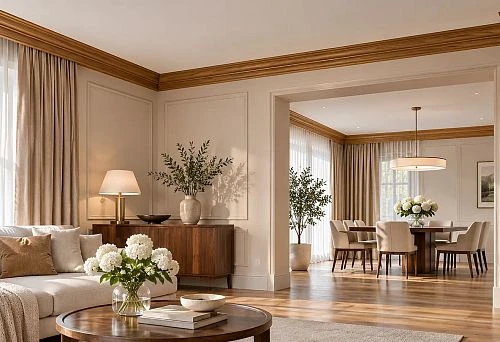
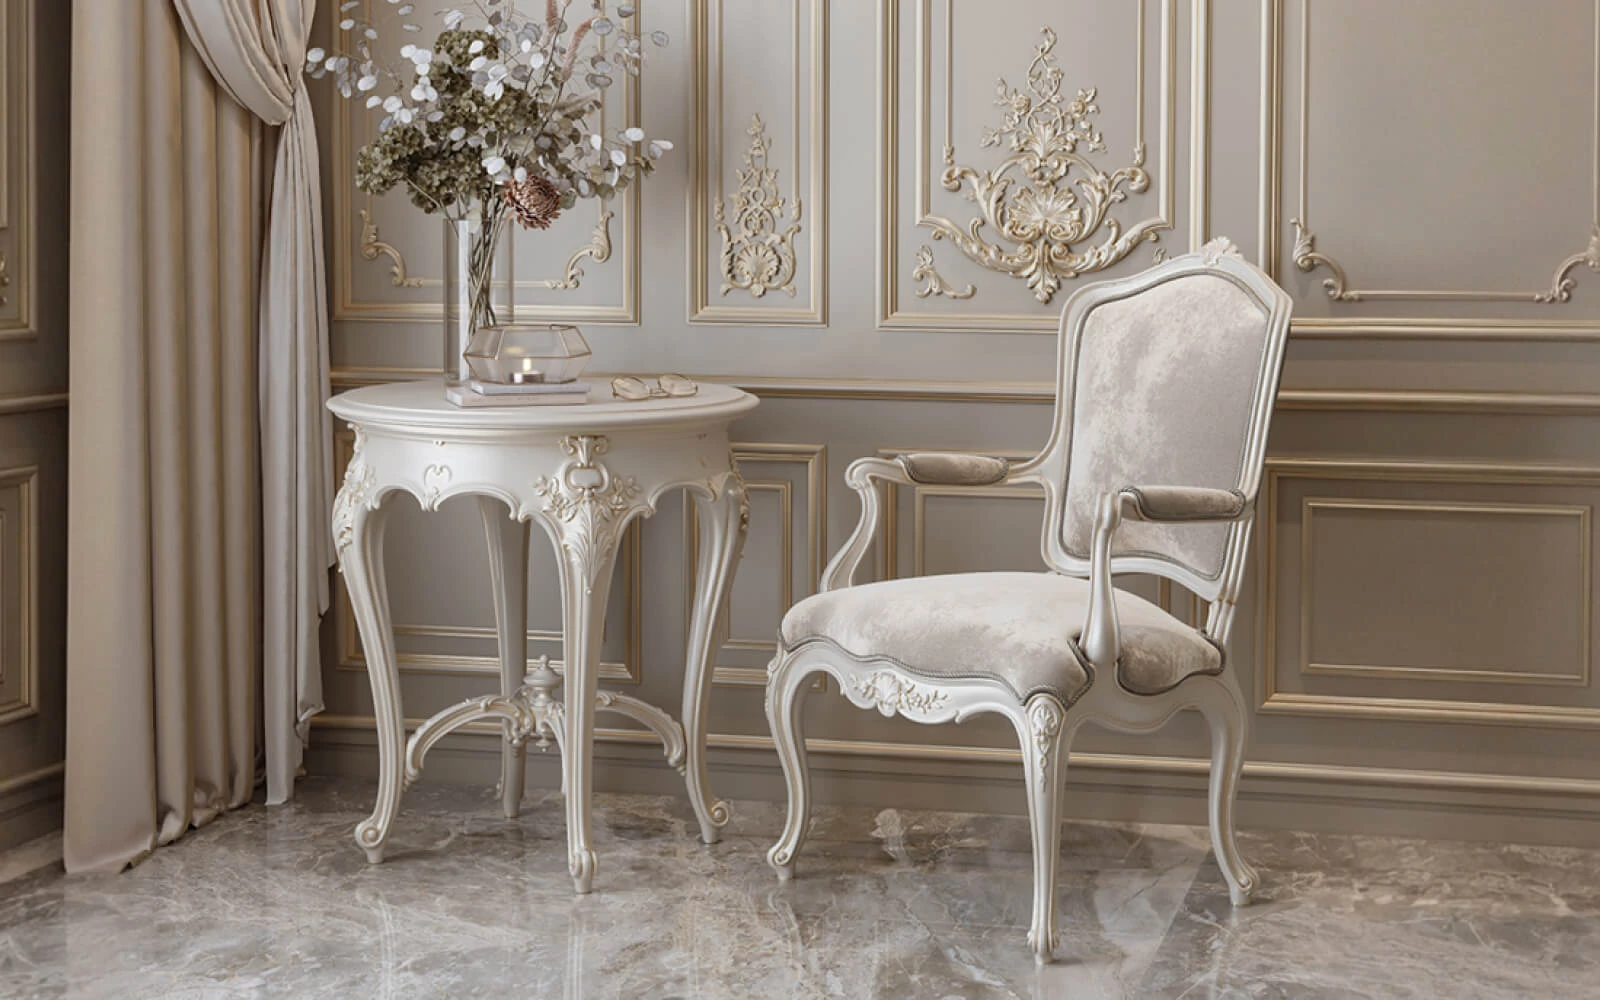
General photos instead of a real product card. From an interior photo, it is impossible to reliably determine the article number, cross-section, or fastening technology. To compare KZ-006 and KZ-004, look at the official images, dimensions, and drawings of these models. Interior illustrations help to imagine the result, but they are not photographs of a specific product.
Furniture coordination that is too late. A floor-to-ceiling wardrobe may occupy exactly the part of the space where the cornice needs to go. The designer prepares one continuous line, the furniture maker prepares a facade without a gap, and the installer prepares the ceiling fastening. If these solutions are not coordinated, the difference of one plank will not be the main expense item: the entire assembly will have to be redone.
Frequently asked questions about wooden ceiling cornices
Can I buy KZ-006 and KZ-004 in the same length for comparison?
In the wooden versions under consideration, both models have a factory length of 2400 mm. Therefore, if the finished lengths of the straight parts match, their number can be compared using the same scheme. However, the profile differs in cross-section, and installation cuts must be checked separately. For a trial fitting, it is not necessary to order the entire batch at once: you can discuss receiving samples or check the available demonstration options with the manufacturer.
Why seven planks if the perimeter is 15.2 m and 15.2 / 2.4 is more than six?
Rounding up alone does indeed give seven, but it does not explain whether the required segments will fit. In the full contour, six strips account for the long pieces of 2150 and 2200 mm, while the seventh yields a pair of 1100 mm pieces. If you choose, for example, different joint points on the wall, rounding the perimeter may turn out to be too optimistic. The purchase is confirmed by the cutting plan, not by linear-meter arithmetic.
Can the section behind a built-in wardrobe be omitted altogether?
Yes, when the wardrobe becomes a permanent boundary of the decorative line and its side panels and top are agreed with the finish in advance. Two neat terminations will be required. If the wardrobe is intended to be temporary or removable, such a gap may later become a noticeable defect. The decision is made taking into account not only today's cost of the sixth or seventh blank, but also the future use of the furniture.
What should you choose if the wardrobe doors almost touch the ceiling?
Do not choose by the name of the wood species. First, check the depth of the specific profile and the trajectory of the fronts. The wooden KZ-006 measures 55×20 mm; KZ-004 — 60×60 mm. A deeper profile may fall within the opening zone, but the final conclusion depends on the furniture design. Make a full-size cross-section template or hold the sample against the finished assembly.
What should be used to measure an angle in a room?
A tape measure, a square and a laser level are used for preliminary marking, but the tool alone does not ensure a correct cut. First, you need to choose the measurement line along the profile cross-section. Then mark the position of the piece at the ceiling and check the adjacent walls. For a non-standard angle, actual marking will be required rather than mechanically using two 45-degree cuts.
How does buying a beech profile differ from buying an oak one?
Cost, original color and the character of the wood grain differ. Our estimate is based on the current product pages for both species. With opaque paint, the visual difference will depend less on the natural grain, but the requirements for preparation and wood behavior remain. If the goal is a clear finish, it is advisable to see a sample of the specific species before purchasing the entire set.
Can a wooden cornice be installed flush against a stretch ceiling?
Such a solution requires a pre-planned structural base and coordination with the ceiling installers. The stretched fabric cannot be considered a support for the wooden profile. During design, the position of the embedded elements, the fastening lines and the possibility of subsequent maintenance must be specified. If the ceiling is already installed, the choice of available solutions depends on its design and the condition of the wall junction.
Is it mandatory to buy an extra plank as a spare?
There is no universal mandatory percentage. With an approved simple cutting plan and known technology, the installer can confirm a base order of six or seven planks. If there are non-standard cuts, a risk of surface damage, incomplete measurements or complex returns near the wardrobe, a reserve may be justified. Its quantity and cost are best shown as a separate line instead of a hidden increase in all lengths.
Are STAVROS wooden cornices delivered to Penza?
The manufacturer states Contact us to confirm shipping to your destination. For a specific order, the transport company, packaging of 2400 mm planks, cost and lead times must be agreed. Stock availability in a warehouse in another city does not equal availability in a warehouse in Penza. Before paying, clarify the full terms and make sure the specification contains the required wood species and quantity.
Can the 197 and 397 mm offcuts be used to finish the ends?
Theoretically, offcuts remain after placing two parts of 1100 or 1000 mm in one blank with a nominal 3 mm saw cut. But the usable length will be less after additional end trimming, and the short element itself may require safe handling and a specific grain direction. Therefore, first design the return joint and only then decide whether the offcut is sufficient. It cannot be included in the set automatically.
Bill of materials before ordering: how to make the final decision
For a full perimeter of a 4300×3300 mm room, record four straight parts of 2150 mm, two of 2200 mm and two of 1100 mm. The base purchase is seven wooden planks of 2400 mm. This option is justified if it is possible to pass behind the wardrobe and preserve the agreed ceiling junction design. In addition, the locations of the transverse joints on both long walls should be decided in advance.
For a perimeter without a hidden section, record two parts of 2150 mm, two of 2200 mm, two of 1100 mm and two of 1000 mm. The base purchase is six planks. This option requires two carefully designed endings near the wardrobe. If separate short returns are needed, they must be calculated separately and offcut availability checked again.
Buying wooden ceiling cornices only after choosing between these two designs. For a compact silhouette, the KZ-006 is suitable, while for a deeper one, the KZ-004; both are available in the beech and oak versions under consideration. A price comparison is given above, but the final budget additionally includes finishing, possible fasteners, packaging, and transportation to Penza.
Before approving the order, ask the craftsman to confirm the dimensions against the actual installation line, the method of corner cuts, and the acceptability of the selected end shape. If the wardrobe design is still changing, do not turn the preliminary bill of materials into a final cutting order. The correct sequence is simple: first agree on the furniture and ceiling, then choose the profile, measure the parts, distribute them across the factory lengths, and only after that pay for the required quantity.