Article Contents:
- Define the goal for the consultation
- When you can manage with your own selection
- What to provide for the cornice
- What to provide for the molding
- Physical sample
- Drawings and 3D models
- Why dividing meters by the plank length is sometimes not enough
- Can selection begin before receiving the apartment
- What to do if the measurement and the design plan differ
- How to transfer a drawing from a program the consultant cannot access
- Can I take measurements from a printed sheet
- What to specify when selecting for an already painted wall
- How to choose a socket before buying a chandelier
- Should the air conditioner and other wall-mounted equipment be shown
- Can previously purchased moulding be included in a new selection
- How to reconcile different customer preferences
- Can part of the decor be purchased before the entire selection is completed
- How to prepare a selection for several identical rooms
- Who determines the installation reserve
- How to account for one SKU in multiple colors
- How to revise the selection after changing one wall
- How to compare two selection proposals
- How to connect your own installer to the approval
- How to hand over the result to another designer or specifier
- How to submit clarifications after the specialist's first response

In the visualization, the molding runs next to the door and looks proportionate to the wall. On site, in the same place, there is a switch, the door casing protrudes further than expected, and the cabinet takes up part of the composition. The question "which profile looks like the picture" no longer solves the task: you need to understand which element will actually fit and preserve the intended pattern.
A consultation on selecting stucco becomes specific when the specialist receives information about the room, dimensions, adjacent structures, and the expected result. Then it is possible to discuss specific moldings, cornices, ceiling medallions, and overlays, compare options, and move on to calculating quantities.
A well-prepared request helps both a designer with a working project and a private client with measurements and photos. The difference will be in the degree of readiness of the solution. Based on the initial idea, you can choose a direction; for purchasing, you will need to confirm dimensions, item codes, and the contents of the set.
Define the task for the consultation
Selection is especially useful when several elements need to work together: a ceiling cornice continues across adjacent walls, moldings surround openings, a ceiling medallion is connected to a light fixture, and decorative overlays are part of the overall composition. In that case, an error in one position affects the others.
Another common situation is when the interior has already been drawn, but the profiles used in the image are not linked to real products. Consultation is needed to move from a conceptual shape to an available product with a known cross-section, length, and joining method. Sometimes, along with the article number, the layout also has to be clarified.
The task should be formulated in one sentence. For example: select moldings for three wall frames while preserving the existing switches. Or find a ceiling cornice that matches a built-in wardrobe and curtain niche. The clearer the constraint, the easier it is to rule out unsuitable models.




When you can manage with your own selection
If the exact article number is known, its size has been checked on site, and the task does not require new transitions or combinations, a separate selection may be unnecessary. For a repeat order, it is enough to verify the finish, quantity, and current delivery terms.
Even a small frame can sometimes involve a complex junction, while a large order may consist of already approved repeating elements. Therefore, the need for consultation is determined not only by the size of the project, but also by the number of unresolved questions.
Our factory also produces:

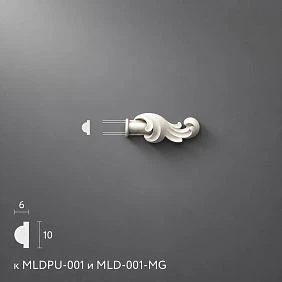
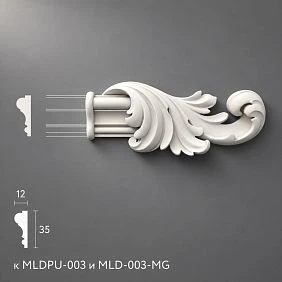
Agree on the expected result before handing over the project
The word “selection” is often used to describe different types of work. One customer expects several suitable profiles, another expects a ready purchasing list, and a third expects a change to the wall composition. Before starting the discussion, it is worth determining what result is needed now and what source data is already available for it.
| Stage | What is needed as input | What result should be requested |
|---|---|---|
| Preliminary direction | Task description, photos, style references | Suitable categories and list of missing data |
| Item selection | Dimensions, layouts or sketches, constraints | Short list of SKUs with explanation of differences |
| Solution approval | Selected options, drawings, samples if needed | Main option, acceptable alternative and open questions |
| Preparation for purchase | Approved layout and verified dimensions | Quantity by items and the agreed specification |
This sequence describes how work on a project is organized. The specific scope of the service, timelines, cost, and involvement in calculations are clarified with the contractor. It should not be assumed that any consultation automatically includes measurement, revision of drawings, and installation support.
For professional collaboration, STAVROS has a section for designers and architects. It presents the possibilities of working with catalogs, drawings, and three-dimensional models, as well as interacting with a personal manager. When reaching out, it is useful to immediately indicate the project stage and the desired outcome of the selection.
Get Consultation
Prepare a short package of source materials
For the first substantive conversation, prepare the room plan, ceiling height, dimensions of the relevant walls, photos, and a description of the task. If you have elevations, sketches, and visualization, attach them to the corresponding zones. It is not necessary to send the entire renovation album if molding is being selected for only one wall.
Give the rooms and walls clear labels: living room, wall 1; bedroom, wall at the headboard. Use them in file names, on the plan, and in comments. The specialist should be able to link the photo to the elevation without guessing, especially if the apartment has several similar openings.
For dimensions, specify the units and origin: actual measurement, design value, or preliminary estimate. The height from the rough floor to the slab and the height of the finished room are different source data. If the finishing layers have not yet been determined, state this directly.
Separately list the decisions that cannot be changed: the position of electrical wiring, door height, dimensions of the ordered wardrobe, the selected light fixture. Next to them, write down what is still under discussion. Such a list prevents a selection that looks good only after an unplanned relocation of neighboring elements.
Specify the date of the current version. If there are old and new drawings, provide the working version separately and describe the changes briefly. Several files with the same name and different dimensions create more uncertainty than one neat sketch.
Show the decor routes and adjacent structures on the plan
The plan helps to understand the shape of the room, the location of openings, and the relationship of the walls. It is especially important for a perimeter cornice, repeating compositions, and decor that must transition consistently from one zone to another.
Mark where the line continues, where it is interrupted, and where it ends with an open end. Not every wall length automatically becomes the cornice length: part of it may be occupied by a cabinet, a niche, or a ceiling structure. Each such place will have its own termination or transition detail.
Show the furniture in its agreed dimensions. A conventional “cabinet” rectangle without depth and height is of little help in checking a protruding profile. For a complex junction, additional dimensions or a section will be needed, but the plan should first make the conflict point itself visible.
If decor is being selected for several rooms, mark the boundaries of the overall system. For example, the cornice is retained in the living room and hallway, while the frames change in height. This allows discussion of repeating specific elements instead of trying to make all the walls in the house identical.
The actual configuration of the corners is also important for consultation. On a general diagram they may look right-angled, although the measurement shows a different position. Clarifying such places affects the subsequent development of joints and cutting, even when the choice of the profile itself has already been made.
Prepare wall elevations with heights and offsets
The plan shows the room from above, while the elevation shows the wall directly in front of the viewer. For selecting interior moldings, it is precisely on the elevation that the height of the frames, the position of the horizontals, the free fields, and the relationships with doors, furniture, and light fixtures become clear.
Show the full width and height of the wall, the dimensions of the openings, and the position of fixed elements. For switches, sockets, and wall lights, not only the centers are needed, but also the dimensions of the visible part. A round mark on the drawing does not show how much space the actual switch frame will occupy.
Specify the dimensions of the decorative composition unambiguously. The width of the frame along the outer edges of the molding, along the inner opening, and along the profile axis are three different values. If only thin lines are drawn on the sketch, label what they represent.
For recessed panels, protruding architraves, and built-in furniture, attach a section drawing. An elevation does not show depth. A molding may fit freely between objects on the plane and still obstruct the opening of a door due to its own projection.
If professional elevations are not available, start with a measured sketch of each wall. Legible dimensions, markings of obstructions, and photographs are more useful than a beautiful diagram without scale. For complex junctions, clarify who should prepare the missing working drawings before final approval.
Separate photographs of the site from images of the desired result
Photographs of the existing room and examples of an interior you like answer different questions. The former show what you have to work with. The latter explain the visual intent. Label them accordingly so that someone else's wall from the selection is not mistaken for your site.
Capture the desired wall in full, the adjacent wall, the corners, and the junction with the ceiling. Add close-ups of problematic areas: the architrave, the niche, the protruding panel, the edge of the cabinet. A general shot provides context; a detailed one provides information about a specific constraint.
When selecting stucco from a photograph, do not determine exact dimensions from perspective. Knowing the width of one item does not eliminate the distortion of the entire image. It is better to put the measured values on a separate sketch and leave the photograph as a means of understanding the location and condition of the object.
A project visualization helps to see the rhythm, the density of decor, and the intended scale. But the depicted profile may be conventional, arbitrarily stretched, or assembled from different shapes. Ask to compare it with the actual product and to name the differences that will affect the composition.
If it is important to preserve a specific feature of the image, state it in words: a thin double contour, a deep shadow of the cornice, a calm central element. Otherwise, a specialist may accurately reproduce a secondary ornament and fail to preserve the very thing for which the example was chosen.
Describe the style through features and priorities
The phrase "modern classic" allows for both almost smooth frames and noticeable ornamentation. For a targeted selection, supplement it with two or three examples with comments: what you like, what is too bold, and which details you would like to exclude.
Separate mandatory requirements from preferences. Maintaining the door swing clearance, existing electrical wiring, and the agreed furniture dimensions are measurable constraints. Making the line lighter or the relief more expressive are tasks of visual comparison. When they are written together without priorities, the selection process can go in circles.
Discuss the wall and decor color, the intended sheen of the finish, and the lighting. A profile painted in the wall color is perceived differently from a contrasting frame. Directed side lighting can make a small projection more noticeable than it appears under even lighting in a picture.
Specify the budget with boundaries: products only, or also consumables, painting, delivery, and installation. For a preliminary conversation, a range is sufficient, but it is useful to know what it includes. Comparing the price of a single molding with the total cost of a finished composition is incorrect.
For a style reference, you can use STAVROS decor collections. At the same time, belonging to the same collection does not replace checking the dimensions and adjacency of elements on a specific wall. The combination must be confirmed on your layout.
Formulate the selection request in a single message
A short cover message links all attachments and explains what decision is expected. It should not retell every dimension from the drawing. Its task is to indicate the object, stage, constraints, and the required response.
For a hypothetical living room, the request might look like this:
I need a selection of stucco molding for the living room. We are considering wall frames, a ceiling cornice, and a ceiling rose for the chosen chandelier. I am attaching the current plan, elevations, and photos with wall markings.
The height of the finished room according to the design is 2800 mm, and the width of wall 1 is 3600 mm. These two dimensions are still design values; a verification measurement is planned before purchase. The position of the switches and the dimensions of the built-in wardrobe cannot be changed.
In the image of the desired result, a calm profile and a double outline of the frames are important. A complex floral ornament is not needed. The decor is intended to be painted in the wall color; the final shade is still being agreed upon.
Please propose two molding options and suitable ceiling solutions with article numbers, dimensions, and links. For each option, indicate which details require clarification and whether a sample is needed.
After choosing the main solution, a quantity calculation is needed based on the approved layout. Please clarify the scope of this work, the additional data required, and the procedure for further approval.
To such a message, it remains to add information about the light fixture, the decision deadline, and the budget in the agreed scope. In a real request, every statement must correspond to your materials: do not present a design dimension as already measured on site.
Divide the stucco by its role in the composition
Browsing the catalog is easier after determining the functions of the elements. For one room, ceiling finishing, wall frames, a central accent, and small junction details may all be needed at the same time. Each group has its own initial data and selection criteria.
| Element | Its role | What to provide for selection |
|---|---|---|
| Ceiling cornice | Wall finishing and transition to the ceiling | Heights, ceiling section, cabinets, niches and line continuity diagram |
| Wall molding | Frames, horizontals and plane division | Development, contour dimensions, adjacent elements and overhang constraints |
| Ceiling rosette | Design of the central or lighting composition | Ceiling plan, dimensions and position of the light fixture, free field |
| Overlay | Local ornamental accent | Section size, axes, adjacent profile and pattern orientation |
| Corner or termination | Line completion and connection | Specific molding, node diagram and its dimensions |
Ready-made solutions for wall surfaces can be found in the section . Clear lines, created using modern technologies, emphasize the strict aesthetics of the room. Each decorative element harmoniously fits into the overall concept, creating a sense of order and thoughtfulness., while ceiling compositions — among ceiling decor. When selecting a set, its composition and permissible layout are clarified, rather than evaluating only the overall photograph.
At this stage, it is useful to reduce the number of decorative roles. If an expressive rosette has already become the main accent, the remaining elements can be discussed with this decision in mind. This is not about a mandatory ban on combinations, but about a clear distribution of attention in a specific project.
Check the cornice and moulding by different dimensions
A ceiling cornice is considered at the junction of the wall and ceiling. For it, the vertical part, the projection onto the ceiling, the position of the mounting surfaces, and the proximity to curtains, built-in furniture, or the ceiling structure are important. One width in a photograph is not enough.
A wall moulding works on a different plane. Its width changes the visible fields of the frame, while the projection affects the abutments and the distance to neighbouring objects. The selection of mouldings for walls begins with the cross-section and installation location, after which the profile pattern is compared.
What to provide for the cornice
Attach a section of the disputed area: the top of a cabinet, a curtain niche, an area near a tall doorway. Indicate where the finished ceiling ends and where the decorative line should run. If lighting is provided, its design and access requirements must be coordinated separately with the relevant assembly and equipment.
What to provide for the moulding
Show the free space between the future line and the switch, casing, or furniture. For example, a 30 mm wide strip between two obstacles does not yet mean that a 30 mm wide molding fits there: the design may require visual clearances and installation space. These are specified separately, not obtained accidentally after installation.
In the section of polyurethane moldings compare specific versions using the product cards. Material, cross-section, and length must be explicitly recorded in the selection. Profiles that look similar may differ in material and conditions of use.
For corners and endings, check separately Decor for Molding. A similar ornament does not confirm that the fit, width, or relief transition matches the selected straight profile.
Coordinate the ceiling rose and trims with the free field
For a ceiling rose, provide the ceiling plan, the position of the light fixture, and the dimensions of its visible parts. The diameter of the entire chandelier, the diameter of the ceiling cup, and the overall size of the ceiling rose are different parameters. Each is needed for its own check.
Specify which center is used in the composition: the geometric center of the room, the axis of the table, the center of the ceiling field, or another position. These points may not coincide. Before choosing ceiling rose made of polyurethane it is worth finding out which of them defines the design.
Do not set the appropriate size by a universal ratio to the chandelier diameter. Perception is influenced by the height, shape of the light fixture, free ceiling field, and surrounding decor. Scale comparison helps choose a candidate, and volume and relief are checked with a sample if necessary.
The method of mounting the light fixture is considered separately from the decorative composition. The ceiling rose finishes the junction, but its choice does not determine the load-bearing structure for mounting the chandelier. It is also necessary to check the central zone, access, and the possibility of installing the specific light fixture.
for polyurethane molding decoration On the wall, indicate the dimensions of the free area and the adjacent lines. The overlay is assessed together with the frame, door, switch, and furniture. A complex silhouette may formally fit within a rectangle but leave undesirable narrow gaps near adjacent elements.
Ask for a short list of differing options
The result of the first product selection is several options among which a decision can be made. For one role, two or three candidates are often enough. This is a convenient working scale for comparison, not a mandatory number of proposals in any consultation.
Ask them to explain the differences: one profile takes up less space, another casts a more pronounced shadow, a third pairs better with the chosen assembly. If twenty models differ only by their order in the catalog, the main selection work remains with the client.
An example of how to record the actual parameters of two narrow STAVROS moldings:
| Parameter | MLDPU-001 | MLDPU-004 |
|---|---|---|
| Material | Polyurethane | Polyurethane |
| Width | 10 мм | 15 мм |
| Thickness | 6 мм | 8 мм |
| Plank length | 2600 мм | 2600 мм |
| What to check in the project | Is the visibility of a thin line sufficient | Are the required clearances maintained with greater width and thickness |
Dimensions are shown in the product cards MLDPU-001 и MLDPU-004. The table shows a method of comparison, not a ready-made selection for any wall. A decision still requires the cross-section, installation location, and an agreed composition.
For each candidate, add the role, room, reason for selection, and unresolved question. For example: fits by dimensions, but the junction with the panel needs to be checked. Such a note is more useful than an unconditional “recommended” mark if an important assembly has not yet been developed.
Choose a verification method for each disputed point
A physical sample, a drawing, and a 3D model complement each other. For a consultation, it is important to understand which doubt needs to be resolved. Ordering a sample just to check the length of the entire delivery, or looking only at a visualization for precise adjoining, is usually not enough.
| Verification method | What it is useful for | What else is required |
|---|---|---|
| Physical sample | Assessment of relief, scale, shadow, and test paint | Verified dimensions of the entire composition and required units |
| Product drawing | Verification of cross-section, overall dimensions, and adjoining | Data on the actual installation location |
| 3D model | Integrating a real profile into a three-dimensional scene | Checking scale, article number, and conformity of the model to the product |
| Full-size layout | Checking the placement of contours on the object | Sample for evaluating volume and surface |
Physical sample
The sample is especially useful with an expressive profile, deep relief, complex lighting, and a large volume of repeating decor. Place it in the intended position and look at it from typical viewing points. A small piece in your hand is perceived differently than the same line at ceiling height.
Choosing samples of stucco and decor, clarify the composition of the available set. A sample of a different profile may help with the material or finish, but it will not confirm the scale of the selected cornice. A test paint patch is evaluated after preparation and drying according to the accepted finishing system.
Drawings and 3D models
To check the joints, request stucco drawings in DWG format if this format is used in the project. For approval with the client, it is also useful to attach a readable sheet with dimensions in PDF. In the section catalogs, drawings, and models of STAVROS materials for project work are provided; the availability of a file for the required article number should be checked separately.
A 3D scene includes a model of a specific product at its real scale. Arbitrarily stretching the profile for a prettier image breaks the link to purchasing. If the scale or shape is intentionally changed, that is already a separate design decision and cannot be passed off as a standard product.
Record the choice and the remaining approval conditions
After comparing the options, write down the primary SKU, the alternative, and the excluded items. For the primary solution, specify exactly what has been approved: shape, size, material, finish, combination with adjacent elements. A single “I like everything” note does not show that the project is ready to order.
Approval can proceed in stages. For example, the profile has been selected, but verification on site next to the cabinet is still pending. Or the geometry has been confirmed, while the shade is still under discussion. It is useful to record such states explicitly so that a preliminary choice does not turn into a purchase too early.
Assign who makes the final decision for each part. The designer may be responsible for the composition, the client for approving the appearance, and the contractor for checking the installation conditions. The distribution depends on the project, but the overall list should show whose response is still missing.
Specify the date and version of the approved layout. If the ceiling height, furniture, light fixture position, or frame dimensions have changed, recheck the related items. The selection relates to a specific room configuration, not just to its name.
Handoff to the next contractor must include the current list and links to the relevant sheets. Old options can be kept in the archive, but they must not remain equal candidates in the working schedule after a decision has been made.
Calculate the purchase after the profile is approved
Before choosing a specific SKU, you can estimate the scale of the project, but the final number of strips depends on the delivery length, the list of cut pieces, angles, and ends. For ornamental profile, the pattern and its repeat are also taken into account. Therefore, the total length of the lines on the wall is not yet equal to a ready order request.
Separate the net requirement, the cutting plan, and the approved reserve. The net requirement describes the necessary sections. The cutting plan shows how to obtain them from the selected strips. The reserve is added according to the conditions of the site and installation, while preserving its purpose rather than using it to mask the absence of a cutting plan.
Why dividing meters by the length of the plank is sometimes not enough
Let's look at a conditional calculation of blanks. Six segments of 1800 mm and six of 800 mm are required. The blank dimensions used in the example already account for the requirements of subsequent processing; these are not universal dimensions for wall frames.
| Workpiece | Quantity | Total length |
|---|---|---|
| 1800 мм | 6 pcs. | 10,800 mm |
| 800 мм | 6 pcs. | 4,800 mm |
| TOTAL | 12 pcs. | 15,600 mm |
With a plank length of 2600 mm, simple division gives six planks. But 1800 + 800 = 2600 mm, and such a layout leaves no room for the cut and end preparation.
Let's assume that in this training example, 10 mm is to be removed from each end, and 3 mm is allotted for separating each blank. The usable length will be 2580 mm. Six long blanks will require six planks; the remaining section on each will no longer be enough for an 800 mm blank.
The short blanks can be placed three per two additional planks: 3 × 800 + 3 × 3 = 2409 mm, which is less than 2580 mm. We get eight planks, or 20.8 m, before separately agreeing on the installation reserve. All technological numbers here are conditional; for a real profile, they are replaced by the parameters of the adopted cutting plan.
This kind of breakdown shows what should be requested from a specialist during calculation: a list of sections, the length of the selected product, the basis for the quantity, and a separately designated reserve. A single number of “meters with a margin” does not reveal whether the set is ready for installation.
Compile the final specification with reference to the rooms
After the selection is approved, each item must be linked to its installation location. Identical article numbers can be combined for purchasing, but the distribution by room is retained. Otherwise, when issuing to the site, it will be unclear which part of the total quantity is intended for the living room and which for the bedroom.
| Field | What should be recorded |
|---|---|
| Room and area | Room name, wall or ceiling section |
| Purpose | Cornice, frame, rosette, overlay, corner or end piece |
| Product | Full item number and selected finish |
| Dimensions | Cross-section, dimensions and delivery length for the relevant product |
| Material and finish | Confirmed material, delivery condition and approved paint finish |
| Quantity | Number of items in delivery units |
| Basis of calculation | Layout, list of cut lengths and separately specified reserve |
| Check | Approval status of sample and design details |
| Link | Direct link to the specific product |
| Alternative | Reserve item code and conditions for an acceptable substitution |
| Version | Date and designation of the approved design |
Specify the unit precisely: piece, strip, or set of a defined composition. A rosette is not measured in linear meters, and the total linear footage of molding does not replace the number of strips being purchased. For a ready-made set, you need to know which elements it includes and how many sets are required.
If installation and finishing materials are included in the estimate, list them as separate line items with a clear basis for quantity. They should not automatically be considered part of the stucco cost. The composition of the final proposal must correspond to the previously agreed scope of work.
The specification becomes a procurement document after the issues affecting selection and quantity are resolved. Until then, it may remain a working schedule with marked incomplete items. This status is more useful than an outwardly finished table with unconfirmed numbers.
Check the alternative as a separate solution
It makes sense to prepare a backup option before an urgent purchase, especially if the project depends on several related elements. But the alternative must have its own item code and clear conditions of use. The note “analog available” does not define an acceptable substitution.
When changing the molding, check the width and projection, the visible fields of the frame, the corner pieces, and the delivery length. When changing the cornice, check the junctions and position relative to furniture and ceiling. When changing the rosette, check the dimensions, the central part, and coordination with the light fixture.
Even a small change in cross-section may require a new layout. If a wider frame reduces the inner field, this must be visible on the current elevation drawing. If the strip length changes, recalculate the number of items based on cutting, rather than automatically keeping the previous quantity.
After checking, record whether the main option has been finally replaced or the alternative remains a backup. Update the related sheets, samples, and specification. The client, the procurement specialist, and the installer must work with a single solution.
Discuss custom plasterwork after reviewing the catalog
A bespoke execution makes sense when standard products do not cover a specific requirement: the needed scale, an original design, or a particular geometry. First, it is useful to establish exactly what is missing and to check the standard options along with the possibility of modifying the composition.
To discuss custom plasterwork, prepare dimensions, sections, an image of the required relief, and the quantity and purpose of the part. The phrase "as in the photo" does not define the shape of the back side, the junctions, or the installation conditions. This information will be needed regardless of how expressive the sample of the desired result is.
Clarify the manufacturing feasibility, minimum order requirements, the procedure for preparing and approving a sample, lead times, and cost. The availability of a custom line does not mean that any element can be produced in any quantity under the terms of the standard catalog.
If it is proposed to enlarge a standard profile, ask to show which parameters will change. Proportionally scaling an image changes the width, projection, and relief at the same time, although the project may require changing only one dimension. Such a solution is treated as a new execution.
The outcome of the discussion should be either a suitable standard item number or an agreed specification for a separate development. An undefined idea for a custom product is not yet ready to be included in the final procurement calculation as a finished item.
Move from consultation to a confirmed order
Once the dimensions are verified, the options are approved, and the quantities are tied to the layout, you can proceed to purchase. The catalog of polyurethane moldings STAVROS helps you find the selected items, but the final offer is checked against the current specification.
To buy moldings according to a design project, provide the full item number, the execution, and the quantity in supply units. If there are several finish options or kit compositions, specify the one accepted. Clarify the availability of each item, lead times, completeness, and delivery terms as they apply to your order.
Match the item with the entire decorative solution. Having a straight profile does not yet confirm that suitable corners or ends are available. If one position changes, return to checking the related elements before final finishing.
To request consultation on selecting stucco prepare a brief description of the task and an agreed package of materials. Indicate whether a choice of direction is still needed or whether a specific list is already being checked. This helps determine the next step without re-clarifying the initial conditions.
A good result for a project is easy to verify: each selected element has a location, item code, size, and approval status; the quantity has a clear basis; open questions are named and assigned to the project participants. After that, purchasing stucco becomes a continuation of the approved decision.
Answers to additional questions about the consultation
Can selection begin before receiving the apartment
You can discuss the direction and preliminary options based on the available plans. Note which dimensions have not yet been verified and which structures will need to be changed. After gaining access to the site, take the necessary measurements and confirm the affected decisions. A preliminary selection is useful for preparing the project, but its readiness for purchase is assessed separately.
What to do if the measurement and the design plan differ
Determine whether the data relate to the same stage of the room and the same surfaces. The difference may be due to finishing, a design change, or an error. Provide both values to the specialist with an explanation of their origin, then agree on the current basis for calculation. Do not automatically choose the size at which the preferred composition fits better.
How to transfer a drawing from a program the consultant cannot access
Clarify the accepted formats and prepare sheets for viewing with legible dimensions. If necessary, attach an editable file in the agreed format. Check that the required layers, annotations, and external references are preserved during transfer. A screenshot can clarify the overall view, but for a complex detail a separate dimensioned fragment is more convenient.
Can dimensions be taken from a printed sheet
Only with a confirmed scale and accuracy suitable for the task of this method. Automatic fit-to-page changes the print scale. It is preferable to use the specified dimension values, and clarify any missing ones with the project author or by measuring. A ruler on a printout must not imperceptibly become the source of the final dimension for purchasing.
What to specify when selecting for an already painted wall
State that the finishing is complete and attach information about the surface if known. Indicate whether the entire wall or only the decor is planned to be repainted. The installation method and material compatibility are clarified for the specific substrate and the chosen system. This will allow the solution to be evaluated taking into account the actual condition of the site and the scope of subsequent work.
How to choose a ceiling rose before buying a chandelier
Record at least the intended geometry of the light fixture and the constraints of the ceiling composition. Preliminary ceiling rose options are possible, but the central assembly and relative position require verification after a specific chandelier is chosen. If one of the elements has already been finally approved, pass its parameters as mandatory input data for the second.
Should an air conditioner and other wall-mounted equipment be shown
Yes, if the decor runs alongside. In addition to the body dimensions, show the opening, servicing, and other clearance zones per the equipment documentation. A frame that beautifully goes around the unit may hinder access to it. Such conditions must be included in the task before approving the wall design, not discovered during installation.
Can previously purchased stucco molding be included in a new selection
Provide the article numbers, dimensions, photographs, and the actual quantity of surviving items. Specify their material, condition, and intended finish. If a new adjacent profile is needed, a joint fitting is useful. The old name or packaging image helps with the search, but does not replace checking the specific part when the product range has changed.
How to reconcile different customer preferences
First separate the general requirements from the disputed ones: for example, both parties agree on the frame sizes, but differ in their attitude toward the ornament. Ask for a comparison of options specifically on this attribute. Set the order of final approval. Otherwise, the specialist will receive contradictory comments and repeatedly return to dimensions that have already been checked.
Can part of the decor be purchased before the entire selection is completed
This is reasonable to discuss for items that have already been agreed upon and do not depend on the remaining decisions. If the selected molding must match a corner element that has not yet been approved, the dependency remains. Before a partial purchase, identify the unchangeable part of the project and list the conditions under which it would have to be revised.
How to prepare a selection for several identical rooms
Provide a general standard layout and a separate list of differences for each room. Check the actual dimensions, openings, and the placement of equipment and furniture. Identical room purposes do not guarantee identical cutting. Common article numbers can be selected once, while the quantity and installation specifics should be kept separately for each room.
Who determines the installation reserve
It is agreed upon during calculation, taking into account cutting, the complexity of the joints, the organization of work, and the conditions for replenishing the order. It is useful to involve the installer, who knows the accepted technology. The schedule specifies which items and in what quantity were added. An arbitrary overall percentage does not explain the availability of specific end pieces, corners, or long segments.
How to account for one SKU in multiple colors
Separate the variants in the working schedule and keep the link to the rooms. One base profile can be used in different paint schemes. When purchasing, clarify the delivery condition, and for finishing work use separate designations for the approved colors and surfaces. Combining quantities must not erase the differences between finished sets.
How to review the selection after changing one wall
Mark the changed sheet and list the related items. If only the frame layout changed, the cut lengths may need to be recalculated while keeping the profile. If the unit with furniture or the ceiling changed, the SKU itself is also checked. The updated version should show the boundary of the change so that the other approved decisions do not lose their status.
How to compare two selection proposals
Bring them to the same composition: rooms, element roles, dimensions, materials, quantities, and included work. Clarify which questions have already been checked and which have been left to the customer. A shorter schedule may mean either a successful simplification of the composition or missed details. Comparing a single total does not reveal this.
How to involve your own installer in the approval
Give them the selected SKUs, drawings, and locations of complex junctions before purchasing. Ask for specific comments on the substrate, access, and the chosen installation method. It is useful to discuss specific units rather than the general question of whether cornice installation is possible. After such a review, add the changes to the overall project version.
How to hand over the result to another designer or specifier
Assemble the current layout, specification, product links, sample check results, and a list of open questions. Separate old versions from the active ones. For each unresolved item, indicate what data is expected and who provides it. A new participant will be able to continue the work while preserving the approved decisions and the basis for the calculation.
How to provide clarifications after the specialist's first response
Link each question to a specific room, sheet, and specific option. For example, clarify the projection of the selected profile at the architrave or whether it needs to terminate at the indicated point. If the source data has changed, attach the updated fragment. This kind of response allows you to close out questions one by one instead of re-discussing the entire selection without a clear result.