


Article Contents:
- Why a staircase should be assembled as a system, not as individual parts
- Complete set of a wooden staircase kit: what is included
- Structural elements of the railing
- Installation and fastening elements
- Decorative finishing elements
- Balusters: the main element to start your selection
- Types of wooden balusters
- Technical parameters of balusters: what to clarify when ordering
- How to choose balusters to match your interior style
- Handrails and railings: comfort and safety in one element
- Handrail profiles and their applications
- Handrail groove: a key technical parameter
- Handrail length: how to avoid mistakes when ordering
- Posts for wooden stairs: support and accent in one
- Types of posts by function
- How to choose the cross-section of a post
- Decorative elements of posts
- Post installation: what you must not forget
- Fasteners for balusters and railings: the invisible foundation of strength
- Why fasteners are as important as the type of wood
- The correct system for attaching balusters
- Specification of fasteners for a standard flight of stairs
- Additional elements: they are remembered last and regretted
- Bottom under-baluster strip
- Corner and turn connections of the handrail
- Risers and stair tread overlays
- How to calculate the quantity of all components: a step-by-step algorithm
- Step 1: determine the composition of the staircase
- Step 2: measure the length of each section
- Step 3: calculate the number of balusters
- Step 4: determine the number of posts
- Step 5: calculate the length of the handrail
- Step 6: calculate the fasteners
- Example calculation for a two-story house
- Price of a set of wooden staircase components
- Factors affecting the price
- Estimated cost of a set for a two-story house
- Mistakes when ordering staircase components: analysis of real cases
- Mistake 1: ordered balusters — forgot posts
- Error 2: took handrail from one manufacturer, balusters from another
- Error 3: didn't count the fasteners
- Error 4: took balusters from different batches
- Error 5: didn't account for corner joints of the handrail
- Error 6: chose baluster style inconsistent with posts
- Error 7: ordered without considering the second floor landing
- What is needed for installation: tools and materials
- How to choose a finish coating for wooden components
- Coating options and their features
- About the Company STAVROS
- FAQ: Answers to Popular Questions
- What components are needed for a wooden staircase?
- Can I buy only balusters, without handrails and posts?
- What should I buy together with balusters?
- How to calculate the number of balusters?
- Where to buy components for a wooden staircase from the manufacturer?
- How to avoid color variation when purchasing components?
- Is a baluster rail needed?
- How to attach balusters to steps?

There is a special category of customers who come to the store for "balusters" — and leave with a full railing set. And there are those who buy only balusters, then separately look for a handrail, then remember about posts, then call with the question "do you have fasteners?" — and end up spending twice as much time, nerves, and money. A staircase assembled from elements of different manufacturers, different batches, and different systems rarely looks as desired. Because wood is a living material, and every detail in it must speak the same language as the others.
buy staircase components with an understanding of the composition, system logic, and selection rules — that's what this article is about. Read carefully: there will be no general words about "beautiful staircases" here. Here — specifics that will save you time and money.


Why a staircase should be assembled as a system, not as individual parts
Imagine: you bought 40 beech balusters. Excellent choice. Then you found a pine handrail — cheaper. You got the posts "with a reserve" from another seller, and they turned out slightly darker. You bought the fasteners at a hardware store — "it won't be visible anyway."
What will be the result? A mismatched, inconsistent structure where each element tells its own story. Under the same coating, pine and beech give different tones. A handrail with a 20 mm groove does not fit onto a 25 mm baluster tenon without modification. Posts with a different groove profile won't accept the handrail at all.
A systematic approach means buy staircase components buying everything from one manufacturer, from one series, one wood species, in one delivery. Then the baluster tenon fits exactly into the handrail groove. Then the coating applies evenly to all surfaces. Then the railing looks as if it was designed by an architect, not assembled from a random set of parts.
Three reasons to buy a kit as a single system:
-
Compatibility: dimensions of tenons, grooves, heights, and cross-sections are coordinated at the factory — installation without adjustment
-
Tone uniformity: one wood species, one grade, one batch — identical results under any coating
-
Stylistic integrity: all elements in one decorative language — the railing looks like a single object


Complete composition of a wooden staircase kit: what's included
Before talking about each element separately, let's understand the full composition. What is generally needed to assemble a wooden staircase railing?
Our factory also produces:


Fence structural elements
-
Balusters — repeating vertical elements, fence infill
-
Posts — support elements at the edges of the flight and at turning points
-
Handrail — horizontal element for gripping, top boundary of the fence
-
Bottom baluster rail — mounted on steps or floor, receives lower tenons of balusters
Get Consultation
Mounting and fastening elements
-
M8 studs with nuts and washers — main fasteners for balusters and posts
-
M10–M12 anchor bolts — fastening posts to floors and stringers
-
Carpentry glue or construction adhesive — fixing tenons in grooves
-
Base plates and support pads for posts — for installation on tiles, concrete, tile adhesive
Decorative finishing elements
-
Post caps — decorative covers, balls, shaped overlays for ends
-
Handrail end caps — clean finish at the start and end of the flight
-
Decorative covers for spikes and fasteners — hide mounting points
-
Post rosettes — decorative plates covering the base of the post
The full list for a specific staircase is always individual. But the logic is the same: not to buy "balusters and handrail", but to cover the entire set from the first to the last detail.
Balusters: the main element from which the selection begins
When a person says "I want a beautiful staircase", they primarily mean the balusters. They form the visual rhythm of the railing, set the style, and create the first impression.
What types of wooden balusters are there
balusters for staircase to buy can be in several fundamentally different forms — and each form carries its own function and aesthetics.
Turned balusters are a classic of wooden fencing. Lathe processing creates a symmetrical profile with vases, tapers, and transitions. The complexity of the profile ranges from two simple vases to five to seven elements with thin necks and contrasting transitions. For most classic and traditional interiors, a turned baluster is the right choice.
Carved balusters are a turned form plus milled decor. A carved pattern is applied over the turned profile: leaves, waves, geometric patterns. This is the highest level of decorativeness — for grand staircases, cottages, classic halls. Buy carved wooden pillars paired with carved balusters — it's an ensemble, not a set of parts.
Square balusters are 45×45 or 50×50 mm timber with chamfers on the edges. Maximum strength for their cross-section, concise modern aesthetics. For minimalist, Scandinavian, modernist interiors — this is the first choice.
Flat balusters are a solid wood plate 80–120 mm wide and 22–28 mm thick with a figured silhouette contour. Two-dimensional shape: front view — wide and decorative, profile — almost invisible. For country fences, terraces, verandas, and homes in the country style — this is a special, light image.
All shapes, sizes, and wood species are in the catalog wooden balusters for staircases.
Technical parameters of balusters: what to clarify when ordering
It's not enough to choose a beautiful shape. When ordering wooden balusters for staircases clarify:
| Parameter | Typical values | Why it matters |
|---|---|---|
| Working part height | 900 / 1000 mm | Standard railing height |
| Total length with tenons | 970–1120 mm | For seating calculation |
| Lower tenon diameter | ø18–25 mm | Compatibility with step plank or groove |
| Upper tenon diameter | ø18–22 mm | Compatibility with handrail groove |
| Planter diameter (max) | 50–75 mm | For clearance calculation |
| Species | pine, beech, oak | Affects tone, strength, price |
| Final sanding | P120–P220 | Surface quality for coating |
How to choose balusters for interior style
Style is not an abstraction. It's a concrete decision that needs to be made before ordering.
Classic and neoclassic — turned complex shapes or carved, beech or oak, tinted or clear varnish.
Country, rustic, Provence — flat or turned simple shapes, pine or beech, white or cream paint.
Modern minimalism, Scandinavian — square from beech or ash, white paint or light oil.
Loft, industrial — square from oak, dark paint, combination with metal details.
Cottage, traditional Russian wooden house — carved from pine or oak, warm tint or natural varnish.
Handrails and railings: comfort and safety in one element
A handrail is what a person touches with their hands every day. Requirements for it consist of three equal parts: ergonomics (grip comfort), strength (withstands load), compatibility with balusters (groove fits onto tenon).
Handrail profiles and their application
| Profile | Description | Application |
|---|---|---|
| Semicircular ø45–55 mm | Classic rounded shape | Universal, for any style |
| Semicircular ø65–70 mm | More massive | Grand staircase, classic |
| Oval 70×45 mm | Elongated ellipse | Modern interior |
| Rectangular with chamfers | 60×40 mm | Minimalism, loft |
| Beveled (slanted) | Special profile | Designer solutions |
The main rule for choosing a handrail: the diameter of the handrail should not be less than the diameter of the baluster vase. If the vase is 60 mm and the handrail is ø45 mm, the handrail will appear thin and unreliable. Optimal: handrail diameter = baluster vase diameter ±10 mm.
Handrail groove: key technical parameter
A groove is milled in the lower part of the handrail, into which the upper tenons of the balusters fit. The groove size must exactly match the tenon diameter:
-
Tenon ø18 mm → groove ø18 (+0.3/+0.5 mm)
-
Tenon ø22 mm → groove ø22 (+0.3/+0.5 mm)
If the handrail groove is purchased from one manufacturer and the balusters from another, size mismatch is guaranteed. Either the tenon won't fit, or there will be play. The first issue is resolved by milling (additional work), the second by glue and washers (a compromise in strength).
To completely eliminate this situation: buy balusters and handrails in a unified system where the handrail groove and baluster tenon are parts of the same production standard.
Handrail length: how to avoid mistakes when ordering
Handrails are sold by linear meter or in fixed lengths. When ordering, consider:
-
Handrail length = length of the flight along the horizontal projection + overhang onto posts (usually 100–150 mm on each side)
-
On turning sections, the handrail is joined using corner connections or bent (bent-laminated handrail).
-
Order allowance — at least 300–500 mm added to the calculated length (for trimming to the flight angle).
Posts for a wooden staircase: support and accent at the same time.
A post in a staircase railing serves two functions — structural and decorative. And while simpler balusters may sometimes suffice, this rule does not apply to posts. The post is the most noticeable element of the railing. It catches the first glance.
Types of posts by function
Starting (bottom) post — installed at the beginning of the flight, at the first step. It receives the lower end of the handrail. The most critical element: it bears the total load from the railing under pressure or impact.
Top (finish) post — at the end of the flight, near the second-floor landing. A mirror of the starting post.
Turning post — at points where the flight changes direction: at a 90° or 180° turn. It receives two handrails from different directions.
Intermediate post — installed additionally when the flight length exceeds 3,500 mm to reinforce the rigidity of the railing.
Decorative post (baluster-post) — an element of larger diameter or cross-section that visually marks a turn or the start of the railing but bears less load than a full post.
How to choose the column cross-section
| Column height | Recommended cross-section | Application |
|---|---|---|
| 1,100–1,200 mm | 90×90 mm | Light staircase, country house |
| 1,200–1,500 mm | 100×100 mm | Standard staircase in a house |
| 1,500–1,800 mm | 120×120 mm | Grand staircase, wide flight |
| Over 1,800 mm | 150×150 mm | High halls, double-height spaces |
Wooden stair posts from solid beech or oak — for all standard heights with the required cross-section.
Decorative post elements
A post by itself is just a beam with proper grooves. Its decorative value is determined by three details:
Edge profiling. A simple chamfer, quarter-round, ogee — these small milled transitions along the post's edges turn it from a "beam" into an "architectural element."
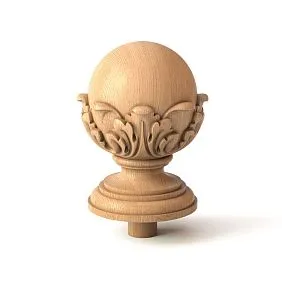
Finial. A sphere, pyramid, dome, or shaped cap — chosen to match the style. A sphere is classic and country. A pyramid is modern. A dome with profile is neoclassical. Buy carved wooden pillars with a decorative finial — covering both function and aesthetics in one action.
Base rosette. A decorative plate or profiled ogee covering the joint between the post and the step or floor. A small detail that gives completeness to the entire railing.
Post fastening: what you must not forget
The post is a load-bearing element. Its fastening determines the strength of the entire railing.
Methods of fastening posts depend on the base:
On a wooden stringer or string — a through bolt M10–M12 with a washer and nut. The bolt passes through the stringer and is secured from the inside.
On a wooden step or platform — a stud M12 with a chemical or mechanical anchor into the step structure, depth 100–120 mm.
On a concrete base — a chemical anchor or a dowel nail ø12 mm, depth 80–100 mm, followed by mounting the post on a stud with epoxy compound.
On tiles — a support platform with bolt fastening through the tile into the base. Direct installation on tiles using glue is unreliable and not recommended.
A detailed master class on all fastening methods is available in the professional material on securing balusters and stair posts.
Fasteners for balusters and railings: the invisible foundation of strength
Fasteners are what you don't see after installation. That's why many people treat them lightly: "we'll take something." This is one of the most costly mistakes when assembling a staircase.
Why fasteners are as important as the type of wood
A railing with excellent oak balusters, correct spacing, and a beautiful handrail — but with poor fasteners. After two to three years of intensive use, it starts to "play": the balusters wobble slightly, the handrail creaks. This is not wood wear — it's loose fasteners.
The vibration load on a staircase railing is specific. Each step up or down creates a horizontal impulse on the balusters. Multiplied by 10–20 thousand passes per year, this is a serious cyclic load that the fasteners must be prepared for.
The correct system for fastening balusters
The "stud + glue" scheme is the standard for professional installation:
-
A through hole for an ø8 mm stud is drilled in the lower tenon of the baluster.
-
The threaded part of the M8 stud is screwed into the step (or plank) to a depth of 50 mm.
-
The baluster is placed onto the stud, the lower tenon into the plank with glue.
-
The upper tenon fits into the groove of the handrail with glue.
-
An M8 nut with a wide washer is tightened from below through the step (or at the base of the plank).
This is a strong, durable system. It works even under a load of 150–200 kg on the railing.
Weak options to avoid:
-
Only a ø4.5 mm self-tapping screw without a stud.
-
Only glue without mechanical fastening.
-
A "two-hundred" nail driven diagonally
All three options can hold up under light use, but not in a family home with children, heavy furniture, or regular loads.
Step-by-step instructions for installation of wooden railings and balusters — from marking to coating application — read in the specialized article.
Fastener specification for a standard flight
| Element | Fasteners | Quantity per 1 baluster |
|---|---|---|
| Bottom tenon | Stud M8×120, nut M8, washer ø25 | 1 set |
| Top tenon | Glue + groove assembly | — |
| Lower post | Bolt M12×200, nut, 2 washers | 2 bolts |
| Upper post | Bolt M10×160, nut, 2 washers | 2 bolts |
| Handrail on post | Lag screw ø8×70 hex head | 2 pcs. per post |
For a flight with 20 balusters and 2 posts — total about 22 studs, 44 nuts, 44 washers, 4 M12 bolts, 4 M10 bolts. Plus a 500 g bottle of wood glue.
Galvanized steel fasteners — for interiors. A2 stainless steel fasteners — for outdoors and wet rooms.
Additional elements: they are remembered last and regretted
Bottom baluster rail
One of the most underestimated kit components. The rail is mounted horizontally on the step (when installing balusters along the flight) or on the floor (for landing railing). It has pre-drilled holes for the lower baluster tenons with precise spacing.
What it provides:
-
Accurate and uniform baluster spacing without manual measurement of each position
-
Protection of the step edge from direct contact with the baluster and fasteners
-
Decorative bottom railing line — straight, neat
-
Simplified installation: balusters are inserted into ready-made holes
Without the strip, installation takes 2–3 times longer. With the strip, precise spacing is guaranteed.
Corner and turn connections of the handrail
When the flight turns — on the landing, with an L-shaped staircase, with a U-shaped one — the handrail needs to be connected at an angle. For this, the following are used:
Turn block — a solid wood blank cut to the required angle (45°, 90°, 135°). It is attached with glue and screws to two straight sections of the handrail.
Bent-laminated turn — a blank made of lamellas glued to the required radius. A more aesthetic solution: a smooth transition without a visible joint.
Metal connecting sleeve — technologically advanced but visible. Suitable for modern interiors with decorative metal accents. Not suitable for classic styles.
Risers and stair tread covers
This is no longer about the railing, but the staircase structure. However, since we are discussing a complete set, it is necessary to mention it.
Risers — vertical planks that close the space between steps. Made from the same wood species as the steps — a unified visual solution.
Anti-slip tread covers — profiled strips attached to the front edge of the step. An essential element for homes with children and elderly people. Material: the same wood species or a contrasting one for a visual accent.
Decorative end caps for steps — cover the end cut of the step from the side of the flight.
How to calculate the quantity of all components: a step-by-step algorithm
This is the practical part that many skip — and regret later. Correct calculation means one delivery, one order, no extra charges for "forgotten" parts.
Step 1: determine the composition of the staircase
Draw a diagram by hand or open the project:
-
How many flights?
-
Are there landings between flights?
-
Is there a railing on the second floor landing?
-
Is there a porch or open terrace?
For each section — a separate calculation.
Step 2: measure the length of each section
A flight of stairs is measured along the length of the stringer (inclined line), not by the horizontal projection. To calculate the number of balusters, the length of the stringer is needed — this is the actual distance on which the balusters are installed.
Horizontal sections (landings, balconies) — along the horizontal length of the railing.
Step 3: calculate the number of balusters
Formula: L ÷ step = N balusters
Where:
-
L — length of the section in mm
-
Step — distance between baluster axes in mm (usually 130–165 mm)
-
N — round up to the nearest whole number
Add 10–15% spare for trimming, installation defects, and replacements.
Step 4: determine the number of posts
| Site type | Pillars |
|---|---|
| Straight flight | 2 (start and end) |
| Flight longer than 3,500 mm | 3 (intermediate in the middle) |
| 90° turn | +1 turning pillar |
| 180° turn | +2 turning pillars |
| Platform fencing | at corners + every 2,000 mm |
Total posts — sum across all sections.
Step 5: calculate the handrail length
Handrail length = sum of all flights and horizontal sections + allowance for posts (100–150 mm on each side) + 5% trimming margin.
Step 6: calculate fasteners
| Fasteners | Quantity |
|---|---|
| M8 studs + nuts + washers | 1 set per baluster |
| M12 bolts for posts | 2 bolts per post |
| Wood glue | 1 bottle 500 g for 20–25 balusters |
| Finials | 1 per each post |
| Handrail end caps | 1 per each open end |
Example calculation for a two-story house
| Section | Length (mm) | Spacing (mm) | Balusters | Posts | Handrail (mm) |
|---|---|---|---|---|---|
| March 1 (stairs) | 3 400 | 145 | 23 | 2 | 3 700 |
| 2nd floor landing | 3 800 | 145 | 26 | 4 | 4 200 |
| Mezzanine railing | 2 400 | 145 | 16 | 3 | 2 700 |
| Total (calculation) | 65 | 9 | 10,600 mm | ||
| Total (+10% reserve) | 72 | 9 | 11,200 mm |
Buy a kit for a wooden staircase entirely according to this specification — in one order.
Price of a set of wooden staircase components
People are often surprised by the final figure — in both directions: sometimes it turns out more expensive than expected, sometimes cheaper. Let's break down what the budget consists of.
Factors affecting price
The type of wood is the most influential factor. Pine is 2.5–3 times cheaper than oak. Beech is roughly in the middle. Ash is slightly above beech.
The shape of the balusters — from simple square to complex carved: the difference in unit price is up to 4–5 times.
The number of balusters is the main volume of the budget. 60–80 balusters × unit price.
The complexity of the posts — simple straight vs. carved with a finial: the difference is 2–3 times.
The length of the handrail and its profile — simple semicircular vs. bent-laminated on turns: a significant difference with complex staircase geometry.
Processing at the factory — basic sanding P80 vs. finishing P180–220: 10–15% to the price, but a fundamental difference in the result under the coating.
Estimated cost of a set for a two-story house
| Element | Quantity | Pine | Beech | Oak |
|---|---|---|---|---|
| Square balusters | 72 pcs. | 56 000 | 112 000 | 152 000 |
| Posts 100×100×1200 | 9 pcs. | 22 000 | 45 000 | 72 000 |
| Semicircular handrail | 12 lin. m | 12 000 | 24 000 | 38 000 |
| Under-baluster strips | 4 sets | 4 000 | 8 000 | 12 000 |
| Fasteners and finials | — | 8 000 | 9 000 | 10 000 |
| TOTAL | ~102 000 | ~198 000 | ~284 000 |
For a point calculation based on your staircase — prices for all items in the catalog: Staircase Components for Sale.
Mistakes when ordering staircase components: analysis of real cases
Mistake 1: ordered balusters — forgot posts
Classic. All attention goes to beautiful balusters, posts seem like "obvious" details. Result — balusters arrived, but no posts. Installation is delayed by a week.
Solution: compile a full specification before ordering. Posts, finials, strips, fasteners — include in the first order.
Error 2: took handrail from one manufacturer, balusters from another
Handrail groove — ø18 mm, baluster tenon — ø22 mm. Doesn't match. Either mill the handrail (extra work and money) or return the balusters.
Solution: buy balusters and handrails from the same system.
Error 3: didn't count the fasteners
"We'll buy studs at the nearest hardware store." M8 studs of the required length weren't found — there are M6 or M10. M6 — too weak for a railing. M10 — tenon diameter doesn't allow it. Trip to stores, lost day.
Solution: include fasteners in the main order from the product manufacturer.
Error 4: took balusters from different batches
First 40 pieces were taken from stock. A week later, ordered 20 more from a new shipment. Under clear varnish — two different shades. Slightly, but noticeable. Redoing means removing all 60.
Solution: entire volume — one order, one batch. Always with a 10–15% margin.
Error 5: didn't account for corner connections of the handrail
L-shaped staircase. Handrail was calculated as the sum of two straight segments. On site, it turned out that two 90° turn blocks were needed. Didn't order in advance. Installation stalled.
Solution: for any non-straight staircase, order rotary blocks or curved handrail elements in advance.
Error 6: chose a baluster style that does not match the posts.
Carved balusters + straight, minimalist posts without decor = dissonance. Carved form requires an expressive post. A minimalist square baluster requires a restrained one.
Solution: choose the entire system with visual balance in mind. Consult with the manufacturer when selecting.
Error 7: ordered without considering the second floor landing.
Only the stair flight was counted. The second floor landing was to be 'figured out later'. Later it turned out the landing required an additional 30 balusters, 4 posts, and 4 m of handrail — a separate order, different batch, different shade.
Solution: during the initial calculation, account for all railing zones — flight, landing, balcony, mezzanine.
What is needed for installation: tools and materials
Professional installation of balusters and railings requires standard carpentry tools. If doing it yourself, check availability:
-
Hammer drill with a 12–14 mm drill bit for attaching posts to concrete or stone
-
Drill with a set of wood drill bits ø8, 10, 12, 18, 22 mm
-
Screwdriver with hex bits
-
Open-end wrench M8, M10, M12 for tightening nuts
-
Level 600 mm and plumb bob for aligning posts
-
Tape measure and pencil for marking baluster spacing
-
Miter box or miter saw for cutting the handrail at the angle of the flight
-
Sandpaper P120, P180 for final preparation of joints
-
Brush or sprayer for applying coating
Detailed step-by-step technology — in the author's material on installation of wooden railings and balusters.
How to choose a finish coating for wooden components
Components are purchased without coating — this is standard. Coating is applied after installation or immediately before it (depending on the technology).
Coating options and their features
Clear varnish — shows the texture and color of the wood. For oak and beech under varnish — maximum decorativeness. For pine under varnish — risk of spotting and resin stains.
Tinting + varnish — allows you to change the wood tone while preserving the texture. The most popular option for classic interiors.
Oil or wax — natural coating without a film. The wood remains "alive" to the touch. Repairable locally: you can treat one baluster without redoing the entire railing.
Opaque paint — acrylic enamel. Covers the texture, evens out the tone. For beech — an ideal base: smooth surface without spotting. For pine — high-quality primer for resins is required.
Stain + varnish — deepens the tone, accentuates the texture. Especially good for oak: makes the pattern more contrasting.
For railings in a house with children — only solvent-free compounds: acrylic varnishes and paints, natural oil. The smell of alkyd compounds lasts up to three months.
About the company STAVROS
STAVROS — Russian manufacturer of solid wood products. Since 2002, specializing in the production of a complete set of components for wooden stairs: balusters, posts, handrails, railings, under-baluster strips, finials, fasteners.
The production cycle is fully in-house: raw material procurement, chamber drying to 8–10% moisture content, CNC turning and milling, multi-stage sanding to P180–220. All products are manufactured in unified compatibility systems: the handrail groove precisely accepts the baluster tenon from the same series — no adjustment during installation.
Catalog — over 50 models of balusters, full range of posts from 90×90 to 150×150 mm, handrails of all standard profiles, fasteners for any type of base. Wood species: pine, beech, oak, ash.
Delivery across Russia by transport companies. Pickup from Moscow and St. Petersburg. Free calculation of full specification based on staircase parameters. Specialist consultation — no obligation.
FAQ: Answers to popular questions
What components are needed for a wooden staircase?
Full set: balusters, handrail, posts, bottom baluster rails, fasteners (M8 studs, M10–M12 bolts, nuts, washers, glue), post caps, handrail end caps, and corner turning elements for non-straight flights.
Can I buy only balusters, without railings and posts?
Yes. But before ordering, make sure the baluster tenon diameter matches the groove of your handrail and rail, and the baluster height matches the required railing height. Size incompatibility is the most common issue when buying separately.
What should I buy together with balusters?
Minimum complete set: handrail, posts, bottom rails, fasteners. For a finished look — post caps and handrail end caps.
How to calculate the number of balusters?
Section length ÷ step between centers (130–165 mm) = number of balusters. Add 10% spare. Step is chosen based on safety: gap between balusters no more than 150 mm (for homes with children — 100–120 mm).
Where to buy components for a wooden staircase from the manufacturer?
The STAVROS catalog offers a full range: balusters, posts, handrails, fasteners. All elements are in unified compatibility systems. Free specification calculation for your staircase.
How to avoid tone variation when purchasing components?
Order the entire volume in one batch, from one wood species, from one manufacturer. This is especially important for transparent coatings — even a slight difference in tone is clearly visible under varnish.
Is a sub-baluster plank necessary?
For a professional result — yes. The plank ensures precise spacing without manual measurement, protects the steps, and creates a neat bottom line for the railing.
How to attach balusters to the steps?
M8 stud (length 100–120 mm) + M8 nut + wide washer ø25 mm + wood glue. This is the professional installation standard. Screws alone are not enough for a durable railing.


