Article Contents:
- Short answer: are FUR-001 and FUR-012 fasteners for KZ-002
- What is confirmed for KZ-002
- What the buyer sees in the product card and why they draw the wrong conclusion
- FUR-001: stud and insert for a furniture leg
- How such a unit works
- What FUR-001 does not explain for KZ-002
- Why the word "mounting plate" is misleading
- Transition between wall and ceiling
- Top of the cabinet
- Door portal
- Library
- Kitchen set
- Decorative panel
- Ceiling niche
- What you need to know about the wall
- What you need to know about the ceiling
- Why you cannot assign fasteners based on the word "concrete"
- Solid brick
- Hollow brick
- Masonry joint
- What to do before closing the frame
- What to do on a finished wall
- Why glue doesn't solve everything
- Hidden bar
- Body mounting
- Where FUR potentially appears
- Glue only
- Mechanical mounting only
- Combined scheme
- Mounting bar
- A test sample matters more than an advertising promise
- Initial fixation and final strength are different things
- External DWG
- Installation drawing
- Check not only the wall, but also the ceiling
- Joint above a furniture side panel
- Joint on the wall
- Joint under transparent finish
- Inside corner
- External corner
- Angle is not exactly 90 degrees
- MDF under enamel
- Beech for enamel
- Oak for transparent finish
- Dry fit before finishing
- End treatment
- Confirmed characteristics
- Dynamic conditions
- Recommendations
- Unconfirmed conclusions for the project
- Joints above the side panels
- Cornice and facades
- When reworking the base is needed
- Not a curtain rod
- Not a thin molding
- Not a furniture leg
- Not a ready-made set with fasteners
- Not a universal profile for wet or outdoor environments
- Not a strip that can be drilled anywhere
- Buy FUR-001 as a standard kit
- Mistake FUR-012 for a ceiling plate
- Choose fasteners by photo
- Drill edge E = 7 mm
- Attach to plaster
- Use only glue
- Do not provide an embedded insert
- Do not check the stretch ceiling
- Paint before trial installation
- Do not request the weight
- Confuse external DWG with installation section
- Do not assign a responsible person
- Do not check the old URL
- Put all related products in the cart
- Not checking communications
- Not performing dry layout
- Not preparing storage
- Designer
- Furniture designer
- Construction designer
- Installer
- STAVROS manager
- Buyer or customer
- What is KZ-002?
- What lengths are available?
- Why are FUR-001 and FUR-012 shown next to the cornice?
- What is FUR-001 for?
- What is FUR-012 for?
- Can KZ-002 be attached to FUR-001?
- Can FUR-012 be used on the ceiling?
- Is mounting hardware included in the KZ-002 kit?
- How do I attach KZ-002 to concrete?
- How do I install the cornice on drywall?
- Is an embedded anchor required?
- Can I use only glue?
- Where should I drill the profile?
- How do I hide the screws?
- Where can I download the drawing?
- Is the external DWG file sufficient?
- Which material is easier to install?
- Can KZ-002 be painted in advance?
- Is a trial installation necessary?
- Can I use a furniture panel above the cabinet?
- What to do if the cornice has already arrived without a diagram?
- Where to buy KZ-002?
- Can I mount KZ-002 to a wooden panel?
- What to do with an uneven wall?
- How to account for the joint of two strips?
- Can I use one type of fastener for MDF and oak?
- Do I need to buy FUR-001 together with KZ-002?
- Do I need to buy FUR-012 together with KZ-002?
- Photo documentation of the base
- Marking of strips
- Handover to the crew
- Anchor the embedded part to the actual cross-section
- Leave access to utilities
- Check room corners
- Coordinate the ceiling system
- Plan for the finish

The box with long planks is already opened. The wooden cornice KZ-002 has passed through the warehouse, delivery, and carrying in, and lies along the wall on even supports. Next to it is a small package with metal fittings. The buyer is confident they have prepared: in the cornice's card, they saw the section "Mounting Options," chose FUR-001 or FUR-012, and added the item to the order. The installer picks up the set, looks at the M8 stud, the insert nut, or the round plate—and asks the most unpleasant question: "Where is the diagram for how to attach this two-meter cornice to the wall and ceiling?"
There is no answer. The concrete wall does not provide a seating for a furniture insert nut. The round plate does not explain which part of the profile to attach it to, how many points are needed for a length of 2000–2600 mm, or how to transfer the load to the load-bearing base. It is unknown whether the selected zone of KZ-002 can be drilled, where the thin edge is, how to hide the fastener heads, and what to do near a stretch ceiling. The fittings were purchased, but the mounting kit for the cornice never appeared.
The confusion did not arise out of nowhere. On the old indexed page KZ-M-002, FUR-001 and FUR-012 are indeed displayed in the "Mounting Options" block. However, the cards of the kits themselves define their purpose differently: these are parts for quickly attaching furniture legs to tabletops and other furniture structures. FUR-001 consists of an M8 × 60 stud and a metal insert nut M8 × 13. FUR-012 includes an M8 × 60 stud and a round mounting plate with a diameter of 37 mm with M8 thread. None of these cards promise universal installation of an architectural cornice on concrete, brick, drywall, or a ceiling structure.
Therefore buy wooden cornice KZ-002 — is only the first part of the solution. Before paying for the fasteners, you need to determine the installation location, the base material, the wall and ceiling structure, the presence of an embedded element, the working plane of the profile, the weight of the selected version, and the method of masking mechanical points. Only after this does it become clear whether glue, a mounting block, screws, anchors, special dowels, or a combined scheme are needed.
This article does not give dangerous universal advice like "take such-and-such a screw and drill through so many centimeters." For KZ-002, such confidence would be a fabrication. The task is different: to learn to distinguish recommended furniture fittings from a real mounting project, gather initial data, and place an order so that the cornice arrives at the site with a clear work scheme, not with a set of parts of unknown purpose.
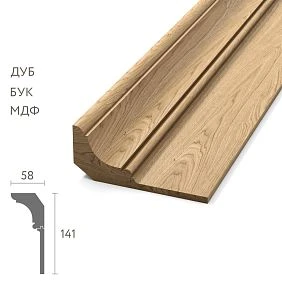
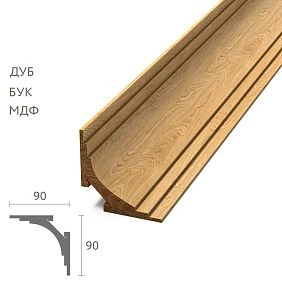
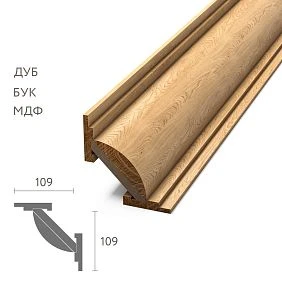
Short answer: are FUR-001 and FUR-012 fasteners for KZ-002
No, they cannot automatically be considered a universal mounting kit for KZ-002 to a wall or ceiling.
FUR-001 and FUR-012 are intended for furniture legs. They can be considered in a specially designed furniture structure if the designer has shown their function, seating locations, and load transfer. But the mere presence of these article numbers next to the cornice does not answer the questions of architectural mounting.
Before purchasing mounting materials for KZ-002, you need to get answers to at least eight questions:
-
Is the cornice installed between the wall and ceiling, only on the wall, or on a furniture body?
-
Which finish is selected: MDF, beech, or oak?
-
What is the length of each slat: 2000, 2400, or 2600 mm?
-
How is the base behind the plaster, panel, or drywall sheet constructed?
-
Is there a load-bearing embedded insert?
-
Which part of the KZ-002 cross-section is intended for contact and fixation?
-
How will the mechanical points be concealed?
-
Who approves and is responsible for the mounting diagram?
Until this data is available, adding FUR-001 or FUR-012 to the cart as a "cornice mounting" is premature.




What is confirmed for KZ-002
Let's start with the facts that can be used in the project without guesswork.
| Parameter | Confirmed value | Why this is important for installation |
|---|---|---|
| Article number | KZ-002 | Eliminates confusion with similar KZ profiles |
| Product type | Wooden ceiling and interior cornice | Requires an installation diagram for horizontal runs |
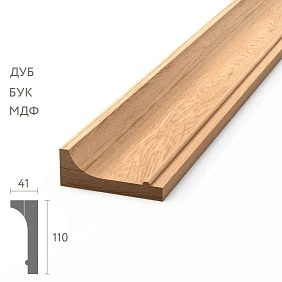
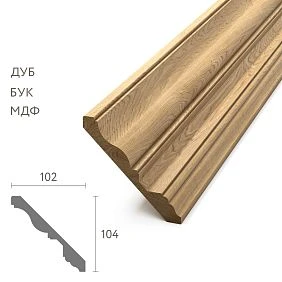
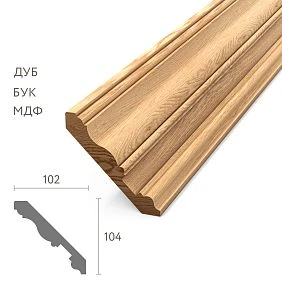
| Parameter A | 104 мм | Shows the overall size of one side of the cross-section |
| Parameter C | 102 мм | Shows the second main dimension of the cross-section |
| Parameter D | 23 мм | Taken into account when reading the drawing and junctions |
| Parameter E | 7 мм | The thin zone should not be automatically designated as the drilling location |
| MDF | 104 × 102 × 23 × 7 × 2600 mm | Long paintable plank |
| Beech | 104 × 102 × 23 × 7 × 2000 or 2400 mm | Solid wood, installation depends on the project and finish |
| Oak | 104 × 102 × 23 × 7 × 2000 or 2400 mm | Solid wood with pronounced texture |
| Sanding quality | «Prestige» | Front surface prepared for finishing per card conditions |
| MDF preparation | For enamel | Installation and sealing of points are tied to subsequent painting |
| Application | Ceiling, furniture, interior compositions | Each scenario requires its own base |
| Price, availability, delivery times | Checked in the current product card | Dynamic data cannot be transferred from the old page |
The KZ-002 cross-section cannot be reduced to two words "104 by 102". Parameters D and E show that the profile has complex geometry. The external shape does not yet indicate where the strong working zone is located. The installer needs a cross-section drawing, not just a photo of the front side.
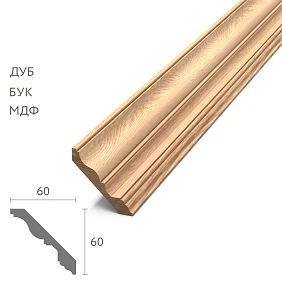
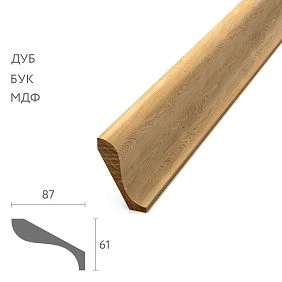
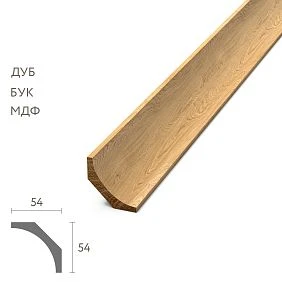
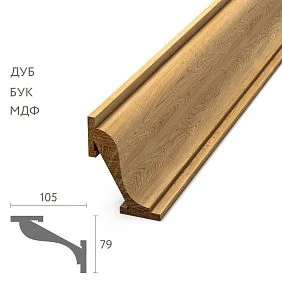
Our factory also produces:
What the buyer sees in the product card and why they draw the wrong conclusion
In the online store, related items are often shown next to a product. The user perceives such a block as a direct recommendation: if the product appears under the heading "Fastening options", it means it fits without additional conditions.
The buyer's logic is clear:
-
chose KZ-002;
-
saw FUR-001 and FUR-012;
-
decided these are two alternative mounting methods;
-
bought one set per plank;
-
expected a ready-made instruction;
-
received a furniture pin or plate.
The error lies not in the buyer's inattention, but in too strong an interpretation of the connection between the cards. The related products block does not replace technical documentation. It does not indicate the number of mounting points, base material, working depth, permissible load, location of the embedded part, or method of hiding holes.
Even the name "kit" can be misleading. The FUR-001 kit is indeed complete for its purpose: it includes a pin and a threaded insert. But its purpose is a furniture leg, not a long curtain rod. Completeness always refers to a specific assembly.
Get Consultation
FUR-001: pin and threaded insert for a furniture leg
To avoid arguing at the level of impressions, let's break down the composition.
FUR-001 for attaching furniture legs, not a ceiling curtain rod includes:
-
a galvanized metal pin, metric/self-tapping screw M8 × 60;
-
screw part 30 mm long;
-
metric part 30 mm long;
-
metal galvanized bushing M8 × 13;
-
basting hole 6.5 mm for the threaded part of the stud;
-
seating hole 10 mm for the bushing;
-
internal thread M8.
How such a unit works
One part of the connection is installed in the wooden leg, the other in the tabletop or furniture structure. The metric thread allows the elements to be tightened, and the bushing creates a threaded socket.
Everything here is logical for a vertical support. The leg transmits the load upward through the local unit. The geometry of the parts is calculated around the M8 axis.
What FUR-001 does not explain for KZ-002
The kit does not answer:
-
how many studs are required for a bar 2000–2600 mm long;
-
where to drill the profile;
-
where to install the bushing in the wall;
-
how to work with concrete or brick;
-
how is the horizontal load distributed;
-
how does the connection hold the upper and lower planes of the cornice;
-
how is the metal part hidden;
-
how to avoid cracking of the array;
-
how to attach near a stretch ceiling;
-
is a mounting plate needed.
Therefore, the coincidence of M8 thread with any part of the project by itself proves nothing.
FUR-012: the round plate also remains furniture hardware
FUR-012 with a round plate for a furniture support consists of:
-
round mounting plate with a diameter of 37 mm;
-
threaded connection M8;
-
metric stud/self-tapping screw M8 × 60.
The card defines its purpose as quick attachment of legs to tabletops and furniture structures.
Why the term "mounting plate" is confusing
The plate sounds universal. A buyer might imagine it being screwed to the ceiling, after which the curtain rod is hung on the stud. But such a picture is not confirmed by the mounting cross-section KZ-002.
To implement such an idea, one would have to answer:
-
where to place the plate;
-
what base holds its screws;
-
how many plates are needed;
-
how the stud connects to the profile;
-
does the hole not fall into the thin edge;
-
how one line is aligned;
-
how to remove the cornice;
-
how the unevenness is compensated;
-
how the plate works under tension and shear.
Without this data, FUR-012 remains a furniture support kit.
Why a furniture leg and a cornice work differently
Let's compare two nodes not by name, but by mechanics.
| Criterion | Furniture leg | KZ-002 |
| Position | Vertical | Predominantly horizontal |
| Product character | Local support | Long-length profile |
| Typical node length | Limited contact area | Plank 2000–2600 mm |
| Direction of main load | Along the leg axis | Depends on orientation, self-weight, and adjacency |
| Number of points | One node per leg | Determined along the entire length |
| Base | Tabletop or body | Wall, ceiling, mounting plate, furniture |
| Level requirement | Local vertical | Single horizontal line |
| Hiding hardware | Inside furniture connection | Need to design on visible profile |
| Working with angles | Usually absent | Internal and external angles, joints |
| Dismantling | Defined by furniture node | Depends on mounting system |
The difference is fundamental. You cannot transfer fasteners from one node to another just because both products are wooden.
Can FUR-001 or FUR-012 still be used together with KZ-002
A categorical "never" would also be incorrect. KZ-002 can be used in furniture. In a specially designed portal, library, or cabinet, individual hardware can become part of a hidden connection.
But then you need:
-
furniture body drawing;
-
material thickness calculation;
-
mounting sockets;
-
exact position of the pins;
-
assembly diagram;
-
tool access;
-
the possibility of dismantling;
-
confirmation from the designer or furniture manufacturer.
In such a system, FUR does not "attach the cornice to the ceiling." It connects specific parts of a furniture unit. This is a different meaning.
The correct wording for an order: "Consider FUR-001/FUR-012 in the furniture joint KZ-002 according to the attached drawing." Incorrect: "Add standard fasteners for the cornice."
Before choosing fasteners, determine the installation location
The same KZ-002 can be found in completely different structures. The place of application changes the entire mounting logic. If it is not yet determined whether a ceiling, wall, or furniture profile is needed, it is useful to first understand how to choose the purpose and profile of a wooden cornice, and only then proceed to attaching the specific item.
Transition between wall and ceiling
The cornice runs along the perimeter of the room. It must maintain a common line, join at corners, and fit against two planes. The base can be a wall, ceiling, special rail, or a combined assembly.
Top of cabinet
The profile crowns the furniture body. Fasteners can be located in the top panel, side panels, frame, or hidden strip. Here, panel thickness, module construction, and top access are important.
Door portal
The cornice completes vertical elements. It is necessary to connect the top piece with pilasters, casings, or the wall base.
Library
A long profile runs above sections. Joints are best tied to side panels, and the mounting base to the body.
Kitchen set
Ventilation, upper cabinets, wall unevenness, utilities, and maintenance must be considered.
Decorative panel
The profile can be attached not to the wall, but to a wooden or plywood substrate.
Ceiling niche
Nearby there may be lighting, stretch ceiling, aluminum profiles, and wiring.
For each scenario, the set of materials is compiled separately. To compare KZ-002 with other solutions, you can view all ceiling cornices and evaluate the cross-section, material, and the intended mounting plane.
Installation between a wall and a concrete ceiling
At first glance, this is a simple case: two solid surfaces. But first, you check which one will become the load-bearing surface.
Possible schemes:
-
primary fixation to the wall;
-
primary fixation to the ceiling;
-
attachment to the mounting plate;
-
combined fixation;
-
adhesive plus mechanical points;
-
cornice on a pre-installed embedded anchor.
What you need to know about the wall
Plaster and paint are not a sufficient description. Behind them there may be concrete, brick, aerated concrete, or cladding.
What you need to know about the ceiling
A concrete slab may be covered with plaster. You need to check the wiring, slab joints, and the available drilling depth.
Why you cannot assign fasteners based on the word "concrete"
Even for concrete, the choice depends on the weight of the bar, the number of points, the diameter of the holes, the distance to the edge, and the material of the profile itself. These parameters must be linked by the installation project.
Solid and hollow brick are not the same base
A brick wall may look the same after plastering, but its internal structure is different.
Solid brick
Mechanical fastening can work in the body of the brick if the point is chosen correctly.
Hollow brick
Fastener designed for dense material can hit a void and fail to provide expected holding. A different type of solution and confirmed depth are needed.
Masonry joint
Randomly hitting a weakened joint changes the strength of the point.
The installer must know the masonry before holes are drilled in KZ-002. Otherwise, a nice profile turns into an experimental template.
Aerated concrete requires a separate scheme
Aerated concrete differs from dense concrete. A standard universal dowel cannot be automatically assigned to a heavy long profile.
You need to determine:
-
density and condition of the block;
-
the thickness of the finishing layer;
-
type of specialized fastener;
-
depth;
-
number of points;
-
need for a distribution bar;
-
possibility of combined installation.
If the wall is covered with a panel, it may be more reasonable to attach the base to the load-bearing structure, and then attach the cornice to it.
Drywall: you need to look not for the sheet, but for the load-bearing base
The most dangerous mistake is to screw a large cornice only to the sheet, because behind it "there is surely something."
Behind the drywall there may be:
-
metal profiles;
-
wooden studs;
-
plywood insert;
-
double sheathing;
-
void;
-
communications;
-
insulation;
-
concrete wall at a distance.
What needs to be done before closing the frame
The best moment to prepare KZ-002 is during the design of the embedded part. Its position is coordinated with the profile cross-section.
What to do on a finished wall
It is necessary to identify studs, embedded parts, and communications in a way accessible to the project. Random drilling "by step" is unacceptable.
Why adhesive doesn't solve everything
The adhesive holds onto the top layer. If the putty or cardboard peels off, the strength of the compound does not save the joint.
Stretch ceiling: the curtain rod cannot be attached to the fabric
The stretch ceiling fabric is not a load-bearing base for KZ-002.
Before installation, you need to understand:
-
where the ceiling system profile runs;
-
whether there is a recessed mounting;
-
what gap has been left;
-
whether the cornice can be brought up to the fabric;
-
how to prevent puncture or overheating;
-
where the electrical wiring runs;
-
how to maintain the backlighting;
-
what sequence of work has been chosen.
Usually, the mounting base is prepared before the fabric is tensioned. On a finished site, a node cut is required and coordination with a ceiling specialist.
Wooden or plywood mounting plate
The mounting plate transfers installation from an unknown wall to a predictable wooden base. But it cannot be chosen at random either.
Check:
-
material;
-
thickness;
-
width;
-
method of attachment to the supporting structure;
-
continuity;
-
flatness;
-
position relative to KZ-002;
-
ability to reach the safe zone with mechanical fasteners;
-
protection from moisture;
-
compatibility with the finish.
A narrow strip located opposite a thin edge will not solve the problem. The mounting plate must align with the working plane of the profile.
KZ-002 on a furniture cabinet
Furniture application is closer to the FUR purpose, but still does not make the set universal.
Need to know:
-
top panel material;
-
thickness;
-
presence of edge;
-
location of confirmats and ties;
-
cornice overhang;
-
joint above side panels;
-
access from inside the cabinet;
-
possibility to remove the profile;
-
body finish;
-
order of furniture assembly at the site.
Hidden bar
It is often more convenient to install a mounting rail along the body, level it, and attach the cornice to it. But the dimensions and position of the rail are determined by the drawing.
Mounting through the body
The possibility depends on access and panel thickness. The heads must be hidden inside the furniture and not interfere with use.
Where FUR potentially appears
Only if the designer specifically developed a threaded detachable joint. Then the number and position of FUR are indicated on the furniture drawing.
Glue, screws, or combined fastening
The general STAVROS article describes different mounting methods. This does not mean that any of them automatically suits KZ-002. It is useful to study general methods of mounting wooden cornices, and then develop a specific cross-section.
Glue only
Such an option is possible only after verification:
-
base material;
-
strength of the finishing layer;
-
contact area;
-
weight of the product;
-
compatibility of the composition;
-
polymerization conditions;
-
need for temporary fixation;
-
possibility of repair.
Adhesive must not be applied to a dusty, loose, or peeling surface. The phrase "holds wood and concrete" does not yet confirm performance on painted MDF, primed plaster, or translucent oak coating.
Only mechanical fastening
Screws or other elements transfer the load to the base but create holes in the cornice. You need to know safe zones and a way to conceal them. You cannot first drill the front part and then look for a way to hide the head: the location of the point must be part of the drawing.
Combined scheme
The adhesive ensures contact area, mechanical points hold the position. This approach is often considered for long profiles, but the specific materials, quantity, and spacing are still calculated. Combining two unknown methods does not automatically become reliable.
Mounting bar
An intermediate wooden base can simplify alignment and hide fasteners. But it increases the offset, changes the profile's position relative to the ceiling, and requires space inside the cross-section. The bar cannot be chosen based on the principle of "whatever block was found on site."
Why you cannot choose mounting adhesive just by the word "universal"
In this section you can choose adhesive for a wooden cornice, but the product name does not replace verification.
Considered:
-
MDF, beech, or oak;
-
painted or unpainted back side;
-
concrete, plaster, wood, metal, or another material;
-
temperature;
-
humidity;
-
open time;
-
initial fixation;
-
final strength;
-
compatibility with enamel;
-
ability to remove excess;
-
joint color;
-
repairability.
Particularly careful work is done with already painted profiles. The compound must adhere not only to the wood, but also to the specific coating. If the enamel peels off from the substrate, the strong adhesive will tear off along with it.
A test sample is more important than an advertising promise
For a questionable pair of materials, a test joint is made on a technological offcut. It shows whether the compound softens the coating, leaves stains, how quickly it sets, and whether excess can be removed.
Initial fixation and final strength are different things
The compound may quickly "grab" the profile, but not yet reach its design strength. During polymerization, the cornice must be held in place using a method that does not damage the front surface or the ceiling. This is also specified in the technical data sheet.
What to request instead of a vague "fastening scheme"
The phrase "give me a scheme" is too general. You need a mounting cross-section.
It shows:
-
KZ-002 in cross-section.
-
The wall and ceiling.
-
The actual contact plane.
-
The embedded or mounting rail.
-
Mechanical fixation points.
-
Allowable drilling depth.
-
Distance from the thin edge E = 7 mm.
-
Glue application area.
-
Temporary holding method.
-
Masking of holes.
-
Joint of two planks.
-
Internal and external corner.
-
Adjoining to a stretch ceiling.
-
Finishing sequence.
In the STAVROS section you can download drawings of molded products and use an external DWG as source geometry. However, an external profile drawing is not always an installation section. It needs to be supplemented with a specific object's node.
External DWG and installation drawing are different documents
External DWG
Shows the shape, dimensions, and profile of the product. It helps:
-
assess height and overhang;
-
check junctions;
-
build a 3D model;
-
create a flat pattern;
-
calculate angles;
-
understand where protrusions and thin sections are.
Installation drawing
Shows the connection to the base:
-
where the load-bearing part is located;
-
how the fastening runs;
-
where the glue is;
-
what the embedded part is;
-
how the opening is closed;
-
how the parts are connected;
-
who performs each operation.
The buyer often downloads the DWG and thinks the installation is solved. In reality, they have received half the data. The shape of the product is known, but the method of load transfer is not.
Why the thin edge E = 7 mm requires caution
In card KZ-002, parameter E is 7 mm. Without reading the drawing, it is impossible to accurately describe the function of this zone, but one thing is obvious: the thin section should not be automatically chosen for through drilling.
Risks:
-
splitting of the array;
-
destruction of the MDF edge;
-
drill exiting on the front side;
-
impossibility to sink the head;
-
noticeable deformation;
-
weak fixation;
-
damage during tightening;
-
defect manifestation after enamel.
A safe point is assigned based on the full cross-section and direction of the fibers. If the installer cannot show it on the cross-section, drilling is postponed.
Why you cannot set the fastener spacing based on the length of the plank
Online, it's easy to come across formulas like "fasten every 300 mm" or "every 500 mm." For KZ-002, such a number without calculation is dangerous.
The spacing depends on:
-
material;
-
lengths;
-
the mass of the specific plank;
-
stiffness;
-
the base;
-
the adhesive scheme;
-
the location of joints;
-
angles;
-
unevenness;
-
mounting bar;
-
requirements for dismantling;
-
position of the thin edge;
-
ability to bring the tool in.
The article deliberately has no universal step. This is not a flaw, but protection against false instructions.
Weight of the bar: an important parameter that cannot be guessed
MDF, beech, and oak have different densities. Bars also differ in length. Therefore, the weight of a 2600 mm MDF version and a 2400 mm oak version is not the same.
For the calculation, request:
-
weight of one selected bar;
-
weight of the finish;
-
mass of connecting elements;
-
number of slats on the section;
-
position of joints;
-
conditions of temporary fixation.
You cannot use the mass of a similar cornice or an approximate calculation from a photo. Even the exact volume by external dimensions is not equal to the volume of a complex profile.
Uneven wall and actual contact area
Even the correct adhesive will not fill an endless gap.
Check the wall with a long straightedge or another design method and mark:
-
bulges;
-
depressions;
-
slopes;
-
plaster unevenness;
-
protruding panels;
-
angles;
-
junctions with furniture;
-
places where contact is interrupted.
If the profile touches the base only at a few points, the adhesive pattern changes. Sometimes the strip needs to be leveled, sometimes a mounting base is required. Pulling a long cornice to a curved wall with self-tapping screws is dangerous: the profile may deform or crack.
Check not only the wall, but also the ceiling
The cornice visually emphasizes the horizontal line. Even a small difference becomes noticeable by the shadow. The installation project must decide whether the profile follows the ceiling, maintains an independent level, or compensates for unevenness with a mounting strip.
Joints along the length and fastening cannot be designed separately
The KZ-002 cornice is supplied in lengths of 2000, 2400, or 2600 mm. On a long wall, joints appear.
Each joint must have:
-
a support;
-
a precise line;
-
the ability to connect the ends;
-
a place for mechanical fixation;
-
allowance for fitting;
-
access for finishing;
-
identical profile orientation.
If the joint ends up between two mounting points without a base, the edges may separate. Therefore, the cutting layout and installation diagram are created together.
Joint above a furniture side panel
In a cabinet, it makes sense to tie the connection to a rigid vertical. But the position of the side panel must align with an available point on the cornice.
Joint on the wall
A continuous mounting rail may be needed underneath it. The ends cannot be left "in the air" and rely only on putty.
Joint under a transparent finish
On oak, the line is more noticeable. You need to match the pattern, grain direction, and edge treatment method.
Internal and external corners
The angle changes not only the cutting layout but also the fixation.
Inner corner
Two parts meet in an enclosed area. You need to ensure the profile matches and it fits against both walls. The last mounting point must support the edge without damaging it.
External corner
The ends remain visible. Support near the edge is especially important here, but fasteners cannot be placed too close without checking. A tightening error can open up the joint.
The angle is not exactly 90 degrees
Actual geometry requires fitting. Pre-finishing should allow for adjustment. If all planks are fully painted in advance, the ends and correction areas will need to be restored.
How to hide mechanical fastening
Options depend on the material and finish:
-
countersunk head with a wooden plug;
-
filling with a compatible material;
-
fastening through a hidden mounting part;
-
fixation from the back side;
-
mounting rail;
-
detachable hidden joint;
-
masking element provided by the project.
You cannot promise in advance that there will be no holes if the scheme is not developed.
MDF under enamel
The filling can be included in the general cycle of primer and painting. But the place must be stable and not show through after the finish. Too thick a layer of putty over a moving point will later crack.
Beech for enamel
Wood requires careful drilling and sanding. The direction of the fibers and proximity to the edge are considered before tightening.
Oak for transparent finish
Any plug and filling remain more visible. It is better to look for a hidden area or fastening from the reverse side in advance.
Finishing before or after installation
This question is related to fasteners.
| Option | Pros | Limitations |
| Full finishing before installation | Clean processing of a long plank | Fitting and holes damage the coating |
| Primer before installation, finish after | Material protection and ability to hide points | Needs careful work on site |
| Full finishing after installation | Joints and fasteners are part of one cycle | Need to protect walls, ceiling, and furniture |
| Combined cycle | Flexibility | Requires a precise technological map |
For KZ-002 in oak under a transparent coating, the solution is especially important: hiding the hole is harder than under enamel.
Dry fit before finish
At least one strip or control fragment is applied to the actual base. Check the shadow, contact, tool access, and position of future points.
End treatment
After cutting, the wood or MDF is exposed. The end face must receive primer, enamel, oil, or another system compatible with the face finish.
What to check on the old and new KZ-002 card
Two addresses are available in the search:
-
main combined card KZ-002;
-
old page KZ-M-002 from MDF.
The buyer should use the main URL from the current scheme. The old address may show the previous fastener block and different dynamic data.
For the site owner, this is a signal to check:
-
canonical;
-
301 redirect;
-
sitemap;
-
internal links;
-
indexing;
-
relevance of the FUR block;
-
consistency of prices and availability;
-
correctness of micro-markup.
In the article, the link leads to the main product card with sizes KZ-002.
How to read a product card without risky assumptions
Divide the information into four groups.
Confirmed characteristics
Sizes, materials, lengths, quality of polishing. They are used in the specification after checking the selected configuration.
Dynamic conditions
Price, availability, timelines, delivery. They are checked before payment, not carried over from a saved screenshot.
Recommendations
Related products, articles, other profiles. They help find solutions but do not guarantee compatibility.
Unconfirmed conclusions for the project
Number of fasteners, dowel type, mounting plane, allowable spacing, embedded part. These decisions are made by the designer or installer.
The first two groups can be used after verification. The third needs to be evaluated. The fourth cannot be guessed.
Comparison of FUR-001, FUR-012, and the actual installation schedule
| Parameter | FUR-001 | FUR-012 | Schedule KZ-002 |
| Main purpose | Furniture leg | Furniture leg | Specific cornice and base |
| Composition | Stud + threaded insert | Stud + round plate | All project materials |
| Carving | M8 | M8 | Depends on the scheme |
| Base | Furniture structure | Furniture structure | Concrete, brick, embedded part, housing, etc. |
| Quantity | One set per node | One set per node | Calculated by length and load |
| Installation section | Not related to KZ-002 | Not related to KZ-002 | Essential |
| Glue | Not included in the meaning of the node | Not included in the meaning of the node | Determined by the project |
| Camouflage | Inside the furniture | Inside the furniture | Being designed |
| Corners and joints | Does not solve | Does not solve | Takes into account |
| Embedded part | Does not determine | Does not determine | Is specified |
The table shows why two ready-made metal kits do not replace one project specification. A real mounting kit starts not with the fastener article number, but with a description of the bases
Practical scenario: KZ-002 above the cabinet
Initial Data:
-
beech profile 2400 mm long;
-
opaque finish;
-
the cabinet consists of several sections;
-
there is a mounting panel on top;
-
the cornice protrudes beyond the facades.
Solutions:
-
Align the joints to the side panels of the sections.
-
Check the thickness of the top panel.
-
Determine the hidden rail.
-
Calculate the attachment of the rail to the body.
-
Design the connection of the cornice to the rail.
-
Check access for the tool.
-
Coordinate the finishing of openings.
-
Try on one section.
Here, the furniture designer may suggest a threaded insert. Only in this case is FUR considered in detail. You cannot install threaded inserts into a thin furniture panel without a drawing on your own.
Joints above the side panels
When two strips meet above a rigid wardrobe wall, the ends get support. But the joint must account for the profile pattern, the thickness of the finish, and the possibility of bringing fasteners from the inside.
Cornice and facades
The profile overhang must not interfere with door opening. Before installation, check the trajectory of the facade, hinges, and decorative handles.
Practical scenario: cornice next to a stretch ceiling
Initial Data:
-
KZ-002 made of oak;
-
transparent tinting;
-
stretch ceiling;
-
hidden lighting;
-
finished wall decoration.
Risks:
-
damage to the canvas;
-
absence of embedded element;
-
wiring;
-
visible holes in the oak;
-
insufficient gap;
-
impossibility of touch-up;
-
overheating from lighting;
-
no access to the driver.
The correct approach is to obtain a cross-section of the ceiling niche, determine the embedded element and the installation sequence. Fastening directly to the fabric is not allowed. If there is no embedded element, the solution is developed together with the ceiling specialists, rather than replacing it with the furniture plate FUR-012.
Practical scenario: the drywall partition is already closed
Initial data are unknown. There is only a finished painted wall.
Before ordering fasteners:
-
study the as-built documentation;
-
look for studs and embedded elements;
-
check utilities;
-
determine the thickness of the cladding;
-
assess the possibility of access from the reverse side;
-
In the absence of a base, a distributing element is designed.
Buying a "drywall dowel" without mass and a diagram is not enough. If the cornice passes through several sheets and studs, the fastening points must be connected to the actual frame.
When base rework is needed
If there is no suitable base behind the sheet, sometimes it is cheaper to locally open and reinforce the wall than to risk the finished KZ-002. This decision is made before painting and final installation.
Practical scenario: door portal
The cornice crowns two pilasters or casings. Externally, it resembles the upper part of a furniture composition, but the base may be wall-mounted.
Check:
-
opening width;
-
position of vertical elements;
-
wall material;
-
support of ends;
-
central part;
-
joints;
-
gap to the ceiling;
-
corner finishing;
-
connection with the door frame.
If KZ-002 rests on the verticals only visually, the load must still be taken by the load-bearing base. Pilasters cannot be considered supports without structural confirmation.
Practical scenario: a wall-to-wall library
A long row of sections creates convenient support points, but the cornice must maintain a single line.
Useful sequence:
-
Assemble and align the cabinets.
-
Measure the actual length.
-
Assign joints above the side panels.
-
Create a cutting map.
-
Install a common mounting rail.
-
Dry-fit the strips without glue.
-
Check corners and junctions.
-
Secure according to the approved scheme.
-
Process the joints.
-
Perform the finish.
FUR-001 can be used for the legs of the library itself, but this does not make it a top cornice mounting.
Practical scenario: kitchen with upper cabinets
In the kitchen, installation is complicated by ventilation ducts, pipes, exhaust hood, lighting fixtures, and uneven module depth.
Before ordering KZ-002, check:
-
the upper line of the cabinets;
-
distance to ceiling;
-
the air duct passage;
-
access to the mounts;
-
opening of facades;
-
temperature zones;
-
humidity;
-
possibility of leaving;
-
future replacement of equipment.
If the cornice covers the technical gap, it must not block maintenance. A detachable mounting is designed in advance.
How not to confuse KZ-002 with similar products
Not a curtain rod
KZ-002 is a decorative architectural profile, not a rod or ceiling track. Keys about double-row cornices, rings, and brackets for curtains do not apply to this article.
Not a thin molding
Its cross-section and projection require separate installation. The method suitable for a narrow molding on adhesive cannot be transferred without verification.
Not a furniture leg
Even in furniture applications, the cornice remains a horizontal element. The threaded leg kit does not solve all its fixation points.
Not a ready-made set with fasteners
Product card and project specification are different things. An associated item does not mean it is included in the kit.
Not a universal profile for wet or outdoor environments
Such conditions require separate confirmation of material, adhesive, and coating. The article does not promise outdoor installation or operation in a constantly wet area.
Not a strip that can be drilled anywhere
The complex cross-section includes thin and protruding areas. The working part is determined by the drawing.
Mistakes that stop installation
Buy FUR-001 as a standard kit
The bushing and stud do not create a wall-ceiling scheme. On site, you will still have to find the base.
Take FUR-012 as a ceiling plate
The plate name does not confirm its use for a cornice. The card links it to a furniture leg.
Select fasteners by photo
The photo does not show the working thickness, mass, and internal geometry.
Drill the edge E = 7 mm
Without a drawing, there is a high risk of damage, especially after finishing.
Attach to plaster
The load-bearing layer may be deeper. Weak plaster will tear off along with the adhesive or dowel.
Use only glue.
The base and mass may require mechanical support. The word "strong" on the packaging does not replace calculation.
Not providing an embedded insert
After finishing, access to the base becomes more difficult. Stretch ceilings and drywall are especially demanding in terms of preparation.
Do not check the stretch ceiling
The fabric, profile, and wiring are easy to damage. The sequence of work is agreed upon before drilling.
Paint before trial installation
Fitting destroys the finish. The defect is especially noticeable on oak.
Do not request the mass
The calculation remains approximate, and the fastener spacing is made up.
Confuse the external DWG and the installation section
The shape exists, but the node does not. The installer still does not know where to transfer the load.
Do not assign a responsible person
The seller, designer, furniture maker, and installer assume that someone else will make the decision. As a result, the cornice lies at the site.
Do not check the old URL
The buyer may see an outdated block and differing dynamic data.
Add all related products to cart
A recommendation on the site does not imply mandatory compatibility. Each item must have a function in the drawing.
Do not check communications
Drilling near the ceiling affects wiring, lighting, and utility routes.
Do not perform a dry layout
Joints and corners reveal errors only after adhesive is applied.
Do not prepare storage
Long planks cannot be leaned against a wall without supports. Geometry may change before installation.
Who is responsible for the mounting diagram
Before ordering, it is useful to assign roles.
Designer
Determines the appearance, position, material, and connection with the interior. He should not unilaterally assign fasteners without structural data.
Furniture designer
Develops the assembly unit for a cabinet, library, or portal. Only he can confirm the use of furniture fittings in a specific carcass.
Structural designer
Checks the wall, ceiling, and embedded elements. Takes into account load-bearing layers and utilities.
Installer
Confirms manufacturability, tools, and sequence. He must receive the drawing before going to the site.
STAVROS manager
Clarifies product characteristics, available drawings, materials, and order conditions. The manager cannot see the hidden wall without customer data.
Buyer or customer
Records the agreed solution and does not replace items without re-verification.
If no one is assigned, the installation diagram remains "between professions." That's when FUR-001 mistakenly becomes the answer to all questions.
What to send to the STAVROS manager
Instead of asking "which fastener to use?" send a data package:
-
item number KZ-002;
-
material;
-
length;
-
quantity;
-
installation location;
-
photographs;
-
floor plan;
-
wall and ceiling cross-section;
-
base material;
-
presence of embedded element;
-
type of finish;
-
furniture drawing;
-
installation method proposed by the contractor;
-
list of questions about completeness;
-
DWG requirement.
The manager will be able to answer more precisely what is confirmed by the product card and what the project should determine. The wording "concrete wall" is more useful than a photo of a white surface, and a cabinet section is more useful than the words "the cornice will be on top."
Statement before payment
| Field | Value |
| Main product | KZ-002 |
| Material | MDF / beech / oak |
| Size | 104 × 102 × 23 × 7 mm |
| Length | 2000 / 2400 / 2600 mm |
| Quantity | ___ |
| Installation location | ___ |
| Wall base | ___ |
| Ceiling structure | ___ |
| Embedded part | yes / no / unknown |
| Plank weight | confirmed / not |
| Installation section | attached / not |
| Glue | Brand and base confirmed |
| Mechanical fasteners | Type and quantity confirmed |
| Drilling zone | Specified |
| Camouflage | Specified |
| Finishing | ___ |
| FUR-001 | Only needed per furniture drawing / not needed |
| FUR-012 | Only needed per furniture drawing / not needed |
| Responsible installer | ___ |
| Test area | Provided |
| Current price | Checked |
| Completeness | Confirmed |
This list is useful not only for the buyer. Based on it, the designer, furniture maker, and installer see the same initial data.
How to order KZ-002 on STAVROS
The commercial route consists of several steps:
-
Open the product card and check the dimensions of KZ-002.
-
Choose MDF, beech, or oak.
-
Determine the length.
-
Calculate the number of slats.
-
Fix the installation location.
-
Examine the base.
-
Get the external DWG.
-
Prepare the installation section.
-
Request the execution weight.
-
Select mounting materials.
-
Separately evaluate FUR only for the furniture unit.
-
Coordinate the finishing.
-
Perform a trial installation.
-
After that, place the entire order.
Thus, the buyer orders not only a beautiful profile, but also a feasible structure. The broad query "buy wooden cornice" logically leads to the KZ profile catalog, and the article query KZ-002 leads to the specific product card.
Who is KZ-002 suitable for
The profile is worth considering if:
-
an expressive ceiling transition is needed;
-
the dimensions 104 × 102 mm are suitable;
-
there is space for the offset;
-
material selected;
-
the base can be examined;
-
the anchor is available or can be created;
-
the installation drawing will be prepared;
-
Finishing agreed upon;
-
the long-length item can be delivered and stored;
-
angles and joints are calculated.
KZ-002 suits a buyer who is ready to consider the cornice as part of an architectural or furniture assembly, rather than as a decorative strip held by the first available glue.
When it's better to choose a different profile
Another cornice may be more practical if:
-
KZ-002 is too large;
-
there is no space for the mounting base;
-
thin geometry complicates hidden fixation;
-
the base cannot be reinforced;
-
the profile interferes with the ceiling system;
-
the lengths create too many joints;
-
it is impossible to perform a safe carry-in;
-
the finish does not allow masking;
-
A curtain rod is needed;
-
the project is not ready for installation calculation.
In this case, it is more useful to choose a cornice made of wood or MDF with a more suitable cross-section than to force KZ-002 to work in an unprepared joint.
Control fitting: one meter of benefit before the entire batch
For a complex base, it is reasonable to prepare a control fragment or the first plank without final fixation.
Check:
-
fit;
-
level;
-
shadow;
-
drill access;
-
position of the embedded part;
-
adhesive performance on the sample;
-
masking;
-
proximity to the ceiling;
-
joint with furniture;
-
possibility of disassembly.
The result is photographed and recorded in an act or working diagram. After approval, the same principle is repeated on the remaining areas.
Acceptance of KZ-002 before installation
The cornice is checked before drilling and painting:
-
article number;
-
material;
-
length;
-
cross-section;
-
quantity;
-
sanding quality;
-
absence of transport damage;
-
straightness;
-
profile match;
-
end condition;
-
batch compliance;
-
order completeness.
FUR-001 and FUR-012, if ordered for another furniture unit, are stored and labeled separately so that the installer does not mistake them for mandatory cornice parts.
FAQ: KZ-002, FUR-001, FUR-012 and installation
What is KZ-002?
This is a decorative ceiling and interior cornice made of MDF, beech, or oak with a profile of 104 × 102 × 23 × 7 mm.
What lengths are available?
MDF — 2600 mm. Beech and oak — 2000 or 2400 mm.
Why are FUR-001 and FUR-012 shown next to the cornice?
On the old card, they are displayed in the "Fastening options" block. This does not confirm universal compatibility with a wall or ceiling.
What is FUR-001 for?
For quick attachment of furniture legs to tabletops and furniture structures using an M8 × 60 stud and an M8 × 13 insert nut.
What is FUR-012 for?
For attaching a furniture leg using a round plate with a diameter of 37 mm and an M8 × 60 stud.
Can KZ-002 be attached to FUR-001?
Only if a special furniture project directly shows such a joint. FUR-001 is not a universal fastener for a wall or ceiling.
Can FUR-012 be used on a ceiling?
The FUR-012 card does not state such a purpose. Use is possible only after separate design and calculation.
Is fastening hardware included in the KZ-002 kit?
Completeness must be checked in the current product card and with the manager. The presence of a related products block does not imply that fasteners are included.
How to attach KZ-002 to concrete?
The type, depth, and quantity of fasteners are determined after checking the mass, cross-section, contact surface, and condition of the concrete.
How to install a curtain rod on drywall?
You need to find the studs or embedded anchors. Fastening only to the sheet without calculation is not allowed.
Is an embedded anchor required?
It depends on the base and the layout. For drywall, stretch ceilings, and complex assemblies, it often becomes a key part of the project.
Can I use only glue?
Only after checking the base, mass, contact area, and compatibility. There is no universal permission.
Where to drill the profile?
Without an installation drawing, the point cannot be assigned. Particular caution is applied to the zone E = 7 mm.
How to hide self-tapping screws?
With a plug, putty under enamel, a hidden rail, or mounting from the back side — as per the project.
Where can I download the drawing?
On the page catalogs and DWG drawings of STAVROS.
Is an external DWG enough?
No. An installation section with the base, embedded part, and fasteners is needed.
Which material is easier to install?
Without mass and a diagram, a universal answer cannot be given. MDF, beech, and oak require different solutions for finishing and drilling.
Can KZ-002 be painted in advance?
It can be done according to the technological map, but the areas of fitting, joints, and holes will need to be restored.
Is a trial installation needed?
For a new unit — yes. The control sample allows checking the geometry and finish before the entire batch.
Can a furniture panel be used above the cabinet?
Only if the cabinet designer has confirmed the placement and operation of the unit.
What to do if the cornice has already arrived without a diagram?
Do not drill. Take measurements, inspect the base, download the drawing, obtain the weight, and prepare an installation cross-section.
Where to buy KZ-002?
In the main STAVROS card after selecting the material, length, and agreeing on the installation solution.
Can KZ-002 be attached to a wooden panel?
Such a scheme can be considered if the panel thickness, its method of attachment to the wall, and the working area of the cornice are known. A decorative panel without a load-bearing base is insufficient.
What to do with an uneven wall?
Align the mounting strip, use the calculated bar, or develop compensation. Pulling the profile to a curved surface without checking is not allowed.
How to account for the joint of two bars?
The joint is placed on a support, linked to the cutting map, and separate fixation and finishing are provided.
Can one type of fastener be used for MDF and oak?
Not automatically. The material, weight, and masking method differ.
Do I need to buy FUR-001 together with KZ-002?
Only if it is specified in the approved furniture drawing. For regular ceiling mounting, such a requirement is not confirmed.
Do I need to buy FUR-012 together with KZ-002?
By the same logic: only for a specially calculated furniture unit, not because of proximity in the card.
Final conclusion: first the unit, then the hardware.
KZ-002 is capable of finishing a ceiling, cabinet, portal, or library with an expressive horizontal line. But the cornice is not held up by one beautiful photo and a caption saying "Mounting options." Installation begins with the base.
FUR-001 is a pin and threaded insert for a furniture leg. FUR-012 is a pin and round furniture plate. These products can work in specially designed furniture, but they do not turn into a universal KZ-002 kit just because they were in the same old listing.
Before purchasing, separate three tasks: choosing the profile, calculating the slats, and developing the mounting assembly. For the assembly, you need the cross-section, weight, wall material, ceiling construction, embedded insert, allowable drilling zone, adhesive, mechanical points, and masking. When all items are gathered in one section, the cart becomes accurate.
STAVROS provides the KZ-002 listing, a cornice catalog, mounting materials, furniture hardware listings, and drawing archives. Use these pages not as a set of random recommendations, but as source data for your project. An agreed-upon assembly protects the profile from damage, the installer from guesswork, and the buyer from a situation where the cornice is already on site but there is still nothing to secure it with.
Control act of the mounting assembly before work begins
When the scheme is agreed upon verbally, it quickly changes on site. One craftsman suggests more adhesive, another decides to add a self-tapping screw, a third moves the point because of a wire. To prevent KZ-002 from becoming a testing ground for different solutions, it is useful to prepare a short control act before installation.
The act records:
-
address and room;
-
item number KZ-002;
-
material and length;
-
drawing number;
-
date of base inspection;
-
wall structure;
-
ceiling structure;
-
presence and location of the embedded part;
-
weight of the selected strip;
-
working plane of the profile;
-
adhesive brand;
-
type of mechanical fastener;
-
number and location of points;
-
temporary fixation method;
-
masking method;
-
finishing sequence;
-
responsible installer;
-
result of the test section.
Such a document does not replace an engineering calculation, but protects the project from unauthorized changes. If a different foundation is found on site, work is stopped and a new version of the diagram is issued.
Photo documentation of the foundation
Before closing drywall or a ceiling niche, embedded parts are photographed with a tape measure and reference to corners. After finishing, it is impossible to tell from a single white surface where the bar runs. Photos are labeled and stored alongside the drawing.
Marking of slats
Each slat is assigned a number: K1, K2, K3. The map indicates the wall, profile direction, joint, and mounting points. This eliminates the situation where a slat with prepared holes ends up on a different wall.
Handover to the crew
The installer is given not a link to the product card, but a set:
-
floor plan;
-
cutting map;
-
external DWG;
-
installation section;
-
material list;
-
finishing instructions;
-
trial installation certificate;
-
photos of embedded parts.
If the package contains FUR-001 or FUR-012 for a separate furniture structure, the purpose is written on the packaging. The phrase "for a cabinet, not for ceiling KZ-002" prevents errors better than a verbal warning.
What to check before closing walls and ceiling
The best installation starts long before the cornice is delivered. While the frame is open, you can prepare the base without damaging the finish.
Tie the embedded part to the actual section
First, obtain drawing KZ-002, then assign the height and width of the embedded part. The reverse order creates a risk: the finished block may end up opposite an empty or thin zone of the profile.
Leave access to utilities
The cornice must not permanently cover the lighting driver, junction box, or ventilation connection. If maintenance is required, design a removable section or access from an adjacent area.
Check room corners
The embedded profile must extend to connection points. A break near an external corner deprives the short end of support exactly where it is needed most.
Coordinate ceiling system
The position of the tension profile, drywall frame, and light niche are linked to KZ-002 on the same section. Separate drawings from different contractors often overlap only on site, when it is too late to fix.
Provide for finish
If the cornice is painted after installation, leave access for a brush or spray and protect adjacent surfaces. If finishing is done in advance, plan the technology for restoring joints and holes.
First working day check
Before mass installation, the crew performs one complete unit: a section of straight wall, joint, or corner—depending on the main risk of the project.
Inspection includes:
-
marking matches the drawing;
-
mortgage coincidence;
-
correct hole depth;
-
absence of edge damage;
-
adhesion of the back surface;
-
glue working time;
-
ease of temporary fixation;
-
masking quality;
-
possibility to repeat the operation;
-
visibility of the node under main lighting.
Only after acceptance of the first fragment are the remaining strips marked out. This order saves material: one detected error is not repeated around the entire perimeter.