Article Contents:
- Which moldings are best to use for wall frames
- Polystyrene: distinguish between lightweight and dense profiles
- Polyurethane: the name matters less than the range of parts
- What to inspect before buying
- Start with the visible area, not the full width of the wall
- Mark the axes and check the diagonals
- When it's better to abandon symmetry
- The tools depend on the material and cross-section
- First mark the measuring line
- The order of the 45° cut
- Why the first neat cut doesn't yet guarantee a good frame
- MLDPU-001 and the small corner MLDPU-1U-1.1
- MLDPU-004 with two corner options
- MLDPU-002 series: corners and a central ornament
- Option 1. A simple outline with four mitre cuts
- Option 2. A frame with ready-made corners from the 004 series
- Option 3. A classic composition on the 002 system
- One frame 1000 × 1400 mm with a 45° mitre cut
- Three tall frames: why the total linear footage is misleading
- How the calculation changes with ready-made corners
- Why a glued profile can come away together with the covering
- How to prepare a wall if the wallpaper is already hung
- Sequence for attaching the parts
- Visible wedge after sawing
- Gap between the molding and the wall
- Crack after painting
- How to make wall frames from moldings with your own hands?
- Which is better for wall frames — polystyrene or polyurethane?
- How do I cut molding at 45 degrees?
- Can I make a frame without a mitered corner cut?
- Which corner elements are compatible with MLDPU-004?
- Can Moldings Be Glued to Wallpaper?
- How do I make the distances between frames equal?
- How do I eliminate gaps at molding joints?
- Can molding and overlays be painted together with the wall?
- Where can I buy STAVROS polyurethane stucco for frames?

Four strips, four corners — it seems impossible to assemble a wall frame incorrectly. But it is precisely at the corners that a mistake is most often discovered: one piece turns out shorter than the other, the relief does not match, and after painting the mitered seam is still visible. Sometimes the cause is an imprecise cut. Sometimes it is that the frame dimensions were taken along the inner edge of the profile but cut along the outer edge.
For a simple rectangular frame, both high-quality polystyrene and polyurethane moldings are suitable. With a level wall and precise tools, the four 45° joints can be made on your own. If you need an ornamented corner or do not want to fit a complex profile, another path is to choose a molding and the factory-made corner elements intended for it. This is exactly where the STAVROS range becomes more useful than an abstract comparison of polymers: Polyurethane moldings includes elements designed for collaborative work.
First, you should decide on the geometry of the frame and the joining method. Everything else depends on this: which profile to buy, how many strips will be needed, whether overlays should be provided for, and where the joints will run. We will go over both ways of finishing the corners, real marking, and cutting without "eyeballing" the calculations.


Which moldings are best to use for wall frames




Polystyrene: distinguish between lightweight and dense profiles
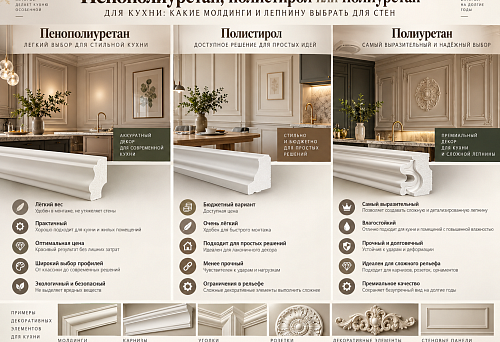
The word "polystyrene" on the packaging does not describe a single level of strength. A lightweight foamed profile is well suited for decorative lines in places where it is rarely touched. It has its advantages: low weight, the availability of many simple cross-sections, and the ability to achieve a clean contour without complex ornaments. But soft varieties can be damaged during cutting, strong pressure, or an accidental impact.
Dense impact-resistant polystyrene is a different product category. Such products can have a more durable surface and neat edges. They should not be evaluated by the properties of ordinary soft foam skirting. When choosing, you need to look at the specific product line, the recommended cutting method, and the quality of the end after a test cut. The commercial name "duropolymer" also requires clarification according to the manufacturer's documentation; for example, the proprietary Duropolymer® refers to materials based on high-density polystyrene.
When is polystyrene quite sufficient? When you need simple rectangles without large overlays, the profile does not protrude into the walkway, and a suitable cross-section with a clear installation technology is available for purchase. Buying a more complex system just for a straight line is not necessary.
Our factory also produces:



Polyurethane: the range of parts matters more than the name
STAVROS polyurethane moldings allow you to choose the width and depth of the relief for a specific interior. The thin polyurethane molding MLDPU-001 measures 10 × 6 × 2600 mm. The more prominent MLDPU-004 is 15 × 8 × 2600 mm. The MLDPU-002 profile, sized 22 × 11 × 2600 mm, is suitable for frames that require a pronounced architectural contour.
A difference of a few millimetres is felt more strongly on the wall than in a store listing. A narrow strip mainly marks a boundary. A profile with a deeper section creates a side shadow, especially near a window or a directional light fixture. At the same time, too high a relief in a narrow hallway may protrude into the zone of accidental contacts.
The distinguishing feature of STAVROS polyurethane products for this task is the ability to choose not only a straight moulding but also matching corners and, if necessary, centre overlays. However, ready-made corners are not universal: a product from one series cannot be automatically joined with a profile from another.
Get Consultation
What to inspect before buying
Place a sample or a full-size printed section against the future frame. Compare the width of the visible strip, the projection above the wall, the shape of the reverse side and the pattern on the front surface. Determine straight away whether the moulding will pass through an area with a switch, a door casing or a cabinet. The more complex the relief, the more carefully you will need to match its pattern at the joints.
It is equally important to check the factory length. For the profiles under consideration, MLDPU-001, MLDPU-004 and MLDPU-002, it is 2600 mm. Accidentally replacing the calculation with “standard two-metre strips” will give the wrong quantity of products.
Polystyrene or polyurethane: a comparison specifically for decorative frames
| What we compare | Polystyrene moulding | STAVROS polyurethane moulding |
|---|---|---|
| Simple rectangular outline | Suitable if the density and section are chosen correctly | Suitable, several profile sizes available |
| Miter cutting of two parts at 45° | Possible with a suitable tool | Possible; accuracy depends on marking and tool |
| Edge condition after cutting | Depends on density, saw tooth and coating | Depends on cross-section, cutting method and tool quality |
| Resistance to accidental contact | Cannot be assessed without the characteristics of the specific product | Also depends on the specific product and its overhang |
| Ready-made corner parts | Depends on the manufacturer's product line | There are coordinated elements for series 001, 004 and 002 |
| Central ornamental overlay | Depends on the product range | MLDPU-2-2.1 is provided for series 002 |
| Painting | With compositions compatible with the product | With compositions compatible with the product and primer |
| wall mounting | Requires a reliable substrate and suitable adhesive | Same requirements; the material does not fix weak plaster |
| Final cost | Depends on the profile price, cutting and labor | Also depends on the number of corners and overlays |
The question "which cuts better?" has no answer based on the material name alone. A very dense, narrow profile may behave differently when cut than a light, wide strip. A quality saw with workpiece support is often more important than the supposed advantage of one polymer over another.
You also need to check the task the corner solves. A 45° cut joins two sides into a continuous contour. A ready-made decorative piece turns the corner into a separate architectural accent. These are two different results, not just two ways to save time.
How to plan identical frames on a wall
Start with the visible area, not the full width of the wall
Consider a wall 3600 mm long and 2700 mm high. Assume door casings, furniture and switches are outside the decorative zone. We want to place three identical vertical frames 800 mm wide. They will occupy 2400 mm horizontally, and another 1200 mm will remain for gaps and edges.
If you make four equal intervals — at the left edge, between the frames and at the right edge — each will be 300 mm: (3600 − 3 × 800) / 4 = 300 mm. This creates a clear rhythm without adjusting distances individually. Note that the marks refer to a pre-selected profile measuring line; if dimensions are set by the outer contour, all four gaps are also measured between the outer contours.
For height, you could consider frames 800 × 1500 mm with 600 mm of free space at the bottom and top. But a living room has a skirting board, armchairs and pictures. Their position can make such a formally correct grid inconvenient. So first mark the boundaries of furniture and walkways, and only then center the decorative frames in the truly free space.
Mark the axes and check the diagonals
Use a tape measure, a long level or a laser level for horizontals and verticals, a square, and a pencil. For each rectangle, measure both horizontal sides, both vertical sides and two diagonals. With correct rectangular geometry, opposite sides are equal and the diagonals match within the tolerance acceptable for finishing work.
Equal diagonals alone do not replace checking verticals: first set the horizontal and vertical lines, then check the right angles and diagonals. Do not rely on the floor line alone — the skirting board, screed or the floor itself may have a slope.
The most useful check before buying is a full-size frame made of painter's tape or paper strips. Stick a temporary outline to the wall and look at it from the doorway, from the sofa, and under evening lighting. A grid that is too dense is noticeable immediately; once installed, correcting the proportions is significantly harder.
When it is better to abandon symmetry
In the pier next to a window, its geometric center may not coincide with the visible axis of the composition: on one side the space is covered by a curtain, on the other by furniture. Here it is more sensible to place one frame in the center of the open area than to strive for mathematical symmetry relative to the entire wall. Decor should be subordinate to the room's architecture, not to random dimensions between two corners.
How to cut molding at 45 degrees without mixing up the dimensions
The tools depend on the material and cross-section
For some lightweight polystyrene profiles, the manufacturer permits a sharp knife. For dense polystyrene and many polyurethane moldings, you will need a fine-toothed saw with a miter box or a precisely adjusted miter saw. A test cut on a short offcut shows whether the tool tears the edge or leaves large chips.
The workpiece is secured so that it does not shift or twist under pressure. When working with a saw, use eye protection and follow the tool's instruction requirements. A complex relief cross-section must not be left hanging without support: the clamp should hold the profile, not crush its face.
First, mark the measuring line
For a rectangular frame made of four strips, it is more convenient to adopt the outer dimension in advance. For example, 1000 × 1400 mm means the distance between the outermost points of the finished profile horizontally and vertically. Then the two horizontal pieces have an outer length of 1000 mm, and the two vertical ones have 1400 mm. Their inner edges will be shorter by an amount related to the visible width of the molding.
If you mistakenly measure 1000 mm along the inner edge, the finished frame will be wider than intended. For a profile 15 mm wide, the difference in outer dimension can reach 30 mm: 15 mm on each side. That is why the entry in the cutting list must contain not only the length but also the rule for measuring it.
Procedure for a 45° miter cut
- Select two short test offcuts of the same profile. Mark on them the face side, the side that sits against the wall, and the outer contour line of the frame.
- Place the workpiece in the miter box or on the saw in the orientation in which the support holds the actual shape of the profile. Check the position according to the tool instructions and the product cross-section; there is no universal rule of "face always up".
- Make two mirrored 45° miter cuts and assemble a flat 90° frame corner. The two cuts must meet without forcing the parts to bend or twist.
- Transfer the verified cutting direction to the finish workpieces. Measure the long vertices of the miter cuts from the chosen outer line of the frame. Do not confuse the left and right sides.
- After processing all four parts, assemble the rectangle without glue on a horizontal surface, or place the elements against the wall markings. Check the outer dimensions, the diagonals, and the relief pattern.
The 45° miter cut here refers to the turning of the decorative line on the wall plane. This is not the same as finishing an external building corner of a wall, where two perpendicular surfaces meet. The latter joint has its own measurements and method of attachment.
Why the first neat cut does not yet guarantee a good frame
Imagine that the top rail has correct 45° angles, but its outer length came out 3 mm too short by mistake. It will not be possible to shift the two side parts while keeping the bottom dimension and the right angles. The seam can be filled, but the geometry will remain distorted. The fix is a new part of the required length or a revision of the dimensions of all elements before gluing.
With profiles that have a repeating ornament, the problem is more complex: the two cuts may fit perfectly, yet the pattern on the two sides ends in different phases. This is a reason either to change the cutting location or to choose a ready-made decorative corner.
Ready-made corners STAVROS: when a miter cut can be replaced with a decorative piece
MLDPU-001 and the small corner MLDPU-1U-1.1
For thin lines there is corner molding MLDPU-1U-1.1 measuring 97 × 97 × 10 mm. It is intended for the MLDPU-001 molding. Compared with large ornamental elements, such a piece fits more easily into a compact frame.
Its availability does not mean that the straight strips can be cut arbitrarily. First, the four corners must be installed according to the design layout, the junction points of the straight profile must be determined, and only then should the length of each straight section be measured. Work should be done according to the drawing of compatible parts, not just the overall size of the overlay.
MLDPU-004 with two corner options
The same one Molding MLDPU-004 can be finished in different ways. Corner element MLDPU-004U measures 135 × 135 × 10 mm. Its L-shaped geometry continues the contour without a large floral ornament.
Another option is stucco decor MLDPU-4U-1.1 measuring 145 × 145 × 14 mm. This is a corner ornamental overlay for the same 004 series. On the same frame, a smooth corner is perceived as part of the geometry, while an ornamental one acts as a standalone accent point.
You should not automatically choose a larger element. If the frame is narrow and located by a door, four 145 mm overlays may visually occupy a significant portion of its sides. A full-size check is especially useful here.
MLDPU-002 series: corners and central ornament
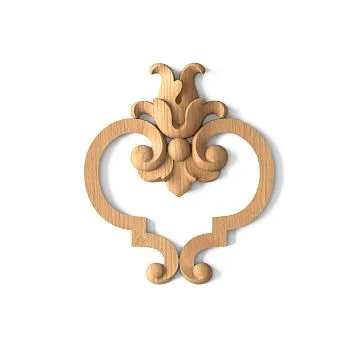
For a more elaborate composition, you can use polyurethane molding MLDPU-002. It is provided with a Corner molding MLDPU-2U-1.1 measuring 210 × 210 × 18 mm. The central part of the straight section can be decorated by the MLDPU-2-2.1 overlay measuring 235 × 237 × 21 mm.
A large frame receives three levels of pattern: the straight profile line, the corner ornaments, and the central accent. At the same time, the MLDPU-2-2.1 overlay is positioned specifically on the molding line section, not necessarily at the geometric center of the empty frame field. If a standalone rosette is needed in the middle of the field, a separate type of wall decor is selected.
Ready-made corners do not eliminate the need for marking. They replace a specific joining method and form a certain pattern, but they do not correct an incorrectly calculated frame width, an uneven wall, or an unsuitable profile. Corner elements are described for rectangular frames; they cannot be used in a non-standard angle without checking the geometry.
Three design options for a single wall: from a simple butt joint to a molded composition
Option 1. A simple outline with four mitered cuts
Let's imagine a frame with outer dimensions of 1000 × 1400 mm. We choose a single straight profile and join the four sides at a 45° miter. With correct cutting, this scheme can be achieved with a suitable polystyrene molding or with the polyurethane MLDPU-001. On a painted wall, such an outline works primarily through its precise geometry. Ornamental details are not essential.
This option requires confident execution of mirrored cuts. On the other hand, you can adjust the frame dimensions yourself without having to match them to large corner blocks.
Option 2. A frame with ready-made corners from the 004 series
Using the same outer dimensions, we apply the straight MLDPU-004 and four corner elements MLDPU-004U. First, we position the corners on the wall, then mark the junction points with the straight profile. As a result, the turns read more expressively than ordinary mitered joints, while the ornament remains restrained.
If we use MLDPU-4U-1.1 instead of MLDPU-004U, the frame gains relief corner accents. This is not a question of the strength of one molding versus another; the buyer pays for a different pattern in the finished composition.
Option 3. A classic composition on the 002 system
For a spacious wall, use MLDPU-002, four matching corner elements, and one central overlay MLDPU-2-2.1 on a chosen straight section. Here you first need to check whether there is enough space between the corners for the central piece and how much straight profile will remain on both sides of it.
Such a set makes sense for a feature wall or a large wall section where the decorative frame should be perceived from a distance of several meters. In a small niche, large overlays may prove disproportionate to the area, and then a simpler system looks more convincing.
How to calculate the number of mouldings for a frame
One frame 1000 × 1400 mm with a 45° mitre cut
For dimensions measured along the outer contour, two sides of 1000 mm and two of 1400 mm are required. The total length of the blanks along this line:
2 × (1000 + 1400) = 4800 mm.
If the factory bar is 2600 mm long, two are sufficient based on the total linear metres. Here the theoretical calculation can indeed be performed without intermediate joints:
| Plank 2600 mm | What to cut | Total outer length of the parts | Nominal remainder before accounting for saw kerfs |
|---|---|---|---|
| First | 1400 mm + 1000 mm | 2400 мм | 200 мм |
| Second | 1400 mm + 1000 mm | 2400 мм | 200 мм |
When preparing the final cutting plan, account separately for the saw kerf width, allowances for initial end trimming, and the orientation of both mitre cuts. A 200 mm margin on each bar makes the example realistic, but by itself does not eliminate the need for a test cut.
Three tall frames: why total footage can be misleading
Suppose three frames measuring 800 × 1800 mm are planned for another wall. They require six vertical pieces of 1800 mm and six horizontal pieces of 800 mm. In total, that is:
6 × 1800 + 6 × 800 = 15,600 mm.
Mathematically, that works out to exactly six strips of 2600 mm. But you cannot cut each one into 1800 mm and 800 mm segments without losing material: the sum equals the full length of the strip, and the saw removes some material. If you do not change the design dimensions or add straight-line joints, a convenient guaranteed plan is eight strips: from six of them, cut one 1800 mm vertical piece each; from the remaining two, cut three 800 mm horizontal pieces each. For three 800 mm segments, 200 mm remains for kerf allowances and end preparation.
This is an example of why a universal “ten percent extra footage” allowance does not always replace a cutting plan. Sometimes the unused offcuts have sufficient total length, but none of them can yield the required single continuous piece.
How the calculation changes with ready-made corners
A corner element occupies part of the frame line. Therefore, you cannot simply order 4800 mm of straight moulding and add four corners: that would result in excess length. But it is also wrong to mechanically subtract two full corner dimensions from a side—for example, two times 135 mm for MLDPU-004U. A 135 × 135 mm dimension does not automatically equal the working length of the profile that the element replaces along the chosen measurement line.
The correct sequence is as follows: mark the outer contour; position the four corners according to the factory drawing or a full-size template; measure from the junction point with one overlay to the junction point with the other. The resulting distances will be the lengths of the straight pieces. If a center overlay is used, divide the corresponding side into two sections and calculate both separately.
To understand the principle, let us imagine a conventional corner element not tied to a specific item code: along the chosen line, it replaces 90 mm on each side of the geometric vertex. Then, for a 1000 × 1400 mm frame, the straight sections would be 820 and 1220 mm. Two 2600 mm strips allow you to cut one section of each size with a convenient margin. For a real order, the 90 mm figure must be replaced with the actual value from the drawing or measurement.
Corner elements are counted individually: four for one standard rectangular frame, eight for two, twelve for three—provided that all turns are finished with the selected element. Center overlays are counted separately; they are not included in the price of a standard corner element.
Can moldings be glued directly onto wallpaper?
Why the glued profile may come off together with the wall covering
If the adhesive has bonded very well to the wallpaper, but the wallpaper itself adheres weakly to the wall, the joint is still unreliable. In such an assembly, the load-bearing layer becomes the paper, non-woven backing, top vinyl layer, or old wallpaper paste. An accidental touch of the textured corner can tear off not only the molding but also a section of the finish.
Therefore, for a permanent decorative frame, it is preferable to prepare a solid base under the gluing areas in advance. This applies to both polystyrene and polyurethane: the profile material does not compensate for weak adhesion of the finish to the wall.
How to prepare the wall if the wallpaper is already hung
First, make precise markings taking into account the width of the adjoining part of the molding, not just its front pattern. Then carefully cut the finish along the areas of future attachment and remove the strips of wallpaper without damaging the solid layer beneath them. The edges should remain under the decorative profile and be protected from peeling; removing too wide a strip of wallpaper will leave a noticeable unfinished band.
Check that the filler, plaster, or existing paint is not crumbling or peeling. Remove dust, restore the base if necessary, and prepare it in a way compatible with the specific adhesive. A glossy or dirty surface also requires an adhesion check. Before starting work, make sure there is no hidden wiring under the markings if any mechanical impact on the base is planned.
Gluing directly over wallpaper is sometimes permitted by the manufacturer of the chosen mounting system. However, this decision should be made based on confirmed conditions, not on the general claim that "everything sticks to non-woven wallpaper." For heavy textured overlays, it is especially important to eliminate a weak intermediate layer.
Sequence for attaching the parts
After a dry fit, prepare a mounting compound compatible with the polymer, the base, and the room conditions. Apply it in accordance with the manufacturer's instructions: along the designated support areas, without contaminating the front texture. Install the top or other support side of the frame according to the markings, then mount the remaining elements, constantly checking the dimensions.
If factory-made corner pieces are used, it is more convenient to first determine and mark the position of all four elements, verify their orientation, and only then install the straight sections. Temporary fixing with masking tape is acceptable if it is compatible with the surface and the paint coating; the holding time is specified by the instructions for the particular adhesive. Do not replace the manufacturer's technical requirements with an arbitrary time such as "holding it for a minute is enough".
After the holding time specified by the manufacturer, fill the small seams with a material intended for this purpose, then prepare the surface for painting. If the decorative element is primed, still check the compatibility of the finish paint with the factory coating. Several thin coats usually help preserve fine detail better than one thick coat.
Why gaps and cracks appear at molding corners
A noticeable wedge after sawing
If, during a dry fit, a triangular gap opens between two mitered ends, the cause is most often the direction of the cut, an inaccurate angle setting, or the position of the profile relative to the tool. First recheck the test pieces rather than trying to fill the wedge with sealant right away. A visually closed joint does not yet mean correct geometry.
Gap between the molding and the wall
Here the cause is different: the wall surface deviates from the plane, and the rigid straight profile does not fit along its entire length. A thick layer of adhesive does not always solve the problem and may produce a weak joint. Check the base with a long straight batten. If noticeable leveling is required, do it before installing the decorative elements.
Crack after painting
A crack may appear as a result of movement of the base, failure to follow the instructions for the joint compound, different behavior of the coatings, or insufficient preparation of the joint area. Neither polystyrene nor polyurethane can stop a moving structural joint. Finishing compounds are chosen according to their purpose: a material for a thin paintable abutment and a compound for a strong end-to-end joint are not always interchangeable.
An attempt to hide a large cutting error with a thick bead of sealant over the face pattern works especially poorly. After painting, the light will emphasize the unevenness even more. It is more correct to replace the damaged workpiece if the cut line cannot be restored without losing the pattern.
How much does one frame cost: comparing a STAVROS set
The price of a straight bar does not reflect the budget of the entire composition. For clarity, let's take a 1000 × 1400 mm frame and two factory bars 2600 mm long, then add the selected compatible parts. Prices are based on verified STAVROS product listings as of October 22, 2026; they must be confirmed before ordering.
| Set | Composition | Cost of products |
|---|---|---|
| Simple frame from the 004 series | 2 × MLDPU-004 at ₽3,190 each | 6380 ₽ |
| Frame with geometric corners | 2 × MLDPU-004 and 4 × MLDPU-004U at ₽1,410 each | 12 020 ₽ |
| Frame with ornamental corners | 2 × MLDPU-004 and 4 × MLDPU-4U-1.1 at ₽1,790 each | 13 540 ₽ |
| Classic frame from the 002 series | 2 × MLDPU-002 at ₽5,460 each, 4 × MLDPU-2U-1.1 at ₽4,490 each, and 1 × MLDPU-2-2.1 for ₽5,350 | 34 230 ₽ |
The amounts apply only to the listed decorative products. They do not include adhesive, wall preparation, paint, delivery, or craftsman labor. For corner systems, two straight strips are a preliminary calculation for the specified frame size; the final cutting plan is drawn up based on the drawings of the selected corners and overlays.
The difference between the first and third sets does not mean that polyurethane has become "twice as expensive" because of its composition. Both options use the same straight profile MLDPU-004. The additional cost arises from four ornamental products and the different complexity of the decorative result. Comparing such a set with a regular polystyrene profile by price per meter alone would be incorrect.
If the goal is to achieve clean geometry, it is more sensible to settle on a simple profile and good cutting. If coordinated corner accents are needed, it is better to choose and buy stucco according to a pre-composed layout, rather than individual random samples. Before purchasing, check the compatibility of each item code and the quantity in the set.
Eight mistakes when making frames by hand
- Choosing molding from a photo alone. A photo does not convey the actual width and depth of the section. Check the dimensions in millimeters and hold a full-size sample against the wall.
- Marking the length alternately along the inner and outer edge. The frame stops being rectangular or turns out larger than planned. The entire cutting sheet must use a single measuring line.
- Trusting the saw angle without a test joint. Even a slight skew of the workpiece creates a wedge-shaped seam. First assemble a test corner from two short offcuts.
- Marking frames from an uneven floor. The horizontals diverge, and the distances at the top and bottom look random. Check the grid against a level and actual architectural reference points.
- Buying ready-made corners from different systems. The cross-section and relief may not match despite the similar name. Compare the product cards and drawings of MLDPU-001, MLDPU-004 or MLDPU-002 with the parts intended for them.
- Calculating consumption only by the perimeter. Even a sufficient total length may not be enough for continuous sides after cuts. Make a cutting map for each strip before ordering.
- Attaching the profile to peeling wallpaper. The molding may come off together with the finish. If possible, prepare a solid area of the base for the adhesive seam.
- Masking an incorrect angle with a thick layer of sealant. The relief pattern is lost, and after painting the thickening remains noticeable. An unsuitable cut is corrected by re-cutting, not by decorative masking.
If it is already clear during marking that there is no room for a frame next to furniture or a light switch, it is better to abandon it or reduce the number of frames. Moldings do not have to cover the entire wall: one well-placed piece often looks more convincing than three placed close together.
Frequently asked questions
How to make frames from moldings on the wall with your own hands?
First determine the wall area available for decoration, then the number of frames and their dimensions along a single measuring line — for example, along the outer contour. Check the marking with a level, a square and the diagonals. Choose the corner construction: four 45° cuts or compatible factory-made elements. Make a cutting map, do a dry fit, and only then attach the parts with a suitable adhesive to a solid base.
Which is better for wall frames — polystyrene or polyurethane?
Both materials may be suitable for a simple geometric contour. A dense polystyrene profile should not be compared with soft foam plastic without taking into account the characteristics of the specific product. STAVROS polyurethane is interesting primarily for its systematic selection: straight profiles can be used to create a laconic frame, and for a more complex composition you can choose the corner and center parts intended for them. The relief, the projection from the wall and the operating conditions are important.
How to cut a molding at 45 degrees?
Mark the outer measuring line and the orientation of the front side on the profile. Secure the molding in a suitable miter box or on a miter saw so that the support matches its cross-section. Make two mirrored test cuts and join the pieces into a right angle. If the angle fits tightly, transfer the direction of the cuts to the blanks of the required outer length. Before gluing, check the entire assembled frame.
Can a frame be made without miter cuts?
Yes, if the manufacturer has provided ready-made corner elements for the selected molding. For example, the MLDPU-004 series includes MLDPU-004U and MLDPU-4U-1.1. In this case, the straight sections are cut to the junction points with the corners, not to the usual outer dimensions of the rectangle. A ready-made corner eliminates one type of joint, but does not remove the need for precise marking and trial fitting.
Which corner elements are suitable for MLDPU-004?
For the MLDPU-004 molding measuring 15 × 8 × 2600 mm, at least two solutions are available: the L-shaped MLDPU-004U measuring 135 × 135 × 10 mm and the ornamental MLDPU-4U-1.1 measuring 145 × 145 × 14 mm. The first supports a calmer geometry, while the second highlights the corner with a relief pattern. When ordering, check the current drawings and the placement of each piece within the overall frame.
Can you glue moldings onto wallpaper?
Technically, some adhesive systems allow such installation on certain coverings, but reliability depends not only on the adhesive. If the wallpaper does not adhere well to the wall, the molding may come off along with it. For a permanent decorative composition, mounting on a solid prepared base is preferable, with the wallpaper edges carefully tucked under the contour or finished around it. The decision is clarified according to the instructions of the material and adhesive manufacturer.
How can equal distances between frames be achieved?
Measure the width of the available wall section, subtract the total width of the frames, and divide the remainder by the required number of intervals. For example, for three frames 800 mm wide on a 3600 mm wall, 1200 mm remains. With equal side margins and gaps, this gives four intervals of 300 mm each. Check the result taking into account architraves, furniture, and other elements, not just the mathematical center.
How can gaps at molding joints be removed?
First determine the cause. If the ends do not meet due to an incorrect cut, it is better to redo the cut before installation. If the problem is an uneven wall, correct the base. Small technological seams after fixing are filled with a recommended compatible paintable compound. A bead of sealant that is too thick over the face relief usually makes the joint more noticeable rather than neater.
Can moldings and overlays be painted together with the wall?
Yes, if the chosen paint is compatible with the material of the decorative items, their factory primer, and the prepared substrate. Monochrome painting emphasizes the volume of the profile through light and shadow, even without color contrast. Before application, test the coating on a sample and make sure the seams are dry. For small ornaments, thin layers that do not fill the recesses of the pattern are preferable.
Where can I buy STAVROS polyurethane stucco for frames?
Start by determining the straight profile and the method of finishing the corners. For system 004, MLDPU-004U and MLDPU-4U-1.1 are suitable; for the richer system 002, the corresponding corner and center decor. In the catalog of polyurethane molding choose overlays only after verifying their purpose against the molding and the prepared frame layout. This will reduce the risk of ordering beautiful but incompatible parts.
Which frames to choose for your interior
If you need simple rectangular lines, start with the wall geometry, choose a quality profile, and test a 45° trial cut. For such finishing, polystyrene and polyurethane can be equally appropriate — provided that the specific item suits the task. What matters most here is cutting precision, marking, and substrate strength.
When the goal is to finish the turns with standalone relief, it makes sense to move from individual strips to a system of ready-made parts. The MLDPU-004 molding can be combined with geometric corners MLDPU-004U or supplemented with the more expressive MLDPU-4U-1.1. The MLDPU-002 series is suitable for a composition with large corner ornaments and a center overlay.
Before ordering, draw up a plan with the chosen measurement line, specify the dimensions of all straight parts, and count the corners individually. Then the purchase decision is based not on a photo of a finished interior, but on a clear set of components that can actually be assembled on your wall.