Article Contents:
- Why a long ceiling needs rhythm, not a random central accent
- What exactly is purchased: NPU-475, its size, and confirmed orientation
- The ceiling map matters more than the total corridor length
- Two ways to calculate an "even" step — and why they give different coordinates
- Equal step of centers
- Equal clean margins
- L-shaped corridor
- Corridor widens into a hall
- End door is offset relative to the axis
- Very long passage
- Lights on the central axis
- Two parallel lines of light
- Track lighting
- Sensors, grilles, and hatches
- If the cornice is smooth
- If there are already molding frames on the ceiling
- When it is better to leave only the perimeter
- Overlays in the color of the ceiling
- Contrasting ornament
- Side and directional lighting
- Check from entry
- Check from the middle
- Check from the opposite end
- Check under working lighting
- What to do if the corridor turns at a right angle?
- Can two parallel rows of NPU-475 be installed instead of one central one?
- Can NPU-475 be alternated with another carved overlay?
- What to do if the lights are not centered in the corridor?
- Can NPU-475 cover a ceiling access hatch?
- What to do with a fire detector, sensor, or ventilation grille?
- Is this scheme suitable for a stretch ceiling?
- Can the distances between NPU-475 near the entrance and at the end of the corridor be changed?
- Do I need to install a rosette in every gap between the lights?
- What to do if three NPU-475 look too sparse, but four look too dense?
- Can NPU-475 also be used on the walls of the same corridor?
- How to design an area where two corridors intersect in a cross?
- Do I need to order an extra NPU-475 as a spare?
- What should I check in the cart right before payment?
- What to do if the corridor has a niche on only one side?
- What to do if one of the rosettes falls exactly on the boundary between two ceiling materials?
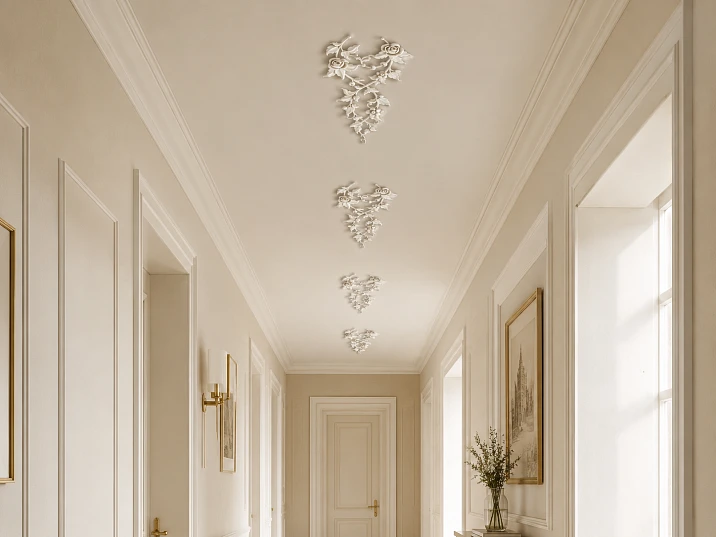
A long corridor ceiling without a central chandelier rarely benefits from a single large decorative spot exactly in the middle. The space itself is elongated, a person walks through it along the longitudinal axis, and light is usually distributed by several points or groups. If you place a single ceiling rosette at the geometric center, it will create one center where the layout requires a sequence. For this scenario, another approach can be considered: several identical carved NPU-475 polyurethane rosettes distributed along the ceiling as repeating ornamental accents.
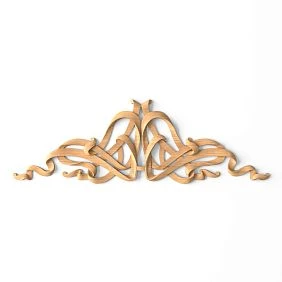
NPU-475 is specifically a carved overlay, not a ceiling rosette. Confirmed size is 350 × 180 × 16 mm, material is polyurethane, price at the time of verification is 4,980 ₽ per piece. In the CPU-P6 STAVROS ceiling system, NPU-475 is used in horizontal orientation: 350 mm along the long side of the ornament, 180 mm along the short side, relief is 16 mm. In this article, calculations are based on the same orientation: 350 mm along the longitudinal axis of the corridor and 180 mm across it.
The main question before ordering is not "will 350 mm fit on the ceiling." On a corridor 5–7 m long, one such overlay takes up only a small part of the longitudinal field. You need to decide how many repeats are required, which uniformity principle to choose, how to navigate around light fixtures, sensors, ventilation grilles, and service hatches, and then check the entire rhythm with paper templates of 350 × 180 mm. Only after such marking does it make sense to buy the carved overlay NPU-475 in the calculated quantity.

Why a long ceiling needs rhythm, not a random central accent
A corridor differs from a square hall in the very logic of movement. In an almost square room, a person can enter, stop, and perceive the ceiling as a single composition with an obvious center. In an elongated passage space, the gaze moves along with the person. The ceiling unfolds sequentially: beginning, middle part, far end. Therefore, a decorative scheme designed only for the geometric center does not always bring the entire space together.
One large ceiling rosette creates a strong local spot. This is natural if there is a chandelier or pendant light beneath it, which explains the presence of the center. When there is no chandelier and multiple light sources are distributed across the ceiling, a large rosette can start to live separately from the lighting scenario: the decor says "center here," while the lighting and the person's movement indicate that the space consists of a long sequence of sections.
NPU-475 allows building a different system. Identical overlays can be repeated on a common axis. Then decorative information is distributed along the length: a person sees not one decorated place, but several connected points. At the same time, the ceiling does not necessarily need to be turned into a full stucco set. Between the overlays, there remains a lot of smooth surface, and the perimeter can be without additional molding altogether or finished with a calm cornice.
This technique is especially useful when the client does not want to make molding frames around each light fixture. Frames require calculating the outer and inner contours, corners, module sizes, and connection with light. A separate NPU-475 is an independent ornamental object. For repetition, fewer variables need to be solved: the longitudinal axis, quantity, center coordinates, free intervals, and conflict zones.
But repetition itself guarantees nothing. Four overlays are not better than three simply because there are more of them. On a six-meter ceiling, an extra repeat can fragment the plane, while too sparse placement can give a feeling of random separate spots. Therefore, the quantity is determined not "by eye along the length," but through the chosen rhythm scheme.




What exactly is being purchased: NPU-475, its size, and confirmed orientation
Before calculations, the product invoice must be fixed. An error in the product type here changes the entire customer journey. NPU-475 is not a ceiling socket and should not be called a socket for the sake of text convenience. It is a carved decorative polyurethane overlay that STAVROS allows to be used, including on the ceiling.
| Parameter | NPU-475 | What this means for the corridor project |
|---|---|---|
| Product type | Carved overlay | Can be used as a separate repeating ornament |
| Material | Polyurethane | The choice refers to polyurethane molding |
| Size | 350 × 180 × 16 mm | In the confirmed horizontal orientation, 350 mm go along the ornament, 180 mm across |
| Relief | 16 мм | The overlay protrudes relative to the ceiling plane and works with light and shadow |
| Price at time of check | 4,980 ₽ per 1 piece | The final cost directly depends on the number of repeats |
| Application under consideration | Ceiling of a long corridor without a central chandelier | Multiple elements can form a longitudinal rhythm |
The size 350 × 180 mm should be perceived at natural scale. On screen, 350 mm seems like a small number, but on the ceiling it is an ornament 35 cm long. If you place four pieces, the total length of the overlays themselves along the axis will already be 1.4 m. At the same time, they do not form a continuous strip: the main visual space is created by the intervals between them.
The 16 mm relief also cannot be ignored. On the ceiling, the overlay can be painted to match the base and still be readable thanks to shadows. If the ornament is made contrasting, its visual activity will increase, so the quantity that seemed calm on a white paper mockup may turn out to be excessive after finishing.
For calculations below 350 mm, they are considered the longitudinal dimension. If a specific project plans to rotate NPU-475 by 90 degrees, the ready-made formulas cannot be mechanically transferred: the length occupied by each repeat along the corridor will change. This option is first checked with a separate template and against the product drawing.
Our factory also produces:
The ceiling map is more important than the total corridor length
The buyer often starts with one number: "a six-meter corridor." For a preliminary conversation, this is enough; for an order, it is not. The ceiling length does not show where the lights are, where the ceiling hatch begins, whether there is a ventilation grille, whether the door on the end wall is offset, whether the corridor expands into a hall, and whether the decorative axis actually coincides with the geometric one.
Before laying out, it is worth drawing a simple ceiling plan. Not a designer drawing with finishing layers, but a working diagram with dimensions. On it, mark:
-
L — the length of each straight section that is perceived as one decorative module;
-
W — the width of this section;
-
the centers and actual dimensions of the lights;
-
the location of tracks, sensors, ventilation grilles, and service hatches;
-
the actual longitudinal axis of the ceiling;
-
expansion, turn, or transition sections into the hall;
-
perimeter cornices and moldings, if they have already been selected.
If the corridor has a total length of 6 m, but the last 1.4 m expands into a square hall, it is not necessary to treat all 6 m as one module. The elongated part can have its own row of NPU-475, and the hall can have a separate composition. This is a different solution than simply "placing four overlays over six meters."
The ceiling width is needed because NPU-475, in the adopted orientation, occupies 180 mm across the axis. On the centerline, half of this size extends to the left and right—90 mm each. If the corridor is narrow, the overlay itself usually fits geometrically, but cornices, light tracks, or molding contours may run alongside. You need to consider the clear central strip between them, not just the distance from wall to wall.
Immutable points are noted separately. A recessed light, fire detector, ventilation grille, or access hatch are not decorative "obstacles" that can be worked around later. They are initial data. The NPU-475 layout is built around them.
It is also useful to note the direction of entry. A corridor may be symmetrical on the plan and asymmetrical in perception: on one side it starts with a wide door portal, and on the other it ends with a narrow door. In such cases, identical end distances do not always produce the same visual impression. First, a strict mathematical scheme is built, and then it is checked from both sides.
Get Consultation
Two ways to calculate a "uniform" step—and why they give different coordinates
The phrase "arrange evenly" is ambiguous. In interior design, uniformity can mean at least two different schemes.
The first is equal spacing between centers. The overlays form a regular sequence of points along the axis.
The second is equal clear fields: the same free distance from the ceiling edge to the first plate, between adjacent plates, and from the last plate to the second edge.
For an element 350 mm long, these schemes do not match. This is where the difference between simple length division and working layout appears.
Equal center spacing
If the length of the decorative section is L and the number of plates is n, a convenient symmetric model without an element directly at the edge is:
P = L ÷ (n + 1),
where P is the distance between adjacent centers and simultaneously the distance from each edge to the nearest center.
For a 6 m corridor and three NPU-475:
6 ÷ 4 = 1.5 m.
The centers are at the marks:
1.5 m; 3.0 m; 4.5 m.
This is a clear three-part scheme: one accent in the first half, one at the geometric center, one in the second half.
But the clean empty fields are not the same. Half of the NPU-475 along the axis is 175 mm. So, from the end to the edge of the first plate:
1.5 − 0.175 = 1.325 m.
Between the edges of adjacent parts:
1.5 − 0.35 = 1.15 m.
The centers are absolutely regular, and the end empty fields are 175 mm larger than the internal ones.
Equal clean fields
If you want the empty intervals to be exactly the same, a different formula is used:
G = (L − n × 0,35) ÷ (n + 1),
where G is the clean free field between the end and the first plate, between adjacent plates, and between the last plate and the second end.
For the same 6 m and three NPU-475:
6 − 3 × 0.35 = 4.95 m;
4.95 ÷ 4 = 1.2375 m.
Then the first center is at:
1.2375 + 0.175 = 1.4125 m.
The second is 3.0 m.
The third is 4.5875 m.
Externally, both schemes are similar but not identical. In the first, the centers form a beautiful sequence of 1.5–3–4.5 m. In the second, the four clean gaps are completely identical.
Which one to choose? If the ceiling is tied to a regular grid of lights, it's easier to start with the centers. If there is no light grid and the main focus is the alternation of 'empty field—ornament—empty field,' it's useful to check equal clean intervals. The final choice is made by a full-size mockup, not the formula itself.
There is also a third situation: architecturally defined edges. For example, on one side the ceiling module starts after a wide portal, and on the other it ends at a transverse cornice. Then the equality of end fields may be less important than precise alignment of the first and last overlay to these boundaries. In such a scheme, the two extreme centers are fixed first, and the internal positions are distributed between them.
How many NPU-475 are needed for a six-meter ceiling
Six meters is a convenient example because on such a length you can compare one, two, three, four, and five repeats. But this is not a 'more is better' scale. Each quantity creates a different character for the ceiling.
Below is a scheme with equal center spacing. The table is for comparison, not as a universal standard.
| Quantity NPU-475 | Centers on ceiling 6 m | Clear field at ends | Clear gap between plates | Cost at 4,980 ₽ |
|---|---|---|---|---|
| 1 | 3.0 m | 2.825 m | — | 4 980 ₽ |
| 2 | 2.0 and 4.0 m | 1.825 m | 1.65 m | 9 960 ₽ |
| 3 | 1.5; 3.0; 4.5 m | 1.325 m | 1.15 m | 14 940 ₽ |
| 4 | 1.2; 2.4; 3.6; 4.8 m | 1.025 m | 0.85 m | 19 920 ₽ |
| 5 | 1; 2; 3; 4; 5 m | 0.825 m | 0.65 m | 24 900 ₽ |
One element leaves almost the entire ceiling empty. This is not a longitudinal rhythm, but a single center. If there is no central chandelier, it is worth asking why a single decorative dominant appears at this particular point. Sometimes there is an answer—for example, an especially important light fixture is located beneath it. If there is no answer, the scheme risks repeating the problem of a large rosette.
Two NPU-475s form a pair. Between them there is 1.65 m of clear space, and to the ends — 1.825 m each. This layout is calm and suits cases where decor should be sparse. Its feature is the absence of an overlay directly in the geometric center.
Three overlays provide a central element and two side points. Therefore, the 1.5–3–4.5 m layout seems intuitive for a straight six-meter corridor. The cost of three items at the verified price is 14,940 ₽.
Four overlays turn the decor into a more pronounced rhythm. The clear distance between them is reduced to 850 mm. With a relief of 16 mm and an expressive pattern, this is already a noticeable ornamental system, especially on a low ceiling or with contrasting paint.
Five elements leave 650 mm of clear space between adjacent overlays. This option should not be chosen just because "the corridor is long." It requires checking the overall saturation of the ceiling and the lighting map.
The main conclusion of the table: the quantity simultaneously changes the rhythm, empty space, and budget. Therefore, the correct order is not the answer "three pieces are needed," but an understanding of what kind of ceiling these three pieces create.
Turns, expansions, and door transitions: when one rhythm needs to be split into two
A straight six-meter ceiling is a convenient model. A real corridor is often more complex. It may have an L-shaped turn, a niche, an expansion before a staircase, a short vestibule at the entrance door, or a transition into a hall. If one mathematical grid is used across all these zones, the ornament may turn out geometrically uniform but architecturally meaningless.
L-shaped corridor
A 90-degree turn changes the direction of movement and the direction of the ceiling axis. NPU-475 in the confirmed horizontal orientation is more logically associated with each straight section separately. The first segment gets its own axis and rhythm, the second — its own.
There does not necessarily have to be another overlay in the corner. Sometimes it is better to leave the turn as a pause. If the ornament is placed directly in the turn zone, its orientation needs to be decided separately, since one NPU-475 cannot simultaneously continue two perpendicular directions.
In practice, this means that an L-shaped corridor with a nominal length of 4 + 3 m should not automatically be considered as "seven meters and four overlays." First, the four-meter section is calculated, then the three-meter one. The quantity may turn out to be the same, but the placement logic will be different.
The corridor widens into a hall
Imagine a narrow passage 4.5 m long, after which the ceiling opens into a wider area for another 2 m. Adding 4.5 + 2 and counting 6.5 m as one line is convenient only on a calculator. The space has already changed its proportions.
The narrow part may get repeating NPU-475, while in the hall a different ceiling composition is more appropriate — including ceiling rose made of polyurethane, if a central light fixture appears there. Thus, the corridor retains its longitudinal rhythm, and the hall gets its own center.
The end door is offset relative to the axis
The geometric axis of the ceiling usually runs through the middle of the width. But the door at the end of the corridor may be offset. Then a person walking through the passage simultaneously sees the correct ceiling axis and an asymmetrical opening.
Do not automatically shift the entire row of NPU-475 to follow the door. First, compare the two schemes using paper templates. In one, the overlays maintain a strict ceiling axis; in the other, the decorative line accounts for the visual center of the opening. If the offset is small, trying to "compensate" for it with the ceiling often creates new asymmetry. If the door is a strong architectural dominant, the solution may be different.
Very long passage
In a long corridor, it is not necessary to increase the number of NPU-475 until the gaps become small. If the layout already contains natural boundaries — an arch, a transverse beam, a change in width, a door portal — the ceiling can be divided into modules.
For example, instead of seven identical overlays on one continuous field, you might get two groups of three with a deliberate pause between them. This is not a universal recipe, but it shows another variable: sometimes the problem of great length is solved by structure, not by quantity.
This approach is especially useful when lighting changes along the corridor. The first zone may have recessed points, the second a track, the third light from an adjacent hall. The same grid of decor through different lighting systems rarely looks as convincing as separate modules.
Luminaires define forbidden zones: first light, then NPU-475
In a corridor without a chandelier, the lighting plan is more important than the central decorative object. Therefore, the location of lighting fixtures is fixed first, then the rhythm of NPU-475 is superimposed on it.
You need to mark not only the center of each luminaire. Its actual dimensions and service area matter. The overlay should not accidentally come close to the shade, cover the opening for recessed lighting, interfere with removing the fixture, or block the sensor and ventilation element.
For a preliminary longitudinal calculation, a model can be used. If a round luminaire has an actual visible diameter D, NPU-475 is located on the same axis, and the project selects an additional clean interval C, the minimum distance between their centers along the axis can be checked as follows:
R = 175 mm + D ÷ 2 + C.
175 mm is half the longitudinal dimension of NPU-475. The value of C is not a universal standard: it is determined by the specific luminaire, its installation requirements, maintenance, and visual layout.
The formula is useful because it reveals a hidden error. You cannot say "the center of the overlay is 300 mm from the center of the luminaire, so there is enough space" without knowing the diameter of the shade. For a large luminaire, the edges may end up almost adjacent.
Luminaires on the central axis
If the spotlights run in a single line down the center, different layouts are possible. The NPU-475 can be placed between the lights if the intervals allow. Then the decorative and lighting rhythms alternate.
Another option is to pair the overlays with larger modules: for example, not filling every gap, but using every other one. This helps avoid the feeling that the ceiling consists of alternating elements without pauses.
If the free intervals between the lights are smaller than the required size, accounting for maintenance, it's better to abandon the central row of NPU-475 rather than try to "squeeze" the overlays in.
Two parallel lines of light
If the light is distributed in two rows closer to the long walls, the central axis can remain free. This is a convenient scenario for NPU-475: the ornament forms a middle row, while the light exists on the sides.
But the transverse geometry needs to be checked. The short side of NPU-475 is 180 mm, meaning it occupies 90 mm from the axis. Sufficient space must remain to each row of lights, accounting for the actual diameter of the fixture and maintenance conditions.
Track lighting
A long track itself creates a strong longitudinal line. If a row of carved overlays is added on the same axis, the two systems may start to compete. Here it's more useful to compare several options: leave only the track and cornice; place the decor in another zone if geometry allows; or abandon the NPU-475.
The product doesn't become mandatory just because the ceiling looks empty. If the light already sets the rhythm, additional molding may be unnecessary.
Sensors, grilles, and hatches
A sensor, ventilation grille, fire detector, or service hatch is not a place for decorative covering. They should be marked on the plan as technical zones. If the device requires free access or an open work area, the decor project adapts to it, not the other way around.
If the final lamp models have not been chosen yet, it is too early to buy the exact quantity of NPU-475. The diameter and shape of the shade can change the suitability of an entire interval.
NPU-475 or ceiling rosette: two different ways to organize the ceiling
The comparison with the ceiling rosette should be made honestly. Both solutions belong to ceiling stucco decor, but they work according to different compositional logic.
| Situation | Several NPU-475 | One ceiling rosette |
|---|---|---|
| A long straight corridor without a central chandelier | Distribute accents along the length | Creates one center |
| Central chandelier | Require a separate additional scheme | Naturally connects to the center of the luminaire |
| Several evenly spaced luminaires | You can create a rhythm between them | The central accent may not align with the logic of light |
| Square hall | Repetition is not always necessary | Central composition often reads more naturally |
| Saturated ceiling | A series can overload | One center is sometimes calmer |
| A sequence by length is needed | This is the main strength | Not a primary function |
If a pendant chandelier or a large central light fixture does appear in the project, it makes sense to first buy polyurethane ceiling rosettes after choosing the suspension point and compare such a solution with a row of recessed lights.
If there is no chandelier and the ceiling is perceived as an elongated route, several NPU-475 units create a fundamentally different composition. They do not imitate a large rosette and do not try to create a false center. Their task is to divide the length into readable intervals.
An intermediate option is also possible: a small rosette around one light fixture and separate recessed lights along the length. But this is already a more complex system with two types of accents. First, you need to prove that the central node is really necessary. If it appears only for the sake of having a rosette on the ceiling, and the lighting scenario does not support it, it is better not to complicate things.
There is another criterion — the direction of the ornament. A round rosette reads equally in all directions or is built around a radial center. NPU-475 has a confirmed horizontal orientation and therefore better supports the longitudinal logic of an elongated ceiling. It is this difference that makes it interesting for a corridor.
Why CPU-P6 solves a different problem and should not quietly become the goal of this article
NPU-475 is part of the ready-made ceiling kit CPU-P6. Therefore, a buyer may get the idea: if several separate recessed lights look good, it is worth gradually adding other details from the same kit.
Such a transition cannot be made automatically.
CPU-P6 is an independent large ceiling system. In it, NPU-475 works together with other ornamental dominants, corner elements, moldings, and the central part. The size of the kit zone is 3200 × 3200 mm. Within this system, NPU-475 is used as a horizontally oriented accent and interacts with other products.
A long narrow corridor without a chandelier solves a structurally opposite task. A square ceremonial center is not needed here. The overlay is used separately precisely because its size of 350 × 180 mm allows forming repeating points along the axis without fully filling the ceiling.
This difference helps avoid overloading the room. In a narrow passage, you can limit yourself to two or three NPU-475 units and leave most of the ceiling smooth. In a large hall or foyer, on the contrary, individual sparse overlays may look too fragmentary, and then it makes sense to compare them with the CPU-P6 stucco decor kit.
For the buyer, this is also a different budget scenario. Purchasing three NPU-475 units is an order of three identical specific parts. Transitioning to CPU-P6 means choosing an entire system and should not happen unnoticed just because the same article number appears in both solutions.
Transverse geometry: how much ceiling remains on the sides of the overlay
Along the corridor, we count 350 mm. Across — 180 mm. The second dimension cannot be ignored, especially if the ceiling already has a perimeter cornice or moldings.
If NPU-475 is centered across the ceiling width, the distance from its edge to each wall, excluding other profiles, can be preliminarily calculated as follows:
B = (W − 180) ÷ 2,
where W is the ceiling width in millimeters.
| Corridor width | Transverse dimension of NPU-475 | Free to each wall when centered |
|---|---|---|
| 900 мм | 180 мм | 360 мм |
| 1000 мм | 180 мм | 410 мм |
| 1200 мм | 180 мм | 510 мм |
| 1500 мм | 180 мм | 660 мм |
| 1800 мм | 180 мм | 810 мм |
With clean geometry, even a corridor 900 mm wide leaves significant side margins. But the actual ceiling may appear visually narrower: part of the width is taken up by the cornice, a wide molding contour, a lighting box, or a light track.
If there are profiles on both sides with an actual overlap onto the ceiling plane P₁ and P₂, the clean central strip is calculated first:
Wч = W − P₁ − P₂.
Then the free field around the centered NPU-475:
Bч = (Wч − 180) ÷ 2.
Such a calculation is more useful than the universal recommendation "leave at least so many centimeters from the wall." Different ceilings and profiles have different geometries. One fixed number here only creates the illusion of precision.
If the cornice is smooth
A calm perimeter and individual carved accents serve different functions. The cornice completes the joint between wall and ceiling, while NPU-475 works within the field. If the two elements do not compete in pattern, the scheme can be quite restrained.
For such a project buy polyurethane moldings only after determining the clear width of the central part. First, you need to understand how much ceiling remains between the profiles.
If there are already molding frames on the ceiling
Then NPU-475 cannot simply be added on top of the existing grid. You need to decide whether each overlay belongs to a separate frame, is placed between frames, or becomes an independent line. If there is no answer, two different rhythms will start to conflict.
When it is better to leave only the perimeter
If the ceiling is low, the lighting is rich, the walls already have many decorative frames, or there is a track running down the center, a row of NPU-475 may be excessive. In such a case, a neat cornice solves the task of completing the interior without additional ornament along the entire length.
Ceiling height, 16 mm relief, and color: the same row can look completely different
For a separate NPU-475, you cannot mechanically transfer the height recommendations that apply to the large CPU-P6. Three separate overlays on a narrow strip of ceiling create a completely different density of decor than a full set.
The 16 mm relief means the element has its own chiaroscuro. The closer the ceiling is to the viewer, the more detailed the ornament reads. On a higher plane, the same pattern is perceived as a general silhouette.
Therefore, ceiling height does not provide a standalone answer of "two or four." It needs to be evaluated together with length, width, number of elements, color, and lighting.
Overlays in ceiling color
If the NPU-475 and the base are the same color, the series is perceived as softer. The main pattern appears through relief and falling light. For initial fitting, this is a convenient model: you can assess the rhythm itself without additional color contrast.
Contrasting ornament
Contrast increases the visual weight of each repetition. Three white overlays on a white ceiling and three dark ones on a light one are two compositions of different intensity, although the geometry is the same.
If contrast is already built into the project, it is useful to paint paper templates approximately in the future tone. Otherwise, a white mockup will systematically underestimate the activity of the decor.
Side and directional light
Directional light enhances shadows from the relief. An overlay that almost dissolved under daytime diffused lighting may become more noticeable in the evening. Therefore, the final quantity should be checked in the working lighting scenario.
There is also the opposite situation: the light fixture is positioned so close that carved shadows become too contrasty. Then the problem is not necessarily solved by reducing the quantity. Sometimes it is enough to change the position of a specific NPU-475 or the light fixture—if the project still allows such an adjustment.
Full-size templates 350 × 180 mm: a check that saves an extra purchase
For NPU-475, the template is especially useful because the main task of the article is built on repetition. One small sketch does not show the rhythm, but several paper parts at a 1:1 scale immediately reveal errors.
Make as many templates as the number of options you want to compare. For a six-meter corridor, it is useful to have at least four rectangles of 350 × 180 mm, even if three overlays are preliminarily planned. The fourth is needed for an alternative scheme.
If it is possible to approximately reproduce the silhouette of the ornament, the mock-up will become more accurate. A solid rectangle is visually heavier than a carved part and shows only the overall dimensions. This is still useful, but the final decision should not be based on the feeling of dense cardboard as an exact copy of the product.
First, the longitudinal axis of the ceiling is drawn. Then the real centers of the lights and technical elements are transferred onto it. After that, the coordinates of NPU-475 are marked according to the chosen formula.
Do not start by attaching one template "approximately in the center." Rhythm is assessed only by a group.
Check from the entrance
Stand at the beginning of the corridor. Here it is especially visible whether the first NPU-475 is pressed against the end and whether the entire line seems shifted into the distance.
If the entrance is designed with a wide portal, the visual boundary of the ceiling may start not where the construction size of the wall ends. Compare the physical end and the perceived boundary of the composition.
Check from the middle
From the central part, the density becomes clear. If adjacent overlays begin to be perceived as an almost continuous chain, there may be too many repetitions. If each part looks isolated and the connection between them is lost, it is worth checking a denser scheme—but not necessarily buying an additional overlay right away. Sometimes it is enough to change the principle of the end fields.
Check from the opposite end
A symmetric mathematical scheme should remain convincing when moving in the reverse direction. If one end terminates with a door and the other opens into a hall, the sensations may differ. This is normal: the task of the mockup is precisely to detect such asymmetry before installation.
Check under working lighting
It is useful to keep paper templates until evening and turn on the future or as close as possible lighting scenario. If one template ends up directly in a strong light spot and the other almost disappears, a formally uniform scheme may look uneven.
After checking, the selected centers are fixed on the plan. The final order should rely on this scheme, not on the memory that "three seemed to look good."
Errors that change not only the appearance but also the quantity in the order
A long ceiling has several recurring errors. They are important because they lead not just to a debatable design, but to the purchase of extra or insufficient parts.
| Mistake | Why it occurs | Consequence | How to check in advance |
|---|---|---|---|
| Dividing the length by a conditional step without considering 350 mm | Perceiving the overlay as a point | Pure intervals turn out to be different | Count centers and edges separately |
| Do not distinguish two types of uniformity | "Equal step" seems unambiguous | Installer and client expect different fields | Fix the scheme before marking |
| Arrange decor before lights | Light is considered secondary | Conflicts arise with shades and maintenance | First create a light map |
| Select four pieces only because of the 6 m length | Quantity is linked only to the footage | The ceiling may become overloaded | Compare templates 2, 3, and 4 |
| Rotate NPU-475 without recalculation | 350 × 180 are considered interchangeable sides | The longitudinal dimension and the entire grid change | Build a new scheme for a different orientation |
| Center by construction width, ignoring profiles | The cornice is not included in the calculation | The central field visually shifts | Count the clean strip between profiles |
| Play CPU-P6 in parts | They see NPU-475 as part of the kit | The narrow corridor becomes overloaded | Compare a single row and a kit as different solutions |
| Order before choosing the fixtures | Want to close the molding issue earlier | After the electrical work, the intervals change | Finalize the light map |
| See only the price of one piece | 4,980 ₽ are perceived separately | The cost of the entire series is not visible | Calculate n × 4,980 ₽ |
| Add a socket and a row without a single diagram | Want to combine both types of decor | Competing centers arise | First determine the role of the central light fixture |
| Mark from one end | The first position seems obvious | The error accumulates toward the end | First apply all centers |
| Copy the step of the adjacent corridor | The rooms seem identical | Different length and light are not taken into account | Count each straight module separately |
Special attention should be paid to the uniformity error. It is almost invisible on a small sketch, but clearly visible after full layout. In a scheme with three NPU-475 over 6 m, the centers 1.5–3–4.5 m look perfectly regular, but the clean end fields are larger than the internal ones. If the customer expected equal empty gaps, they will see an "error" where the installer formally executed the specified coordinates. Therefore, the layout principle should be noted directly on the working diagram.
Another costly mistake is counting the quantity before the lighting equipment. Suppose four NPU-475 fit perfectly along the length, but one of the fixtures, after the final selection, has a large shade and s
When NPU-475 should not be bought for a corridor
Commercial material is useful only when it also helps to refuse an unsuitable product.
NPU-475 is not needed if the ceiling already has a strong independent composition and an additional row will only increase density. For example, a long decorative track, complex molding frames, and several light groups may already fully organize the upper plane.
If continuous track lighting runs down the center of the corridor and there is no free axis for overlays, it is better not to try to squeeze an ornament between technical elements.
If the corridor is short and one NPU-475 effectively becomes a regular single central decor, it makes sense to compare it with a ceiling rosette or just leave only the cornice. The task of a repeating rhythm in such a room may simply be absent.
If after installing a wide ceiling profile the clean central strip looks too narrow relative to the 180 mm NPU-475, it is more rational to look at other Polyurethane decorative appliques of a smaller scale.
If the room's proportions are already closer to a square formal hall, repeating individual overlays may yield to a central composition or a ready-made ceiling decor.
An empty ceiling is also not always a problem. If the corridor walls are saturated with paintings, door portals, panels, or expressive carved decor, a smooth upper plane may be a necessary pause. Buying additional molding in such a case will not improve the interior.
And finally, NPU-475 should not be chosen just because the article number already appears in another room of the house. Repeating one motif can be beautiful, but the corridor's scale needs to be checked anew. What works well in a tall hall does not have to suit a narrow passage.
How to choose between one, two, three, and four NPU-475 without a "magic number"
There is no universal rule of "one overlay per two meters." It does not account for the length of the product itself, lighting, end zones, turns, and the nature of the finish. Instead of a ready-made coefficient, it is better to go through a decision tree.
If there is one obvious central light accent in the hallway, first compare one NPU-475 with a ceiling rosette. Perhaps a repeat is not needed at all.
If there is no chandelier and the ceiling has two independent spatial modules, try two recessed fixtures. The pair creates a calm composition and does not place a mandatory accent exactly at the geometric center.
If the straight section is about 5–7 m and a readable longitudinal rhythm is needed, it is useful to compare three and four patterns. Three give a sparser system and a central point. Four create a denser sequence and, with a scheme of equal centers, do not place a fixture directly in the middle of a six-meter ceiling.
If for four elements the free gaps already seem small, a fifth repeat will not fix the situation. You need not to add quantity, but to consider a sparser scheme, dividing the ceiling into modules, or another type of decor.
If the hallway is longer but has architectural boundaries, divide it into sections instead of automatically extending the series. A ten-meter passage with a portal in the middle may be more logically perceived as two modules rather than one line of many identical fixtures.
There is also a financial filter. At a price of 4,980 ₽, moving from two to three pieces increases the cost by 4,980 ₽, and from three to four—by another 4,980 ₽. If an additional pattern does not create independent compositional benefit, its price is not justified solely by the desire to "fill the ceiling more densely."
The decision process can be reduced to seven questions:
- Is there a central chandelier or another indisputable center?
- How many straight architectural modules does the ceiling have?
- Where are the light fixtures and technical zones?
- What is the net length of each module?
- What looks more convincing: equal centers or equal empty margins?
- How does the ceiling change when adding another NPU-475?
- Is this new effect worth the price of another detail?
If the answer to the sixth question is "almost no effect," there is no need to buy an additional overlay.
Installation begins with full layout, not with the first glued detail.
A series of repeating NPU-475s is sensitive to accumulated error. If the first overlay is shifted by a few centimeters relative to the chosen scheme, subsequent positions will also start to drift. Therefore, the installation stage begins with the geometry of the entire ceiling.
First, the longitudinal axis is fixed. Then the centers of all overlays are transferred onto it according to the prepared plan. After that, the actual dimensions are checked: from each center along the corridor, the product occupies 175 mm, and across — 90 mm.
The next check is for light fixtures, hatches, sensors, and other fixed zones. It is useful to temporarily mark not only the centers of the NPU-475s but also the entire 350 × 180 mm rectangle. Then it becomes visible where the edge of the ornament comes too close to a neighboring object.
Installing one piece before checking the rest may seem like a time saver, but it removes the ability to calmly change the spacing. While the ceiling only has markings and paper templates, you can shift the entire series by a few centimeters or switch from four overlays to three. After final fixation, this becomes rework.
The specific composition for installation, surface preparation, and fastening technology depend on the actual ceiling surface and the chosen finish. You cannot automatically transfer the working method from another material or another type of molding. For an already painted ceiling, separately check the condition of the coating and the compatibility of the chosen fixation system.
If the ceiling is suspended, stretch, or has decorative cladding, first determine whether the specific structure allows the installation of such decor and where the prepared base is located. The permitted use of NPU-475 on a ceiling does not mean that any ceiling system can be loaded equally.
For a series, it is especially useful to mark out from a central reference point or immediately from two extreme boundaries, rather than sequentially 'from the previous piece.' Then each position is checked against the design coordinate, and a small error in one installation is not passed on to the next.
What to buy together with NPU-475, and what is an alternative rather than a mandatory addition
Related pages are needed here not to increase the cart. They help choose the level of solution: one series of overlays, a central rosette, a calm perimeter, or a ready-made ceiling composition.
| Next step | When needed | STAVROS page |
| Buy NPU-475 | Layout and quantity already verified | to buy the carved overlay NPU-475 |
| Compare other overlays | 350 × 180 mm does not fit the scale | Buy decorative polyurethane overlays |
| Select a central composition | A chandelier or pronounced center has appeared | buy polyurethane ceiling rosettes |
| Switch to a ceiling system | The corridor opens into a large hall or foyer | buy ceiling decor |
| Add a calm perimeter | Need a cornice or molding contour | buy polyurethane moldings |
| Select other groups of polyurethane decor | Several interior zones are being designed | You can buy ready-made stucco matching the Baroque style. Calculate the quantity: linear meters of cornices and moldings, number of rosettes, pilasters, consoles, corner elements. Add a ten to fifteen percent allowance for trimming. |
| Compare other types of stucco decor | The product task has become broader than one category | Buy Molded Decoration |
For a broader question about how it is generally structured ceiling decor for hallway and hall, it is useful to separate the general interior scheme from the current product task. The broad material allows comparing cornices, frames, rosettes, and ready-made sets. Here the question is already: whether exactly the repeating NPU-475 are needed and how many to buy.
This distinction also protects against unnecessary purchases. If after the mockup it turned out that a series of overlays is not suitable, the article should lead not to another formulation of the same purchase, but to a real alternative: a rosette, a molding, another overlay, or the absence of central decor.
From scheme to order: quantity, budget, and final check
The price of one NPU-475 at the time of check is 4,980 ₽. For a series, the cost is calculated directly:
Cost = quantity × 4,980 ₽.
Two overlays — 9,960 ₽.
Three — 14,940 ₽.
Four — 19,920 ₽.
Five — 24,900 ₽.
These numbers should be considered before making the final choice of quantity, because moving from three to four elements means not an abstract "slightly more expensive," but purchasing another full piece. If the fourth template does not improve the ceiling, it does not need to be ordered for greater decorative density.
Before purchasing, it is useful to go through one final route.
First, measure the length of each straight section. Then record the width and the clear central strip between cornices or other profiles. Mark all light fixtures and technical elements. Check the orientation of the NPU-475; all longitudinal calculations provided assume 350 mm along the corridor.
After that, choose the uniformity principle. For a light grid, an equal step of centers may be more convenient. For a purely decorative field, use equal intervals between edges. Calculate the coordinates, transfer them to the ceiling, and place paper templates.
Look at the ceiling from both ends. Evaluate the composition with the light on. Check that the first piece does not start too close to the portal and that the last one does not end in conflict with the door, sensor, or ventilation.
Then compare the selected quantity with the nearest option. If three NPU-475 units are planned, be sure to look at four. If four seem like the main solution, temporarily remove one and look at three. Such a check shows the real value of the additional piece.
Finally, ask a control question: does a single ceiling rosette, perimeter molding, or even a smooth ceiling solve the same task more simply? If the row of NPU-475 still wins, the quantity is already justified.
After that, you can order NPU-475 350 × 180 × 16 mm not "for a long corridor in general", but for a specific scheme with known centers and budget.
Markup work sheet: what to record before installation and ordering
Once the scheme is chosen, it is useful to convert it from a sketch into a short work sheet. Such a document is especially needed if the markup is done by a designer and the installation is performed by another person. The phrase "three plates roughly every one and a half meters" leaves too much freedom; a table with coordinates removes ambiguity.
For each NPU-475, it is enough to record the position number, the center coordinate from one selected end, orientation, the nearest luminaire or technical object, and the result of a control check. If a scheme of equal empty fields is used, this is also recorded as a separate line so that it is not accidentally replaced with an equal step of centers.
| Position | Center coordinate from the base end | Orientation | Nearest object | Control before installation |
| NPU-475 №1 | According to the approved scheme | 350 mm along the axis | Luminaire / end / none | Check the full dimension 350 × 180 mm |
| NPU-475 №2 | According to the approved scheme | 350 mm along the axis | Luminaire / sensor / no | Check axis and free field |
| NPU-475 №3 | According to the approved scheme | 350 mm along the axis | Luminaire / hatch / no | Check access and distances |
| Next positions | According to the approved scheme | As per project | According to actual plan | Check before fixing |
The base end should also be named unambiguously: for example, "from the wall plane at the entrance door", not "from the beginning of the corridor". If the finish includes a cornice, ceiling niche, or portal, the construction length and visual boundary may differ.
The plan should retain template dimensions, not just center points. Then, with any adjustment of the luminaire, you can immediately see whether the new object intersects with the actual spot of NPU-475. This schedule turns the design idea into a verifiable installation task and reduces the risk that the chosen rhythm will change already on site.
FAQ: additional questions about NPU-475 on a long ceiling
What to do if the corridor turns at a right angle?
Divide the ceiling into two straight sections and build a separate longitudinal axis for each. Continuing one numerical step "around the corner" is usually pointless because the direction of movement and the orientation of the ceiling change. At the turn, it is better to leave a pause or design a transition separately.
Can two parallel rows of NPU-475 be made instead of one central one?
Geometrically, this option is possible only after a separate calculation of the ceiling width, but this is already a different composition. The distance between the rows, cornices, and lights needs to be checked. All formulas for quantity and step above apply to one longitudinal row.
Can NPU-475 be alternated with another carved overlay?
A mixed rhythm can be designed, but then the simple logic of identical repetition disappears. The second article must have a clear role: for example, marking a separate spatial boundary, not just diversifying the row. The dimensions and axes of the two products are calculated as a new composition; the scheme of identical NPU-475 no longer applies to it.
What to do if the lights are not located in the center of the corridor?
Do not automatically move the overlays to follow them. First, compare the geometric axis of the ceiling and the lighting composition. Sometimes a central row of decor and offset lighting coexist normally, sometimes the asymmetry becomes too noticeable. The solution is checked on the plan and templates.
Can NPU-475 cover a ceiling access hatch?
The decor must not deprive access to the serviced area. If the hatch must open or be removed, the overlay must not cover its seam, fastening, or trajectory of movement.
What to do with a fire detector, sensor, or ventilation grille?
Treat them as immutable technical zones. The overlay must not cover the device or impair its maintenance and operation. Exact requirements are determined by the specific equipment.
Will such a layout work for a stretch ceiling?
You cannot independently transfer the standard mounting method to a stretch system. First, confirmation from a specialist regarding the specific structure and prepared base, if needed, is required. The layout can be designed in advance, but installation feasibility is checked separately.
Can the distances between NPU-475 near the entrance and at the end of the corridor be changed?
Yes, if it is deliberately tied to the architecture: for example, the passage widens into a hall or intersects with a portal. Random step variations usually look like a mistake. The transition between two rhythms should be anchored to a clear spatial boundary.
Is it necessary to place an overlay in every gap between the lights?
No. The lighting and decorative grids do not have to have the same number of elements. Sometimes NPU-475 occupies every other free module or only the largest intervals. The key is that the repetition is perceived as a system, not as an attempt to fill every empty space.
What to do if three NPU-475 look too sparse, but four look too dense?
Do not look for an "average quantity" that does not exist. Check the second principle of uniformity, change the end margins, divide the ceiling into two modules, or compare a different size of decorative overlay. If the problem persists, perhaps NPU-475 is simply not suitable for the length and lighting grid of this corridor.
Can the NPU-475 be used on the walls of the same corridor?
The card allows the overlay to be used not only on the ceiling, but the wall composition must be designed separately. Repeating the same ornament on both walls and ceiling can sharply increase decorative density. First complete the ceiling scheme, then decide whether this motif is needed elsewhere.
How to design an area where two corridors intersect in a cross?
The intersection point is better considered a separate ceiling zone, not just another interval in a row. Four directions create a new center. It can be left empty, use a separate accent, or finish each row before the intersection; the solution is checked with a separate plan, because the linear formula of a straight corridor no longer describes the geometry here.
Do I need to order an additional NPU-475 as a spare?
For ready-made individual overlays, there is no universal percentage of spare, as for linear material. The quantity is determined by the number of actual positions. A reserve can be an organizational decision of the customer, but it should not automatically be included in the geometric calculation.
What should be checked in the card immediately before payment?
The exact article number NPU-475, size 350 × 180 × 16 mm, material, current price, and order terms. The price of 4,980 ₽ refers to the time of verification and must be re-checked before purchase.
What to do if the corridor has a niche on only one side?
The niche changes the perception of width, but does not necessarily require shifting the ceiling axis. First, maintain a strict central line and check templates from key points. If the asymmetry of the niche visually dominates, you can consider a separate module specifically in the expansion zone, without breaking the entire row.
What to do if one of the overlays falls exactly on the border of two ceiling materials?
Such a position needs to be checked not only visually, but also technically. Different bases may require different preparation and fastening. It is easier to shift the decorative center within the overall layout, if this allows preserving the rhythm and avoiding a questionable installation joint.
A long ceiling benefits from a precise rhythm, not from the maximum amount of stucco.
For a corridor without a central chandelier, NPU-475 is interesting because it allows abandoning a single decorative center. The carved overlay 350 × 180 × 16 mm can be repeated along the longitudinal axis and divide the elongated plane into clear intervals.
First, the system is determined, not the quantity: the boundaries of the straight module, the lighting layout, the longitudinal axis, and the chosen type of uniformity. Then the transverse field, relief, color, and view from both ends of the corridor are checked. After that, paper templates show whether the next overlay truly adds structure or only increases decorative density.
If two or three pieces already create a complete rhythm, the next one is not needed. If a central chandelier appears, the layout must be compared again with the ceiling rosette. If a narrow passage opens into a large hall, the row can be finished at the architectural boundary and move on to another ceiling system.
After such a check, the purchase becomes predictable: it is known exactly what to order, how many pieces, where the center of each NPU-475 is, and why that particular quantity was chosen. For a straight project, you can to buy the carved overlay NPU-475; if the 350 × 180 mm scale is not suitable, compare Polyurethane decorative appliques; when moving to a more complex ceiling, open Ceiling Decor.
STAVROS company allows choosing either one specific NPU-475 or a more developed system of stucco decor. For a long corridor, the value lies not in the maximum number of elements, but in precise marking: preserve free fields, align the ornament with light, and make the repetition part of the architecture of the passage, not random filling of an empty ceiling.