Article Contents:
- Where to use wooden corner: complete usage map
- Lining on walls and ceiling
- Wooden slopes
- Wall panels and decorative panels from solid wood
- Furniture
- Openings and portals
- Baths, saunas, wooden houses
- Joints of baseboard, batten, casing and panels
- External and internal wooden corner — main difference
- External wooden corner
- Internal wooden corner
- Table: how to understand which corner is needed
- Wooden corner for lining — choosing by situation
- External corner of lining
- Internal corner of lining
- Transition of lining to ceiling
- Corner of lining in a bathhouse
- Wooden house: corner outside
- How to choose a wooden corner for slopes
- Window slope: task and solution
- Alignment with trim
- Protection of the protruding edge of the slope
- Wooden corner for wall panels — complete the look
- Panel transition to adjacent wall
- Joint of two panels in a corner
- Combination with slats, moldings, and baseboards
- Panel transition to ceiling
- Material: which wood species is best for the corner
- Oak
- Oak
- Birch
- Spruce
- MDF for painting
- How to choose the size of a wooden corner
- Size range and selection logic
- How to measure the required size
- How and with what to attach a wooden corner
- Mounting adhesive and liquid nails
- Finish nails (brads)
- Combined method (glue + nails)
- Hidden fastening
- How to cut a corner piece at 45 degrees
- Wood corner piece coating — how to preserve and match color
- Corner piece for varnish
- Corner piece for oil and wax
- Corner piece for tinting (stain)
- Corner piece for painting (enamel)
- Corner piece for bathhouse and sauna: specifics
- Wood species for bathhouse
- Mounting method in the bathhouse
- Mistakes when buying a wooden corner — to avoid going back to the store
- What to check before buying a wooden corner — a quick checklist
- FAQ — answers to popular questions about wooden corners
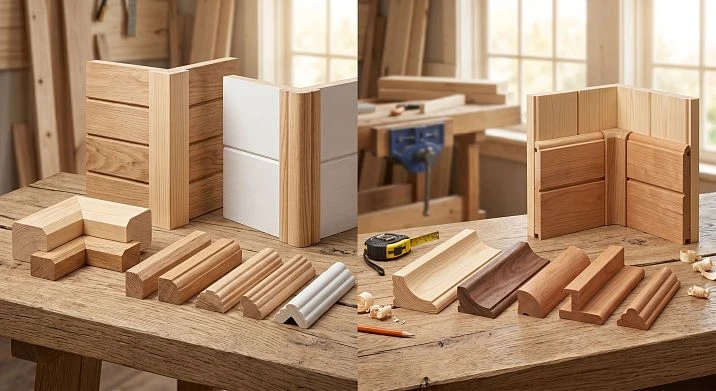
The renovation is almost done. The lining is laid, the panels are mounted, the slopes are installed. And then comes the moment that many underestimate in advance: the corner. The bare joint of two planes, where the finish ends and... emptiness begins. A gap. Or an uneven cut of the board that spoils the impression of the entire work.
This is where the wooden corner for finishing comes into play — a small but fundamentally important element of the trim. It covers the joint, protects the corner from mechanical damage, and visually completes the finish. Without it, even perfectly laid lining or an expensive wall panel looks unfinished.
View Wooden corners and trim STAVROS — in the catalog.
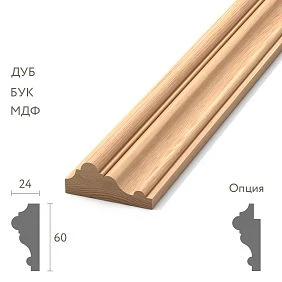
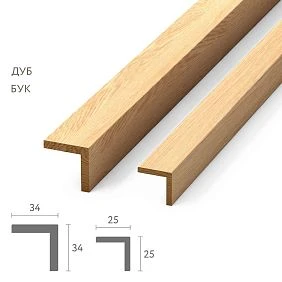
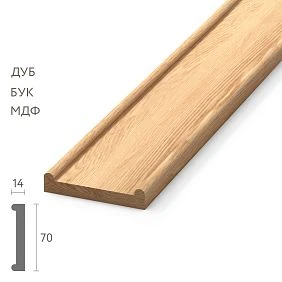
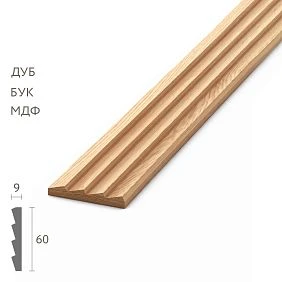
Where to use a wooden corner: a complete usage map
Before talking about selection, let's outline: where exactly this element is needed. This is not a single scenario — the wooden corner works in a dozen different contexts, and in each of them, it has its own task.




Lining on walls and ceiling
Clapboard is the most common "partner" of a wooden corner. When sheathing walls with clapboard, at least four types of corner joints arise: external corners of the room, internal corners, the transition from wall to ceiling, and the transition to the floor. Everywhere you need a profile that will cover the ends of the boards and make the joint clean.
Our factory also produces:
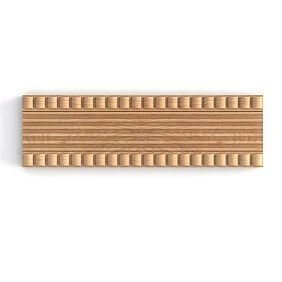
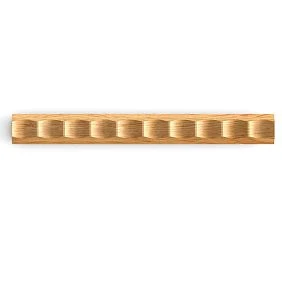
Wooden window reveals
The slope of a window or door is a place of maximum visibility. An unsightly joint between the slope and the main wall, an uncovered end of the panel, a gap between the slope and the window sill — all of this is visible every day. Wooden corner for trims covers these joints and protects the protruding edge, which, with a frequently used window, is constantly subjected to mechanical stress.
Get Consultation
Wall panels and decorative panels made of solid wood
The modern trend for wall panels has created a new need for corner profiles. A panel on an accent wall is beautiful. But where does it end? At the junction with the adjacent wall, with a doorway, with the ceiling. Without a profile, the edge of the panel sticks out or sinks into a gap.
Furniture
A wooden corner is also used in furniture — as a protective and decorative element on open corners of cabinets, shelves, and wardrobes. This is especially relevant for solid wood furniture, where the corner of the body is an open cut of wood.
Openings and portals
When designing a door portal or a decorative opening, the corner covers the transition between the wooden finish and the wall — where the casing meets the slope or wall panel.
Baths, saunas, wooden houses
In a bathhouse and sauna, the corner profile serves a dual function: aesthetic and protective. Wood in conditions of humidity and temperature changes "works" — expands and contracts. The corner piece covers this expansion gap. For a bathhouse, it is essential to choose the right coating.
Joints of baseboard, batten, trim, and panels
In places where different elements meet wooden trim — transition from baseboard to wall panel, batten to slope, trim to panel — the corner profile creates a clean transition line. Without it, joints look random.
External and internal wooden corner piece — the main difference
This question is the first and decisive one. A mistake here means buying the wrong profile, and then — a trip to the store again.
External wooden corner piece
The external corner piece is a profile in the shape of the letter "G" (or "L") that fits over a protruding (external) corner. It covers both adjacent planes from the front side and protects the corner edge from impacts and chips.
When needed:
-
the angle between two walls lined with clapboard, where the corner protrudes into the room space;
-
corner of a furniture body;
-
outer edge of a slope at a window or door;
-
decorative corner in an opening;
-
protective corner on a frequently used surface (corner of a corridor, corner of a wall in a hallway).
External wooden corner piece is mounted so that its flanges cover the ends of the finish on both sides of the corner. The stronger and thicker the profile, the better it protects the corner.
Internal wooden corner piece
Internal corner piece — a profile for joining two planes that form a concave angle. Typical example: two adjacent slopes in a niche corner, the junction of a wall and ceiling when lined with clapboard, the junction of two panels inside an opening.
When needed:
-
transition from wall to ceiling with wooden cladding;
-
joint of lining in the corner of the room (where two walls converge inward);
-
transition from the slope to the wall inside the window opening;
-
joint of wall panels on adjacent walls.
Internal wooden corner outwardly similar to the external one, but installed in a mirrored position: the shelves cover the edges of the trim from the inside, hiding the joint.
Table: how to understand which corner is needed
| Situation | Corner type |
|---|---|
| The corner of the wall protrudes outward into the room | External |
| Corner where two walls converge inward | Internal |
| Outer edge of the window slope | External |
| Joint of the slope with the wall inside the opening | Internal |
| Corner of a furniture body | External |
| Transition from wall to ceiling (cladding) | Internal |
| Corner of a decorative portal | External or internal (depending on the situation) |
Wooden corner for paneling — choose based on the situation
Paneling is the most common context for using corner profiles. Let's break down each situation separately, because each has its own specifics.
External corner of paneling
Imagine: a room is paneled with clapboard, and there is an external corner — for example, a column, a wall protrusion, or a partition corner. The clapboard boards are cut at the corner, and the cut becomes visible. External wooden corner for clapboard covers these cuts on both sides of the corner, creating a clean vertical line.
Profile size: the corner flanges must overlap the clapboard ends with a margin of 3–5 mm. If the clapboard is 14 mm thick, the corner flange must be at least 20 mm. For 20 mm clapboard — flange from 25 mm.
Internal corner for clapboard
When two walls paneled with clapboard form an internal corner of the room — the joint of boards on both sides creates an unsightly gap. Especially on uneven walls, where the clapboard sits with a slight offset.
The internal corner covers this gap, forming a clear vertical line in the corner. It is installed after laying the clapboard — as the last element in the corner.
Profile and size: the flanges of the internal corner must be wide enough to cover any possible gap and lie on both planes of the clapboard. For 96 mm wide clapboard — corner 20×20 or 25×25 mm.
Transition of clapboard to ceiling
The joint of clapboard with the ceiling is a separate topic. Here, the internal corner works as a ceiling cornice. It covers the top end of the clapboard and decoratively finishes the paneling at the ceiling. An alternative option is wooden molding or cornice, which is more decorative and creates a more expressive horizontal line.
Corner of paneling in a bathhouse
In a bathhouse and sauna, paneling is the main finishing material. Here, the corner profile has an additional requirement: resistance to moisture and temperature changes.
For a bathhouse: corner made of linden, aspen, alder — the same species as the main paneling. Coating — special oil for bathhouses and saunas, resistant to high temperatures. No water-based varnishes, no regular acrylic paints.
Important: in a bathhouse, the corner is installed with a small expansion gap — wood expands when heated. If the corner is glued rigidly, it may "pop" or crack during the first heating.
Wooden house: corner on the outside
For wooden houses, the external corner is not only decor but also protection for the ends of logs or timber. At the corners, the rows join, and the ends need additional protection from precipitation and wind. A wooden corner profile for external use should be made of dense wood (larch, oak) and coated with a weather-resistant compound.
How to choose a wooden corner for slopes
Slopes are a highly visible and frequently used area. It is here that a poorly covered joint catches the eye the most.
Window slope: task and solution
A wooden slope is installed along the perimeter of the window opening — at the top and on the sides. It covers the installation gap between the frame and the wall, insulates the slope, and creates a decorative window frame.
Several corner joints occur in the slope area:
-
External corner — where the slope meets the wall on the front side. This protruding edge needs protection.
-
Internal corner — where the slope adjoins the window frame. Here, the corner piece covers the installation gap.
-
Slope-to-windowsill joint — the horizontal plane meets the vertical one. A corner profile or plinth is also needed here.
For slopes, it is important: the corner piece must be from the same wood species and with the same tint as the slope itself. Different wood shades in one opening are the main mistake made when purchasing.
Coordination with the casing
If a door is installed wooden casing made of oak in a specific tint — the slope corner piece next to it must be from the same oak with the same tint. Otherwise, the entire trim system "falls apart" — each element looks like it randomly ended up in its place.
Protection of the protruding edge of the slope
The outer edge of the slope is a place that is constantly bumped when opening a window, washing windows, or moving furniture. A wooden corner profile here works as a protective overlay: it takes on the mechanical load and prevents the end of the slope from chipping and delaminating.
Wooden corner for wall panels — complete the look
Wall panels made of wood, MDF, or decorative veneer are a trendy element of modern interiors. But it is at the joints and corners that this beauty often 'breaks'.
Transition of the panel to the adjacent wall
When an accent wall with wooden panels meets a side wall, a corner profile is needed. Without it, the end of the panel faces the space. An external corner installed at this transition covers the end and creates a vertical decorative line.
Joint of two panels in a corner
If the cladding runs on two adjacent walls, the internal corner requires a special profile. The panels simply butt into the corner, and the joint looks unattractive — different textures, possible gaps. Internal wooden corner solves this problem cleanly.
Combination with slats, moldings, and baseboards
Wall panels are part of a wooden interior system. They are finished at the bottom by Wooden baseboard, at the top by a molding or cornice, and at the corners by a corner piece. All these elements should be made of the same material, with the same tint, preferably from the same series.
A chaotic set of different profiles from different manufacturers — even from the same wood species — almost always results in a shade mismatch. Therefore, when designing a wooden interior, the correct strategy is to take all wooden molding trim — corner pieces, baseboards, moldings, architraves — from the same catalog, same series, same batch.
Panel-to-ceiling transition
The top edge of a wall panel is the most difficult place to conceal. If the ceiling is perfectly level, the internal corner profile will press tightly against it. If the ceiling is uneven (which is almost always the case in reality), a small compensation cut is needed.
Alternative: use a wider molding-cornice in the panel-to-ceiling transition area, which will cover a small gap and create an expressive horizontal line.
Material: which wood species is best for a corner piece
The material of the corner piece is no less important a choice than the profile type. It determines strength, color, texture, and the ability to accept coating.
Oak
Oak is the best choice for interior corners that will be in plain sight. A dense, hard wood with expressive pores and an even texture. It accepts any coating: oil, wax, stain, varnish. When stained, oak gives a deep, rich color.
An oak corner is suitable for:
-
a hallway with oak trim and baseboard;
-
a living room with wooden wall panels;
-
a classic-style study;
-
a corridor of a wooden house.
Limitation: oak is an expensive wood. If the budget is limited and the corner will be painted, there are more economical options.
Beech
Beech is dense, stable, with a fine, uniform texture. Slightly lighter than oak, with a less pronounced grain pattern. It is excellent for painting in any color. Beech sands well — the surface becomes very smooth.
A beech corner is ideal for:
-
paneling for staining or painting;
-
slopes in painted interiors;
-
furniture under enamel.
Birch
Affordable species, even white wood without a pronounced grain. An excellent base for enamel and any paint color. For corners to be painted white, gray, or neutral — birch is optimal.
Limitation: with open staining (when the texture remains visible), birch looks modest — it lacks the expressive grain of oak or ash.
Spruce
Soft species, easy to work with. For baths and saunas — suitable with proper coating. For interior corners in low-traffic areas — acceptable. But on external corners of hallways or kitchens, pine quickly gets dents from impacts.
MDF for painting
MDF corner — for monochrome interiors where all trim (baseboards, casings, moldings) is for painting. Smooth surface, precise geometry, no visible texture — but any RAL color. Plus: MDF does not warp with proper double-sided coating.
Limitation: when chipped, MDF reveals a gray core — unsightly. Therefore, on actively used external corners — solid wood is better.
How to choose the size of a wooden corner
Size — a simple but critical question. A corner that is too small does not cover the gap. One that is too large looks rough next to thin paneling.
Size range and selection logic
10×10 mm — a miniature corner. For closing very small gaps, for thin panels and inserts. Rarely used alone, more often paired with another profile.
15×15 mm — small, neat. Suitable for thin paneling (12–14 mm) and decorative panels in modern interiors. Looks delicate, almost unnoticeable.
20×20 mm — standard for paneling. Covers gaps up to 8–10 mm, overlaps board ends with a margin. Universal size for most tasks with paneling and slopes.
25×25 mm — slightly larger, more expressive. For thick paneling (20 mm+), for slopes with noticeable gaps, for wall panels.
30×30 mm — decorative profile. Already noticeable on its own, creates a clear corner line. For classic interiors, for framing portals and openings.
40×40 mm and above — architectural corner. A pronounced decorative element, close to a molding or cornice. For luxury interiors, wooden houses, classic studies.
How to measure the required size
Step one: measure the width of the gap to be covered. The corner shelf should overlap the gap + 5–8 mm for a secure fit.
Step two: assess the thickness of the finish. The corner shelf should not be narrower than the end of the finishing material — otherwise the corner does not cover the cut.
Step three: consider proportions. On thin paneling of 12 mm, a 40×40 mm corner looks absurd — too large an accent on a thin material. Guideline: corner shelf width ≈ 1.5–2 times the finish thickness.
How and with what to fasten a wooden corner
Fastening is the technical side of the issue that many put off "for later." And then it turns out that the corner falls off, sticks out, or leaves marks on the finish.
Mounting adhesive and liquid nails
The most common and convenient method. Mounting adhesive (e.g., "Moment Montazh") or liquid nails are applied to the back side of the corner piece in a thin strip. The corner piece is pressed against the corner and held under pressure for 1–3 minutes.
Advantages: no marks on the front surface, fast, neat.
Limitations: the adhesive bond is permanent. Removing the corner piece without damaging the finish will be difficult. Therefore, before gluing, be sure to do a dry fit and check.
Finish nails (pins)
Thin finishing nails with a diameter of 1.2–1.6 mm are driven into the corner piece at a slight angle. The heads are countersunk with a nail set, and the holes are filled with putty to match the corner piece color. This method is reliable, especially for long corner pieces (over 1.5 m), which may "pull away" in the center with only an adhesive bond.
Important: the finishing nail is driven into the body of the corner piece, not into the thin edge. For 20×20 mm corner pieces, do this carefully to avoid splitting the profile.
Combined method (adhesive + nails)
The adhesive ensures a tight fit along the entire length, while the nails provide mechanical fixation while it dries. For long corner pieces (over 2 m), this is the optimal option.
Hidden fasteners
Used in expensive interiors where fastener marks are unacceptable. A self-tapping screw is driven through the back of the corner piece into the base — it is hidden under the next trim element or behind the corner piece. Requires precise planning.
How to miter a corner piece at 45 degrees
In places where two corners meet at a right angle (e.g., on a vertical and horizontal slope), their ends need to be cut at 45 degrees — this is called a "miter cut." A 45-degree cut provides a clean joint without a gap.
For a 45-degree cut, use:
-
a miter box — the simplest tool for cutting at 45° and 90°;
-
a miter saw — more precise, faster, for professional work;
-
a jigsaw with a guide — with careful adjustment.
After cutting — test fit. If there is a gap, trim it. Cutting is "singing," meaning it goes smoothly with the right tool. With a poor tool, the wood tears instead of cutting.
Coating a wooden corner — how to preserve and match the color
The corner coating must match the coating of the main finish. This is an axiom that is most often violated.
Corner with varnish
For interiors in classic and neoclassical styles, for slopes and portals — varnish adds shine and emphasizes texture. Matte varnish is a modern choice. Glossy varnish is for classics.
Important: apply varnish before installation (on a workbench) to cover all sides and ends. After installation, touch up the joints with a brush. This ensures even coverage without gaps.
Corner for oil and wax
Natural coating for oak and ash. Oil penetrates the fibers, highlights the texture, and gives a velvety surface. For wooden houses, baths (special oil), living rooms in Japandi or country style.
Corner for tinting (stain)
Tinting changes the color while preserving the texture. Oak in 'wenge', 'dark walnut', 'gray' is tinting. After that, varnish or oil must be applied on top for protection.
The main rule: the corner tinting must be done from the same batch of stain and with the same number of layers as the main finish. Only then will the color match be accurate.
Corner for painting (enamel)
For MDF corners and birch wood corners — enamel in the desired RAL color. Acrylic enamel, odorless, 2–3 layers, with interlayer sanding using P220–P320 sandpaper.
It is better to paint before installation — on a horizontal surface, so that the paint lays evenly without drips.
Corner for bath and sauna: specifics
This is a separate, important case. In a bathhouse, the corner piece operates in an aggressive environment: high temperature (up to 100–120°C in the steam room), humidity fluctuations from 10% to 100%. A regular interior corner piece will warp, crack, or peel under these conditions.
Wood species for a bathhouse
For the steam room — linden, aspen, alder, abachi (African wood). These species do not heat up to scalding temperatures, are resistant to humidity fluctuations, and do not release resin when heated.
For the washing area and relaxation room — a wider range can be used. Important: the coating must be special — oil for baths and saunas with antiseptic properties.
Method of fastening in a bathhouse
In a bathhouse, liquid nails and most mounting adhesives are strictly prohibited — they do not hold at high temperatures and delaminate from moisture. Fastening is only mechanical: finishing nails made of stainless steel or galvanized. Installation expansion gap: 1–2 mm for thermal expansion.
Mistakes when buying a wooden corner piece — to avoid returning to the store
Buying an external corner piece instead of an internal one (or vice versa). This is the most common mistake. Before purchasing, you need to clearly understand: does the corner protrude or is it recessed?
Not measuring the gap that needs to be covered. A small corner piece will not cover a wide gap — the corner piece will not sit on both edges of the trim.
Choosing a profile with a different tint. A corner piece in "light oak" on paneling in "dark walnut" is a contrast that was not intended as a design feature.
Not accounting for humidity in a bathhouse or sauna. An ordinary birch corner in a steam room will delaminate within a year.
Not trying it on before gluing. The glue sets quickly. An incorrectly glued corner means removal with damage to the finish.
Not cutting the corner at 45°. The ends meet with a straight cut — a gap is visible between them. A miter is needed.
Too thin a profile on a heavily used corner. A hallway corner, a kitchen cabinet corner — here you need a profile with a strength margin. A thin 10×10 mm corner on an external corridor corner will be chipped within a year.
Not matching the corner with the rest of the trim. A corner from one catalog, a baseboard from another, a casing from a third — three different 'oaks' that don't match. The system must be unified.
What to check before buying a wooden corner — a quick checklist
-
What kind of corner needs to be covered — external or internal?
-
What is the width of the gap between the finishes?
-
What is the thickness of the main finish (lining, panels)?
-
What is the material of the main finish and its tint?
-
Where will the corner be installed — in the hallway, bathhouse, living room, or on a slope?
-
Is painting or tinting required?
-
What length of corner is needed?
-
Are 'miter cuts' (45° cuts) needed on the ends?
-
What coating is planned — oil, varnish, enamel?
-
Does the corner match the baseboard, trim, and other moldings in series and tint?
FAQ — answers to popular questions about wooden corners
What is the difference between an external wooden corner and an internal one?
External corner covers a protruding corner (the corner extends into the space), while an internal one covers the joint inside a concave corner (the corner 'recedes' into the wall or opening).
Which wooden corner profile to choose for paneling?
For protruding corners — an external profile of 20–25 mm. For the joint of two walls in a room corner — Internal wooden corner 20–25 mm. More details — wooden corner for siding.
Can a wooden corner profile be used for slopes?
Yes. On slopes, it covers the ends, protects the outer edge, and frames the transition to the wall. It is important to choose one in the same tint as the main slope and trim.
What to attach a wooden corner profile with?
Glue + finishing nails — optimal. Only glue — for small corner profiles under low load. In a sauna — only mechanical fastening with galvanized nails.
Can a wooden corner trim be painted?
Yes. A corner profile made of birch or MDF accepts enamel in any RAL color. A corner profile made of oak or beech accepts tinting, oil, wax, varnish. It is better to coat before installation.
How to cut a wooden corner profile at 45 degrees?
Use a miter box or a miter saw. Both corner profiles (vertical and horizontal) are cut at 45° towards each other — resulting in a precise joint without a gap.
What size corner trim should I choose?
Reference: corner shelf = gap width + 5–8 mm. Standard for lining is 20×20 or 25×25 mm. For slopes and decorative finishing — 25–30 mm. For architectural accent — 35–40 mm and above.
A wooden corner is a small detail, but it is precisely what determines whether the finish looks complete or unfinished. A well-chosen profile turns a joint from a technical issue into a neat architectural line. It is these details that distinguish professional finishing from DIY work done "as it turned out."
STAVROS offers solid wood corner trims for lining, slopes, wall panels and furniture, Wooden Skirting Boards, Wooden casings, Moldings and cornices, Wooden planks and a complete set solid wood moldings for any interior. Own production from premium dry oak, beech and ash, precise profile geometry, Contact us to confirm shipping to your destination. STAVROS — because a neat corner starts with the right profile.