Article Contents:
- First, a map of the four furniture levels is drawn up
- The main profile is chosen based on its role in the composition
- The cornice is assessed together with the overall dimensions of the entire carcass
- The side return of the cornice is designed straight away
- Vertical profiles connect the top and the base
- The facade frame works at a different scale level
- The central field is calculated after the moulding is placed
- The lower band is coordinated with the plinth or legs
- The hierarchy changes with the furniture type
- Carved moulding receives a separate compositional task
- A simple batten can become a calm connecting line
- The material unites different shapes but does not replace selection
- The overall finish is approved on different sections
- The overall appearance is checked at scale, the joints at full size
- The system is checked from the front, from the side and when opening
- Overload is eliminated by changing a specific level
- The specification and linear footage are compiled after all levels are selected
- Where to buy wooden furniture moulding as a single set
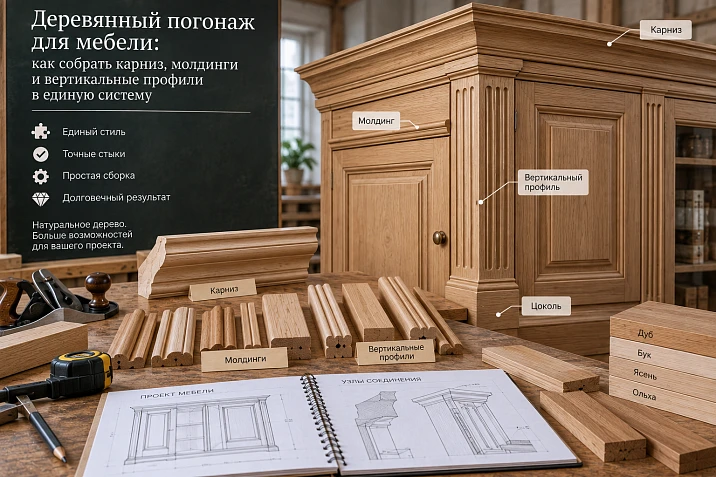
If a wide cornice, deep facade frames and an expressive lower band all draw attention equally, the cabinet may look overloaded even before handles and carved overlays are added. That is why wooden moulding for furniture is selected according to the role of each profile in the overall silhouette. First the main accent is determined, then the other lines and projections are coordinated with it.
A successful set does not have to consist of a single repeated section. The cornice completes the carcass, the verticals connect its levels, the mouldings organise individual facades, and the lower profile is coordinated with the plinth or legs. Unity appears when these parts support the overall composition and connect correctly with one another.
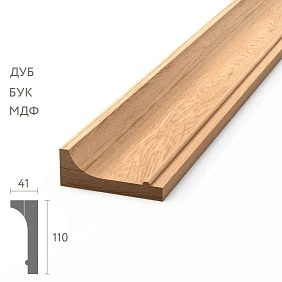
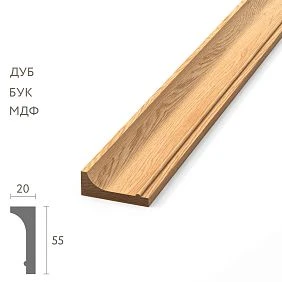
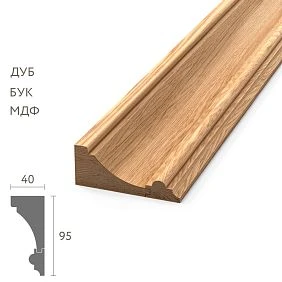
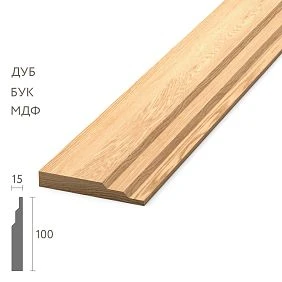
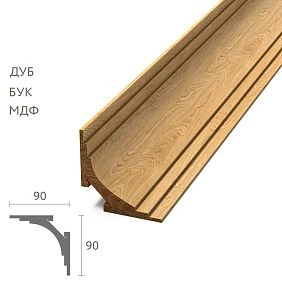
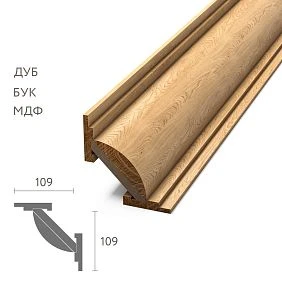

First, a map of the four levels of the furniture is drawn up
On the elevation drawing of a wardrobe, bookcase or sideboard, the top, vertical parts, facades and bottom are marked. For each zone a task is defined: to finish the silhouette, divide sections, highlight a door or form the base. After this it becomes clear where a profile is really needed and where the construction already has sufficient detailing.
| Level | Task of the moulding | What it is coordinated with |
|---|---|---|
| Top | To complete the overall volume | By the height, width, side panels and installation location of the furniture |
| verticals | To connect levels and mark the boundaries of sections | By the cornice, lower band and arrangement of doors |
| Facades | Define the field of an individual door or drawer | With a handle, panel, decor, and adjacent fronts |
| Bottom | Form the transition to the base | With a plinth, legs, gap, and lower doors |
It is not necessary to fill all four zones with decorative profiles. For furniture on expressive legs, the lower band can remain calm. In an open bookcase, some of the facade frames are absent, but the rhythm of the uprights and shelves matters more.
The same diagram also distinguishes the fixed parts of the carcass from the movable fronts. The decor line must not accidentally cross a technical gap or connect a door to a side panel. Already in the first sketch, it is noted which profile belongs to the carcass and which moves together with the front.




The main profile is chosen according to its role in the composition
Visual weight depends not only on width. A deep profile creates a noticeable shadow, a contrasting finish highlights even a narrow line, and frequent ornament increases attention to a small strip. Therefore, comparing four positions by millimeters alone is not enough.
For a classic tall wardrobe, the cornice can become the main accent. Then the vertical profiles support its scale, and the facade moldings work more calmly. In another project, attention is focused on wide side uprights or the central section, and the top completion is subordinate to them.
A practical way to check is to look at the overall appearance of the furniture first without small decor. The main silhouette, the division into parts, and the main accent should be legible. If attention is scattered between equally active bands, it is worth reducing the expressiveness of one of them before adding new elements.
Hierarchy does not imply a mandatory formula of "the top is always the widest." A narrow carved frieze can be more active than a wide smooth base. When selecting Wooden moldings for furniture, the section is assessed in its installed position, its shadow, and its relationship to adjacent parts. Dimensions are refined after this role is determined, rather than used as the sole criterion for consistency.
Our factory also produces:
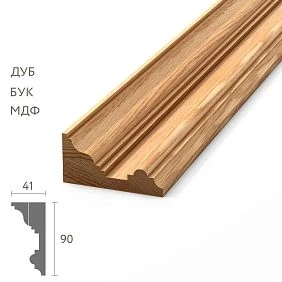
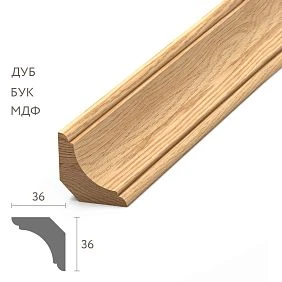
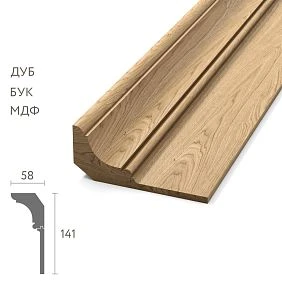
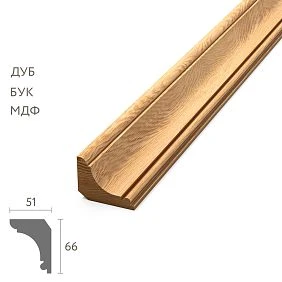
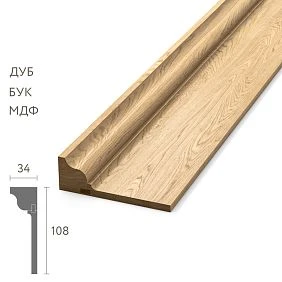
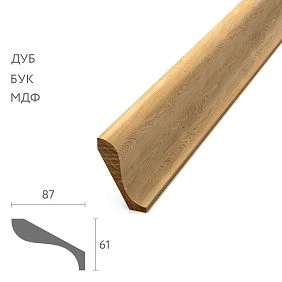
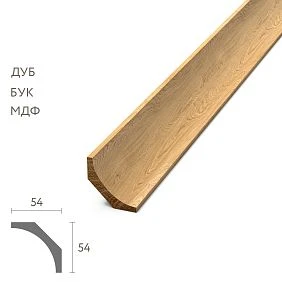
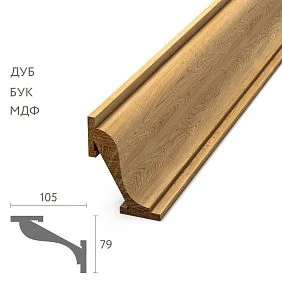
The cornice is assessed together with the overall dimensions of the entire cabinet
The upper cornice forms the completion of the furniture and affects its full external size. When choosing, consider the height, width, and depth of the cabinet, the dimensions of the doors and upper sections, and the distance to adjacent surfaces. The rule "a cabinet of this height needs a cornice of a certain width" is of little help without the other conditions.
It is especially important to distinguish between the cabinet size and the size with the decor installed. A conventional example: a cabinet 1200 mm wide is complemented by a cornice that protrudes 35 mm on each side. The overall width will be 1270 mm. If the entire cornice must fit within an opening 1250 mm wide, such a set will not fit, even though the cabinet itself does.
On the front view, check how well the top matches the width of the vertical stiles and the scale of the fronts. On the side view, check its projection and position relative to the doors. A deep shadow under the cornice can make the top appear noticeably heavier than it seems from the outer contour line alone.
The location and sequence of installation are also determined. If the cornice is attached after the cabinet is installed, access to the relevant areas must be maintained. Being able to assemble the upper band on a workbench does not guarantee that it can be installed as a whole in a confined space. This is taken into account before the final choice of section.
Get Consultation
The side return of the cornice is designed in advance
A return is the continuation of the profile from the front side to the side, or its intended turn toward the completion surface. It shows how the cornice ends within the volume. Without this decision, the front sketch may look complete, while from the side an accidentally exposed end remains.
For freestanding furniture, the cornice is often continued along the visible side panel. For a built-in structure, the ending is coordinated with the niche, wall, or adjacent section. A specially designed end is also possible if provided for by the project. It is important to choose one clear method for each visible ending.
They check where the lower part of the cornice meets and how it connects to the vertical profile. With different cross-sections, the lines may not align even if the outer dimensions are close. The transition is designed as a predefined joint: with a continuation of the profile, a standalone termination, or a suitable intermediate element.
A trial assembly is useful for the corner fragment. It shows not only whether the miters match, but also the shadow, the projection, the appearance of the end face, and the space for fastening. If the profile is installed at an angle, its position is retained when checking the joint as well. Fitting such a junction using a flat image is unreliable: part of the geometry of the working cross-section is not visible in the sketch.
Vertical profiles connect the top and the base
A vertical on a side post or furniture pilaster defines the boundary of the main volume. Its top and bottom must have clear terminations: under the cornice, at a separate transition, on the lower band, or near a support. Then the profile is perceived as part of the structure, even if it serves only a decorative function.
On a tall bookcase, long vertical lines can be more important than small facade frames. Their width and projection are compared with the thickness of the visible posts and the size of the open sections. Too massive a treatment can visually and physically narrow the opening if it projects into the usable space.
The same molding is not necessarily equally successful in vertical and horizontal positions. A profile with a pronounced one-sided direction or ornament may change character when rotated. Therefore, for posts it is acceptable to choose a different cross-section while preserving the overall transition lines and coordinated finish.
The lower termination is checked together with the base of the furniture. The vertical must not accidentally break off between decorative levels or overlap an expressive part of the leg. If the line ends above the floor, this position is shown on the elevation. Different setbacks on the right and left are acceptable as a deliberate decision, but must not arise from mismatched part lengths.
The facade frame works at a different scale level
Facade molding organizes a single door or drawer. It is viewed from close up, next to the handle and the central panel. Therefore, a reduced copy of the upper cornice does not always become a successful profile for the frame: over a small area it may turn out to be too deep or too complex.
A distinction is made between the vertical of the cabinet body and the vertical side of the frame on a door. The first connects the overall architecture, the second marks the boundaries of an individual facade. These lines may have different widths and cross-sections. Their consistency is expressed in proportions, setbacks, and rhythm, rather than in a mandatory match of the article number.
For several adjacent doors, the repetition of the frames as a whole is compared. The narrow strip between two fronts already contains two sides of the framing and the gap between fronts. An additional active profile on the stile can make this area overly busy, even though each door looks calm on its own.
The handle is placed within the same composition. It needs a comfortable place to grip and sufficient distance from protruding lines. If, because of the profile, the handle ends up in an inconvenient position, the framing is reconsidered. A decorative solid wood moulding should support the use of the front rather than force every opening to adapt to a complex relief.
The central field is calculated after the moulding is placed
Profile width matters through the portion of the front that remains free. In the calculation, the outer boundary of the frame is set first, then the width occupied by its sides on the plane is taken into account. The position of the overlay, handle, or other central element is checked within the resulting field.
A conditional example: the front is 420 mm wide, and the outer edge of the frame is 30 mm from the side edges. Let us compare two profiles occupying 18 and 30 mm on the plane. If a 260 mm wide overlay is located in the center, the result will be as follows:
| Parameter | 18 mm profile | 30 mm profile |
|---|---|---|
| Outer frame width | 360 мм | 360 мм |
| Free field inside | 324 мм | 300 мм |
| Distance from the overlay to the frame on each side | 32 мм | 20 мм |
This is a geometric example, not a recommendation for minimum clearances. A smaller field may suit a calm composition and prove cramped for an active ornament. Therefore, after the calculation, the entire front is examined.
If the frame has become wider, you should not automatically reduce all the other elements. First, check whether the selected profile is really needed at this level. Sometimes a more compact wooden furniture molding preserves both the proportions and a comfortable handle position without reworking the composition.
The lower band is coordinated with the plinth or legs
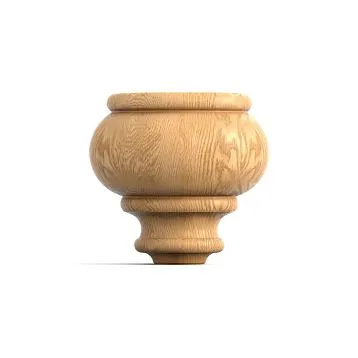
On a cabinet with a plinth, the lower profile can form a pronounced base on which the verticals visually rest. A sideboard on exposed legs has a different task: to preserve the transition from the carcass to the supports and not hide their distinctive shape.
Check where the lower horizontal line runs and how much of the leg remains visible. If a wide profile covers the upper curve of a carved support or the first bead of a turned one, part of the intended design disappears. Individually beautiful details in such a combination work against the overall silhouette.
Also look at the number of closely spaced bands. The lower edge of the door, the carcass band, the decorative molding and the top of the leg can form several competing lines. Sometimes it is enough to leave one pronounced horizontal and a simpler finish on the other surfaces.
Check the cross-section of the lower profile in its working position, including door opening and access to the fastening. The decorative strip must not accidentally cover a service area or interfere with assembling the base. If the plinth part is removable, take this into account in the placement of the joints. A profile that looks continuous in a sketch must retain the necessary ability to remove the intended panel without damaging the adjacent decor.
The hierarchy changes with the type of furniture
One set of cross-sections cannot be transferred from a tall cabinet to a low sideboard without checking. The length of the horizontals, the size of the doors, the viewing distance and the ratio of the top to the base all change. Therefore, the system is considered in the context of a specific piece, even if it belongs to the same collection.
| Furniture | A possible main accent | What can work more quietly |
|---|---|---|
| Tall closed wardrobe | Top finish and the associated post silhouette | Door frames and lower rail |
| Open shelving unit | Rhythm of vertical sections | Shelf edging and individual horizontal lines |
| Low sideboard on legs | Facade composition and supports | Upper profile and transition to the legs |
| Furniture portal | Side parts and the top that unites them | Inner opening trim |
These are options for distributing attention, not mandatory schemes. In a project, you can choose a different accent if the other levels support it.
When developing a series, recognizable features are retained: the character of the curves, the shape of the steps, the material and the finish. At the same time, the dimensions of secondary profiles may change. This way the wardrobe and the sideboard remain stylistically linked, but each keeps a scale suited to its own dimensions. Copying all sections without changes does not always produce this result.
Carved moulding receives its own compositional task
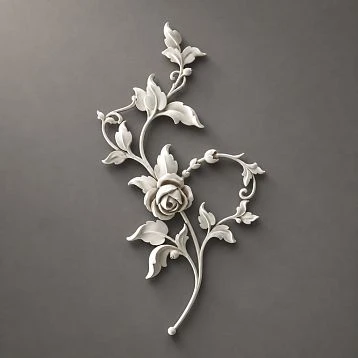
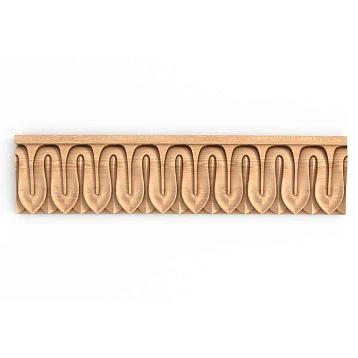
wooden carved trim it simultaneously forms a line and carries an ornament. It is useful to assign it to a specific level: the upper frieze, a single band or a chosen trim. Then the pattern reads as a deliberate accent and is not lost among repetitions on all surfaces.
Carving is matched with smooth profiles by scale and character of transitions. If the ornament is already detailed, an adjacent calm line helps it to be seen. This is especially noticeable on furniture with small doors, where several complex patterns quickly fill the free fields.
Check the direction of the ornament and its endings. A vertical section may require a different placement of the pattern than a horizontal one. On an extended band, determine in advance how the pattern approaches the post, corner or central axis. A full analysis of the pattern repetition belongs to the preparation of specific joints, but the decision about a continuous ornament itself is made when choosing the system.
It is not necessary to add carving to all already selected profiles. Sometimes an expressive upper band is enough, while a smooth facade moulding and a calm lower part leave the ornament the space it needs. If there is also carving on handles, overlays or legs, it is taken into account in the overall composition rather than evaluating the moulding in isolation.
A simple batten can become a calm connecting line
A wooden batten is appropriate where a clear boundary or a straight vertical without complex section transitions is needed. It can mark the edge of a post, support the division into sections or become an intermediate line between more expressive parts.
But a rectangular cross-section alone does not make a part visually light. A wide strip with a large projection casts a strong shadow, and a contrasting color turns it into a noticeable band. That is why actual dimensions and installed position are compared, just as with a shaped profile.
A strip is chosen instead of a molding when a complex relief at a given level does not add the needed meaning. For example, next to an active cornice, a simple vertical may better preserve a readable cabinet structure. If, however, a pronounced framing with a specific transition to the central field is required, a shaped profile solves a different task.
Before replacement, the junctions at the top and bottom are checked. A calm line should end logically at the cornice and the base. A random open end or a step at the joint does not become successful merely because of a simple cross-section. For the strip itself, the treatment of visible edges is also agreed so that it does not look unfinished among the prepared furniture profiles.
The material unites different shapes but does not replace selection
A cornice, a vertical profile, and a facade molding may differ in cross-section and still remain part of one system thanks to a coordinated material. Under a transparent finish, oak moldings tie the composition together with their characteristic texture, while beech profiles give a different surface pattern. The choice is made for the furniture as a whole.
At the same time, one species does not mean the same shade for every strip. Wood characteristics, grain direction, and the composition of the blank all have an influence. A long horizontal cornice and a vertical post may be perceived differently even after the same tinting. Adjacent visible areas are selected and compared together.
Requirements for the quality of wooden products are taken into account depending on the future finish. Under a transparent composition, the appearance of the wood matters; under a covering enamel, the coordinated result of preparation and painting matters. The material and surface condition are checked for each item code, not just by the name of the general section.
If the project specifies a furniture profile made of solid wood, this is recorded in the specification. The range of linear products also includes versions made of MDF, so the composition of a specific item must be clarified. The possibility of obtaining a similar color does not mean that materials can be silently substituted: the agreed version is maintained throughout the entire purchase.
The overall finish is approved on different cross-sections
For the entire system, the color, permissible wood show-through, and gloss are determined. These characteristics are tied to the approved sample, and a common internal finish designation is used in the specification. It helps coordinate different item codes but does not mean that all surface preparation will necessarily be the same.
A deep cornice, a flat batten and a carved band have different conditions for application and inspection. Material can accumulate in the recesses, unevenness of gloss is more noticeable on a smooth plane, and grain features stand out under tinting. A test is made on each significant type of section, then the samples are compared side by side.
The assessment is carried out after the specified system of layers has been completed. The shade of the stain before the protective coating does not always show the final result. Real lighting is also taken into account: horizontal and vertical surfaces reflect light differently, so the same material does not have to look exactly the same at any angle.
The order of finishing and installation is agreed with the design of the joints. If the profile is painted in advance, the necessary seating and adhesive areas are protected. If after installation, access to the complex relief and adjacent surfaces is checked. Mounting and finishing materials are selected for compatibility with the substrate and coating. Color consistency does not replace the requirements of the specific joint.
The overall appearance is checked at scale, the joints at full size
A drawing at a scale of 1:10 helps to see the number of decorative levels and the ratio of the large parts. To compare options, keep one image size and the same presentation. Then a change to the cornice is not masked by an accidental enlargement of the whole cabinet in the picture.
After the overall composition is approved, they move on to the joints at full size. The actual section, projection, inner field of the frame, position of the handle and side return are checked. This requires drawings of the selected versions and physical fragments of the profiles. Available materials can be found in the section drawings and models.
STAVROS offers Samples of linear products 100 mm long. For the sample, the required item code and available material are specified. A short sample helps to assess the section and finish, but it does not always allow a full corner to be assembled or the repeat of the ornament to be seen.
A more complex junction may require a longer fragment or a separate test kit. The samples are positioned as they will be installed on the furniture, preserving the working planes and the direction of the profile. Simply comparing several strips lying side by side on a table does not show the full difference in their projections and shadows after installation.
The system is checked from the front, from the side, and when opening
The front view shows the composition: whether the main sections read clearly, whether there is enough free space, and whether the verticals align with the upper and lower bands. This is also where the placement of frames on adjacent doors and drawers is compared.
The side view is needed for projections and terminations. Check how the cornice returns onto the side panel, whether an unintended step appears at the stile, and which end faces remain visible. For freestanding furniture, the side becomes a full-fledged facade of perception, even if it was barely visible in the main sketch.
The third check is performed while the doors and drawers are moving. A protruding molding may collide with an adjacent leaf, a fixed vertical, or a handle. Assessing only the gap in the closed position is not enough: the relative position of the parts changes as they open.
On the trial assembly, take into account the selected hinges, the facade thickness, the actual profile projection, and the intended range of movement. If a simplified flat frame was used for the check, the result cannot be automatically transferred to a deeper section. If a conflict is found, consider changing the profile, its offset, or the assembly design. The solution is checked again in all three positions so that fixing one problem does not disrupt the overall appearance.
Overcrowding is eliminated by changing a specific level
Signs of overcrowding relate to how fields and lines are used. The handle ends up pinched between profiles, the central part of the facade almost disappears, each band gets its own ornament, and the top and bottom demand equal attention. In such a situation, adding another unifying element usually only increases the number of details.
First, determine which level retains the main role. Then temporarily simplify one of the others: remove an extra band, replace a carved section with a smooth one, or reduce the depth of the facade profile. Compare the options on a single elevation, changing one decision at a time.
It is not always necessary to reduce the width. Sometimes it is enough to remove the color contrast, drop a separate patina on a secondary band, or remove a repeating bead. Therefore, evaluate shape, shadow, and finish at the same time, while preserving the parameters that are already important for installation.
After the change, check the junctions again. A more compact vertical may meet the cornice differently, and a narrow molding may expose an area that was previously covered. Compositional simplification must not create unfinished joints. Approve the option in which the free fields read clearly, the main lines remain clear, and every visible boundary has a clear termination.
The specification and linear footage are compiled after all levels have been selected
The entry “linear footage — 25 meters” does not describe a furniture set. In the specification, the upper cornice, vertical profiles, facade molding and lower termination are listed separately. Each item must have its own article number, selected cross-section, material, surface condition and finish designation.
The items are linked to the elevation drawing and detail nodes. This shows where the profile is installed and which line its dimensions refer to. For the cornice, the front part and side returns are taken into account; for verticals, the number of posts; for frames, all corresponding facades. In the lower band, the specified gaps and removable sections are marked.
After that, a list of cut lengths and a cutting map for the available stock lengths are compiled. Joints, saw kerf, end preparation and pattern matching where required are taken into account. The reserve is determined by specific items and operations, rather than replacing the calculation with a uniform allowance for the entire order.
If, after approval, the profile is changed, the affected links are revised: facade margins, projections, terminations and cutting. Even a similar cross-section may require a different cut length or corner treatment. A single current version of the documents is handed over to production so that purchasing and assembly do not use different versions of the upper, facade or lower band.
Where to buy wooden linear moldings for furniture as a single set
Select wooden moulding for furniture STAVROS is conveniently organized by approved roles: first the main profile, then the coordinated verticals, facade frames, and lower belt. For each level, a specific version is selected and its combination with adjacent parts is checked.
The set request specifies article numbers, cross-section dimensions, material, quantity and stock lengths. Samples, surface condition and the information required for installation are clarified separately. If part of the system must have a transparent finish, this is taken into account when selecting the wood version, not after receiving the full linear footage.
For workshops with repeat purchases, it is useful to check conditions for manufacturers, and to confirm the availability of the selected items and receipt of the order taking into account payment and deliveryLead times are estimated for the entire set: the absence of one significant profile can delay the assembly of the overall unit.
Before purchasing the full volume, it is worth approving the combination of sections and key junctions on samples. Then different cornices, moldings, and vertical profiles go into work as a proven system: with a chosen main accent, clear transitions, coordinated finishing, and a defined place for each part on the furniture.