








Article Contents:
- A room with one cut-off corner: how much skirting board is needed
- How to choose a wooden floor skirting board in the STAVROS catalogue
- Why PLT-006 with a height of 100 mm was chosen for the calculation room
- PLT-005 and PLT-001-1: two options with a height of 120 mm
- PLT-003 and PLT-007: a tall band or a large thickness
- Oak or beech: choosing the wood for a specific finish
- What to measure before calculating the perimeter
- How to get a diagonal wall and two 135-degree corners
- Doorway: why not only the leaf width is deducted
- Five walls and the finished square footage without the door section
- Detailing: ten installation parts instead of five long walls
- Cutting plan for eight 2400 mm strips
- Why the final 1910 mm of leftovers cannot be considered a reserve in one length
- Where to place straight joints so they are less noticeable
- Two non-standard angles: the order of trial assembly
- Preparing the walls, floor and base before installation
- How to work with the face surface and final finishing
- How much does the PLT-006 set in oak and beech cost
- Which adjacent products really make sense
- Delivery of wooden skirting boards to Izhevsk and order preparation
- When a wooden skirting board should be replaced with another solution
- Mistakes when ordering and cutting for a five-wall room
- Frequently asked questions about skirting boards for a room with a sloped wall
- Can I buy only eight planks and do without a reserve?
- Why is the diagonal 990 mm if the cut is 700 mm?
- Do I need to set 22.5 degrees on the saw at two corners?
- Can I finish with one type of skirting board and use extensions in another?
- Is cutting to size included in the STAVROS product price?
- How can I check the joints if the finished flooring is already laid?
- How much will it cost to deliver nine skirting boards to Izhevsk?
- Can leftover pieces be used for another room?
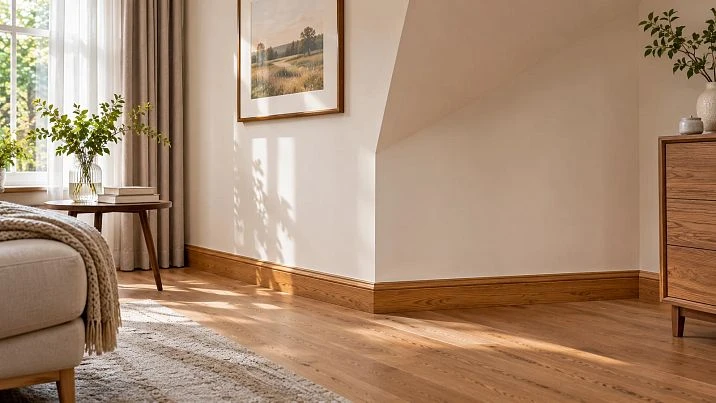
A room with one cut-off corner: how much skirting board will be needed
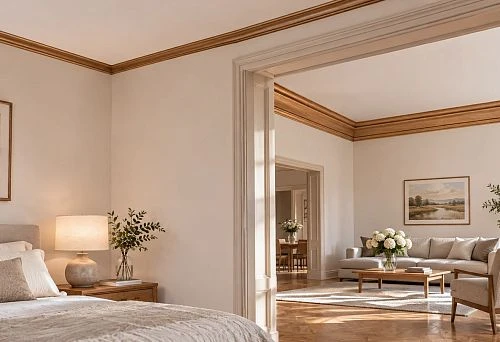
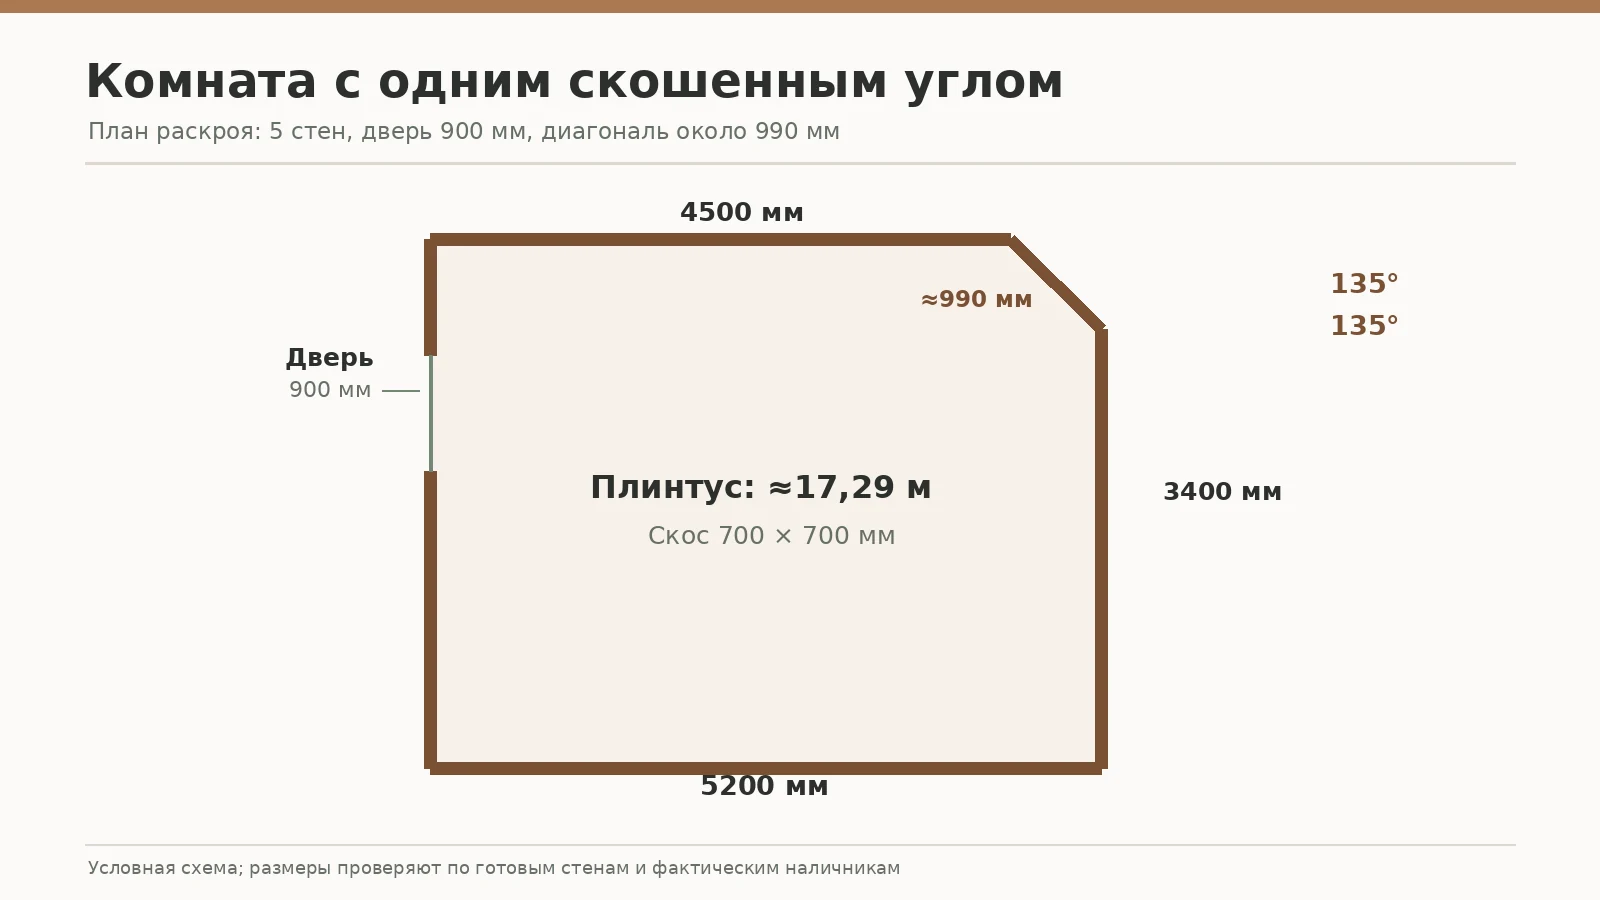
A room 5.2 m long and 4.1 m wide has one corner cut off by a diagonal wall. On the floor this diagonal looks small, but it changes the usual order of finishing: instead of four walls there are five, and between the straight sections two joints appear with an unusual angle. It is easy to underestimate the amount of skirting board by eye, especially if a doorway is nearby, where the finishing strip is not needed. For the room in question, after excluding a 900 mm wide opening, the calculated skirting board length is about 17.29 m.
If you choose the PLT-006 wooden skirting board 2400 mm long, the arithmetic of "17.29 divided by 2.4" alone is not enough. The theoretical minimum is eight pieces. By laying out the individual sections across the blanks, it is indeed possible to get eight whole strips, if the design lengths allow for allowances for end trimming, cuts and fitting. A ninth strip is useful as a reserve, but it should not appear in the estimate just because of the habit of adding an arbitrary percentage.
Order for Izhevsk Wooden skirting board made of oak or beech through the STAVROS catalog. In it, you need to select wooden version a specific model rather than focusing on the minimum price of the product card: the same card often also contains MDF options. The wood species, cross-section size, and length determine the calculation far more than the general label "wooden skirting board".
Below is an example of a real selection sequence: first verify the profile, then measure the five-walled contour, cut ten mounting pieces from eight purchased planks, check two 135° angles, and place the order. The numbers are used as a training project, not as a replacement for measuring a specific apartment. Any unevenness of the wall, thickness of the finish, and method of joining can shift the final dimensions.
How to choose a wooden floor skirting board in the STAVROS catalog
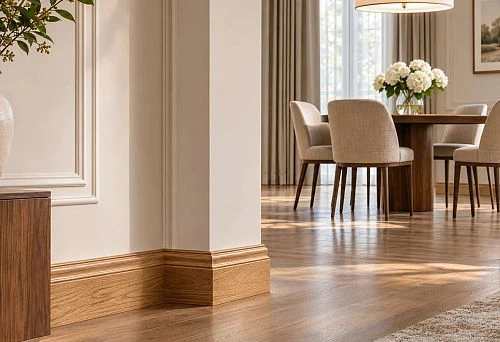
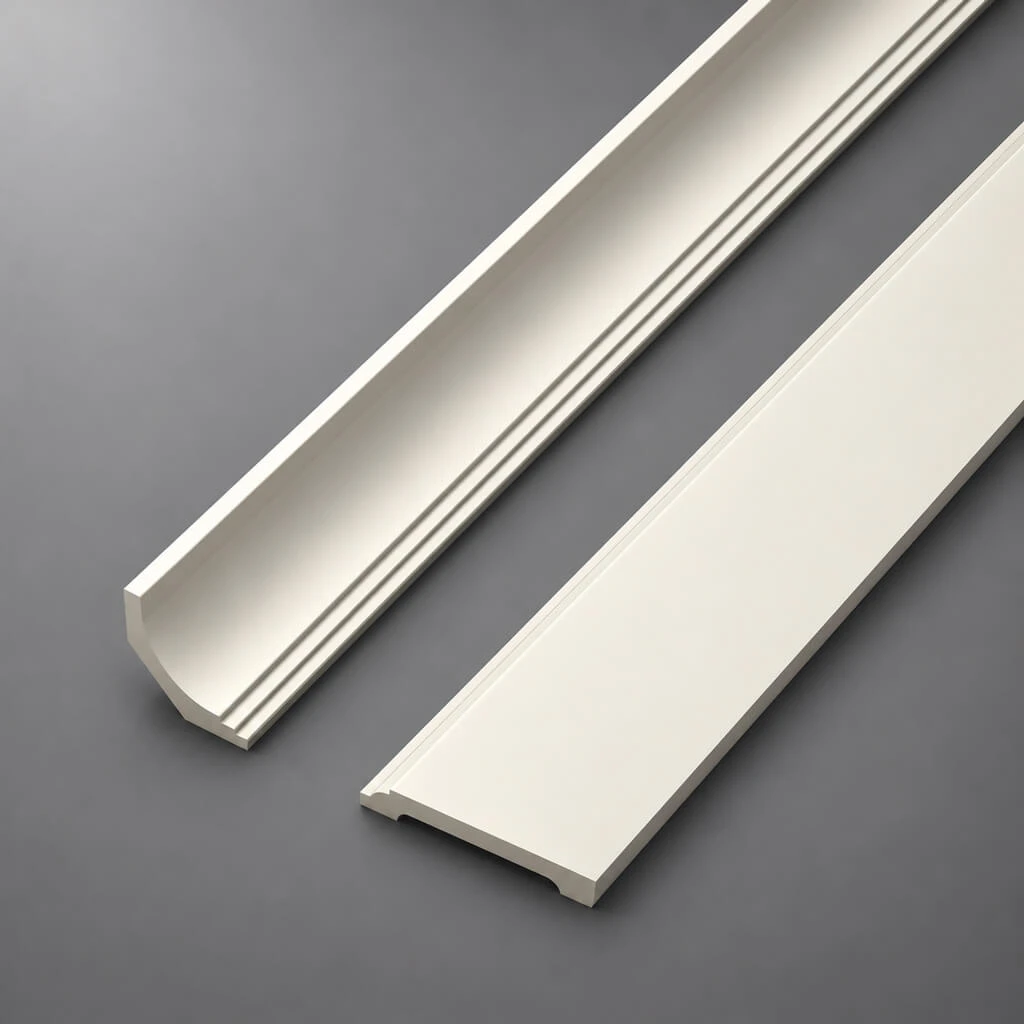
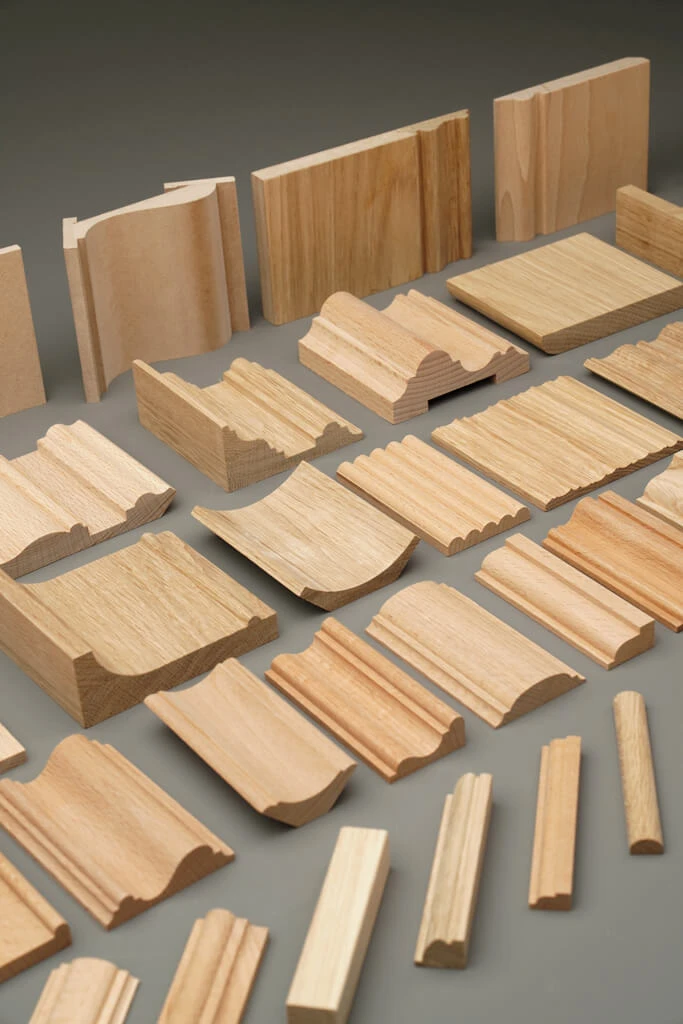
It is more convenient to start the selection not with a photo of the room, but with the cross-section of the product. Two profiles about 100 mm high can have different thicknesses and a completely different transition from floor to wall. On a long wall, this difference is visible in the shadow above the top edge; near the door casing, it is noticeable by the protruding end. For a room with a cut corner, the profile is especially important: a more complex relief requires careful alignment of lines at two angled joints.
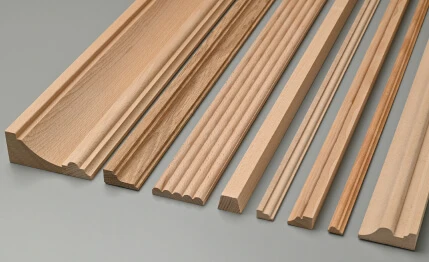
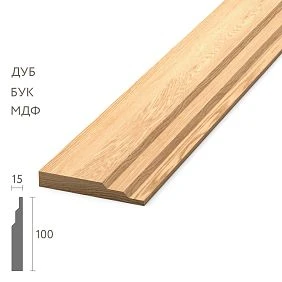
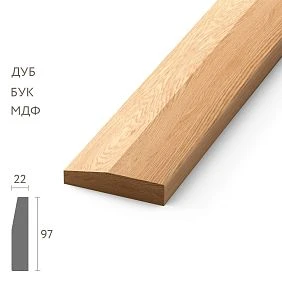
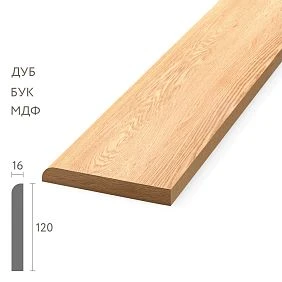
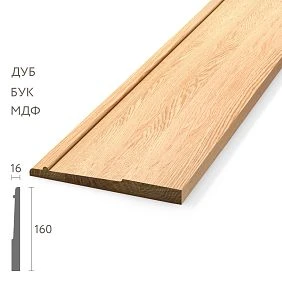
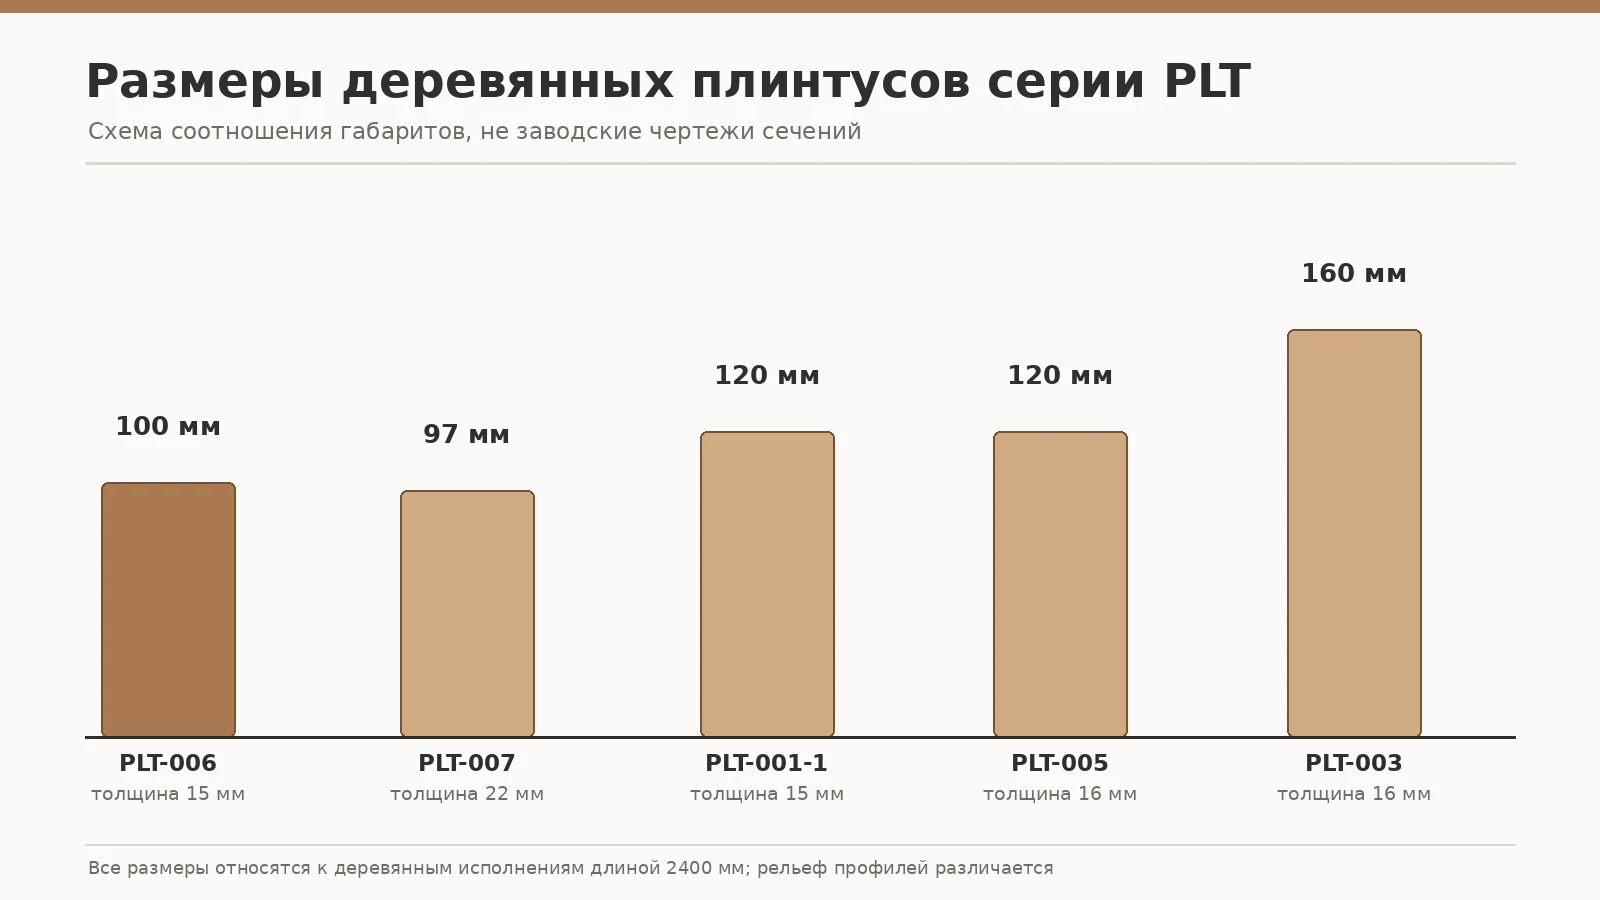
The catalog contains several products from the PLT series made of solid oak and beech. According to the verified product cards, the wooden options have the following dimensions. These are overall cross-sections, and not a description of all the curves of their front relief.
| Model | Solid wood cross-section, mm | Length, mm | What to check before ordering |
|---|---|---|---|
| PLT-006 | 100 × 15 | 2400 | Position of the top line and mitred joints |
| PLT-007 | 97 × 22 | 2400 | 22 mm projection and transition to the architrave |
| PLT-001-1 | 120 × 15 | 2400 | Height relative to the door and furniture |
| PLT-005 | 120 × 16 | 2400 | Texture, thickness and selected finish |
| PLT-003 | 160 × 16 | 2400 | Sufficient clear wall height |
Important difference: the wooden PLT-006 has a 100 × 15 mm cross-section, not 100 × 16 mm as seen among the MDF options. The 2400 mm length of the wooden strip must not be automatically replaced with the 2600 mm length of the MDF option. Such a substitution would change the number of blanks, the joint locations and the final cost. For the same reason, the specification table must always be accompanied by an indication of the material.
When required buy wooden skirting board PLT-006 for the calculated room, the order specifies "oak" or "beech", the size 100 × 15 × 2400 mm, the number of pieces, the preparation for the selected finish and the packaging requirements. If there are protruding radiators, a cabinet or an architrave along the wall, also check the distance from the finished wall surface to the front edge: the nominal 15 mm does not guarantee that the skirting will pass alongside all protrusions without modifying the assembly.
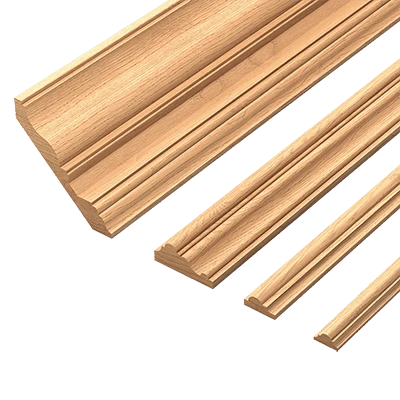
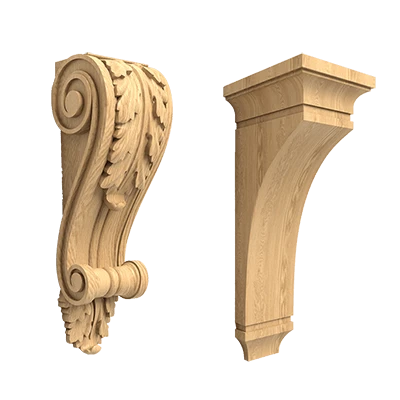
Our factory also produces:




Why PLT-006 with a height of 100 mm was chosen for the calculated room
A 100 mm high skirting board is quite noticeable on the wall, but it does not take up as much vertical space as a 160 mm high product. For a room with a doorway and a slanted corner, this is a practical starting option for a training calculation. However, the solution is not universal: next to a high door threshold or a low built-in wardrobe, even one hundred millimetres may be too much. Before choosing a height, make several marks on the wall with masking tape and look at them from the usual point of entry into the room.
PLT-006 has a wooden version length of 2400 mm. This value is convenient for a cutting list: all parts can be compared against one constant length. But calculation convenience does not mean that joints must necessarily be made on the wall every 2400 mm. On the contrary, long products make it possible to distribute the joints in advance so that there are fewer of them on the most brightly lit wall, or so that they are located in a calmer part of the surface.
Also take into account the allowance for processing at the ends. If a installation part must be exactly 2400 mm along the visible edge, it cannot be obtained from a nominal strip of the same length after two end cuts. Therefore, in our example the main parts are limited to 2300 mm. The remaining approximately 100 mm is not a guaranteed manufacturing tolerance, but working space that the craftsman manages after measuring the blank and determining the cut.
The price in the product card refers to a specific version. On the date of checking, PLT-006 in beech 100 × 15 × 2400 mm was priced at 3220 ₽ per item, in oak — at 4780 ₽. The cost of the MDF option on the same page is not included in the estimate for wooden products. Dimensions and prices only make sense together: if a person wrote down the price but forgot the material or length, such a note cannot be used to verify the order calculation.
Get Consultation
PLT-005 and PLT-001-1: two options 120 mm high
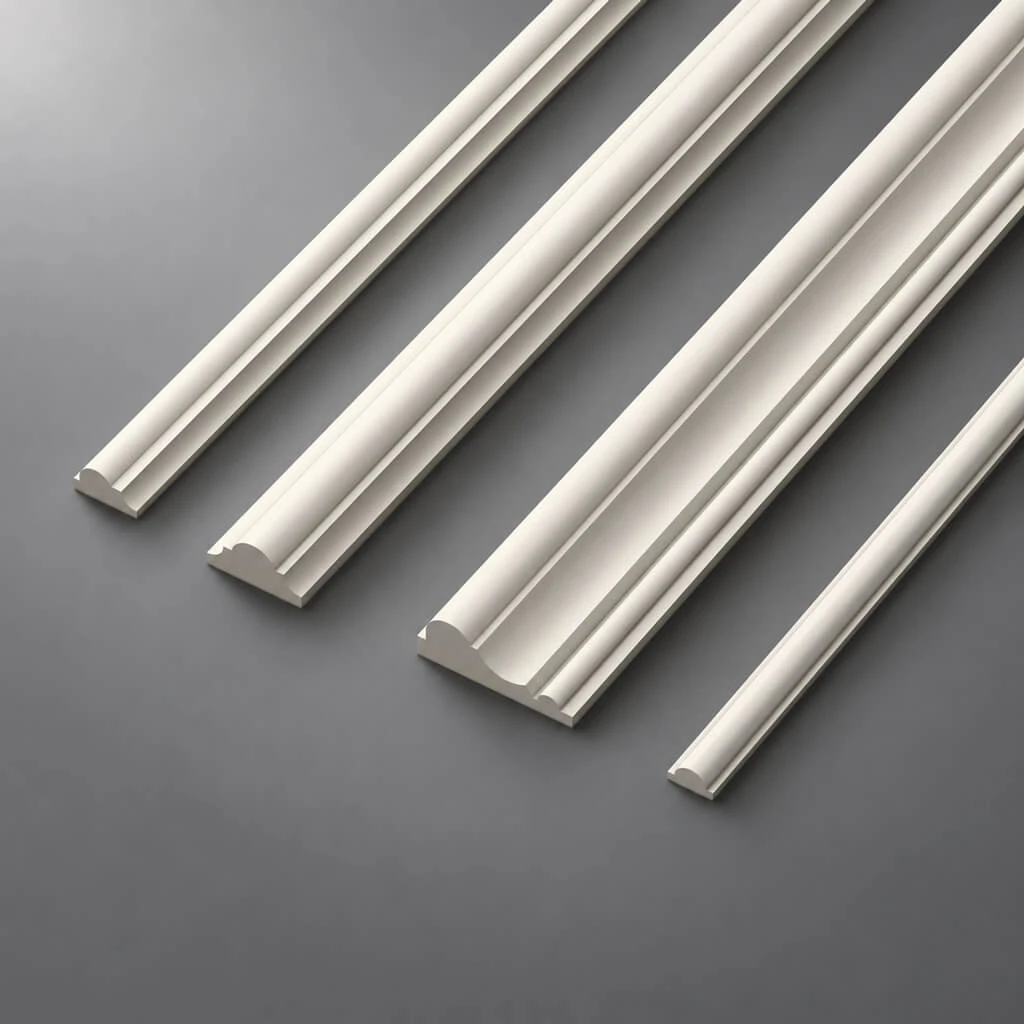
On paper, the difference between the two 120 mm high profiles looks small. For the wooden PLT-005, the thickness is 16 mm; for PLT-001-1, it is 15 mm. But these millimetres do not by themselves explain the shape of the front surface. Before buying, you need to open both product cards and compare the actual images or drawings, and for responsible approval of the finish — samples. The same height does not make the two products interchangeable on the same wall.
If doors with massive architraves are already installed in the room, you can start fitting from them. The top line of the skirting board should end at the architrave so that no sharp uncovered step is created. There is no obligation to make the architrave and skirting board the same thickness. It is important to decide in advance whether the end of the skirting board will be visible, whether it will be covered by the supporting element of the architrave, and whether a separate transition is needed. This is better determined before ordering the whole batch, rather than trying to fix it with cover plates after installation.
In the catalog you can buy a wooden baseboard PLT-005 in oak or beech, and wooden skirting board PLT-001-1 consider as an alternative with a different geometry. For room calculation, they cannot be mixed with PLT-006, even if the total metreage is sufficient. A joint of two different profiles in the middle of a wall usually will not give a continuous relief line.
The choice of a 120 mm skirting board is especially noticeable in a room where the height of the door and the visible part of the wall is ordinary, and the furniture stands almost flush against the wall. When a wardrobe or chest of drawers is moved, the profile may be exposed only in fragments, and then any error in height and colour reads more sharply. For such an interior, it is useful to draw not only a floor plan, but also a short elevation of the wall with furniture, sockets and architraves. Then it will become clear whether it is worth paying extra for a taller profile.
PLT-003 and PLT-007: tall profile or greater thickness
PLT-003 in oak or beech has a wooden section of 160 × 16 mm. This is already a prominent strip along the floor; it can occupy a noticeable share of the distance from the floor to the lower edge of cabinets, radiators or door decorative elements. Such a profile is appropriate where the free part of the wall really allows it to be shown in full. If furniture conceals the skirting board, a 160-mm height by itself will not improve the finish and will complicate going around junctions.
Another option is solid wood skirting board PLT-007. In its wooden version its dimensions are 97 × 22 mm: the height is close to PLT-006, but the thickness is greater. Take this protrusion into account near the door frame, a narrow passage to furniture and floor-mounted equipment. On a bevel the difference in thickness is especially visible: the junction line of the joint must align both on the wall surface and on the outer edge of the piece.
For a room with a beveled corner, a tall skirting board PLT-003 makes the task of fitting the angled joint more difficult. The taller the face, the more noticeable any mismatch in the pattern or slight vertical skew. This is not a reason to abandon a tall skirting board, but a reason to first make a test joint, check it under side lighting and only then work with long finished pieces.
If the room is to have the walls painted together with the decorative elements, the materials must be suitable for the same primer and finish system. One should not assume that a beautiful joint on dry untreated wood will automatically be the same after opaque painting. The coating layer emphasizes certain cracks and open corners, and correcting them over a finished surface is more difficult. Therefore a color sample and a test cut are more useful than a general promise that "everything will come together".
Oak or beech: choosing the wood for a specific finish
Oak is valued for its pronounced natural pattern. If the skirting board is to be coated with clear lacquer or stain, the shade of adjacent lamellae and the direction of the grain become part of the interior. On a long wall this can look natural, but an abrupt change of pattern directly at a joint catches the eye. Hence the practical rule: before sawing the planks for the most visible wall, lay them out on the floor, choose matching face sections and mark the sequence.
Beech is usually perceived as visually more even and is often considered for painting with opaque finishes. This does not mean that any beech blank can be coated with a single thin coat of paint without preparation. A clean surface, a suitable primer and a test of the chosen finishing system are required. With opaque painting, particular attention is paid to the shape of the profile and the quality of the joints: the wood grain no longer distracts attention from the joint line.
In one room, it is preferable not to substitute oak with beech simply because this reduced the cost of short fillers. Even after tinting, species may show their texture differently and take the coating differently. If a uniform opaque color is intended, different substrates are technically possible, but this requires tests and does not eliminate the need to agree on the specification. The easiest option to control is one model, one material, one preparation for finishing around the entire perimeter of the room.
In the catalog there are differences not only in the species, but also in the wood preparation options "for enamel" and "for tinting". When placing an order for beech skirting board PLT-006 select the beech version, not the initial MDF option shown in the product card. Choose the version based on the actual future coating, not on how the name sounds. For an open wood grain, it is especially important to agree on the permissible difference in shades; for opaque enamel, the quality of the surface and the priming scheme. These issues must be settled before calculating paint consumption, otherwise it may turn out that the material has been purchased but the desired surface appearance has not been agreed.
What to measure before calculating the perimeter
A slanted corner is only one of the reasons why the plan from the project may differ from the finished room. Walls after plastering are not obliged to exactly repeat the drawing, and the door frame and floor covering change where the skirting board ends. Therefore, start with an actual measurement along the line of the future skirting board junction, already after completion of the main wet works. A rough tape measure along the floor and the final size of the visible edge at the wall may give different values, especially on slanted sections.
On the plan, mark all the vertices of the room and assign a designation to each straight section. Separately label the finished dimensions between the junction points. At the doorway, record not only the width of the leaf, but also the position of the architraves: the skirting board more often ends at the architrave, and not strictly at the line of the structural opening. If the door is located on the left wall, it will have two separate short sections rather than one continuous line.
To check the diagonal, measure the horizontal and vertical offsets of the cut corner from the intersection of the imaginary straight walls. In the training project, both offsets are 700 mm. On site they may differ: then the angle will no longer be exactly 135°, and the diagonal wall will change length. It is useful to measure it directly with a tape measure and compare it with the calculation based on the two legs. If the numbers diverge more than the expected error, check the original geometry.
Separately note deviations from straightness at the floor: a local bulge in the plaster, a protruding reveal, a thickened paint layer or finish coating. With a long wooden skirting board, you must not thoughtlessly pull the product against an uneven surface — gaps may appear elsewhere or stress may build up in the strip. Such areas are pointed out to the installer in advance; they may require preparing the base or changing the fastener positions.
How to get a diagonal wall and two 135-degree angles
Imagine a regular rectangle 5200 × 4100 mm. At its upper right corner, mark off 700 mm along the top and right walls, then connect the marks with a straight segment. The length of this segment is calculated as the hypotenuse of a right triangle: the square root of the sum of the squares of the legs. With equal legs of 700 and 700 mm, the result is approximately 989.95 mm, that is, about 990 mm. This value should be rounded only for a preliminary estimate, not for setting up the saw.
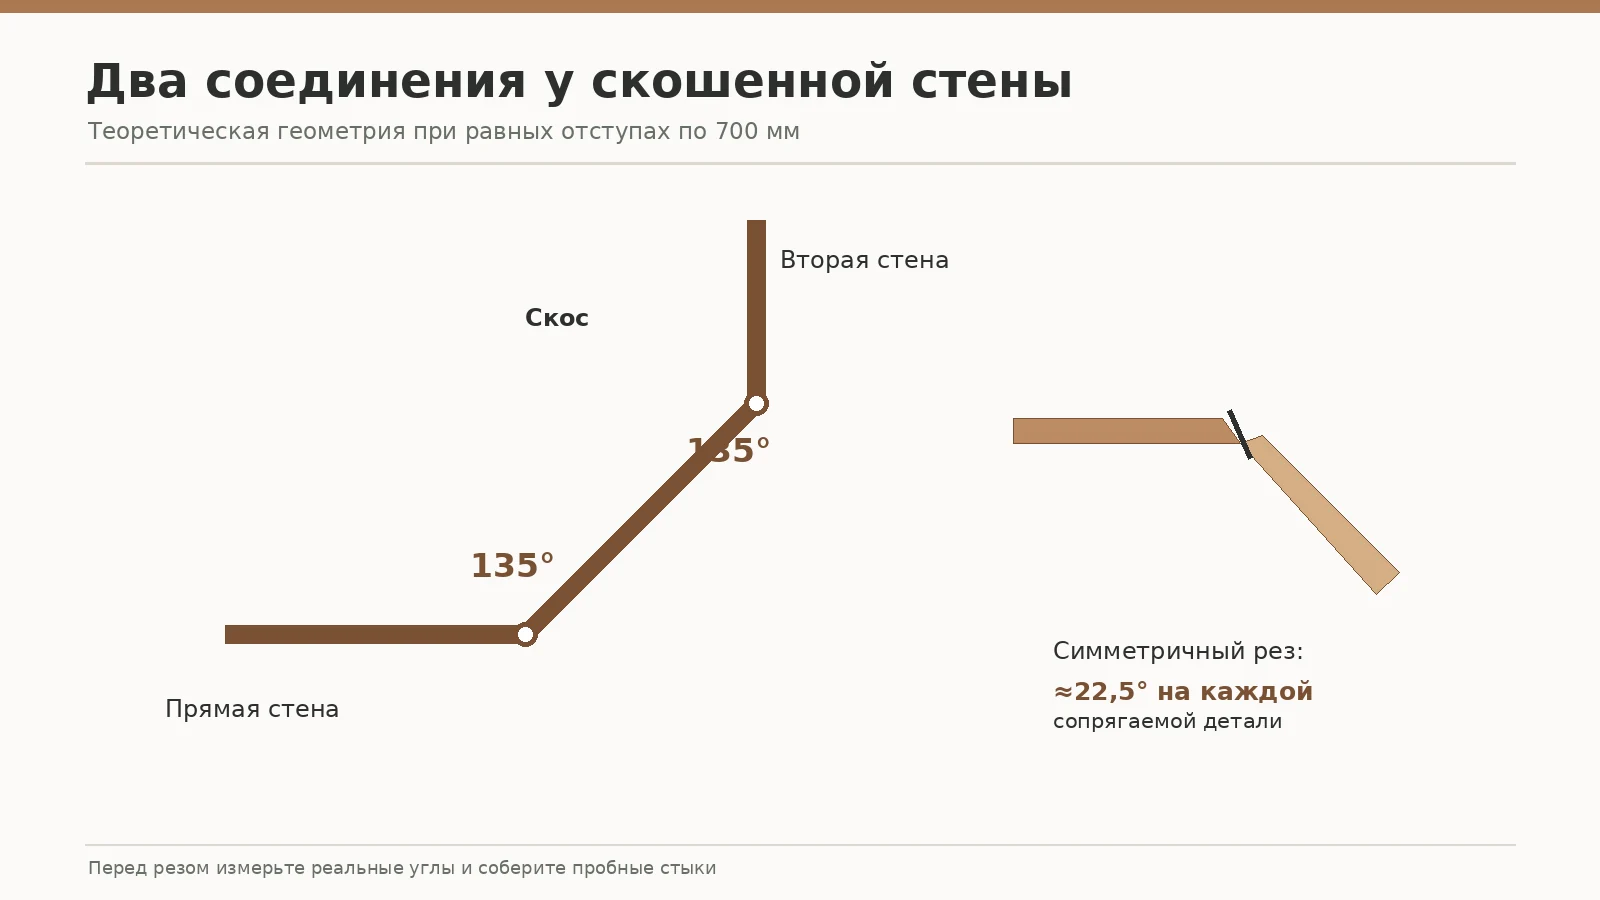
The diagonal wall has two junctions with the adjacent straight walls. If the cut is symmetrical, the interior angle of the room at each point is 135°. This is not a case where you should automatically use a standard 45° cut intended for a right angle of 90°. With a symmetrical junction of two parts, the total turn of the skirting line is 45°, so the turn of each piece's end relative to a square cut is about 22.5°. But this is only the initial geometry, not a guarantee of a finished joint.
Check the angle on site with a template or an adjustable angle finder. A difference of even one or two degrees on a tall profile can lead to a noticeable gap. The craftsman must also understand which scale his mitre saw shows: the cut angle reading on one tool may be described differently from the angle between the finished pieces. Before the final cut, make a test on small offcuts of the same profile, hold them against the actual wall and assess the joint both on the face and along the top edge.
There is one more nuance. The length along the bottom edge, along the back plane and along the most protruding decorative part is not always the same with an angled cut. Therefore, you cannot transfer the length measured from the wall vertex to any chosen edge of the skirting board without corrections. First determine the reference dimension line, then record the orientation of the piece, the position of the "left" and "right" ends, and only then mark the cut. This discipline is especially useful where two similar pieces require mirrored cuts.
Doorway: why more than just the leaf width is subtracted
In the training example, a doorway 900 mm wide is excluded from the outline. This does not mean that in any apartment you must subtract exactly 900 mm upon seeing the corresponding door marking on the box. The door leaf, the structural opening, and the distance between the outer edges of the casings are different dimensions. The skirting board ends at a specific abutment point, and it must be fixed after installing the frame and casings or according to the final installation plan.
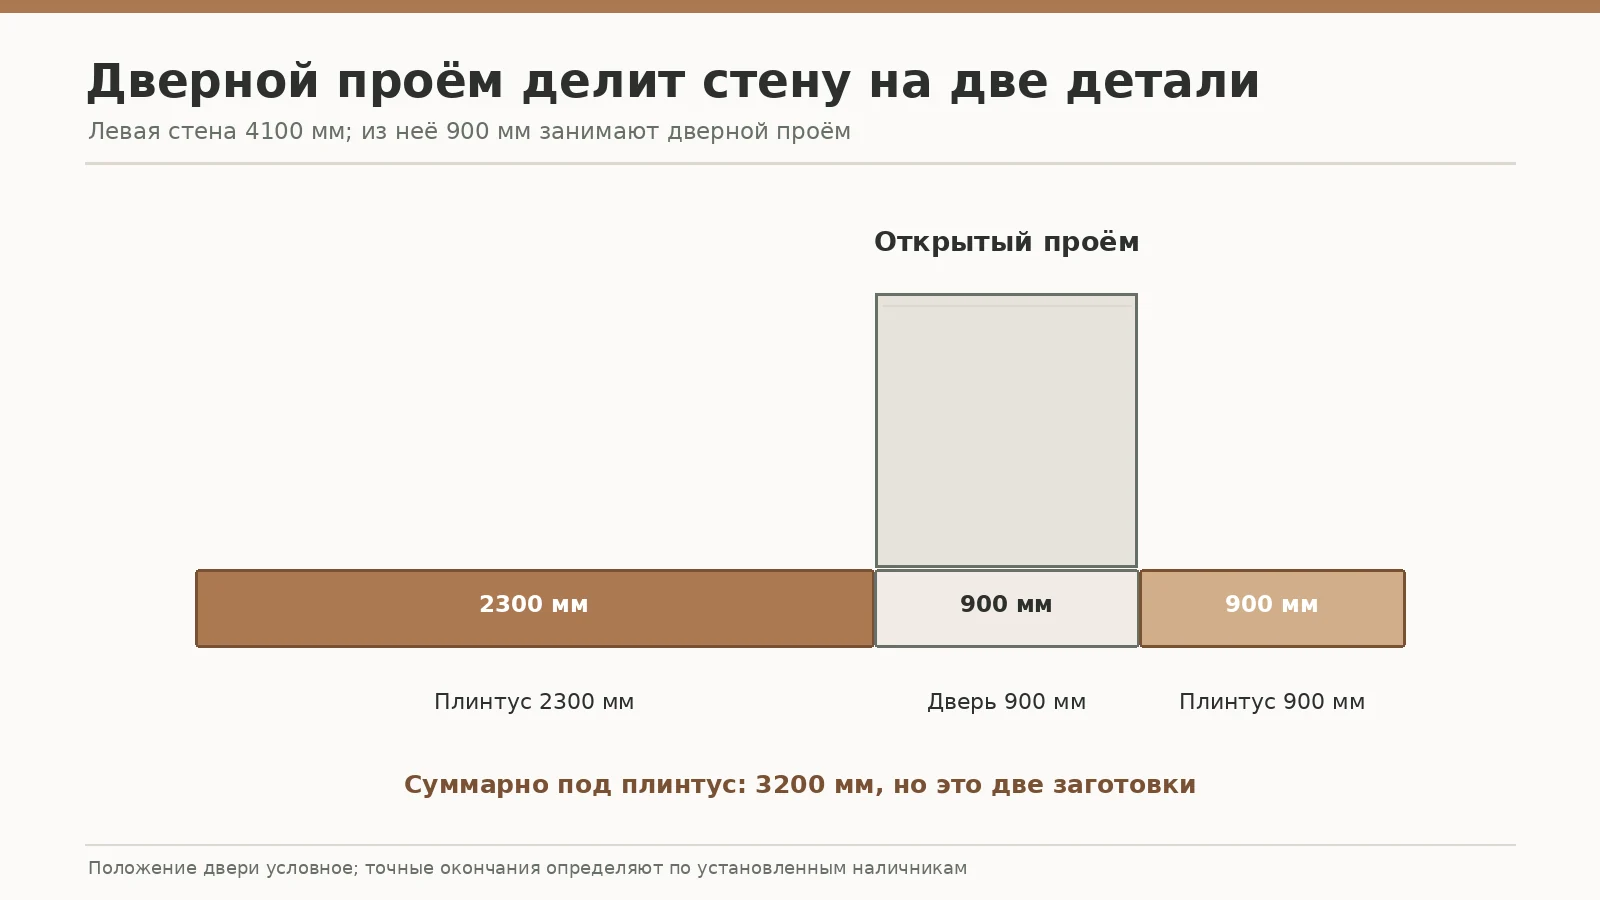
Suppose the left wall has a total length of 4100 mm. After excluding a conventional open section of 900 mm, 3200 mm remains for the skirting board, but this length does not form a single solid piece. If the opening is positioned so that 2300 mm remains below and 900 mm above, they are counted as two separate segments. The cutting list can no longer contain the entry "left wall — 3200 mm as one strip," since such a piece does not physically exist in the room.
For the casing, you need to decide in advance whether the end of the skirting board will abut the vertical plane or whether special treatment will be required. For a thick profile, a straight visible end left exposed sometimes looks rough. But you cannot add an arbitrary overlay: it must match the geometry and the finishing method. Check the actual shape of the casing and skirting board rather than trying to join incompatible parts simply because both products are wooden.
If the door opens into the room, assess the trajectory of the leaf and the bottom clearance. A skirting board directly against the wall usually does not interfere with opening, but thick decorative protrusions, door stops, and furniture may intersect. It is convenient to check this spot with a paper template or a short sample before the entire perimeter is fixed. Such a test is especially useful when replacing a thinner old skirting board with a new one that protrudes noticeably from the wall.
Five walls and the finished linear footage without the door section
Now the calculation can be assembled into a single schedule. The original rectangle has a perimeter of 2 × (5200 + 4100) = 18,600 mm. Two 700 mm segments that were cut at the corner are removed from it, and a new diagonal of approximately 990 mm is added. This gives 18,190 mm. After excluding 900 mm under the door, what remains is 17,290 mm, or 17.29 linear meters. For the estimate, this is a verifiable starting point.
| Section | Project length, mm | Explanation |
|---|---|---|
| Bottom wall | 5200 | Continuous long side |
| Right wall | 3400 | 4100 minus 700 mm cut |
| Sloped wall | ≈ 990 | Diagonal 700 × 700 mm |
| Top wall | 4500 | 5200 minus 700 mm cut |
| Left wall | 3200 | 4100 minus a nominal 900 mm opening |
| Total for skirting | ≈ 17 290 | Without technological allowances |
The resulting footage does not include a reserve for angled cuts, end trimming or defects. But it would be a mistake to simply add ten percent to it and consider the matter settled. For short sections that can be cut from common blanks, calculating a percentage sometimes results in excessive purchasing; for long segments that do not fit into the standard size, on the contrary, it may not provide enough whole strips. Therefore, the next step is always a schedule of specific parts.
Converting the footage into the number of whole products gives a mathematical minimum: 17,290 / 2400 ≈ 7.204, therefore at least eight strips are needed. The minimum by length alone proves nothing about the cutting plan. It should be verified by laying out each future part across the strips. If at least two long parts cannot be combined in one blank, the reserve of total footage may remain useless. It is precisely such non-obvious losses that affect the real cost of the set.
For finishing the open part of the room, it is better to measure along the entire route in one direction, for example from the lower left corner clockwise. Record not only the lengths, but also the type of joint at the ends of each section: an internal right angle, a transition to a bevel, an open end at a door, or a joint on a straight wall. When preparing the parts, this information is more important than a single final figure of 17.29 m.
Detailing: ten installation parts instead of five long walls
To plan the cutting, the five sides need to be divided into actual segments, each of which does not exceed the retail strip length. In the training schedule, the long lower wall is split into two parts of 2300 mm and a filler of 600 mm. On the right wall, 2300 and 1100 mm are used. The beveled section takes about 990 mm. The upper wall gets parts of 2300 and 2200 mm. On the left side, on both sides of the doorway, separate parts of 2300 and 900 mm are placed. This gives ten parts.
| Wall or opening | Details for the training calculation, mm | Number of parts |
|---|---|---|
| Bottom, 5200 mm | 2300 + 2300 + 600 | 3 |
| Right, 3400 mm | 2300 + 1100 | 2 |
| Diagonal, about 990 mm | 990 | 1 |
| Top, 4500 mm | 2300 + 2200 | 2 |
| Left, without the door section | 2300 and 900 | 2 |
| Total | ≈ 17,290 mm | 10 |
Why are 2300 mm segments used instead of 2400? The extra hundred millimetres leaves room for mitre operations and for refining the corner geometry. However, this hundred does not mean that this exact allowance is always sufficient: its distribution depends on the actual profile, the length along the visible edge, and the tool used. For the 990 mm section, it is especially important to first determine along which line it was measured. The diagonal wall is short, but both of its end boundaries are slanted.
Mark up the schedule with colours or letters. For example, B1–B3 — bottom wall, R1–R2 — right, C1 — chamfer, T1–T2 — top, L1–L2 — left. Next to each part, indicate the shape of the left and right end: straight, internal 90° corner, or 135° transition. The workshop should not have to guess from a set of ten numbers which part should be turned face-on to the room.
In the finished specification, it is useful to indicate the quality of the face surface as a separate line. On an area hidden behind furniture, one selection principle is acceptable, while on a sunny exposed wall, a more careful selection of shade and pattern is needed. This does not mean permission to use a product with a defect: it is about distributing the normal visual variations of natural wood. A competent cutting sequence allows this nuance to be taken into account before a long skirting board becomes a set of short pieces.
Cutting plan for eight strips of 2400 mm
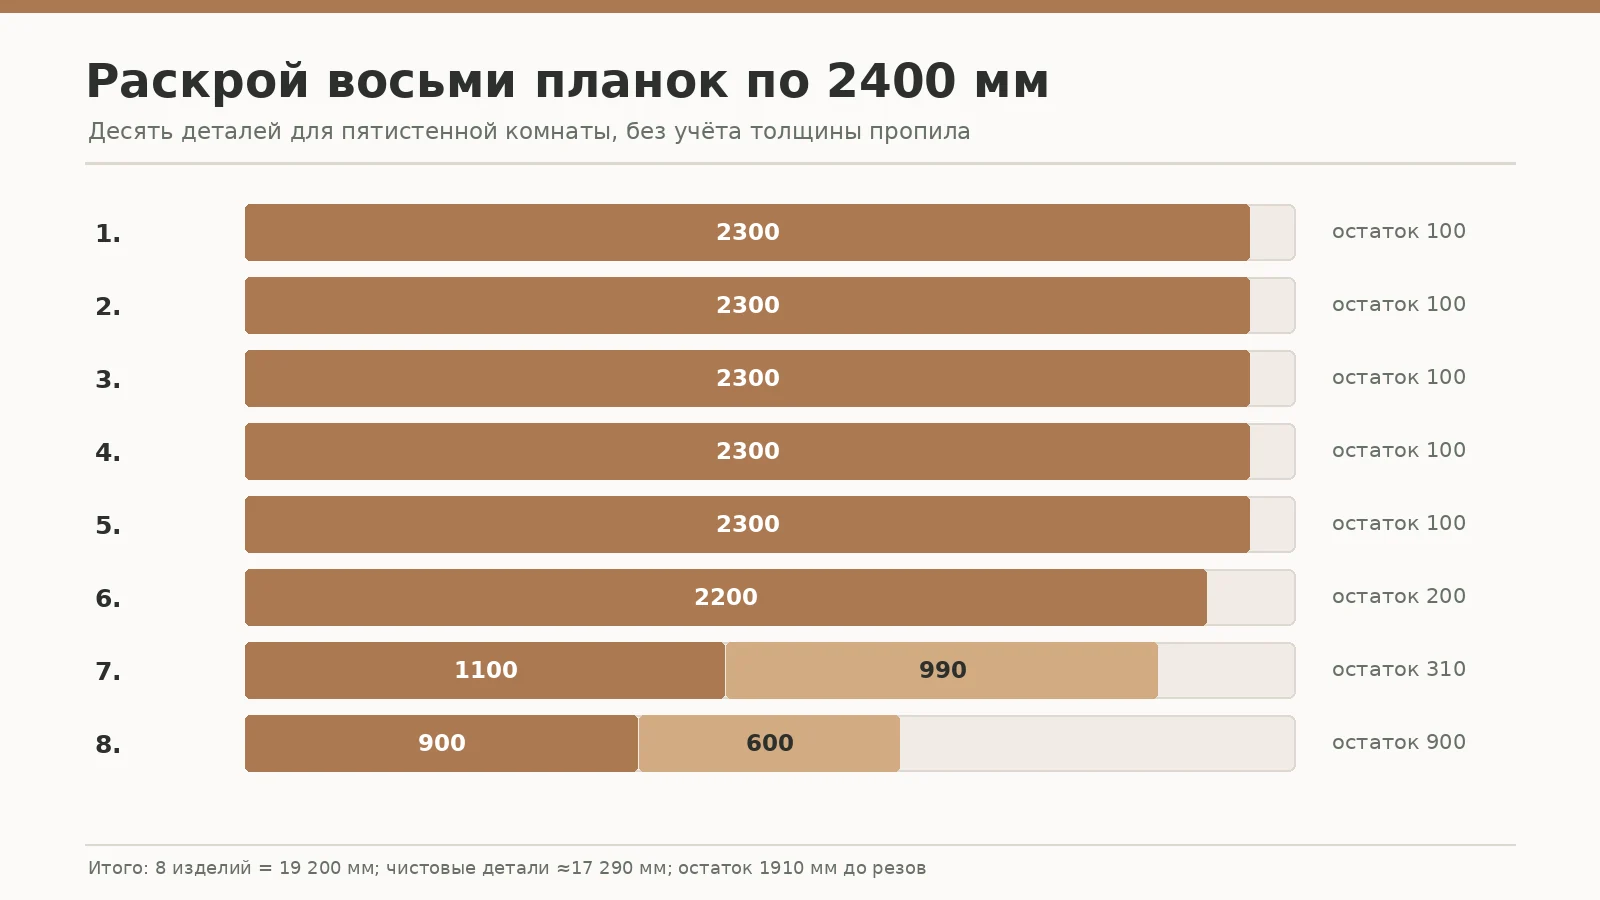
Now it can be proven that eight purchased products are sufficient for the training scheme. Five pieces 2300 mm long each require a separate strip. One more strip goes to a 2200 mm segment. From the seventh, two segments of 1100 and 990 mm are cut, from the eighth, 900 and 600 mm. In total, this is exactly ten pieces planned for the five-wall contour. The total original length of the eight strips is 19,200 mm.
| Plank | Pieces after cutting, mm | Net total, mm | Remainder before cuts, mm |
|---|---|---|---|
| 1 | 2300 | 2300 | 100 |
| 2 | 2300 | 2300 | 100 |
| 3 | 2300 | 2300 | 100 |
| 4 | 2300 | 2300 | 100 |
| 5 | 2300 | 2300 | 100 |
| 6 | 2200 | 2200 | 200 |
| 7 | 1100 + 990 | 2090 | 310 |
| 8 | 900 + 600 | 1500 | 900 |
| Total | 10 parts | 17 290 | 1910 |
The table shows a training cutting plan without a fixed kerf thickness. It remains feasible by nominal length, since no row requires 2400 mm of finished pieces. But an angled cut may require additional length on a specific edge, and the factory end sometimes needs to be straightened. Therefore, a real craftsman first checks the maximum workpiece size and adds technological allowances, and only then confirms that all pairs fit into the allocated strips.
The seventh and eighth strips provide useful combinations of short pieces. The seventh pair 1100 + 990 = 2090 mm leaves approximately 310 mm, the eighth pair 900 + 600 = 1500 mm leaves 900 mm. The last remainder may be useful for two test joints or for checking the coating. But it should not be automatically included in the calculation of a new segment for the room: it may have been needed to test the correct setting of the miter saw. Plan the purpose of the remaining parts in advance.
Another important detail: the purchase sequence and the cutting sequence are different. For an interior, it is wiser to first select the straightest long strips that match the pattern for exposed areas, and only then optimize the short fillers. On paper, one can obtain an equally advantageous scheme in terms of linear meters, but accidentally direct the most noticeable joint to the center of a light wall. Technical economy must work together with the quality of the visible finish.
Why the final 1910 mm of remainders cannot be considered a reserve as a single length
The difference 19.2 m − 17.29 m = 1.91 m looks substantial. But it is distributed among eight original products. Five strips, after producing the 2300 mm piece, have only 100 mm left each, the sixth has 200 mm, the seventh has 310 mm, and the eighth has 900 mm. These remainders cannot be combined into one new solid piece. If during installation it turns out that 1250 mm is required instead of a 1100 mm segment, some of the offcuts simply will not help.
That is why ordering a ninth plank can be rational even when eight are arithmetically sufficient. This is not about an unconditional stock norm, but about risk management. If every part has been checked on site in advance, the wall geometry is stable, the craftsman knows how to work with the profile, and delivery of a repeat batch is convenient, a set of eight pieces can be considered. If the room is complex, the mitre has deviations, and the wood surface must match in shade, an additional plank reduces the likelihood of installation stopping because of one unsuccessful blank.
A reserve is also useful in another situation: some hidden offcuts were initially planned from remnants, but after a dry fit a different pattern or grain direction turned out to be necessary. In natural wood, end grain and longitudinal grain differ, so swapping two parts of identical size is not always visually equivalent. The cost of an additional blank is sometimes justified by the ability to choose the finishing material without a forced compromise.
However, the reserve should not be turned into a reason to buy extra products automatically. For a section 250 mm long, a suitable offcut will suffice if its shape and direction allow the necessary cuts. For a full part of 2300 mm, remnants will not be useful. Therefore, the decision on the reserve is made after the cutting list, not before it. This rule is especially useful when working with an expensive oak profile.
Where to place straight joints so that they are less noticeable
Corner joints are inevitable, but joints on straight walls can be distributed. On the lower wall of 5200 mm in the training scheme there are two joints between three parts. If the wall is opposite a window, the difference in texture may be more noticeable on it. If a sofa stands along one part, that section can be used for a less exposed joint. The exact decision depends on the furniture layout, so first draw the wall elevation, and then finally assign the sequence 2300 + 2300 + 600.
On the upper wall 4500 mm long, two parts of 2300 and 2200 mm are sufficient, and therefore one straight joint. It may end up almost in the middle of the wall. If a painting hangs in the center or a small cabinet stands there, this may be a convenient place. But the joint must not be deliberately placed at a point where there is noticeable curvature of the base. On such a section, two rigid straight parts often produce a gap or a step on the face surface.
Profiles can be joined in different ways, depending on geometry and finish. A straight butt joint is simpler to mark out but more noticeable. A mitre joint along the length allows the character of the joint line to be changed, but requires additional material and careful matching of the pattern. For such a joint, the cutting plan must be recalculated: the clean wall length is not equal to the sum of blank sizes without allowances. One type of joint cannot be silently replaced with another in the project while leaving the old material quantity unchecked.
Before final fastening, lay out all parts dry along the corresponding walls. Mark the joint locations with a pencil and look at them from normal eye height under natural light. Some joints look inconspicuous on the floor but become the main line on the wall after installation. Do not rush to fasten the first two parts just because they have already been cut: sequence errors then have to be corrected along the entire long section.
Two non-standard angles: the order of trial assembly
For a 700 × 700 mm mitre, the two corner joints will be mirror images. Even with the same theoretical size of the diagonal wall, two parts cannot be cut "from memory" or the marking transferred from one end to the other without checking. Visually the pairs of ends look similar, but the plane of the cut is rotated. On the back of each trial sample it is useful to write the direction: to the upper wall, to the right wall, inner side, face side.
Start with samples several tens of centimeters long from suitable offcuts. Place the two pieces as they will stand in the room, and only then measure the joint angle. If the theoretical angle of 135° is confirmed, the symmetric cut of each element corresponds to an angle of approximately 22.5° relative to the square crosscut end. But what matters is not the number on the scale, but the absence of any gap opening in the joint when the profile is actually pressed against the wall and floor.
After the first successful joint, move on to the second. It may require mirroring the tool setup, although the numerical value will be the same. The difference between a right and left cut is a frequent cause of ruining an expensive long piece: the craftsman uses the correct angle but cuts it in the wrong direction. On the finish workpiece, mark not only the length but also the surface from which the dimension was taken.
Do not try to eliminate a noticeable gap by excessive fastening force alone. The skirting board may press tight at one edge but remain under stress and later open a gap at another seam. If the test joint separates, find the cause: the actual wall angle differs from the calculated one, the skirting board is not positioned vertically correctly, the top edge is deformed, or the workpiece cannot hold the plane of the cut. The correction must match the specific defect.
Preparing walls, floor and substrate before installation
A wooden skirting board does not have to conceal every construction irregularity. Its face line should look straight, and the lower junction should follow the actual floor plane. If there is a step at the joint between floor coverings, first determine whether it can be eliminated or covered with a designated technical detail. Do not pull the skirting board to the floor like a flexible strip: a solid product has its own rigidity.
The substrate for fastening must be sufficiently strong and suitable for the chosen installation method. Painted plaster walls, drywall cladding and wood panels may require different solutions. You cannot declare one adhesive or one screw spacing universal in advance. Before work, check the fastener manufacturer's recommendations, the substrate type, the presence of concealed wiring and whether the possibility of subsequent removal must be preserved.
When moving to the door casing, make sure the edge of the skirting board does not protrude inappropriately and does not create an exposed end that cannot be finished to a quality standard. If a decorative plinth block under the casing is planned, its dimensions are coordinated with both parts of the joint. A link to the casing product card does not by itself prove compatibility with the chosen skirting board. Verification is done using the actual cross-sections and the method of junction.
Also assess the temperature and humidity conditions of the room. Natural wood reacts to environmental changes, so before installation you must take into account the manufacturer's recommendations for storage, acclimatization and finishing of all accessible surfaces. For a room with periodic heavy humidification or direct water exposure, a wooden skirting board without suitable protection may not be the best choice. Operating conditions matter more than the promotional name of the species.
How to work with the face surface and finish coating
If you choose oak with a semi-transparent finish, after sawing the ends will show the cross-grain pattern of the wood. It usually differs in absorption of the finishing compound from the longitudinal surface. To avoid sharply dark or light edges, end treatment must be planned together with the overall coating system. Start with a test piece, not with the main long piece prepared for the most visible wall.
For a beech skirting board under enamel, the main task is a level base, clean geometry and a matching sanded surface after installation. Fillers and sealants may behave differently from solid wood, so any product for masking the joint is tested for compatibility with the primer and finish paint. If the joint is already noticeably opening up, one coat of paint will not replace a correct mitre cut.
The coating is chosen taking into account the cleaning of the room, possible impacts from footwear and furniture, as well as colour requirements. Transparent lacquer shows the wood; opaque paint forms a single surface. Both options require preliminary preparation, but they make visual errors different: with a transparent coating, unsuccessful texture matching is noticeable, while with an opaque one, steps and gaps on the profile line are visible. One option cannot be considered inherently simpler without taking into account the workmanship and qualifications of the installer.
If possible, agree on a sample of the skirting board against the background of the final floor and door. On a small board, the shade looks different than on 17 metres of a continuous line. Light from the window can bring out the warm tones of oak and change the perception of painted beech. It is useful to assess the sample in the morning and evening under normal room lighting, and not only under bright store light.
How much does a PLT-006 set in oak and beech cost?
For the room being calculated, prices for the same PLT-006 model in two species are sufficient. On the date the listing was checked, the wooden product 100 × 15 × 2400 mm cost 3220 ₽ in beech and 4780 ₽ in oak. Eight planks give an initial length of 19.2 m, and nine give 21.6 m. The difference between the two purchase scenarios equals the cost of one additional plank, not a conventional “ten percent for waste”.
| Set option | Beech, ₽ | Oak, ₽ | Initial length |
|---|---|---|---|
| 8 planks PLT-006 | 25 760 | 38 240 | 19.2 m |
| 9 planks PLT-006 | 28 980 | 43 020 | 21.6 m |
| Price of an additional plank | 3220 | 4780 | 2.4 m |
The table shows only the cost of the products themselves. Delivery to Izhevsk, protective packaging, finishing materials, fasteners, consumables for sawing and installation are calculated separately. The prices indicated on the website may change, so when placing an order they must be checked again in the selected configuration. You cannot add the price of an oak plank to the price of an MDF product just because they are on the same catalogue page.
If funds are limited, you don't necessarily have to switch to a different species right away. First, clarify how necessary the ninth plank is given the installation specifics, and whether the risk can be reduced through precise measurement and trial cuts from the available offcuts. But removing the reserve when ordering a repeat batch would require a separate lengthy shipment is also not always reasonable. This decision should weigh the cost of the additional blank against the price of a possible work stoppage.
When choosing a taller profile, you cannot recalculate the estimate with a simple height coefficient. PLT-003 has a different cost for the specific configuration, and its own material parameters apply to it. If the interior requires 160 mm instead of 100 mm, draw up a new specification for the required model. The room geometry stays the same, but the cutting specifics, appearance, finish availability and total amount change.
Which adjacent products actually make sense
A buyer who is finishing an entire room sometimes adds moldings and casings to the order. This makes sense when you need to create a unified color and get the same coating system for several wooden parts. But buying accessories should not be automatic. A skirting board can fully solve the task of the wall's lower boundary without additional decor, especially if the room is small or furniture covers a significant part of the perimeter.
solid wood millwork it is useful to consider as a general category when matching the same wood. If decorative frames are actually planned on the wall, you can separately compare Wooden Moulding MLD-004 by dimensions, texture and finish. But a molding does not become a replacement for a floor skirting board just because it has a long wooden plank.
For the opening, it is worth checking the corresponding casing. For example, wooden trim MLD-007.1 belongs to a different product group and requires separate agreement on the thickness and where the skirting board ends. Do not use it as a universal joint compensator; the decorative transition must be built according to the actual geometry. If in doubt, make a full-size drawing of the joint at 1:1 scale on paper and attach material samples.
If all elements are to be painted, agree on the order of work in advance: paint the products individually before installation, after fitting, or combine both approaches. Treating the ends after sawing will still require attention. Material with expensive open grain should be selected within a single batch, rather than hoping that two sets purchased at different times will be indistinguishable in tone.
Delivery of wooden skirting boards to Izhevsk and order preparation
Purchasing long decorative moulding requires an exact specification. It is not enough to write “wooden skirting board — eight pieces” in the order. For the room in question, you need to specify PLT-006, solid oak or beech, cross-section 100 × 15 mm, length 2400 mm, the selected preparation for finishing, and a quantity of eight or nine whole pieces. If shade matching is required, state this before the batch is assembled.
Because the products are long, shipping terms should be discussed separately from the cost of the strips themselves. Clarify protection against bending and damage to the ends, the packaging method, acceptance rules, and whether the goods can be inspected on receipt. STAVROS offers Contact us to confirm shipping to your destination., but the mere fact that delivery is available does not imply a specific price, arrival time, or the existence of a warehouse in Izhevsk. Such details depend on placing an actual order.
Do not assume that the store will prepare mitre cuts for the buyer. The public PLT-006 page states that cutting to custom sizes is not provided. This means the estimate must include the work of a workshop or installer, as well as a check that the chosen product can be cut neatly. If the project includes two 135° corners, it is better to find a specialist in advance who can carry out a trial assembly on this profile.
Before paying, compare the order with the schedule: five pieces at 2300 mm, one at 2200 mm, one at 1100 mm, one at about 990 mm, one at 900 mm, and one at 600 mm. If another craftsman suggests changing the joint structure, they should be asked to explain how many pieces will be used and why. This check prevents the situation where, after delivery, it turns out that the total length is sufficient but the two long pieces can no longer be assembled from the remaining offcuts.
When a wooden skirting board should be replaced with another solution
There are cases where choosing PLT-006 in solid wood will not be the most practical option. For example, the lower part of the walls is regularly exposed to direct water, the room is not consistently heated, or the skirting board is to be fixed to a base that cannot be levelled and reliably used. Wood should not be declared suitable for any conditions simply because it looks solid. In such a situation, the operating limitations are clarified first, and a finish is selected to suit the actual environment.
Another reason to avoid a tall wooden profile is limited space next to a door, furniture, or concealed building services. If the thickness of the skirting board interferes with installing the required equipment, saving on rework may be more important than decorative expression. In some cases, it is better to choose a smaller thickness, a different height, or a completely different junction detail. The decision is made after checking dimensions, not on the basis of a general idea of the room’s style.
The opposite also happens: the buyer wants a strict, continuous line around the entire perimeter without noticeable joints. For a room 5.2 m long, 2400 mm profiles will objectively require joints on the long walls. If the absence of joints is a mandatory project condition, this task must be discussed separately: the standard range may not meet the requirement. It is impossible to promise a continuous line from two-metre products where it is physically impossible.
Sometimes it is wiser to postpone the order until the doorways and flooring are complete. Buying early without clarifying the junctions creates a risk of rework. The article helps to draw up a preliminary estimate, but it does not replace exact as-built dimensions. In a complex renovation, timely refusal of a hasty purchase can prove to be the most useful decision.
Mistakes when ordering and cutting for a five-wall room
The first mistake is to take the perimeter of the original rectangle as 18.6 m and ignore the cut-off corner entirely. For this example without a door, the real contour is shorter: approximately 18.19 m. Another mistake is to subtract the 900 mm door but not split the remainder of the left wall into two separate pieces. The total number of meters will come out correct, but the installation map will be wrong.
The second mistake is to apply the same setting to internal 135° corners as to straight 90° corners. The numbers on the tool's scale cannot be replaced by measurements of the room's geometry. Two trial short pieces correctly fitted at the bevel will be far more useful than confidence in a universal "45-degree cut". On a finished oak strip, correcting a reversed cut direction can make the whole piece too short.
The third mistake is to calculate waste from the overall difference of 1910 mm without assessing the length of each offcut. The sum of the offcuts does not turn into one solid strip. If the installer shortens one section by 150 mm more, that does not mean he can compensate for the loss with a set of small offcuts. Specific pieces are selected by length, profile orientation and the need for an angled cut.
The fourth mistake is to buy the product at the lowest price on the page without selecting the material. The wooden PLT-006 has a different size and cost than the MDF version. As a result, the invoice may contain eight long strips in a finish other than the one checked in the project. This is prevented by a single clear specification line: model, material, cross-section, length, quantity and surface preparation.
The fifth mistake is to finish the long wall before checking the door junction. If the skirting turns out thicker than the door casing, the visible end becomes noticeable immediately on entering. Do not rush to fix all the pieces: first hold samples against the door, and then determine the finishing line. The sixth mistake is to paint an untested corner joint in the hope of hiding a gap. The quality of the geometry is checked before the final coating, otherwise the repair will be more expensive and more noticeable.
Frequently asked questions about skirting boards for a room with a bevel
Can I buy only eight strips and do without a reserve?
In the tutorial diagram, ten installation pieces fit into eight products of 2400 mm. But this is not a promise for any room with the same nominal dimensions. If the walls really match the measurements, the cut direction is known, the allowances are sufficient, and the ends can be finished within the remainder, eight strips may be enough. A ninth is needed where the risk of error or uncertainty justifies a reserve.
Why is the diagonal 990 mm if the offset is 700 mm?
Two offsets of 700 mm form the legs of a right triangle. The diagonal is its hypotenuse: approximately 989.95 mm. It is not the sum of 700 + 700 mm. On the finished site, the diagonal section is measured again, because the offsets may be unequal and the wall surface may deviate from the project.
Do I need to set 22.5 degrees on the saw at both corners?
With an ideal internal angle of 135°, a symmetrical cut involves a 22.5° deviation from a square end. However, the method of setting the number depends on the tool's design and the orientation of the workpiece. The correct approach is to measure the finished angle, do a trial assembly of two samples, check the face edge, and only then make the final cut.
Can the finish be done with one type of skirting board and the extensions with another?
Geometrically, different profiles can sometimes be joined via a special transition piece, but a continuous relief will not happen automatically. For a single room with a complex bevel, it is better to choose the same model and cross-section for the entire perimeter. The wood species and surface preparation should also be kept uniform to avoid color mismatch or a noticeable change in surface over a short section.
Is cutting to size included in the price of a STAVROS product?
According to the store's verified public page, custom profile cutting is not provided. The buyer needs to arrange installation work with a separate workshop or contractor. The educational cutting map should not be treated as a ready-made production instruction: it must be clarified after actually measuring the room and determining the cut positions.
How can joints be checked if the finished flooring is already laid on the floor?
Protect the surface from shavings and possible scratches, then lay out short trial samples at the bevel in their working orientation. Do not transfer marks onto the finished floor with a permanent marker. For final marking, use suitable protective tape and transfer the reference points onto the workpieces themselves. It is important to check the position of the profile relative to the vertical and the bottom plane, not just the alignment of the two ends.
How much will delivery of nine skirting boards to Izhevsk cost?
The cost depends on the actual order, packaging, carrier, and delivery address. The calculation shows only the price of the wooden strips themselves: 28,980 ₽ for nine beech or 43,020 ₽ for nine oak. Delivery and packaging must be requested separately when placing the order; a fixed amount cannot be given without calculating the shipping.
Can leftover pieces be used for another room?
Yes, if the leftovers have sufficient continuous length, the same profile, a suitable wood species and surface. However, in the layout under consideration, most of the waste consists of short fragments of 100–310 mm. They may be useful for test joints or small details, but they will not replace a long section of wall. The ninth full plank provides much more flexibility than a set of small offcuts.
What else to read before ordering
A separate guide is useful for understanding the types of wooden skirting boards “Wooden Skirting Board from A to Z”. It covers a general topic and does not replace this five-wall room project. If the difficulty is specifically the long straight joint, this material will be useful “Joints of wooden skirting boards on a straight wall”. The question of the comparative length of profiles is covered in the publication “Skirting Board 2400 or 2600 mm”.
These materials help solve different tasks. For this calculation, the key remains not choosing the “longest” plank, but the correct configuration of exactly wooden PLT-006 with a length of 2400 mm. Once the material and length are fixed, you can use the parts table and check how well the production map matches the geometry of the actual walls. If the original dimensions change, the estimate is recalculated rather than transferred automatically.
Order STAVROS wooden skirting boards with delivery to Izhevsk
The room in question has five walls, one doorway 900 mm wide, and two transitions to a bevel. For PLT-006, the training calculation requires ten installation parts with a total length of about 17.29 m; they can be distributed across eight purchased items 2400 mm long, keeping the ninth strip as a reserve if needed. Before placing an order, verify the actual on-site dimensions, the side of each cut, and the quality of the base.
In the STAVROS catalog you can choose and buy an oak skirting board PLT-006 or the same product in beech. Compare specific versions, not the initial price on the product card. To place an order, prepare the wood species, section 100 × 15 mm, length 2400 mm, eight or nine pieces, and the selected finish. Delivery to Izhevsk is calculated separately; this calculation does not include any guarantee of a local warehouse or the same shipping time for all orders.
The result of a quality project is not just 19.2 linear meters of purchased trim, but clear ten parts with assigned walls, correct left and right ends, two verified 135° corners, and pre-planned locations for straight joints. It is this kind of specification that is convenient to hand over to the installer and use to check the received order.